A Week in the Shop
Published 13 Aug 2023
Tags: älgen, delfinen, hästen, OSHCamp, painting, spray-booth, templates, toothbrush, verkstaden, wuthering bytes
No attempt at a pithy opening paragraph this week: too much already packed in this week! Exciting but exhausting :)
Hästen
In last week’s notes I was a bit worried about the state of the neck I’d made for Hästen, as it’d got grubby whilst I was cleaning up the frets, and my usual cleaning strategy hadn’t given me the results I wanted. So this week I made another pass at it:
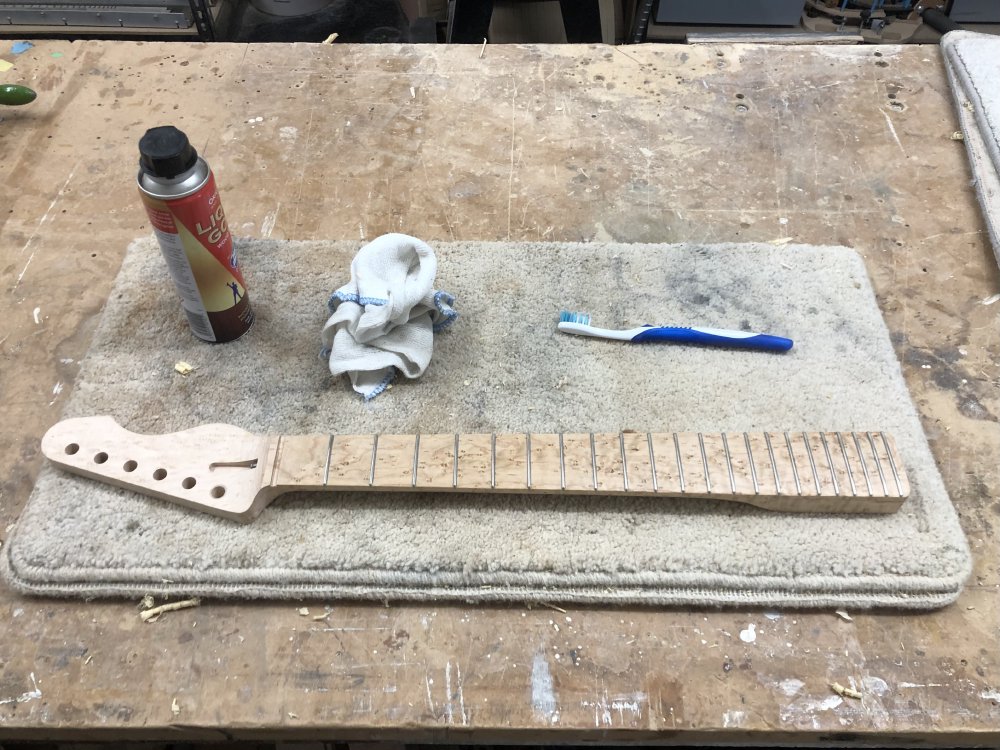
My workshop-mate Matt had suggested I add a tooth-brush to my cleaning set-up, which worked quite well. I went with a softish tooth-brush, so it’s not very aggressive such that it’ll mark the wood, but it really got into the fret edges, which was nice, as I was struggling with a cloth to get dirt out from those edges. Once I’d taken another pass, and then left it to dry off again, I think the neck is probably going to be alright. It’s not what I had in mind at this stage, and that’s always frustrating, but if I make myself stand-back and think how will it look at the end, and will someone not knowing my original plans think this was a failure, then no, I think it’ll be fine.
I originally had planned to try lacquering it, just because I wanted to learn how to do that having never done it and I’ll be doing clear-coats on the bodies (see later), but the cleaning has darkened the maple such that it looks oiled, and so I’ll oil this neck instead, which will have a similar effect anyway and hopefully make it all consistent. I have a bit of leeway as the client didn’t specify what they want, so I can be a bit reactive to how the build goes, which is fortunate. I do have enough wood to restart the neck build, but I’d rather not waste both the materials and time if I don’t have to.
So now all that remains for this before I give it a final clean up and oil is deciding what to put on the headstock…
Headstock designs
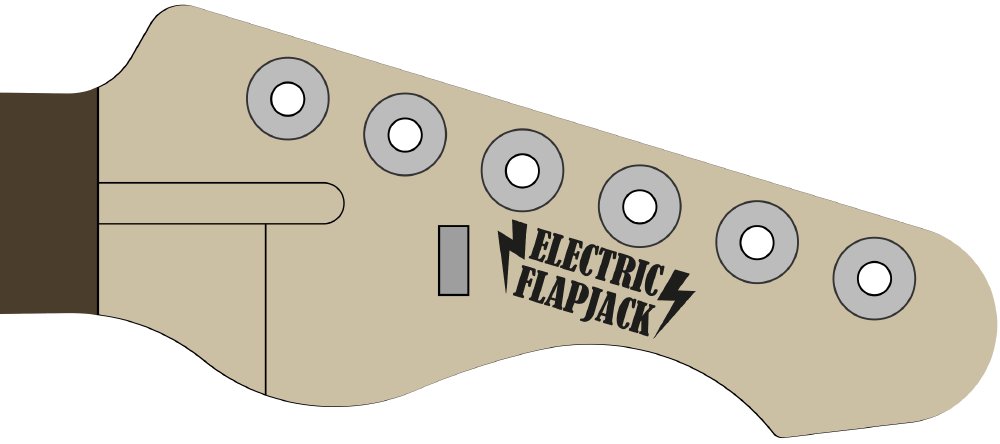
I’m still umming and ahhing about my headstock design. I now have three necks that just need the headstock logo etched before I take them any further forward, so at this point I really do need to pick one and get a move on. Before now, I’ve just gone with laser-etching the Electric Flapjack logo on most headstocks:
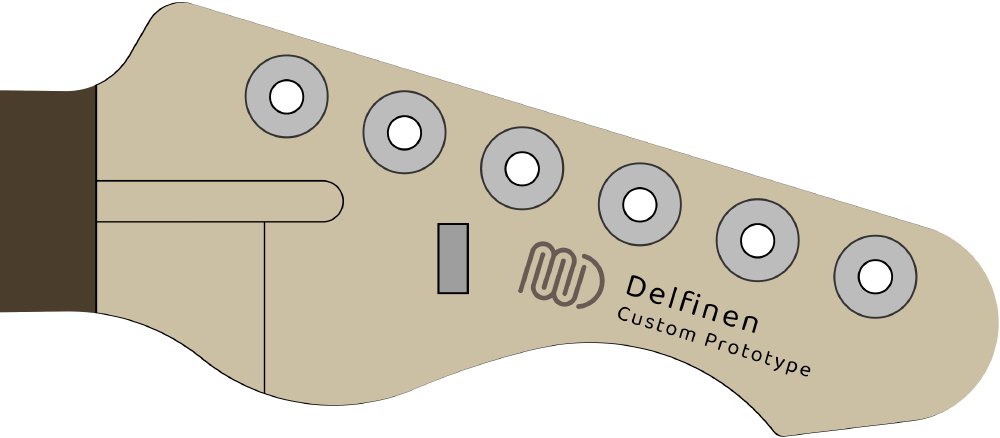
But that didn’t really fit on Älgen, where the logo was on the control cover due to space restrictions, and so I used a logo based on my initials instead. I’ve tried to come up with a way use the same logo on a headstock, but I’ve not really found a way that works for me on that one, as a guitar headstock really encourages a long/thin block logo.
I thought perhaps instead I could just use a cleaned up variation of my signature, with the instrument name:
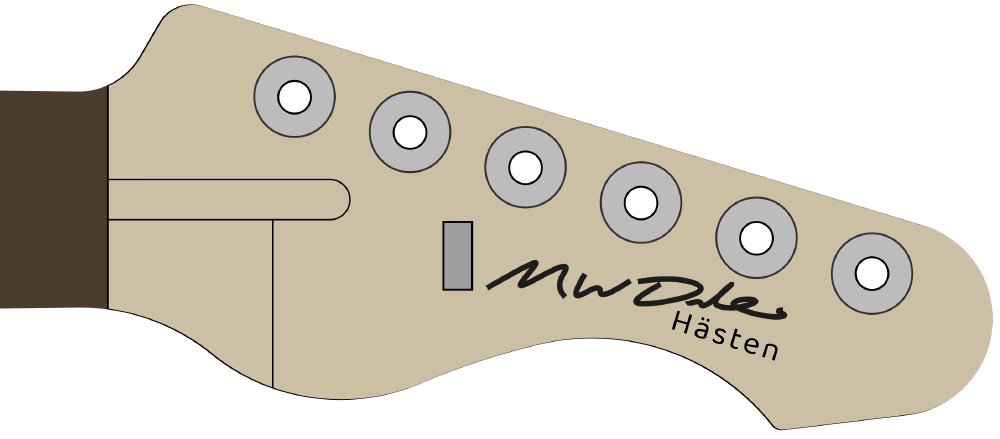
This has been done before, most obviously being the PRS guitars logo, but even the Fender logo is like this. But then, there’s very little that’s not been redone in the guitar world, so I don’t think that’s a particular show-stopper.
I did say a while ago that I wanted to put some generative art on the headstock, and I’d still like to try that one day, but that turned into a bit of a time sink, and I had to shelve it for now.
I could just go with no logo at all, which I’ve also seen done - my workshop mate Jamie does this for his electric guitar models, as does Nacho Guitars which my jazz hero Julian Lage is often seen playing.
I suspect one of the later two options (signature or nothing) is what I’ll go with, and I just need to roll the dice on it if I don’t make a decision soon. I suspect I’ll do a test burn of the signature on some offcuts to see how it looks in real life first.
Painting Hästen and Verkstaden
After building up to it for a little while, I finally started painting the bodies for both Hästen and Verkstaden, under the expert tutelage of Matt, who has many years of experience painting solid-body electric guitars.
The drill will be as follows: there will be four coats of primer, two coats of colour, and then two or more coats of clear coat at the end. For the primer, I’ll do two coats per day, spaced out about 15 minutes or so to let the first one dry, and then between days I’ll gently sand them back before starting the next pair. For the other coats, I await more lessons :)
Given this was all new for me, there’s a lot I had to learn about using and cleaning up spray-guns, which I’d never used before. Matt walked me through mixing paint with appropriate thinner, the different nozzle sizes I’d need for primer (1.5mm) versus paint (1.3mm), and how to strip and clean the spray-gun once done.
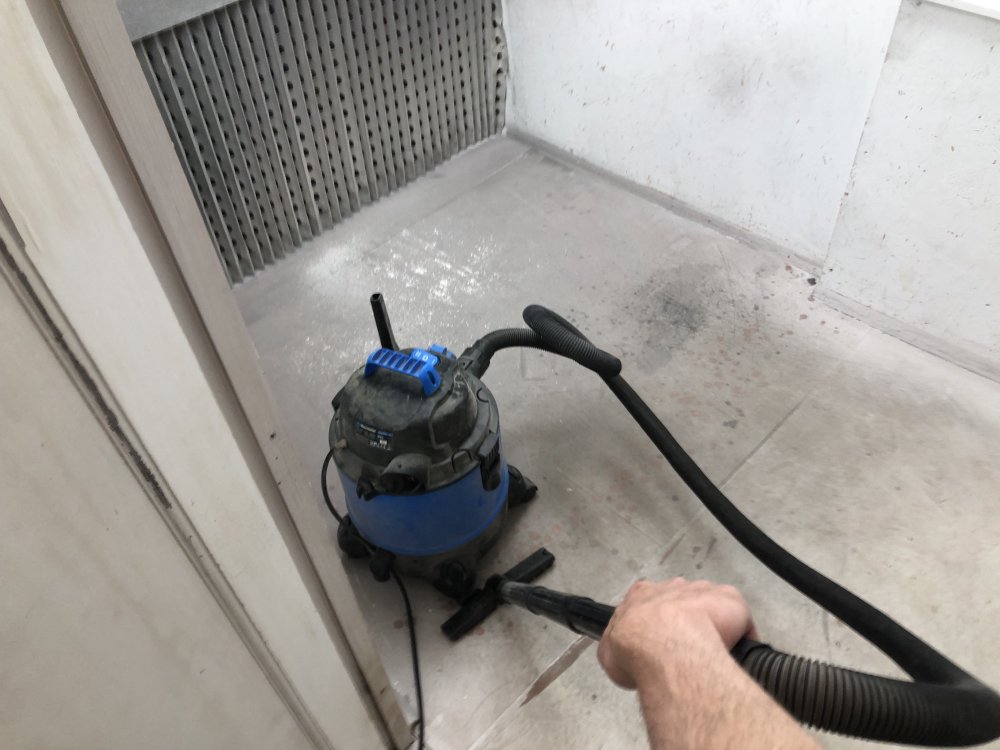
Before any of that though, I had to first clean the spray-booth, to make sure there would be as few particles in the air and that the filters were clean to ensure good air-flow:
Matt also gave me guidance about how to then do the spraying in terms of technique: distance, speed of pass, etc. I definitely owe Matt some beers for his time here. There was also little tips that just never would have occurred to me, like counting to 10 seconds before opening the door after you finish spraying, otherwise you’ll find the other guitars your painting that you left just out the door will pick up tiny but annoying amounts.
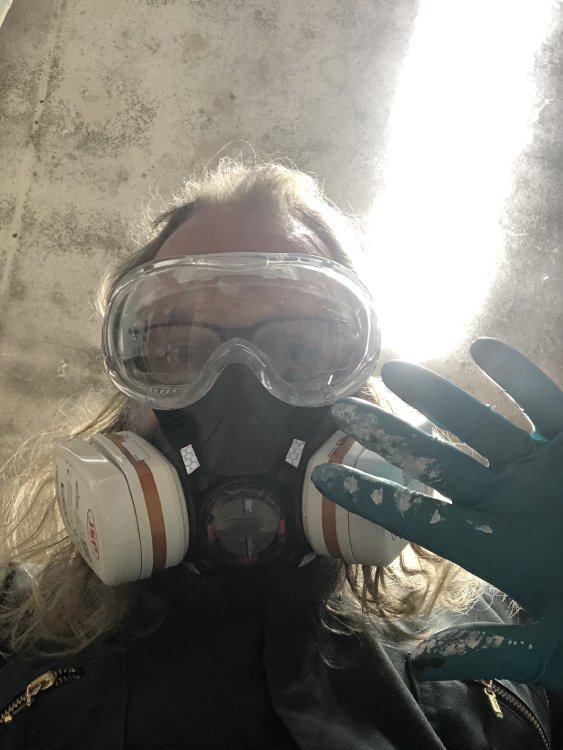
Before doing anything with paint I got into my overalls and donned my PPE, as it’s nasty stuff fume wise. You definitely will need a respirator with filters for volatile organic compounds, but I also put on goggles, overalls, and heavy duty gloves. It was a warm day, so this wasn’t particularly a pleasant experience!
Hopefully that also explains why there’s no photos until I’d completed my painting session:
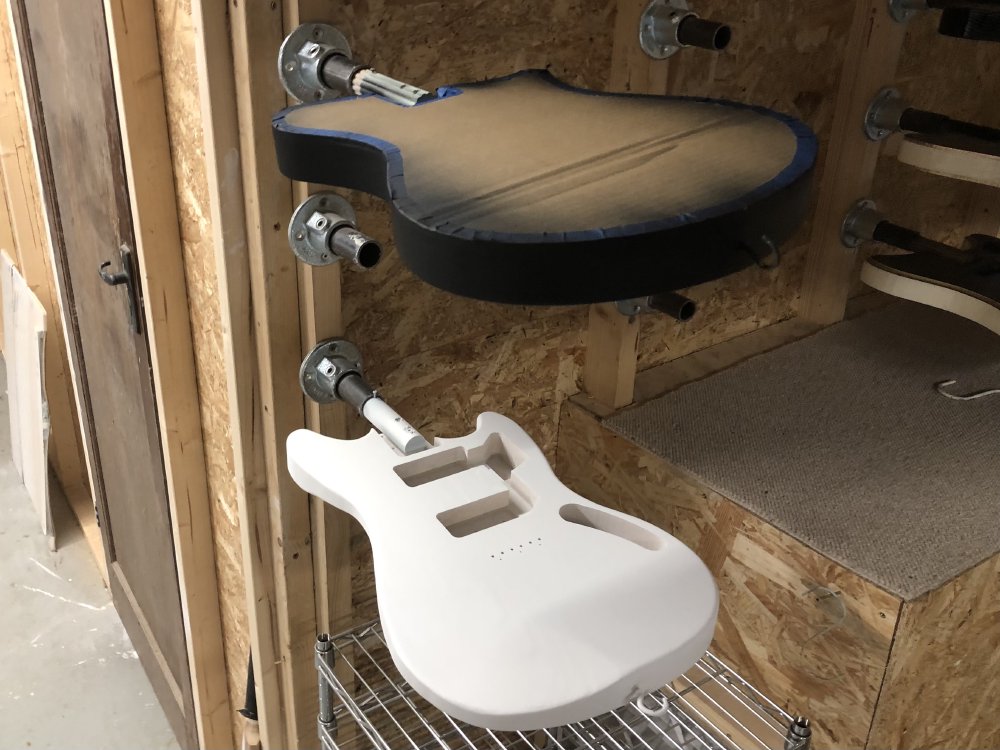
I have to confess, after years of staining and oiling guitar bodies, I did get a kick out of seeing the pure white painted body, even though this is just the undercoat: it let me see my work in a whole new light.
Not that all the light was good - I discovered that any flaws in your work in terms of shape seem to be accentuated with paint, whereas with a natural finish you might not notice. I guess the fact you’ve removed so much in terms of detail in terms of wood grain means that anything that does remain becomes more noticeable, particularly in white, where shadows show up more.
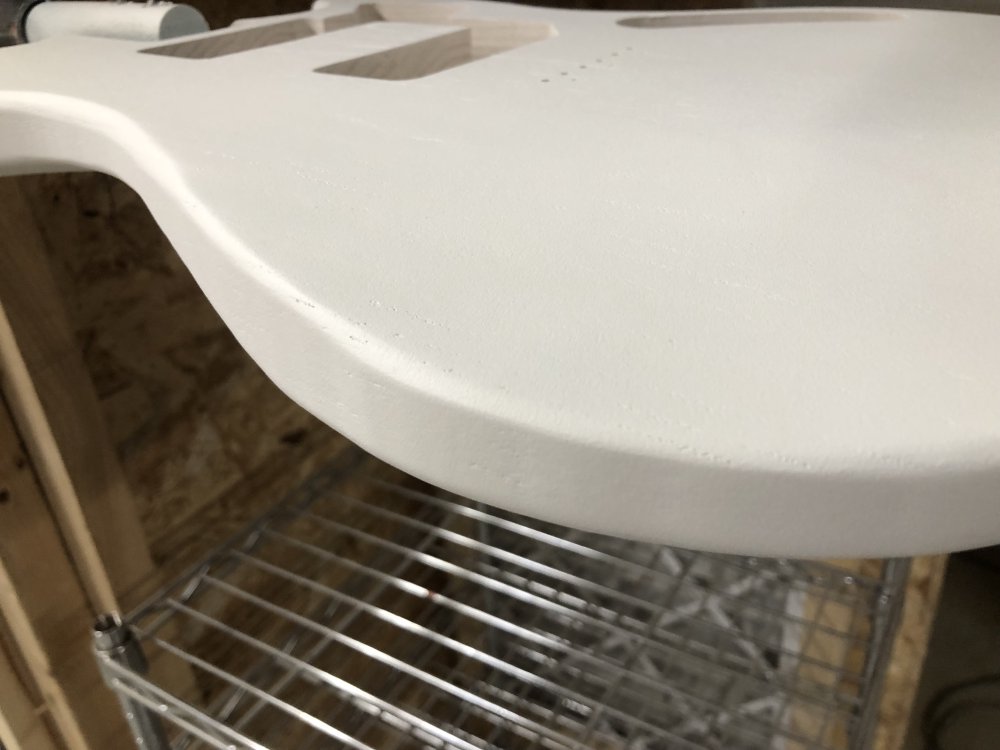
I wrote a couple of weeks ago about how I was having to remove some artefacts left in the body profile from errors in the template, and I thought I’d managed to work all those out, but the white primer revealed there still are some hints there. Not enough that I’ll strip this back and re-start, but enough to bug me and remind me once again never to accept a defect in a template and think “I’ll sort that out later”. If you look in the detail shot here you can kinda see the faceting is still a little visible here on the area around the arm carve:
With the two coats done, I learned the other truth of spray-painting: you spend at least twice as long cleaning up as you do spraying :) Matt showed me how to strip the guns, and then set about ensuring they’re clean of paint build up so they’re good to go next time, and all the time I’m still in all my overheating PPE: staining and oiling definitely has its advantages!
Still, I’m stoked with how both guitars have turned out for my first go, even if this just is the primer stage. I’m sure it’ll take me a while to get to the level of my fellow workshop-mates, but I feel I’ve already got a cheat-code thanks to Matt’s guidance, and well in advance of where I’d have been otherwise. Shared workshops with awesome people for the win!
Delfinen
Delfinen has been absent from these pages for a little while, last appearing in early May displaced by my desire to get Hästen finished, but now its into a sort of finishing mode, I have time again to pick back up this build. Delfinen is another prototype/demo guitar that I’d like to offer as a standard model: there seems to be a want for 24" scale offset guitars based on the number I made in the past, and so it seems silly to come up with some standard models and not having something in that space.
Before I resumed I reminded myself how this guitar was going to look once done by pairing the body up with its neck, and adding some parts I had to hand:
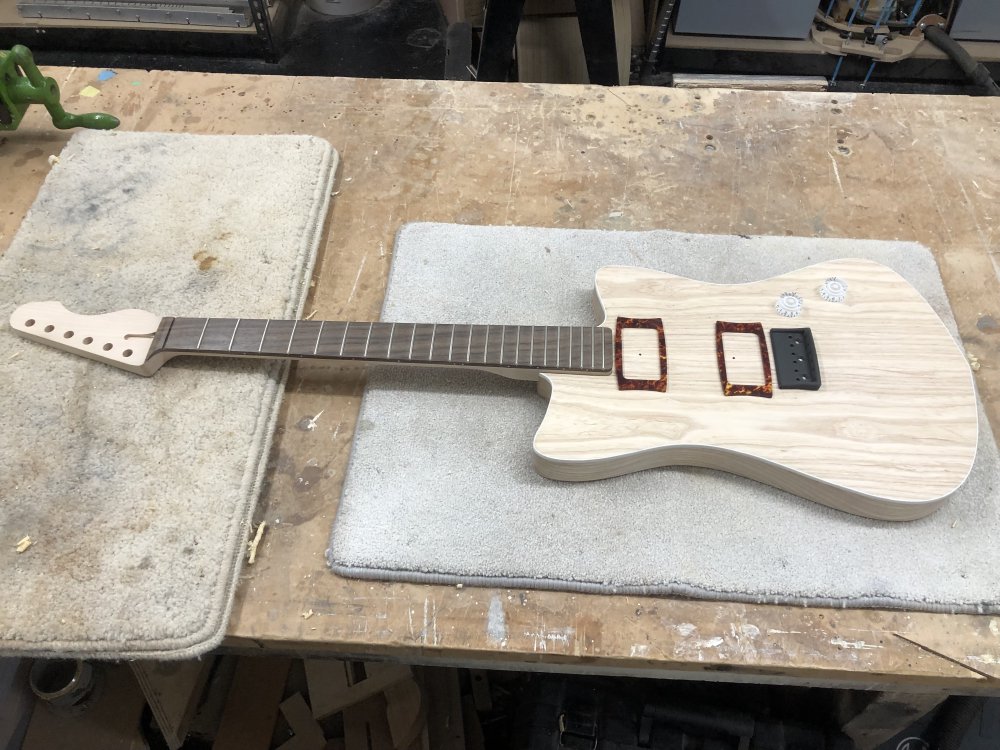
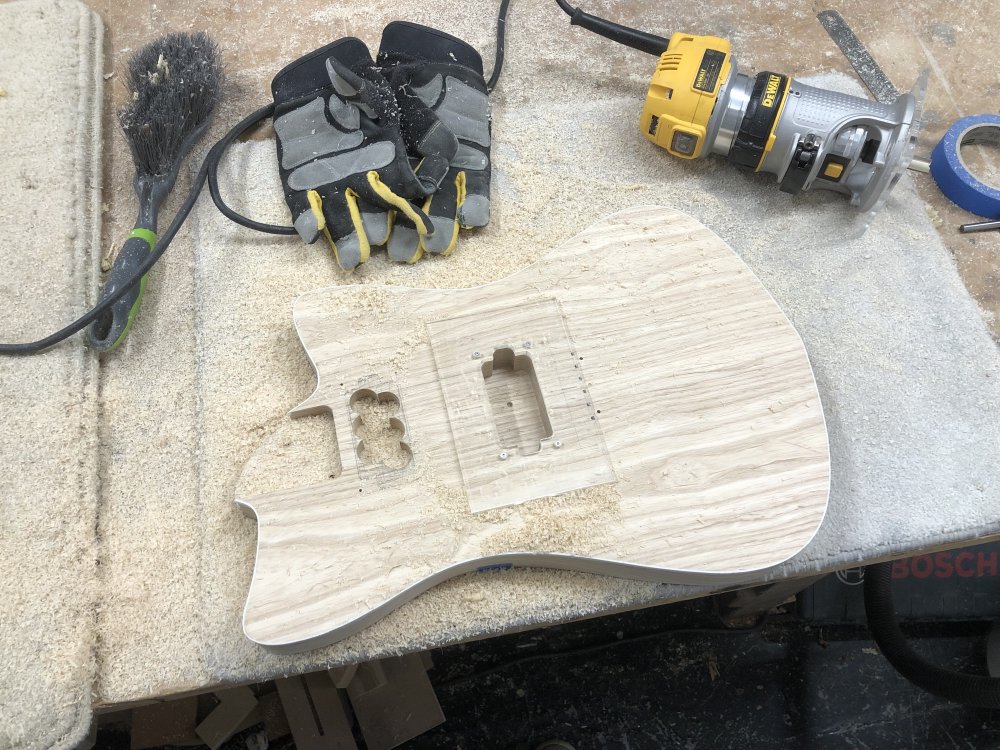
Once I was happy with the layout, it was time to remove some more wood from this body, which currently felt quiet hefty compared to the other two bodies I was painting earlier in this post, as they’ve both had more wood removed. The rear control cavities were already routed out, so the next task was the pickup cavities.
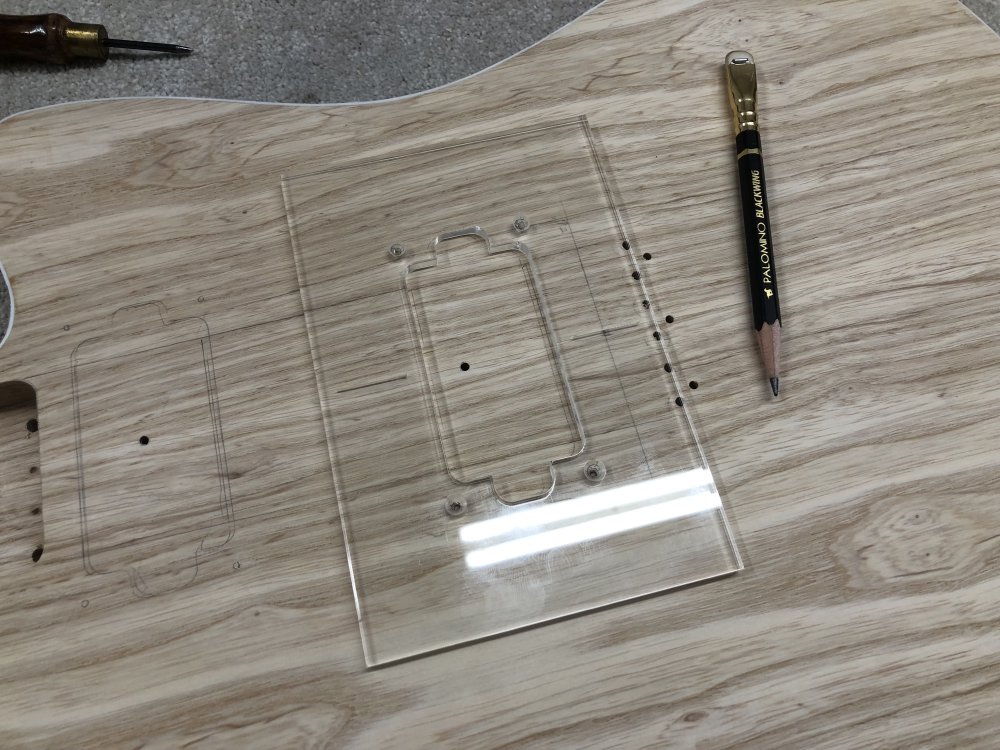
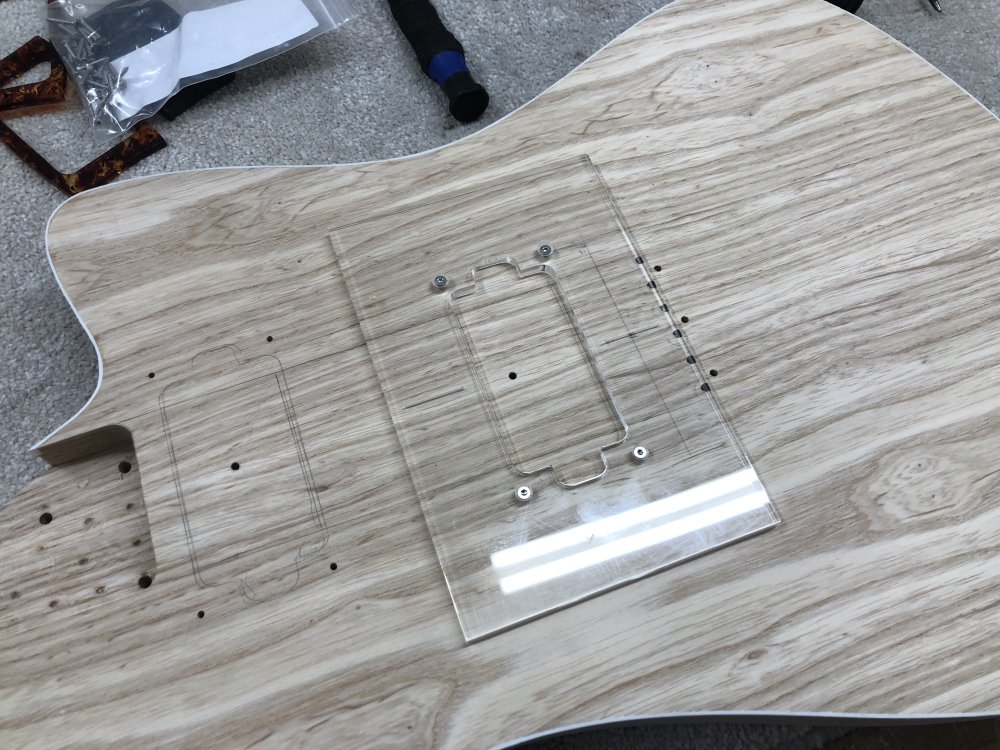
This template is similar to the one I made and used for the corvette build, only for larger regular-sized humbuckers rather than the smaller mini-humbuckers I used then. I use clear acrylic so that I can mark the centre-line on the template and line that up with the centre join-line on the two-piece guitar body. I mount it using the four screw holes that match the pickup-ring mount screws that I’ll eventually use too, which solves the mounting problem. I know that in the past people have wanted my template diagrams, so here it is as a dxf version and inline as SVG below, but be aware that the screw holes may not match the pickup ring you’re using!

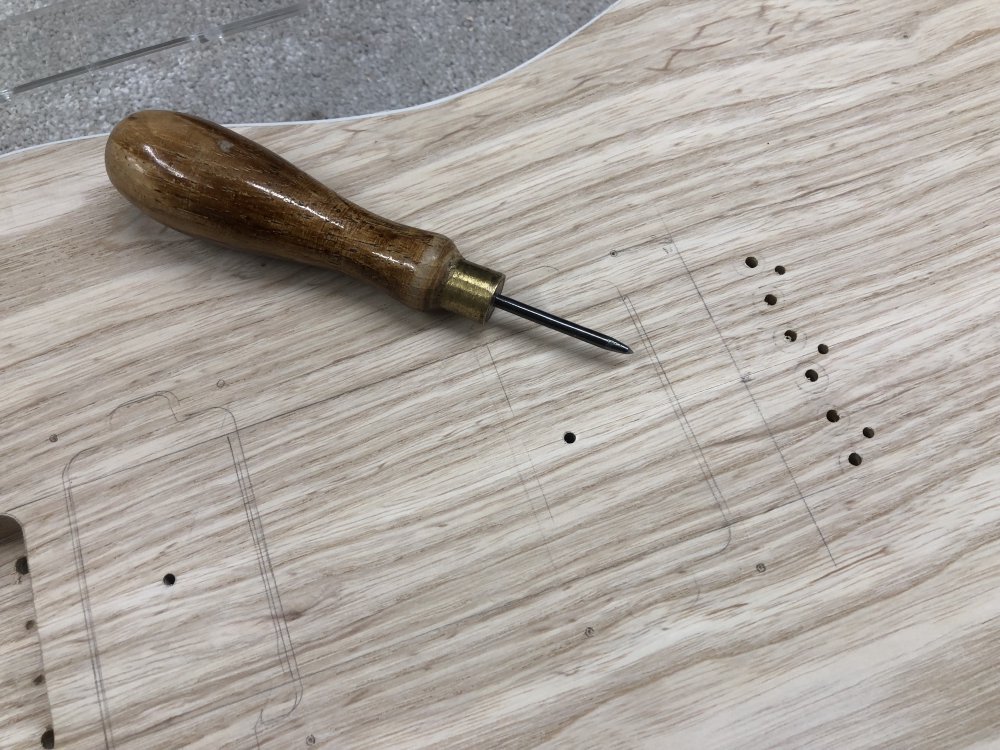
With the template position sorted, it was time to drill the mounting holes, starting with my trusty bradawl (or “Brad” as Matt likes to refer to it) to mark the initial positions and guide my drill bit to the right place:
With the holes primed was over to the pillar drill:
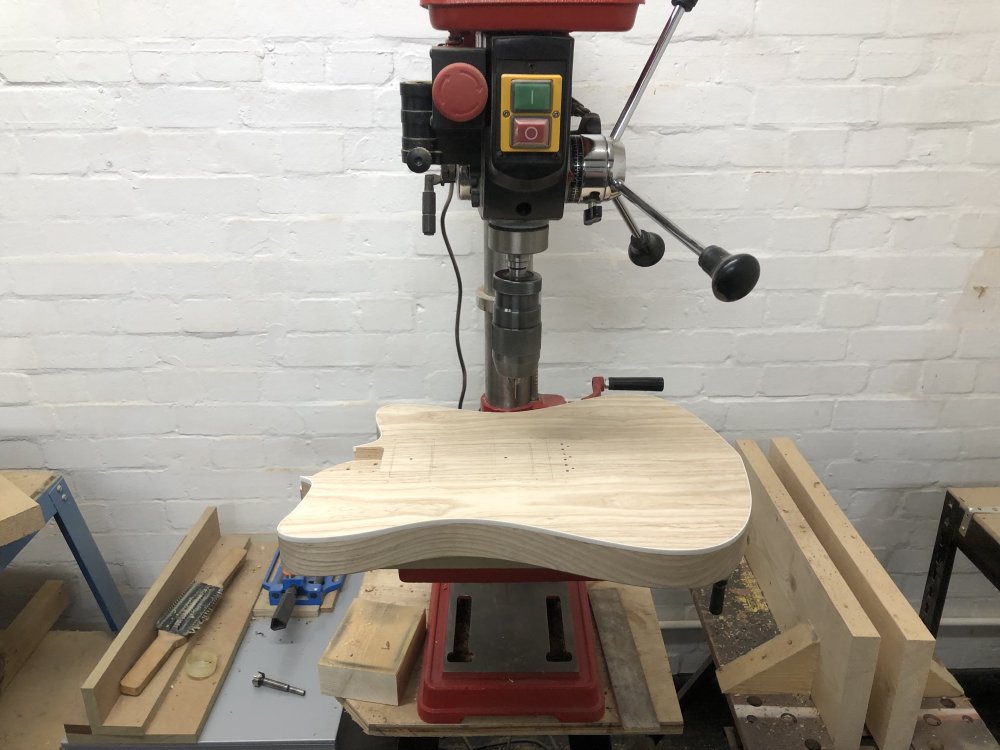
With that, I was able to mount my template ready for action, using the same holes that down the line I’ll use to mount the pickup-ring in the future:
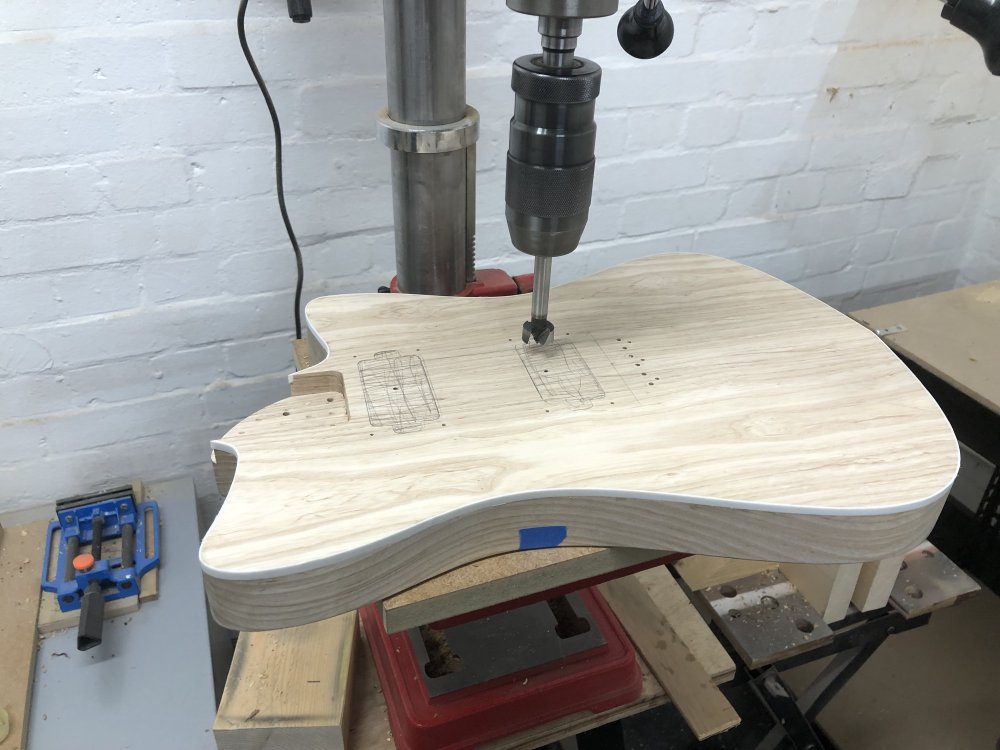
Having mounted the template properly, I just marked up the final position of the cavity and then removed the template again, as the next step is to remove as much material as possible using the drill press with a large forstner bit. In the picture below you can see the bit of tape I used as a depth gauge for setting the stop on the pillar drill. In the past I’ve drawn this with pencil, but then I have to remove it, so this is a sign that I’m slowly learning :)
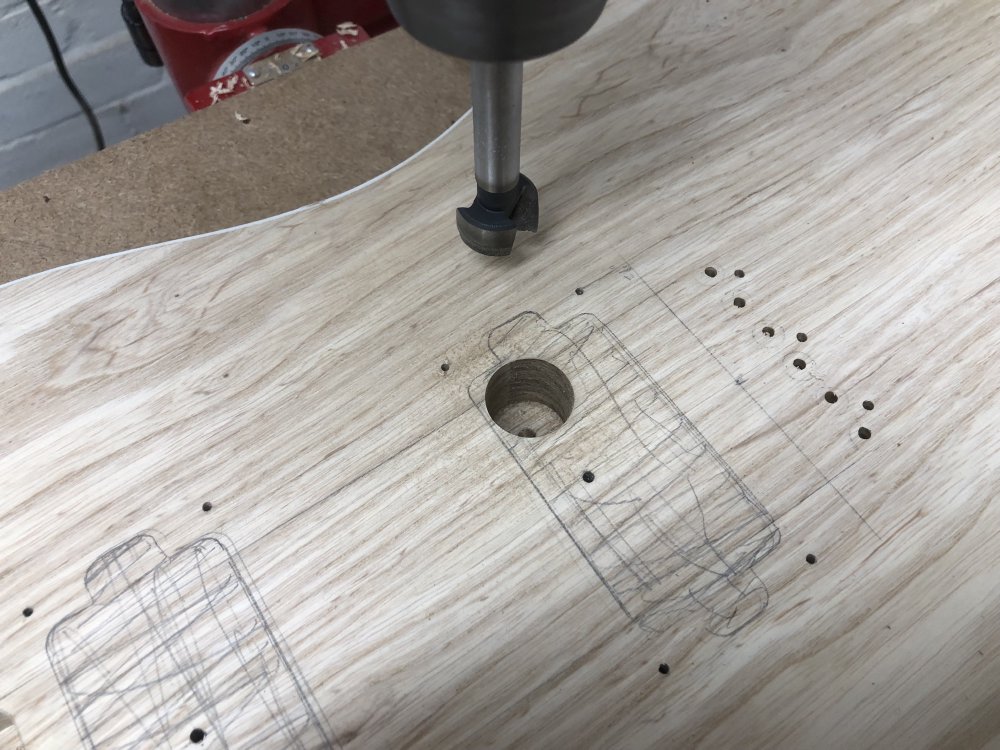
Next is the first in a series of making a mess in the workshop as I remove the first of the dozen holes I made on the press:

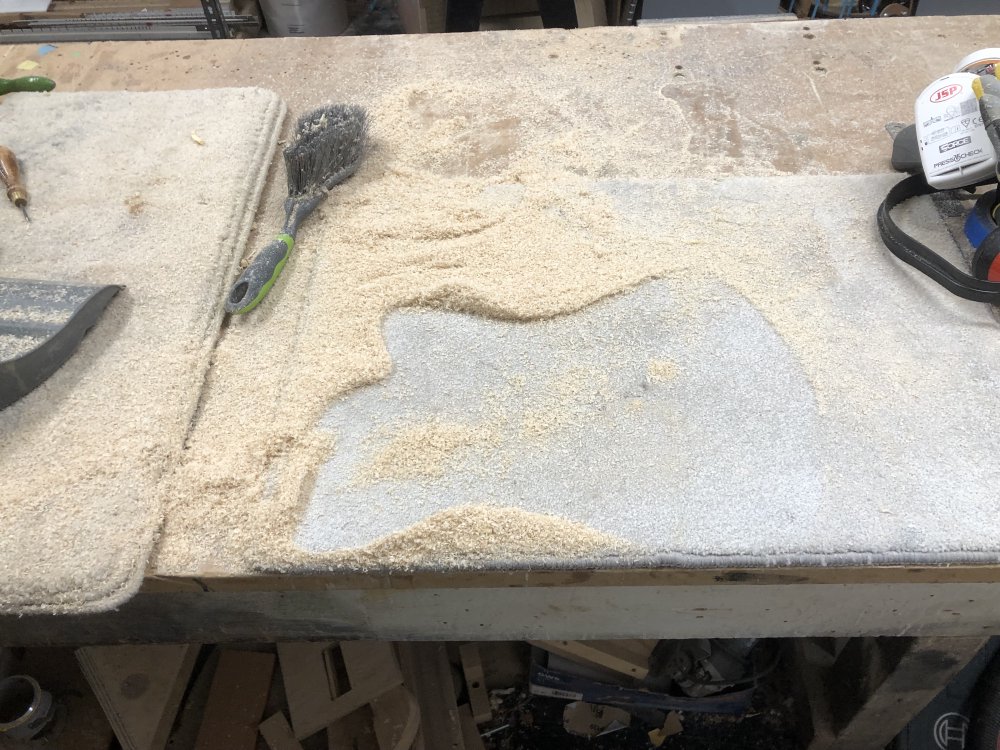
All that mess, was just from one hole!
You can just about make out where I held the body in the dust pattern - I held the guitar body with my ungloved hands, and I could feel the heat coming off the drill bit. Forsner bits get fairly hot on a dense wood like this ash, and the initial shavings were quite toasty too, and you get a smell of something being warmer than you’d like. I do a sort of pecking motion with this sort of bit to let it cool a little as I drill.
I repeat the process a bunch more times, trying to overlap the holes as best I can to both make a nice big space, but not have to do too many cuts. I’ve also found Forstner bits don’t like it if you have less than half the face on material.
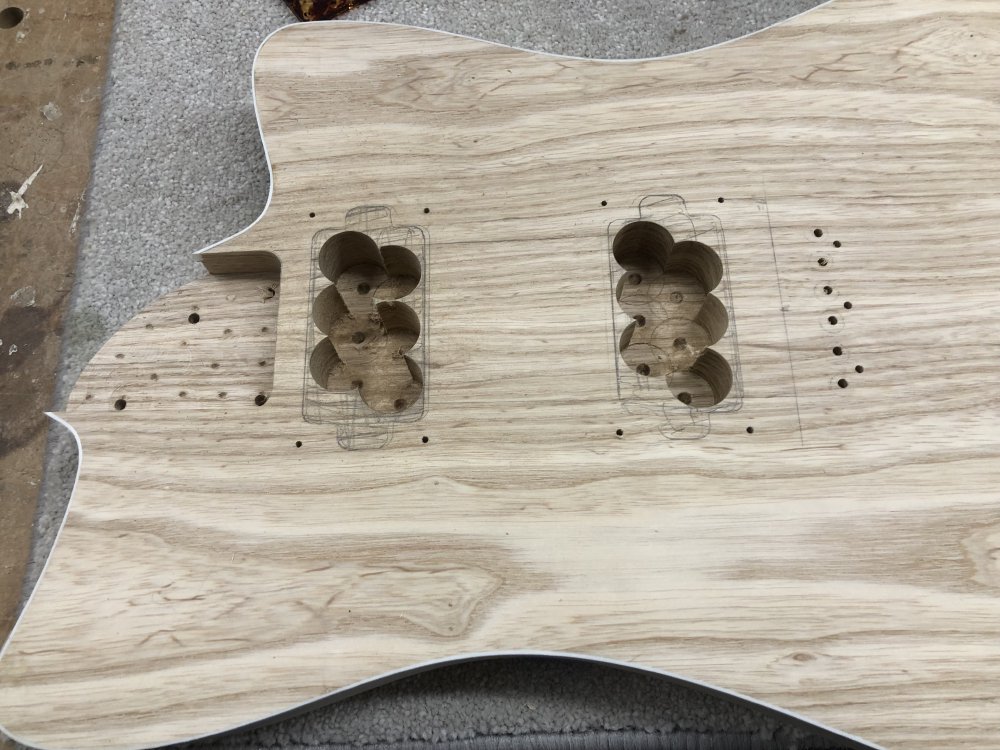
I should have used a bigger bit than the 20mm one I used here - I’m not sure why I didn’t go for the broadest bit that would fit, which is what I’ve done in the past, but whilst this worked, having lots of bumps to deal with just slowed down routing out the rest of the wood.
I also used the palm router, rather than the plunge router, and that was a mistake also. It worked fine, just it was much slower. I’ve been using the palm router a lot, and I generally prefer less powerful tools where I can, but in this instance the bigger version would have been the right tool for the job.
Routing out pickup cavities really does lead to a lot of clearing up afterwards:
Some time later, after a lot of sweeping and vacuuming, I work out my next steps. Embarrassingly this involves reading the post from last time I did this on the blog :)
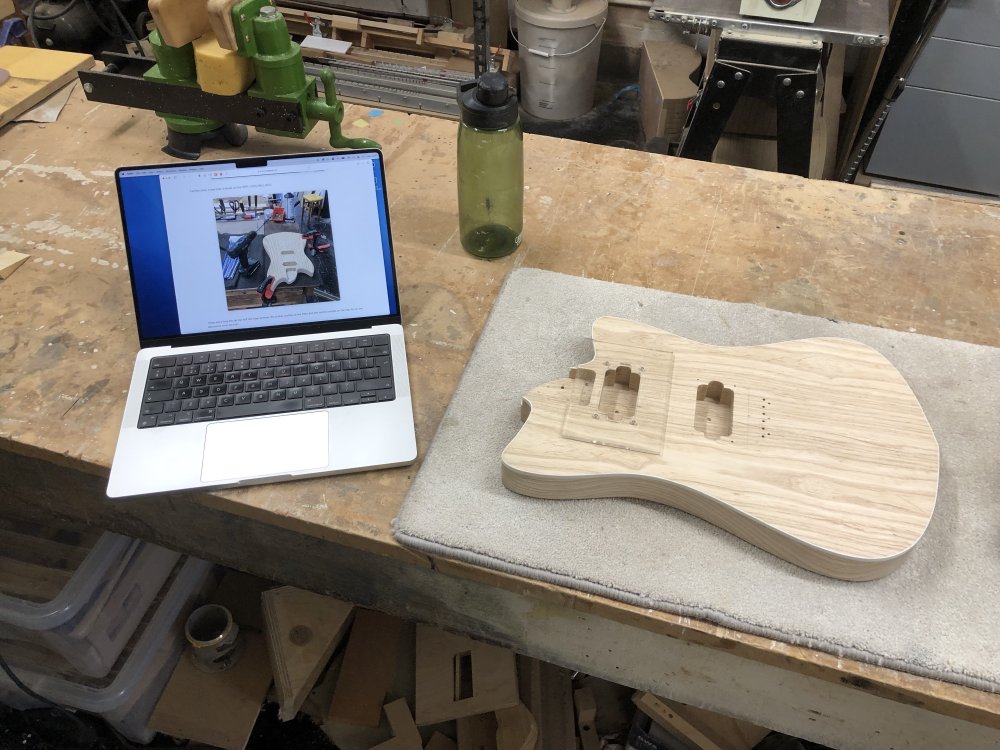
According to post Michael, the next task will be to drill the channels for the wiring between both the pickup cavities and the control cavities, but that’s a task for next week, as I’d run out of time at this point!
OSHCamp talk
I’ve realised that OSHCamp day, part of the Wuthering Bytes Festival, is fast approaching, and I’m speaking there, and I didn’t have a talk ready, so I’ve been working on that too. I didn’t really know where to start, so I decided to just bookmark all the build posts I did here about Älgen over the 18 months or so it took to build, and did a first “practice talk” just going through those, which enabled me to find a narrative I think, and so I now have some slides, made up of pictures from those posts, plus a couple of artsy section titles :)
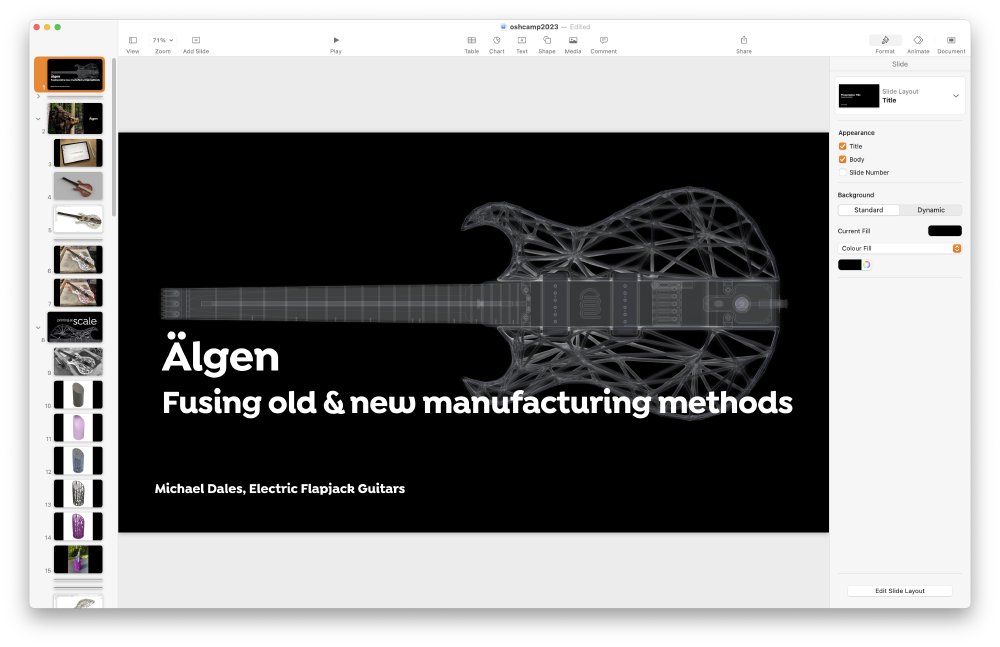
Mostly in writing the talk I realised that I can’t cover as much as I had hoped in a 30 minute slot: I thought I’d do a talk on three of the more interesting 3D-printed parts in Älgen, but with that time slot I can just about squeeze in two, and I had to throw out the slides for the third. I hope to find perhaps somewhere to do the full version at a later day, so if you’d like me to give a talk about large item 3D-printing, generative design, and interfacing 3D-prints with hand-crafted wooden parts, then let me know :)