A Week in the Shop
Published 5 Aug 2023
Tags: bass, design, fretwork, Fusion 360, grain filler, hästen, verkstaden
Messing up on a guitar build is an expensive thing: somewhat down to the material costs, but mostly down to time costs. I have a (mercifully) small collection of necks that didn’t make it, which serve as a reminder of this. I’m currently undecided if I’m about to get a new entry to that collection or not, as things this week went from “oh yeah!” to “oh no!” quickly.
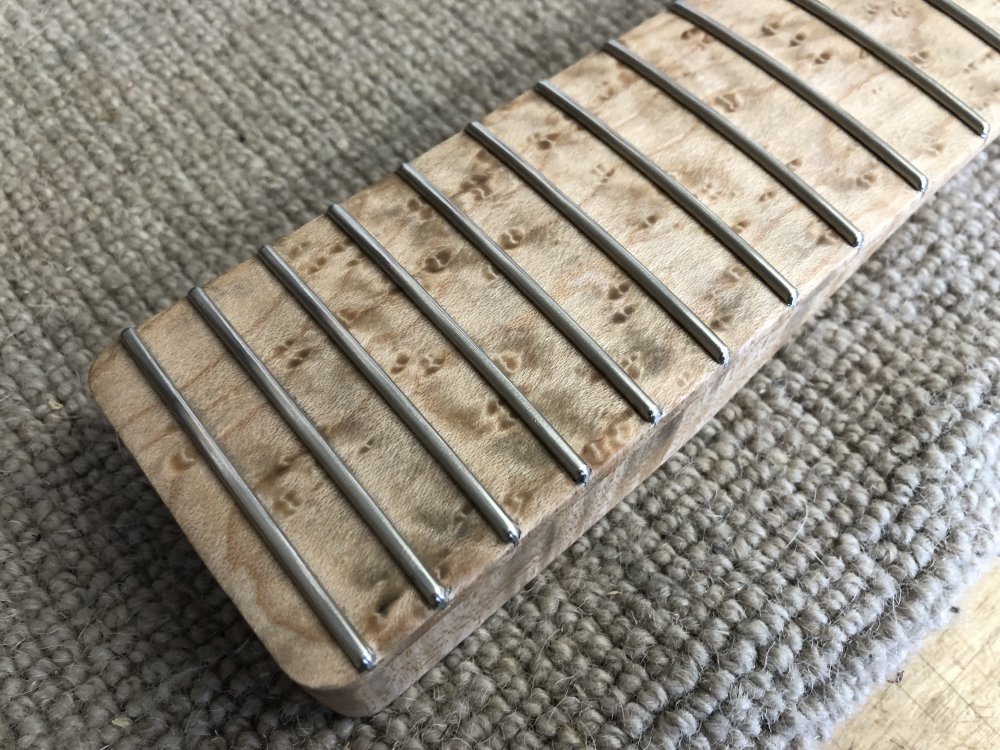
But for once, the “oh yeah!” part of the build went so well that even if this does mean I have to start over due to the “oh no!”, I do so with a positive vibe, as the fretwork I pulled off on this neck was, at least for me, amazing and I feel that my perseverance is being rewarded on that front. My workshop-mates are an inspiration to me on this front: I can see that their attention to detail on fretwork makes a huge difference to their instruments. I’ve set my sights on achieving a similar quality, and each neck I make of late has been better than the last, but this week’s fretwork I could start to see me getting to a similar level. The journey isn’t over, but I can see that I’m on the right path to where I want to be.
My joy of this is slightly spoiled by things then going pear-shaped afterwards, but even if the neck I’m working on isn’t recoverable from the mishap (and generally what seems unrecoverable is usually redeemable after you’ve calmed down and chatted with others), I can take it in my stride as I’m seeing that I’m becoming a better builder still. There is a cost, but some of that is paid for by the sense of progress.
Whether my client would be as glad if I do have to start over remains to be seen of course, and whilst that would not be news I’d be pleased to have to deliver, it’d be easier to take that on the chin when I know that the next neck will closer yet to the standard I’ve been chasing for so long.
Hästen
The tasks this week started simply enough: in last week’s workshop notes I described how I’d applied grain-filler to the body of Hästen and then left it to dry, and so the first task this week was to sand that back and just get things ready for actual painting.
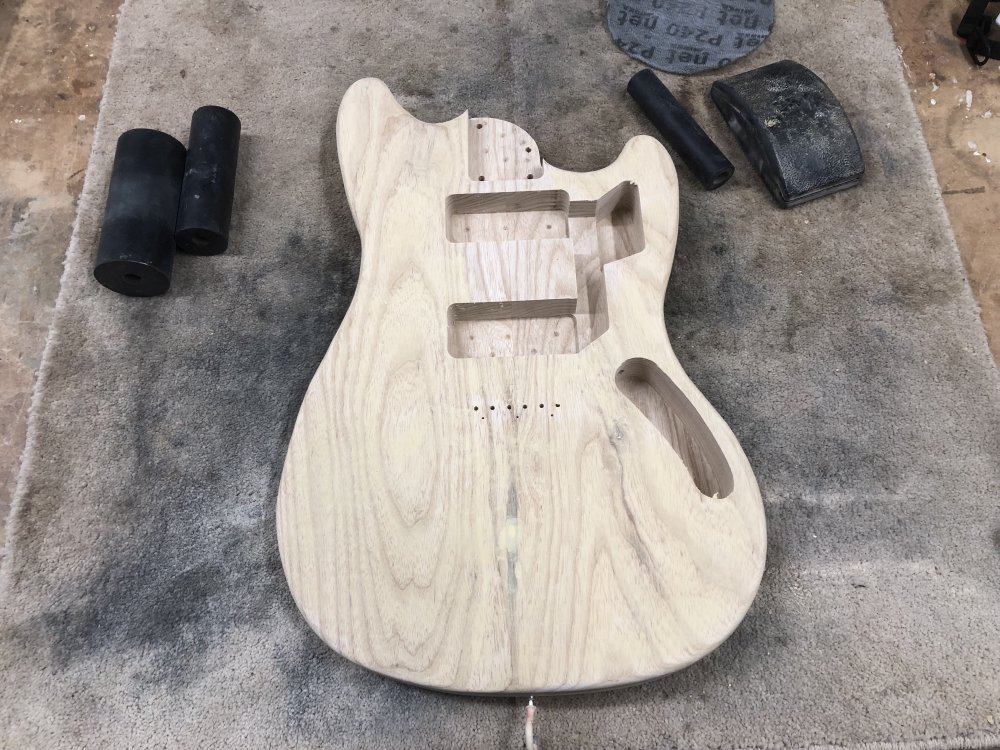
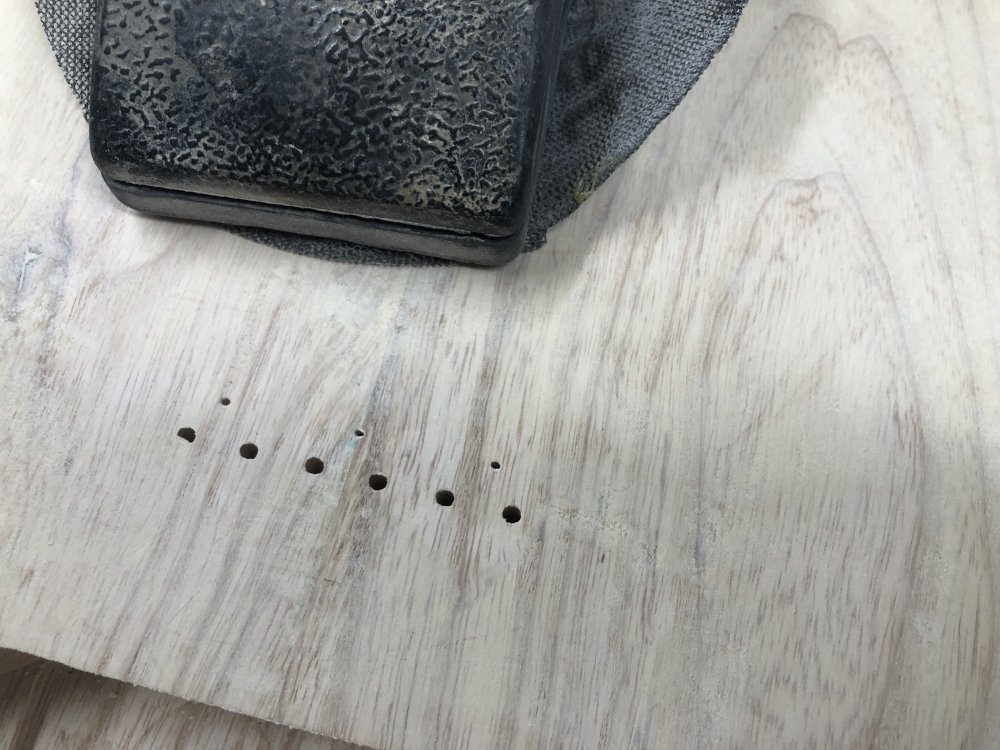
I’d tried to ensure as I applied the grain filler there wasn’t too much left built up on the surface, but there was some left, in places which you can just about see here to the right of the holes for the bridge, and that needed to be cleaned up:
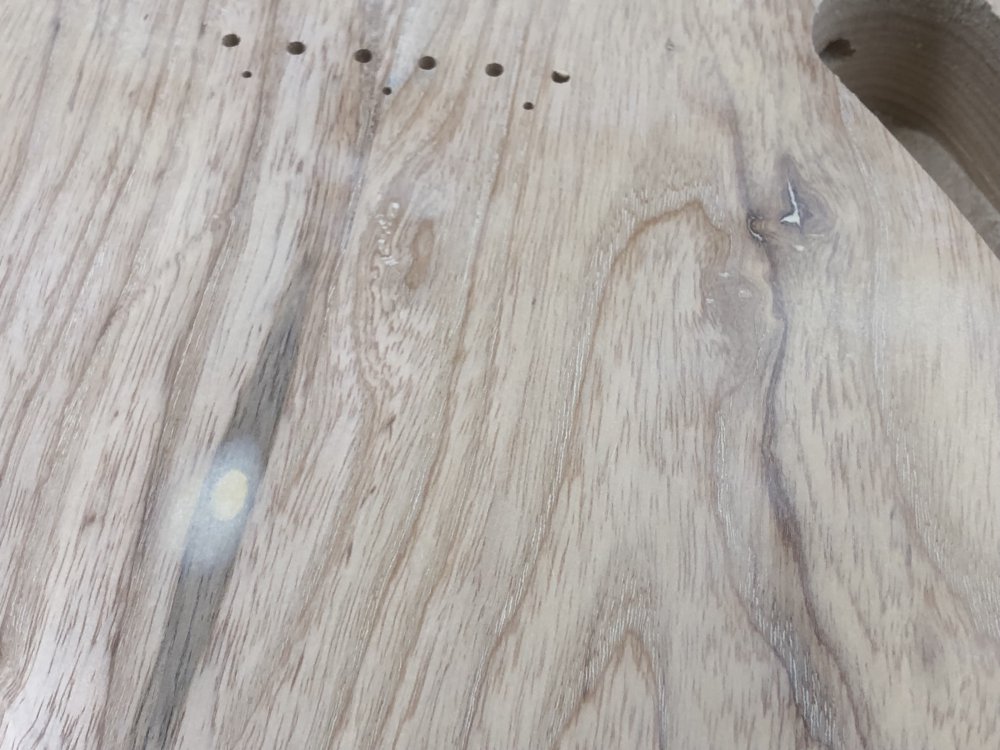
I speculated last week about whether the filler would do a good job on the couple of knots in this wood, which originally were going to be a feature (so most likely resin filled), but then the client decided they wanted the guitar painted, so I had to fill these in. That seems to have gone okay:
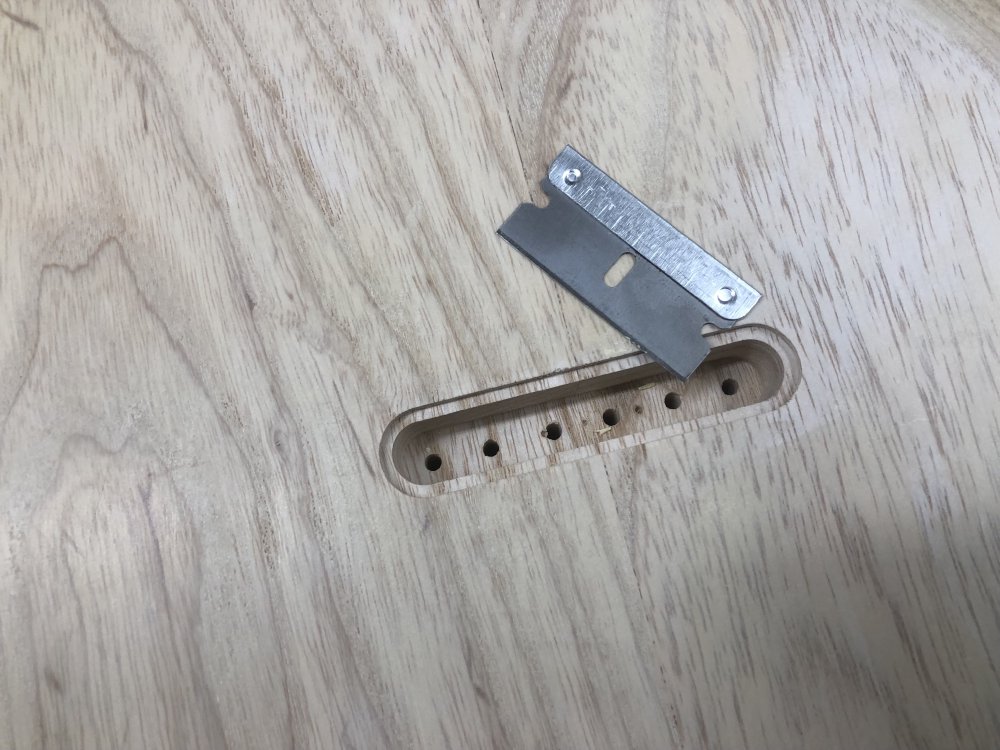
Once the sanding was done I went around and removed the bits of filler that had built up in the string and screw holes, and around the edge of where the ferrule-block will sit on the rear, using a combination of hand-wielded drill bits and workshop most-valued-player this week, a razor blade:
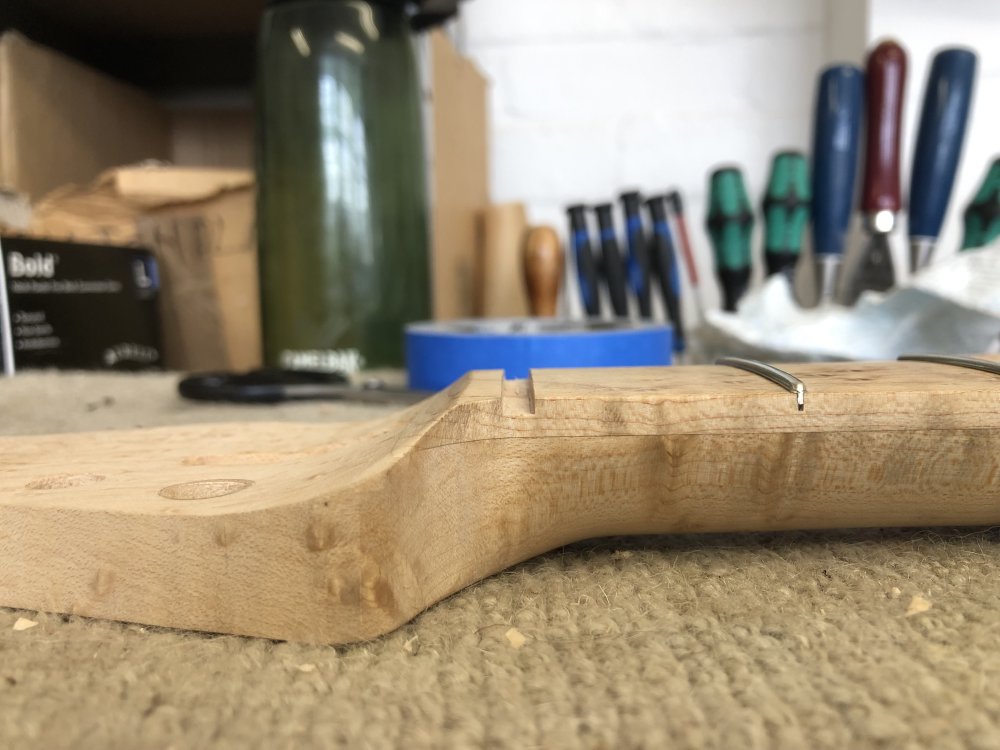
Once I’d got the body feeling smooth and removed any filler from where it shouldn’t be, all that then remained was to add the wooden baton that will go into the frame we have in the spray-booth, which attaches in the neck-pocket:
Now next week I get to paint my first guitar body. I’m a bit nervous about this, but I know that so long as I don’t go crazy it should be fine, and I can sand back and retry if necessary. I did the lacquer spraying on Älgen a couple of months ago, so at least I’m not going in totally fresh to this.
With the body prepped, I returned to the fret job I also started last week on Hästens neck.
This is the bit that went well. My aim here is to have rounded fret-ends; quarter-hemispherical if you will. The aim on dressing the fret ends is not to make them look good (that’s just a nice side-effect), but to make the instrument as effortless to play as possible, and so having rounded fret ends does make it much easier to run your hands up and down the fretboard.
For each fret end I now have a routine I go over:
- I use a flat file to put facets on each side of the fret: first at 45˚, then at 30˚ and 60˚ and do a last rouding pass.
- I use the triangular file to then repeat that pattern with it held with the top flat.
- I use the triangular file now at a shallower angle, which rounds the top a bit more.
- I use the other flat sided file I have to follow the neck carve and round over to the top of the fret, which is also doing a final check that the fret end if properly flush with the neck (though it already should be).
- I do another pass with the flat file, which has a rounded smooth edge on one side, and then just re-assert that 45˚ facet and round off things a little.
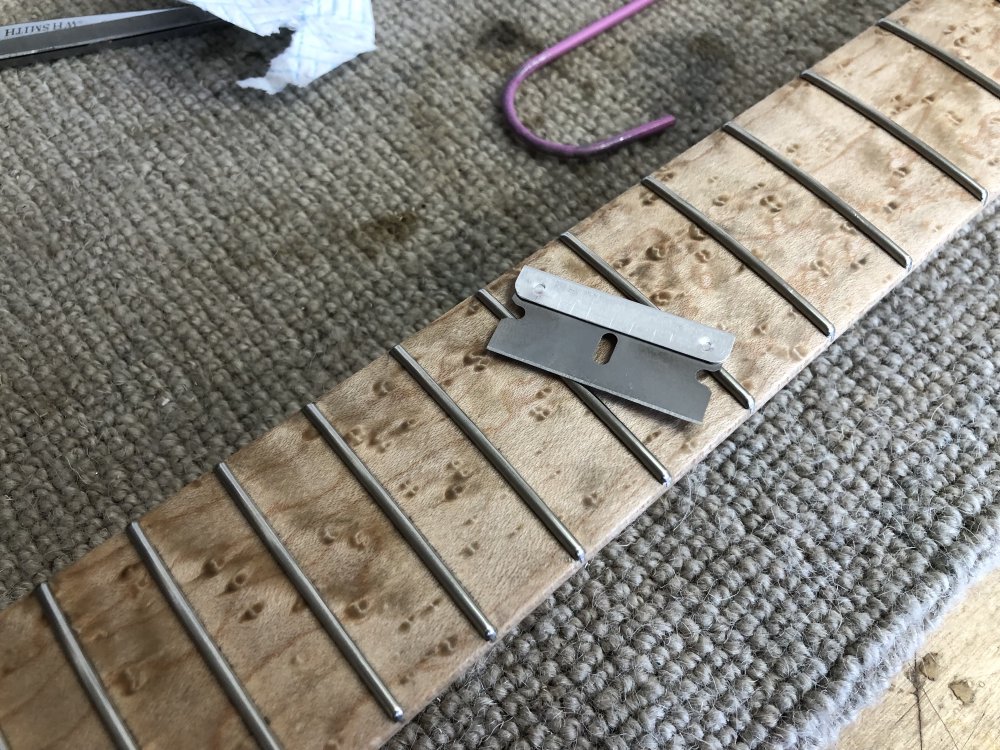
- I then use the razor blade to pick off bits of swarf, as the fret was pushed into the wood, so the file might not get perfectly down to the bottom. I then use the flat file again if this has left any rough feeling edges.
- I wire the whole thing with some 800 grit disk - this is just to give a test sanding, am I happy with this? Proper sanding will follow to get all the rasp marks out.
Now repeat this 43 more times :) It’s a lot of effort for such a tiny bit of the instrument, but it really to my mind makes the neck nicer to play, and so an investment here will hopefully lead to a lot of benefit over the lifetime of the instrument. I usually have some music going to keep me company, and you get into the grove.
Unfortunately I don’t have any nice pictures of this: I use my old phone to take all my workshop pictures, but it won’t close focus enough to get the fret ends in detail. You can kinda see it in some shots, but I’ll try take a better camera into the workshop with me next week to see if I can get a better picture to explain what I’m after.
Going back in time you’ll see that I used to cover the fretboard with masking tape before doing this work, to protect it from dirt and scuffs, but for the last few necks I’ve not done that. The fretboard will pick up some marking as you work the frets, but all the files I use have smooth sides, so all you’re seeing is a little rubbing mark that will be removed when we later sand everything down. Fret dust will get onto the fretboard, but that will come off as I clean it with liquid gold. This will even remove any sharpie that has accidentally gotten onto the wood.
Whilst the masking tape process would save me from some of this, it tended to wear through anyway in places, so you’d still have some clearing to do, and when you’re at the stage of trying to get the file right into the bottom of the fret as you round it over, the thickness of the tape does get in the way. Add to that the time it takes to cut masking tape to the right size to fit between all the frets, it takes longer to do it than to not and tidy up afterwards.
That’s the theory at least. This had worked well on the last few necks I’ve done, including Älgen’s, but this time I did go nearly as well.
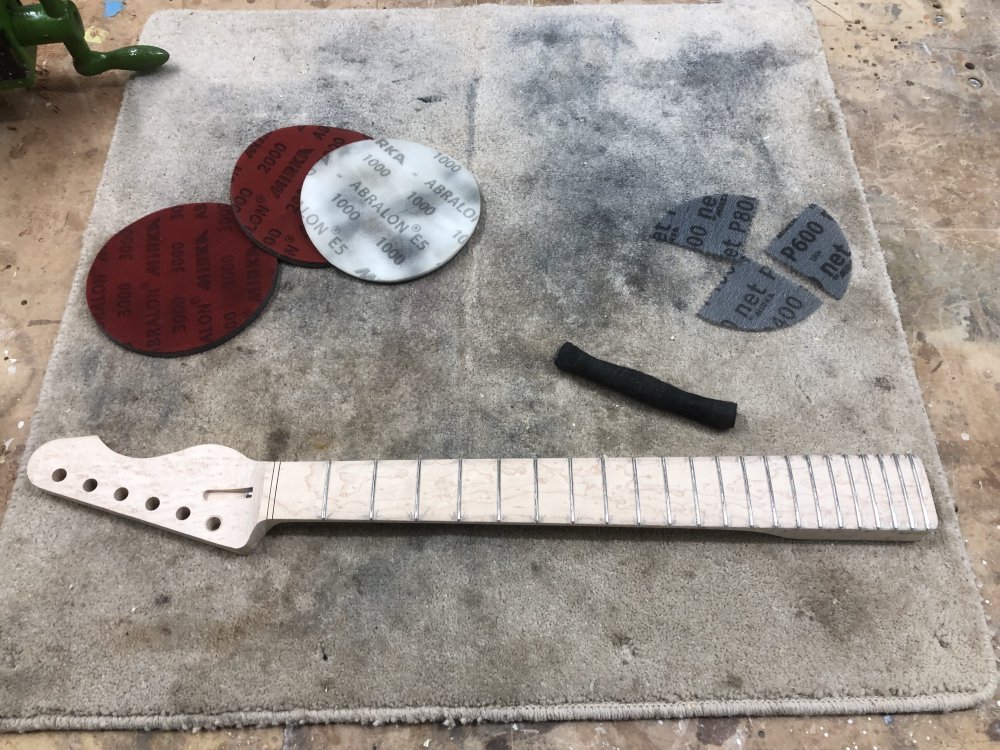
We started off here, where you can see there is some marking around each fret where the file as been. The main aim at this stage is I have sand over the frets to remove all the marks from where they’ve been shaped by the files and rasps I’ve used. This isn’t just the fret ends I did just before this, but all the levelling and re-crowning I did the previous week. I’ll work my way up the various grits starting at 400 and going up to 3000, using the workshop’s “artificial finger”, which saves you getting blisters on your own.
I then sanded the frets as I’ve done before, and the fretboard did, as you’d expect, get quite grubby as a result of all the metal dust.
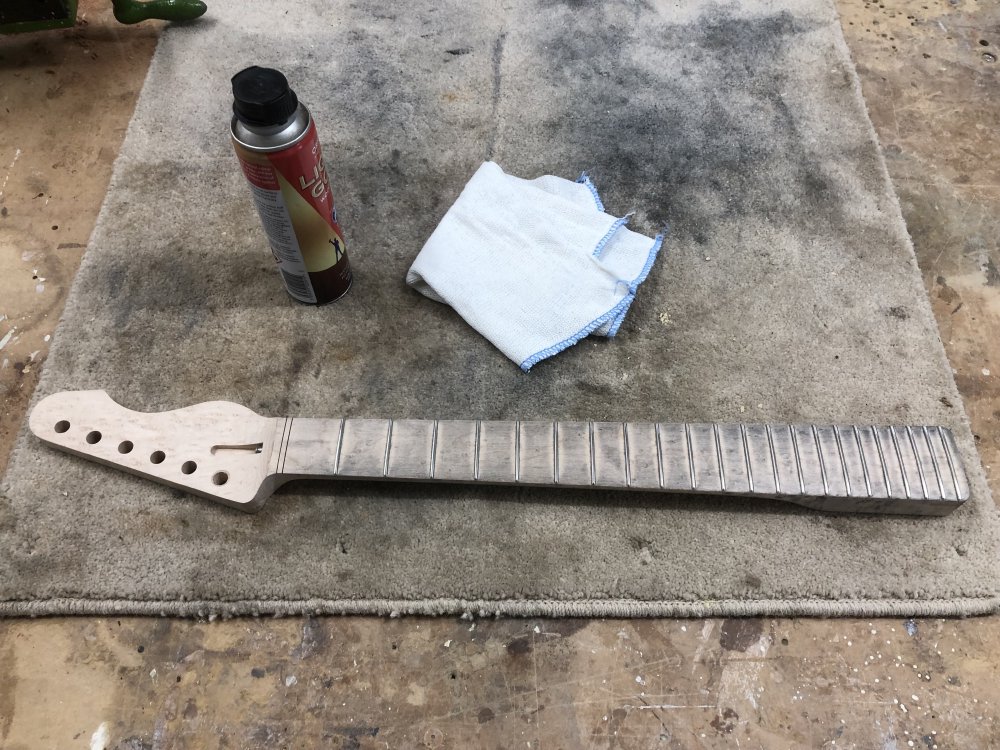
Unfortunately, when I went to do the cleaning, it really didn’t go as before. It’s hard to get in pictures, but in several places the dirt just seemed to work into the wood, as you can kinda see here. I think there’s a combination of metal dust getting into the grain, and bits of ink from what sharpie remained soaking into the figuring in the maple.
As a positive aside, this is the best shot you can get of the fret ends. It looks like the frets here have a notch in the end, that’s actually my silhouette with the workshop window behind me. If you could zoom in really close you’d see quite a sad look on my face at this moment!
I did a little bit of work with a razor blade, using it as a tiny wood-scraper, which did help in areas, but still there were areas I wasn’t happy with.
At this stage I decided before doing anything else to leave the neck to dry before attempting anything else cleaning wise. How bad it actually is is hard to tell, because with the wood still damp from the cleaning fluid things look different anyway.
In terms of what would I do different in hindsight? I suspect I still think that for doing the fret shaping I don’t want masking tape on there, but perhaps I could use a lighter, thinner grade when doing the sanding of the majority of the frets. I should have used the hoover to do a first pass to get as much dust of before doing scrubbing, which I didn’t think to do, but is something I do when levelling the frets.
My hope is that we can save this neck, yet again, and that next week it’ll not be so bad. But regardless, the fretwork went so well that even this can’t put a dent in my mood. The gradual improvement neck-after-neck for the last year has been notable, and gives me confidence to keep pushing.
I find as a day in the workshop wraps up it gets tempting to leave little jobs until next time, but I’ve been trying to fight against that of late, and I didn’t want to end the day in the workshop on a low, so I also carved the nut slot on this neck. The last few necks have all had rosewood fretboards, which is quite easy going, but this maple was a nice reminder that not all woods are so easy to work with.
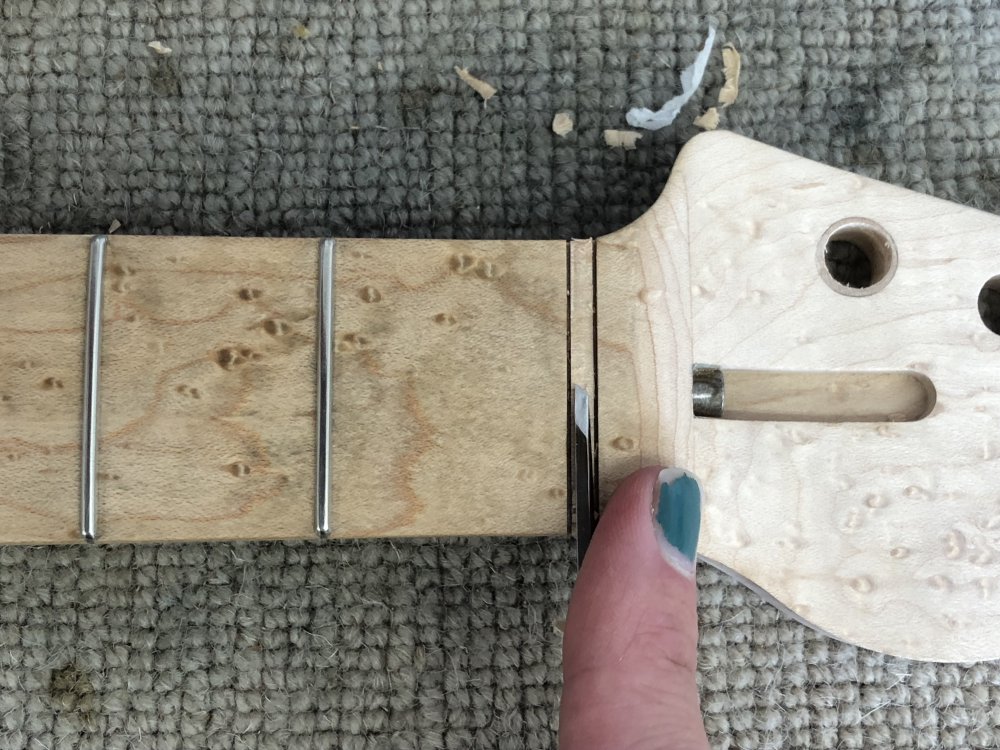
You have to go slowly at this, as you don’t want to accidentally cut into the walls on either side. I use this angled chisel you see here that is able to rub up against the wall without cutting into the way a regular chisel would. Ten minutes later I have my slot cut:
In theory, this neck is now complete, other than needing the headstock logo laser-etched in to it, and something done about the grubby state it now finds itself in. Fingers crossed that it cleans up nicely next week, otherwise I get to do it all again.
Verkstaden
Given I’ll want to be in the spray-booth next time I’m in the workshop, I thought I’d also prep the other body I want to paint, which is for my Verkstaden prototype build.
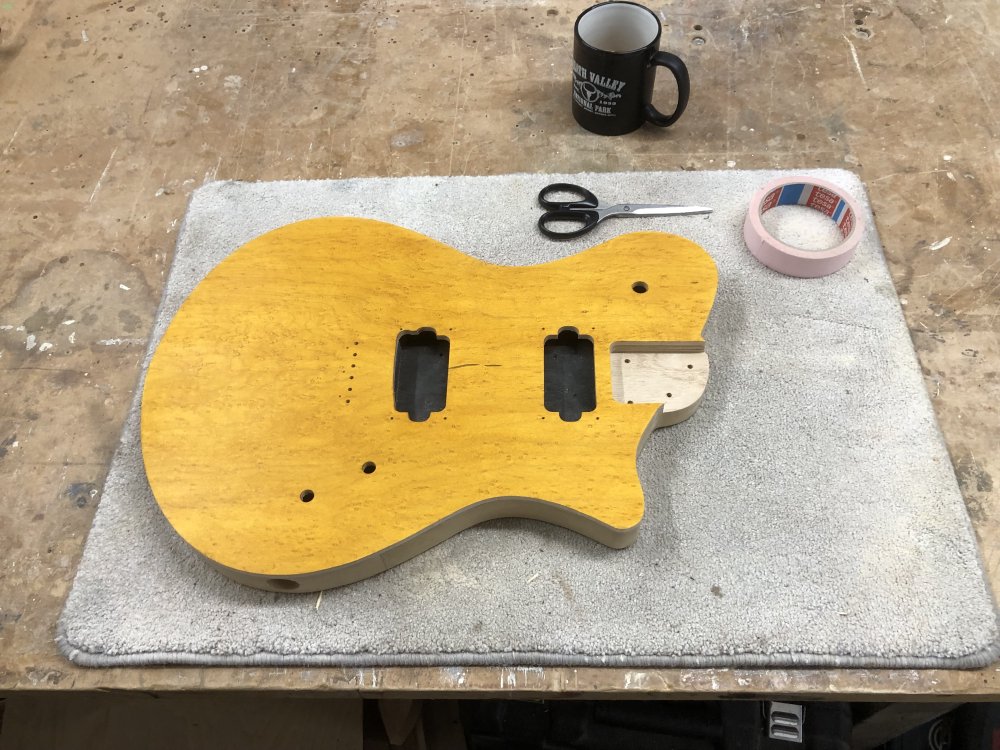
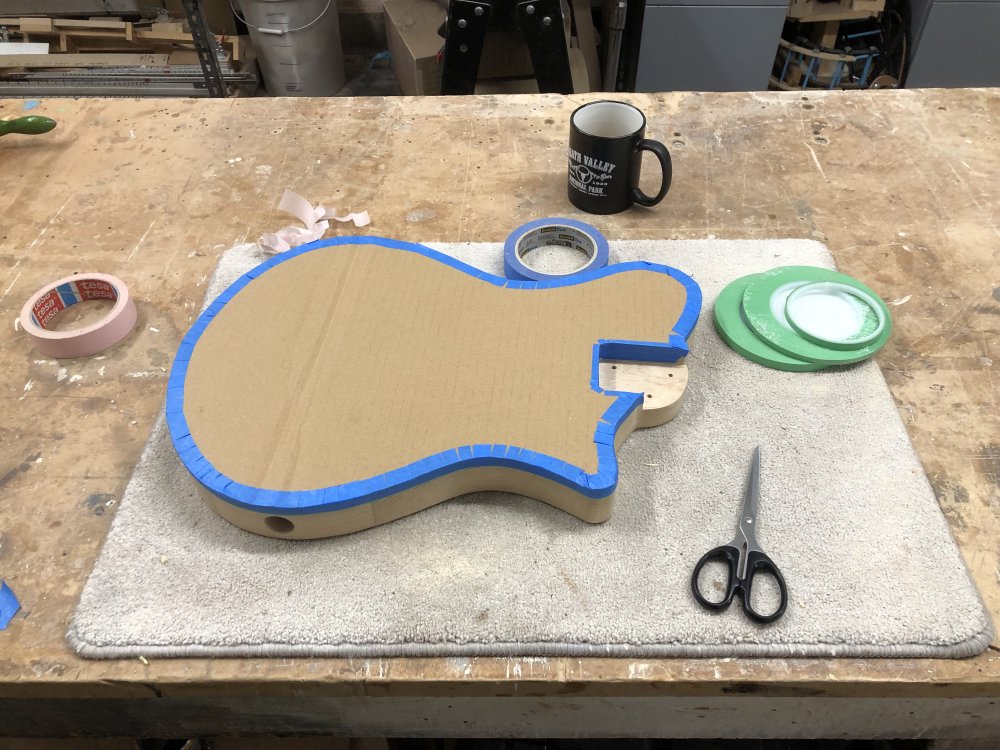
The body of Verkstaden has a poplar back with a birds-eye maple cap. The front of the maple-cap I’ve previously stained a golden yellow, and I intend to leave the sides of the cap unstained and visible as a sort of natural binding effect. The poplar part though I want to paint a dark colour, so it was time to mask up the front and top-edge to protect them whilst being spray painted. Thankfully my workshop-mate Matt had a selection of different paint-masking tapes to select from, including this one which was a near perfect fit:
Once that was on, I then taped over the cardboard mask I laser-cut a little while ago for this task:
And then finally I mounted this body onto a pole ready for spraying along with Hästen:
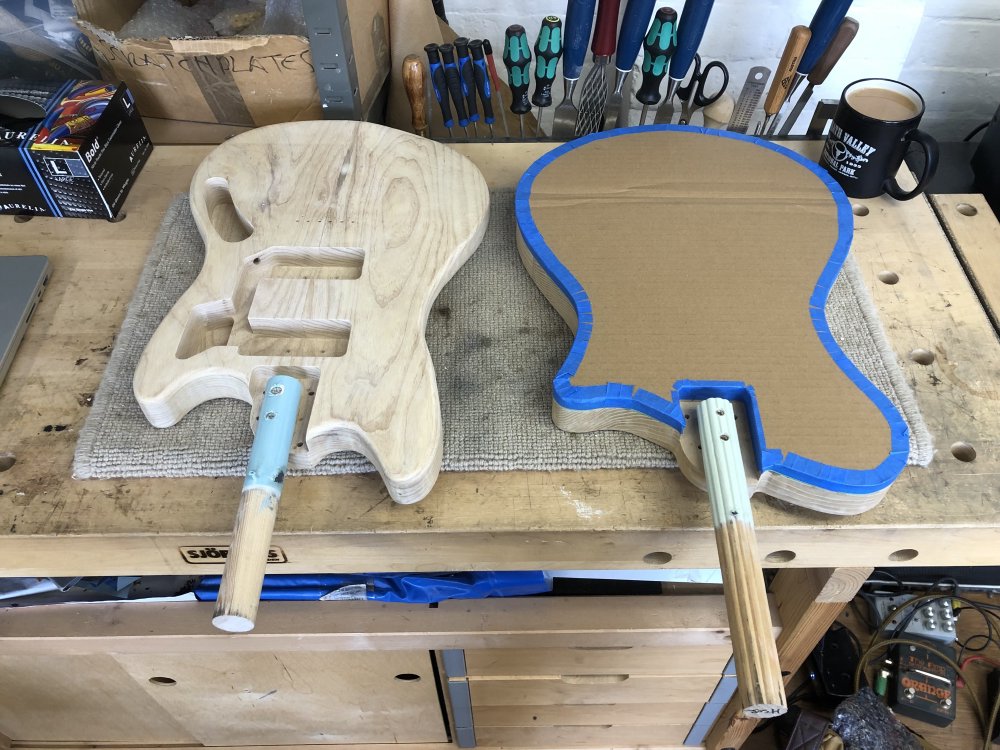
Hopefully this means that I can get into the spray-booth next week and make some progress on these two together.
Bass concepts
I had someone enquire about the feasibility of me building a bass guitar for them, which is not something I’ve built before, but would be interested in doing. Guitars, bass guitars, ukuleles, what have you, are all the same instrument just optimised for different frequency ranges, give or take. The conversation hasn’t got beyond that initial enquiry, but I figured I should use this as a motivation to figure out some design option so that I’m prepared for giving a proper response in the future. It’s also been a while since I did any CAD in anger, so I put some time aside to just get the ball rolling, with the aim to get one Älgen style design and one more conventional style design.
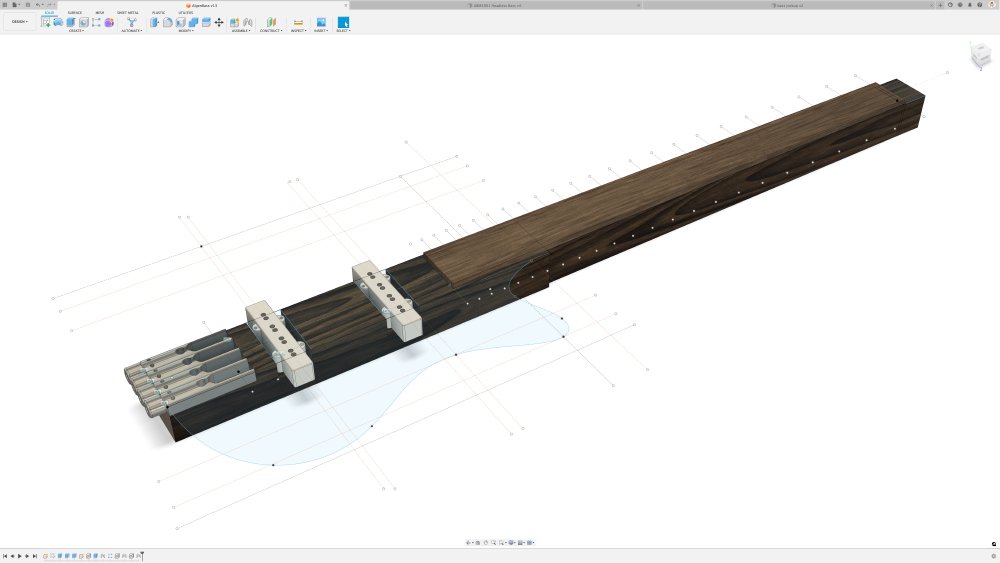
For the Älgen style design I had a look around for suitable parts, and I found a suitable bridge tuner for headless bass by ABM guitar parts, and thankfully they also had rough dimensions in their spec sheet so I could model it up in Fusion 360. Over time I’ve accrued this large library of guitar parts in Fusion 360 that I can just drop into any guitar design I’m working on, but I have no bass parts yet, so I started having to add things anew. Similarly I went looking for pickups that I could use that mount in the middle, and thankfully the pickups from a Fender Jazz Bass fit the bill, so I found some dimensions for those and modelled them up also.
This sketch still has some thinking to go into it - bass guitars tend to have the bridge at the very end of the tail, which solves one of the niggles with Älgen I’ve talked about in the past, which is access to the tuners is a little awkward, but also means I can’t place the controls in the same place, so I’ll probably have to find a way to mount them on the 3D printed wings.
For the more conventional design I got as far as updating my existing neck design for use in a bass guitar. This means a longer scale-length, narrower nut and heel, and fewer tuners.
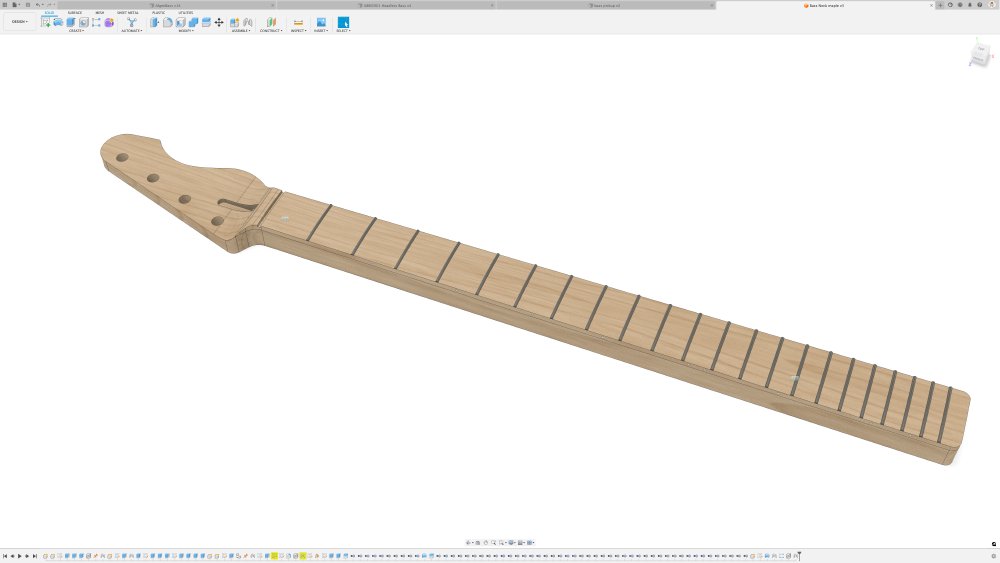
I was quite pleased with how quickly I was able to do this, thanks to having spent time making a parameterised neck design. I found a few niggles as I upped the size and changed the tuners, but mostly it was improving my existing design, and next time I need to do another bass at a different scale length. I’m really unreasonably happy that I could just change the scale length parameter and all the frets and dot-inlays all just did the right thing :) You’ll note I don’t model the back of the neck in Fusion 360 - I’ve never done this, as I hand carve them (I even did this back when I used a CNC-router) - it’s a complex shape to teach the computer to then just have me not use that detail, and it’s a feature I’d need to tweak for every different style of guitar as the neck pockets are usually a little different - so it’s not just up-front cost, it’d have a maintenance overhead too.
The one thing I’ve not done in this is model adding in carbon-fibre rods to strengthen the neck, which is fairly common on bass necks these days, at least in the boutique side of things. I’ll need to read up a bit more on those, and if I want to use them I’ll need to figure out how to make some suitable routing templates to make the channels. Doing the truss-rod channel is awkward enough, but I imagine these would be much worse as I’ll not get a bearing-guided bit small enough.
Still, not bad for an afternoon’s work after not CADing for a while.