A Week in the Shop
Published 5 May 2023
Tags: delfinen, emily hopkins, harp, hästen, jigs, routing, templates, verkstaden
Review time
With Älgen out the workshop for a bit as I use it as my daily instrument for a bit try to work out what tweaks need to be made, it was time to take stock of what else is being worked on in the workshop this week. I have three other builds on the go right now, in various stages of completeness, and I was struggling to remember what needs doing to what, and what ordering constraints there are, so I did a quick run down of each one to let me plan out the next few days in the shop.
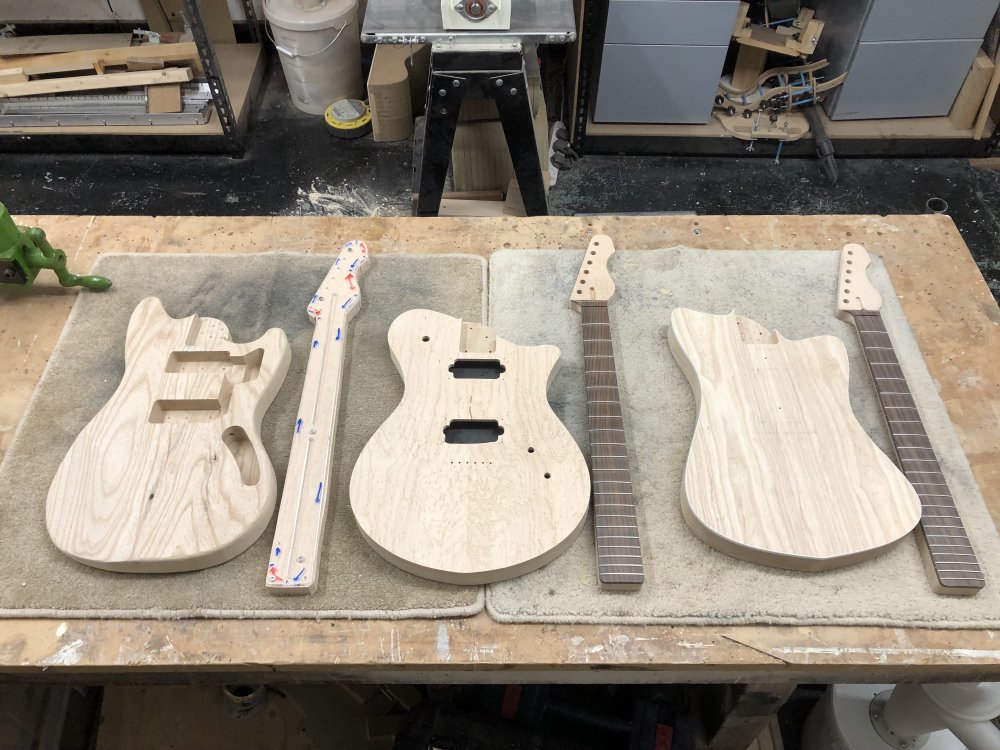
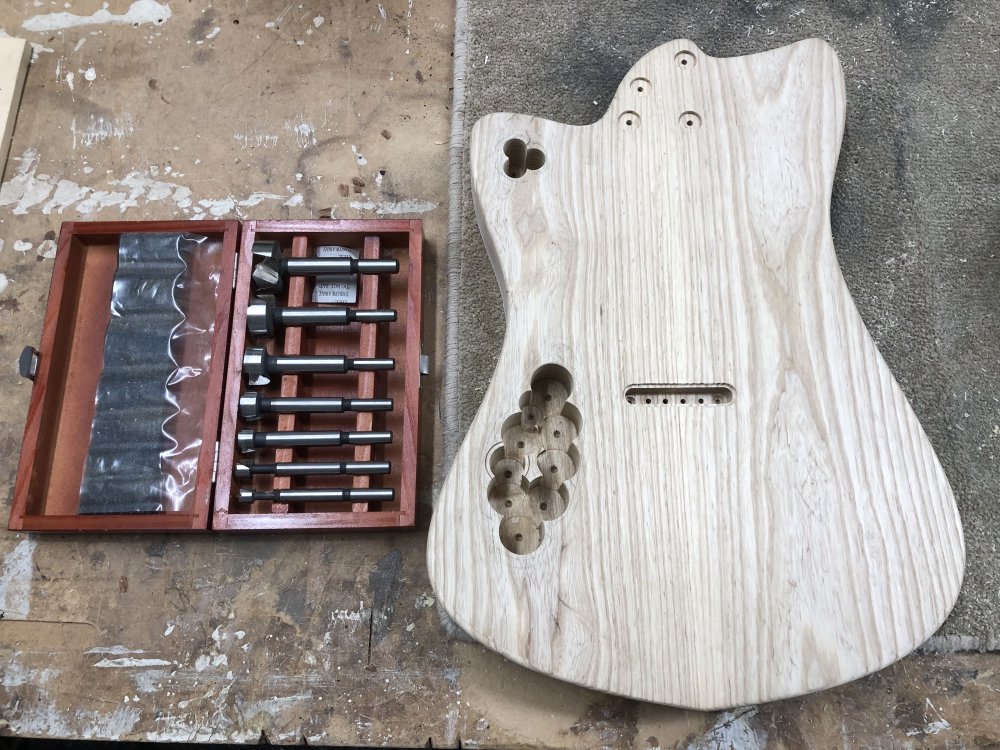
Hästen (left)
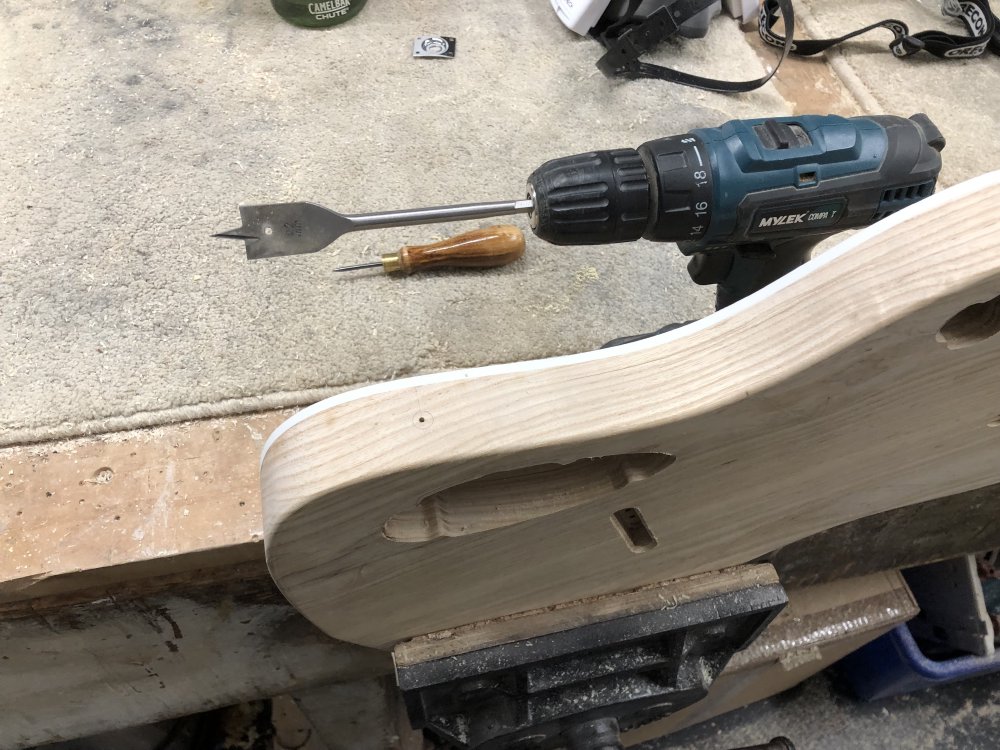
Hästen is the last of the mustang inspired guitars I have in the pipeline. The body is mostly done, except the bridge mounting. Before I can do that, I need to move the neck along, so I can measure the distance from the nut to where the bridge should be. The neck is trimmed and needs routing flush with the template next, but I was in the workshop on my own this day, and I still am not used to the kick of the table-router in the workshop, so I decided to leave that until a day when others where in.
Once that table routing is done, I’ll route out the truss-rod channel, before trimming the face of the headstock, and gluing up the fretboard. This means I need to check I have a good sharp band-saw blade in for cutting the top layer off the headstock, and I need to thickness the fretboard blank I have.
Verkstaden (middle)
Verkstaden is actually pretty close to done in terms of build. The main outstanding job here is just etching a logo into the headstock, and then I can look into painting/staining/finishing this. But that requires me to actually know what that logo is, which isn’t a day in the workshop task. Also for finishing I need to get trained on the workshop spray booth, which is another task I need to wait until I’m in the workshop at a time with others around.
Delfinen (right)
The neck for Delfinen is at the same stage as the one for Verkstaden, just needing a logo but otherwise done. The body however is missing a lot of holes. Unlike Hästen though, I have a neck to give me a reference for where the bridge needs to go, so I guess I know what I’m doing next…
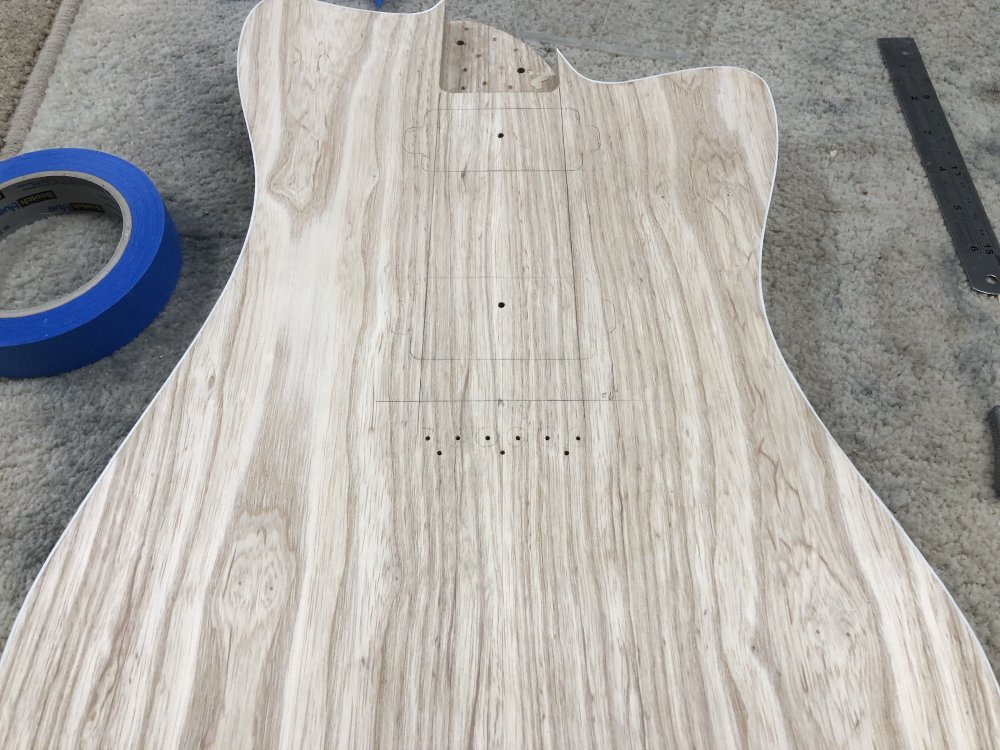
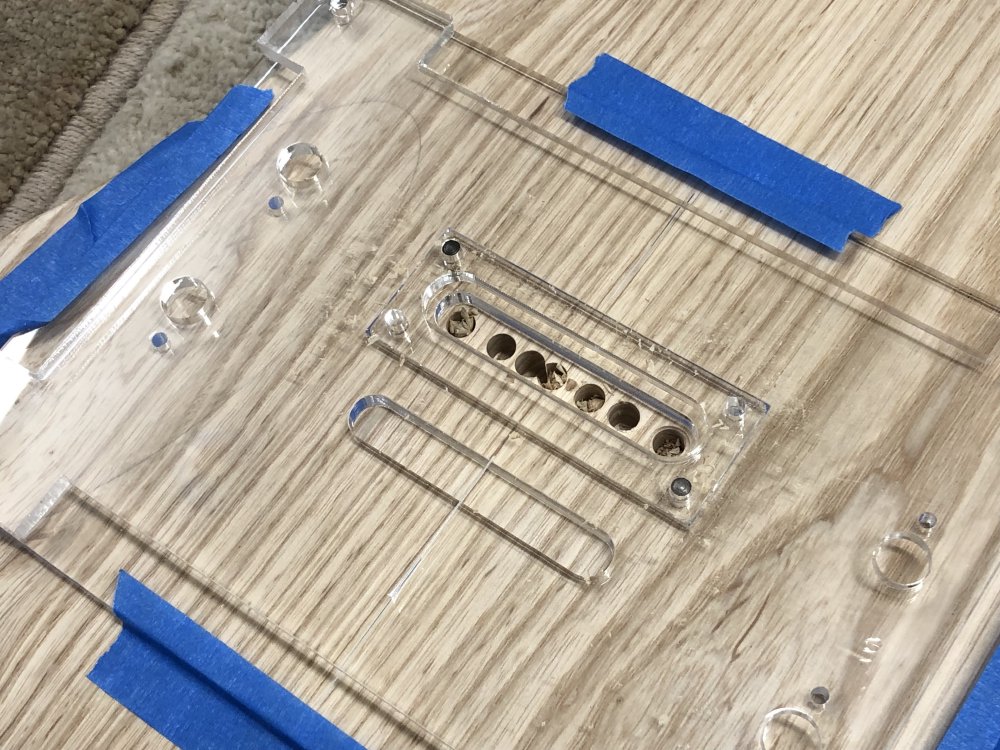
Delfinen
I’d actually previously marked up the bridge mount point for this build, but I did break out the ruler and double check things before proceeding, as it’s been a while, and we know that it’s measure, measure, cut. Once I convinced myself that past Michael had the right idea (something I’ve learned never to assume :), I then broke out what has to be my most frequently used template, which is one for mounting three-screw hard-tail bridges.

I based this template on a third-party hard-tail bridge I used to use before I started making my own bridges, so I assume it’s a generic enough thing for Fender style hard-tails, and so should you want to make your own copy of the template, here’s the DXF for download, and inlined here as SVG:

The template is just there to let me drill the initial pilot holes, rather than the actual final holes: lining up a 1.5mm drill bit correctly nine times so I don’t damage the template is easier than doing so for the bigger 2.5mm and 3mm drill bits. I lightly laser in the outer circles just so I have some visual reference for where the final holes will go, but they’re not for actual drill guidance.
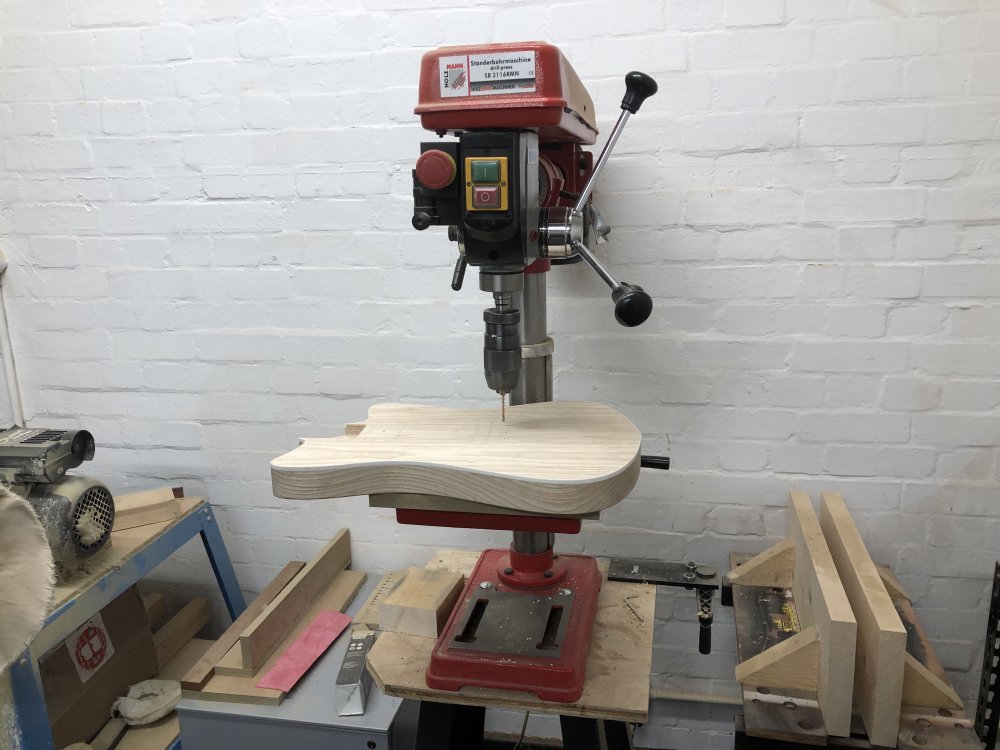
Once the template was mounted, a few minutes on the pillar drill and I have the pilot holes in:
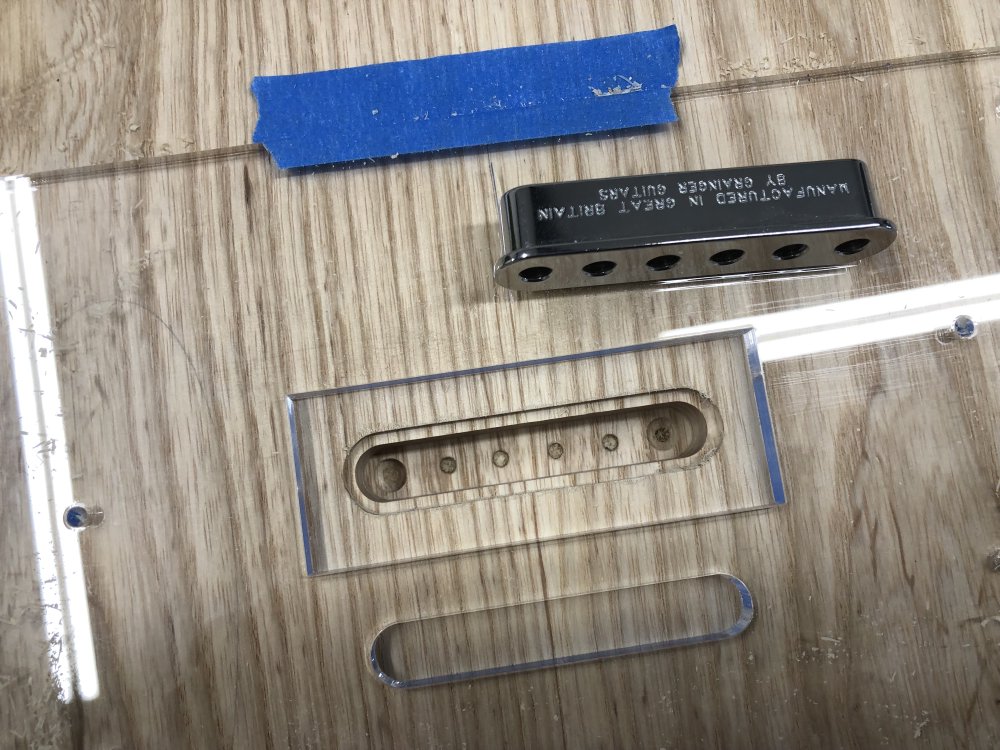
With the pilot holes in place, it’s then back to the pillar drill to make the holes at the actual size:
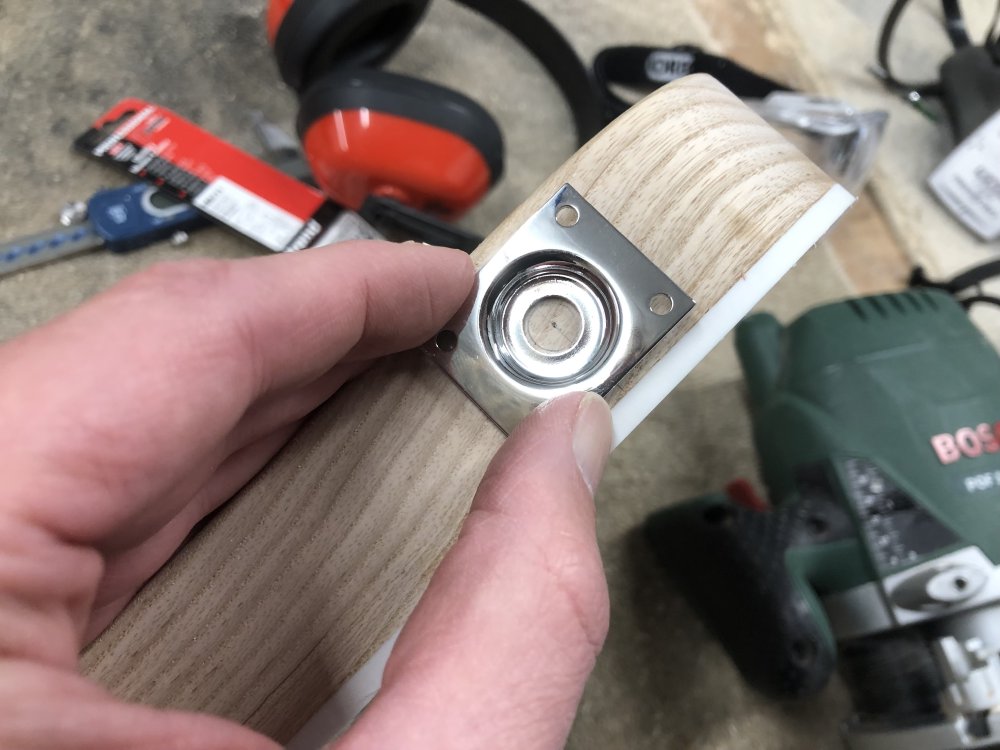
As I mentioned when I last did this, if you’re using individual string ferrules on the back, you normally would drill the string holes half way through from the front, except the outside two, and then you’d drill the middle four from the back using the template again to ensure a nice straight line. But because I’m using ferrule blocks these days, I actually drilled all the holes roughly all the way through - I’d have done them all the way through only drill bit was too short, and I had to in the end just re-drill the outer two with another bit using a hand drill :) Trust me, I know what I’m doing…

With this bit done, we’re now over to my overly complicated template/jig of doom :)
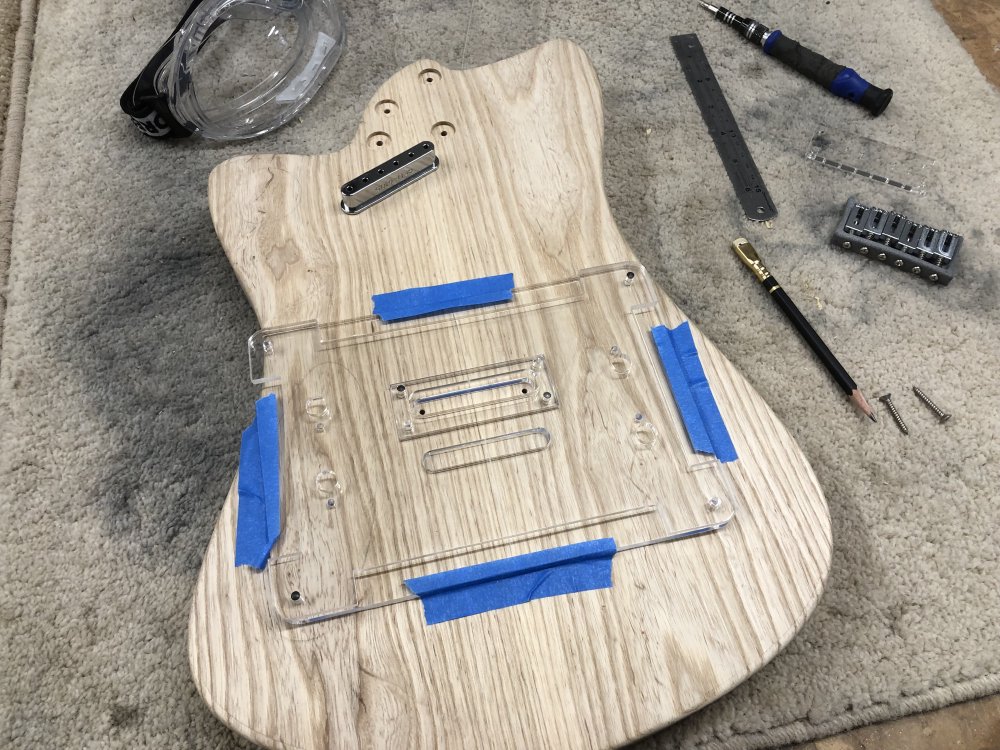
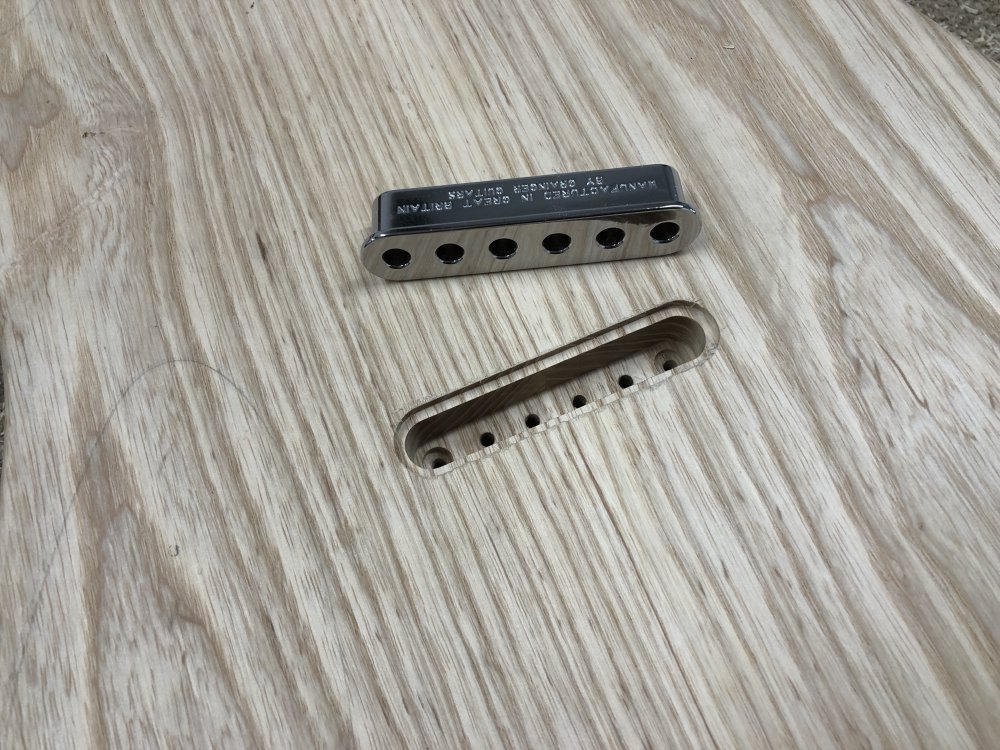
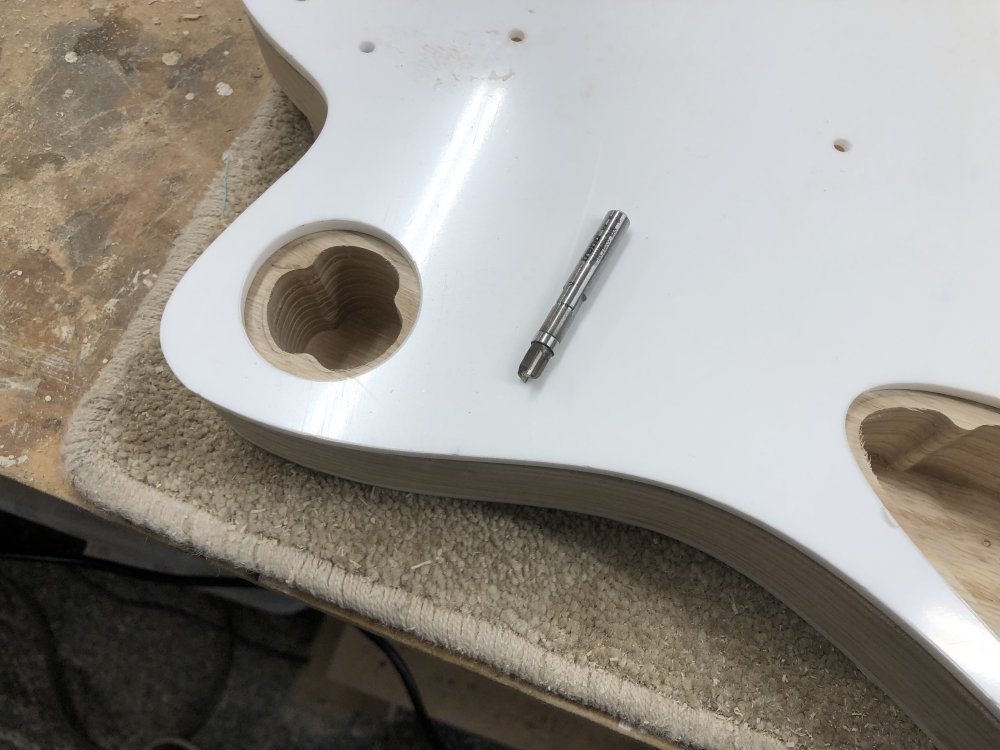
When I did the first attempt at routing out the back of a guitar for one of these ferrule blocks, my template didn’t work quite as I’d hoped, as I struggled to route out the lip around the main pocket without resorting to some sketchy tricks to lift the original template higher. Based on that I designed this template, which is based on having two layers of acrylic to let me route out both the main pocket and the lip without having to move things. It feels a bit over the top, and it’s now time to see if it works.
Before breaking out the router, first I drilled out as much of the wood as I could easily do, as a router is just a finishing tool, not a bulk removal tool:
Unfortunately I don’t have much of the way of in progress shots here, as I was busy concentrating on the task in hand, but I got there in the end:
The tolerances on my template were a little too tight, so I had to do a few passes to get it to work. I suspect the router bit I’m using has dulled a little after many years use, so it was cutting a hair shallow compared to the guide bearing. I got around this by flipping the inner templates to let me abuse the kerfing from when it was laser cut (kerfing means the sides aren’t perfectly straight). It’s another little reminder that as a technologist I tend to think of things in terms of perfect alignment and precision, but the real world needs a little more wiggle room in practice. But overall my complicated template did work, and it means I can break it out again for the next body quite happily.
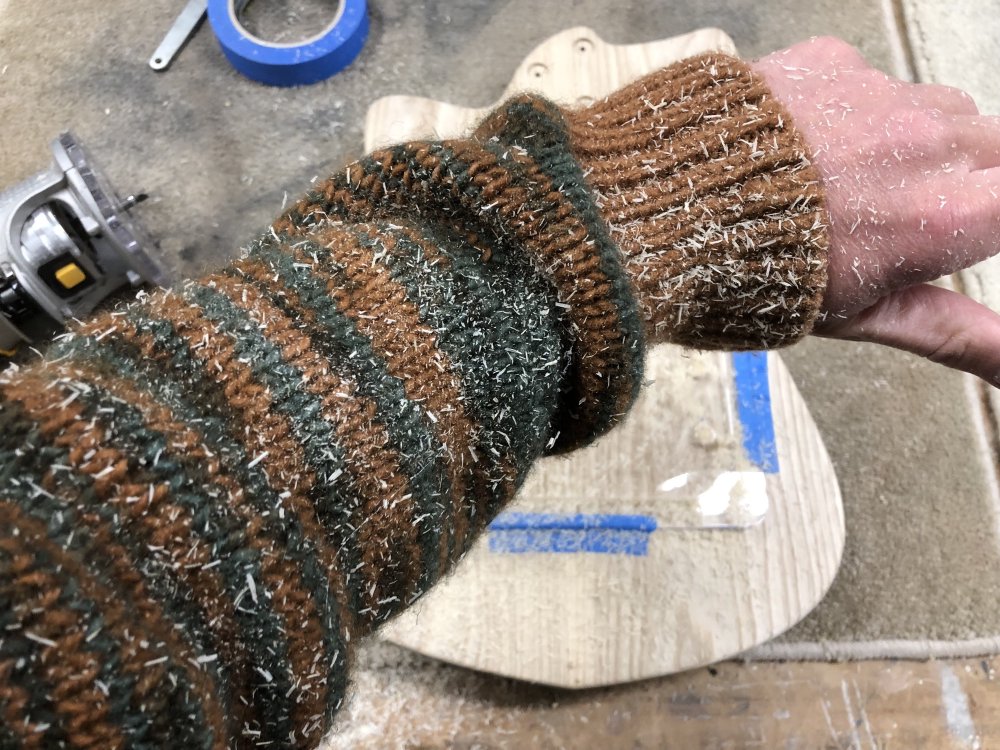
If you take anything away from all this, let it be this lesson: even if it’s cold in the workshop, perhaps take off your woolen layers before routing, as otherwise you’ll be picking bits of workshop-glitter out of your nice garment gifted to your significant other for days to come :)
With the bridge done, it was now onto a similar, albeit simpler, process for the electronics cavities. First up, drilling out the bulk of the material for the cavities. The ash for this particular build is quite dense, so this was quite the work out.
With that done, it was on with the template, and routing these out, just with a bigger router than I used last time. And before you ask, I did remember to take my sweater off before starting this time :)
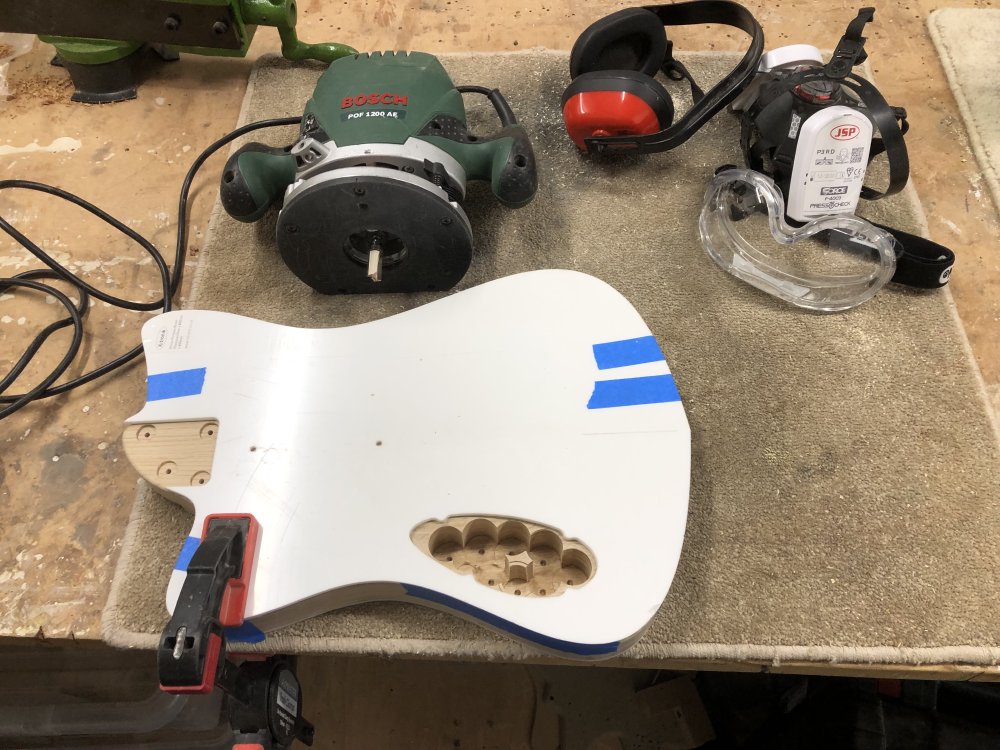
Vexingly I then hit the problem that I hit last time with the string-ferrule block, in that I needed to route out the lip for the lid that will cover the cavities, but the template just wasn’t thick enough. In my head it had all worked out, but I’d not allowed for the gap that there is with my smallest router bit between the cutting edge and the guide bearing, which is exactly the dept of my template material 🤦🏼
I did wonder why this hand’t been a problem on previous builds, but reading back through the blog (which is kinda why I do this :), I realised that in the past I’d used a slightly different design for my cavity pockets, which didn’t have the little dimples you can see in the above picture. Those dimples are there to provide more support material for the screws that’ll hold the lid on the cavity, as I was worried about having a hole in the lids so close to the edge. But this means that the trick I’ve used in the past of using a router bit where the guide bearing is narrower than the cutting edge and just following the pocket won’t work here.
The solution is I’ll just cut a second template with the same pockets on it and stack them, but that means finishing this off is now a problem for next week unfortunately.
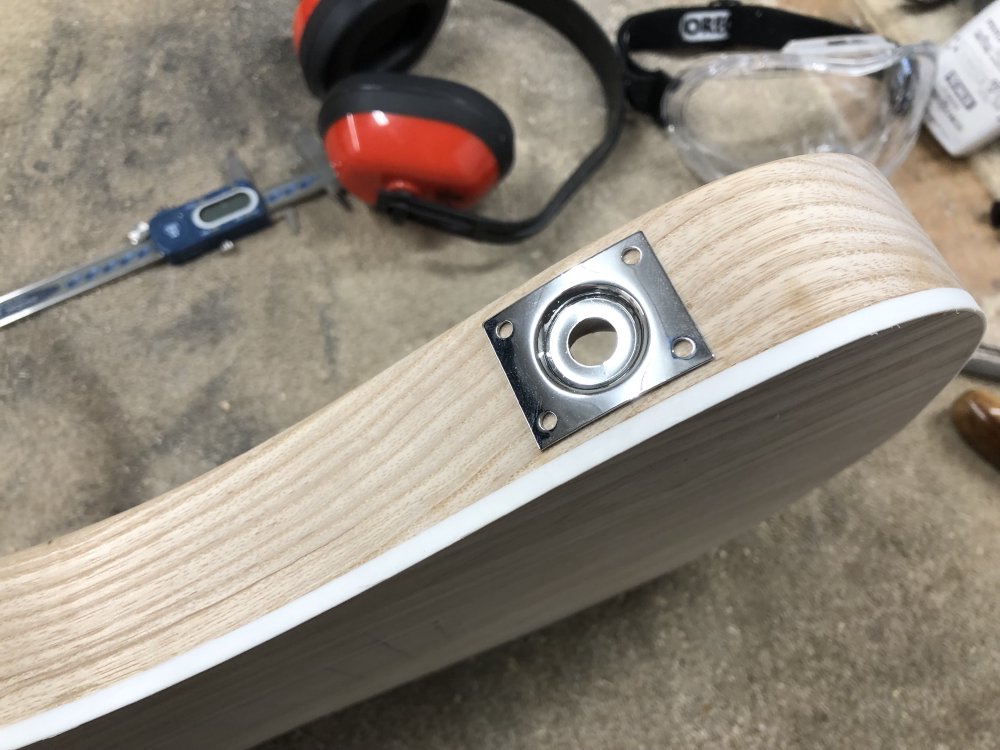
Still, whilst here, I could make one more hole in the guitar: the one for the jack to connect the guitar to the amp. I have to confess, I really hate this process, as it involves using a very wide spade bit, which is quite a brutal bit, and doing so by hand, and it just feels like a mistake is waiting to happen. But, I did design the guitar this way, so I’ve only myself to blame :)
Firstly, I needed to measure up where I needed the hole. Normally this would be in the middle of the side of the body, but because for this body I added binding, I actually need to shift it slightly lower, otherwise it’ll look a bit ugly.
With the position marked up, I then mark my centre hole with a bradawl, and drill a small pilot hole all the way through for the tip of the spade bit to follow, and then it’s on to the bit I hate:
One of the issues I have with this is because it’s quite a broad bit, you need to put quite some effort behind it to get it to cut, but then what happens when you burst through the other side? There’s no way to tell how far through you are until it’s done, and so you tend to pop out the back with quite a jolt, risking damaging the other side of the electronics cavity. The tip, which workshop-mate Matt taught me is to fill the cavity in with some sponge, which’ll stop you making a mess of the far side when you do burst through.
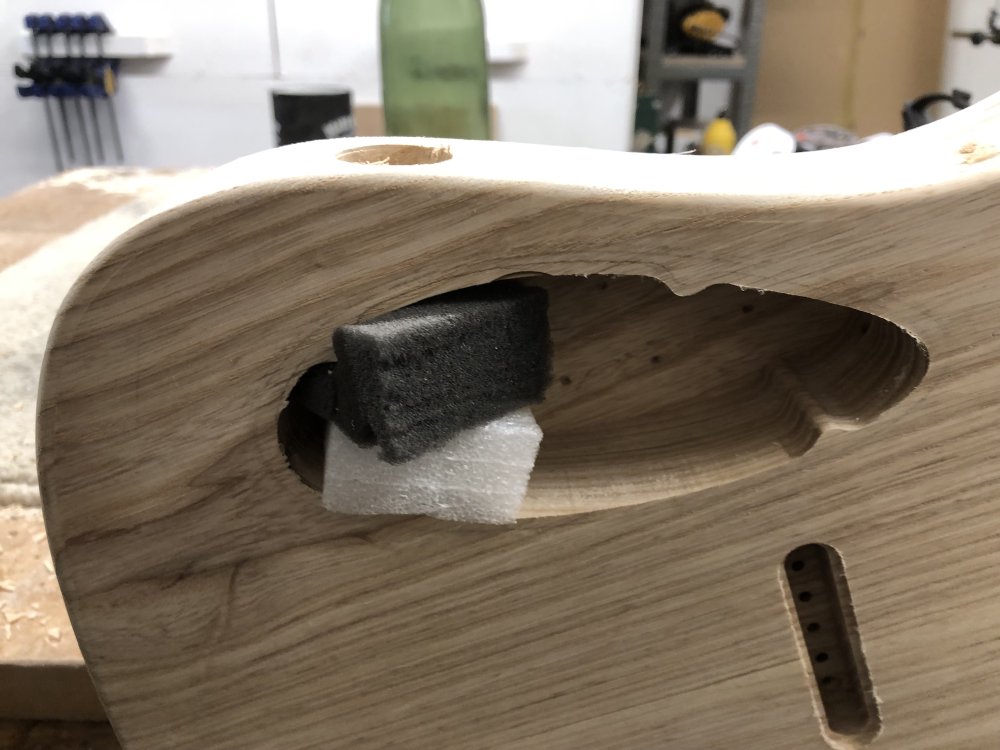
In the end it all worked out okay. I actually didn’t burst through, because the far side of the hole was sloped relative to the direction I was drilling, the bit started chattering badly when I’d got part out the other side, and I ended up just finishing the hole by hand. Still, all nice and tidy in the end:
That was it for the day then. I didn’t get the body finished, I still need to route out the pickup cavities and finish the lips for the electronics cavities, and then do the belly-carve - so perhaps another day on this one to go before it’ll be ready for finishing.
More 3D-printing
The Markforged printer was back up and working at the local maker-space, so I was able to start printing the small backlog of parts I wanted to do, starting off with the bridge for Verkstaden:
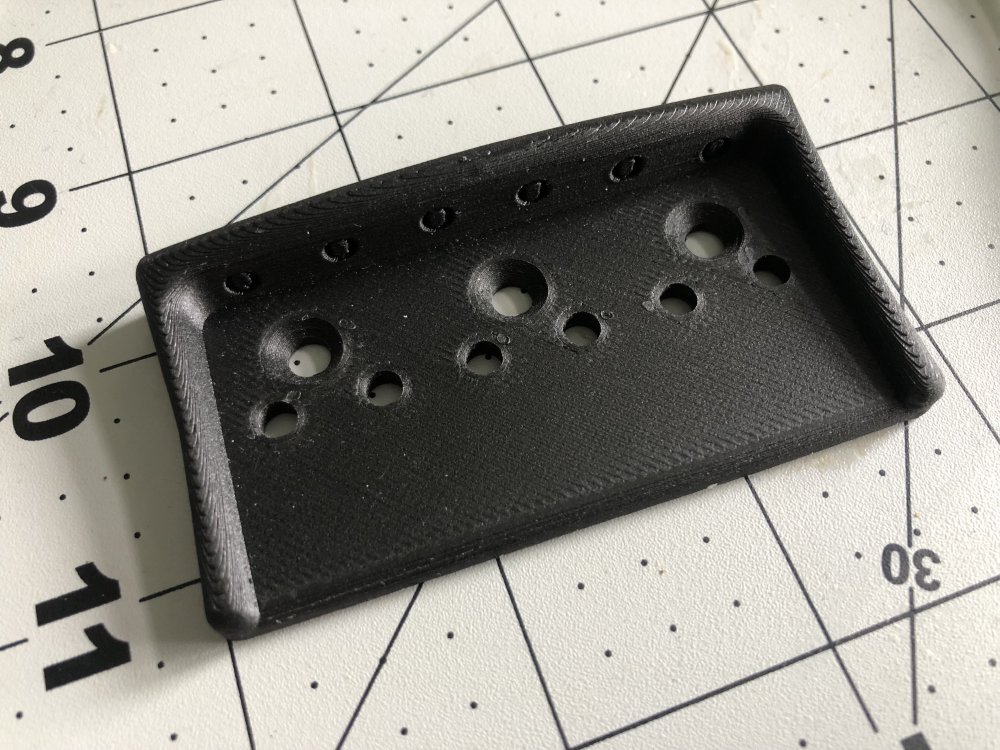
The one I printed a few months ago and installed on my daily player is still going strong, I’m quite pleased with it. I still think longer term I’d like to print them in metal, but for now, the carbon-fibre layers in this nylon bridge seem to hold up great, and at least on my guitar the black bridge works quite well as a look.
Harps/Emily Hopkins
This week I finally caught up with guitar internet and discovered Emily Hopkins, who does demos of guitar effects pedals, but played with a harp, rather than a guitar. As a crash course in harp and pedals I enjoyed this interview/playing session she did on the JHS Show:
Not only is it wonderful to listen to the harp like this, but it also made me realise I knew little about how a harp worked, so I did some reading (aka, read up the wikipedia entries on Harp and Pedal Harp). To encourage you that harp is something interesting, here are my top harp facts for you:
- The bar that rests on the player’s shoulder in hollow, acting like a sound chamber similar to that on an acoustic guitar, giving the instrument more volume.
- The strings on a harp only have seven notes per octave, rather than the twelve semitones you have on a guitar or a piano. The strings are tuned to the key you’re playing in - so in C major your strings would be tuned to C, D, E, F, G, A, B. But if you wanted to play in the key of G major, which is made up of the notes G, A, B, C, D, E, F#, you need to stop and tune all your F strings up a semitone.
- Whilst some harps have little clips that you manually engage clip, per string to sharpen them, this is where a pedal harp comes in. These harps have 7 foot-pedals, one per note, and let you adjust all the strings for that particular note at once as the pedal is activated, letting you change key on the fly.
All in all, the harp is quite a distinct instrument when compared to say a classical stringed instrument or a guitar. I’m not about to start making one, but it’s been fun learning about how they work.