A Week in the Shop
Published 27 May 2023
Tags: andy powers, grain filler, hästen, joe cocker, mistakes, neck, verkstaden
A long write-up one this week, as I make significant progress, make a significant mistake, make a recovery from my mistake, and make more progress.
Hästen
This week I wanted to get the neck for Hästen to a similar level for my other two builds so I could laser etch all the headstocks in a single batch, rather than making several trips to the local laser-cutter equipped maker-space to do it.
When we last saw this neck I’d roughed it out, and was holding off using the table-router in the workshop to trim it flush as to be frank the table-router we have terrifies me, and has caused me trouble in the past. In the end, despite having workshop-mates in the workshop this time, I opted to still just cut it by hand using a plunge-router. I know where I am with a plunge-router, having made many a neck this way, and what I lose in time I make up for in being more chill about the whole thing.
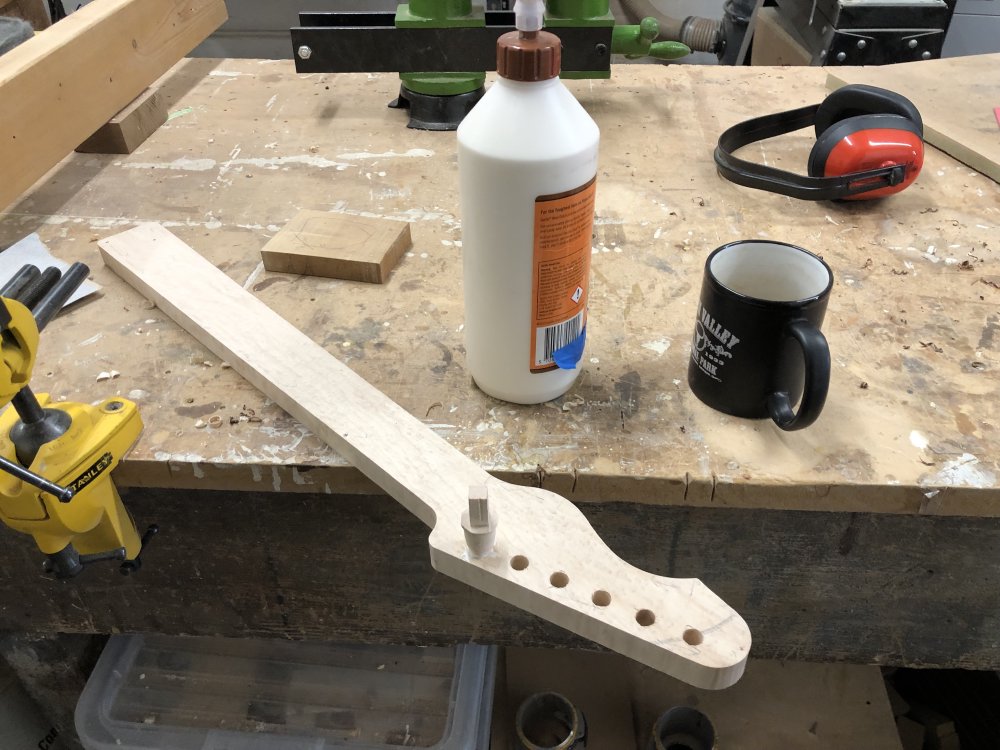
However, what I did take from my experiences using the table-router, which I’ve not done in the past when using the plunge-router, was pay attention to cutting direction versus the wood-grain. Normally I’d just route everything from the top side, which is nice and simple as far as process goes and only requires a single router bit, but can (and normally does) lead to tear out, particularly on the awkward tight transition from the headstock area to the main neck, which means more sanding, a process that I loath. But I actually do have guide-bits for the router with bearings on both the top and the bottom of the bit, so this time I decided to try flipping over the piece as I went, to ensure I was always cutting in a grain-appropriate manner whilst still cutting in a safe direction.
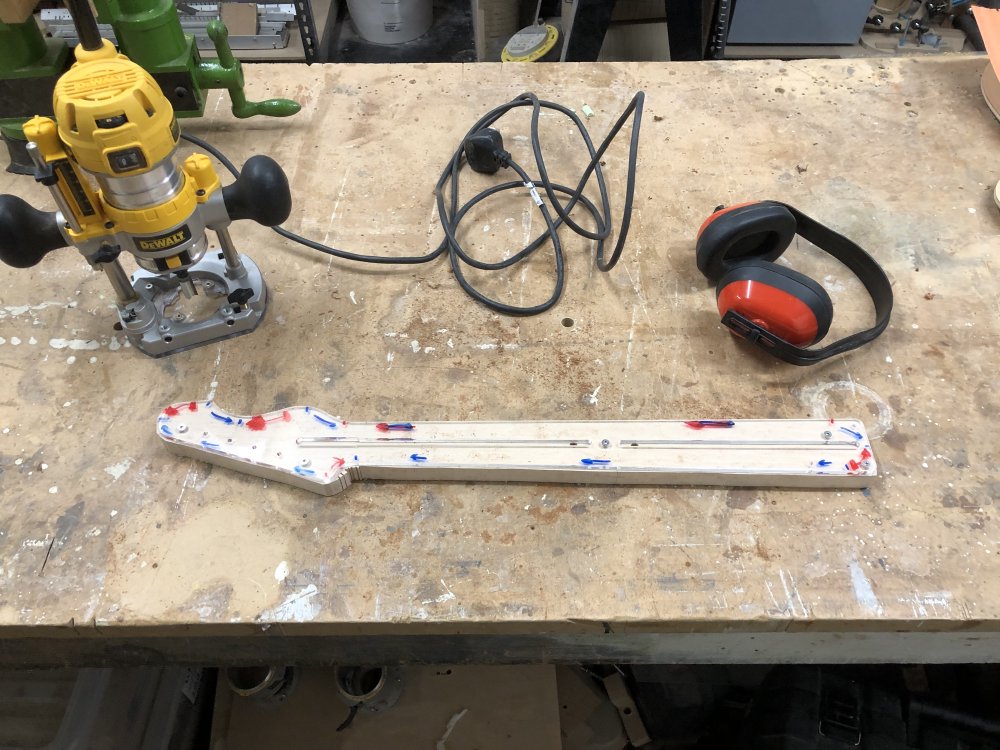
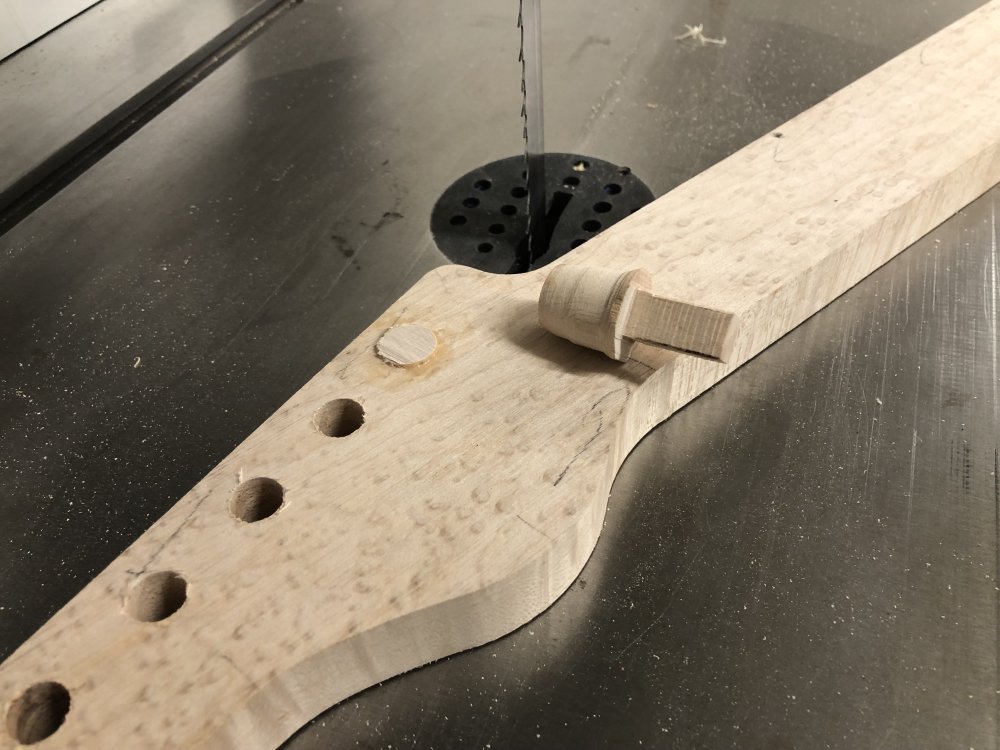
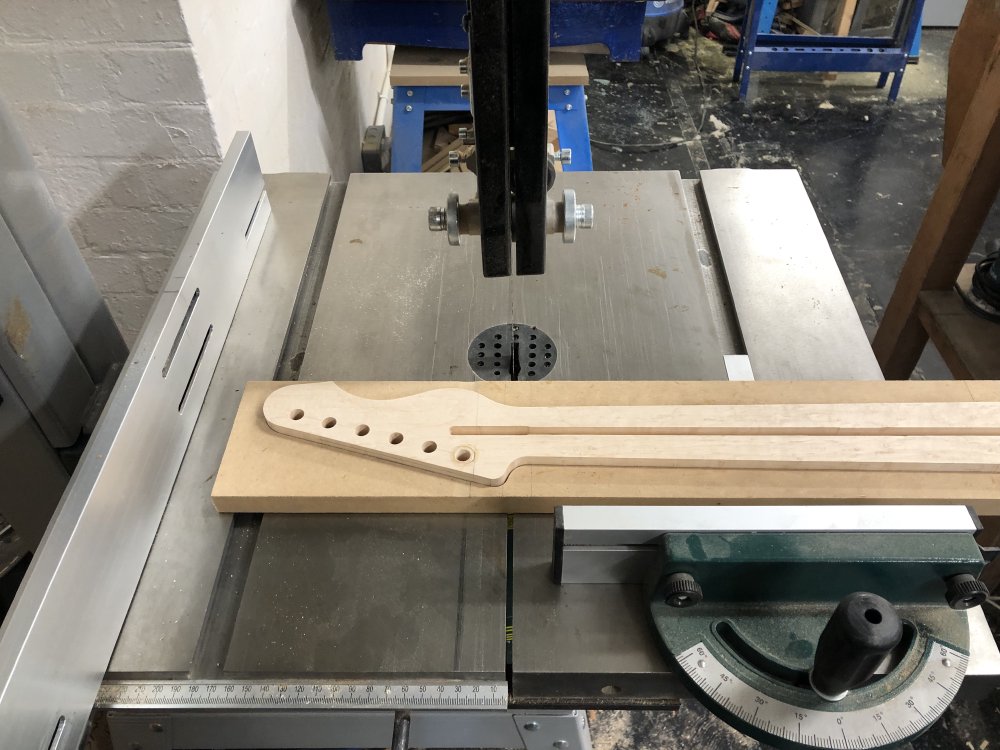
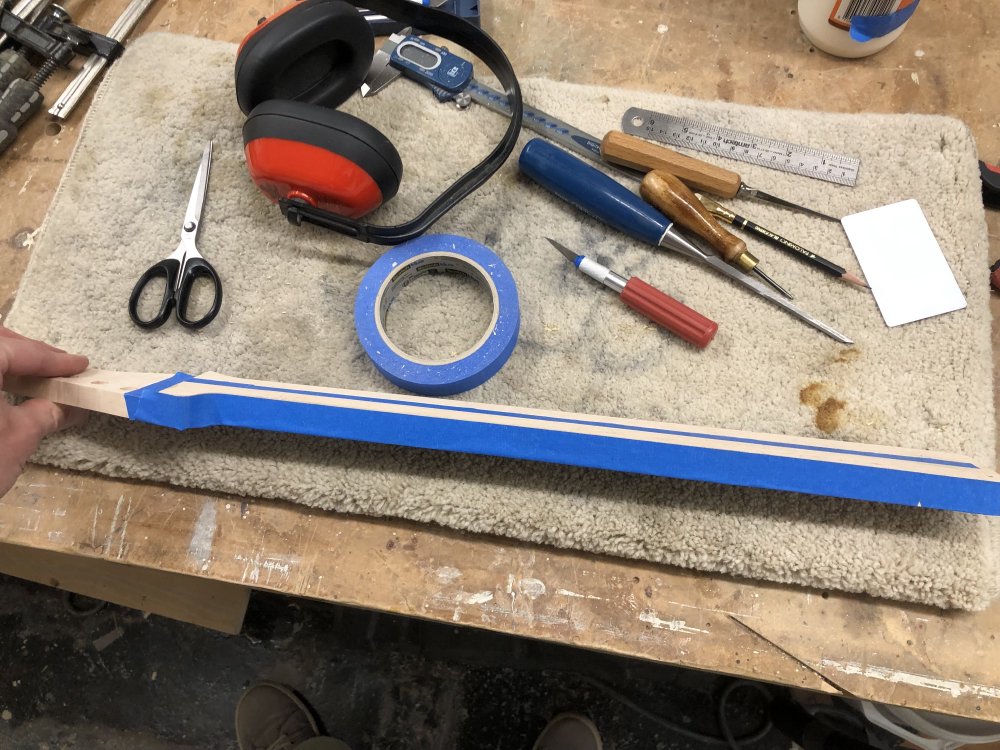
This was in part brought about as I was reflecting on a missive from my friend and former workshop-mentor Graeme who politely questioned the correctness of my direction arrows, which you can see drawn in red and blue in the above picture, based on my previous posts. I went over them again with workshop-mate Jamie, and firstly my red arrows were mostly pointing the wrong-way, though in practice that wouldn’t have mattered as the red just told me to flip the piece rather, and I wasn’t really paying attention to the arrow direction, I was always cutting so I was pushing against the drive of the bit. But still, that was past Michael, and present and future Michael we know are easily confused, so I did my best to re-draw the arrows to indicate the correct direction to move the router relative to the wood. Jamie also did point out once side was incorrect for the grain on this neck too, so I adjusted it for that also.
With the arrows fixed, it was now over to the workbench to make some dust:
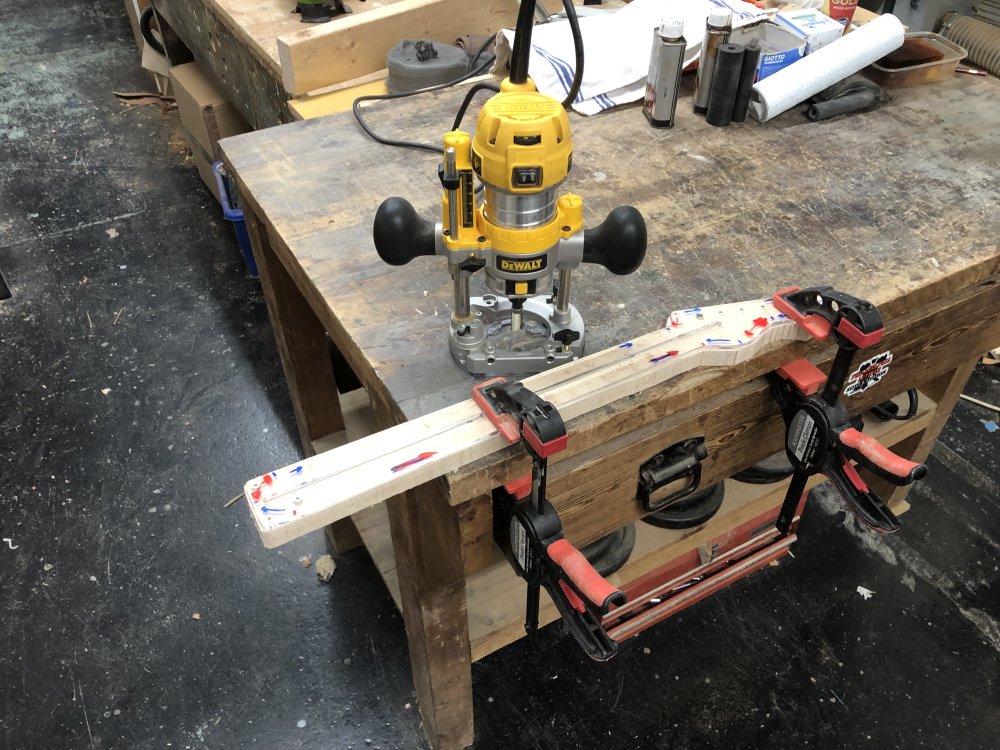
With the cuts all made from the top-side done, I then flipped it over, and sketched on the appropriate arrows again with pencil to remind me what I needed to do from the bottom, and set about it again, this time using a different router-bit with a guide bearing at the other end.
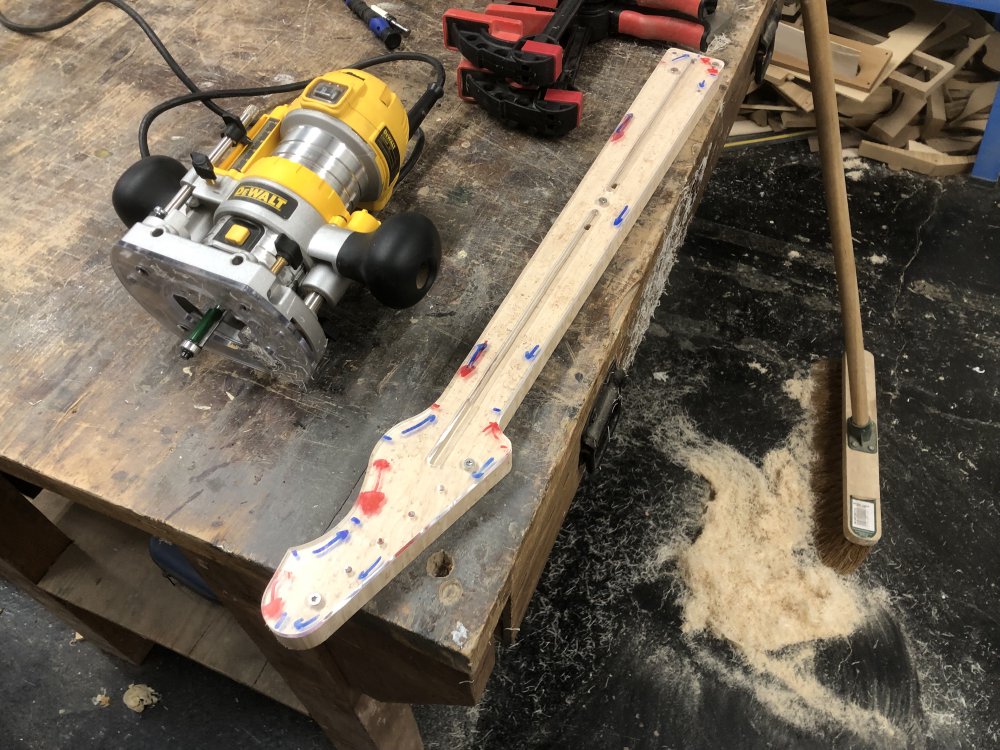
The result of taking the time to flip the part and pay attention to the grain direction meant I had a perfectly clean cut, with no tearing out at any point, probably the best job I’ve ever done on a neck at this stage, all of which is down to the guidance of Graeme and Jamie.
With that done I then switched bit a second time to the small guided 1/4" bit I use for the truss-rod cavity and got that hollowed out. It always takes a couple of passes to get the right depth for this one, definitely a case where my CNC friends have the upper hand, but I got there in the end.
Overall, I was really pleased at this point: I’d decided not to use the table-router, go back to what I knew, and I did it better than I’ve done it before. I was delighted with the result.
It’s a shame I’m about to make a significant mistake with the next step.
With a quick reference to a previous entry in this blog to check my process in the past, I knew the next step in neck building was to drill the holes for the tuners. I do this next because I have a nice reference point from the template, which I attach using screws set at the centre of the outermost two tuners, and I’ll loose once I cut the headstock face.
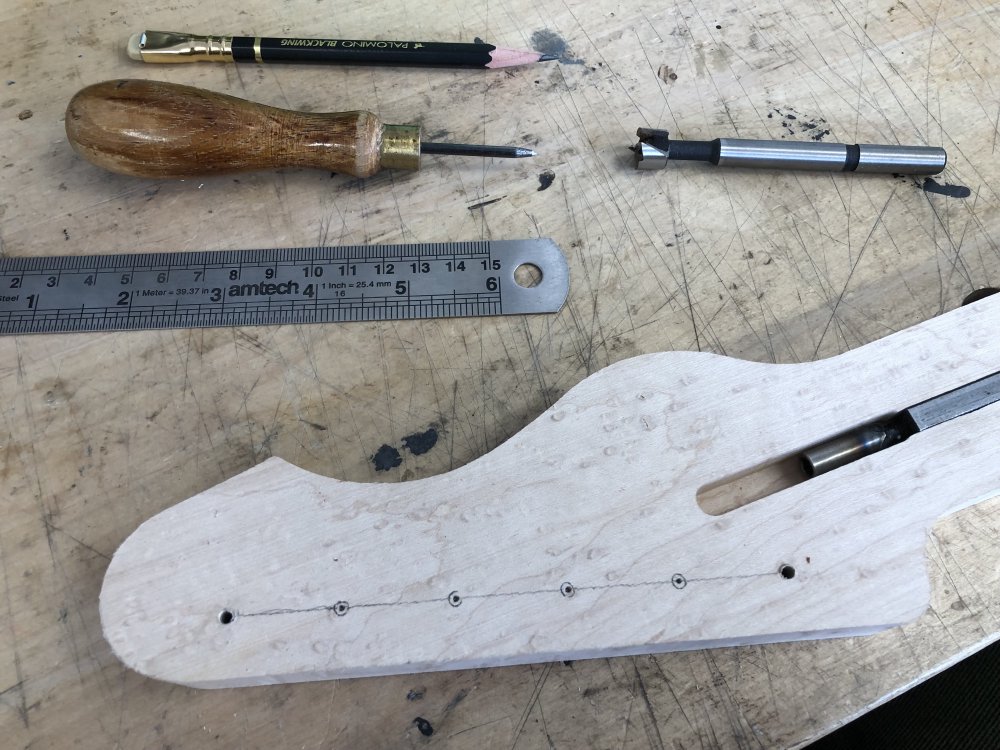
With the headstock marked up, I got the 10mm forester bit needed to make the holes, and head over to the pillar drill, ready to make a very silly and significant mistake.

As I say regularly in these pages, most mistakes I have when building are down to one of two things:
- Failing to measure, measure, and then cut.
- Errant CNC machines that decided they know better than my g-code.
Given we don’t have a CNC machine involved here, then obviously we’re dealing with a failure to measure something. Can you guess what it is yet?
It’s not the template, that was correct. It’s not the pencil markings or measuring there, that’s correct too. It’s not even that I initially selected the wrong drill bit from my set of forstner bits.
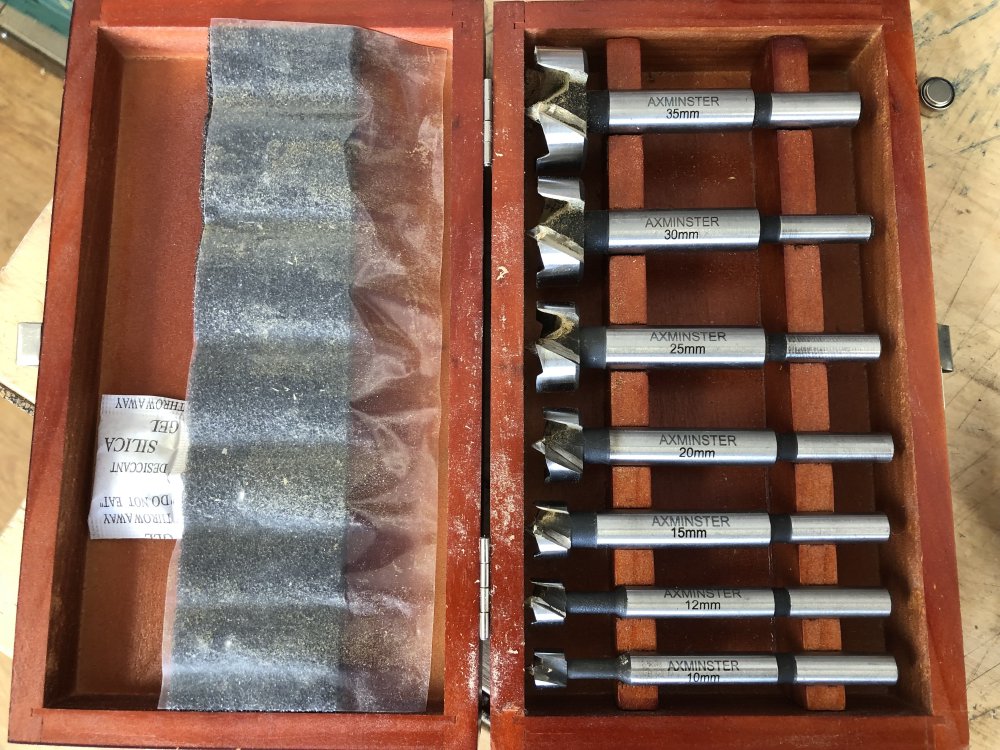
Initially I had picked up the 15mm bit, which is too big! Thankfully I read on the side it was 15mm, and put it back, and picked up the 10mm one…
Or I thought I did…
I thought they bits went down in increments of 5mm…
They mostly do; except in one instance…
Ooops.
Yes, I drilled the first hole at 12mm, rather than 10mm.

I immediately realised the resulting hole was too large, which is when I discovered my mistake, but at least I didn’t cut all six and then realise. I was still on a high from the earlier success in routing, and so for once I didn’t panic or get angry, I just looked at it and thought: oh well. This doesn’t sound like much, but for me that’s quite remarkable restraint :) I guess I know that I had enough wood to restart things, so this wasn’t the end of the world. In fact, because the morning had gone so well, I felt happy that I could actually just start over and be back on track having just lost half a day.
But, my workshop-mates Matt and Jamie convinced me that the neck wasn’t lost. The 12mm hole, whilst bigger than I want for the shaft of the tuner, is still smaller than the diameter of both front and back of the tuner, and so any repair will not be visible. Thus it was suggested I could either get a bushing that downsizes from 12mm to 10mm and put that in the hole, or I get as 12mm bit of dowel, glue that in the hole, and then re-drill it.
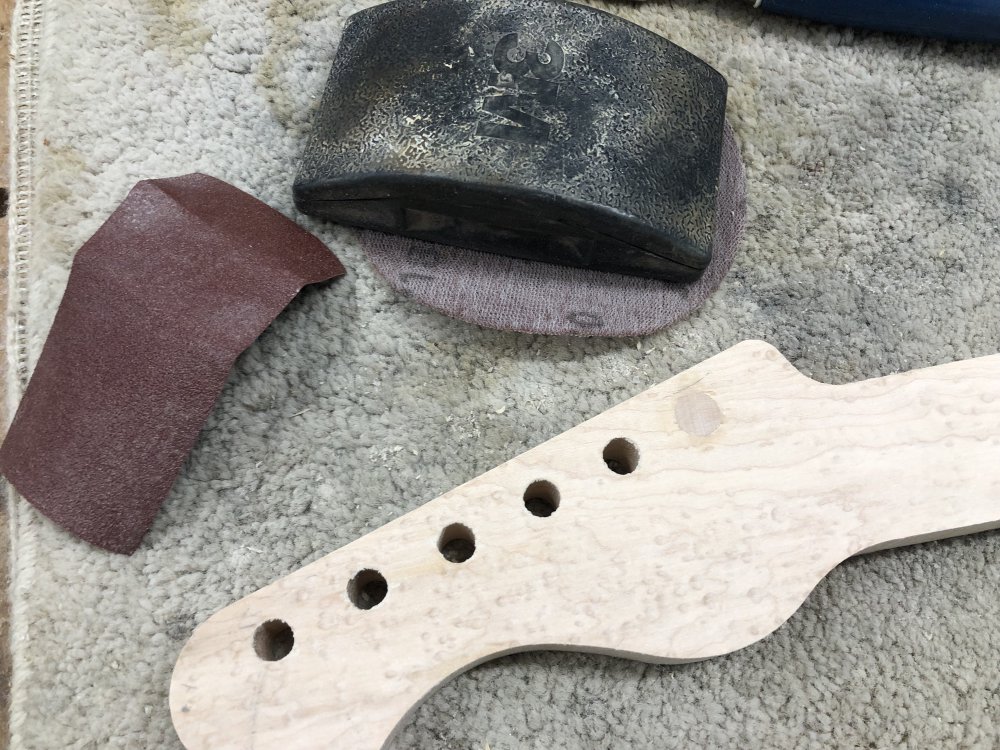
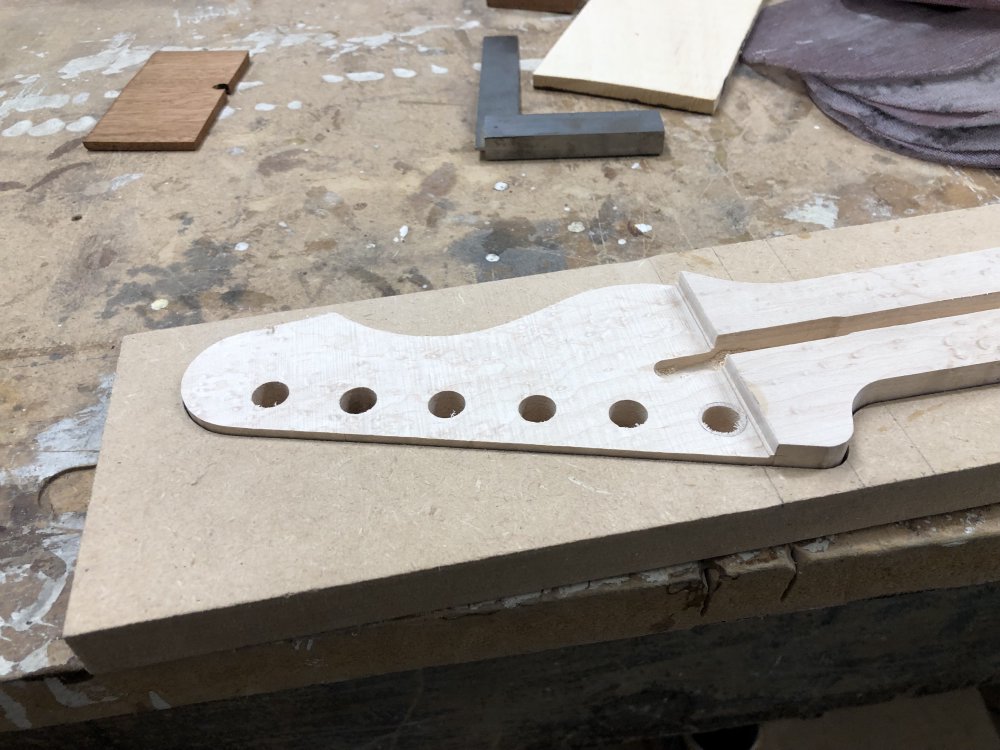
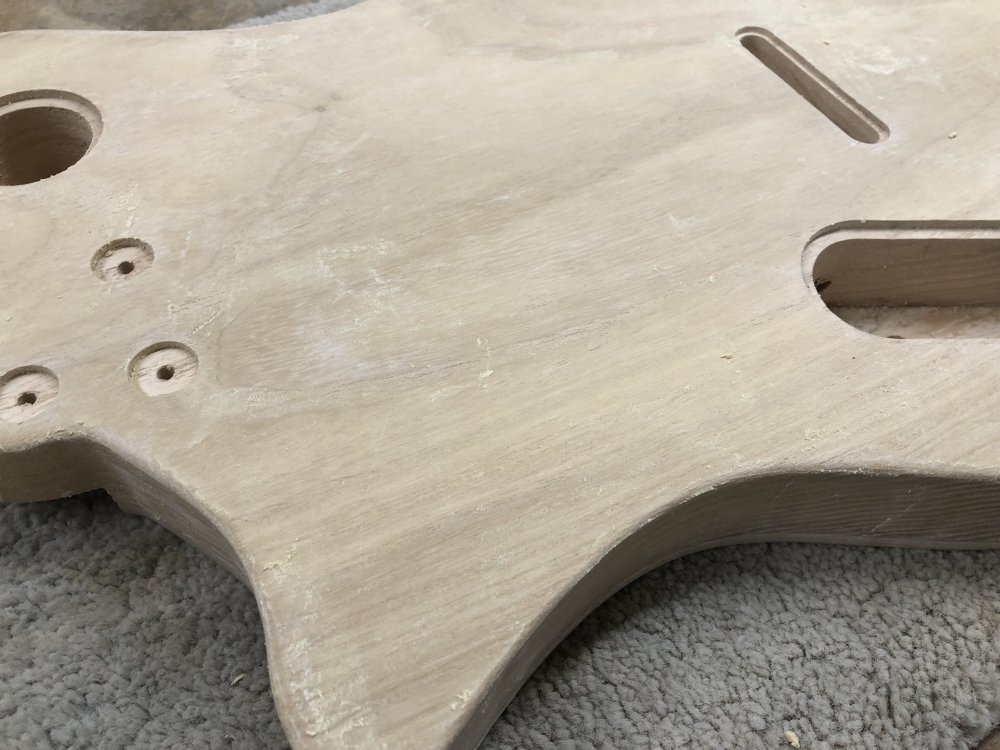
So, first thing was to drill the rest of the holes at the right size, given I was set up for this already. Thus you can now clearly see my mistake:
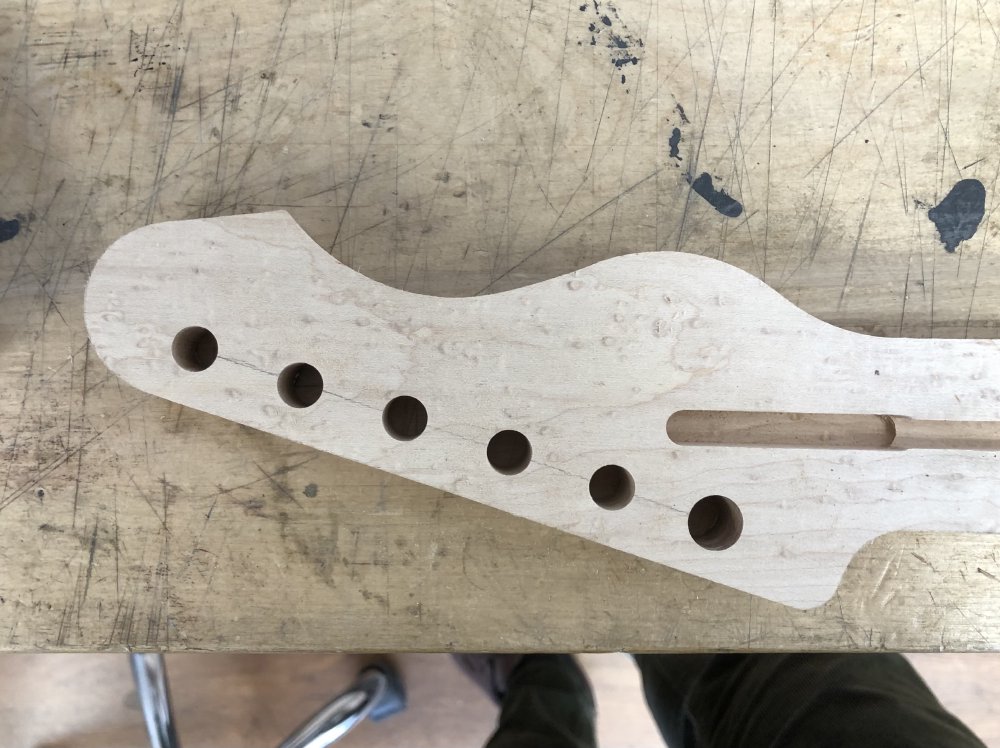
🎶 One of these holes is not like the others, one of these holes is not the same… 🎶
I decided that I wanted to go with the second option, and started looking up bits of dowel I could order, when again my workshop mates pointed out that I could make my own dowel using a bit of the offcuts from the neck, so it would even match wood-wise. I was somewhat skeptical I could pull this off, but having nothing to lose, I gave it a go, and followed their directions.
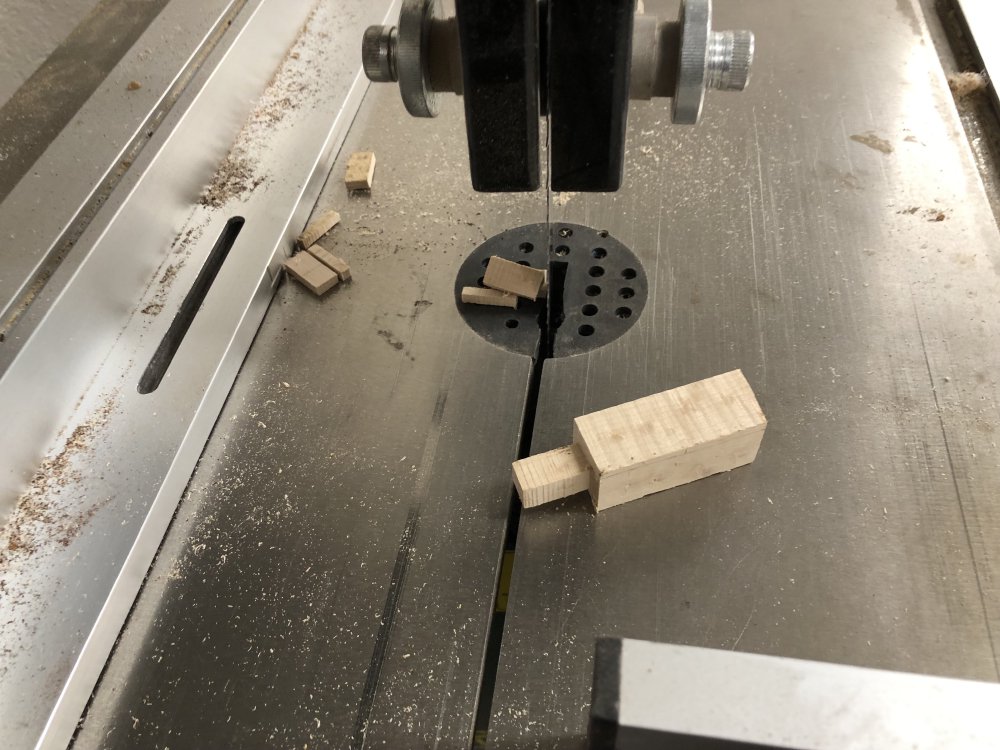
Now, if I had a lathe to hand, I’d be less skeptical, but we don’t have one of those in the workshop. But what we do have is a band-saw, a power drill, and a disk sander :) The first step was to make a crude square profile peg, and make one end of it small enough to fit in the chuck of the drill. For this I turned to my trusty friend the band-saw:
At least now if this guitar building thing doesn’t work out I can take up hand-making dreidels :) Next I used a chisel to turn those long 90 degree edges flat, turning it into a somewhat octagonal piece; a small hand-plane would have been better for this, but I suspect my no 7 is overkill, and so chisel it was.
With this done, I did first try to round out the peg using the pillar-drill and a sanding block, as that seemed more controllable to me than what my workshop-mates had suggested. And whilst that is possibly true, it was so slow, and my workshop-mates both guided me to the insane sounding combination of power-drill and disk sander…
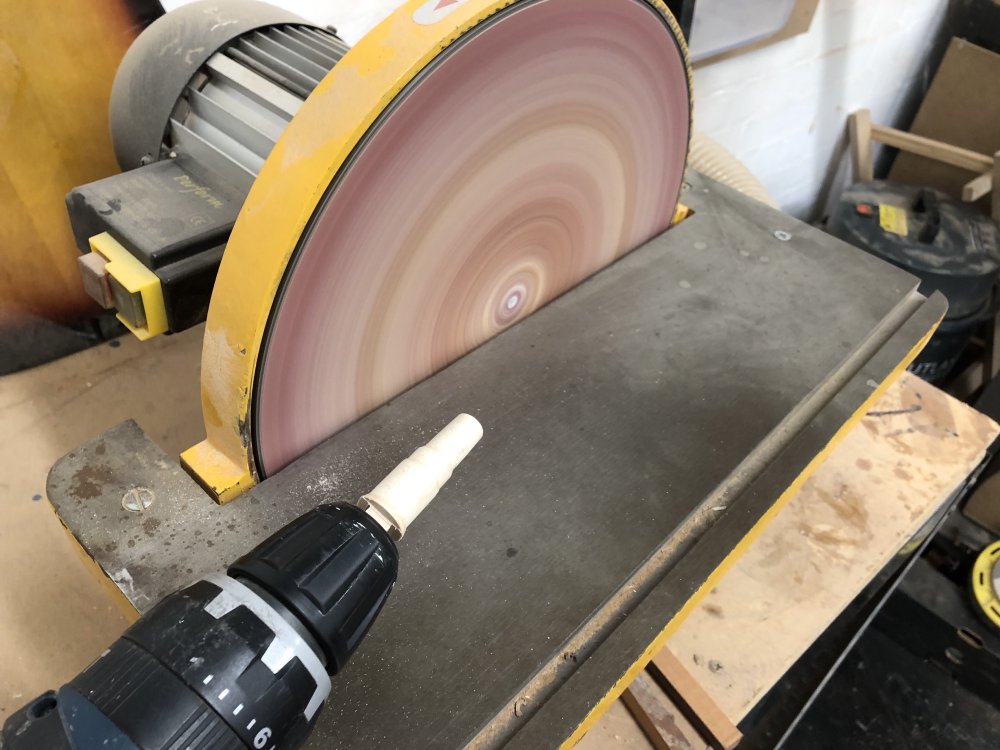
To my amazement, this worked. Some cautious work later, checking with both calipers and the offending 12mm hole, and I have a long enough section of dowel that is roughly the right diameter that I have something to work with:
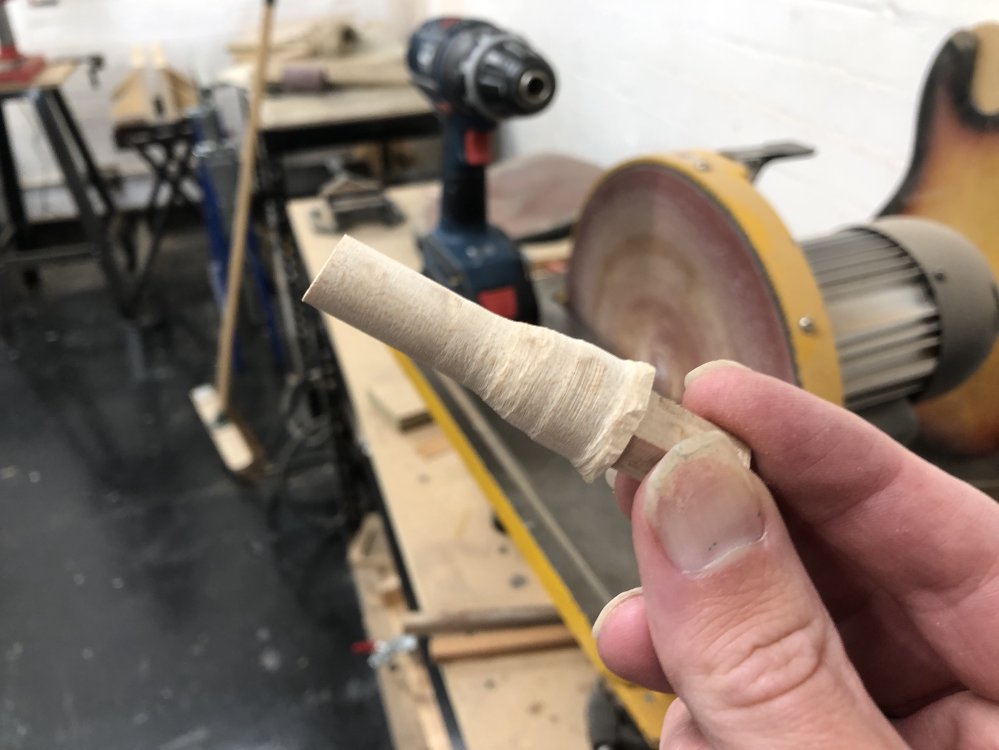
It wasn’t a perfect fit, and it tapered slightly (even the straight looking bit), but that worked okay. It’s close enough that at one end it’d be a proper fit, and the taper, which is just fractions of a millimetre, makes it easier to insert, and wood glue will fill the space. I inserted it from the back of the neck, so that the best fit will be there, as I’ll lose the front of the headstock later anyway.
I left the glue to set and got on with other things, and came back early one morning in later in the week to finish the job.
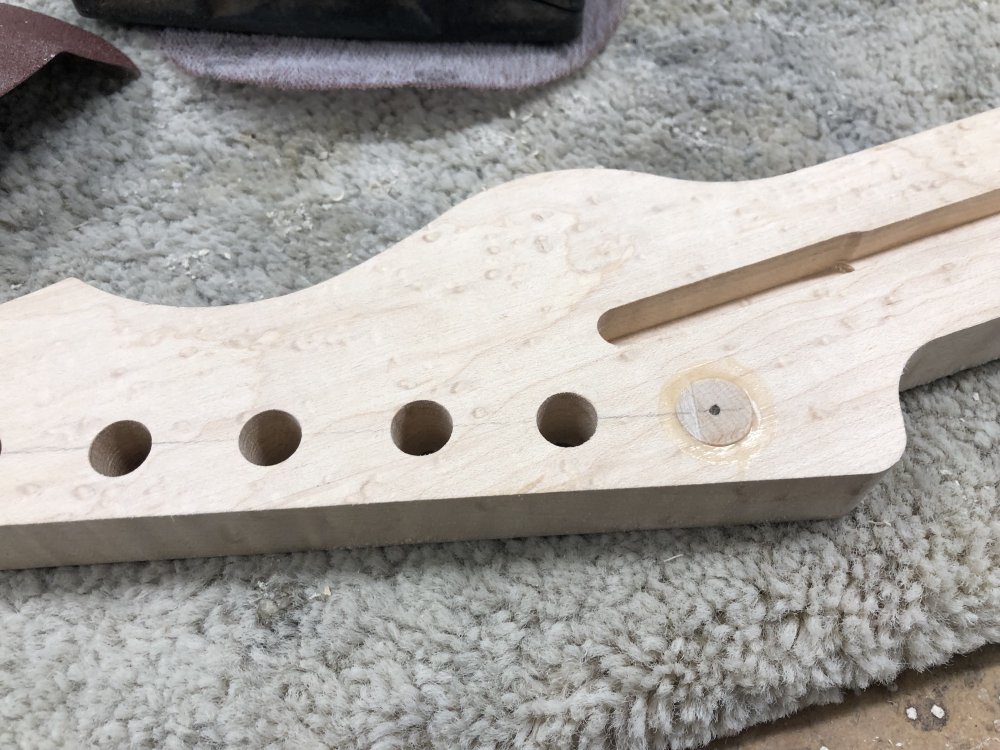
The first thing I did was cut off the excess on both sides as much as I dare using the band-saw, and you can already see, wood glue aside, that the fit is really good.
My initial assuption was that I’d use a chisel to get it down flush, but I didn’t recon with the fact I was going across the end-grain here, which meant it was a sanding job. I’d deliberately picked the direction of the grain not to match (as you won’t see the wood once the tuners are on), but rather to give me the most strength when I was making the dowel. So a bit of careful sanding later (and chisel to remove the surrounding wood glue), you can see that the patch has fit really well. Not bad for my first attempt at making my own dowel!
On the front I didn’t need to do such a fastidious job, I just got it level enough that I could mark it up for drilling and have some confidence that the drill bit will hit level wood. All the rest of this will be cut off when I cut the headstock face anyway.
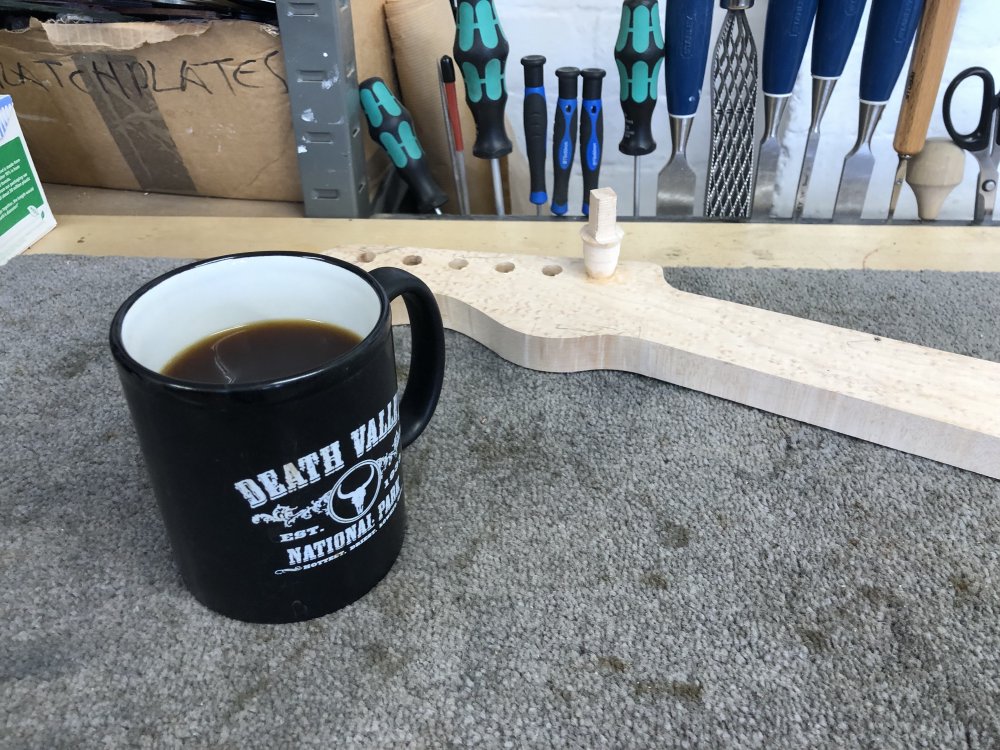
With the new hole re-drilled, we’re back to where we should have been a few days ago!
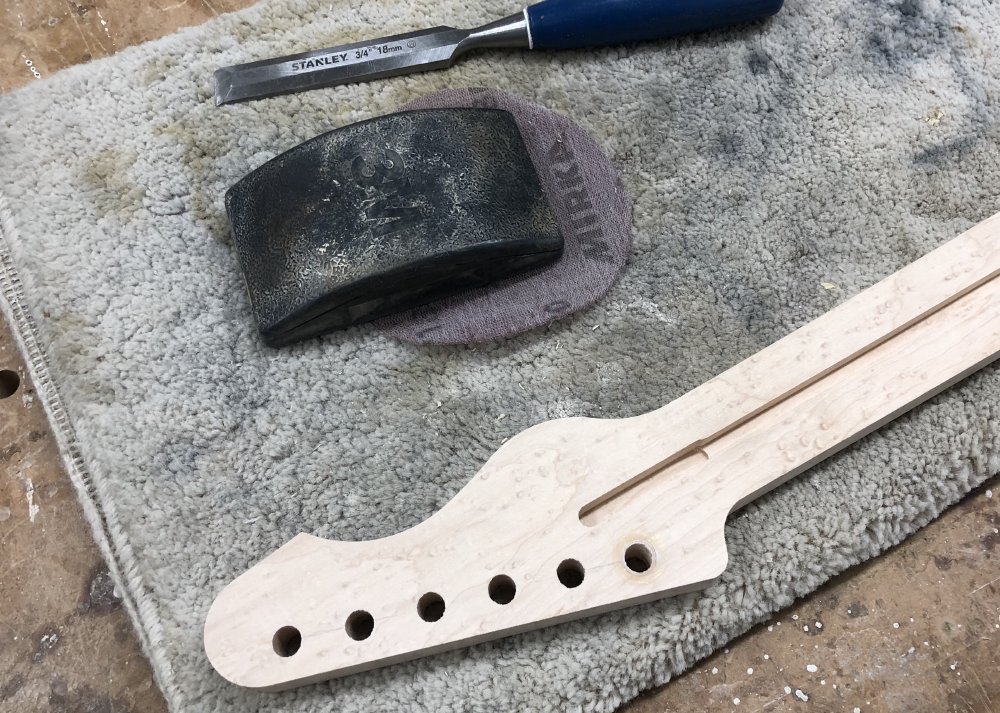
I will confess the hole of the back did deviate a little from the others, I suspect drilling through the end-grain lead to the bit wandering a bit more than usual, but by the time the tuners are on (which are slightly less than 10mm in diameter) you don’t notice.
An interesting adventure, I learned a new skill, and I’m glad I got to save this beautiful bit of birds-eye maple from my careless mistake.
With the hole patched, I could now get back to the regular program of neck building, the next step of which was cutting the headstock face to the right depth. The plank of maple was thicknessed to 20mm, but the headstock wants to be about 15mm thick; the Gotoh tuners I tend to favour have a minimum distance they’ll clamp to of 14mm, although in this instance I’m using locking tuners from another brand that will go down to 12mm. Look at me measuring things before acting :)
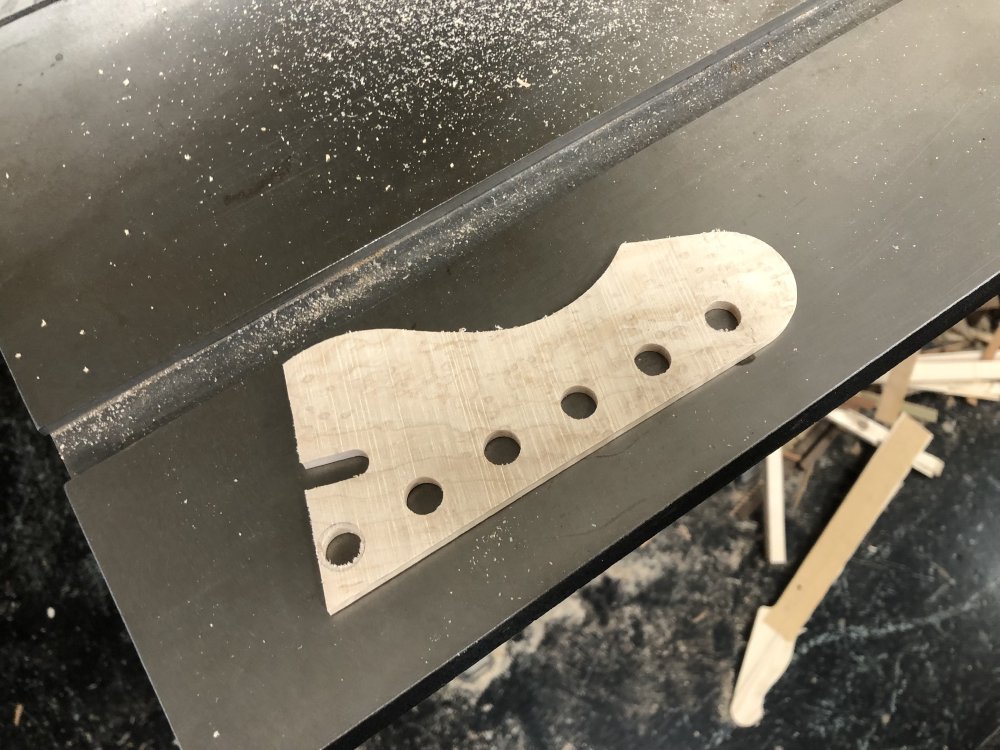
I cut the front of the headstock off using the band-saw, which is always a slightly terrifying prospect after so much work, but if you have a well setup band-saw then you have a precise tool with which to work, and thankfully the aforementioned Graeme has taught me well on this front, so after running some scrap through the band-saw to double check it was cutting true, I made my two precise cuts following some pencil lines I added, I was done:
And I’m left with another headstock blank to add to my collection, a memento of another guitar build:
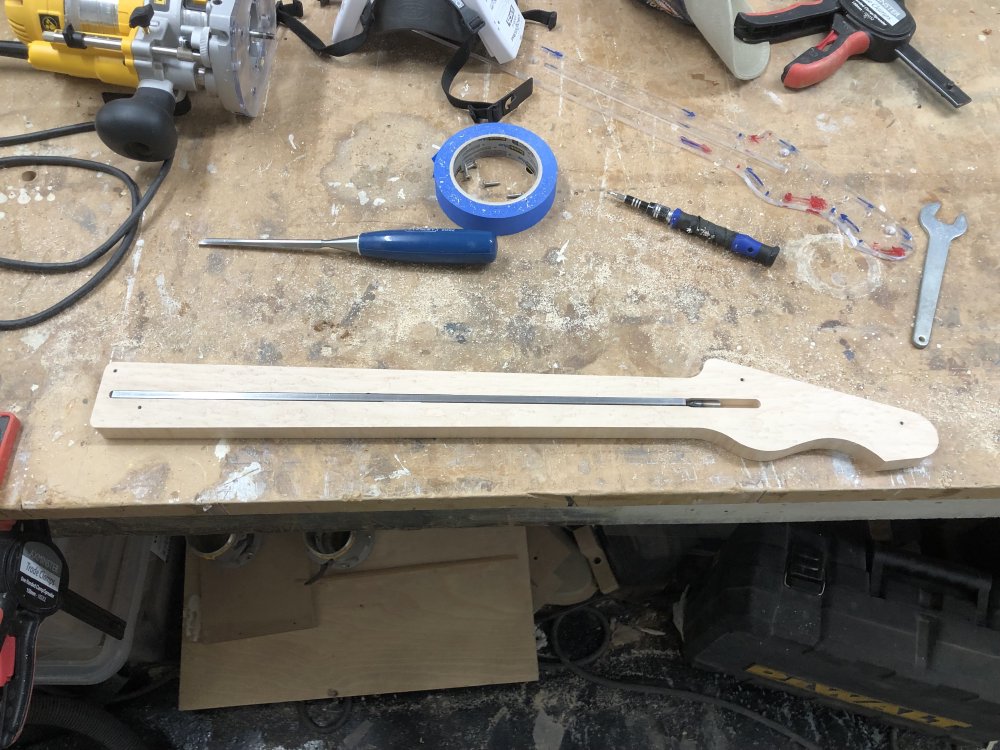
And with a bit of final fettling I was ready to glue on the fretboard. The masking-tape you see is there to stop the glue getting into the truss-rod when I apply said glue, and if I’m lucky I remember to remove it before I clamp on the fretboard.
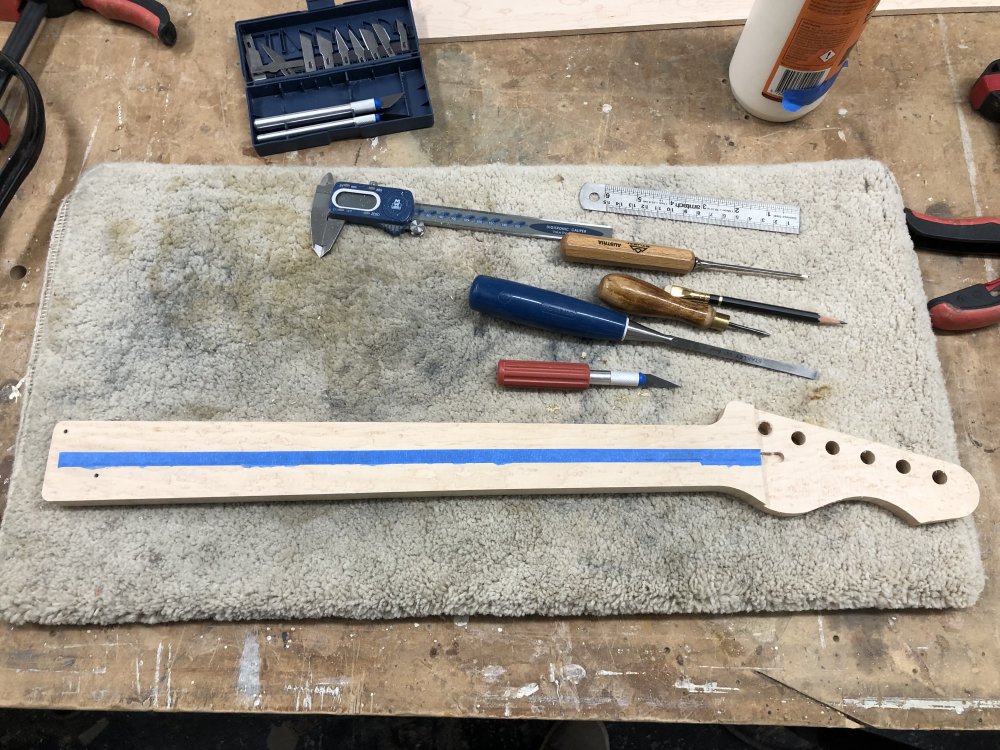
I’ve only forgotten to remove the masking-tape once, and that neck is now in my “demonstrator at maker events” pile, as the fretboard didn’t have a close enough fit in the end. An expensive mistake when you factor in the time taken to get to this stage, so a nice reminder to me each time I do this that I must remember to remove the tape!
I also taped up the sides, which is not something I normally bother with, but this should help save effort cleaning up the glue afterwards, particularly as I did such a good job of not having much work be needed after routing the shape out.
Before I glued on the fretboard material, I need the fretboard material :) I had ordered some birds-eye maple blanks a while ago, but I still had yet to thickness them. Normally I’d use a planer-thicknesser, but given I was only losing a few millimetres here and because the “eyes” in birds-eye maple will tear out easily, I used the thickness-sander in the workshop to level these down. Even if I had used a planer-thicknesser I’d have stopped short and used the thickness-sander to finish it off for that reason.
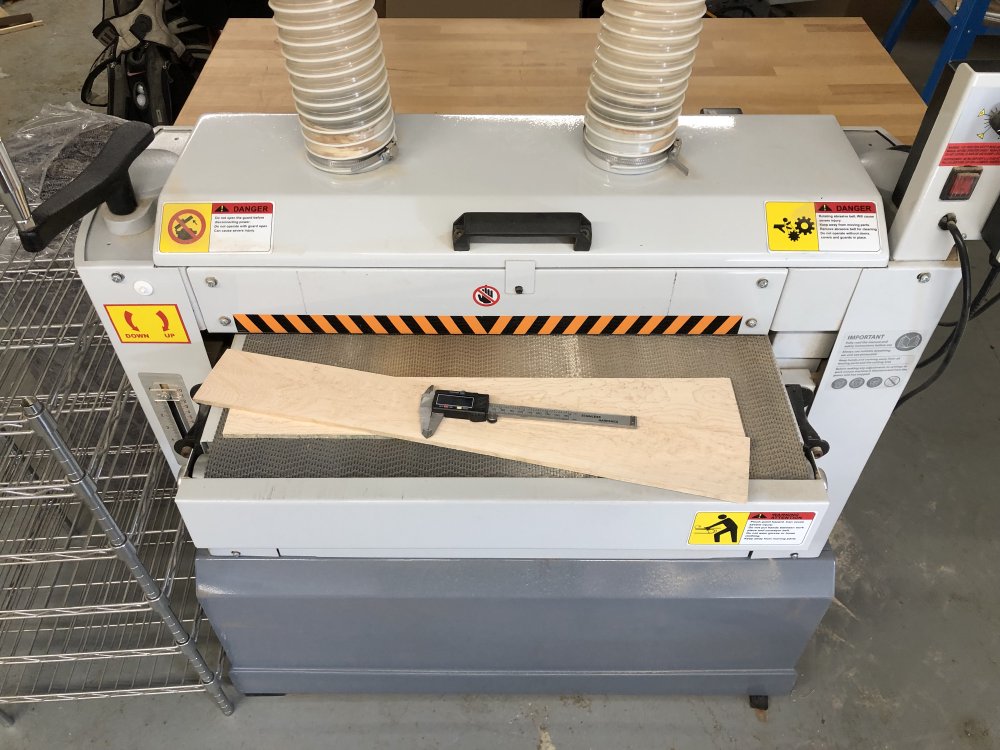
In general I like to have more than one fretboard blank of a given type to hand, just incase one has a grain pattern or marking that shows up as you thickness it. Thankfully both of these ones were suitable after thicknessing, but you can’t assume that when ordering.
With everything assembled, it was now time to apply the glue, and use ALL OF TEH CLAMPS:
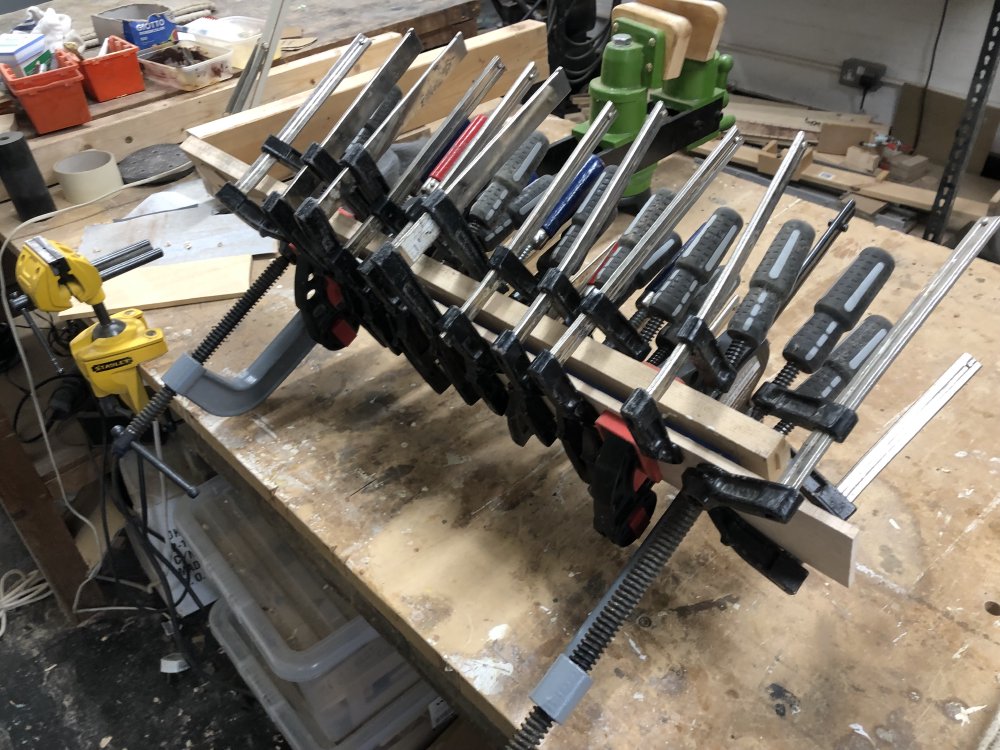
That’ll be dried by the time I next make it into the workshop, at which point I can trim the fretboard flush and round off the headstock transition on the spindle-sander, at which point I’ll have achieved my goal of getting this neck ready to be laser-etched on the headstock along with those for my other two builds.
Verkstaden
For Verkstaden’s body is made with a birds-eye maple cap on a poplar body, and I want to stain the front and paint the back, mostly as the poplar isn’t particularly attractive, and is quite scratch friendly, so I figure it needs a tougher coating. And also because I’ve not yet painted a guitar, so I’d like to learn how, as it is something I’ve been asked for in the past and declined to do.
The first step towards painting the body then is to apply grain-filler to the poplar part, so that I get a uniform finish on the paint. When staining the bodies I like that the grain shows up, but in this instance that’s not the look we’re after.
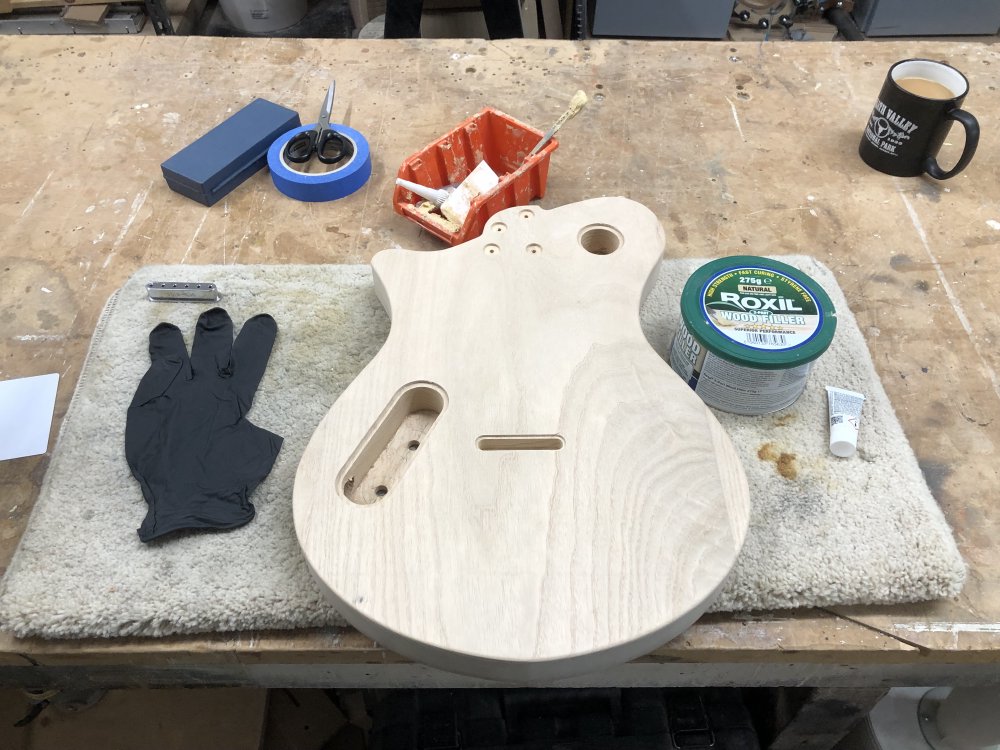
My two main learnings for doing this: you want a well ventilated space and ideally a respirator that offers VOC protection, and the filler sets really quickly, so only mix small amounts as you go, don’t mix lots at once as you’ll never get through it. For the former, thankfully, on the advice of Matt, I upgraded my mask setup a month or so ago ready for using the spray booth, so I have the A2P3 inserts for my mask now, and given how still the air was this day, even though I had doors open, I’m really glad I had the mask given it took me an hour to do the body.
The Rolix comes as a main compound and a small tube of activator, and I just kept making small amounts as I went and applying them with a credit-card sized plastic blank I have for applying glue and such things. You end up doing a two phase motion when you press the goop into the grain and then wipe it clear. It’s not tricky, but because I was learning as I go, and kept having to remix stuff, it did take longer than I expected.
Next time I’m in the workshop I’ll sand it back and then hopefully it’ll be ready to paint. Though before I do that I do need to decide on a colour for the front, and whether I’m going for a harsh line between the maple and paint, or I’ll do a sort of burst over-spray. Thoughts welcome!
This week’s earworm
I’ve had this tune stuck in my head this week after reading yet more of the seldem seen… thread I talked about last week, and I thought I’d throw it in here, as I think it highlights something that I think is very important and hopefully is apparent from this week in particular, but in general from this blog: it’s rare that things are done in isolation, usually even as a solo builder, maker, coder, baker, candle-stick maker, etc. you occasionally need help to get through when things don’t go as you’d hoped.
I’ve been fortunate that ever since I started trying to build guitars I’ve always done so in a shared space with other people who have been kind enough to lend their experiences when I get stuck, and without which I’d not be as nearly as far along as I am in my journey. This is why I try to do the same when I can, and in part why I write up my learnings here to try help others.
Speaking of which, I had several people reach out and offer guidance and/or assistance on my pickup-winder motor problems, so thank you all!
Andy Powers
To wrap up, I’ll leave you with this podcast I enjoyed listening to this week, which is an interview of Andy Powers, the CEO of Taylor Guitars (the interview starts around the ten minute mark if you want to skip straight to it). Similar to Paul Reed Smith, who I mentioned a few weeks ago, Mr Powers is someone who is passionate about how guitars are built, and started life as a builder and repair man, and that experience clearly comes through in the interview. In the tech world I’m used to CEOs having a tech background, but in the guitar world it’s not a given that the person in top is actually someone who is that interested in using the product, let alone understands it intimately and clearly tries to keep their hand in.
He’s also the least CEO sounding CEO of a major company I’ve heard interviewed, which was nice to hear, and his story of how he became the CEO is one of reluctance but the realisation he could do more at Taylor for musicians than he could alone. As someone who is more interested in making things that help people do things rather than just making money (either guitar wise or tech wise), it’s heartening to hear this.