A Week in the Shop
Published 17 Jun 2023
Tags: älgen, carving, hästen, laser-cutting, neck, spraying, verkstaden
It’s been a hectic week, as I try to get things finished for Liverpool Makefest at the end of the month (July 1st, hope to see you there!). I had an already tight schedule, but then I’m now unexpectedly travelling to Stockholm, which is a wonderful derailment, but also means I’ve lost several days of workshop time. Basically this meant that I had to get most things done this week, as I’ll have very limited time upon my return to do anything before we have to go to Liverpool.
Still, after learning Swedish this last few years, this will be my first trip to try and fumble through some phrases in person, so wish me luck on that front! I am also looking forward to revisiting Twang, which was a crazy cafe/guitar repair shop that we found in Stockholm on our last visit, so hopefully I’ll have a few pictures of that to share when I return!
Being in a rush, I’ve also had to knock this update out in a hurry, so apologies if there’s even more typos in it than usual! If all the rushed prose is too much for you, I did a wrap up video at the end, so feel free to skip the details and listen to me try to speak over the workshop starlings :)
Älgen
Last week I had just put on the first two coats of acrylic lacquer on the 3D-printed body parts for Älgen, and done so with a certain level of nervousness as I’d never sprayed anything before: until now all my guitars have been purely wooden parts and finished with oil.
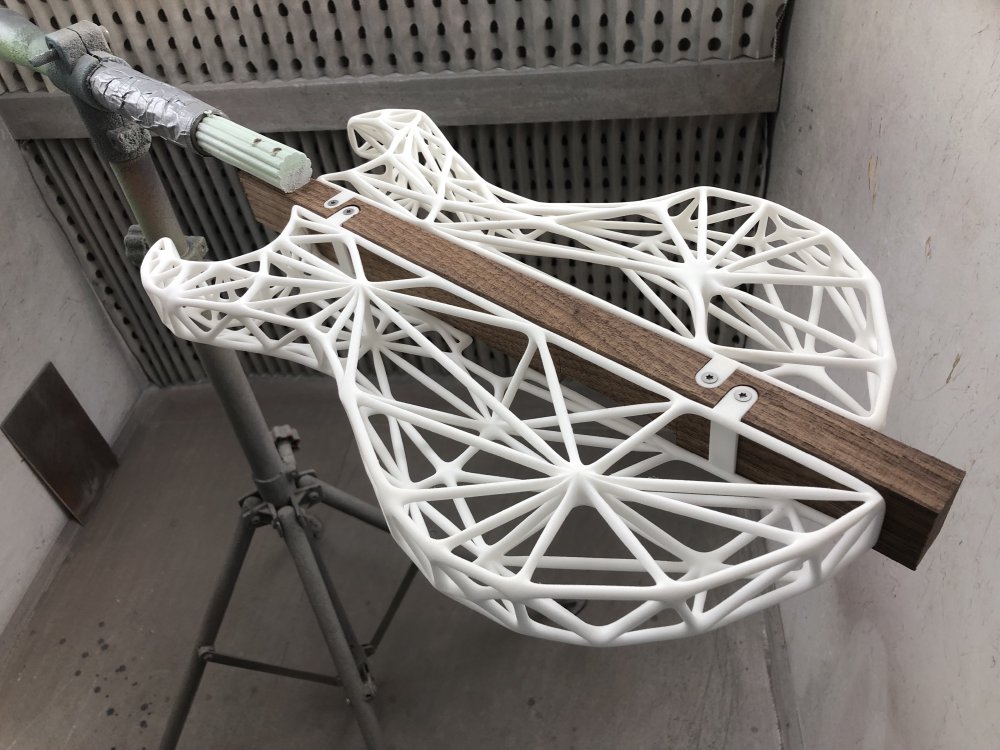
I mentioned last week that I’d expect to sand it down a little every other coat, and Dale over on the Scope of Work slack asked why. The reason was I could see that it was building up a bit of fluff on the sections where I assume the spray isn’t quite landing properly:
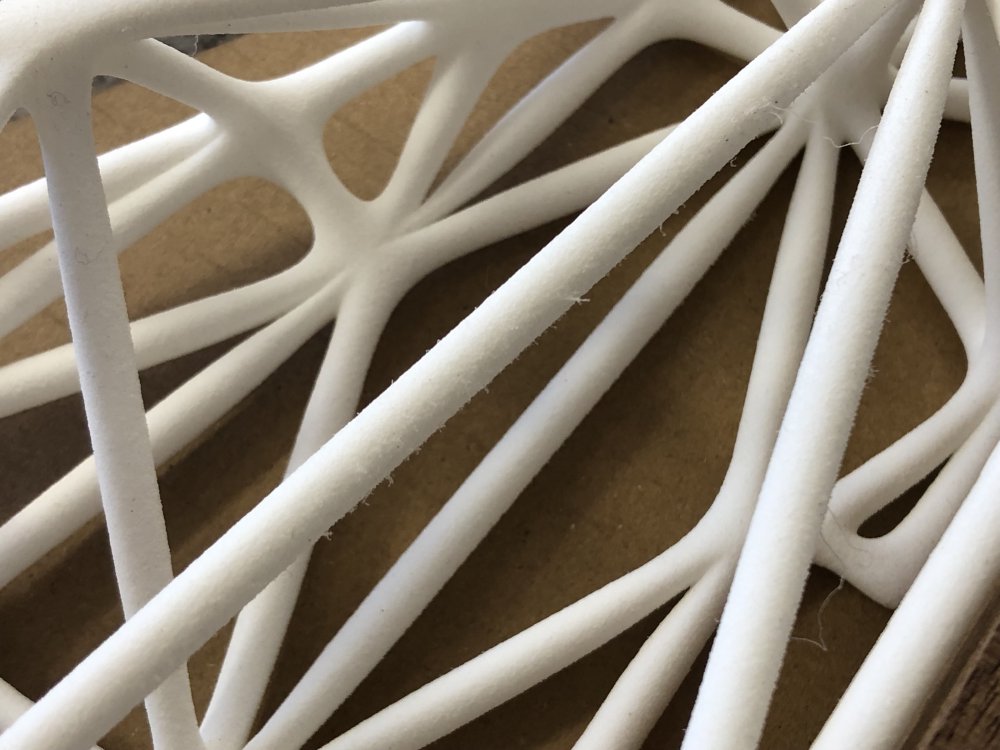
Of course, sanding it is where things started to go a bit wrong. I mistakenly started at the very high end of the grit spectrum, as I didn’t want to be too aggressive with my sanding, but the 3D-printed lattice on the production body turns out to be much rougher than that of the test-prints I’d used before. I think this is because on the test-prints all the vertices were purely cylindrical and aligned along a regular axis, and so the layering artefacts were along the direction of the cylinder and quite smooth; but the vertices on älgen are much less regular, and so you get more small edges along the beams that are rough to touch and tore the dark grey material of the sanding pad, causing the pure white plastic to start to look grey 🤦🏼
Whatever the root cause, this was not what I wanted this late in the game, so I tried multiple things to fix it: washing it with a microfibre cloth and water, which didn’t seem to help; I tried using masking tape adhesive to lift the dirt off the print, which also didn’t work. In the end I went down to an 800 grit disk and smoothed off those rough edges and worked back up, and that seemed to do the trick. Disaster averted, but a few extra grey hairs gained in the process.
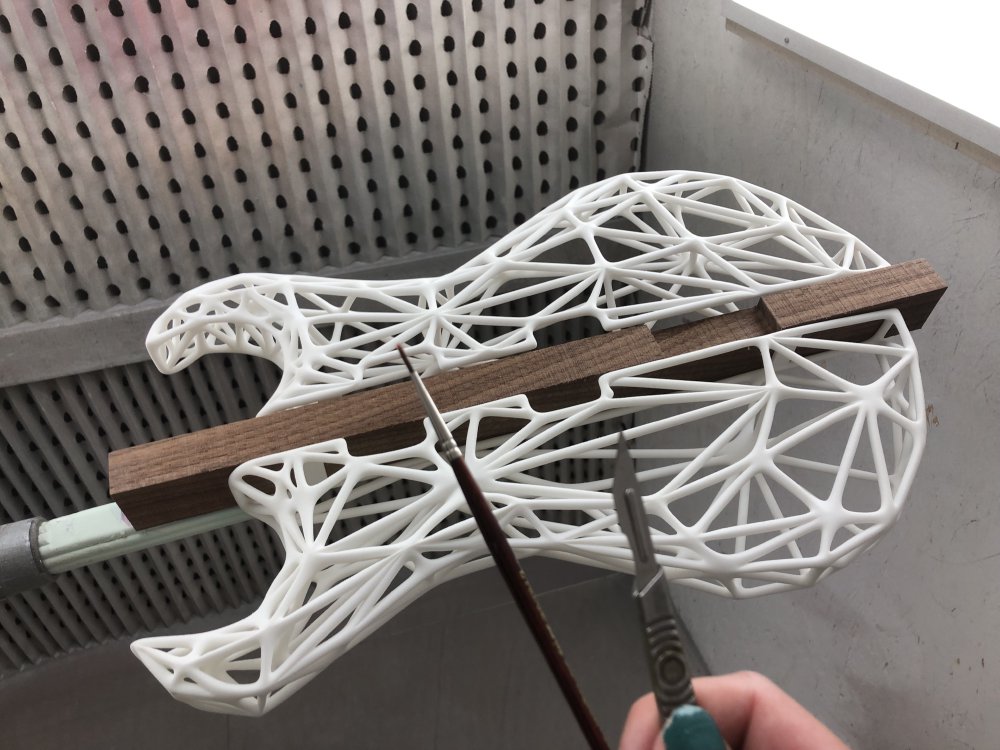
Even after that, I learned that a spray booth isn’t the same as the clean rooms you see in chip fabs (I used to work at Intel, and I was always sad I never got to dance around in the fabs in those colourful suits). After spraying little bits of lint in the air will stick to your lacquer, and on a white 3D print this is very obvious.

The solution was before spraying the next layer to use a scalpel and a paint brush to remove anything that had stuck from the last layer:
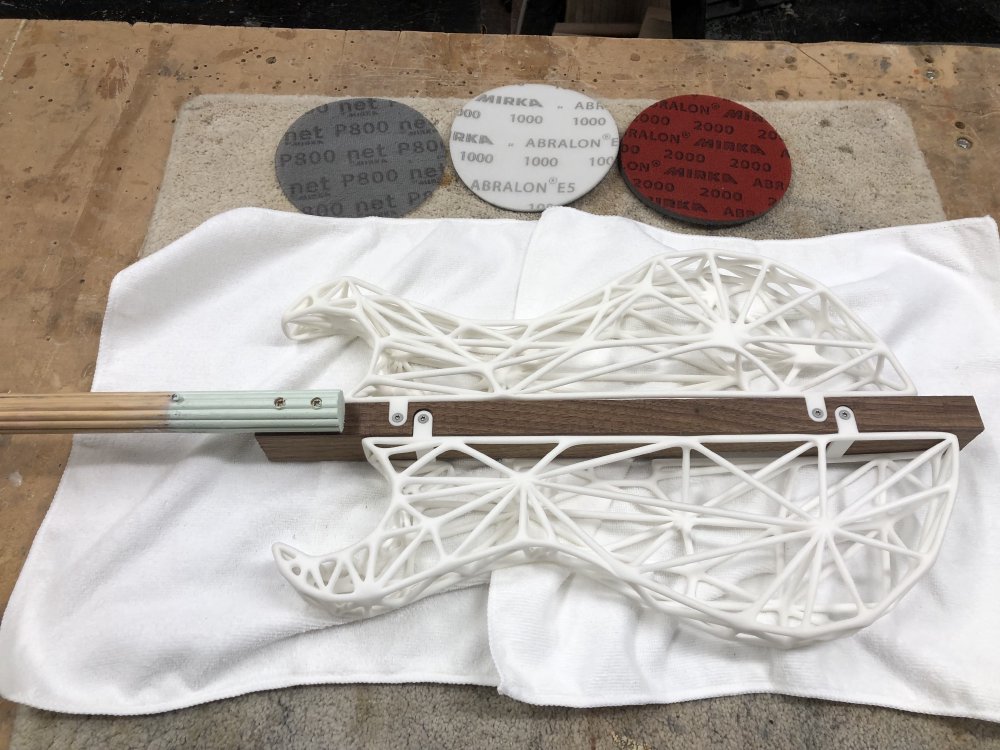
So after several trips up to the work shop, and a lot of stressing about it, I got to six coats on. Now I’ll leave it to cure for a week (which I’d have done anyway, the trip just gave me a tight deadline to achieve that). When I get back I’ll have no time to apply any more coats, so I just have to hope this will be enough to protect it from picking up too much dirt when it starts to get proper use.
Hästen
Hästen continues to move along - I’m keen to get this build wrapped up as it’s the only one with a person, as opposed to my other builds that are demonstrations of what I can to do design/build wise. Last week I’d put the side-dot inlays and the frets in the neck, and this week was continuing to move it through the process.
The first step was just getting the frets ends flush with the neck so I don’t catch my hands on them as I do other work to the neck: the actual fret levelling and shaping is one of the final build stages of the neck.
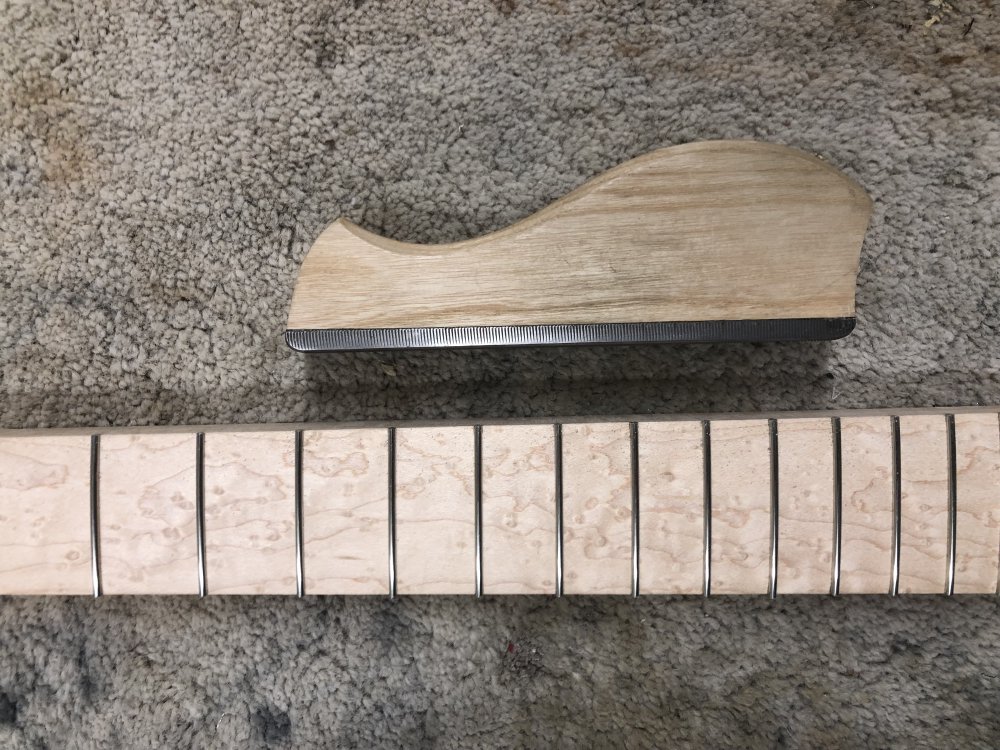
Not only did I file down the fret ends, I also at this point filed the metal side-dot inlays I’d installed, getting them flush with the wood also:

With the neck made slightly less likely to harm me, I next marked up the guide lines for where I’m going to carve the neck. I should probably write this up in detail at some point, as I don’t think I ever have, but given I’m trying to get these notes wrapped up the night before I have a very early taxi call, this isn’t the time for that.
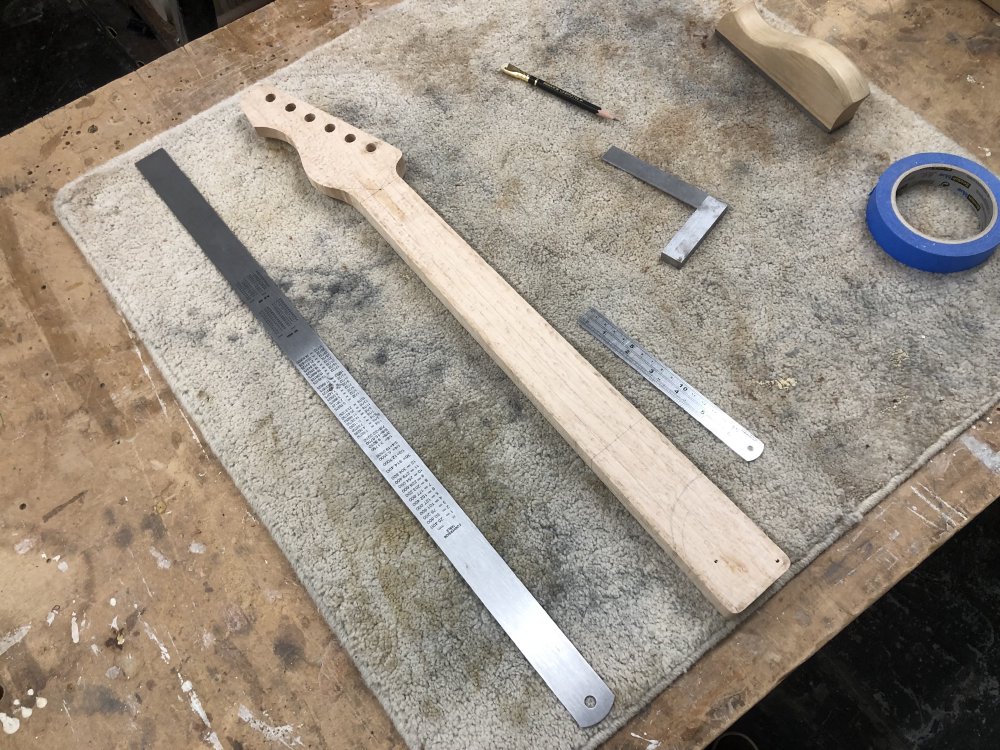
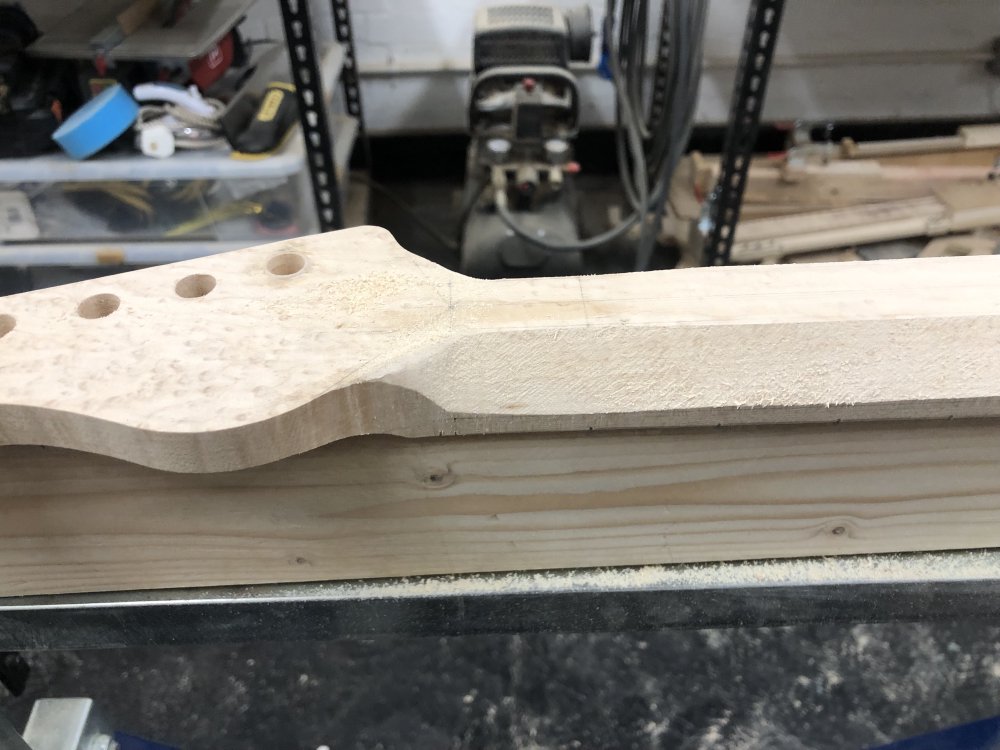
With the lines marked up, it was time to do some physical labour and carve the neck, which I do by hand with a Shinto Saw-toothed rasp.
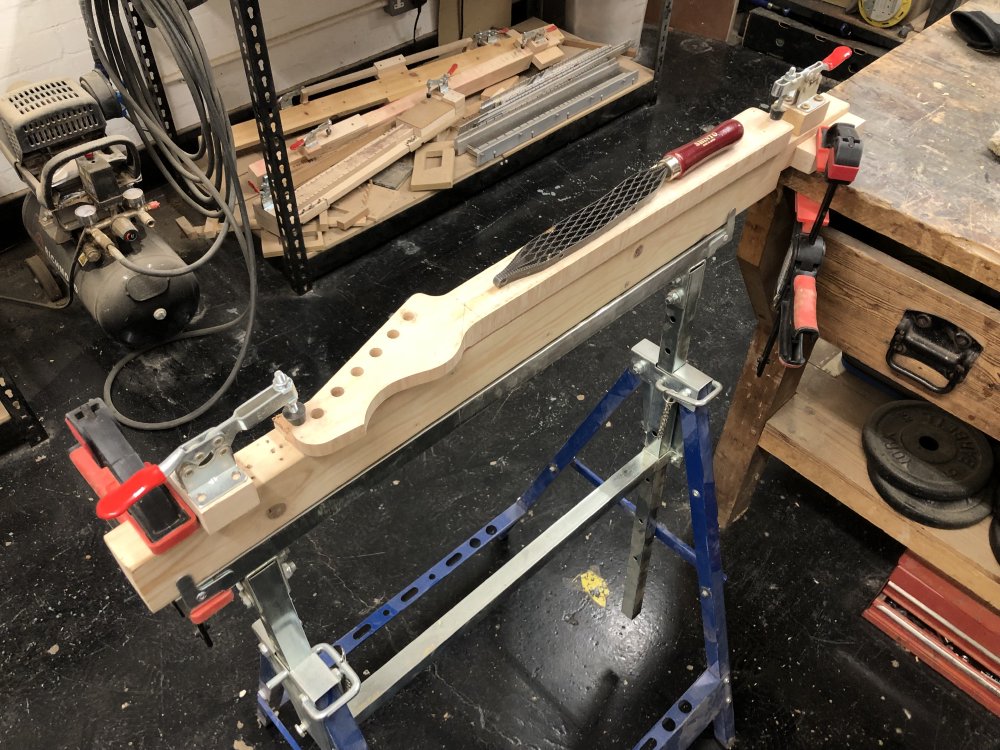
After an hour or so of carving and regretting my fitness choices, I’d got the first two facets cut:
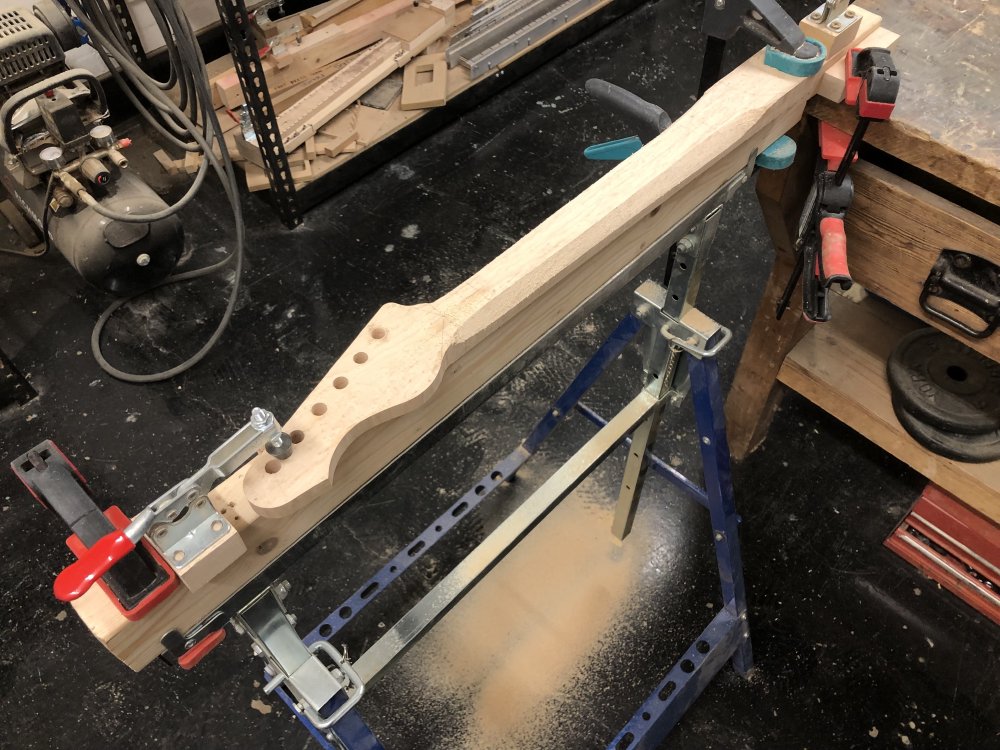
I was a bit worried at one stage, as around the first fret as I removed material a dark patch appeared, and I was worried that there would be a natural vavity in the neck:
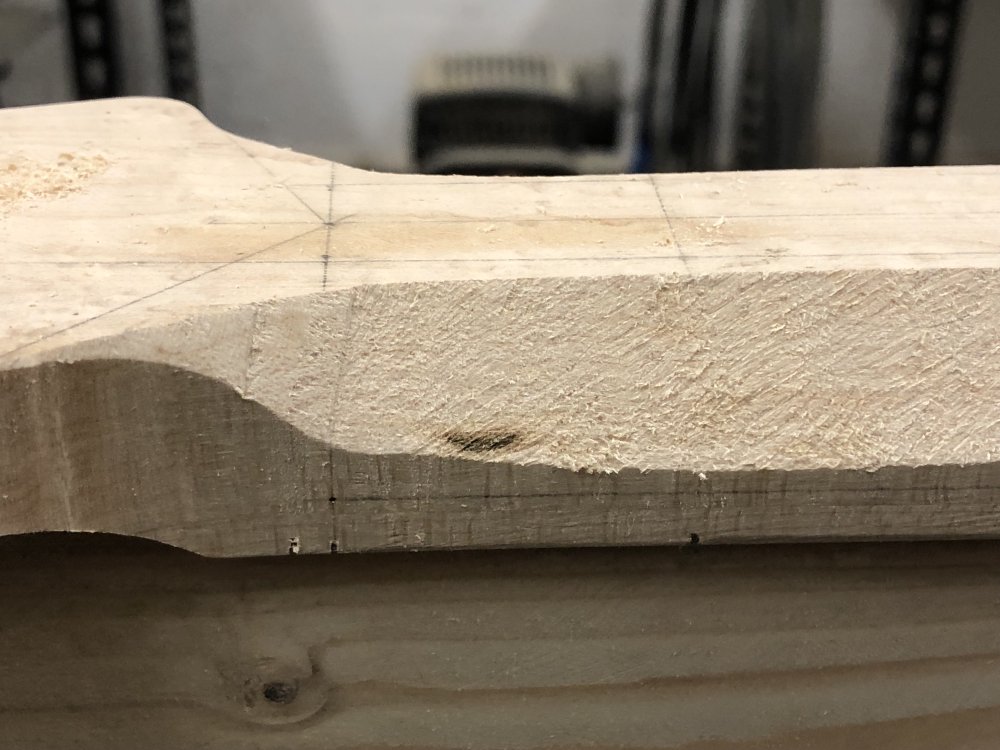
But thankfully as I continued to work the wood it faded out again, and I suspect by the time I’m done shaping the neck you’ll not see any trace of it. I have had it before that on a neck there’s been a “feature” hidden that didn’t go away, so I was quite relieved that this one appeared to do so.
It was quite hard going, and I suspect this is in part because my rasp is starting to blunt in places:
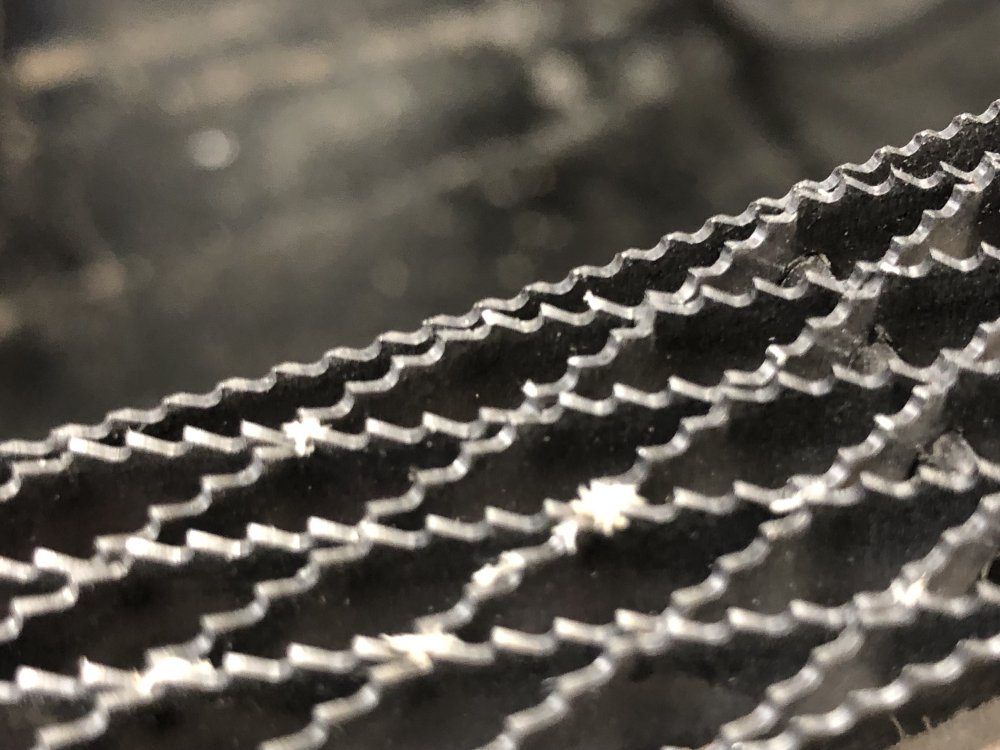
I’m hoping I can get a replacement blade for this, but for now it’s not too bad so I’ll get the job done. However, not this week, as I ran out of time after just doing the initial facets.
With the neck now fretted, I was able to mark up the scale-length on the body last week, and so this week I could start making the last few holes required before I can move this body to finishing. As I’ve noted in the past, getting the scale-length is something I’ve been bitten by before, with all my early guitars having the bridge mounted slightly forward of optimal on account of poor guidance I received early on in my career. Since then, thanks to workshop-mate Jamie, I now know better, but that legacy still hands over me and makes me want to measure, measure, measure, measure cut.
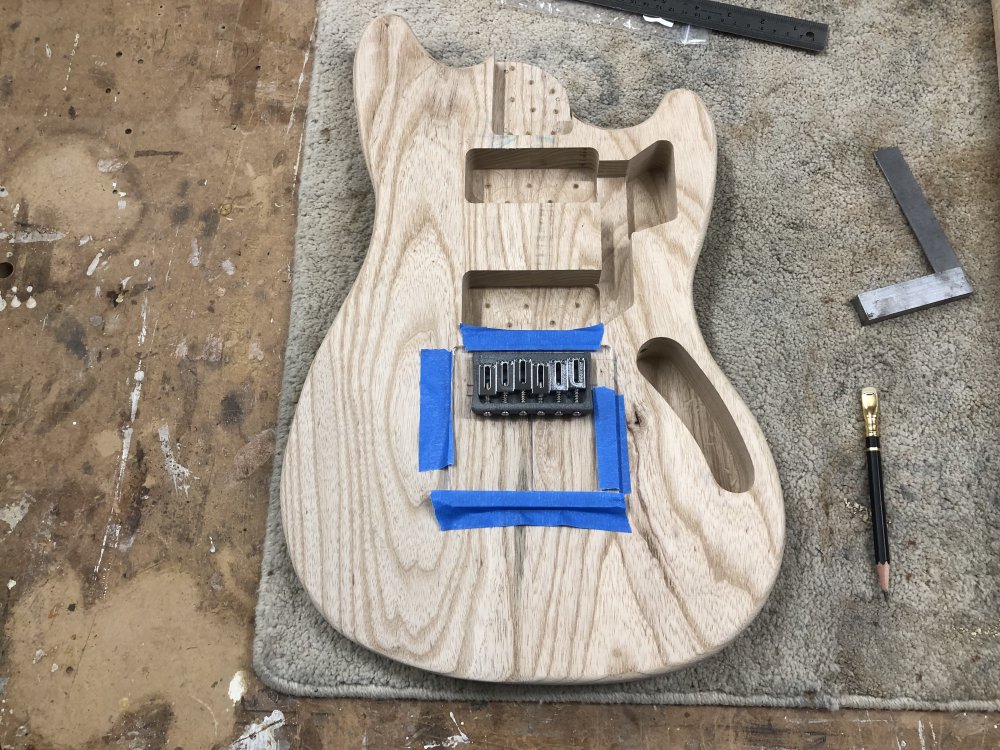
Once I was happy I had the bridge in the right position, I then used my usual acrylic-template for drilling the pilot holes for both the strings to pass through the body and the bridge mount screws (a template you can download here should it be of use to you). Once I had the pilot holes done, I used a 3mm brad-point bit to make the holes for the pass through the body. You want to get a good quality rigid bit for this job - in my experience the standard ones you buy, at this size range, have a point that isn’t perfectly true, and at 3mm that can be quite a significant deviation.
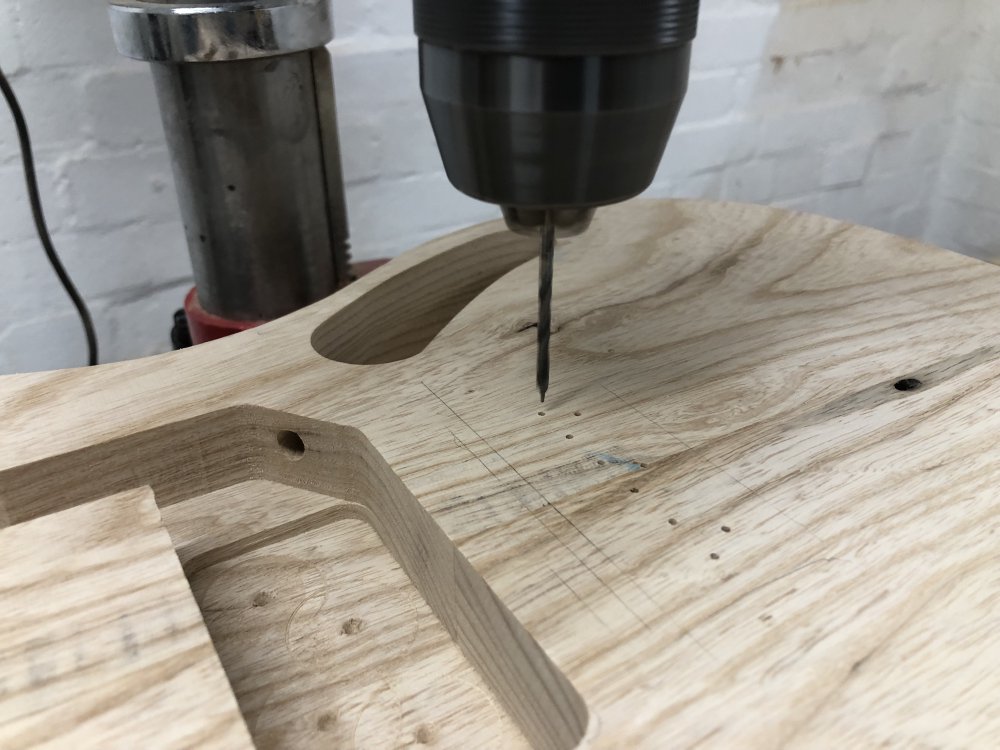
A few minutes work later, and I have a fresh set of holes on the front:
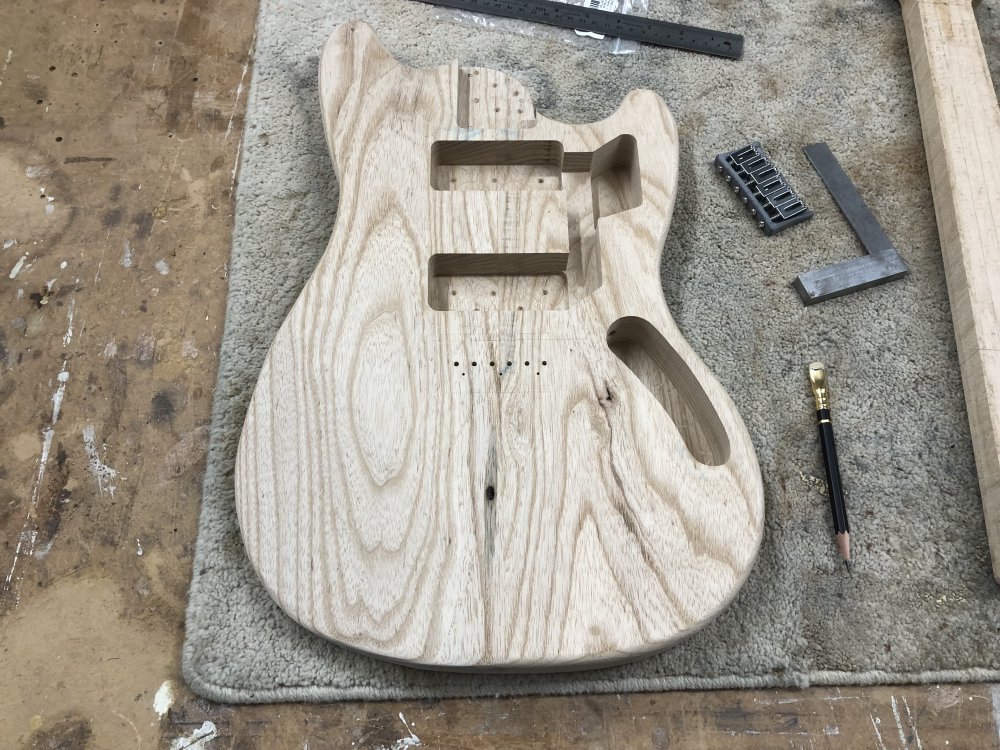
And on the back just the outer two have been run all the way through:
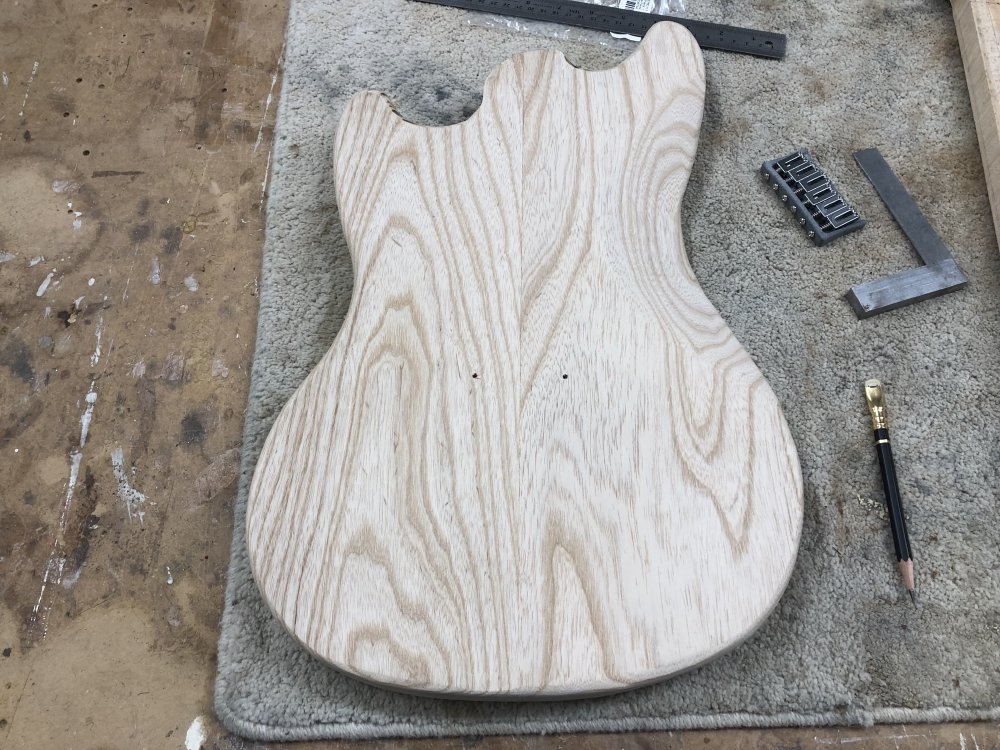
Next I’ll use my slightly crazy jig system to route out the cavity for the ferrule-block in which the strings will anchor, but that’s a job for future Michael.
Verkstaden
I was hoping to have Verkstaden ready for Liverpool Makefest, but that’s not going to happen now, but I still pushing to get it done as I think next to Älgen this will be the more important of my demonstrator guitars. The body for this guitar has a lovely stained birds-eye maple cap, and I plan to spray the back of it a dark brown or black, and to do that I’ll need to cover up the front with something. Thankfully, I have access to a laser-cutter and a CAD model of the guitar, so…
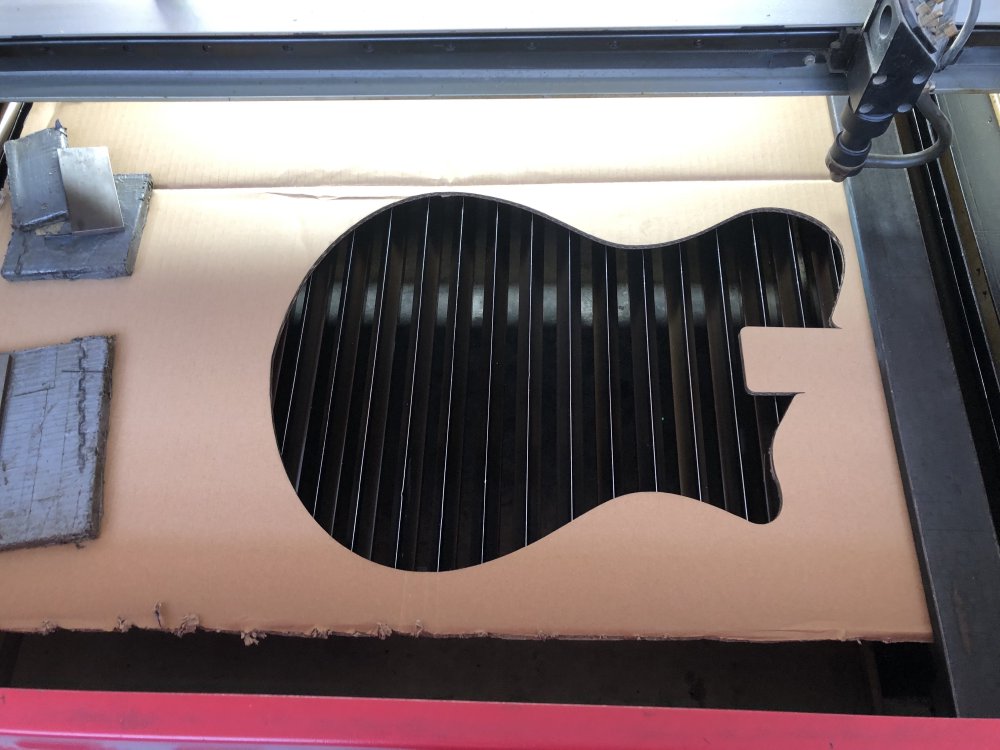
A bit of scrap card was turned into a perfect cover for Verkstaden:
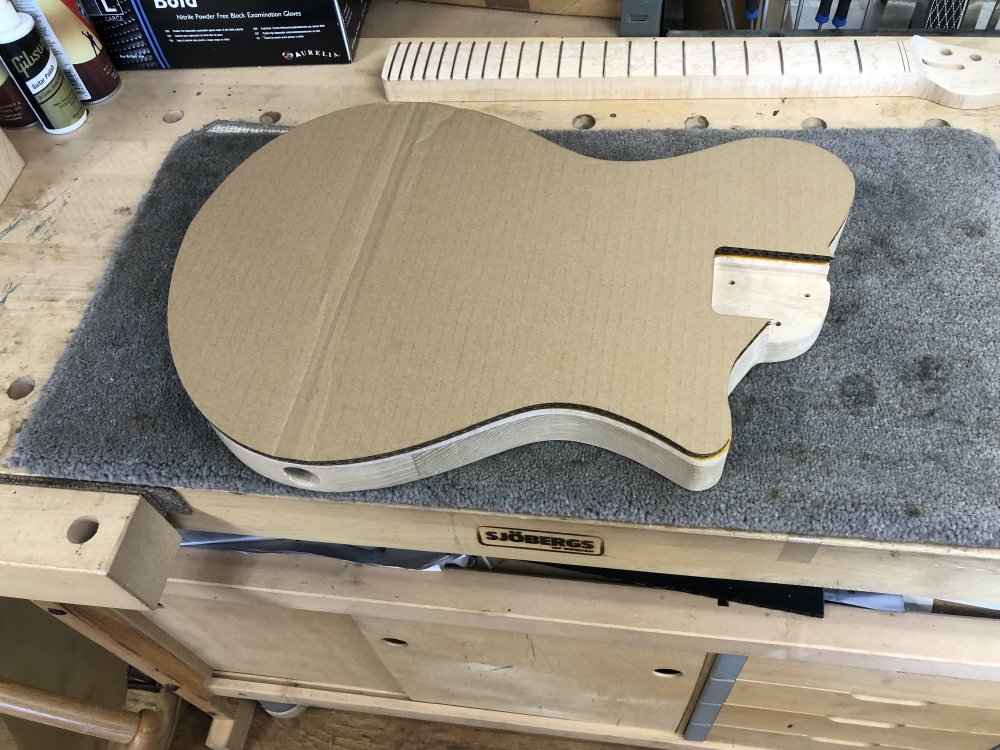
Now when I get time to paint it, I can tape this on and not worry about accidentally painting the front!
Wrap up
After all that, here’s a little wrap up video I shot before departing at the end of the week - as a bonus you get to hear the starlings that live over our workshop :)
Fingers crossed, and I suspect by the time I next write my build blog entry Liverpool Makefest will be upon me, so send me any good vibes you have to spare!