A week in the shop
Published 27 Jun 2022
Tags: älgen, delfinen, scale length
It was all go in the shop this week in the race to get something, anything ready for Liverpool Makefest. This was the last full week I had, so I made the best of it.
Älgen
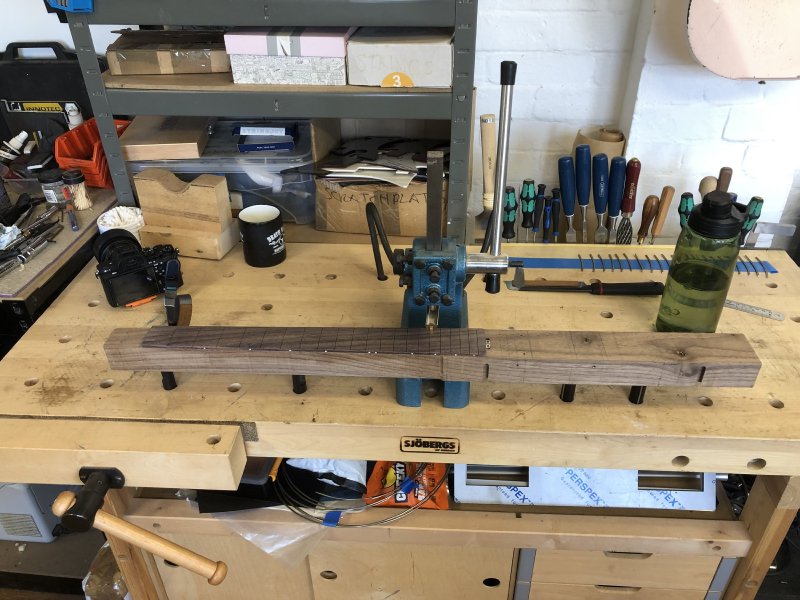
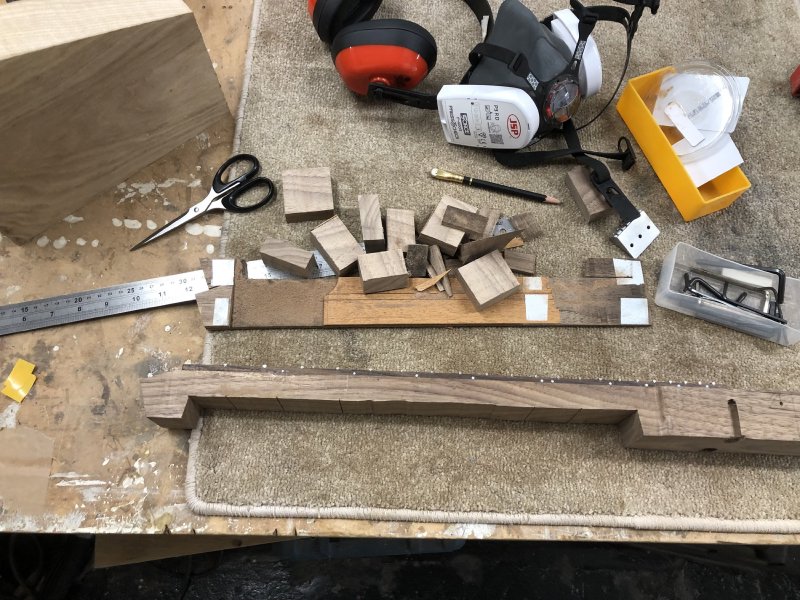
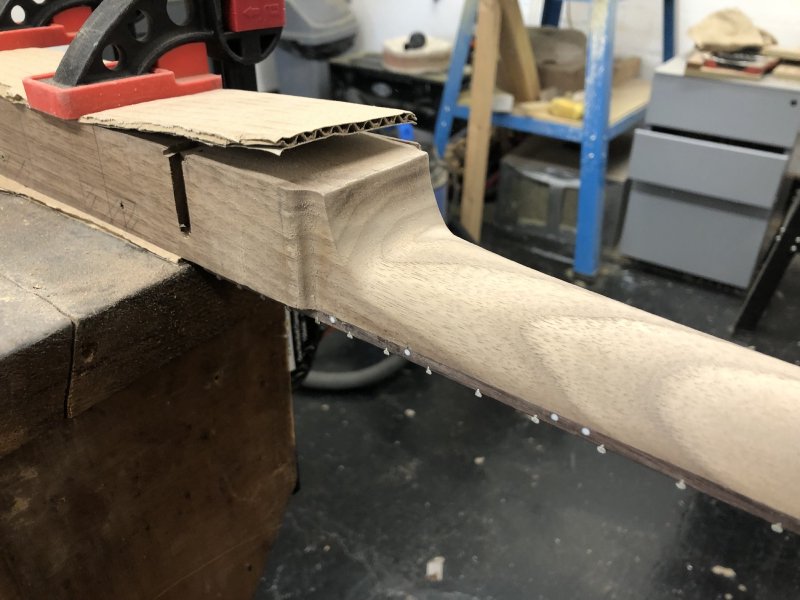
Most work was put into getting Algen closer to complete. I’d accepted into my heart that it won’t be finished in time for the show, but I’d set the aim to perhaps m have it strung up at least. At the end of last week’s notes I’d radiused the fretboard and prepped the fret-slots ready for fretting, and got my fret-wire ready to go. But then when I went back to the workshop I realised I’d forgotten one important task: the marker-dots on the side of the neck to indicate to the player which fret is which!
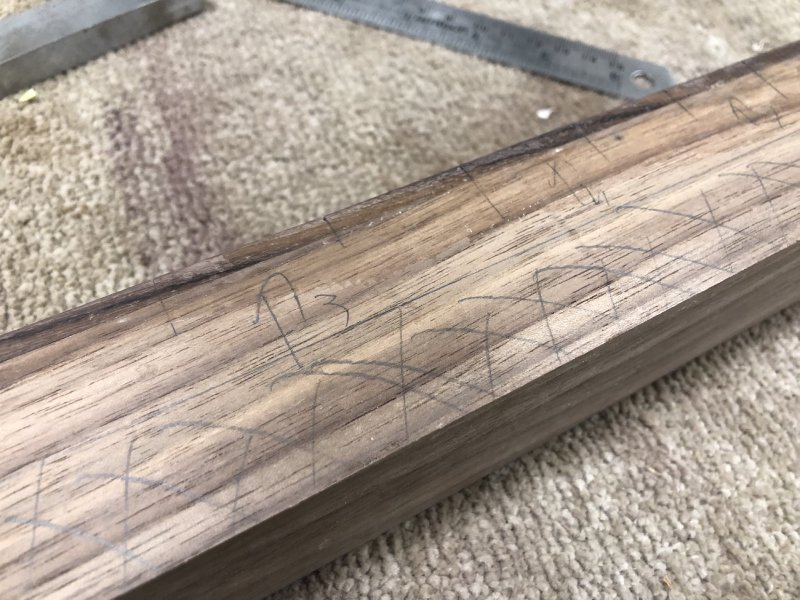
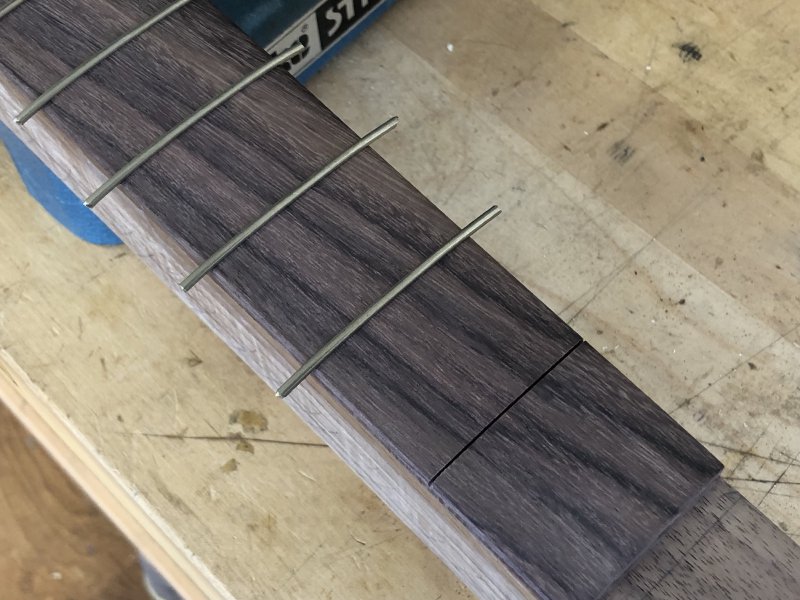
Normally I install the marker dots on the boundary between the fretboard and the neck, as I think that looks visually quite nice. But on Älgen I can’t do that as the fretboard continues over where the walnut back spreads out to the wider section of the body, which means I have to put the marker dots into the side-wall of the fretboard itself. There isn’t much room along the side of the fretboard - the inlays are 2mm and the side wall of the fretboard goes down to about 4mm at the far end, as you can see here after I’ve drilled the holes into which I’ll install the indicators:
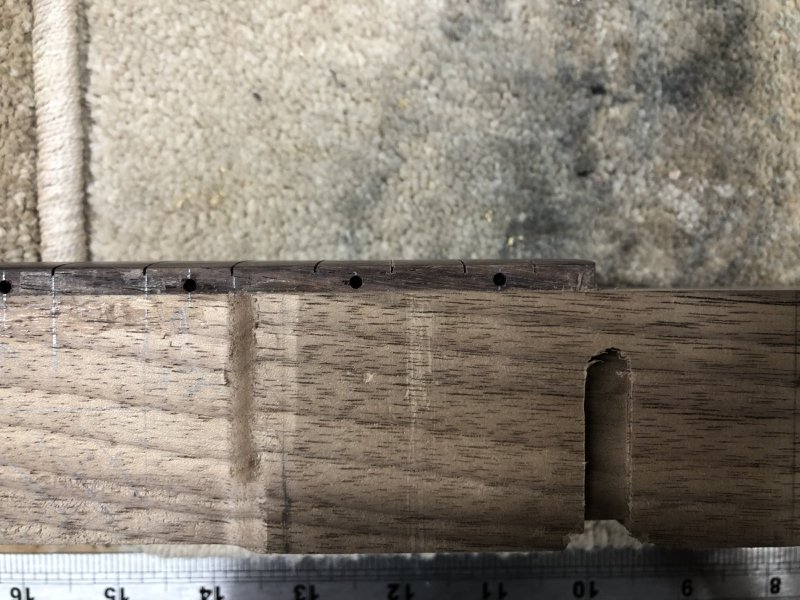
Getting them on the join between neck and fretboard or doing this, either way is a nerve-wracking drilling process and I keep promising myself one day I’ll find an alternative design to them, but this wasn’t that day. A bit of superglue and snipping and I had my marker-dots installed:
The white acrylic I used is a bit bright here, and looks a bit over the top, but they’ll look less so once the white 3D-printed sides are installed. Besides, you need to be able to see them when playing in dark conditions, so bright is good functionally too.
To get them flush I went around with a chisel to get the dots perfectly flush (cutters never do that) and to remove the excess superglue that was left after I set it with the accelerant.
I also used this as an opportunity to remove some more of the glue left on from when I glued the fretboard on, as doing that once the frets are in will be a bit more fiddly. It was slow progress, but worth it for the effort saved later.
Before we plough into the next bit of the build, it’s confession time: I’ve always been scared of installing the frets into a neck.
It’s certainly the area I’ve felt I’ve been the weakest in as a guitar builder, and that’s not just my self-criticism, it’s also born out based on (much appreciated) honest feedback from early clients. I’ve got better at it over time, but it’s still not a part of the process that brings joy. It’s not just that fretwork is slow and tedious: I’ve become intimidated by it because it has been such a source of trouble in the past - frets failing to seat correctly, or twisting as I insert them, etc. I’ve just always struggled with this bit of the build.
With Älgen it was no different: once I got to the stage where I needed to put in the frets, I got everything ready, was about to start, and the fear was there again.
So this time, rather than struggle on, I stopped and asked myself why.
It comes down, I think, to how I learned to do fretwork initially by watching YouTube videos, and how I’ve doggedly stuck to an ideal that one series in particular taught me, despite that ideal being impractical, or at least imparted without suitable caveats to make it useful. And in the same way that I hate statistics largely because my maths teacher at school hated statistics, I think I picked up this bias of ”you should do it this way” from this tutorial and took it as religion without really understanding that I had done so.
To cut to the point, the root cause of the issue is that I cut my fret slots too narrow. The theory is that if you have a narrow fret slot then you can get the fret installed without glue, which makes the guitar easier to maintain in the long run - frets will eventually wear down, so if you don’t glue in the frets then they’re easier to swap out down the road. And maybe that is sensible, but I was applying this next-level technique without having first got to a point of having got a sound basic fretting skill first.
Now, I’m not totally blinded by teaching: I had tried a couple of times to use wider slots and glue the frets in, but those hadn’t worked out to my satisfaction either. In one instant I think the slot was just too wide for the fret wire I was using, and the other time the glue inevitably seeped out and I didn’t have the skills to remove that glue properly (something I now do know how to do). These failings caused me to double down on the other technique.
I ran through this with workshop-mate Jamie, who is someone who thinks a lot about the guitar building process, and he immediately pointed out it’s all about the numbers: we measured the actual fret-wire I was using: how wide was the the bit that sticks in the slot and how wide was the tang (the teeth that grip the slot), and how wide was my saw blade I was using. I was cutting a 0.3mm slot, but once you factor in the tang (which I hadn’t) I was trying to squeeze 0.8mm into said slot. I’d not adjusted this ideal for the practicalities of the tools and fret-wire I was using.
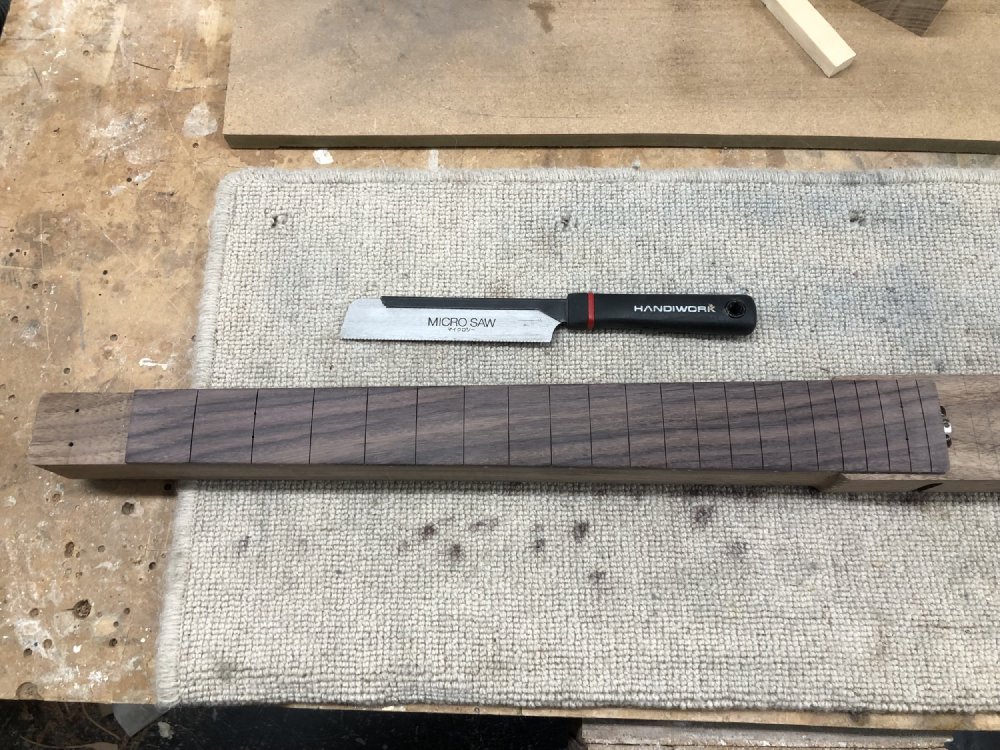
There’s so many little parts to guitar building that I’d never stopped to question this specific one in detail in many before, and it now feels silly in hindsight that I’d never just run the numbers like Jamie suggested, but it was all there to see. So Jamie lent me his 0.5mm saw (matching the width of the fret descender on my fret wire) and I took on the chin another hour or so of carefully re-cutting the original slots that little bit wider, taking that as hopefully teaching me a lesson for the future:
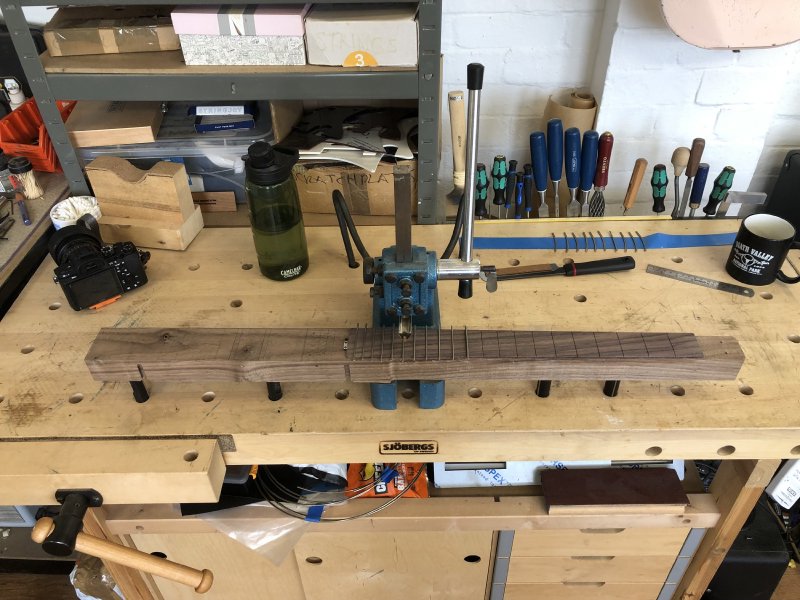
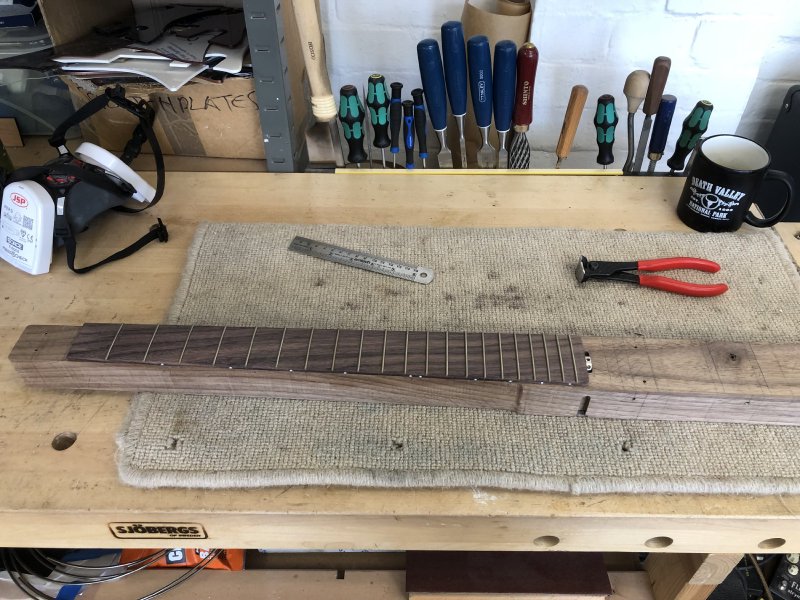
With the wider slots the frets now press in much easier; I still have to be careful and take my time, as if I apply pressure incorrectly then I risk twisting the fret-wire as I press it home, particularly if I haven’t held my saw perfectly perpendicular to the fretboard. But as I made my way along everything was much more chill, and the part of the process I feared has been removed.
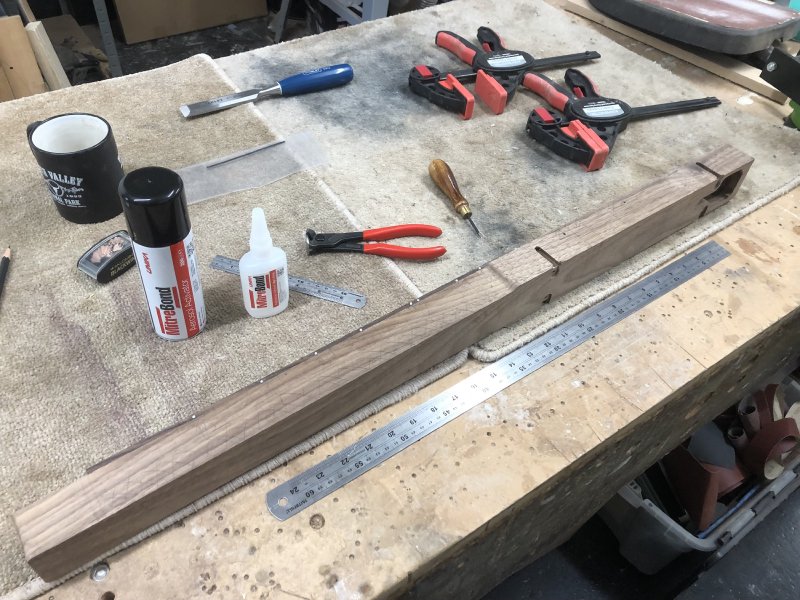
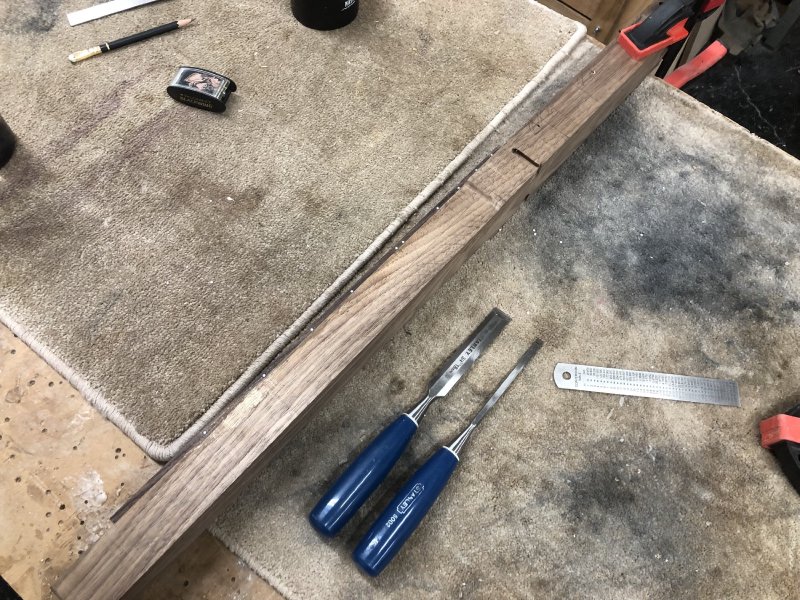
Whilst we’re on the topic of fretting, I mentioned last time how I’d pinned the fretboard when gluing it onto the main body part to stop it moving around whilst I clamped it down. Pinning involves drilling small holes where the frets will be to let you use locating pins. Well, here’s the proof that the the evidence is covered up with the before:
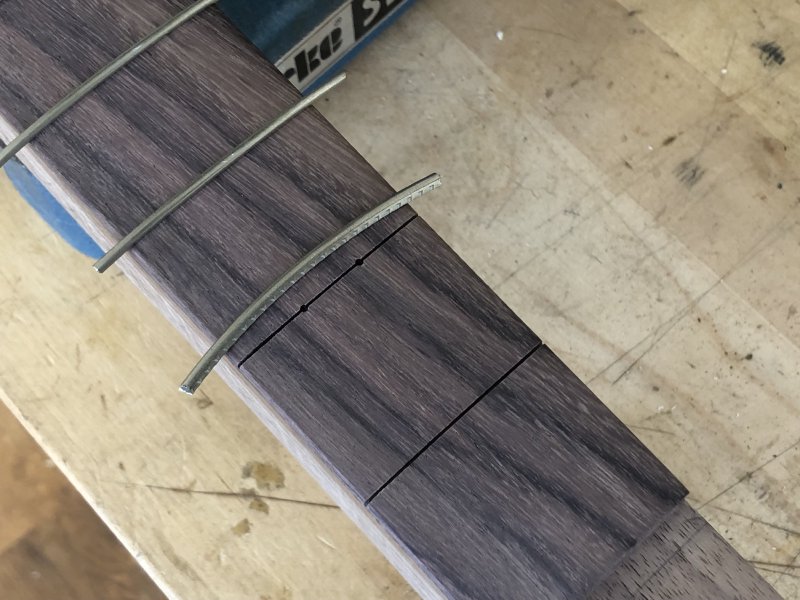
And the after:
A pleasing result. So much has been learned on this guitar technique wise, thanks to the generosity with knowledge of my workshop-mates.
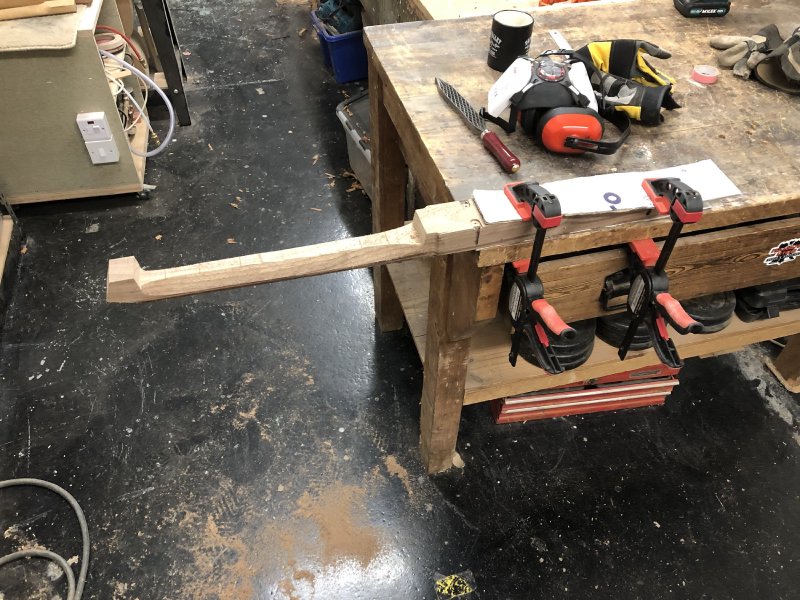
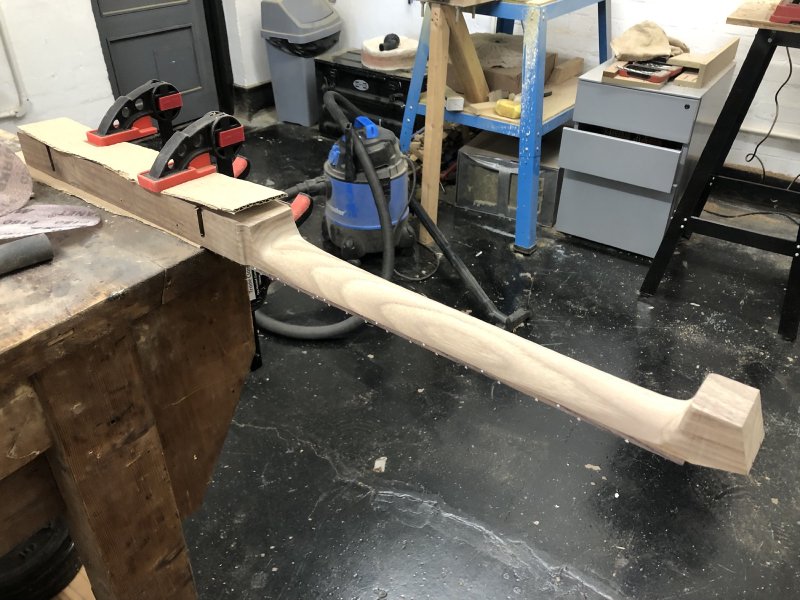
A short hair-cut later and now Älgen’s body is starting to look like the part:
With any design you’re building for the first time, particularly with something as complicated as this guitar, where you look at the next step in process and wonder what you thought you were doing at the CAD design time. The danger with CAD is that it’s very easy to design things that can’t be built easily! Thankfully I didn’t hit anything totally unstoppable, but this next step was more fiddly than younger Michael sat at his computer thought :)
Having put the frets in, the next step was to shape the neck of the guitar. In the previous picture you’ll see there is quite a bit of wood still at the neck end, and I need to trim it shorter (having left an inch or so for clamping etc.) and make it about half the depth. But as I stood in front of my band-saw trying to visualise the series of steps required to do all this (a process that often causes my workshop-mates to question if I’m okay) I realised I’d not allowed for the fact that the neck is already tapered, so cutting things at right angles will be tricky, and that I have course fret edges that I don’t want to scrape over the band-saw table.
The solution, as ever, is yet another jig!
This being a prototype I decided rather than to CAD and make a complicated jig as I would normally, this was time for a lashed up jig. In particular, this jig will not survive the process it is going to enable, so I didn’t want to get too precious about it. I went back to my model and checked: the neck starts with a 5mm drop from the body width, and then the headstock is about 5mm off again from the body end of the neck (and I have an advantage that the headstock itself isn’t tapered). So with a 5mm thick bit of wood I was able to start to make my shim:
The next challenge I realised was that the headstock top-face needs to be cut at 20˚, and that’s the kind of angle that’s hard to cut on a band-saw, as all the fences tend to be set up for 0˚ or 45˚-90˚. So again, it was time to improvise, and I sacrificed a bit of poplar I had lying around the workshop: by cutting a allowed 70˚ angle to a square bit of wood I could get my 20˚ once I’d flipped it over. This was my test piece (and before you panic, this is a pose for the photo, I didn’t cut it from this obviously unsafe position!):

At this point I think my workshop-mates were questioning my sanity a little, as I’d switched from my usual work mode to channelling my inner Magyver, but the results all worked. First I cut the headstock:
And then I trimmed the rest of the neck:
You can see the remains of my poor jig in the pile of off-cuts, now somewhat smaller than it started. It served its purpose well!
The headstock is still a bit oversized still at this point: I don’t expect the final version to descend so far, but for now having a foot to keep the neck balanced is useful, particularly as at this point the centre of gravity is pretty much at the neck transition point.
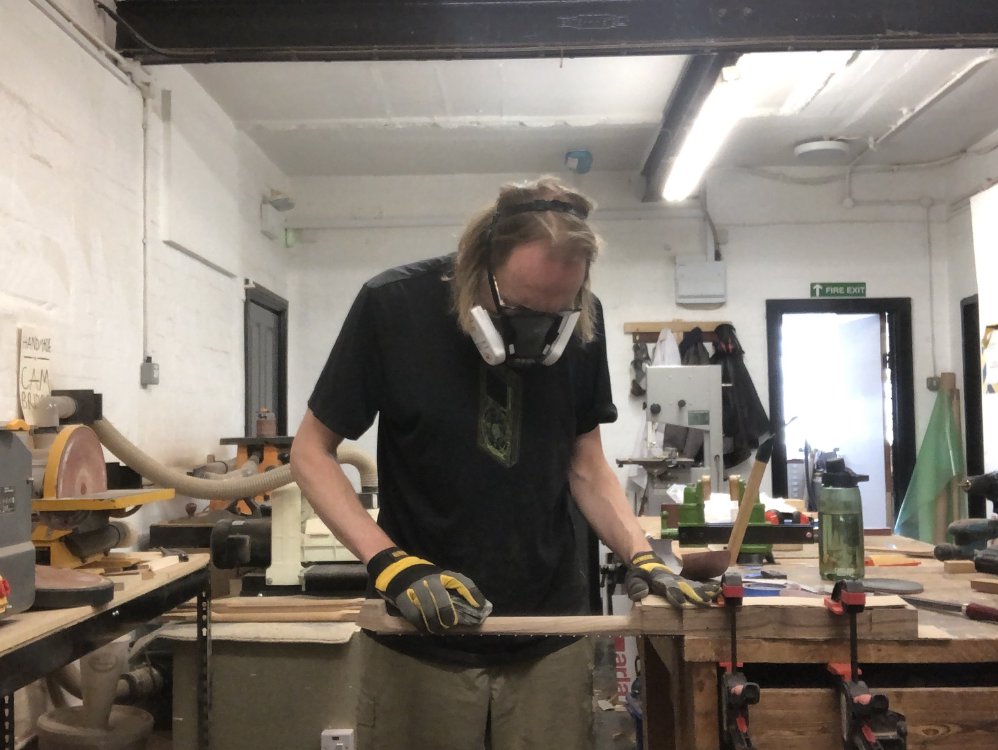
With the neck roughly cut, it was time to get some exercise in as I carved the neck by hand:
This is dusty work, so a PPE heavy few hours:
It’s worth noting the difference between me prototyping a build here, and my workshop-mate Matt who was also processing necks at the same time as me, and thanks to custom jigs and a custom routing machine, did 4 necks in the time it took me to do half of this one :)
Still, it was good timing, as I chatted over with him what I was doing and how I was unhappy with the step from neck to body that felt like it’d get in the way with playing, and he suggested I round it over on the spindle-sander, which is one of the steps he still does by hand on his after they’ve been routed into a rough shape. It made sense, so I gave it a go:
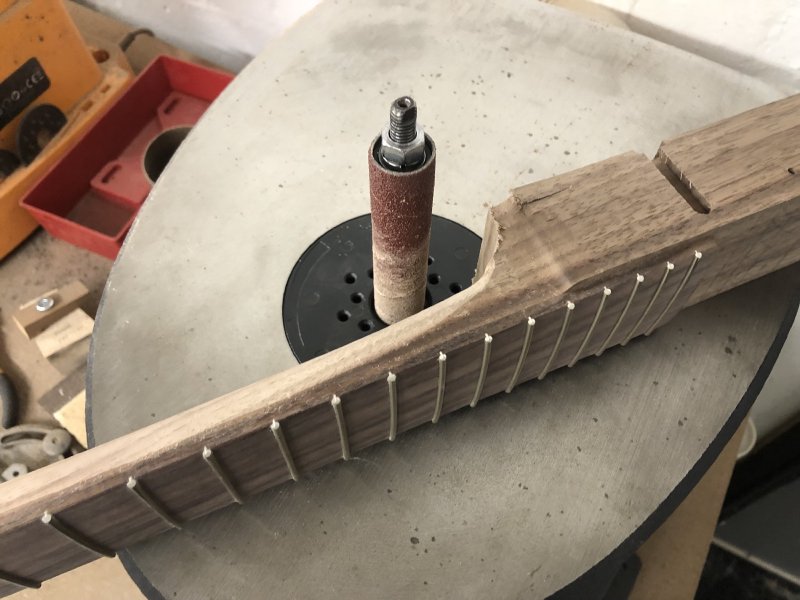
This worked quite well; I still suspect I’ll round it more towards the sides to make it dig into your hands less, but I want to string the guitar up first to feel how it plays before I remove any more material:
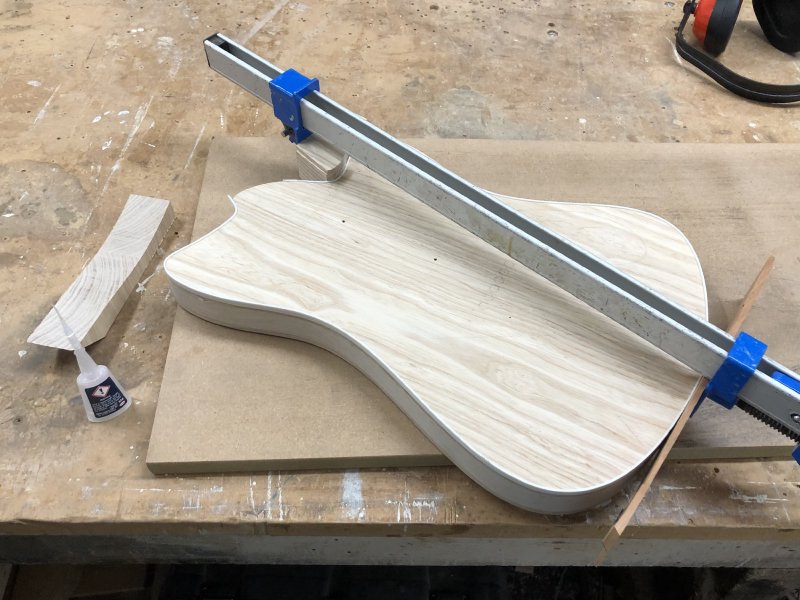
Overall though, it’s looking good, even if I do say so myself:
And with the wings on it now feels like a guitar, and I can start to think about the ergonomics of it as I get towards the fine-tuning stage of the build:
It feels good so far, albeit a bit light because of the lack of pickups etc. I also know the headstock needs re-shaping, but I won’t know how I want that to feel until I’ve got strings on it.
With the neck getting there, my attention then changed to getting the hardware onto the body, where I had another series of ”ah” moments as I worked out how to mount the rest of the hardware. First up I thought I’d attach the input jack, which will also act as the strap button. When I ordered the parts for this a while ago the specific one I’d designed around wasn’t in stock, so I’d picked another equivalent part. Unfortunately this one is just too big, and there’s no way the jack and volume potentiometer will both fit in the cavity I have:

For reference this is what I have in the CAD model:
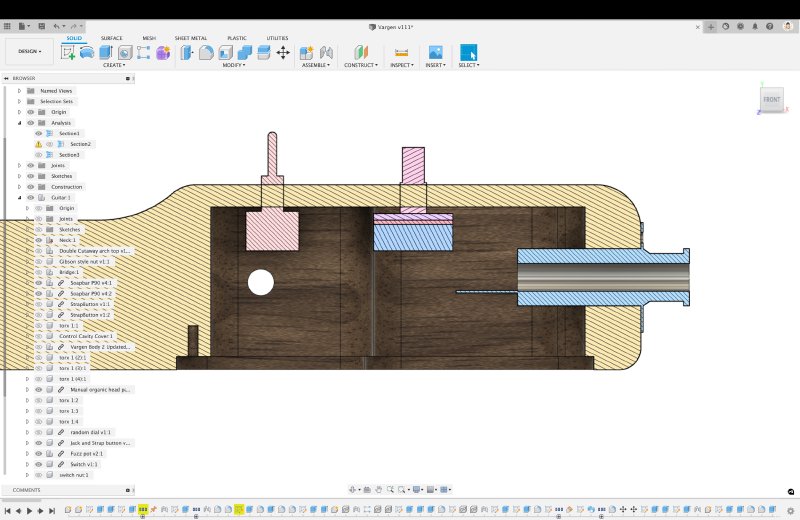
It was always going to be a tight fit, but this particular jack seems to have put the metal tube around a lot of jack internals, making it longer, and so running foul of the pot. This is also coupled with the fact that the cavity is actually a little shallower than I’d designed in CAD because my router bit doesn’t go deep enough, so I lost 3mm that way. Thankfully the part I originally designed for was back in stock, along with another version of the same part with a different design, so I’ve ordered both and hopefully one will fit.
Next on I looked at the bridge part, and worked out how that’s going to install:
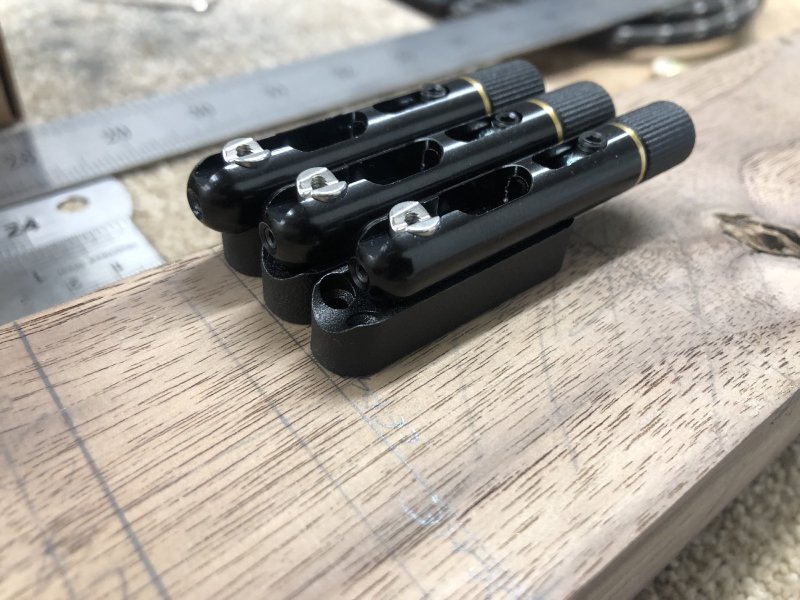
Here I’ve got one saddle in its neutral position and then one adjusted all the way forward and another all the way back - this is how you’ll adjust the intonation on the instrument. On this Submarine 3 bridge from Mera Guitars there’s quite an impressive range you can get of 4mm forward and 5mm backwards.
In another “what I learned from YouTube early on in my career is wrong”, I had picked up at some point that the rule of thumb was that you wanted to position your bridge to allow the saddles that support the strings to move 2 to 3 mm either way from the notional scale length. But I remember chatting to Jamie a while back about this and he pointed out that for the kind of guitars I build that’s not the case, in fact for an electric guitar you tend to find all strings move longer than the scale length and never shorter.
Thankfully there are several calculators for this sort of thing out there, such as this one. For example, if we assume I’m putting on a set of Elixir 10-46 strings (and the core sizes for the wound strings which I found here), given the guitar’s 25.5” scale length, the calculator tells me that the high-E will need to be 1.5 mm longer and the low-E will need to be 6 mm longer than the notional scale length, which is quite a difference from the plus/minus 3mm I first learned from YouTube. This means I’m going to have to move the bridge slightly further back from where I designed it originally, though the generous throw of the Mera bridge means I don’t need to move it too much. Still, it’s nice to have numbers for this sort of thing.
The other ”ah” moment I realised is that once the bridge is installed in the recess I’ll not be able to get easy access to the adjustment bolt for the intonation. The bridges assume that you have direct access to the rear of the bridge, like so:
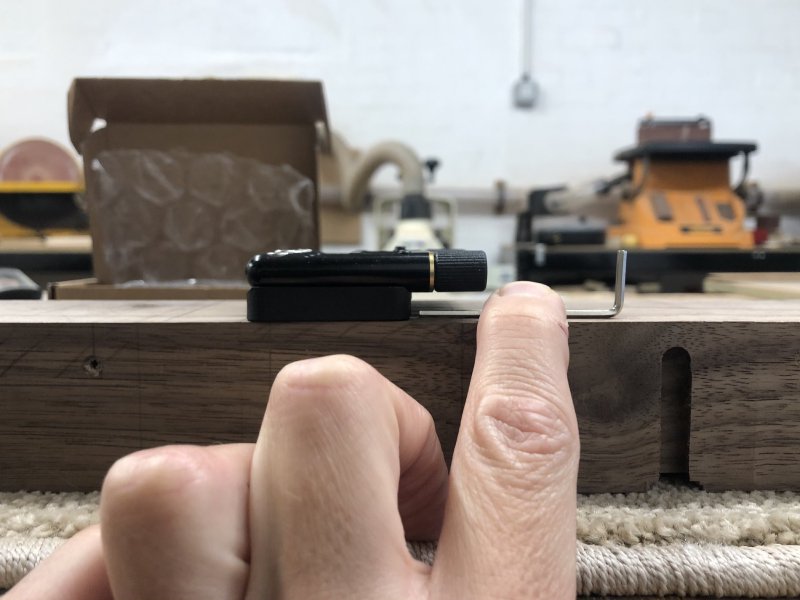
Whereas I need to lower the bridge slightly to allow for the fact that this isn’t a separate neck unit, which would normally leave the fretboard relatively higher. There will be some room behind the bridge where I can extend the recess, but I can’t run it too far back as then it’ll run into the cavity I made for the electronics… So now I need to source a custom allen key for the guitar - doh! If anyone knows where I can get a 2mm allen key with a 30mm length on one side then do let me know! I suspect in the near term I’ll have to ”make” one myself using an existing allen key and a saw.
And this I ended the week with a lot of placement planning, but not much actual placing, but it felt good to take the time to do all this measuring and part checking, and I’ve set myself up to get started on trying too install the hardware next week.
Delfin
My other ongoing guitar project got less attention this week, but it did provide a nice postscript to the fretting story above, as the next major step for this guitar was to cut the fret slots :)
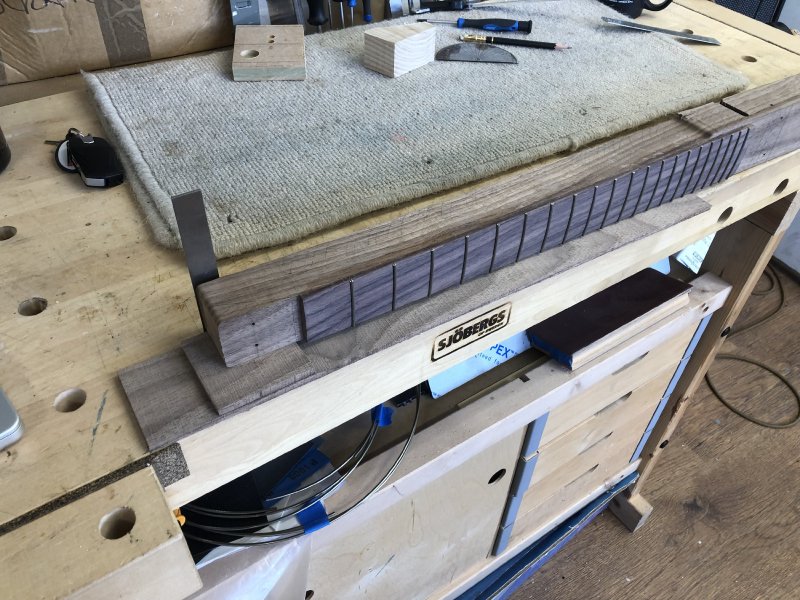
Having had my earlier epiphany about the width of the slots, I decided to go all in with how my workshop-mates make their fret-slots: using a table-saw!
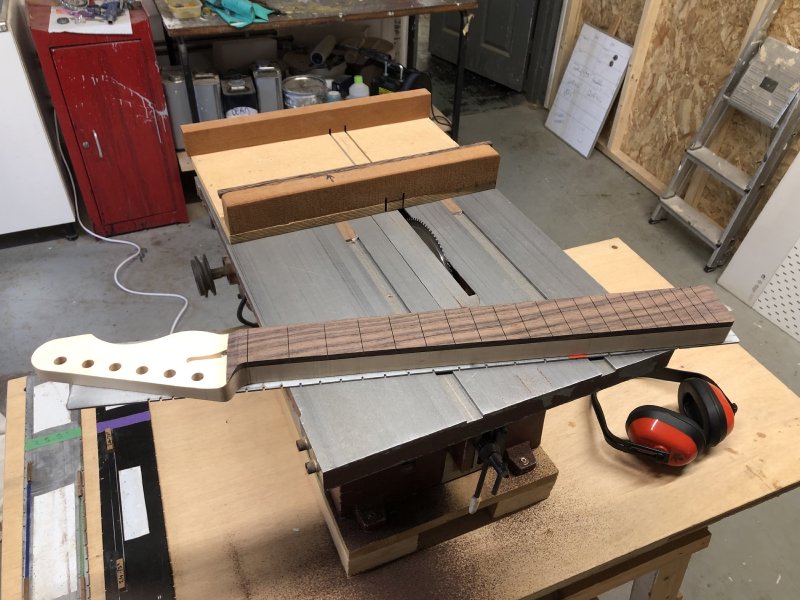
Quite the about turn from last week using a very fine Japanese pull saw to this :)
The table-saw (with an appropriate sized blade) is how both Matt and Jamie cut the slots in their necks. What you see here is I have the neck stuck (using double sided tape) to a metal strip with notches for each fret position (you can see in the lower left there are other strips for different scale length). On the table saw is a sled that has pin in it that will sit in each notch on the metal bar to put me at the right position for each fret. A few minutes of (careful) back and forth with the sled and I’ve done in a few minutes what has taken me an hour or two on all my previous necks cutting the slots by hand.
The only thing this setup doesn’t allow for is cutting the extra slot that you need to let you make a channel for a nut-slot. Matt and Jamie do this on the CNC-router, but given I don’t have the pinned jig for such a thing, I just used the old manual slot cutting jig to add this:

Slower, but I’m only cutting one slot this way now, not all 23 that I’d have to have cut otherwise!
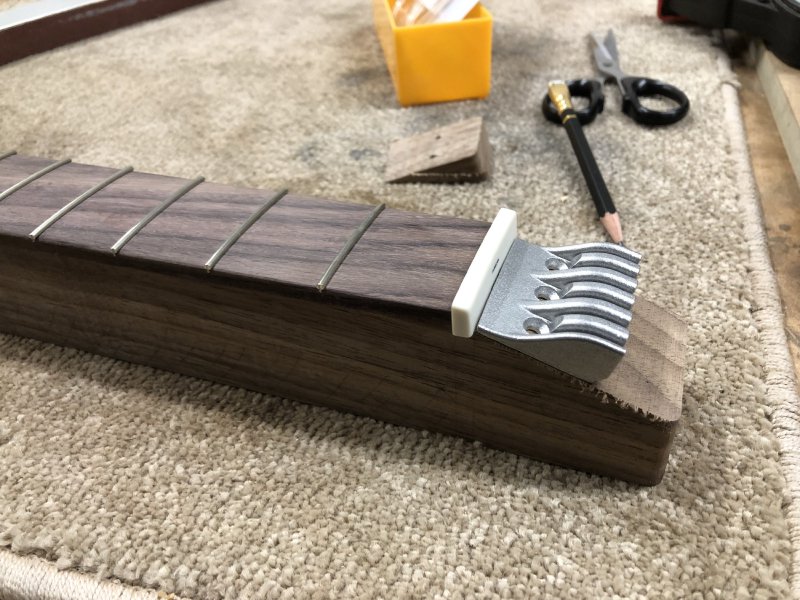
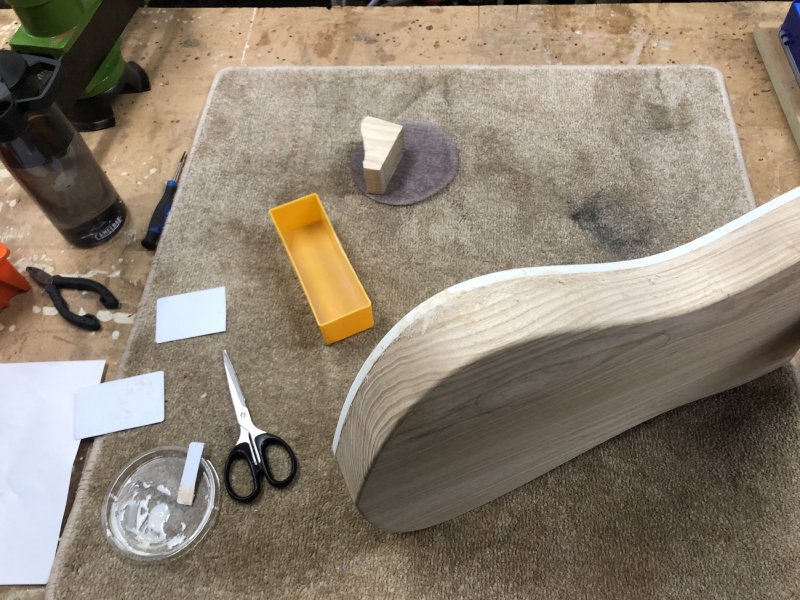
The only other thing I did on the Delfin was to fix up the binding, which as I showed last week had a couple of gaps in it. For the couple of gaps visible from the front where tape hadn’t been sufficient before to hold the binding flush to the curves I shaped a block of wood to apply pressure as needed and clamped that with a bit of fast-wicking superglue:
For the bit on the side where the tape had lifted the the binding, I consulted with my workshop mates, and the response was just to fill it with glue and then sand into the glue along the edge, being careful not to also sand in plastic. I wasn’t sure I’d be able to avoid the plastic, so I instead went for a mix of wood glue and dust that I sanded from one of the offcuts, which I pressed into the gap using a spatula:
Hopefully this will dry light enough - in the past I’ve found that mixing light wood with wood-glue doesn’t work as well as it does for darker woods, but we shall see when I scrape it back next week.
Liverpool Makefest
And that’s just about it. I did manage one last bit of Liverpool Makefest prep: thanks to being in the workshop all weekend, I was able to finally go through they Frank Zappa back-catalogue properly 😛
At the first Makefest I did there was a wonderfully gregarious couple who stopped by my stand to look at the guitars and asked if I’d ever listened to Zappa, and I had to confess I had not. The second year they stopped by again, and were dismayed that I was still Zappa ignorant - will, should they happen by next weekend, I’m properly prepared now :)
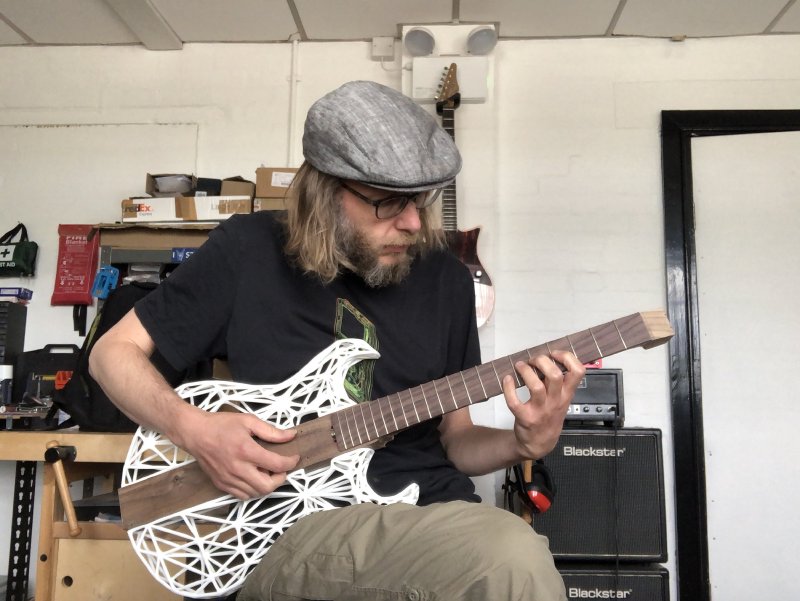
Which does mean that by the time I write my next weeknotes Makefest will have come and gone, so hopefully it’ll have gone well. My plan currently is to try and communicate something about trying different approaches to instrument construction based on one of my demo builds that has 3D printed controls, the 3D printed body I got from Warwick University a while ago, and Älgen in whatever state it is in. It’s sad it won’t be a playable instrument, which I think weakens the narrative somewhat, but with luck I can hopefully inspire someone out there that there’s new and interesting approaches to these things out there that they might like to try.
So if you’re in the area next Saturday please do stop by and say hello!