A Week in the Shop
Published 12 Mar 2023
Tags: älgen, amp, dalarna, design, fusion 360, hästen, website
It’s was a busy week last week, with a lot going on, including finally having a guitar reach the “instrument” phase rather than the “pretty object” stage, which is such a huge milestone. I’m always very cautious around getting sucked into seeing what looks like a guitar and feeling a sense of achievement - I have to remind myself that unless you can make music on it, it’s not really a guitar. So it’s with some relief that even though Älgen still has a few steps to go before it’s finished, it crossed that important threshold, and I feel I can finally start to take pride in what I’ve accomplished.
Älgen
After what feels like far too long, Älgen finally became playable this week, which is a huge relief and cause for celebration for me.

It’s not quite finished, but it is close enough that I got to plug it into an amp and take it for a spin:
I’ll save all my gushing and notes on what I’d change for the next iteration for a proper write up once I’ve had more time with it and it’s actually finished, but I will just say I’m really pleased with this as an instrument. It plays well, the centre of gravity is in the right place despite the unusual construction, and the neck and fretwork is the best I’ve done (thanks to the guidance of my workshop-mates Matt and Jamie).
Of course, it’d not be this project if there wasn’t some stumbling blocks along the way :) First up I had to string the guitar up, mounting the unconventional Mera Submarine tuners on the 3D-printed baseplate I made for them which I installed last week.
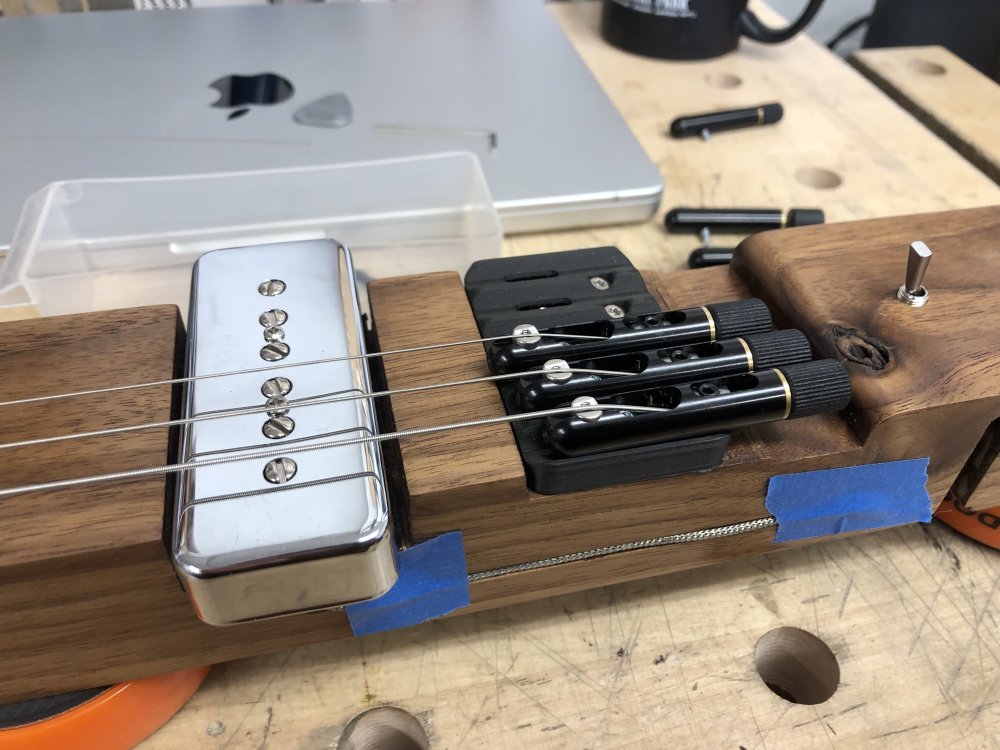
This was a slow process, as I needed to make sure I was using the right tuners for the right strings, as they’re subtly sized differently for the wound and unwound strings, which I forgot initially, so had to start over after I took the above photo. It’s also hard to intonate because the mechanism for moving the bridge is in the plate, and it’s quite hard to access given how I’ve designed the guitar. These bridge units were really meant for being placed at the end of the guitar body rather than in the middle of it, as is a common form-factor on headless guitars, and so I’m using these tuners not how they were originally meant to be used. Still, given that Fender stuck the truss-rod adjustment on the original guitars at the heel of the neck, meaning you had to remove the neck if you wanted to adjust string tension, I don’t feel I’m in bad company here with awkward access to infrequently changed adjustment controls. Still, it is something I’d like to rectify in future revisions.
Once I had it strung up, I then discovered that the volume control potentiometer I’d installed was broken, and so had to remove it and install a new one:
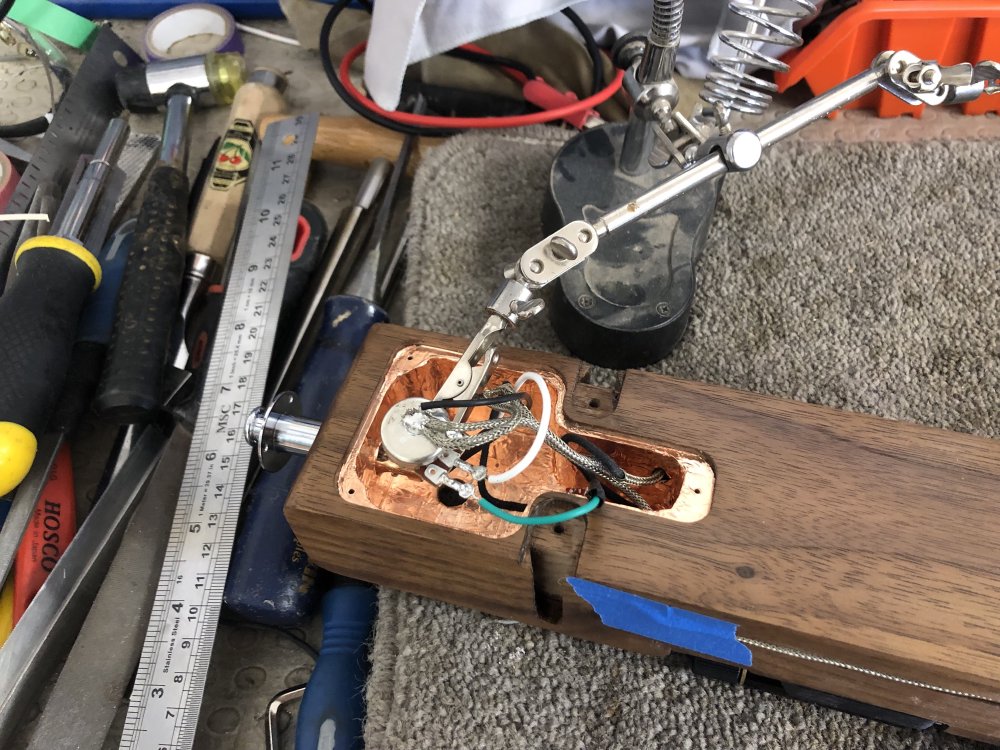
It’s rare that components like this arrive dead, which is why I didn’t think to test it before installing it. I was fortunate that Jamie had a spare small-format pot I could use, as I didn’t have an appropriate one to hand, otherwise it’d have been yet another week of delay!
Whilst I’m excited that Älgen is finally an instrument, there are still a few tasks to be done before I can consider it complete: I need to polish the frets properly, which I’d been holding off until I was happy with how they played; I need to add bits like the neck strap button, and secure the tail strap button/jack with screws, and secure the controls. Dotting the ‘i’s and crossing the ’t’s as they say.
After that I’m looking forward to playing it and getting others to play it so I can get feedback on what works and what needs improving.
Hästen and others
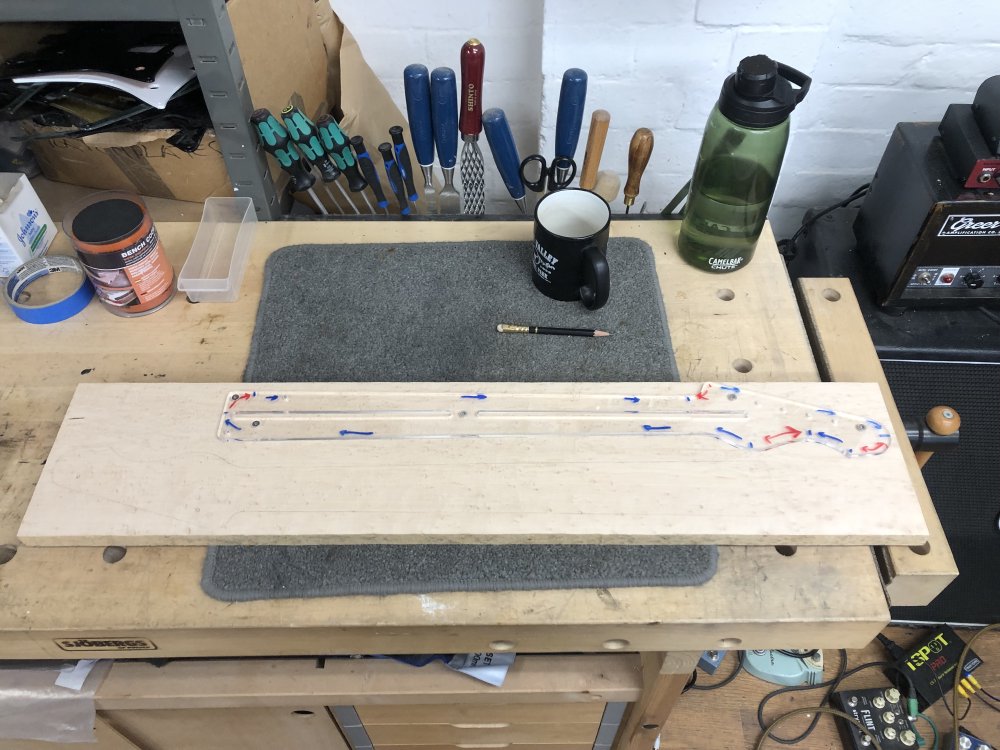
Having had a major success, I spent quite a bit of time in the workshop just playing Älgen, and so didn’t make huge progress on other builds. I did make a start on the neck for Hästen, that last Mustang style build I have left over I talked about the week before last. The wood I have for the neck for Hästen, a nice bit of birds-eye maple, is actually big enough for two necks, so I ordered some matching birds-eye maple fretboard blanks to let me make two necks, and I also ordered the truss-rods and fret-wire to go with them.
You can see the first neck being marked out here:
With the necks marked out, I then liberated the first one on the band-saw as much as I could, ready for it to be trimmed flush on the table-router in the near future:
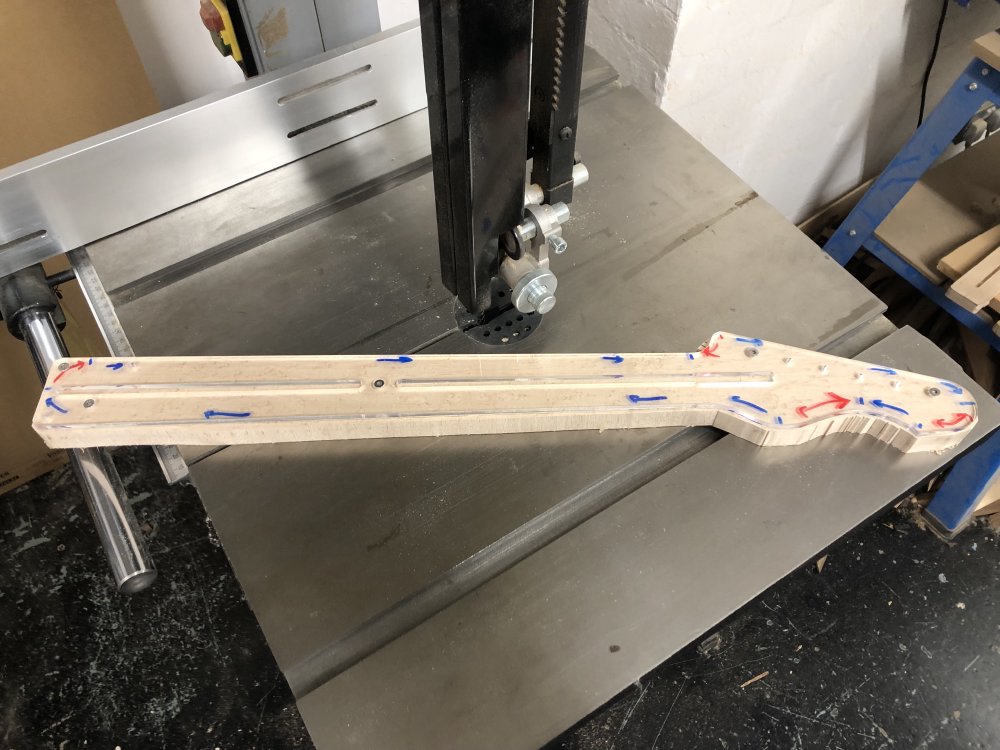
I’d have done the second neck at the same time, but I wanted to make that a 25.5" scale length, and the template I have for that is of the older design, before I started adding the bridging material in the middle of the truss-rod guide, so I’ll need to make a new one of those first. It’s a small thing, but it definitely makes the template stronger, something important when using the table-router, which is quite a strong-willed machine.
Whilst I was laser cutting some templates for fixing up my amp (see below) I also made some new pickup mounts for my old workshop test build:
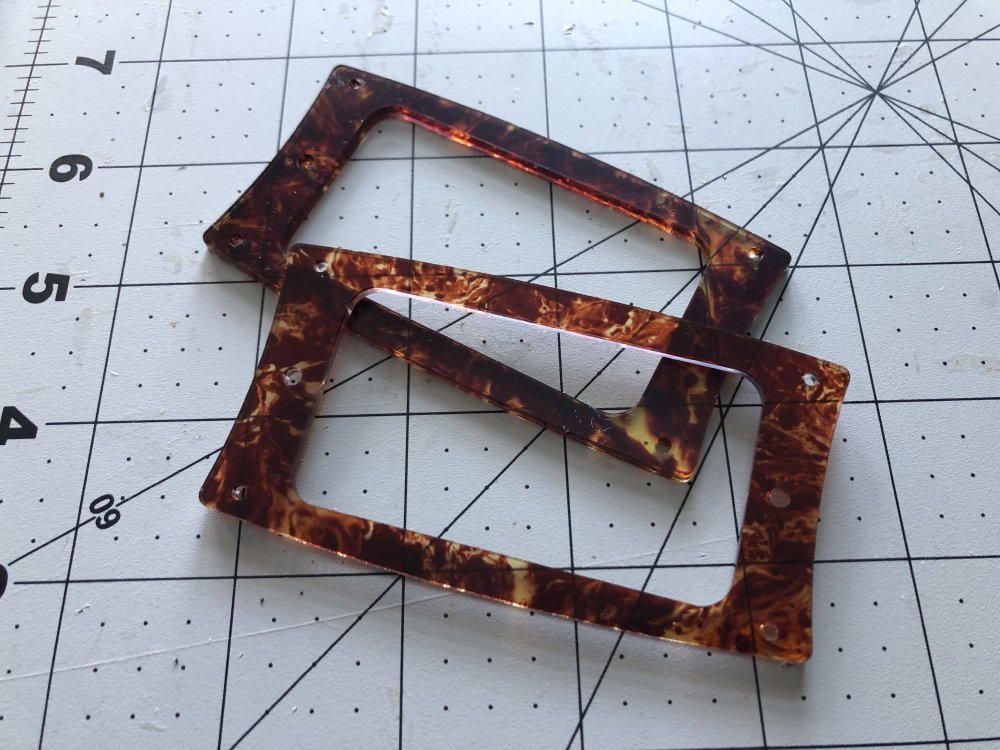
I did have some like this, which you’ll have seen in previous pictures of this guitar in the past, but they were cut for humbuckers with caps, and these are a better fit for the cap-less humbuckers I have for this guitar.
Dalarna
Recently I was playing one of my older Mustang builds, just as a reminder of what it was I made, what was good, what I’ve got better at since I made it, and what I’d still like to improve upon further as a builder. But one thing that became apparent to me is that, as a player, 24" scale length isn’t my thing: I have large hands, and I often am drawn to playing in the 12th to 17th fret range, and for that on a 24" scale length things get kinda cramped.
It dawned on me then that I don’t have a 25.5" scale length guitar design that resonates with me still; I’ve invested quite a bit of my guitar building life into 24" scale guitars as that’s what people asked of me. The idea was that Verstaden was meant to fill that spot, but as I progress the build, I realise that unlike it’s siblings, Älgen and Delfin, whose designs I feel erally speak to me, Verstaden just doesn’t quite do it. In particular, it doesn’t speak to me in the way my old telecaster guitars do: I love their simplicity and ruggedness, they’re just workhorse guitars without frills that just invite you to play them. At least for me - everyone is different of course.
So I decided to ask myself this question: if I was building a telecaster today, what would I make? It’d not be a telecaster, but what could I make that is both my design, in that it uses the techniques I love to mix, and also sparks the joy I get when I pick up my own daily player?
So as an exercise I went back to this guitar, the second guitar I built:
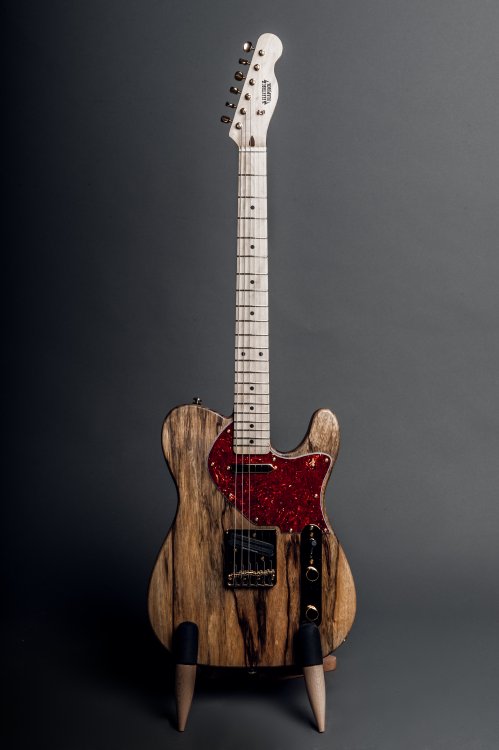
This is the Chuncaster: a metal inspired t-style guitar that I made for my brother when he was in the band IKARI. This guitar was an important one for me, because I got to see my brother play it at one of IKARI’s early gigs at King Tut’s Wah Wah Hut in Glasgow, a venue I used to go to as a student, and seeing how that instrument formed part of why that room full of people were having an amazing night was what lead to me wanting to keep making guitars.
So I went to Fusion 360, and did what I’ve not done for a good while, which is design a new guitar model. I say new, as one is always influenced by the past, and in this case I’ve tried to take what it was that I liked from Verkstaden, blend in what inspires by about Delfinen, and be true to what I love about those old telecasters. This is what I came up with:
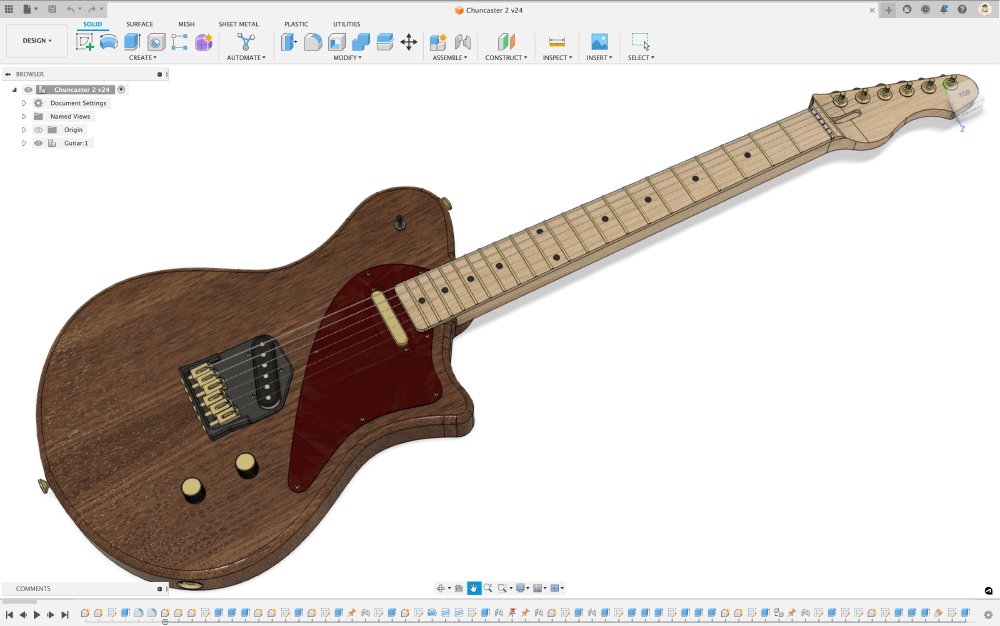
The outline still follows the lines used in Älgen and Verkstaden (it might not be obvious, but Verkstaden’s profile (which you can see below) is the same as Älgen, just with one side filled in), but using the somewhat Danelectro inspired shorten from that I used in the Delfin design. I took my existing 3D-printed bridge design and extended it crudely to suite the t-style look, but I’ll want to refine that more if I run with this design. I’m quite taken with it on CAD, but it’ll be interesting to see how it feels in the flesh. I did try to visualise how it might look by drawing some new lines on the current Verkstaden build, to see if that would help:
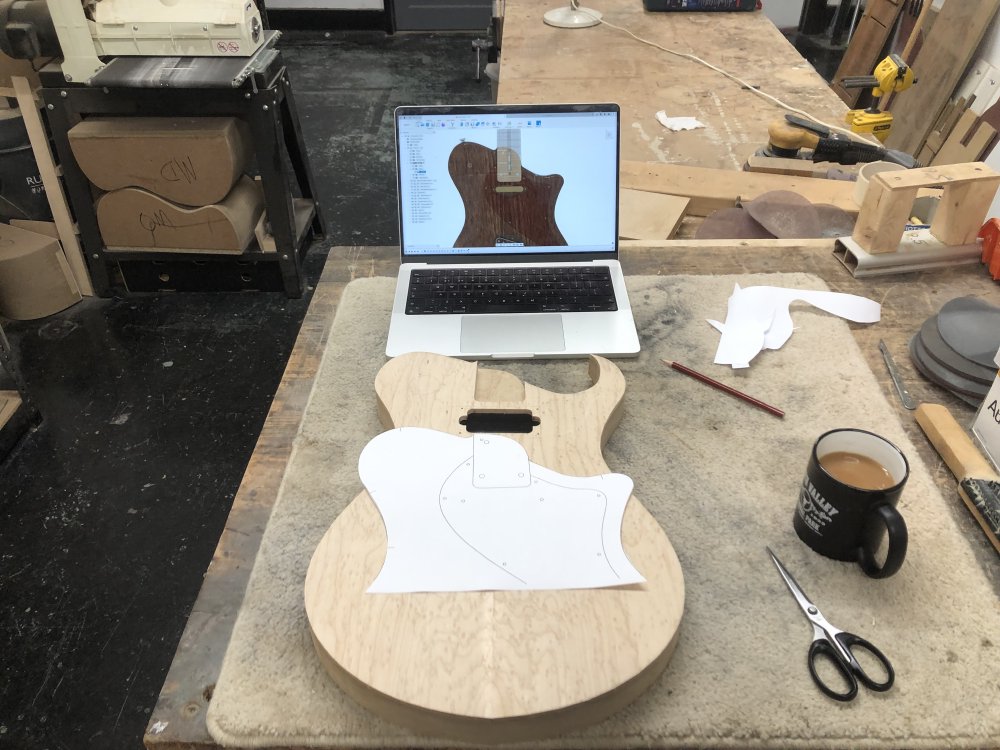
Alas, it didn’t really work for me, so I suspect the next stage will be to 3D-print a smaller version. I’ve done this in the past and it really helps me when I can see the actual lines.
Amp repair/upgrade
A while ago the power transformer on the amp I made for myself burned out. I chatted to someone with a bit more electrical knowledge than me, and their advice was to upgrade the transformer, as a like for like replacement was likely to just fail in the same way after a few years again, and power transformers are not cheap. The downside was that the new transformer was somewhat larger, and so I needed to re-work the chassis for the amp to accommodate it. This was 18 months ago, and whilst the new power transformer turned up not long after, I’ve just not had the time ato get around to it. But at 18 months it’s getting a bit silly, so I decided to finally try get around to moving this forward.

The first stage was to remove the old transformer, and work out where to position its replacement. There’s plenty of room in the case for the circuit, but it’s not well laid out, so fitting the replacement will probably be quite constrained, particularly once you allow for the fact that you have to clear the speaker too as you move the chassis in and out at an angle.
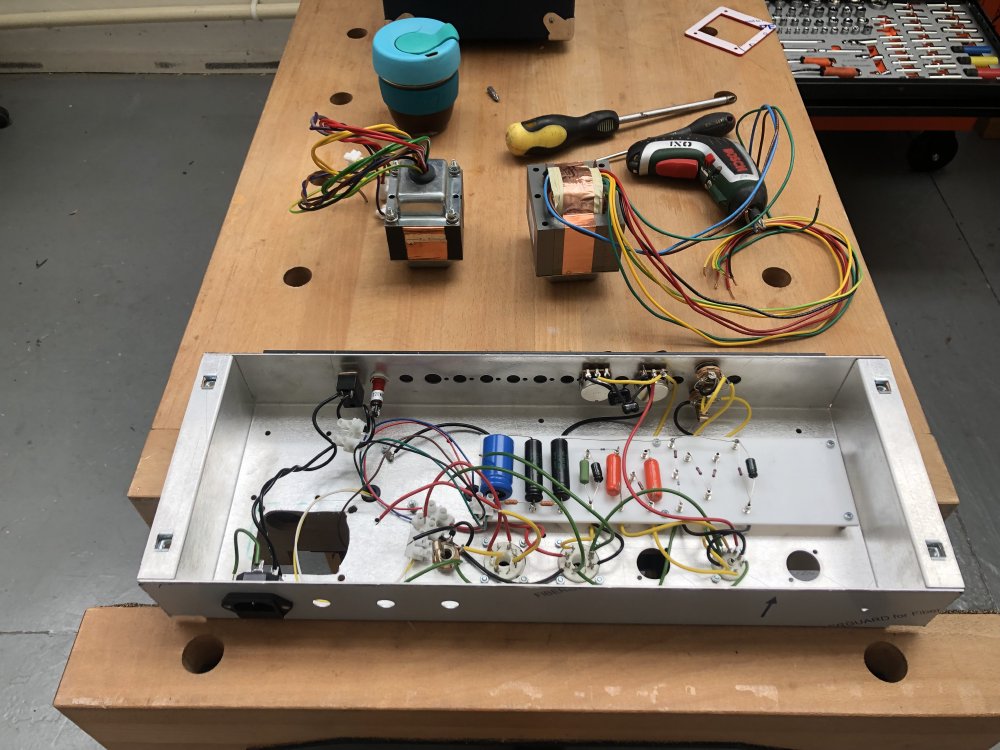
To help both work out the fit, and to give me a template for cutting new space in the chassis I laser cut a mount for the new transformer. The transformer didn’t come with any tech-specs for size, so it took me a couple of goes to get a good fit.
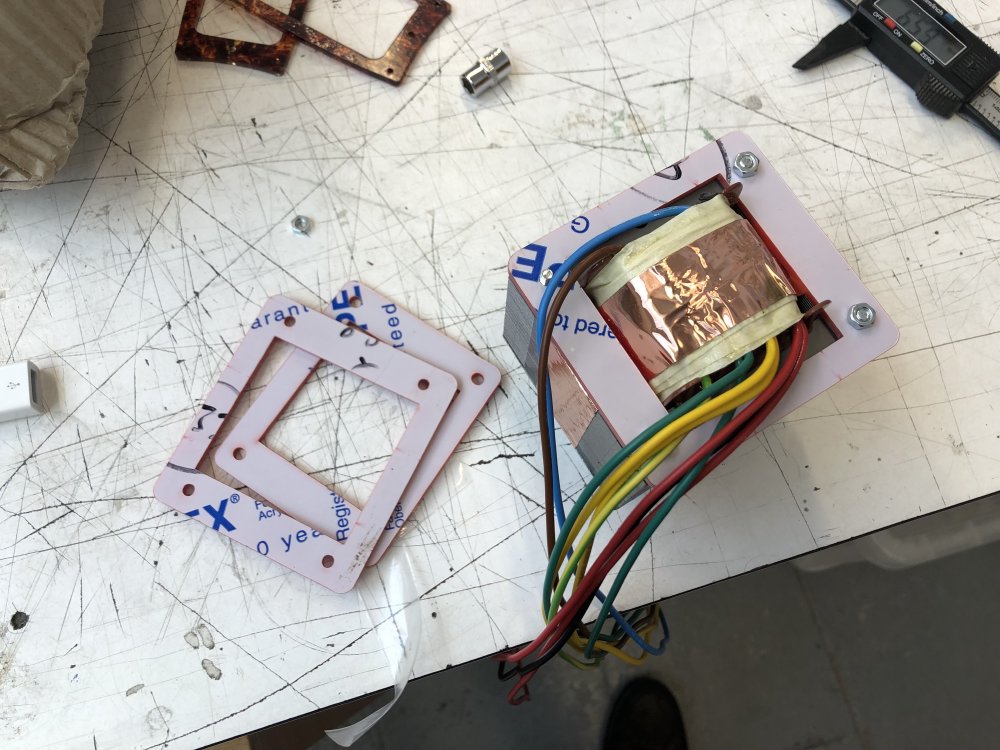
Still, once done, I was able to work out where to try place the new transformer:
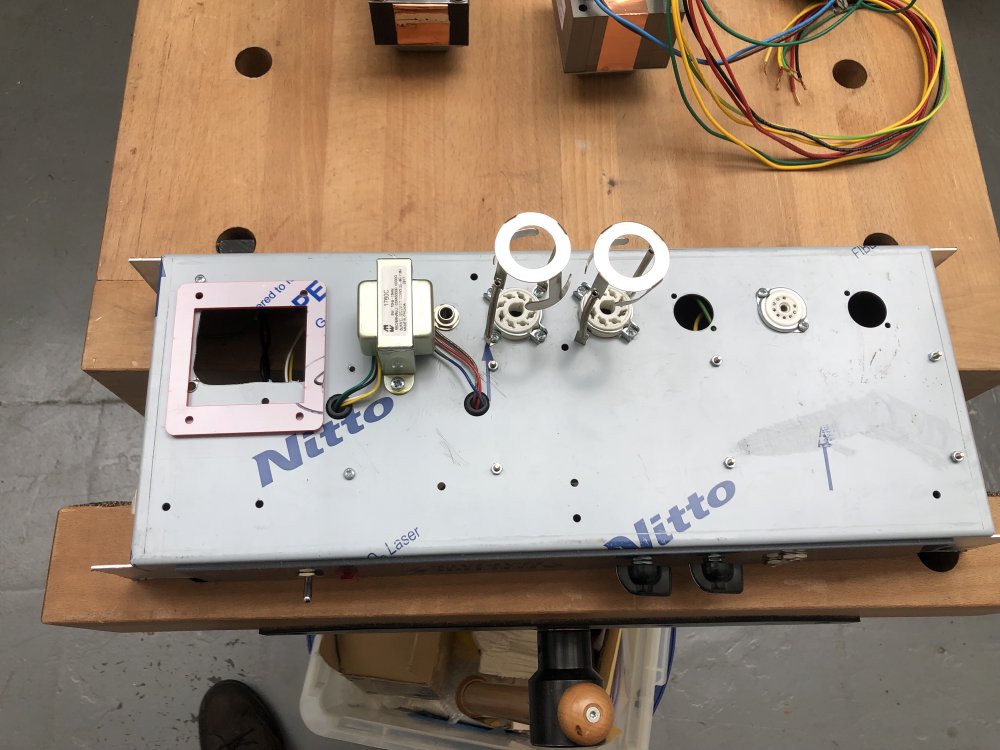
With the location for the new hole cut, I then had to embarrassingly look up how to use a spring-loaded centre punch, which I last used about 5 years ago when I originally made this amp!
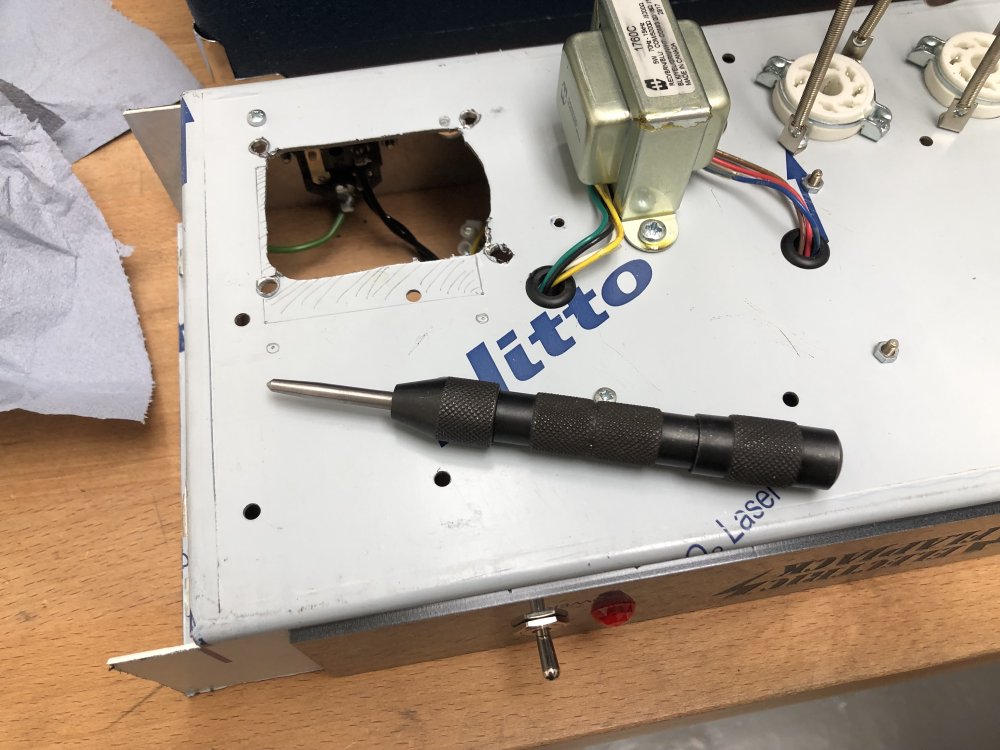
Unfortunately, after all this prep I wasn’t able to do much more, as the workshop at Makespace was being used for training, and thus I couldn’t get access to the pillar-drill. Still, it feels good to have finally got the ball rolling again on this one!
Website updates
Whilst not as glamorous as designing or building guitars, I spent a bit of time this week just tidying up this website. The landing page is now viewable on a phone for instance, which isn’t sexy but is important if I want people to discover what I’m doing. I’ve also continued to re-work the site to have better alt-text support for images, as I know I post a lot of pictures here and I’d like the pages to still be accessible without them. I started doing that for all blog post images since the new year, and now title images used in list pages should have them too. Still not close to 100% coverage, but it’s getting there.
I also went through and fleshed out the builds page, both adding the current in-progress builds, along with a few old projects that I’d missed off, like the beard fuzz pedal I built and the cigar box guitar. I suspect I’d left these off originally as they felt less “professional” than just listing the full sized guitars, but I think they’re still interesting and contribute to the narrative of whatever this guitar building endeavour is. The pedal was one of the earlier examples of my using 3D-printing as a significant part of a build for instance, and the body of älgen shares a lot in common with the design of a cigar box guitar, and so I doubt I’d have made this crazy new guitar if it wasn’t for first building that cigar box.