A Week in the Shop
Published 26 Mar 2023
Tags: älgen, design, ESP32, pickups, verkstaden
In the last week I’ve had a few people say kind things about these weeknotes, so my thanks to them for the kind words of encouragement. There’s many reasons I spend time writing these notes each week, but knowing other people go something out of them is definitely a key motivator.
In particular, I want to thank Scott Leishman, who mentored me back when I as an intern at Xilinx in Edinburgh many years ago when I was at university. To have Scot leave me a message that he appreciated these notes feels particularly fitting, as he’s one of the people who, during my internship, conveyed to me that despite having your head down on delivering a thing, you need to make time/space to be exposed to new ideas and fresh thinking, it doesn’t just happen otherwise. After my internship, rather than trying to snag me into Xilinx, Scott also encouraged me to stick with university whilst I had the opportunity to do so, again pushing me to keep learning.
I mention this partly because I don’t think I’ve ever properly thanked Scott for all the encouragement, and being the unintentional role model he became, but also because it’s the kind of thinking that Scott encouraged me in that shapes a lot of what I do in the workshop and these subsequent notes. Thank you Scott 🙏
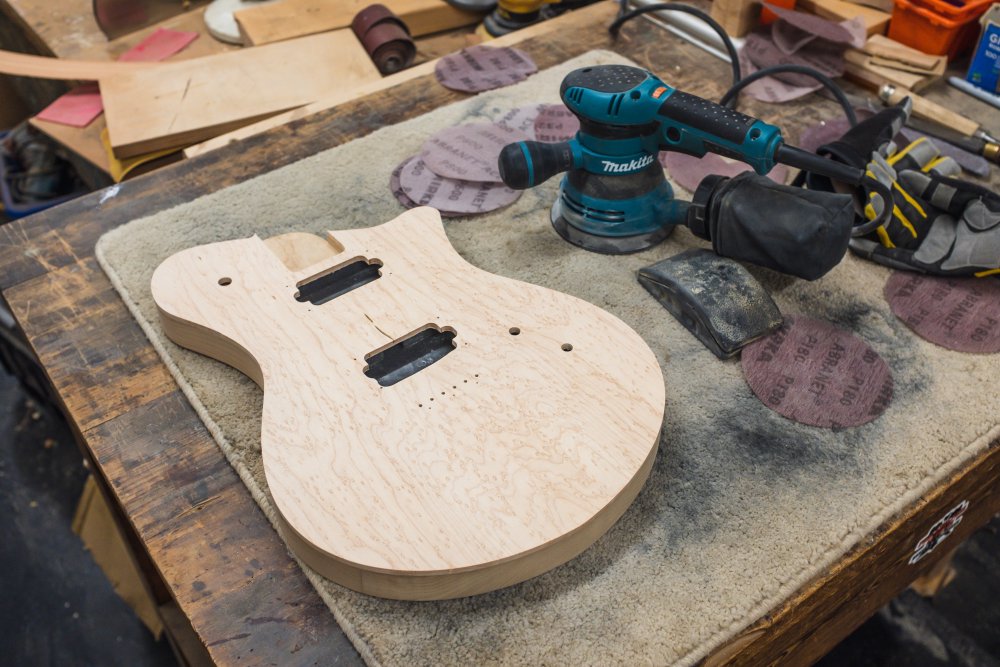
Älgen
The week before last I’d finally got Älgen plugged in and playable, but there was a little more detail work still to do, so a priority has been doing that work.
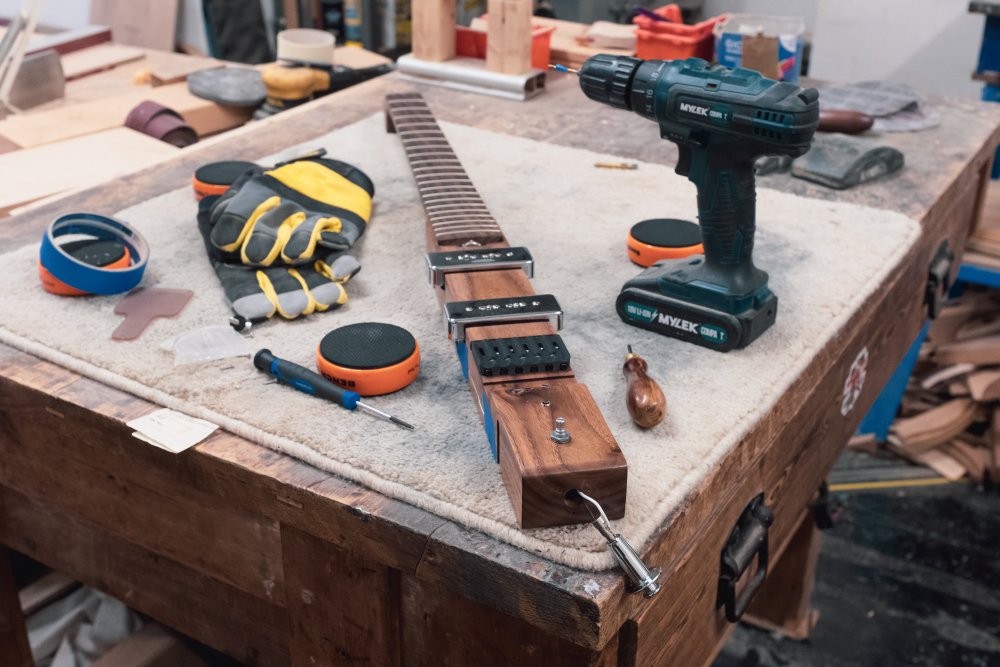
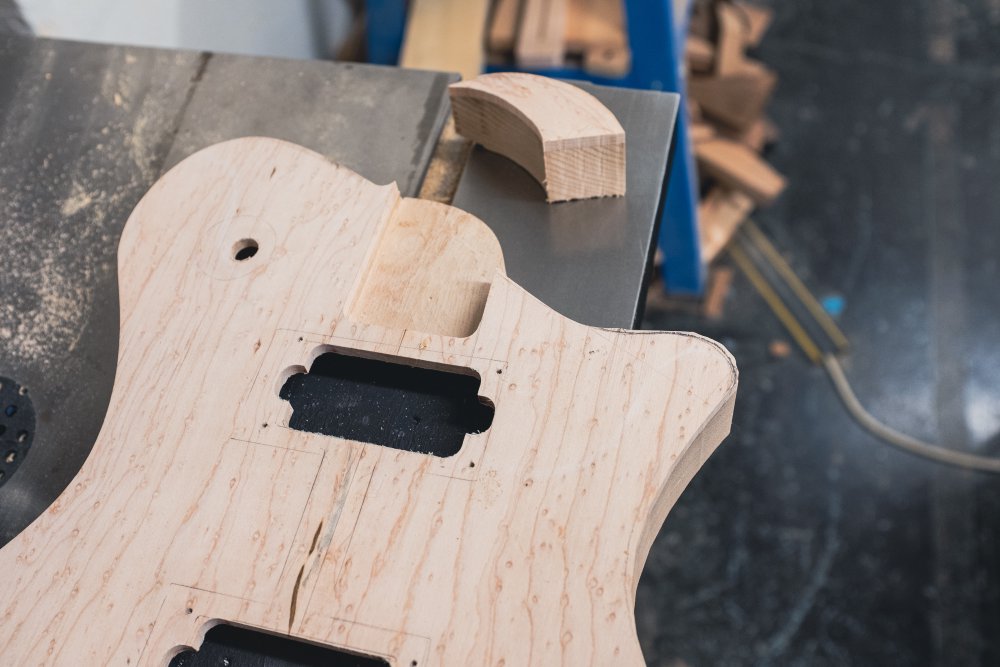
One slight oddity of the design of this guitar is where the strap buttons go. The tail strap button is actually also the cable jack, as you find on electro-acoustic guitars, and the photo above shows me drilling the pilot holes for the screws to properly secure that one. The other strap button would normally go on the horn of the guitar, but that’s part of the 3D-printed wings, and I didn’t like the idea of that lattice holding the load (as light as this guitar is). Instead I took a leaf from the Gibson Flying-V, and put the other strap button just behind where the neck transitions into the body:
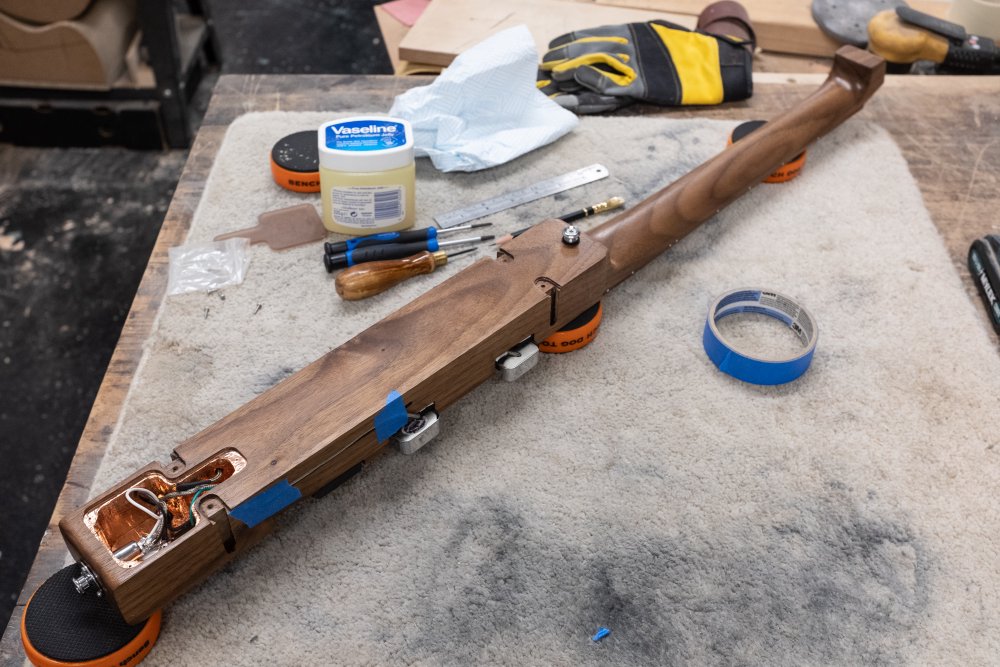
Apologies for the poor quality photo - I was using a different camera this week in the workshop, and accidentally left it on too shallow a depth of field. So much for using a better camera to improve my picture quality. Still, you can hopefully just about make out what’s happening there.
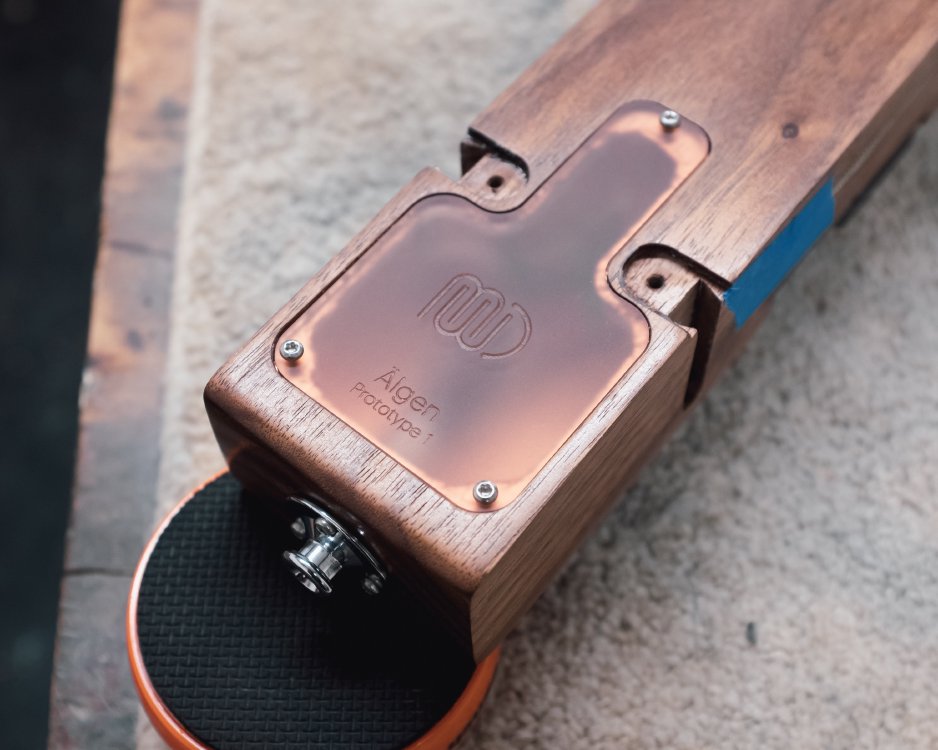
I also fitted the electronics cavity cover, which kinda made it feel official that this build is drawing to a close:
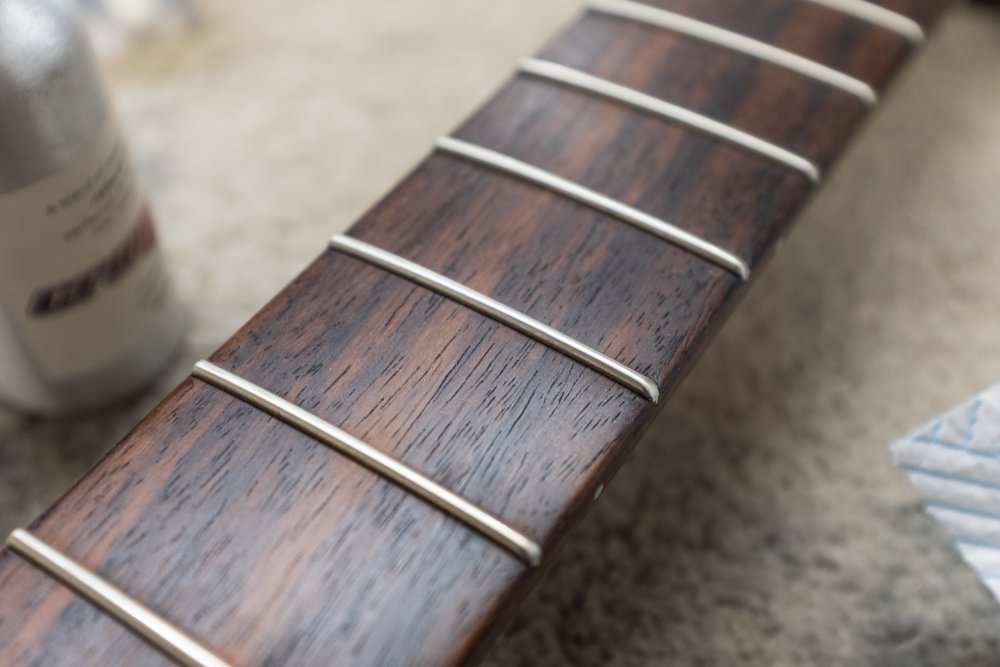
Whilst I had the strings off, I gave the rosewood fretboard a final oil. With rosewood you’re not oiling to build up a lacquer as you do when oiling maple or indeed the rest of the guitar if you finish it that way, but rather you’re just topping up the natural wood oils and effectively leaving it unfinished. Given I’d cleaned all the crud out of the fretboard left over from the fretwork, I wanted to just give it a bit of oil to bring out it’s colours and help protect it from pesky fingers.
All of which this build is kinda done:

Two tasks remain:
- I need to 3D-print a volume control. I was hoping to use the new Formlabs resin printed at the local maker space to do this in clear plastic, but it seems they’re having issues with the printer logistics that mean it’s been without clear resin for the last few weeks and there doesn’t seem to be timeline to that being resolved, so I fear there’s a Shapeways order in my near future. I could just use an off-the-shelf volume control, but at this point that seems like a silly detail to ignore.
- The 3D-printed wings are already starting to get dirt on them, and I worry about them staining, so I suspect I’ll need to coat them with a light varnish or such. Adan gave me some guidance on that, but first I’ll need to actually talk to my workshop-mates about the logistics of using the spray-booth we have, as I’ve never used it before.
On the topic of 3D-prints, I’m also still uncertain about the feasibility of the bridge base-plate I made on this build. Whilst the 3D-printed bridge plate I made for more conventional guitars has been holding up well, that shape lets me create full carbon-fibre layers in the piece, whereas for älgen’s bridge plate that wasn’t possible due to the way the saddles work, and so there’s narrow strips of carbon-fibre in there rather than one continuous layer over the entire piece. Whilst it hasn’t obviously warped, when I came back to the guitar after letting the strings bed in for a couple of weeks things felt a bit looser than I recall having left them. I tightened it all back up, and I’ll see how it goes over the next couple of weeks - I may have to print this one in metal at Shapeways if the output of the Markforged printer I’m using locally isn’t holding up. We shall see.
But despite these last niggles, it’s still okay for getting a tune out of as is. I wasn’t really in the mood to make demos, but when one has a guitar it’s hard not to just play it :)
Not my finest playing, but some proof again that it lives :) I’m really pleased with the sound of these P90 pickups. I play P90s in my daily player, but they’re much more accented, as I was very specific about what I wanted with them. The P90s in Älgen do a great job, at least with that amp, of having the body of a humbucker sound but with the clarity from a single-coil. I’m looking forward to exploring what they can do more in the coming weeks.
Probably the most frequent question I get about Älgen (annoyingly not “please can you make me one, I can pay” ;), is what is the impact on the sound of the guitar from having a body that is so different. One thing I note from just stringing it up is that it’s actually pretty resonant as electric-guitars go. I’d be tempted to say this is down to using the finest tone-filaments in the 3D-prints, but I suspect it’s helped by having just one bit of wood run all the length of the guitar.
I wasn’t really set up for proper audio fidelity testing in the workshop, but I took this video when I was re-stringing it to try and capture what it sounds like acoustically:
Not great audio, but hopefully gives you some sense of what’s happening. I also did this one plugged in, which attempts to capture the sustain (with apologies to SRV). I say “the amp is turned down low” - I should point out that this is a gigging amp rather than a home practice amp, but again, hopefully it gives you some idea of what’s going on.
Almost there, but it does at least mean that I should be able to make good on my promise from Liverpool Makefest last year, where I showed Älgen half built and promised to return with it completed. I mention this as they just put out their call for makers to participate, and I’ve thrown my hat in once again. Looking forward (and terrified, if I’m perfectly honest :) to having all those I turned away last time be able to actually play it this time.
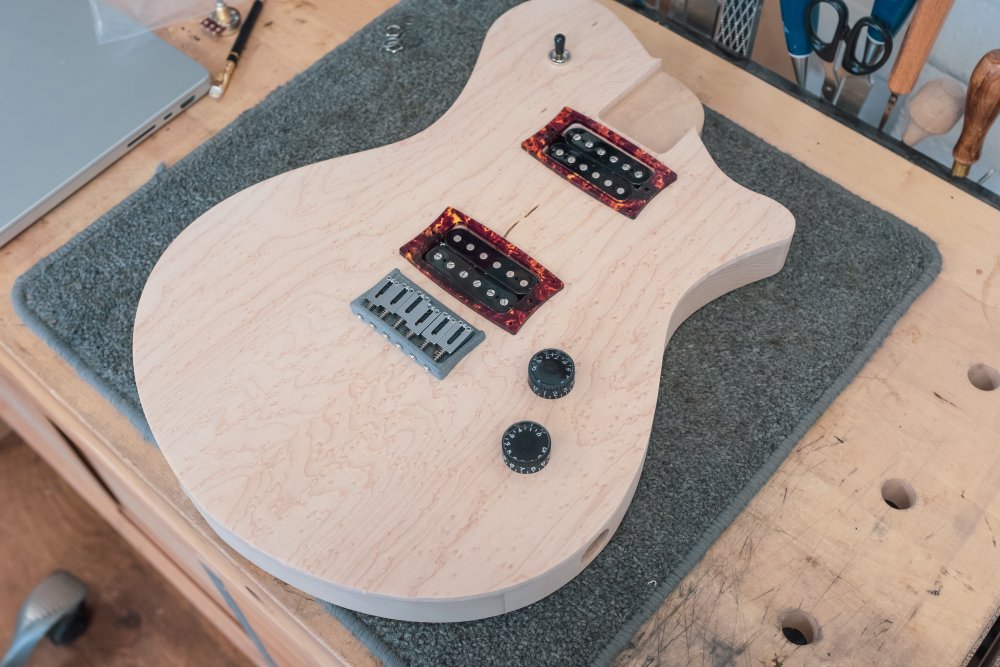
Verkstaden gets a remodelling
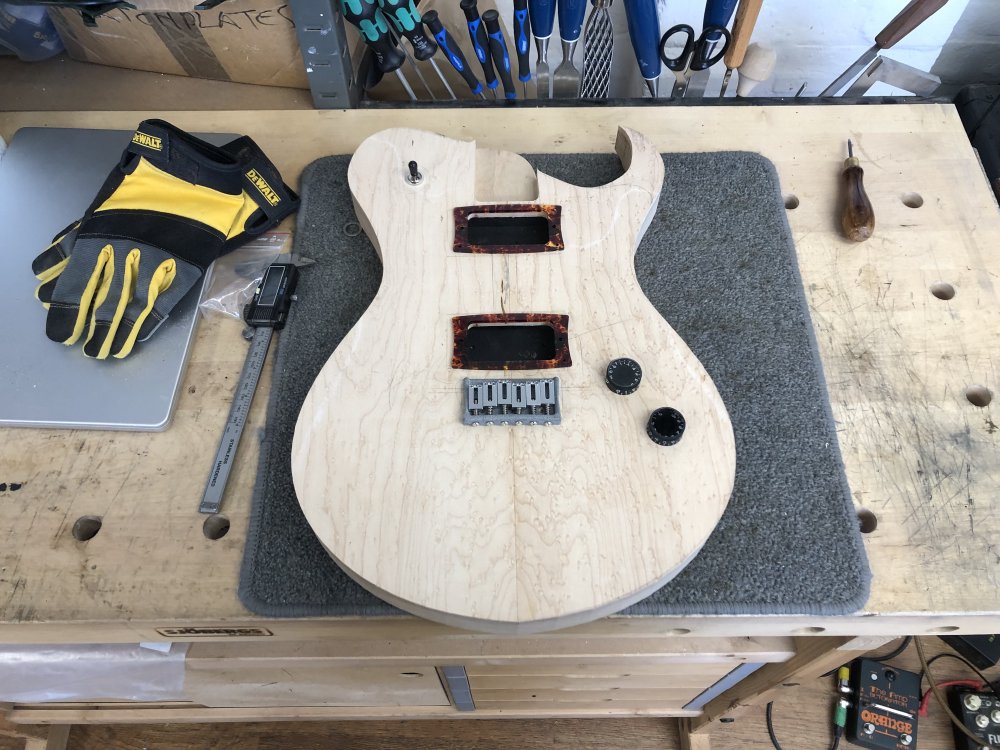
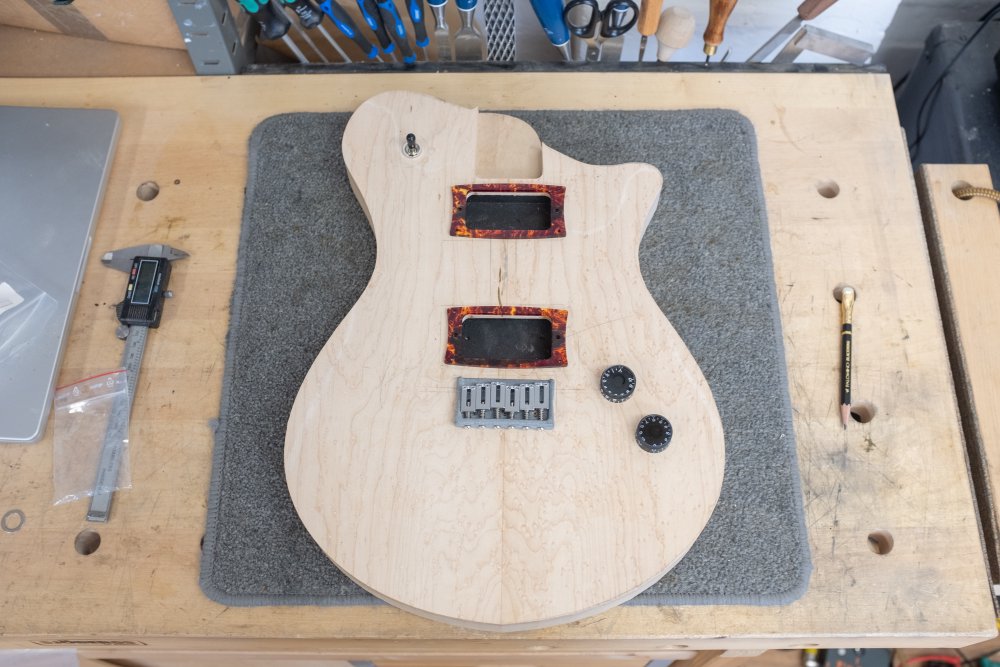
With Älgen drawing to a close, I spent the rest of my time in the workshop focussing on Verkstaden. My initial aim was to just get this guitar body over the hump of being somewhat finished to some final form, starting out with drilling holes for the pickup-selector switch and the volume/tone controls. As I went along, I laid out all the bits on the body, to check where I was with things:
The name Verkstaden is Swedish for “The Workshop”, and I picked that name as I originally started this body in 2020 as a test piece for when I moved to my new workshop to let me figure out what I did and didn’t have in my new space, what changes I’d need to make to my workflow, etc.
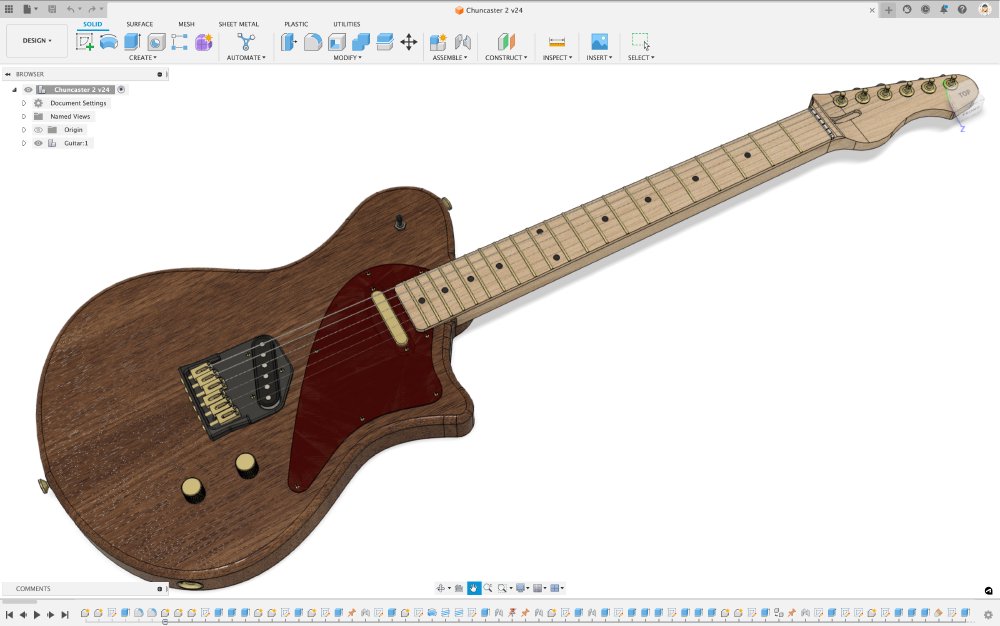
But, my Swedish being somewhat poor, I actually keep accidentally referring to it as “Verkligen” in my head (and, I noticed it’s even called that in Fusion 360 🤦🏼), which is Swedish for “really”. I assume this is my subconscious having a joke, as I’ve never really bonded with this guitar design: given how unhappy I’ve been with it, calling it “really?” does seem a bit more fitting. Nice one, subconscious.
So, on that note, looking at the guitar laid out like this, I decided to change things up. A couple of weeks ago I mentioned that I had come up with a new design for a guitar, which is a riff off both this design and my Delfin design, merging them into something that was more to my tastes:
Back then I just printed out the new shape and laid it over this body to try get a sense for how it’d feel, and it didn’t really work. This week, I decided that, to hell with it, this guitar has never sat right with me anyway, so I might as well do the conversion from the old design to the new: if in the end I don’t like the new design, I’m not really any worse off than when I started, as I wasn’t that taken with the original. So, it’s time to say goodbye to the more aggressive Verkstaden design, and hello to the more subtle swoop of the Dalarna design:
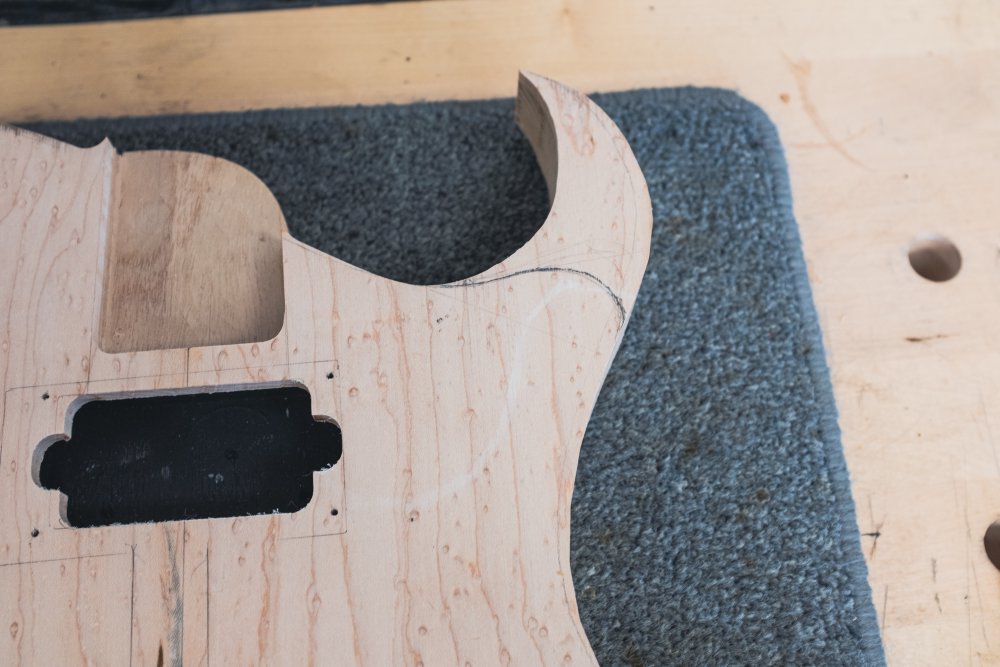
Happy that I’ve copied the outline correctly, it was over to the bandsaw to make some non-reversable modifications…
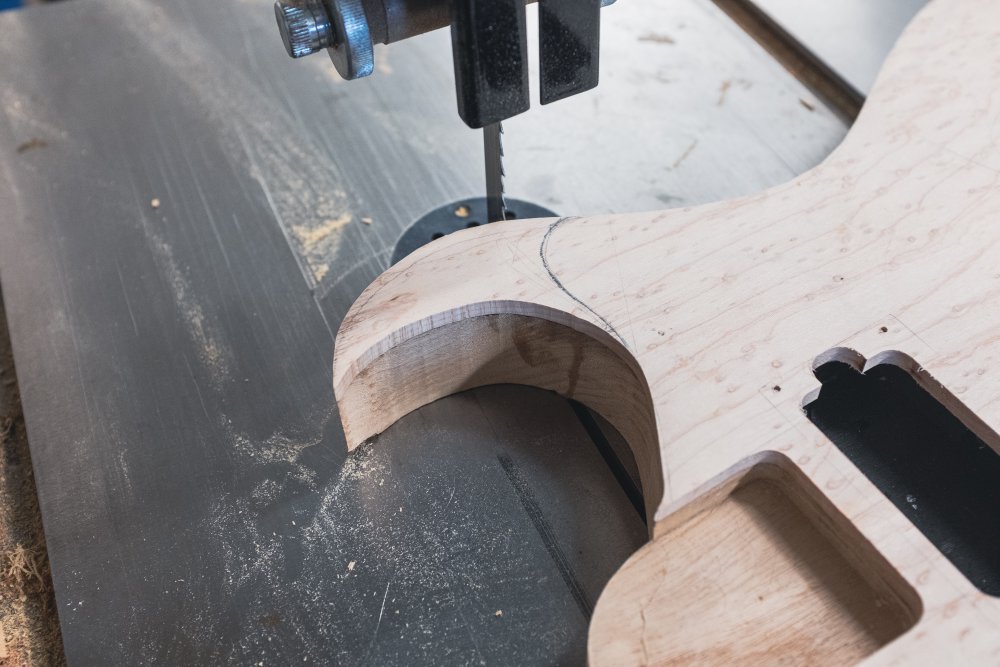
A few careful cuts later:
The end of the run for that particular design, at least for now :) A bit of time on the spindle sander, and the shape was pretty much where I wanted it to be:
I’m really quite pleased with the change. This guitar is not quite going to be the Telecaster inspired guitar I had in mind when I designed the Dalarna model, due to already having the pickup cavities routed out for a pair of humbuckers, but it still lets me see how well the overall shape works, and I like it. Just because something looks good in CAD doesn’t mean it’ll look good in reality, but this time it’s worked out I think.
Just out of interest, I did laser-cut the telecaster style pickguard to see how it looks in place, and I REALLY like that.
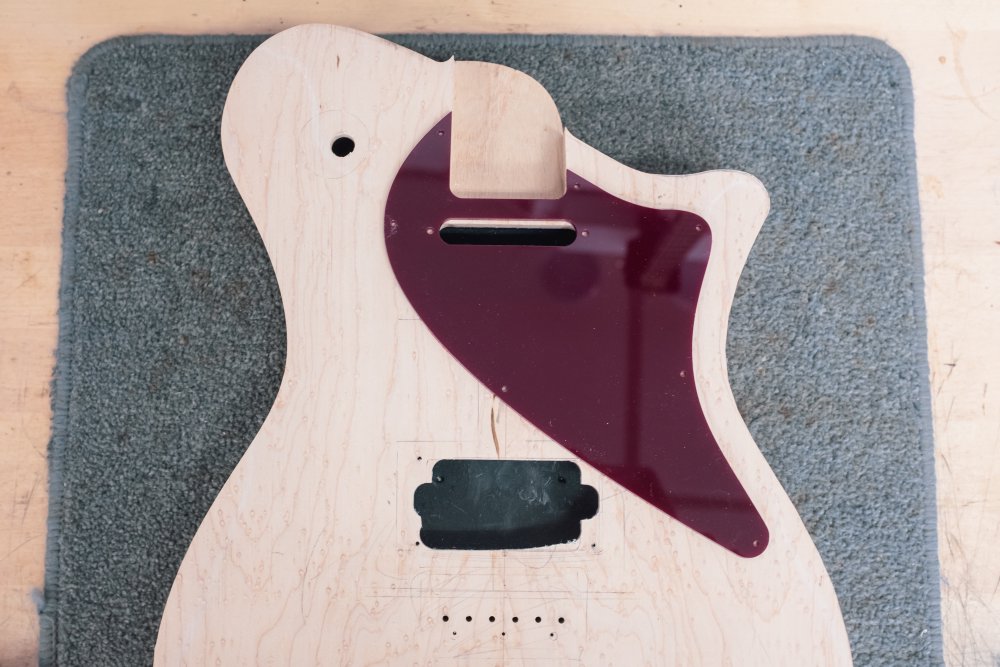
But that’ll need to be another build in the future :)
With the change done, I then set about doing all the smaller changes, drilling holes for the controls, rounding over the rear edge, and so forth.
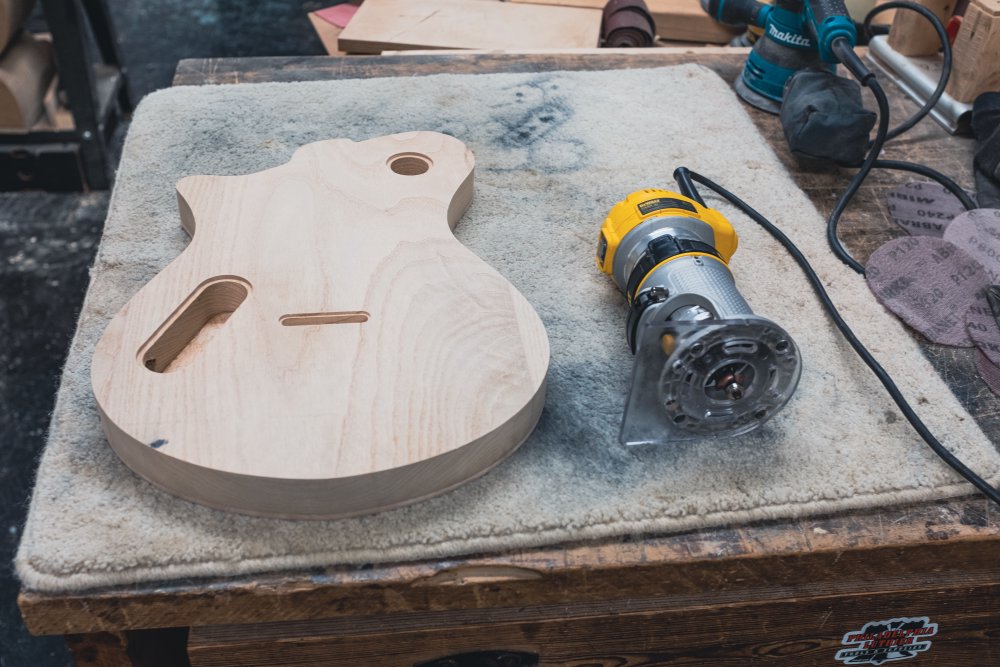
And then a lot of sanding, my favour activity of all.
This was a particularly long process, more than I expected, because as I sanded up the nice birds-eye maple cap to higher grit, it revealed some subtle marks in the wood than ran along the length of the body. I assume they were from when the wood was cut for book-matching, and they were very subtle, and couldn’t get the camera to pick them up, but I had to remove them as it’d be sad to finish a guitar and have them show up in certain lights. Still, beats a gym membership I guess - I ached quite a bit the following day :) Still, worth it for that lovely birds-eye maple.
It was a long day, but I’m really pleased with where this body is now. It’s got over the hump of being something that didn’t quite inspire me to push it forwards, to something where I’m now really looking forward to the result. I have the neck sat ready for fretting too, so it should move forward quite quickly at this point.
The one thing I do think will present a challenge is finishing. The rear part of the body is a exceedingly soft poplar wood. It’s wonderfully light, but I worry it’ll be quite easy to dent. As such I think I’ll want to probably paint it or at least use some other finish that provides a more durable seal than my usual oiling technique. I guess this gives me a second reason to learn about the workshop spray-booth - I guess taking me full circle back to why this guitar was originally started.
Pickup winder
If you missed last week’s notes, then you missed the bit where I decided that it was time to experiment with winding my own pickups, and the obvious path here was to build my own pickup winding machine, because what else would I do with my time? :)
My order of part from PiHut turned up, and predictably things have not been as smooth sailing as I’d like :) Rather than just getting an Arduino board for for this project, which would have been totally adequate, I went for a more powerful board based on the ESP32 microcontroller, which would mean as I do more with this over time (I have crazy ambitions, obviously), this board will allow for that. And I’ve used an ESP32 in the past - at one point when I was thinking about building a pedal board as a thing I’d sell, I designed up a switcher circuit to build into it that was ESP32 powered, but using a different board to the one I’m using now.
The reason I went for a different ESP32 board this time was because of power supply compatibility, but I’d assumed beyond that they’d all be much of a muchness. Oh dear, how naive. The thing I’d liked about using an ESP32 board last time was that although it was more complex, I could still use the nice Arduino software tools to program it, which come with lots of libraries for things like driving stepper motors and displays, the two things I want to do right now. Unfortunately the board I picked this time doesn’t work with the Arduino software, so I had to use their much less friendly tool chain instead. There’s meant to be some tools to let you use Arduino software with the Espressif toolchain my board uses, but it was in a mess, so after fiddling with that for almost an hour I gave up with the idea that this might be as quick to get up and running as I’d hoped.
Now, I guess it’s fair to point out here that I do make my living as a software person, so this is technically all within my remit, but it does move the project from “thing I’m doing for fun” to looking a lot like the duller side of work. It took me three hours just to go from unpacking things to getting the LCD board up and running:

Still, I did learn a lot along the way, and I’m sure all the extra effort required now will pay dividends down the line, but it isn’t where I’d hoped to be investing my time. I just need to focus on the end goal!
Pickup nerdery
I’ve been trying to understand more about evaluating pickups, not just the technical specifications about magnet types, wire gauges, resistances, and so forth, but also how to evaluate what I hear when I play a guitar. It’s a bit like tasting things, like coffee or wine, where you can easily say whether you like or dislike something, but it’s much harder to articulate why.
It’s made further complex because a guitar pickup doesn’t exist in isolation: it matters quite a bit what kind of music you’re trying to play? Is the pickup being used clean, or is it expected to be heavily effected? Are you playing relative to other instruments, and if so are you trying to blend in or stand out?
As a concrete example, I’m not a fan of the bridge telecaster pickup as a general rule, despite otherwise loving (and owning several) telecaster type guitars, but that’s because I tend to play cleanish and tend to just play on my own or over a looper track, so the harshness is a bit much for me, but this is just my context.
Similarly, despite the fact some of my favourite recorded sounds from a guitar are from a Fender Stratocaster (think Stevie Ray Vaughn or John Mayer), yet when I play a strat I them lackluster and uninspiring. I’d always assumed it was because I never had a “good” strat, but I now have come to understand that it’s at least in part because the strat is a neutral guitar that needs some gain to colour it, at least when trying to get the sounds my guitar-heros have gotten out of such an instrument.
I learned a bunch of pickup appreciation from these two videos from That Pedal Show, where they do two deep-dives on the sounds of Fender’s Telecaster and Stratocaster guitars, playing different variations in different contexts to show where they’re work and where they don’t:
These are super detailed and quite long, so not to everyone’s cup of tea (Hi GlasgowDave! ;), but for what I’m trying to research right now, they helped a lot. It certainly helped me pin point more specifically what it is that I was unhappy with with some of the configurations of my guitars, and how much that is just they’re not my cup of tea versus I’m not applying them correctly.