A Couple of Weeks in the Shop
Published 14 Nov 2023
Tags: action, älgen, delfinen, hästen, painting, staining, truss-rod, verkstaden
It feels longer than two weeks since I last wrote my “week” notes, but I think the continuing frustrations on the current set of builds just makes it seem so; I’d love to have some nice wins to share, but I’m still struggling with these builds. As my other-half pointed out, all three builds have me doing something I’ve not done before, and so it’s kinda of to be expected it’d not all be pain-free, but it also hard to escape the feeling that I’m getting worse as a luthier when progress has been as problem-fraught as it has been this last couple of months. But I refuse to give in to that notion, and so I keep persevering - but I do hope at some point to have something positive to report here rather than yet another litany of misfortunes.
I think one thing that makes the high friction on the current builds more notable is that I’ve made a barrier for myself beyond which I struggle to see: I’ve set the bar that I can’t start any new builds or new projects until I ship the current trio of guitars. But as my workshop-mate Jamie pointed out, one should still try to have a plan for what comes next to keep you motivated. Thus I’m going to try plan out what I want to build in 2024 over the coming weeks, so at least I have something to look forward to beyond getting these three guitars over the hump.
Certainly I want to do another 3D-printed guitar, an Älgen II if you like. For that I found these Lace Aluma 90 pickups that I think would work quite well in that design - they’re both modern looking and effectively hollow, so I think will work quite well in that context. I also want to do a simple Dalarna build: I still love my tele-style builds as workhorse guitars, and this is meant to be my take on that, and it blows my mind that I did that sketch back in March and it’s now November. Suggestions for anything you’d like to see me try build also welcome - I miss having client work to help pull me in new directions, so if you have a thing you’d like to see me tackle on the blog, let me know and I’ll perhaps work that into my next set of builds.
Anyway, that’s all for the future, for now, let’s see how the last week or two went.
The necks
Overall, the necks are all going okay. In the last week notes I’d started oiling two of them, and I had re-done the fret ends on the last one, delaying it joining its siblings, but now now I have all three necks going through the oiling process, just at slightly staggered numbers of coats:
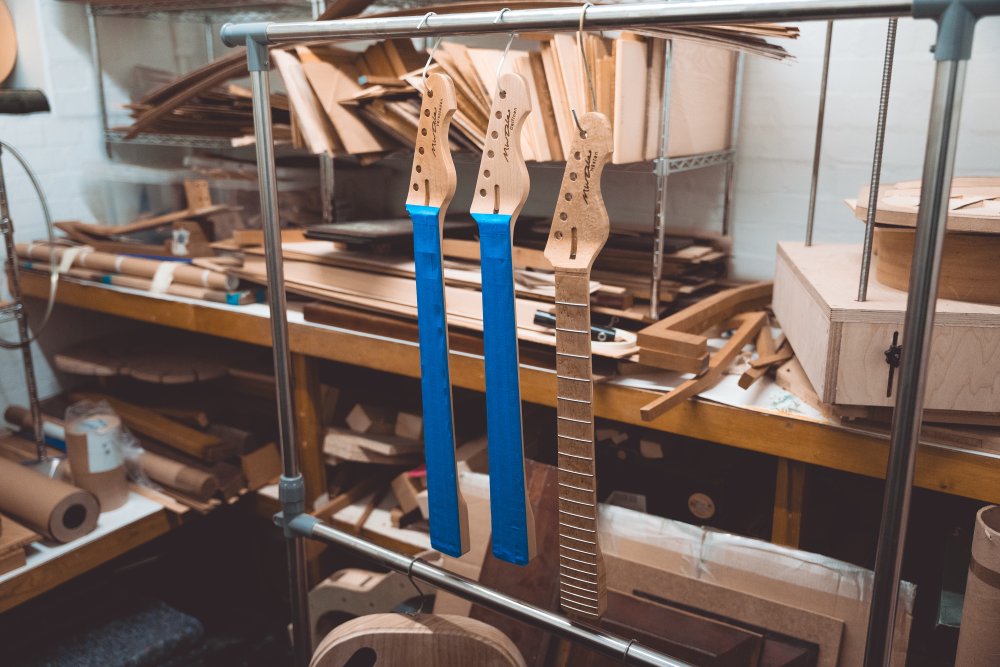
The all-maple one for Hästen is the furthest along, and needs some tweaking. Applying a coat of oil is a two stage process: you apply a coat of oil all over, leave it for five to ten minutes to soak in, and then you wipe off the excess and let that coat dry before applying the next layer. In between every other layer I’ll give it a light sanding back to help even out the finish and let the next coat take.
The problem that I’ve always had with oiling, particularly the fretboards, is that oil can pool up in places and avoid your attempts to wipe it back, and then at some point later it leaches out, creating a raised layer of oil, rather than just having the oil soaked into the wood. The frets are the worst for this, but my new laser etched headstock branding also seems to be much worse for this than my old logo, I guess it being more narrow script makes it harder for the cloth to pick up the excess. Anyway, Hästen’s neck has a bit of both, so next time I’m in the workshop I’ll need to do a bit of tidying before the last coats go on.
The painting
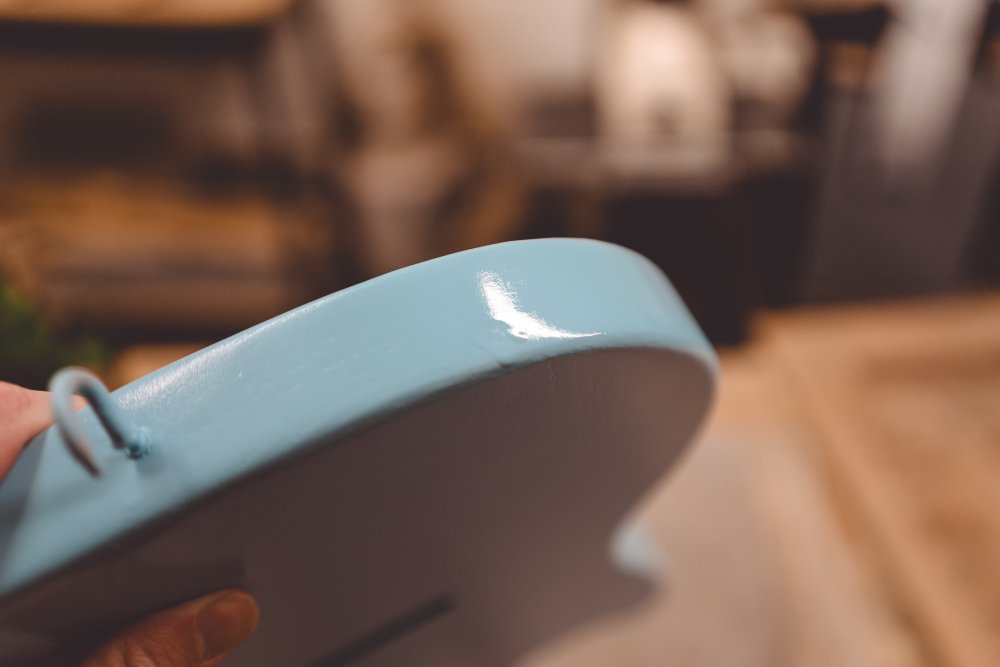
I’ve continued to paint the two bodies that are going that way. For Hästen, there was another buffing after the 3rd and 4th coats:
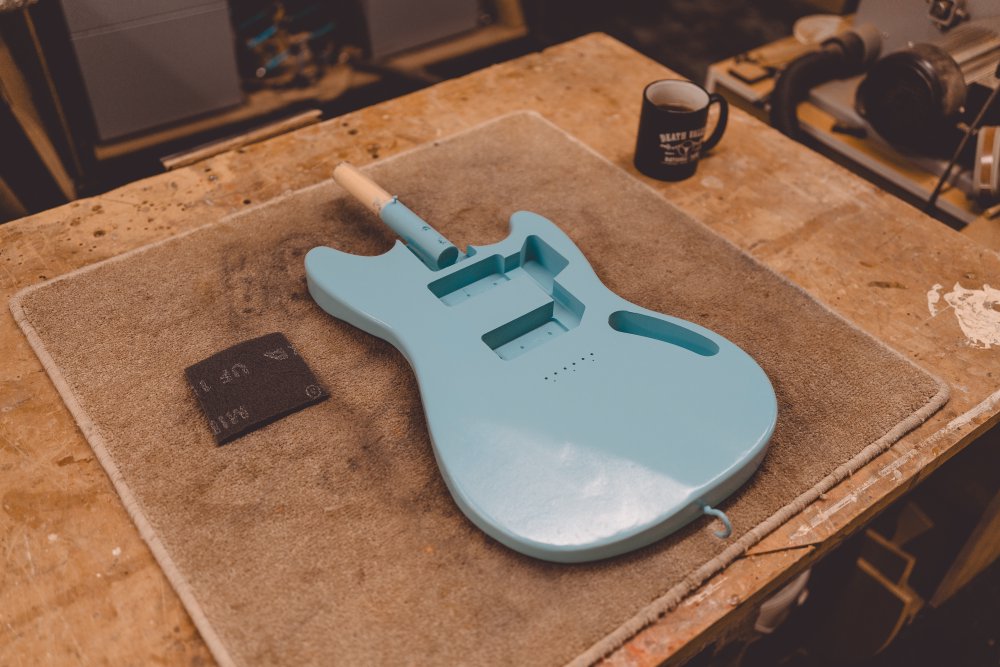
I do like how the grain of the wood is still there in the finished surface. Unlike a big-brand painted guitar where you get a super flat finish, here there’s still a hint of what’s under the paint:
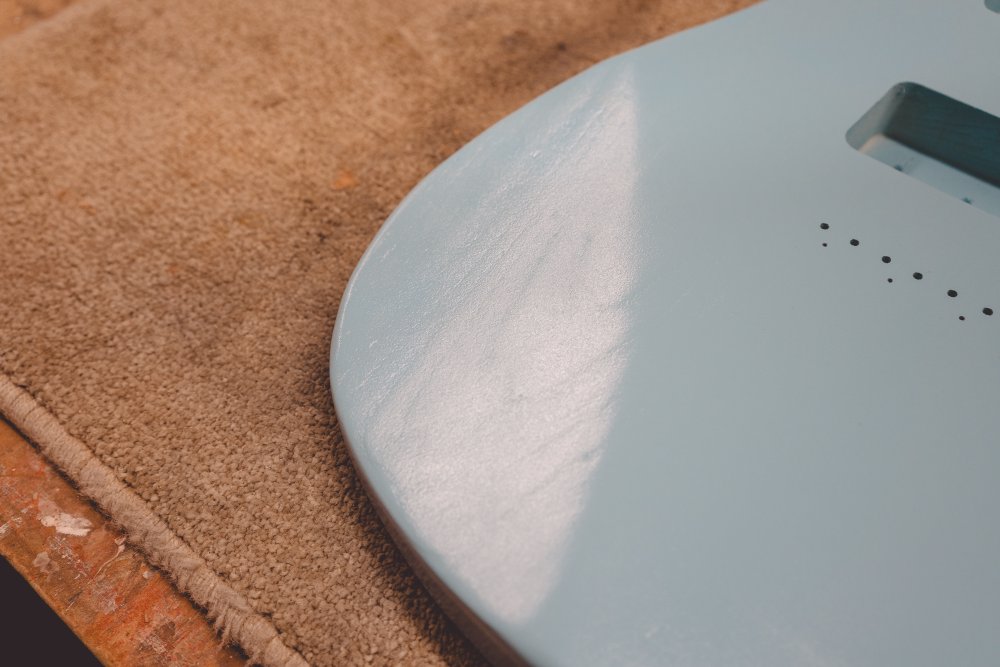
That’s not to say there’s anything wrong with a super-flat finish, just that given this guitar is hand-built, I think having that hint of the wood there helps tie it back to the source somewhat.
Unfortunately, just as I went to apply the sixth and final coat of paint to this build I managed to snatch defeat from the jaws of victory, as I got some overspray on the bottom edge, which pooled up and then caused some drip marks as it dried:
I’ll need to sand this back and then go once more into the spray-booth with this one alas. This is just lack of practice on my behalf, and the only way I’m going to avoid this is by keeping at it. Still, I’d be lying if I didn’t say it wasn’t a frustrating end to that session in the booth.
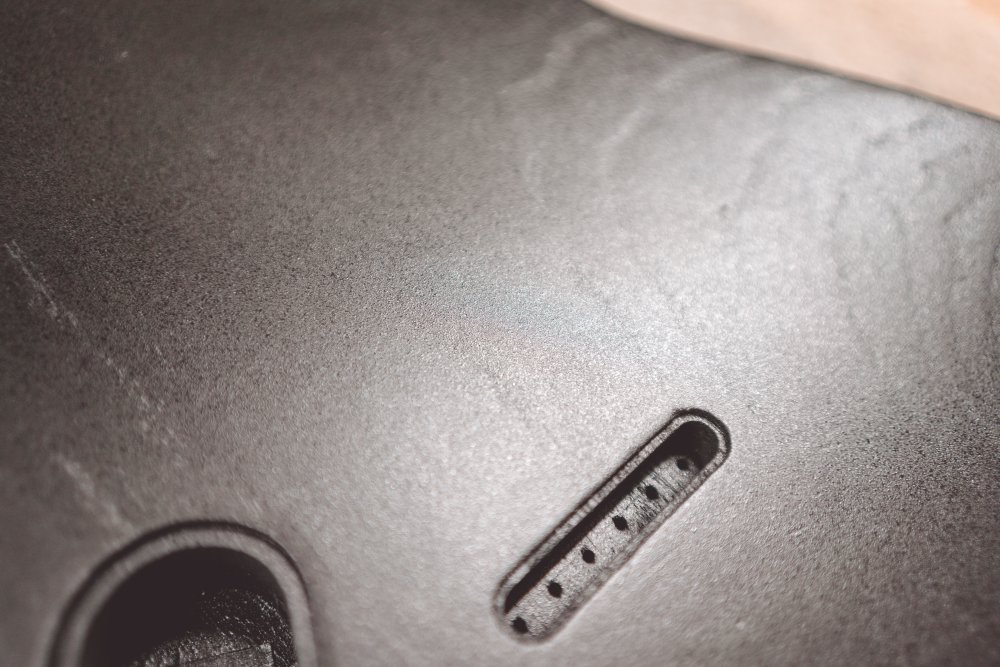
That same session also ended in frustration for Verkstaden also. After the last coat of black paint on the rear I gave the paint a buff with a 1200-grit pad, and then spent quite a long and careful time with a razor blade scraping away the bits of paint that had managed to seep up under the masking tape.
With that done, it was time to switch to applying clear lacquer, to seal in the unpainted sides and to give an overall gloss finish. Unfortunately this time I think I had my first blockage in a spray-gun. At the time I didn’t realise that was what it was, just that having mixed and filled the spray-gun, when I came to spray it didn’t come out as a fine mist, more of a blown raspberry splatter, just speckling the guitar:
I aborted this one, as I had no understanding of what I was doing wrong, but when I flushed the gun with thinner as part of the clean-up process the thinner first just dribbled down the side of the gun before suddenly running free. I suspect either some dirt had got into the chamber before I poured the clear-coat lacquer in, or it just hadn’t been cleaned properly (though we’re all particularly fastidious about the spray-guns in the shop, so I assume more likely it was the former).
Whatever the cause, this will now also need to be buffed back and back into the booth. Again, it’s all learning: next time this happens I can at least not tear everything down rather than just try switching spray-gun instead.
The staining and the oiling
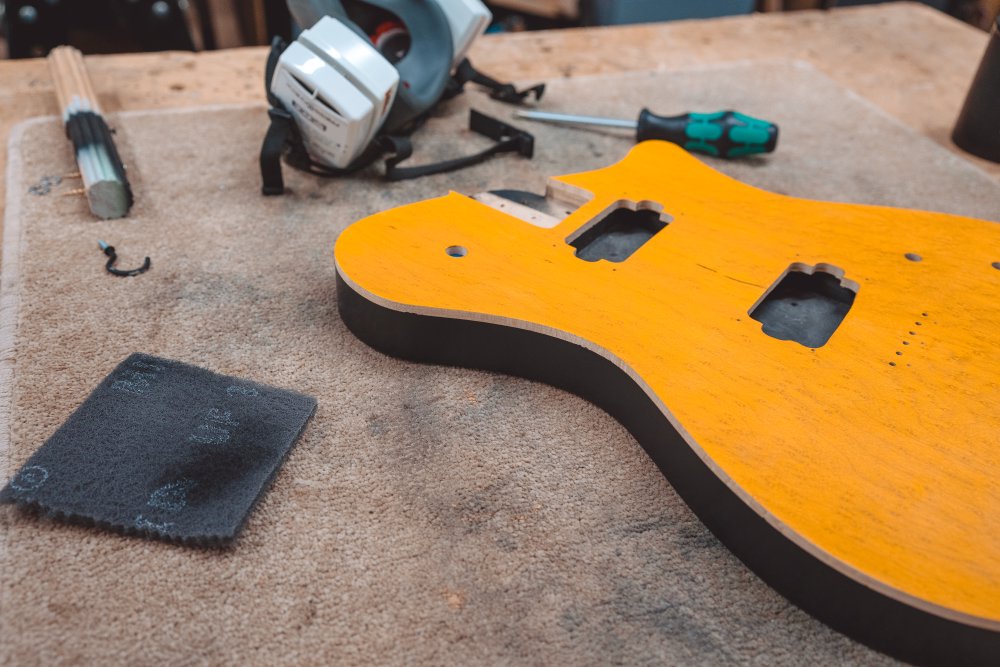
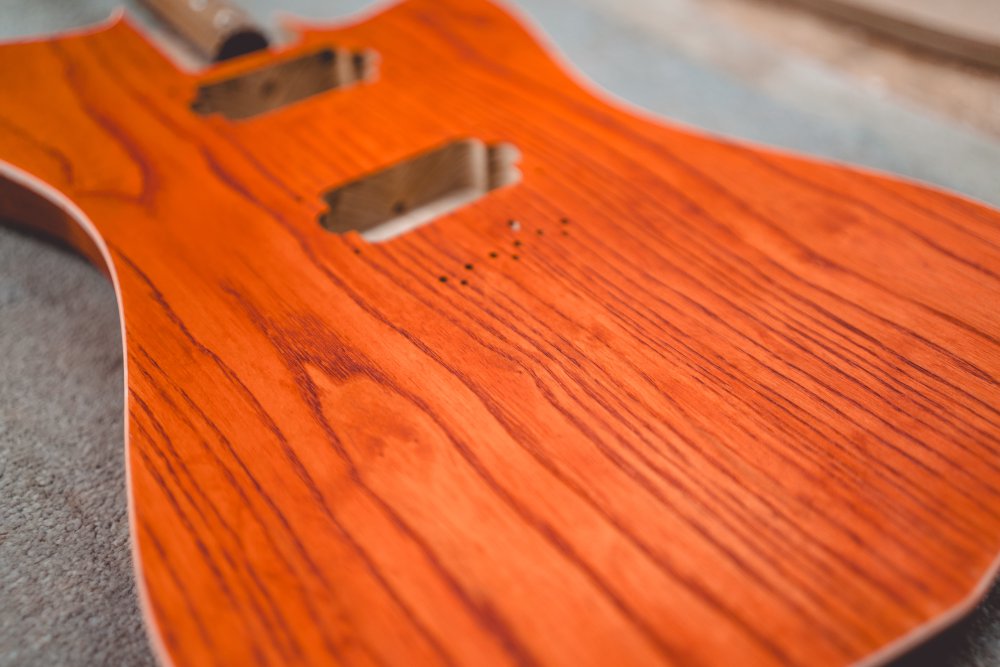
The saga with Delfinen and its staining has continued, and I’ll not bore you with that yet again, but suffice to say that I did eventually get it to a point whereby it’s now got a uniform orange stain over it, with no glue patches stopping the stain getting in:
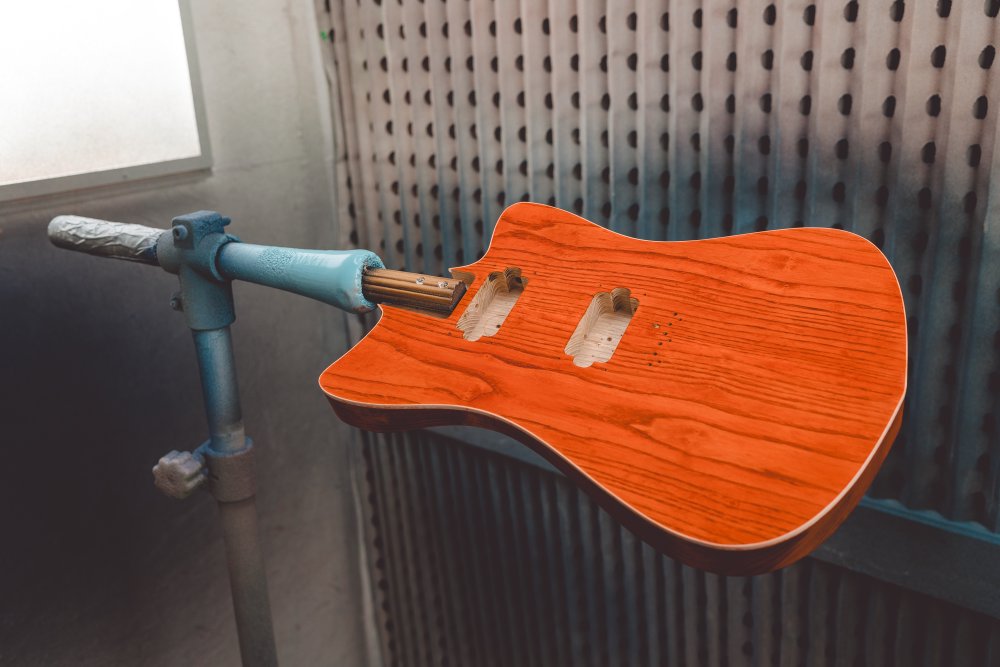
With that stage done, I’ve started applying an oil stain to this also. I really like having an oil finish on a stained ash body, as the oil both makes the colour pop more, and at the same time darkens the grain to emphasise the tiger-striping effect.
Unfortunately (you knew this was coming, right?), for some reason I’ve once more had the binding in the two tight corners near the neck pocket start to come away. I’m beginning to feel like this build is definitely a bit cursed.
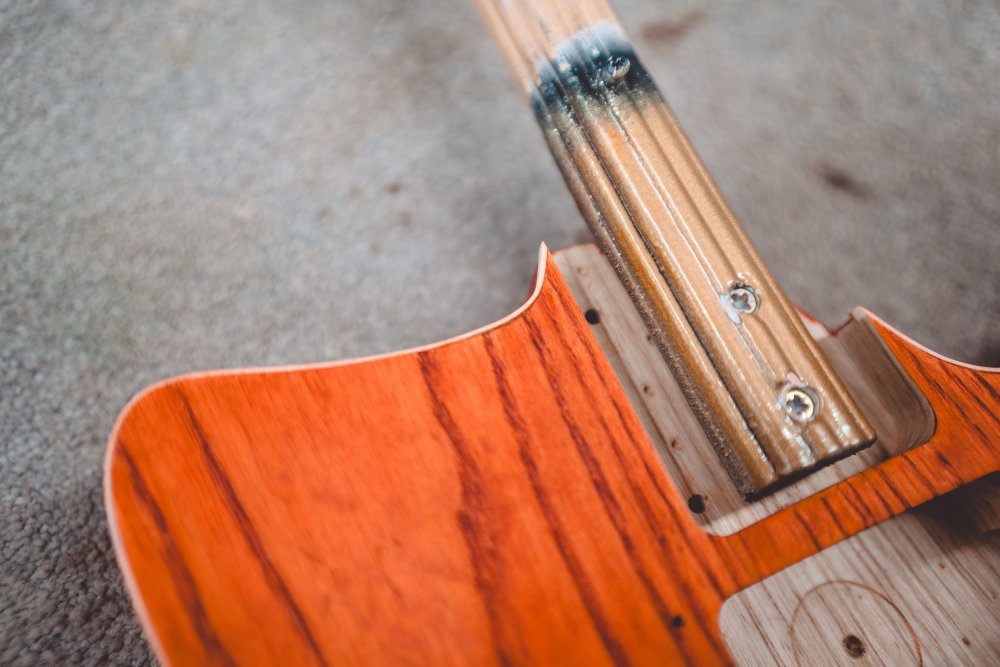
I assume it’s some combination of me not heating the binding enough in these tight corners and so that the glue hasn’t held it well, and just as I stainand oil the body the cloth dragging over that edge is enough to pull it off? Certainly I think the lesson that you should take away from this is that if you plan to do binding try not to have such tight transitions as I have here.
At this stage, now I’ve started oiling it, repairs will now wait until I’ve finished the oiling process. Hopefully the oil will make it easier to control any excess glue when I do repair it. Otherwise at some point I can just accept this body isn’t going to be one I can show to people, but has been a useful learning process, and it’ll become a demo piece for me, and I’ll need to make a new body for Delfinen and I can try tweak that radius before I do so.
Älgen
So as not to end on too much of a downer, it was nice to have Älgen back in for a tune up:
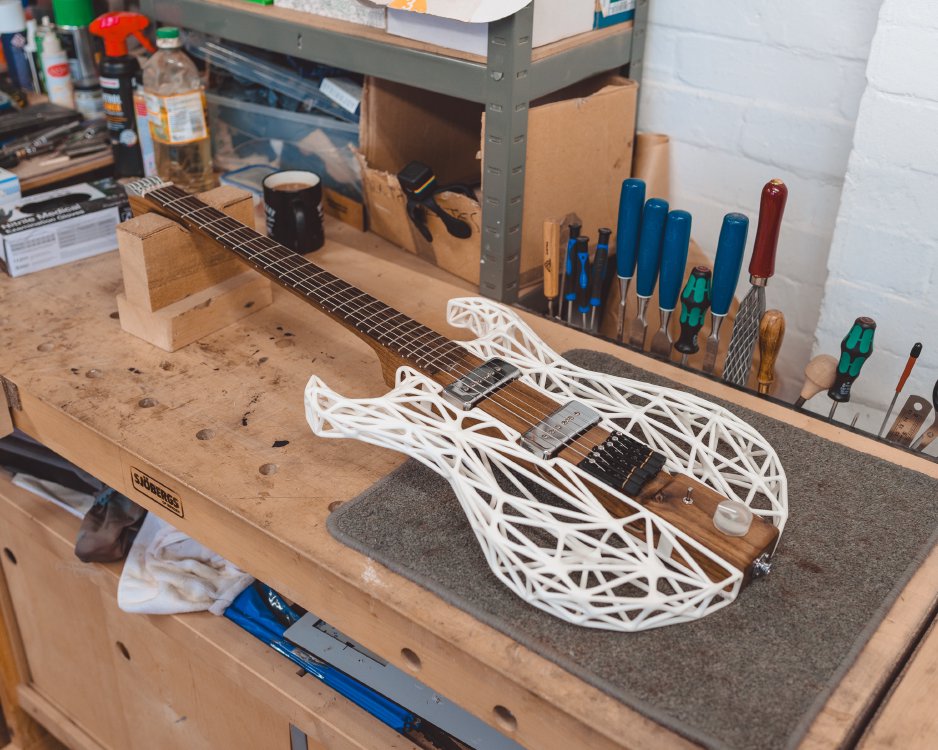
This is the first time it’s been in for a tune-up since it did its little summer show-and-tell tour. In particular, I’d noticed that the action had got a little high at the body-end of the neck, and I wanted to try fix that. A check with my little measurement card showed that it was quite a bit out now from the general recommendation on both sides.
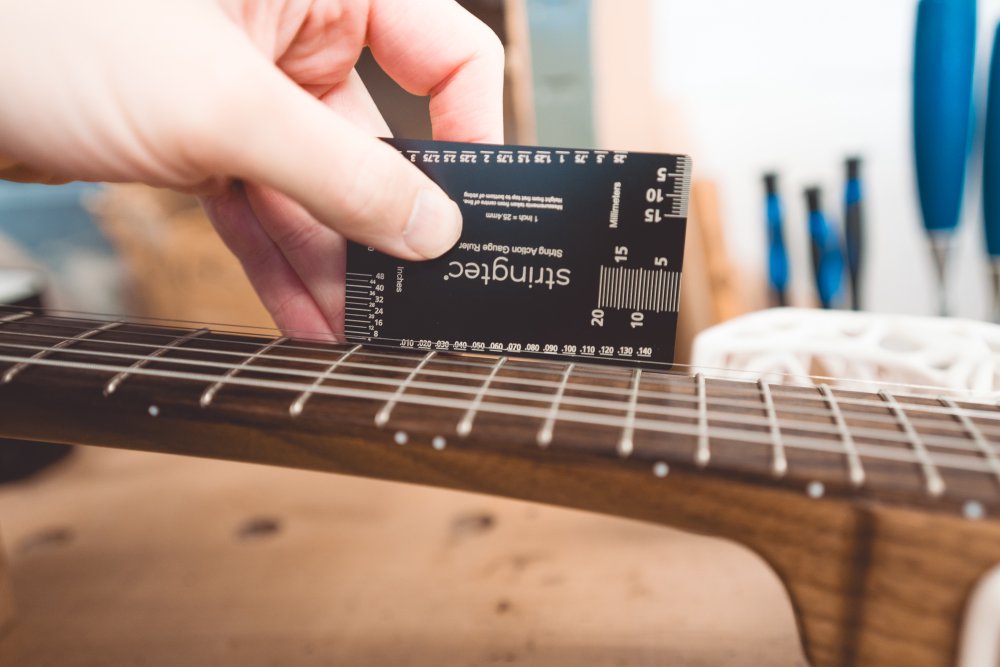
Tweaking the truss-rod I’ve got it pretty close to where I want it, but not quite, and I think if I want to lower it any more then I’ll need to actually remove some wood from under the bridge: the bridge saddles on both outer strings are as low as they’ll go. I’ll leave it to settle for a day or so, before deciding what to do. Regardless at that point I’ll swap out the strings and give a good clean before stringing it back up again. I’ll also give the frets a proper-polish using the technique I’ve demonstrated in the last couple of week notes, as I think that’ll get a better finish than what’s on there right now.