A Week in the Shop
Published 22 Jan 2023
Tags: delfinen, fretting, kerf, laser-cutting, neck, palm router, verkstaden
Getting back into the workshop this week my main goal was just to do some woodwork, as it feels like a while since I did that and felt like I wanted to reconnect with that side of the process. Although there’s lots of other bits I should be doing, I got into guitar building to make physical things by hand, and so I wanted to do just that. There will be a lot of pictures this week as a result!
Delfin
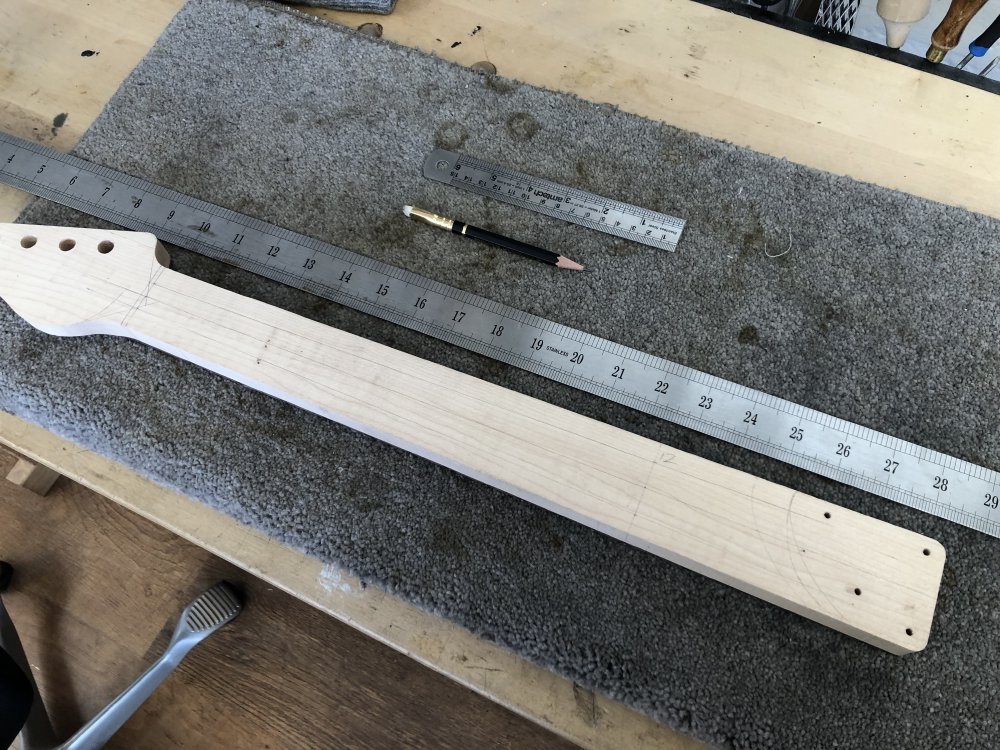
First up, having radiused the neck for the Delfin build last week, I wanted to push that neck along through to the next stages. Last week I walked about how I used the palm-router to make the fretobard radius, and how that saved me a lot of time and effort versus sanding, there’s still a little sanding I needed to do (sorry Graeme!).
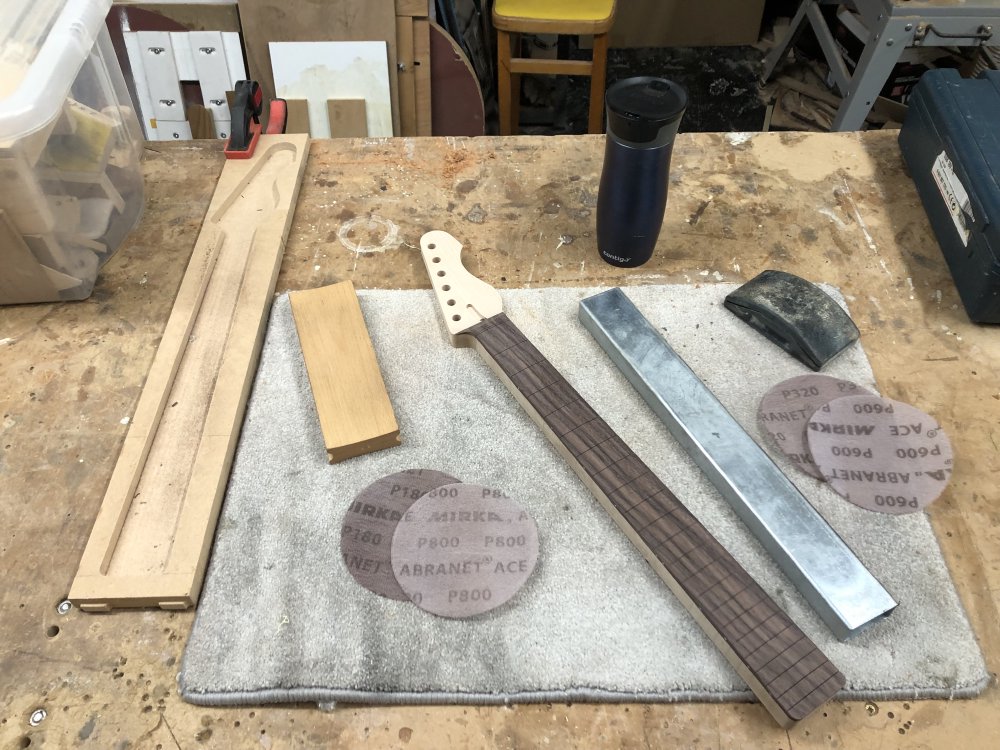
There were three tasks I wanted to get done here. Firstly to check that the fretboard is properly straight, and if not correct for that. Thankfully it was close to spot on, but I did find it had a very slight bow to it along its length, being higher in the middle than at the ends, which I corrected for by sanding the central section some, checking frequently with a straight edge. I also at this stage did the second task, which was to remove the few machine marks left by the palm-router; the routing did a much cleaner job than I’d actually expected, but there was one spot where you could see the outline of where the blade was introduced to the material that I needed to remove.
The final task was the round-over the edges of the fretboard so that there’s not a harsh line that you can feel when you play, which is what is left by the routing process.
I’ll need to re-assert this rounding-over as I work on the neck, for example, when I level the fret-ends it’ll reintroduce a harsh line again if left unchecked, but I find it’s good to start early and try maintain the round over rather than just add it at the end.
As an extension to this, I also rounded over the top end of the fretboard as it transitions to the headstock, again just to remove the hard edge there and give the strings a bit more clearance as they go from the nut to the tuning pegs:
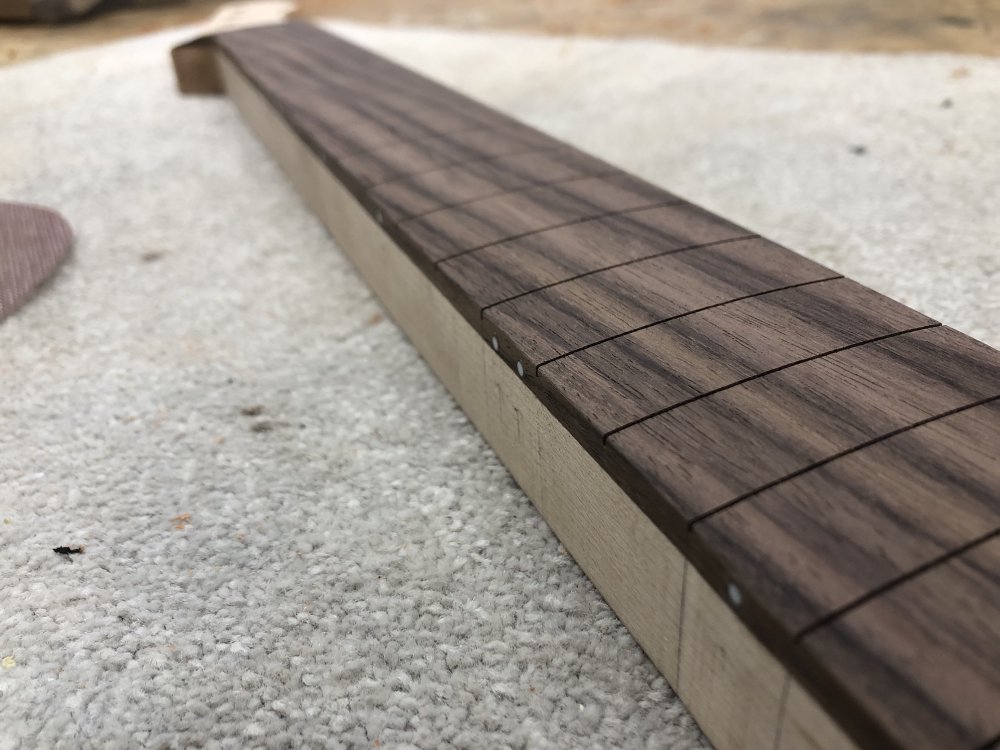
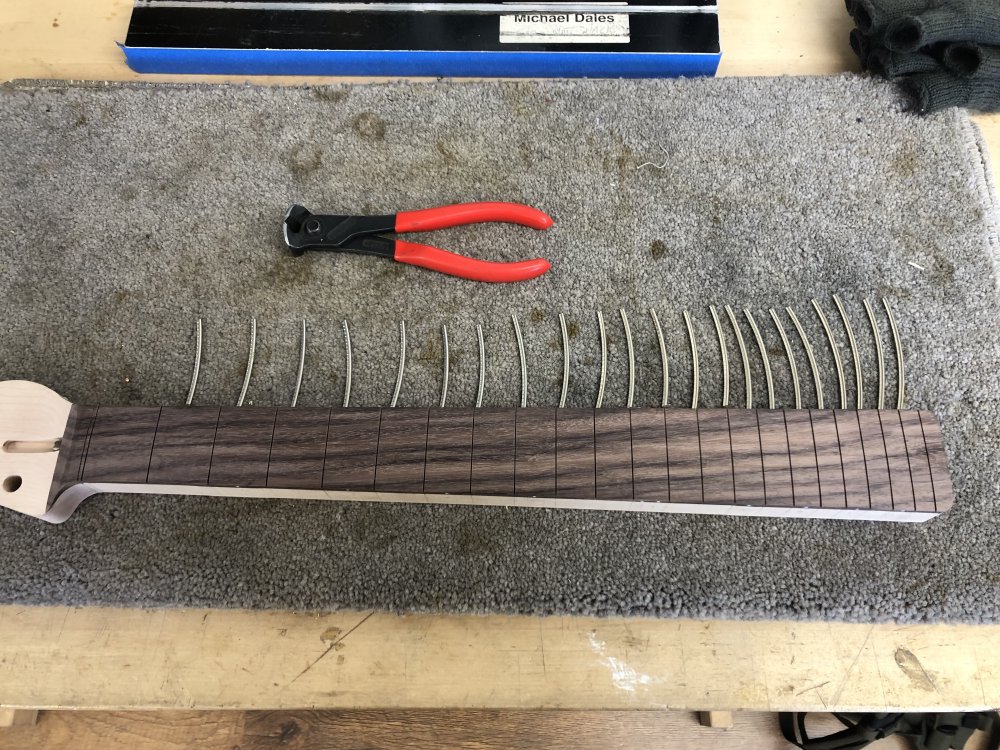
With the fretboard prepped, it’s time to insert the frets. As a preliminary stage for this, I run over the fret-slots using a triangular rat-tail file to just give a slight chamfer to the top edge of the fret-slots, making it easier for the tang on the fretwire to slot in without slipping.
With the slots prepared, I cut all the fretwire, which comes in 1 meter long coils, to size. All my fretwire I’d already bent to be a slightly tighter radius than that of the fretboard, so that when you press the fretwire in the edges go in first rather than the middle. I cut the fretwire to have about 5 to 10mm overhang on each side. This level of overhang seems quite wasteful, but I found that cutting the fretwire will twist it slightly, and so I don’t want any of that twist to be on the bit of the fretwire I’m slotting in, so as such I’d rather leave too much rather than too little.
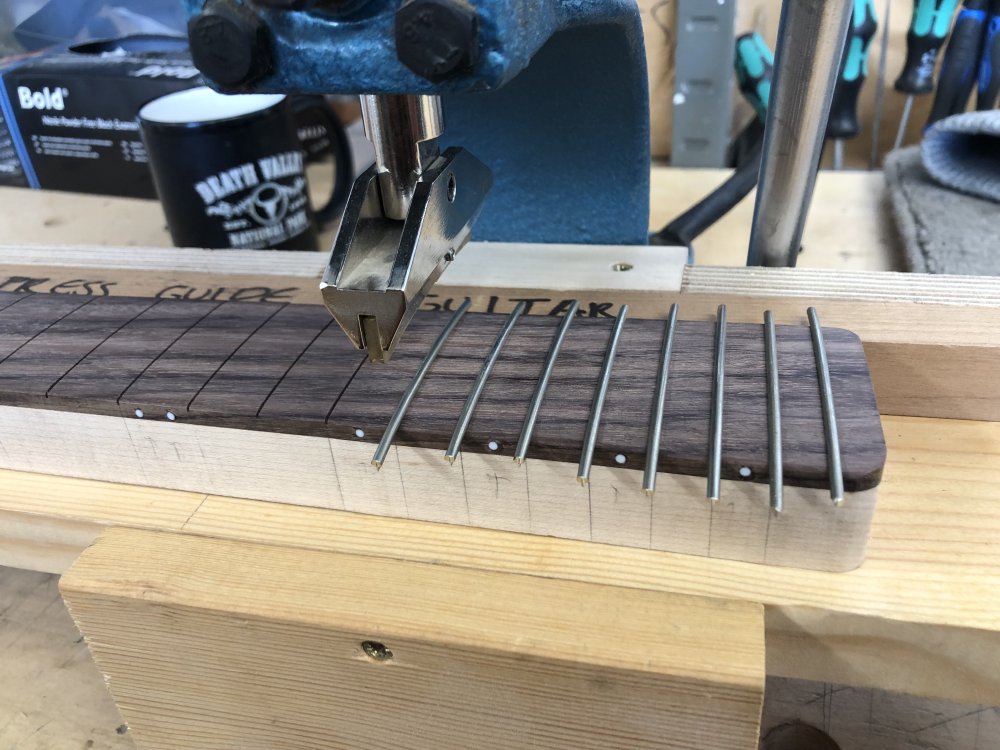
With the fret-wire cut, it’s then over to the arbor-press, to get the frets in:
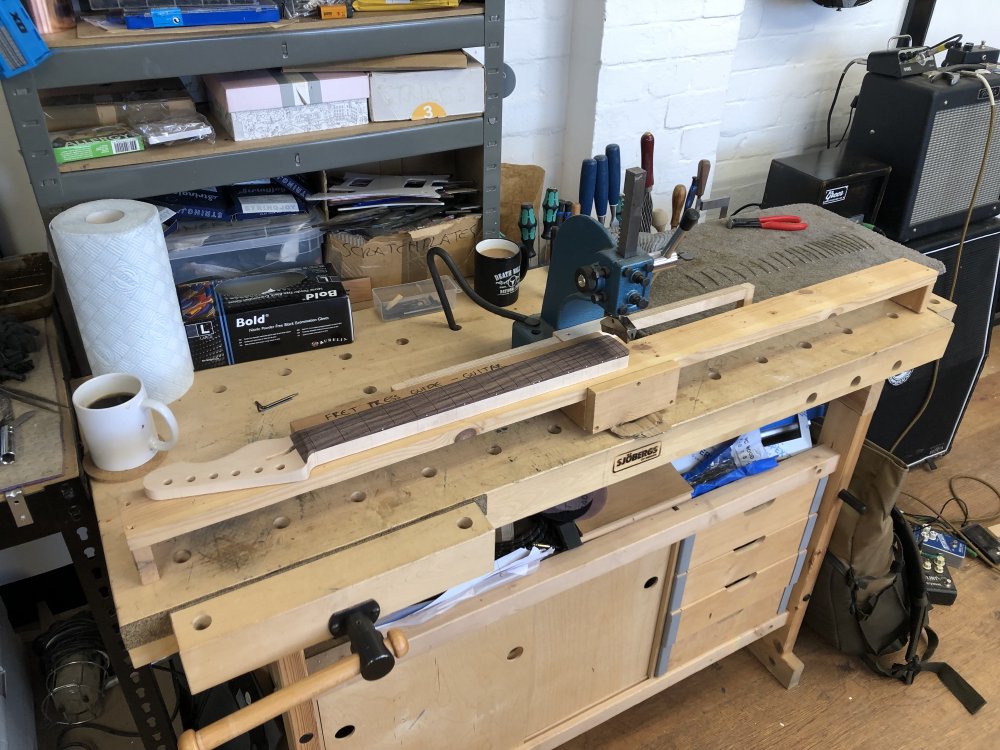
Last time I did this was with Älgen, but there the depth of the neck was too deep to use Matt’s jig that holds the neck level, and so I had to use bench dogs as a substitute. This time however I was able to use Matt’s jig, which made sliding the neck along, inserting the fret, sliding along again, etc. much simpler.
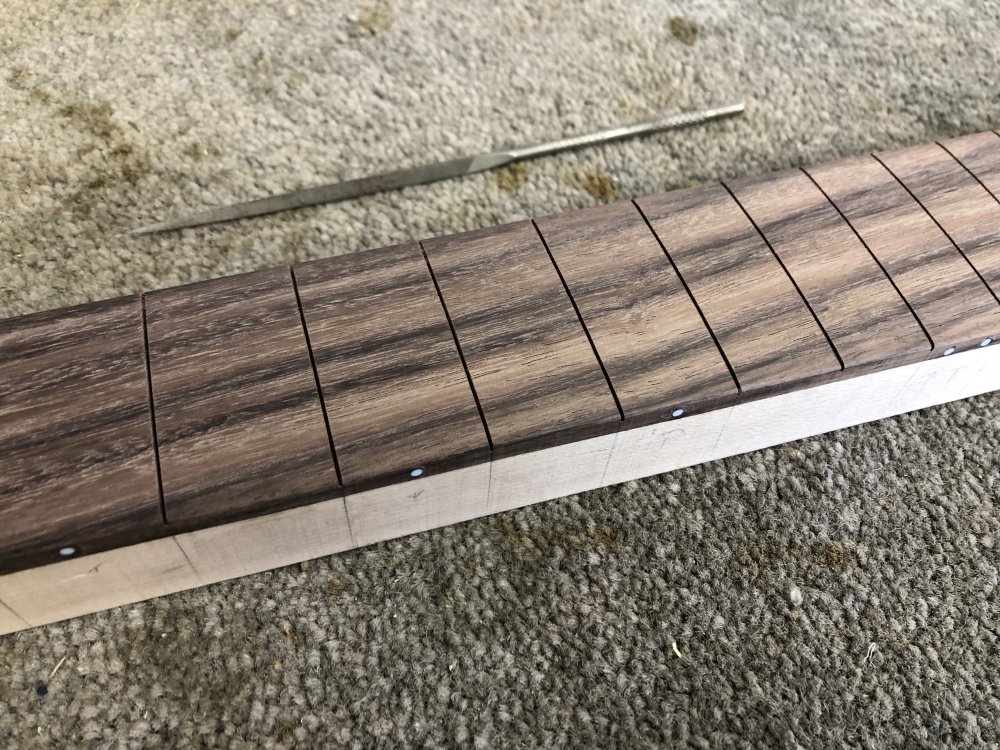
Once the frets were pressed home I then followed Matt’s guidance and wicked in a little glue onto the frets to help keep them secured. It’s not a lot of glue, but doing so seals the ends and helps secure them as I file and shape them. As I’ve said beofre, earlier on in my luthiering I was dead against using glue, as that’s what I’d been told in tutorial videos I watched, but I’ve become more pragmatic with experience, and anything that helps me do a good job on the frets for the player is something I’m happy to consider, having learned the hard way how hard fret work is and yet now vital a part of the guitar playing experience it is to get right.
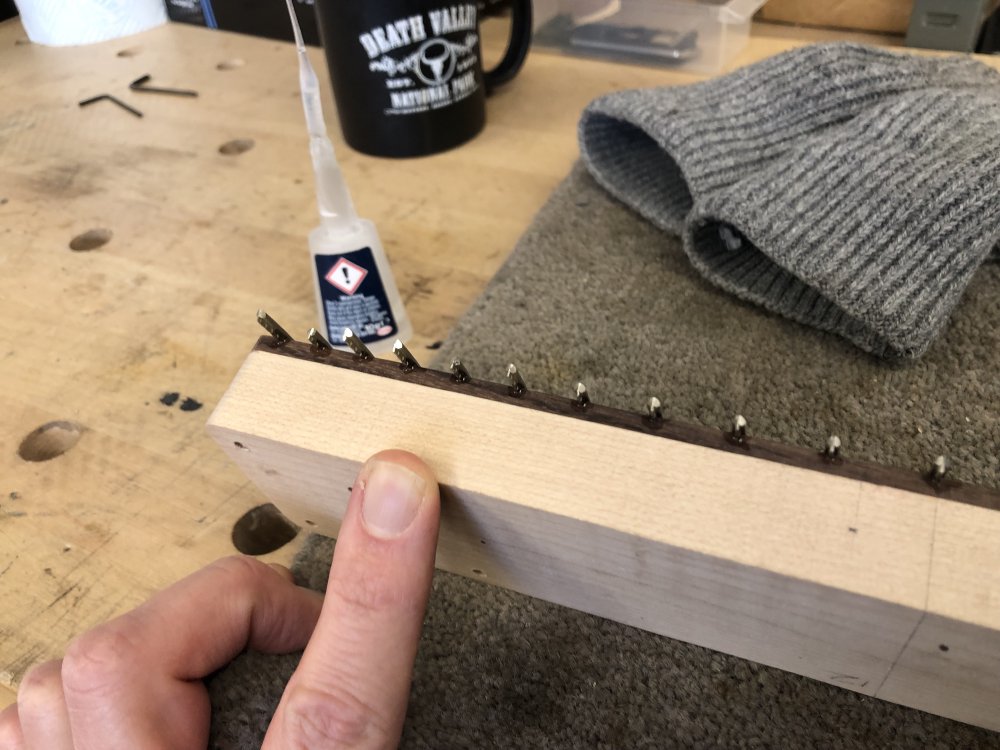
Once the glue dried I then trimmed the edges flush, and now the frets are ready for levelling and shaping.
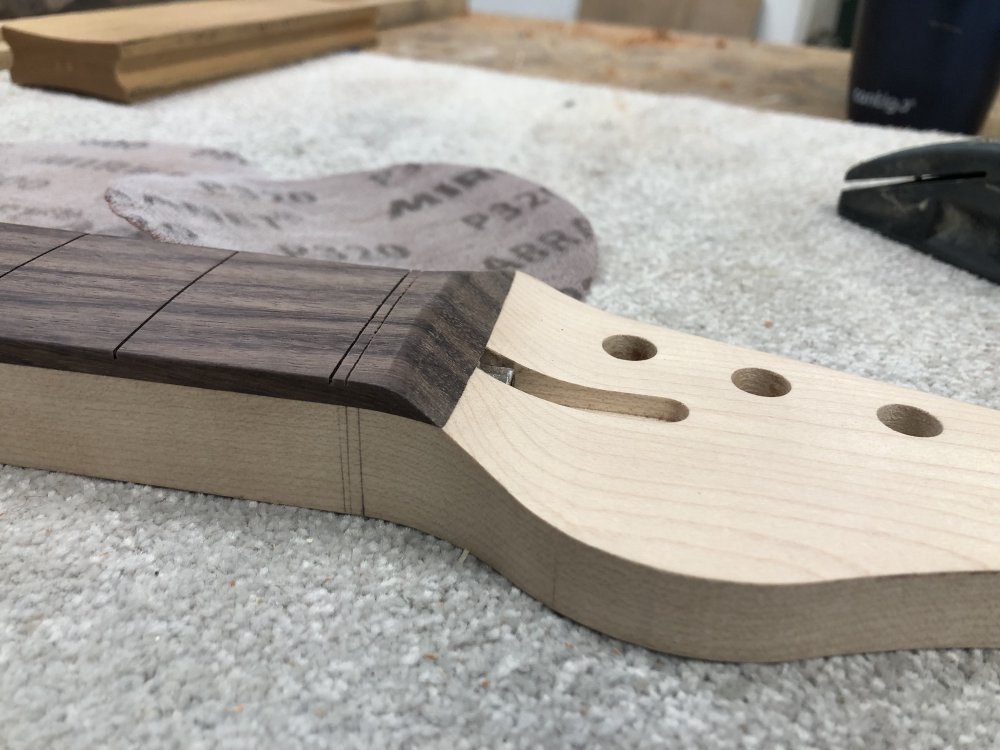
Before I work the frets too much though, I’ll next want to carve the neck, as otherwise I’ll scratch up the frets whilst doing that given it has to rest on them. So, whilst I had the neck on my workbench I also marked it up ready for carving:
I didn’t get to the carving, but I look forward to the upper-body workout that it will entail next time I’m in the workshop!
Verkstaden
I’ve written previously how starting with the Delfin build I want to move away from using individual string ferrules to using a ferrule block, and how I’d designed a new template to let me route out the cavities for that.
Well, before I used this new template on the actual guitar body for Delfin, I wanted to try it out on bit of spare wood to test the process before I risk discovering the process I thought would work wouldn’t. Unfortunately I didn’t have a big enough bit of scrap wood to hand to test on, but I did have this old guitar body that I’d fallen out with in the workshop still:
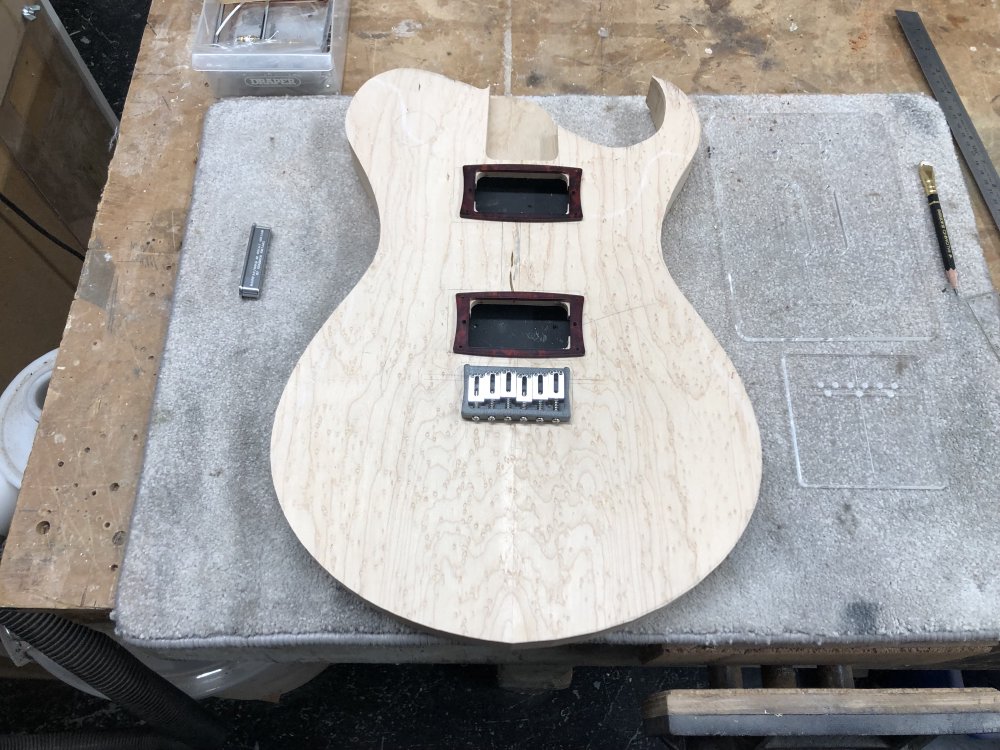
This is the body I started in mid 2020 when I moved to my then-new, now-former workshop. It doesn’t have a name, it was just called “the workshop prototype” build in my notes from the time, so for now I’m calling it “Verkstaden”, which is just Swedish for The Workshop. I fell out with this build for a couple of reasons, partly I messed a couple of bits up on it, though not fatally so, but mostly because whilst the front of the body is this lovely bit of birds-eye maple, the rear is made from the softest poplar wood ever, and which I picked for it being light, but in practice it is just so easy to dent and damage, which makes working on it a pain. So I put it to one side and moved on at some point.
But actually I felt now was the time to bring it out of retirement, as true to its original inception, I have a new process I need to prototype! Which is good, as it’s a shame to waste things, and I do quite like the design of this one.
Before I can do the work for the string ferrule block, I needed to mark up where the bridge will go and drill the string holes based on that. To do that I need to know where the bridge will be placed, but thankfully for me I documented already in this old post how to place the bridge on a guitar correctly, including the numerical offsets for a guitar with a 25.5" scale length, which is what this guitar body is designed for - yay for past Michael!
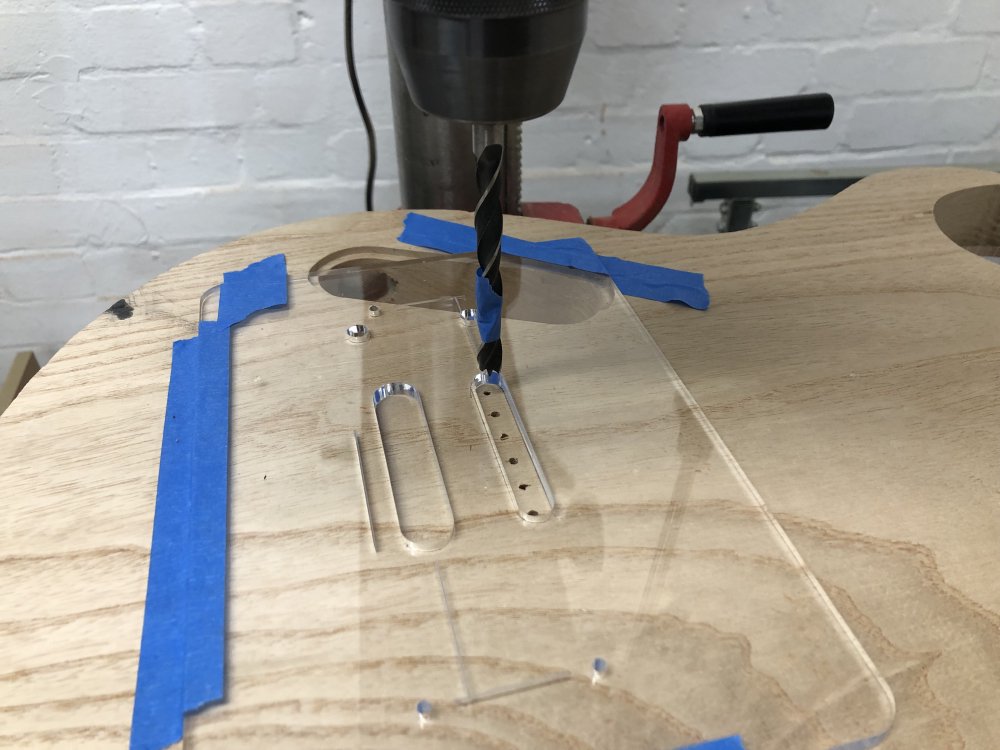
With that all worked out, it was over to the drill press to drill the pilot holes for both the holes where the strings run through the body, and the bridge mount screws:

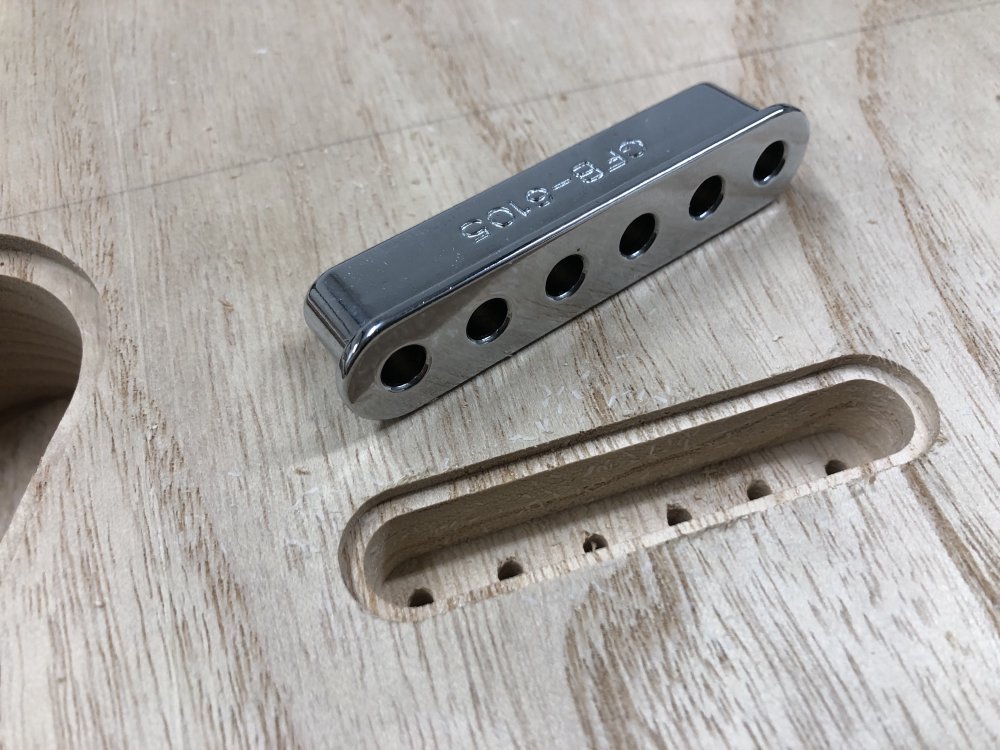
With the pilot holes drilled, I then wanted to drill the string holes all the way through the body.
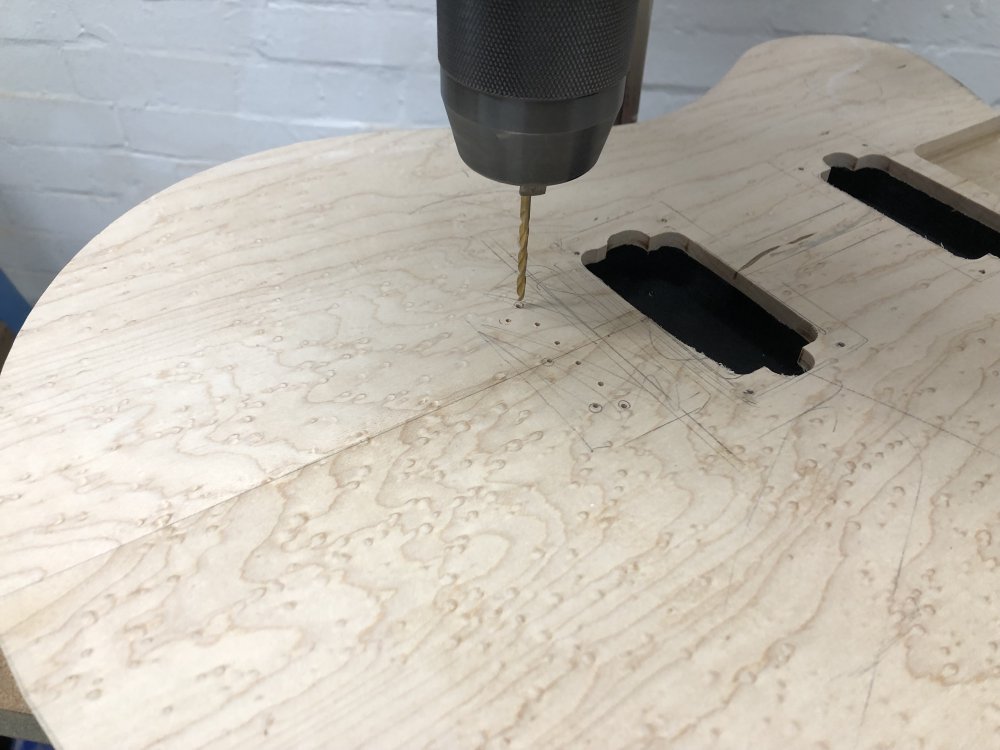
Normally this is a slightly fiddly process because drill bits rarely go through wood perfectly straight, they wander slightly as the grain of the wood pushes them around; so what starts as a tidy line of holes on the front ends up somewhat higgeldy-piggeldy by the time you get to the back. The trick then is to drill through the two outer holes as a reference, and only drill the center four half way. You then flip the body over and re-mark the other four middles ones on the rear relative to the two outer ones, and drill again. The deflection from going half the way will be minimal enough that the two sides will line up well enough to thread a guitar string, and you now have a neat row on both front and back.
But, because this poplar is so soft I just drilled everything through from the front, and the drill did not wander a jot! Even if it had, I knew that it’d not wonder enough for it to not align with the ferrule block.
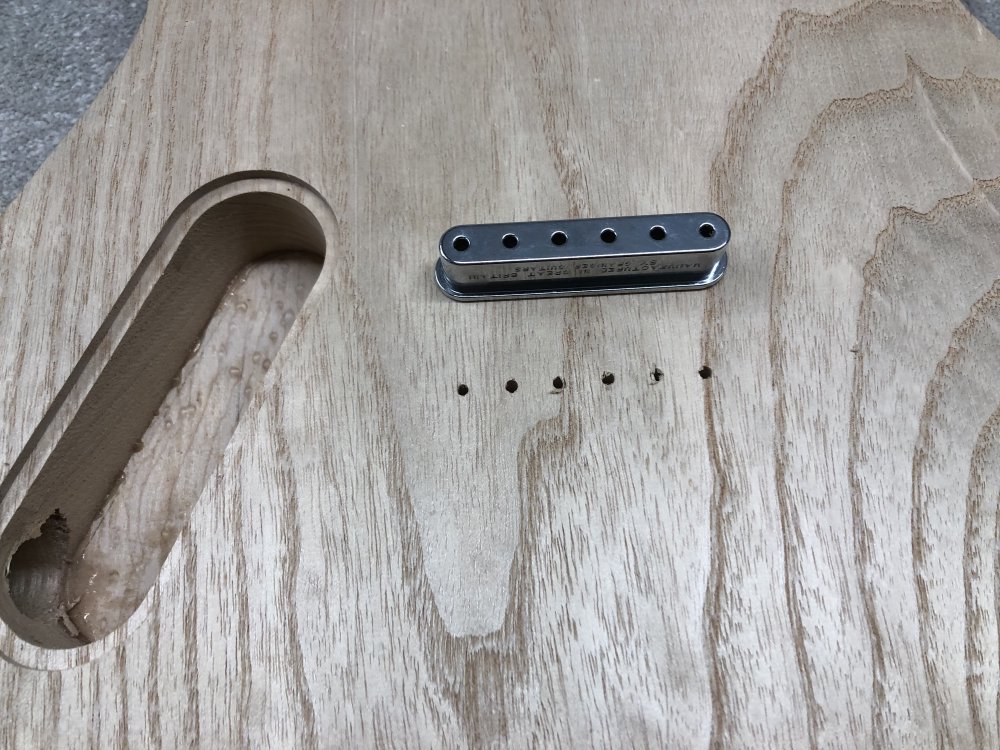
With the string holes done, I now need to make the cavity for the block. I’ll use a palm-router to do the shaping, but hopefully I’ve laboured the point enough times now that readers know a router is a finishing tool, not a bulk removal tool, and so I first went back to the pillar drill to get rid of most of the material using a close to width drill bit:
With the holes roughly drilled through, I then finally went over to the palm-router to finish up the material.
One important thing I want to note: you can see here I’m using masking tape to hold the template - this isn’t my ideal,and is not a practice that I advocate you use! There’s two screw holes in the template that I’d use for the Delfin, but I can’t use here as the wood they’d go into is already been removed. On Delfin the screw holes are placed so that I screw it into wood that’ll later be removed for its electronic cavity. Thankfully again this body is so soft that I can get away using masking tape to hold the template in place as it puts up very little resistance to the router. Just note that I’d not recommend you do this on your own builds!
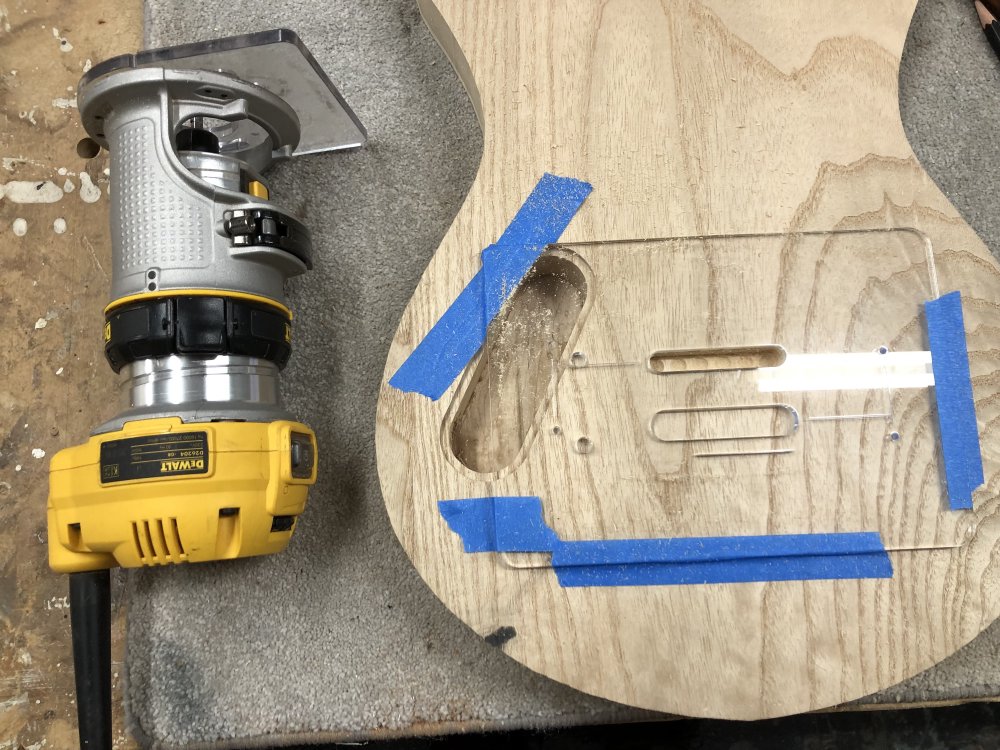
I did have to cut this twice - I was again bitten by the kerf on the laser-cutter I used to make the template being quite bad, and so one way up the template was too narrow, and so I had to flip it over and re-cut the cavity with the wider side of the kerf down. A useful learning that I’m glad I made on this body rather than on the Delfin. When I recut this template (as noted below) I’ll also check the kerf more carefully.
The template has two slots on it - the bigger one is for the outer lip on the ferrule block, and having cut the inner cavity, it’s now time to cut the cavity for the lip. Originally my intent was to cut the recess for the lip overly deep, as I didn’t have enough material to make right depth of template for the router bit I had, and the fact that it’s cut a little deep doesn’t matter if the base of the main cavity is load bearing. But I decided that I didn’t like that plan at the last minute, so instead stacked the template I’ve been using with another template I had laying around that had a wide enough gap in it to let me cut just the 2mm deep channel I needed:
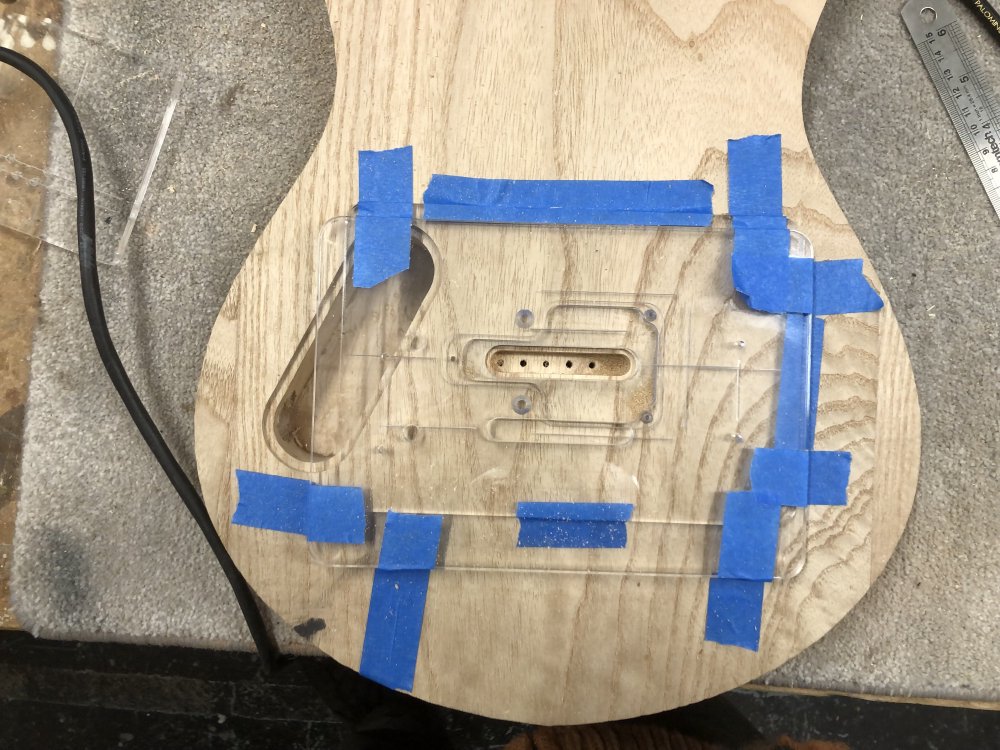
Again, I do not advocate doing what I just did here! I had the luxury of super-soft wood being cut to a very shallow depth (I did two 1mm passes), and I didn’t care if I ruined this body, it being one I’d already given up on once before. But this did work in this instance, and I got a nice lip that was the right depth:
Now I need to design a double height template which I’ll glue together into a single piece rather than holding it together with masking tape, and to make sure I check the kerfing is kept in check.
Misc
Whilst sizing up the position of the 3D-printed bridge, I noted that there was an unexpected dimple on each of the screws used to adjust the position of the saddles. I naively assumed perhaps they were there to indicate how much you’d turned them when adjusting the saddle position:
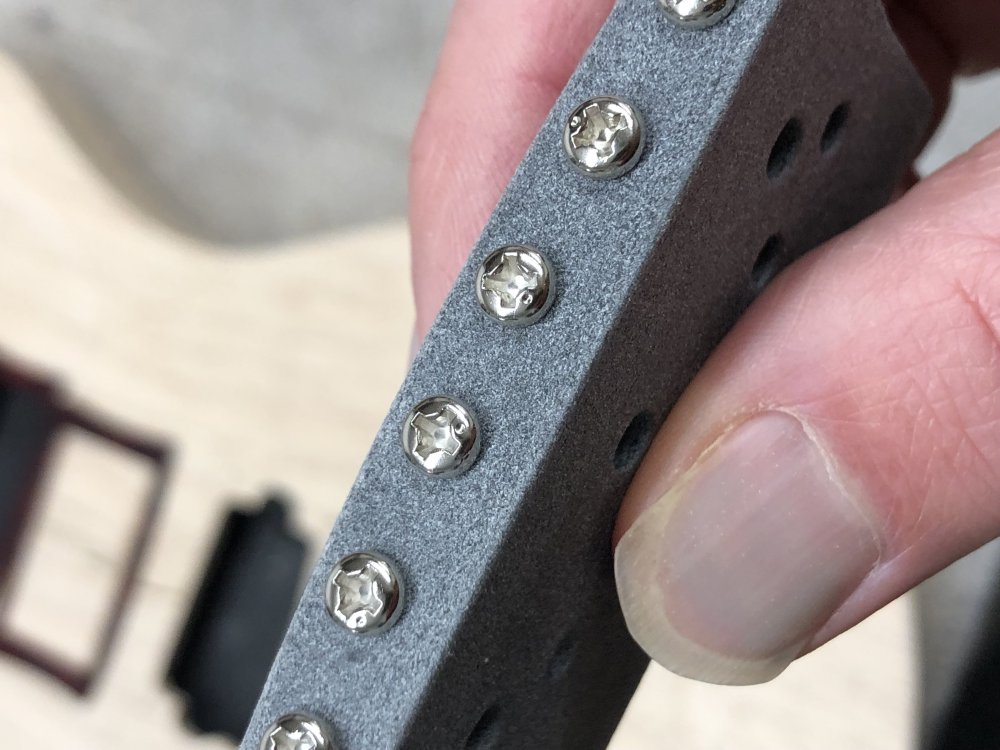
I enquired about this on the Scope of Work slack, and Ryan McLean was able to shine a light on their purpose: they’re not, as I’d assumed philips screw heads with an extra dimple, but rather Japanese Industrial Standard (JIS) screw heads!
Another SoW lunch meet regular Dale Short then found this wonderful explanation from future me, aka James May (long running joke with an old uni friend), where he explains the JIS screws as he rebuilds a Japanese Fender guitar:
It seems that in these a philips screwdriver is likely to slip, whereas a JIS screwdriver will work in both JIS and philips screws. This article implies that the 300 series Wera screwdrivers I use in the workshop should be useable in both, but the Wera datasheets for their philips screwdrivers doesn’t mention any standards at all AFAICT, even philips ones, so who knows.
But something to be aware of, and a huge hat tip to both Ryan and Dale for educating me!
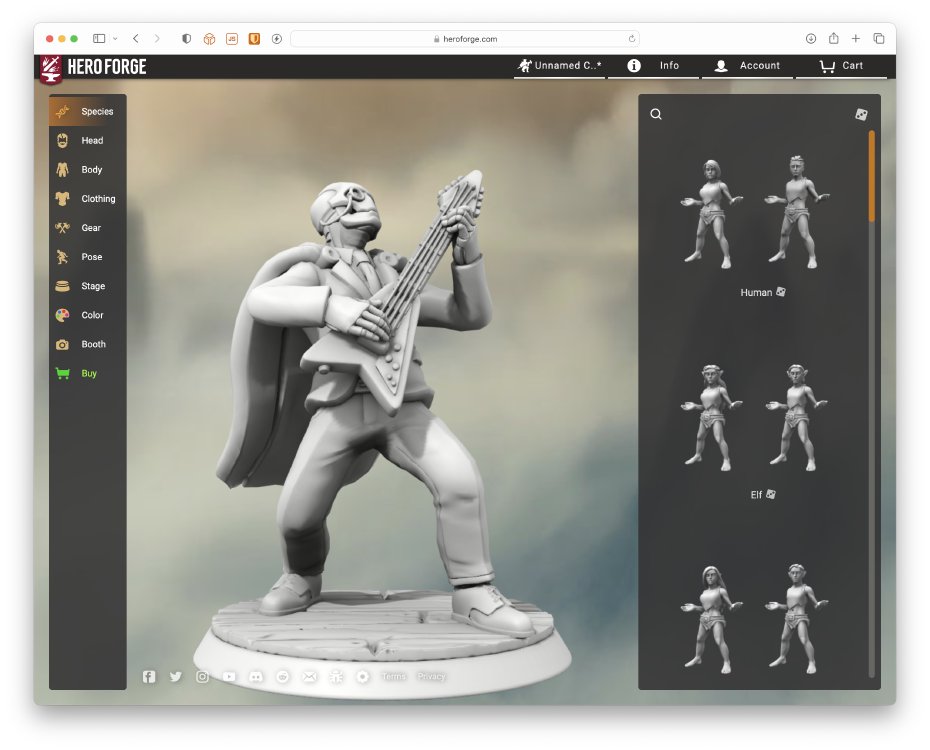
Last week I mentioned I had done my training on the Formlabs Form 3+ printer that Cambridge Makespace, the local maker-space, had got, and I wanted o try printing something on it. I didn’t have any guitar parts that needed printing right now, particularly given that Makespace only has a limited supply of resins, so instead I printed that thing everyone needs in their workshop, a dapper robot playing a Gibson Flying-V, as generated on Hero Forge:
I loaded this into the Form 3, swapped over the resin from wax-casting resin to the clear, the only other resin they had, and two hours later I had my little guitar-playing robot:
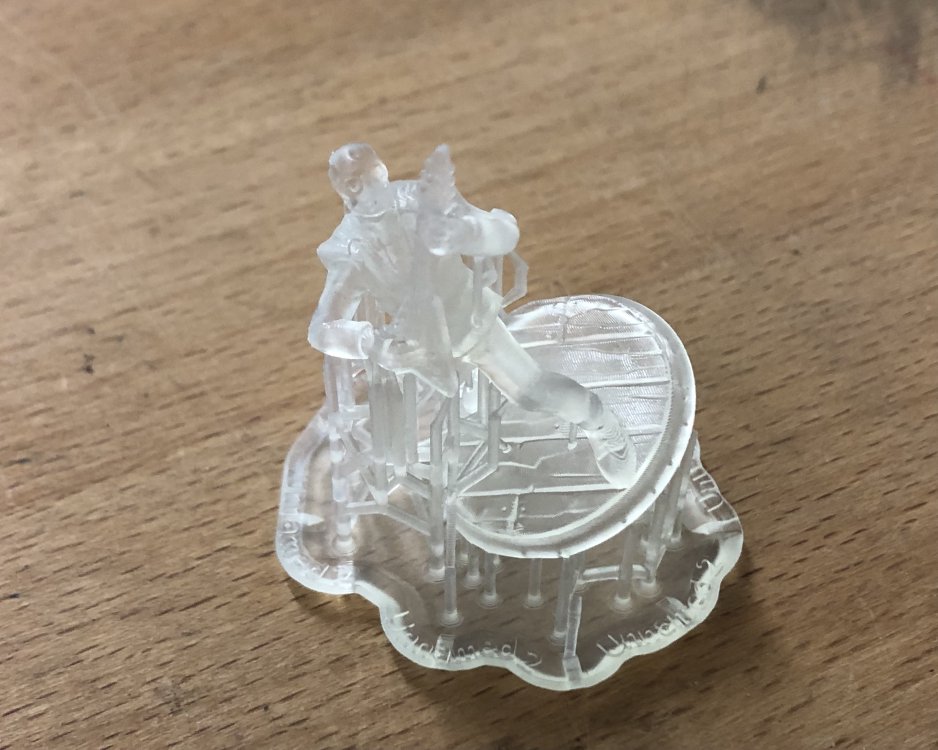
I will say the Form 3+ is a dream to use after all the time I spent on the Form 1 back in the day. Whilst there’s still a bunch of wet stages with this print, in that you need to remove it whilst wet from the printer, remove excess resin on the build plate, etc, the fact that the IPA wash bath is now a machine rather than just a tank you dump it in, and the UV curing machine we have is a production unit rather than the home made one we had before, it was a much slicker process.
Print quality is great - there’s some detail loss that might upset you if you’re trying to actually make a role playing army or such out of the hero-forge prints, but for the level of detail I need on guitar parts its fine. The print did have one layer defect on it, which was slightly sad:
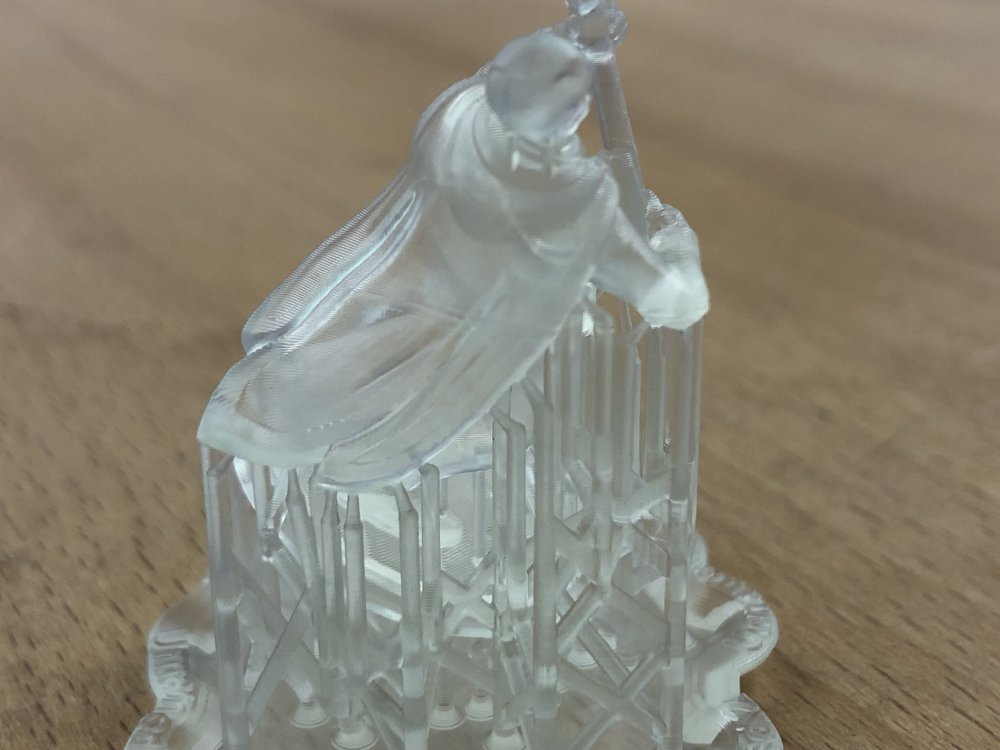
But overall, a win, and if Makespace every extends their range of resins then I can see me prototyping more things here, but as it is my use case for clear is somewhat limited. The challenge for Makespace (and what lead to them getting rid of the From 1 originally) is that unless enough people use the resin it goes off, and it’s not sustainable. I suspect even me who does a lot of 3D printing won’t be enough to justify them having yet another resin around, so it’ll be interesting to see how it goes. For now I suspect I’ll still end up using Shapeways for actual guitar part prototyping, but I’ll try shift prototype production locally where I can.