A week in the shop
Published 17 Aug 2020
It’s been a while, but after an enforced hiatus I’m returning, slowly, back to the workshop. Apologies in advance as this is a long post as I try to catch up with the last little while and what I’ve done this week. It’s a cautious return, which I’m taking slowly as I work out where I’m comfortable with things, and if the pandemic gets worse again then I may well end up stopping things again, but for now, it was nice to get back to physical making. I actually started the prep for getting back into things a few weeks ago, but I must confess I found it hard to get over the mental inertia that had built up from having a well worn routine of several months just staying at home doing contract software dev work.
I think for me the enforced time away from the workshop has been a useful refection point. The last build I shipped was a struggle, then I had to find a new workshop, then I got some constructive feedback that was delivered perfectly but still left me feeling a bit down about where I was as a builder and doubting my skills. Being away has let me draw a line under that somewhat, and now I’m re-engaging I can work out what I need to work on to get back into things.
In the interval I turned my creative attention otherwhere, working through several years of unprocessed photographs in an attempt to up my skills with Lightroom and I even did some prints and made a little photo-zine (a process I still need to document at some point).
One thing that has helped me get back into things has been joining in the weekly DoES Liverpool virtual maker nights. I know the people at DoES well enough from being up there a few times a year for various things, and I (very belatedly - I should have done this sooner) became a member to try support them in these times, so I felt I had an excuse to join in despite not being local. It was a nice way to get into hearing about people making things as best they could in the current environment and talking a bit about what I was starting to do to give me motivation to do a bit more for next week.
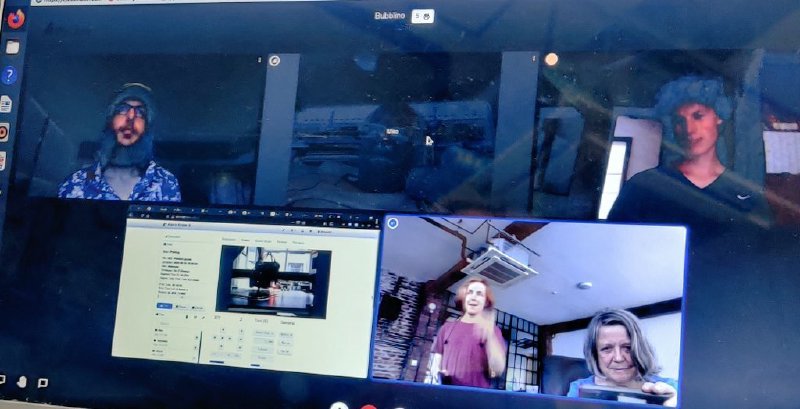
It’s a nice, friendly, and relaxed chat, and I found it helpful in getting the ball rolling again engaging with a wider set of people. My thanks to Jackie Peace for organising it (and for providing the above picture!) and to all the others for making me feel welcome.
Before I get into what I did in the workshop this week, I did do a brief bit of guitar building over the summer, just not on my own guitars. I helped Matt at Fidelity Guitars (whose workshop I now inhabit), with the wiring harnesses for his new Lite models. At the start of lock-down Matt launched a new budget friendly line of guitars, and demand was strong enough he wanted to take on some help getting them made. He brought on a couple of local builders, myself included, to help out.
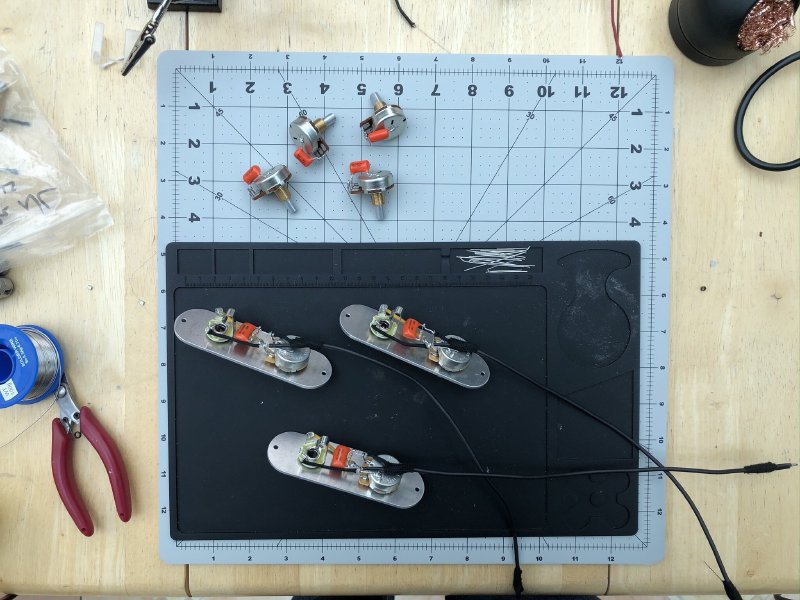
Although the Lite models only have one pickup, Matt still wanted to provide plenty of tonal options, so he designed a custom wiring harness that had a tone control and a treble bleed circuit. I ended up putting together a bunch of these in May and June:
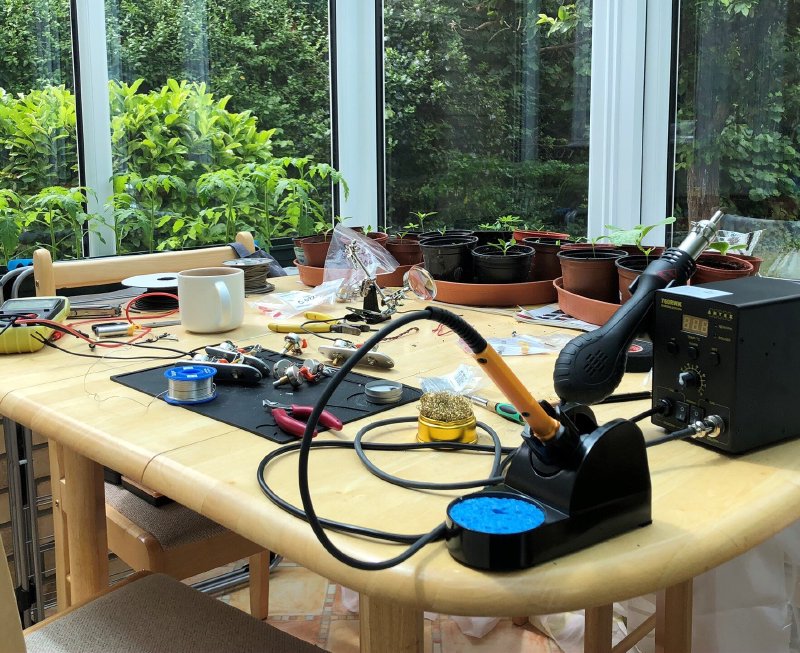
Less of setting up a cottage industry, more a conservatory industry. It was a good excuse to get myself a soldering station, something I’d been meaning to do for a while. I got an Antex model with both a temperature controlled soldering iron and a hot air gun to let me do heat shrink (alas the model I bought doesn’t seem to be available any more, otherwise I’d have provided a link). Antex came recommended (thanks to Aleric for being the first to point me this way) and I can report I’m happy that the quality of the unit has justified the price.
It was interesting making up the wiring kits at scale, as opposed to doing just one-offs as I do normally. Matt operates at larger scale than I do, so has optimised things like this to make build readily repeatable to a good quality. Matt has refined his harnesses down, making them if not easier to put together, at least easy to repeat and get reliable results.
I got to play one of the Lite models at the end and it’s a cracking guitar. It may only have on pickup, but thanks to the particular tone circuit that Matt’s using in combination with the Mojo Pickups gold foil pickup in the model I played you could get a good range of sounds out of it.
It was educational, and made a nice break from spending most of my days otherwise hitting a keyboard. Doing a bulk batch also let me work on upping my solder game, and I was pleased with the results.
But that was about it in the last four months guitar building wise, so back to the present.
Rather than just pick up the two builds I had going before lock-down, I felt that I needed to work my way back into things without immediately resuming work on a build for a specific customer. Partly just to get used to working with tools again, and partly to let me work on some of the things that I know I need to improve on before I put myself under the pressure of having to get it right.
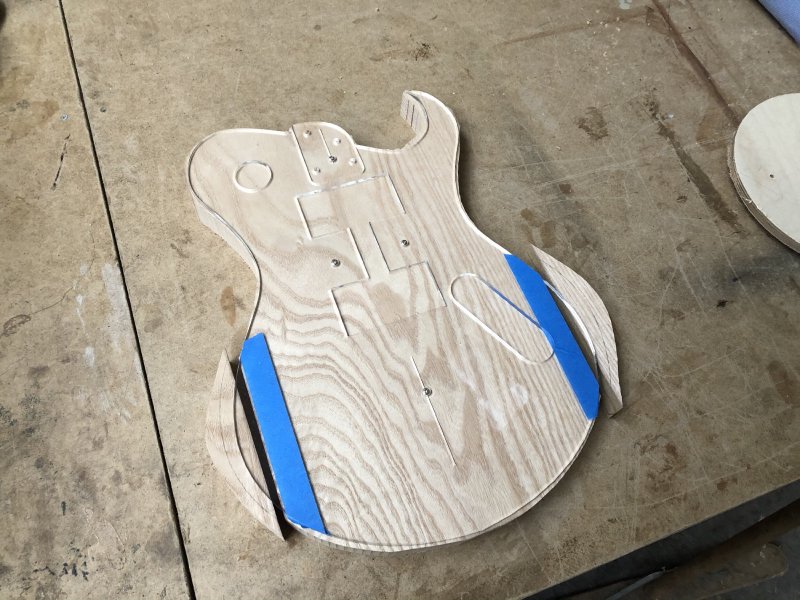
To this end I dug out one of my designs I made last year, and simplified it as much as I could, and this will be the first guitar I try and make:
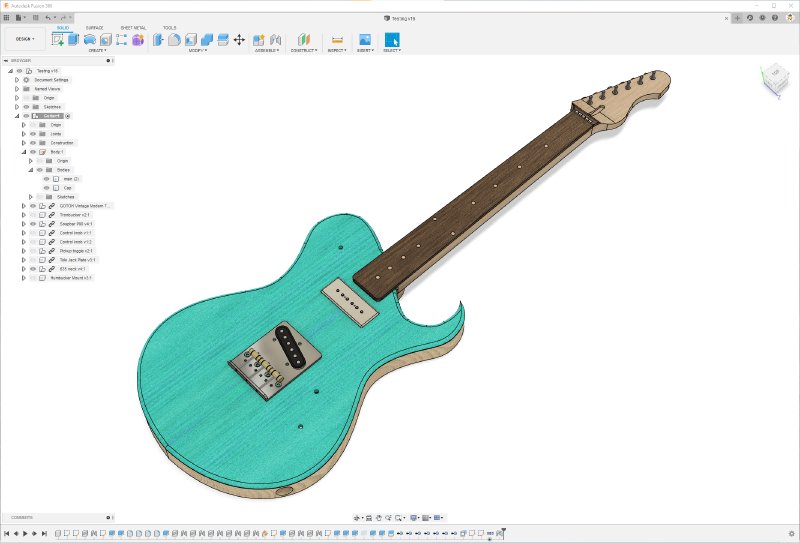
This is a single cut version of the double cut body I 3D printed last year, with the controls routed in from the back.
The main thing I want to work on is getting better at the necks: I want to get a couple more built to get better at the fretwork, rounding over the edges, and so forth - I just need to put in the time. However, a neck needs a body, and there’s a couple of bits there I want to work on too that this design will help me with, notably routing out the pickup cavities and placing the bridges. I had success with that on the last Mustang style build, but I was getting nervous about it on the Corvette build, so I want to fix that by doing it here first.
I’ve gone for a cap on the body, the green/blue bit on the front in the above picture. The cap will be a separate bit of wood from the main body, which lets you hide the internal cavities (put there for electronics or for weight relief) without having to use plastic or metal on the front. I’ve always wanted to do this and I have some spare wood that I bought to use as a cap for a guitar a while back where the client decided not to use it, so I figured it was an opportunity to learn about this technique.
Having made the design, the next stage was to make some templates. Thankfully in the last few weeks Cambridge Makespace, the community workshop I used to build from, has re-opened, albeit in a limited capacity to keep members safe. But it was open enough that I could go in and use the laser cutters to make some templates for the body (I already had the neck template from a prior build).
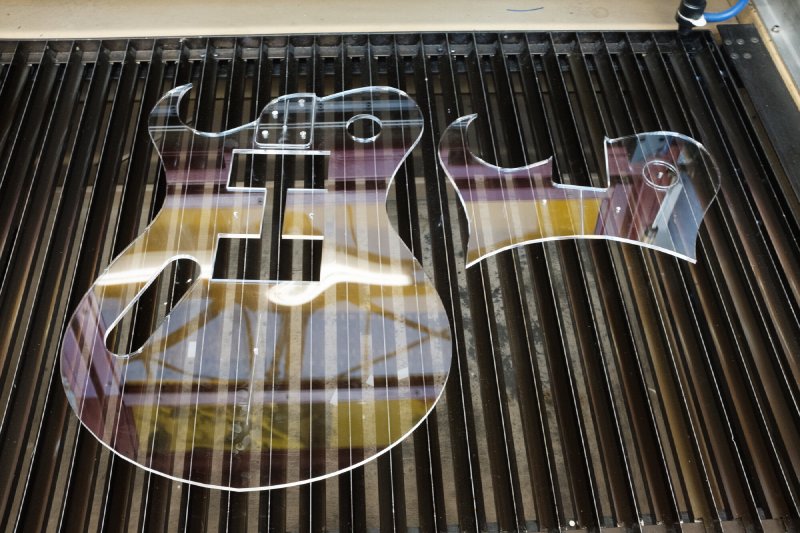
As ever, I made my templates with 5mm clear perspex. The main reason I use perspex rather than the more traditional MDF is it means I can use the laser cutter to make them, rather than the CNC router. Despite getting started with the CNC router, I generally avoid it these days if I can due to its slow speed and poor reliability (of the specific one that is at Makespace). It’s still the right tool for certain jobs, but if there’s another option I’ll generally take it.
Perspex is a little thin for a template at 5mm, but I can’t cut much thicker in the laser cutter - even at 5mm I had to cut these templates at the maximum power and a very slow feed rate (though it is still orders of magnitude faster than the CNC router because of the lack of physical movement constraints). However, perspex does has one advantage over MDF: I can make my templates transparent! That means I can check the position of the template to ensure it’s properly centred on the wood, and that I’m happy with the grain I’m selecting for the part.
With the templates made, I then finally ventured back to the new workshop. In March I’d literally moved my stuff into the workshop, set up my bench, and then lock-down happened, so I’d never really got to use it. Thankfully Matt, who I’m renting space from, has been very understanding about this.
I still had things to finish unpacking, and as is inevitable in a workshop, my bench had acquired a nice layer of dust in my absence, so I spent some time getting it back in shape, and it was lovely to have my bench ready to go, and my trusty bradawl back out ready to get building.
Another incentive for starting a new build rather than trying to resume an existing one is that I’m going to have to change how I work to fit in with my new workshop environment, and again I’d rather do that learning first rather than fumbling around on a build I know is going to someone. The tools and machines I have available to me in the new workshop are not the same as what I had access to in Makespace, and as such I’ll need to adapt how I make things to fit in. Whilst I can still pop into Makespace for odd jobs like using the laser cutter, in general I want to avoid lugging bits of half built guitar around East Anglia.
To this end I spent some time just stood in the new workshop this week going through things in my head, trying to work out what I could do as I used to, where I’d need to change my process, and identifying any gaps where I needed to either come up with a new solution or invest in tooling.
A good example of this is the bandsaw. A good bandsaw is central to how I build guitars now, and the new workshop doesn’t have one. It has other tools, but none fit how I’ve come to rely on a bandsaw, and without going back to CNC routing I can’t see myself moving away from that. So in the short term I’ll have to nip back to Makespace for some of the early roughing out, and find an alternative way to for later bits where I don’t want to move the guitar between places for risk of damage. Eventually though I’ll need to invest in a bandsaw.
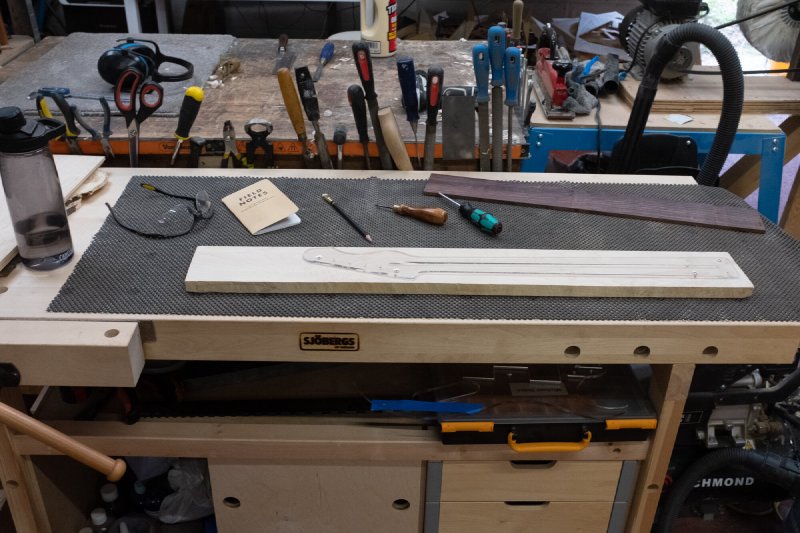
Thankfully, having done an inventory check to remember what bits of wood I had in stock, I had enough bits of wood around to put together a guitar. Some maple and Indian rosewood for the neck, both already thicknessed, and some poplar for the body and a lightly birds-eyed set of book-matched maple for the cap.
The first bit of new dust I got to make was thicknessing the poplar for the body to get it down from a couple of inches thick to the 36mm I wanted for this guitar (plus cap, so the final result will be around 40mm). As is sometimes the case with wood, this bit of wood only wanted to go one way through the thicknesser, tearing badly in one direction:
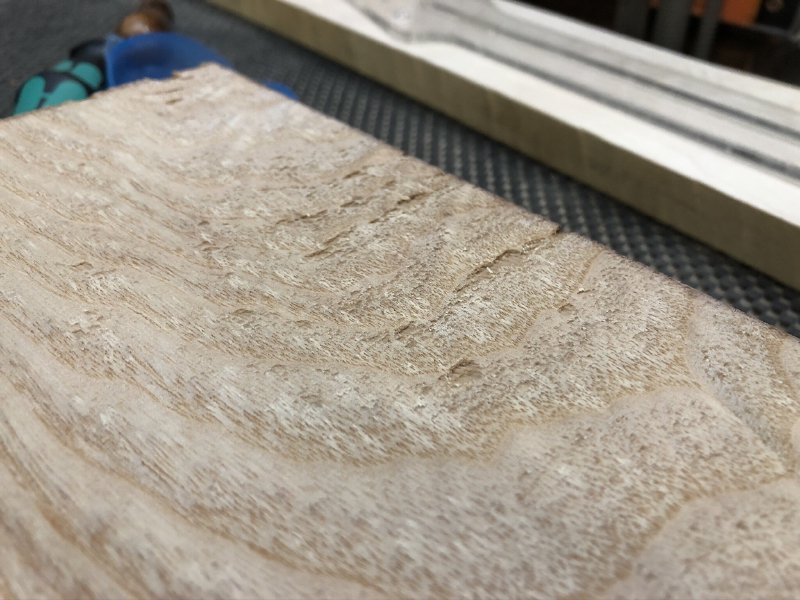
In most cases the solution to this is simple enough, just run it through in one direction for each surface. I make a note on the side to help me remember which way which surface needs to run:
Sometimes you’re unlucky the wood will have areas that tear when fed one way, and other areas that tear when going the other, in which case you have to stop short of your final target thickness and just sand down the last bit or use a hand plane to work with the variable grain direction.
Whilst I was doing that Matt kindly sorted out the maple for the cap for me, as he was making some caps for his own builds. He used a makeshift shooting board to hand-plane the joining edges of the two bits of book-matched wood so that they joined together without any gaps in the seam, and then I glued them up, sitting them on some plastic sheet (to stop the glue sticking to the work surface underneath), put some weights on them, and then clamped them with sash clamps.
It was a nice immediate example of how I hope I can learn a load more things from Matt now I’m sharing a workshop with a more experienced builder, whilst at the same time I’m hoping that some of the things I’ve learned coming at things from a different angle can assist Matt at some point.
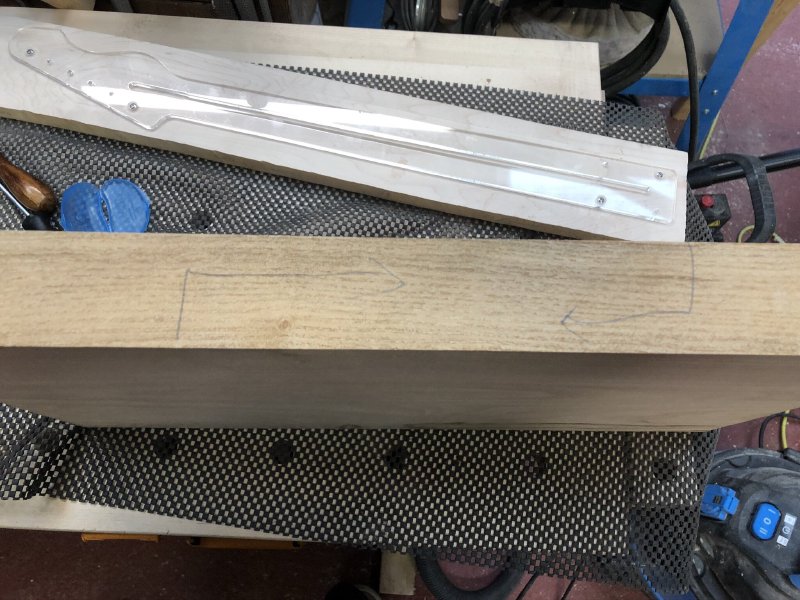
With the poplar thicknessed, I mounted the templates for both the neck and the body to their respective bits of timber:
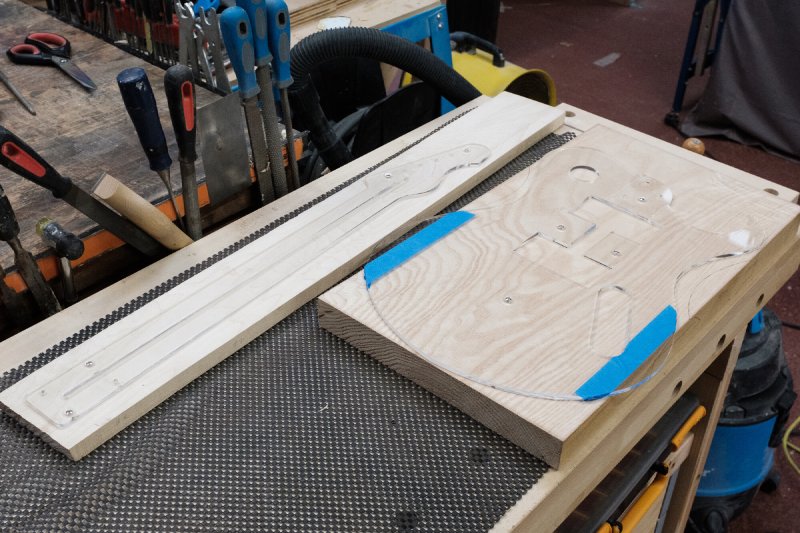
You’ll note that the body template doesn’t quite fit: the wider lower bouts hang off the edge (where I marked with blue tape). This bit of poplar is almost wide enough for a guitar, but not quite! However, I checked before I started, and you can see my pencil lines at the narrow “waist” of the guitar: there’s enough material that is cut out at the waist that I can then join to the lower bouts to make the full body.
The next stage for both of these was a trip back to Makespace to use the bandsaw. With the bandsaw I’d need to be very careful with cutting out the waste to ensure I had enough material, as a bandsaw does have a limited curve radius due to the thickness of the blade. Thankfully whoever had fitted the blade last had left it with a nice narrow 12mm blade that meant I could easily guide the blade between the template and my pencil markings:
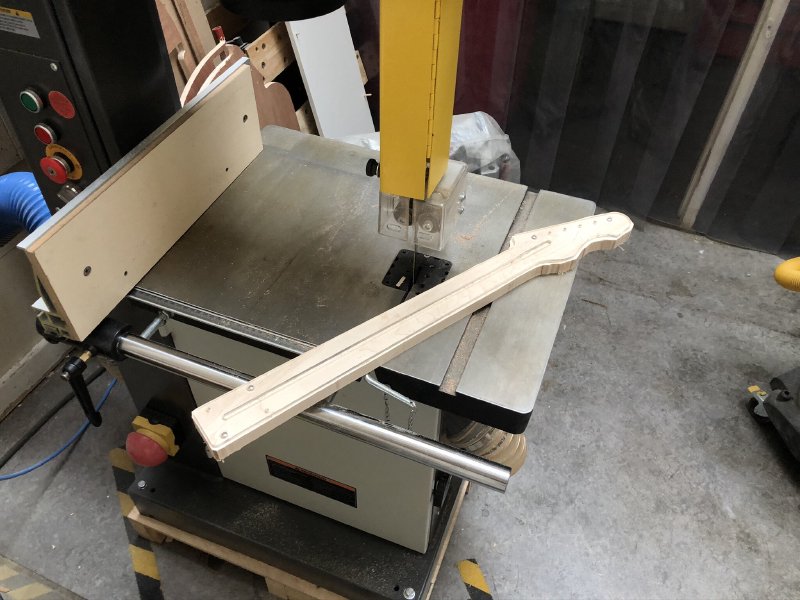
With the body done I also trimmed the excess off the neck too:
Only a couple of days since I started back up and I have what looks like the beginnings of a guitar!
It was great to get started, but unfortunately next week I’ll have limited time to make much progress, as I’m heading up to Scotland to visit my parents for the first time since February. I’ll try and least get in to plane the sides of the body and glue on the wings, and if I’m lucky I’ll perhaps get started routing the neck to shape, but I fear that’ll be it.
Still, having got started, there’s things to be doing and it feels like I have some momentum again. So, global pandemic allowing, here’s to some more workshop activity in the coming weeks!