Getting back to the Shop
Published 16 Jan 2023
Tags: älgen, delfinen, jigs, laser-cutting
It’s been a whilst since I last posted an update, which is because it’s been a while since I was last in the shop. My day job got very busy, and with no pressing commissions right now I decided to concentrate on getting that done rather than switching between tasks all the time and adding undue stress. Thankfully that crunch is done, and so I’m able to get back into the workshop and focus on the guitars a bit again. It’s always frustrating taking time away from the workshop, but I do a better job on the guitars when not rushing, and over the lifetime of the instrument a few weeks delay isn’t the end of the world.
One aim this year is to restart taking commissions, as I find they provide a good focus. I paused commissions over the pandemic year, and then kept them paused whilst I found my feet again in the new workshop, but I think it’s got to the point where I need the discipline that commissions bring as much as the interest. It’s very easy to put the guitar building to one side when other things start to add up, and then inertia creeps in and it’s hard to switch back again, and it takes something like a xmas break to reset things again.
The other thing that stopped me soliciting for commissions again was I wanted to get my current new crop of guitars built, as these are the first of my own personal designs, and I wanted a reference point to try bring people along the journey to having a somewhat unusually constructed guitar, be it full on mixed design like Älgen, or a more subtle inclusion of 3D printed bespoke parts as per Delfin. But I feel both these builds are getting to the phase where I can see their exit, and I want to be planning the next pair of builds so I have something to move on to when these are completed, and thus I feel it’s time to get others involved in my builds again.
To try and get things going again I’ll probably repeat the offer I did when I first started taking commissions, and do a couple of guitars at cost of materials plus contingencies. So if you’ve been pondering getting a guitar built, and wanting something a little unusual, then drop me an email.
Älgen
The bodywork for Älgen was effectively completed when I last posted, and since then it’s gone through the finishing stage, where I’ve oiled the body. This is a slow process, so was something I was able to get on with in my forced absence from the workshop: oiling takes time as you build up the layers, buff them back, apply the next layer and so froth.
I got that mostly done last year, but upon inspection when back in the workshop it needed a couple of tweaks.
The first one was just a blemish in the finish I wasn’t happy with, I suspect from where I’d inadvertently touched the surface after applying some oil and whiping it back. The oil had built up a built up thicker than the surrounding area in the shape of what looked suspiciously like the tip of my thumb! I’m afraid I was sufficiently annoyed at myself I forgot to take a before picture, but above is the after picture, where you can see the lighter area is where I’ve had to sand back the oil so I can build it up again. Thankfully oil finishes are quite easy to work with in this way, I’ll just need to refinish this one spot and we should be good to go.
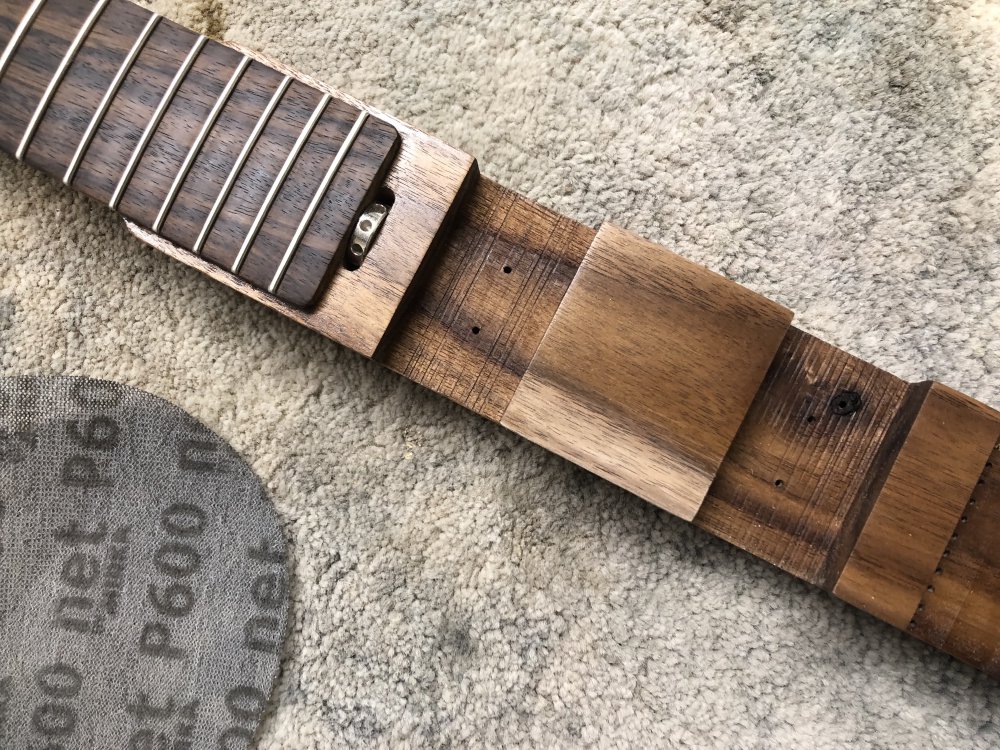
The other place where I needed to make some adjustment was along the edge of the neck:
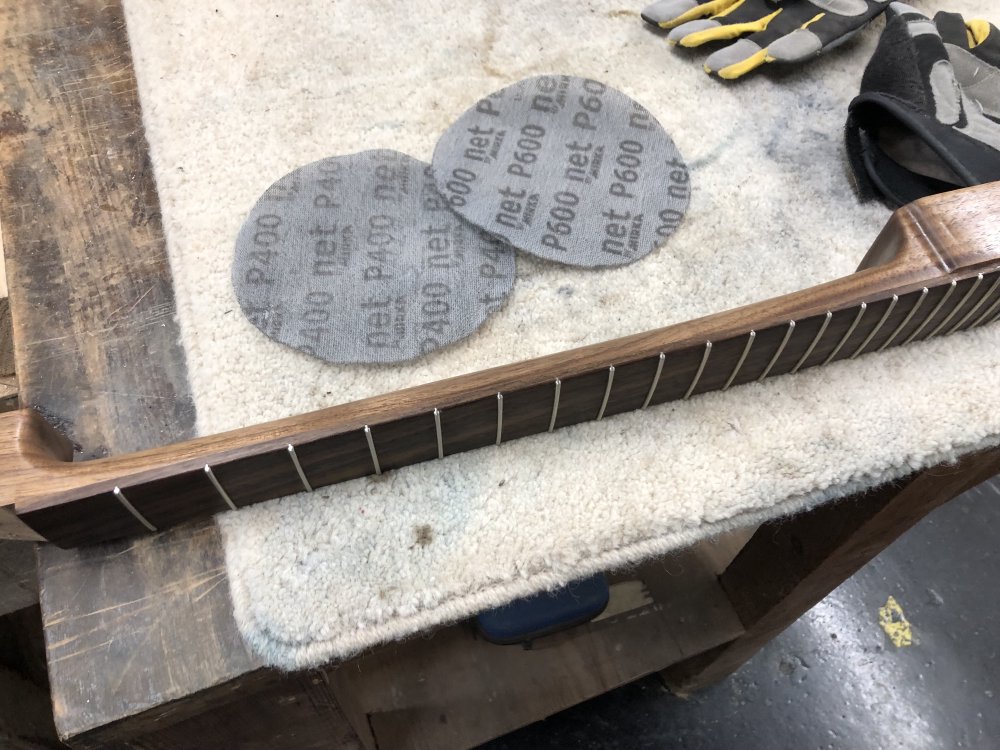
This guitar has a rosewood fretboard, so it will get a different finish to the rest of the body. The usual process for a rosewood fretboard is to just give it an occasional top-up of the natural oils in the wood rather than build up a laquure finish which is what I’m doing on the rest of the neck. However, after I removed the masking tape that was covering the fretboard I could feel a distinct step between the oiled walnut body and the rosewood fretboard, so I had to sand that back gently so it’s not something you can feel when you play.
With that done, I also did the shiny bit of the build, and applied copper insulting tape to the electronics cavity:
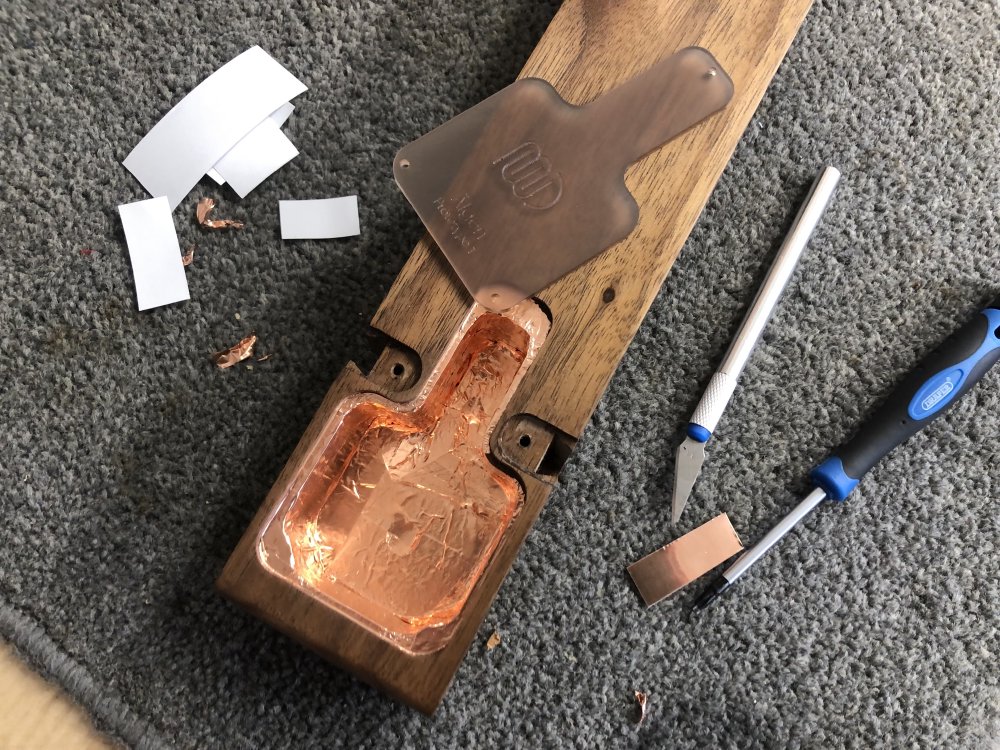
Usually when I do this soft of work, it’s a secret only I get to see, but this time I’m using a diffused but translucent acrylic cover for the cavity, so some of the copper’s brilliance will still be visible to the owner of the instrument - so now it’s a secret we both get to share.
Delfin
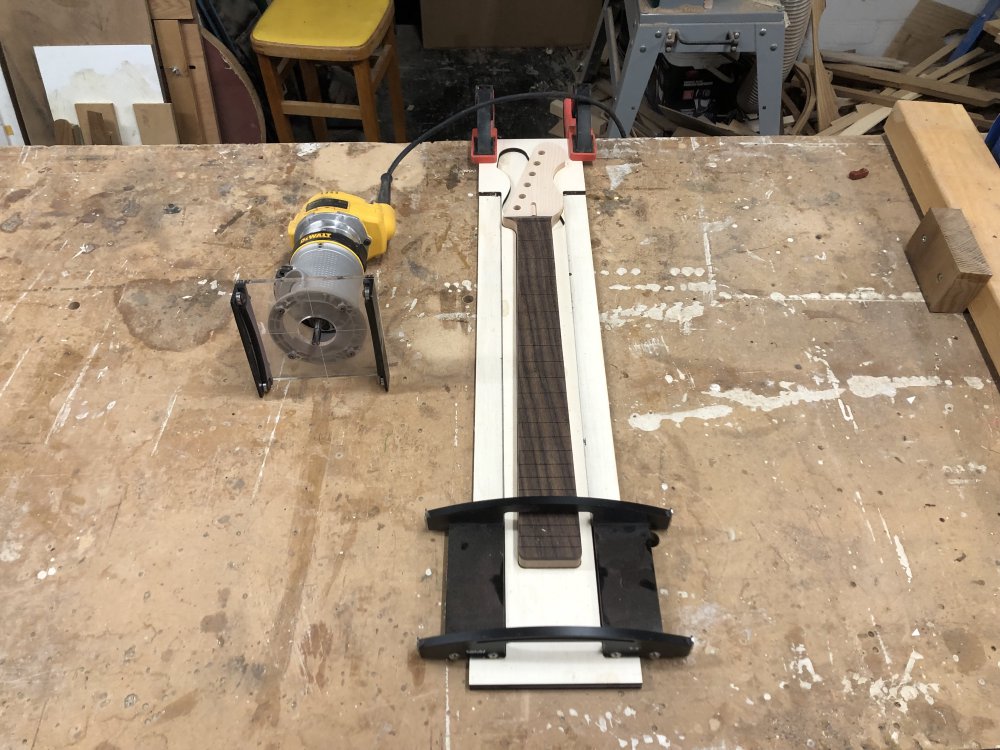
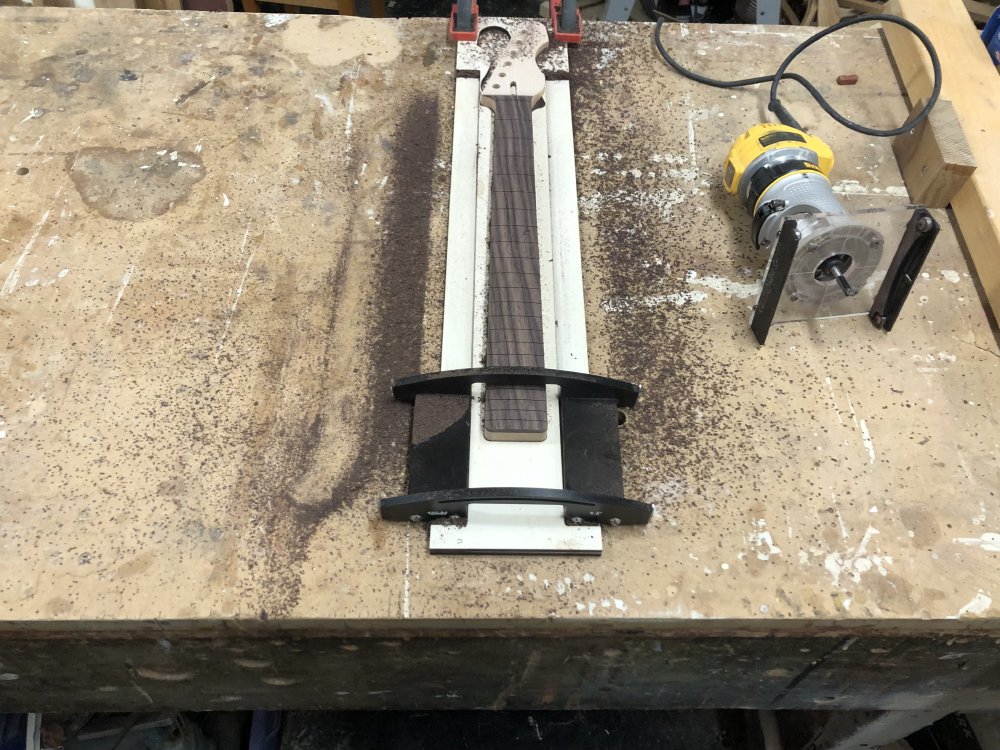
Last time I posted I wrote about how I’d designed a jig for my necks to let me use a G&W radius router jig to radius the necks rather than doing so using a sanding block as I had done for all builds thus far. This is how far down the rabbit hole we’ve come - we’re now making jigs for our jigs! To save some head-scratching in the following, here’s the finished jig, a neck, and the G&W jig that’ll guide the router. The idea is that the G&W jig will let the router move along the correct radius for the fretboard, whereas my jig will hold the neck dead centre and guide the G&W along the neck’s axis.
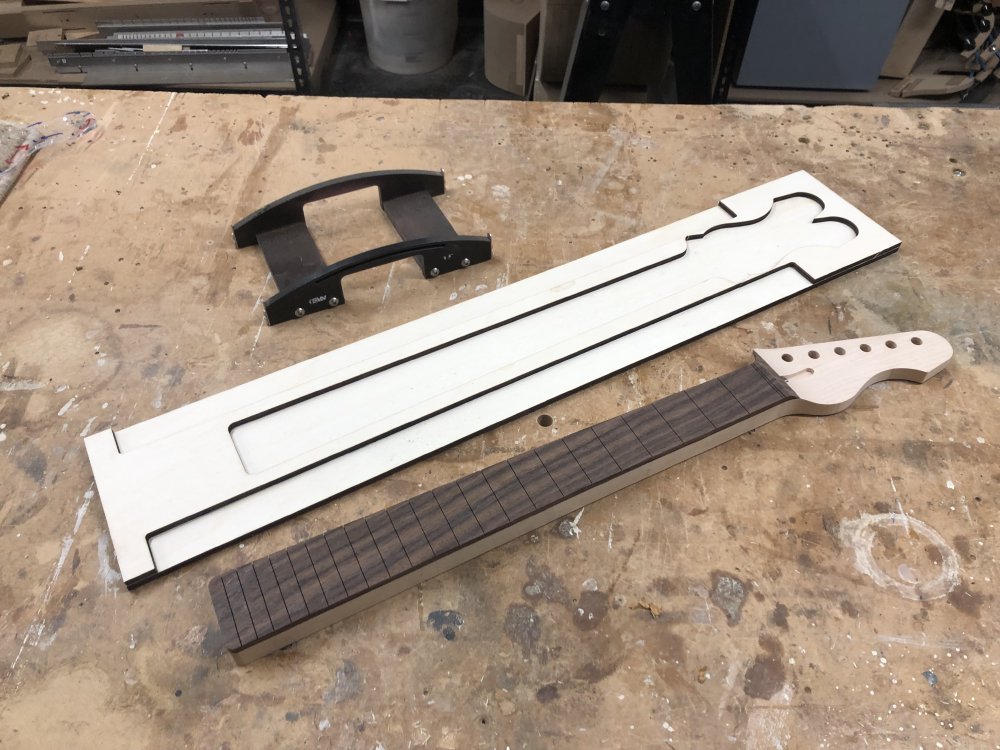
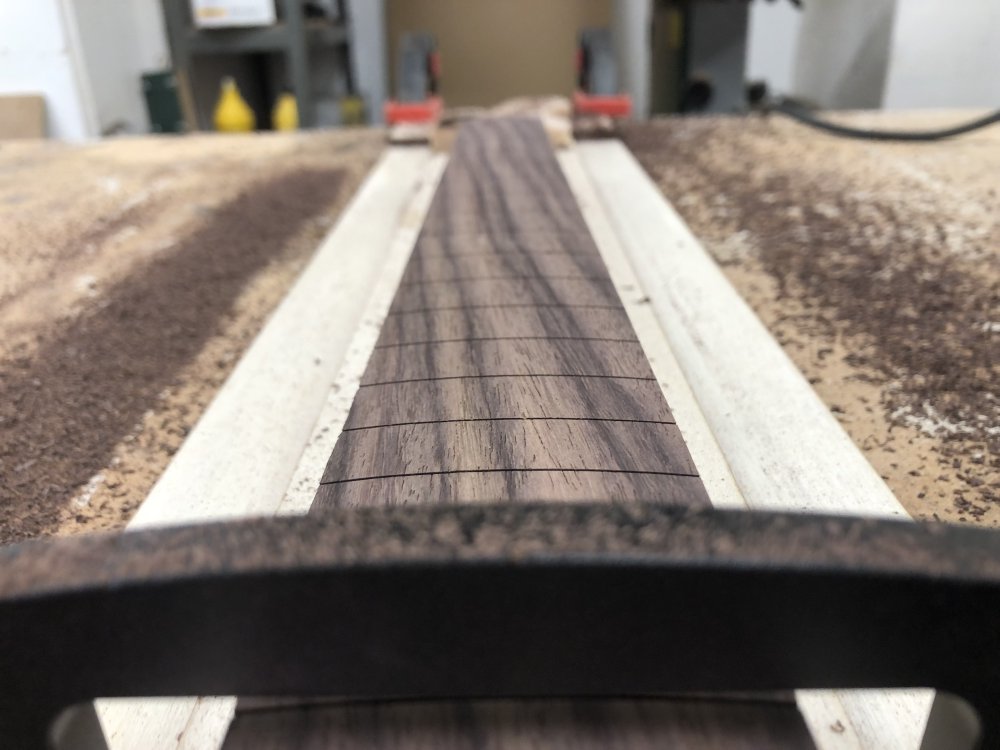
Hopefully it’s somewhat clear how the jig works: the bit I’ve made will hold the neck in the middle, and provides guides for the G&W to slide along, with stops at each end placed to ensure the router bit will go beyond the fretboard, but not much more.
To make my jig, rather than use acrylic as I’d normally do for this soft of job, I ended up buying some 6mm plywood, as it’s easier/cheaper to get sheets at the length and depth I needed, and it’s easier to glue the layers together. After a little test calibration on the laser cutter, the two parts cut nicely:
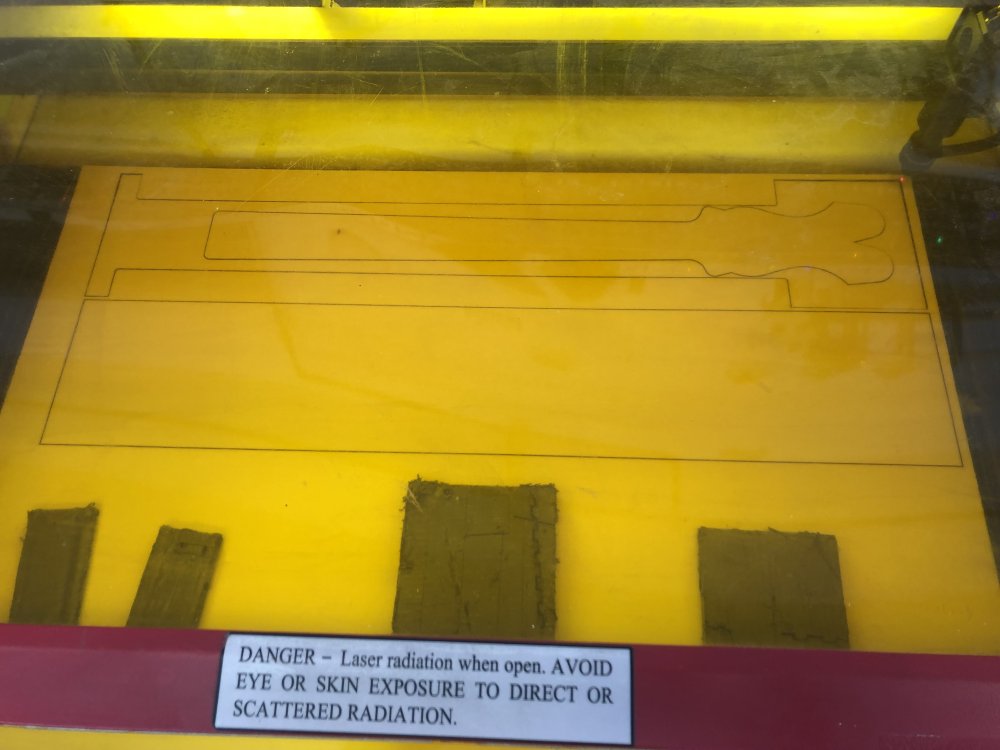
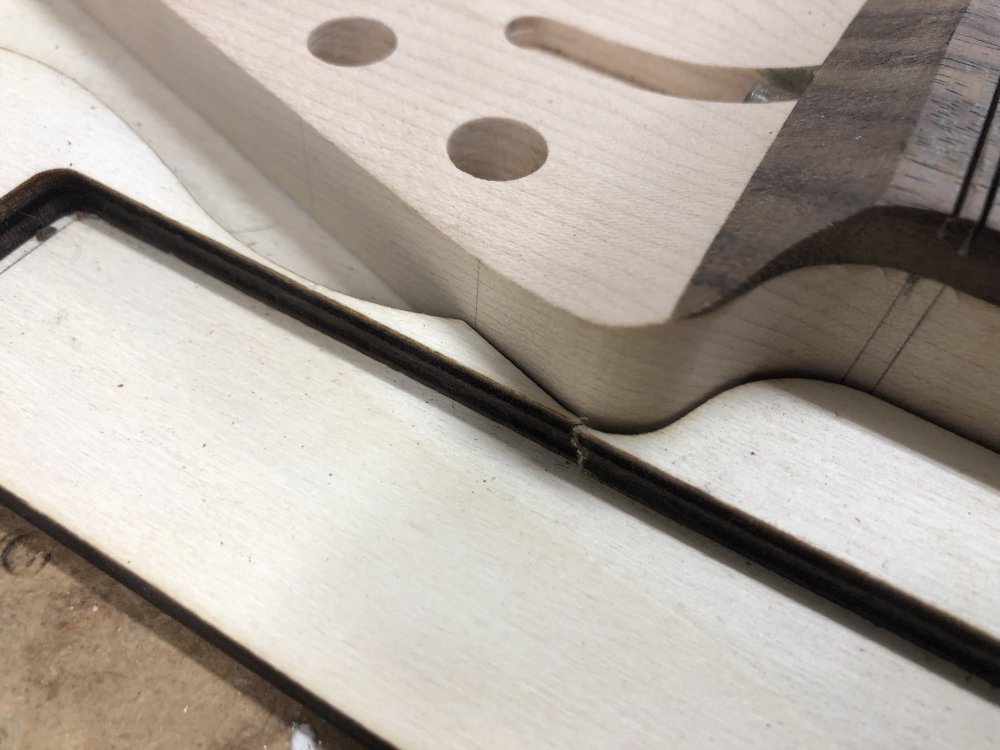
You can see it was quite tight in terms of would the headstock fit within the bounds of the G&W jig, as it has to go quite far along the headstock at the top end. It was just possible, but it was so fragile that the part broke in transport from the makerspace whose laser cutters I used to my own workshop:
Thankfully when I glued the two layers of my jig together I could use the acrylic template I use for routing the neck as a thing to hold the two halves in place. So with that holding things together, I applied some glue and left it under some weights to set:
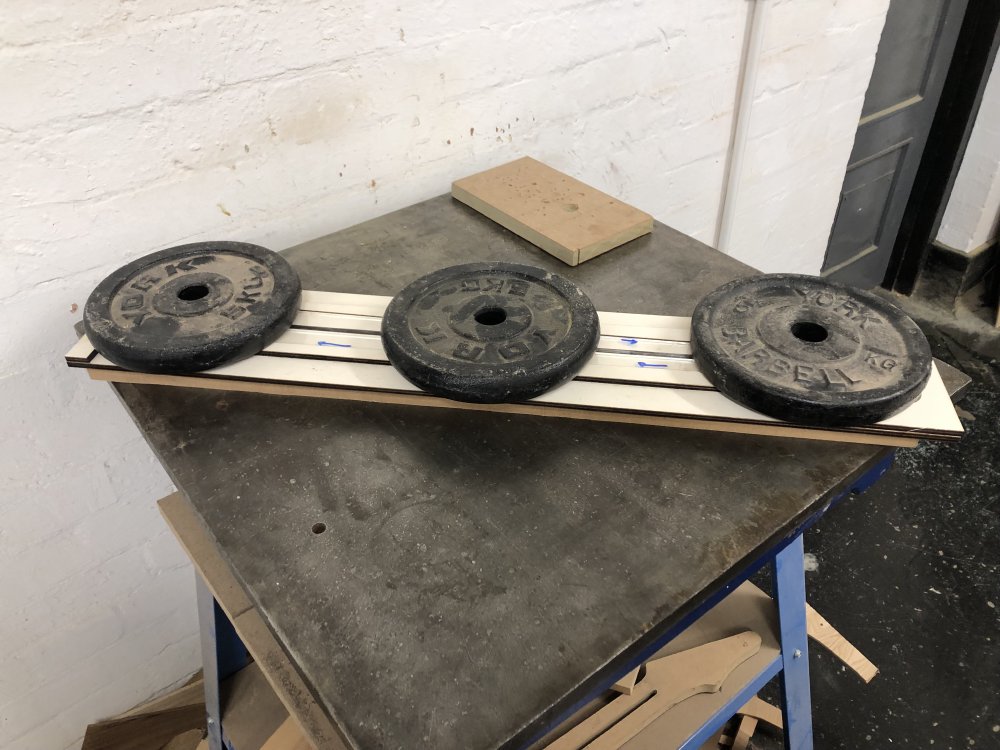
I was careful here to ensure that the thing on which I rested my jig whilst it glued was as level as I could get it, otherwise there’d be a risk of introducing bowing to this jig, which would translate to a bow on the neck when I radius it.
Once the glue had set, the jig worked a charm. Here’s a quick video clip showing the slide in action:
With that done it was time to actually put it into use:
A few minutes was all it took then to use the guided palm-router to put in the radius:
A quick close inspection, and this setup proves itself not just to be an order of magnitude faster than doing this by hand with a sanding block, but it’s also super smooth, with virtually now machining marks left from where I did the multiple passes:
I’ll still sand this down slightly to get a smooth to the touch finish, but it’s otherwise nigh on perfect and ready to go.
Misc other notes
I’ve started looking again at how and where I get my wood. With Älgen I switched to walnut as a local sustainable alternative to say using mahogany or other darker hardwoods, and I’d like to do some more looking into that as I start to turn my attention to starting some new instruments in the near future. I started writing that up for this week, but it just keeps getting murkier the more I look currently, so I’ll write that up more in the near future, otherwise these notes won’t get shipped today.
I’ve started taking another look at FreeCAD, as it seems to have come along a long way since I first looked at it when I started this and concluded that I should give it a miss compared to Fusion 360. Whilst I get a lot out of Fusion 360, I’m reluctant to recommend it these days since they gutted the hobbiest option, and it’d be nice to know what else to recommend there.
A long whilst ago, before I switched to using Shapeways for all my 3D printing work, I used to use a FormLabs Form 1 printer at Makespace, but Makespace eventually got rid of that printer as it wasn’t well suited to use in that particular environment - the printing process was much messier than the more popular ultimaker FDM printers, and there was this negative feedback loop whereby the resins go off after a few months if not used, and so people’s prints would fail due to poor resin, which would cause the printer to not be used so much, so more resin would go off… Fast forward a good fw years to today, and Makespace just got a Form 3 printer, which is effectively the same thing, but now the resins and washing flow is much better managed, at least in theory. I got my training on the new kit at the end of the week, so hopefully this week I’ll kick of a print proper to see if in practice it still generates results that make the effort worth it.