A Week in the Shop
Published 12 Sep 2022
Tags: älgen, delfinen, drilling, filling, sanding, templates
A week of slow but steady progress on both Älgen and Delfin - just putting in the time required to make an instrument rather than doing anything new and exiting.
Delfin
I did a bit of work on the Delfin to start the week.

When I last wrote about Delfin a few weeks back I was measuring up the neck with the body, and the next obvious step was to actually mount the neck to the body, as that’s easier to do before I radius the neck.
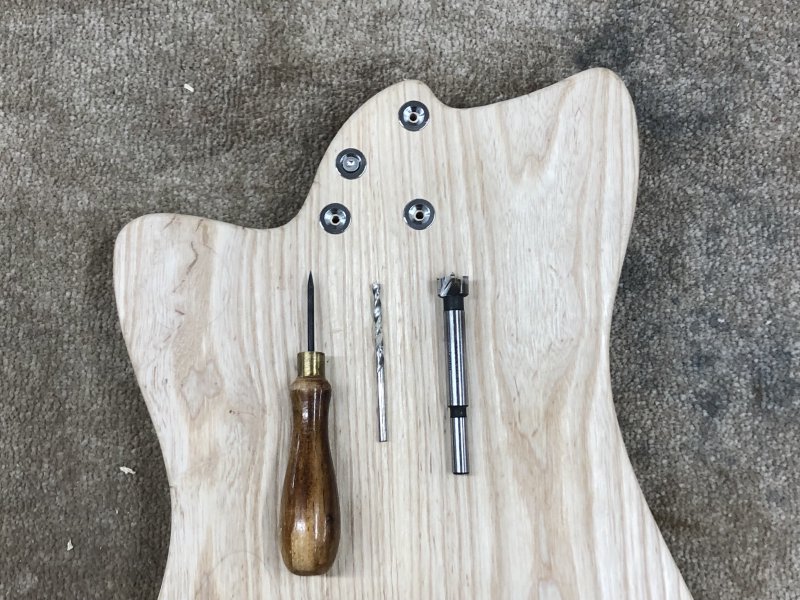
To get the positions right I used the location of the actual mount points as the mounting holes for my neck profile template, so I copied those over onto the body first:
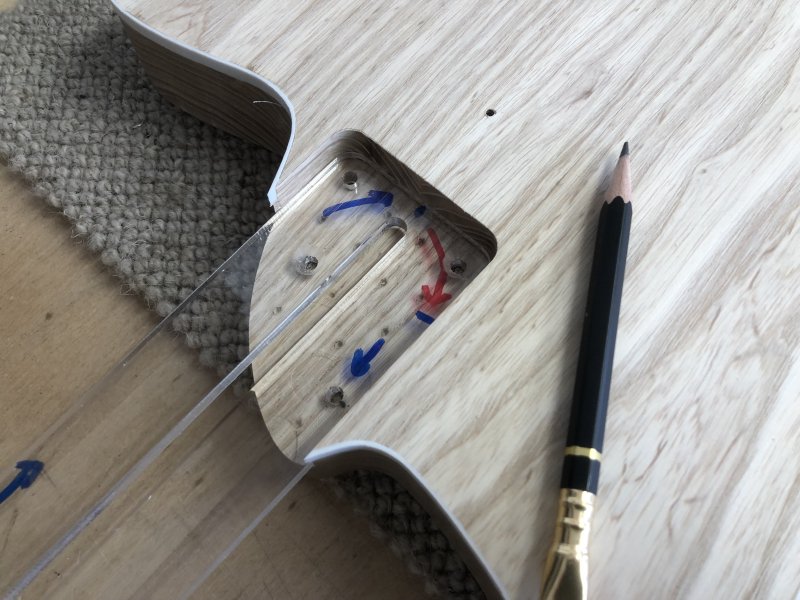
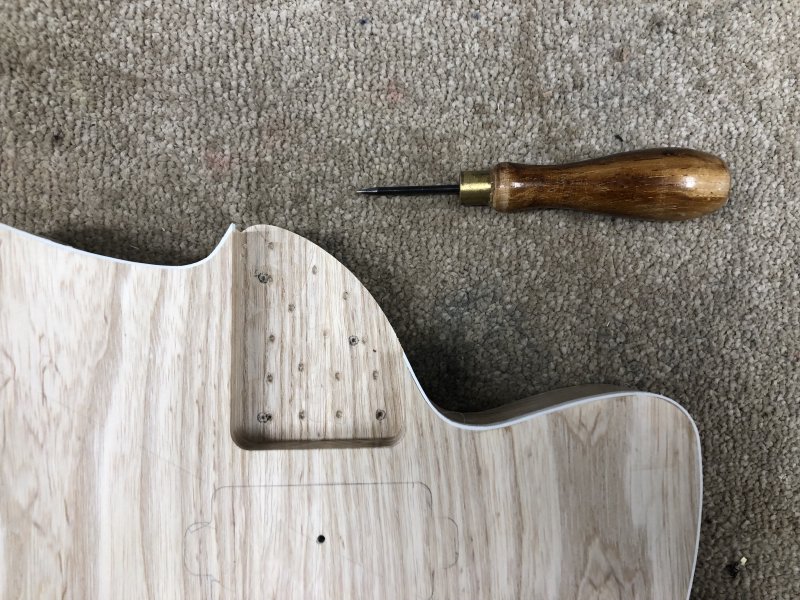
After that, it’s then out with the bradawl to help with drilling accuracy. This is where all the indents caused by the forstner bit I used to clear the neck pocket get a pain, as they could cause the drill at this stage to wander if it sinks first into the indent left before. At least with the bradawl I can correct for that.
Then using a brad point bit I drilled the holes for the screws to pass through the body. The screws I’m using at 3.75mm in diameter, so I’m cutting a 4mm hole here so that the screw can pass through cleanly.
A mistake I made early on when starting out was assuming the screw was meant to bite in both halves, but that leads to trouble if your neck isn’t perfectly flush when you put the screws in: rather the screws should just pass through the body and form a sort of clamp where the body is sandwiched between the neck and the neck plate or ferrules (depending on which you use) on the back.
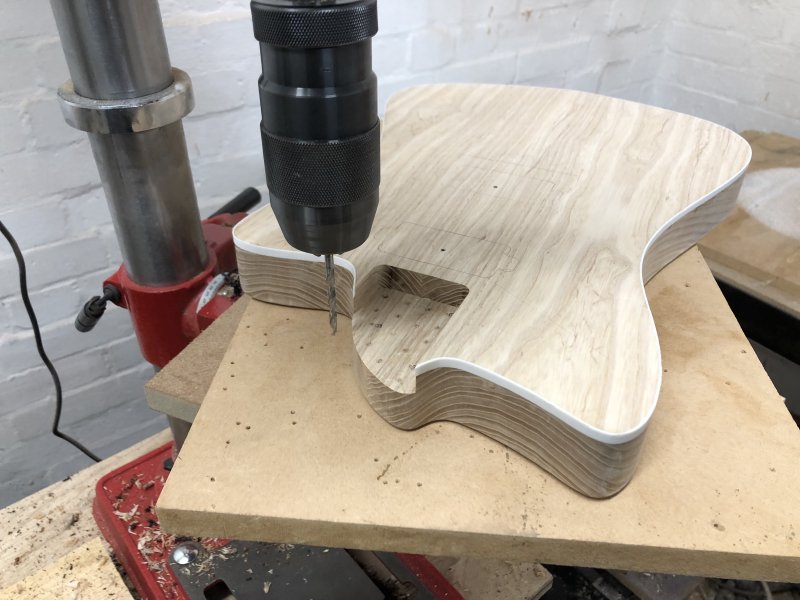
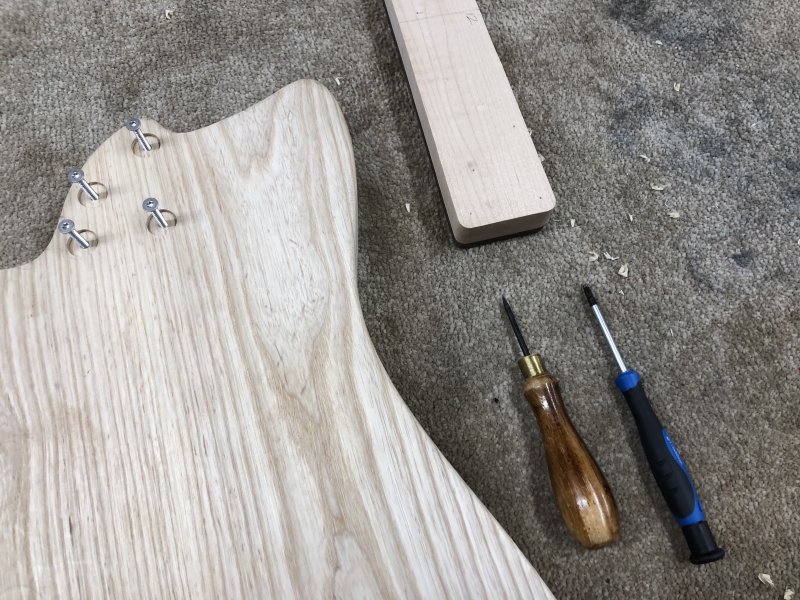
Holes done, we then look at the back of the body. I’m going to be using ferrules on the back rather than a neck plate. I do this for two reasons: firstly it gives me more freedom to define the pocket shape without worrying about whether I can get a matching plate, and secondly ferrules don’t leave a mark in the wood when you use them, which means I can assemble the guitar before doing the finishing safe in the knowledge I’m not going to leave a compression mark on the body. I know that ferrules aren’t to everyone’s tastes, but as a builder they just make much more sense to me.
To make the recess I’ll again use a forstner bit. The pencil marks you can see in the before shot above are actually from the original body template, so you can see that things have moved a bit as I’ve worked on the body as the holes don’t match up, which is why I use the neck template as a reference for this rather than the body template.
A few minutes on the drill-press again and we have a nice set of recesses for the ferrules:
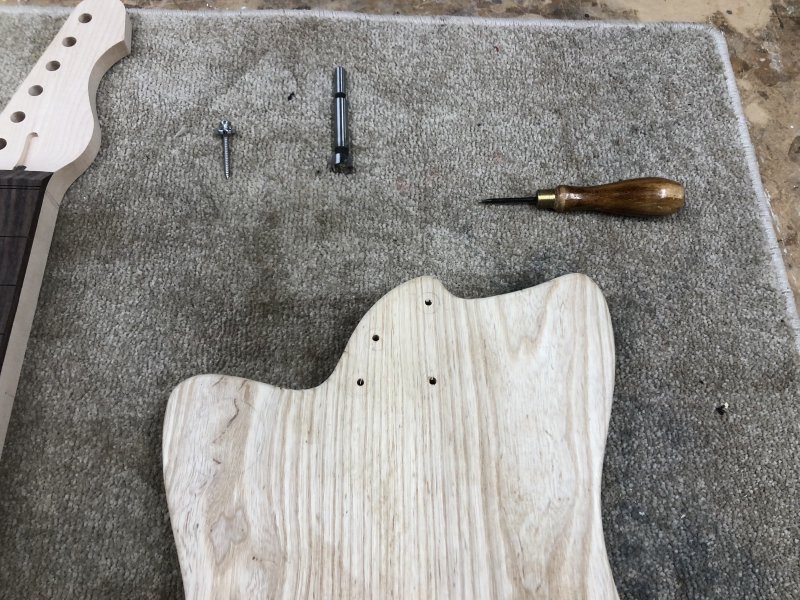
With the body side done, we now need to drill some pilot holes in the neck. To get the position right for this I hold the neck in place in the neck-pocket on the body and push through the screws to make an initial indent. This is why it’s nice to have the body holes only just oversized - enough that the screws will pass through without biting into the walls, but not enough wobble such that I can use this method to get that initial impression. That initial impression is tidy, so I then asserted it further using my bradawl:
After which it was a final trip to the drill press to dill some pilot holes in the neck. It was somewhat satisfying as I drilled them that I could feel after getting part way through the neck drilling became easier as I reaced the screw holes I’d used when mounting the template to the neck when I first shaped it: the transfer of position from neck template to body and then back to neck hadn’t lead to any misalignment :)
And with all this done, I could now finally mount the neck to body:
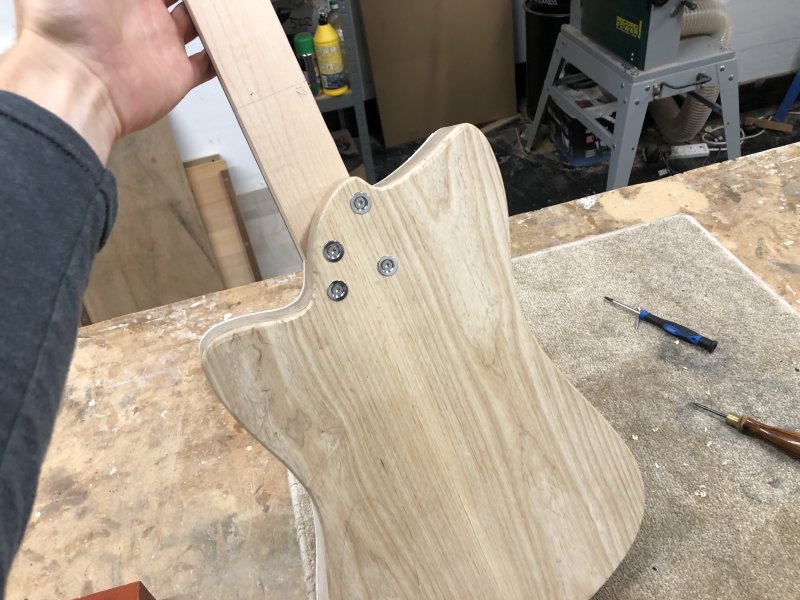
I’m very pleased with how the Deflin is shape wise:
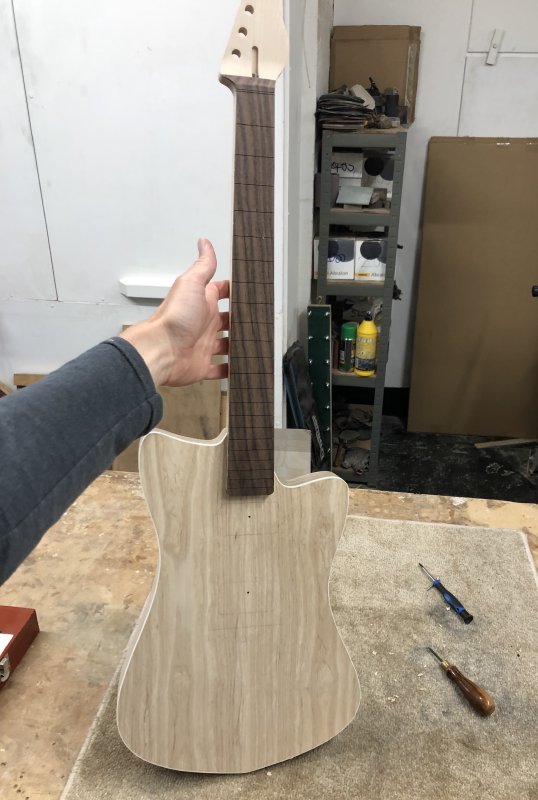
The next stage for the Delfin is shaping the neck and making the cavities on the body.
Älgen
The initial aim when I got into the workshop was to do the last bits of cutting on the Älgen, but before I did that I had one final patch job to do. Last week I wrote about patching up some tear out, and given how well that went, I wanted to try using the same technique to patch up where I’d mis-cut the mount for the 3D-print because I’d not allowed for print shrinkage. Because I had to recut the rear-recess for the 3D-print, it was oversized, and was getting close to where I’d need to cut out material for the recess for the control-cavity cover. So to try and not end up with a more damage there due to routing with too thin a wall of material I decided to fill the gap.
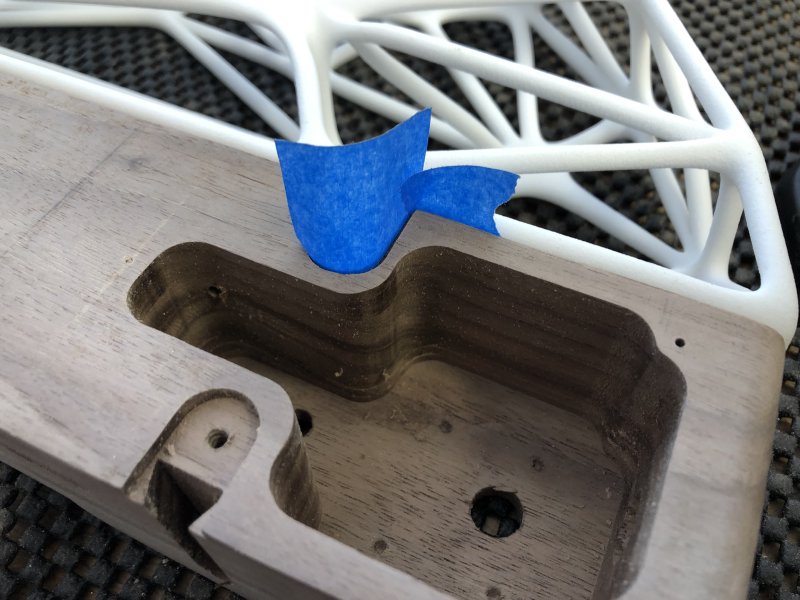
In practice, it turned out there was plenty of material, so this was a bit of a waste of time, but I only realised that after I cut the recess for the cover :) Still, it’ll look a little tidier once finished, so not truly wasted effort. Having taped up the 3D print so as not to get it covered in my usual mix of wood glue and sawdust (though not made with a saw, but “belt-sander-dust” doesn’t trip off the tongue so well) I filled up the gap and left it to set for a few hours whilst I did the aforementioned work on the Delfin.

Once that was set, I cleaned it up with a chisel, and was annoyed to note that somehow I managed to get some flecks of lighter wood in my mixture (I forgot to take a picture, probably as I was annoyed at myself), so here’s one from later after I’d cut the recess that shows it clearly:
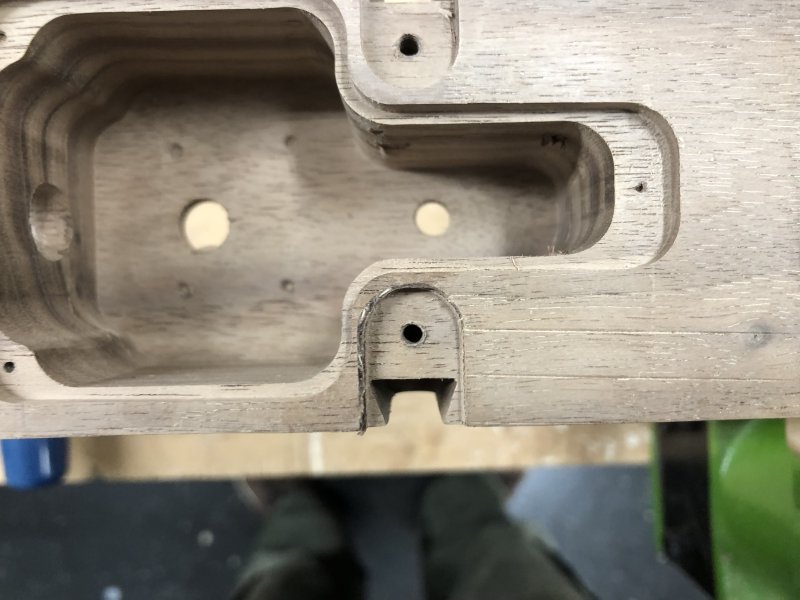
If this wasn’t a prototype, I’d have chiseled out this patch and started again, and I can still do that alter, but for now I’m going to hope that once oiled up it won’t look too bad, and I didn’t want to have to delay doing the rest of the work I had planned for the day for this: it’s more important I get this prototype playable!
So, with the patch set, I dug out the template I made for the recess. I’d designed this template to mount using the same screw mounts that I use for the 3D-printed wings - I find that a large part of building templates is trying to work out how to re-use existing mount holes, or to tweak mount-holes early in your design so that they can be multi-purpose like this!
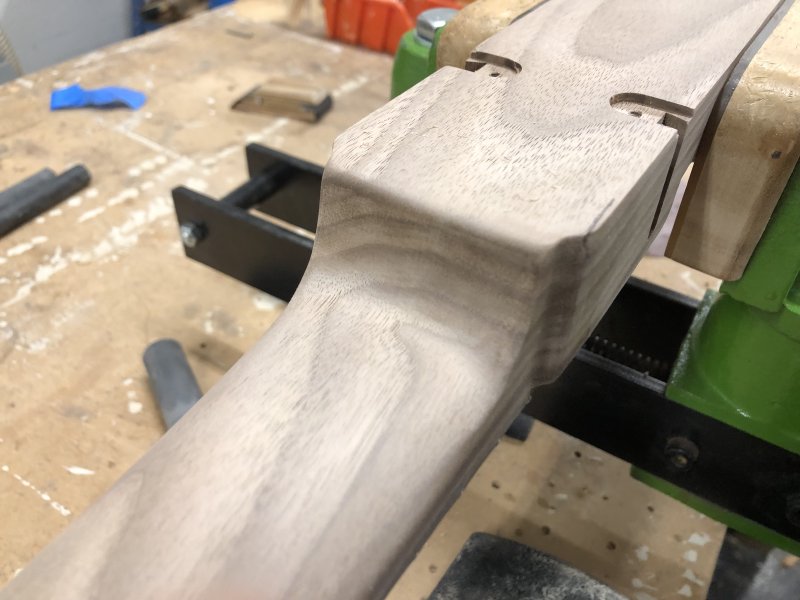
I then used the palm router to slowly remove the the material. Because I was worried about tearing on the walnut, which seems very given to that sort of thing, I worked slowly, just taking one millimeter off at a time.
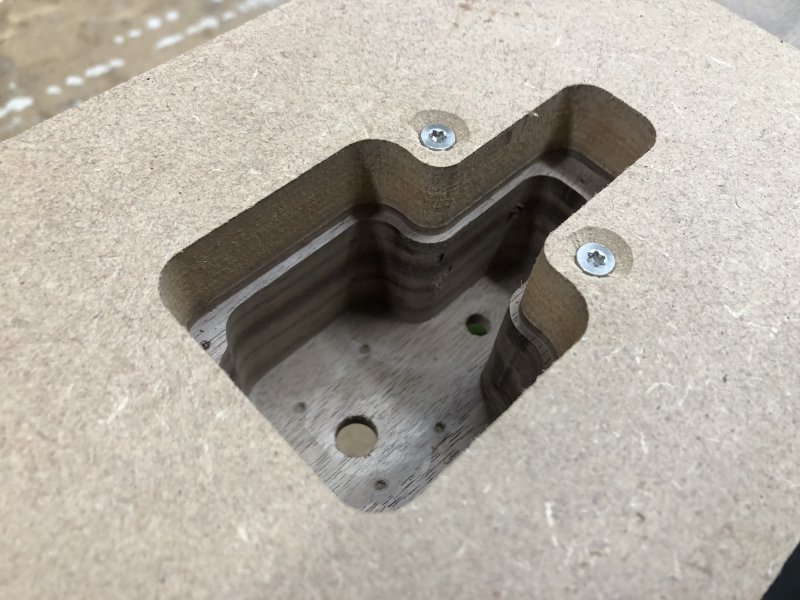
The end result I’m really pleased with (other than that patch which is a bit distracting and continues to offend me):
You can see how thin the wall is where the patch was - I suspect in the end it’d have been fine given I went slow and took shallow cuts, but hopefully that explains why I went to the effort.
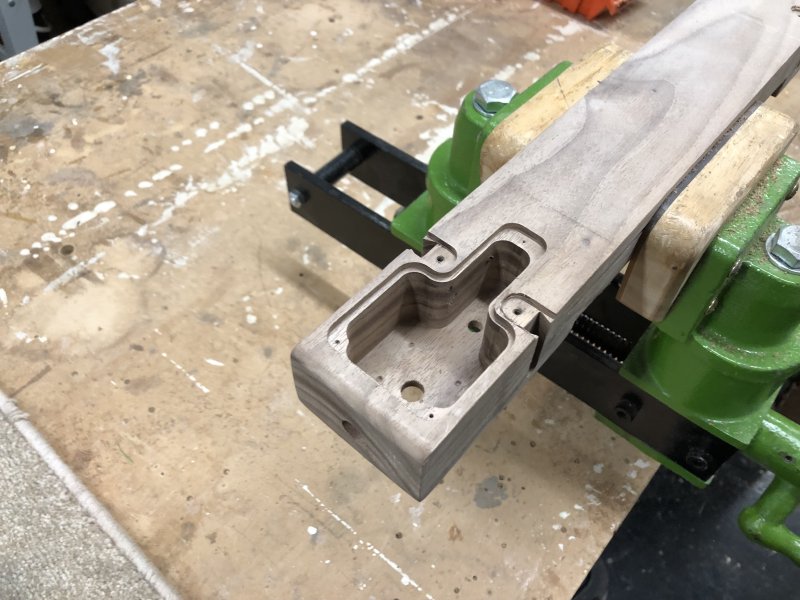
With that recess done, I went back to finishing, breaking out the sanding disks and spindles:

My main complaint about my design for Älgen is all of the awkward end-grain surfaces I’ve created, which are just a pain to work on, particularly the shoulders as the neck transitions into the body, but also the two flat ends where the neck transitions to the full body depth at both the body and headstock end:
In the end I found that using scrapers worked quite well on these, so I mixed the two techniques as appropriate. I didn’t get it quite finished despite a good number of hours, but it’s close. I discovered another annoying property of walnut is that it scratches quite easily if you brush it cross-grain, so I had to be really careful not to brush the sand-paper over the main part of the neck whilst working on these awkward bits, as I had to then do more tidying work when I occasionally inevitably did.
Still, it’s close to done - I think another half day and I’ll be ready to start oiling. Here’s another end-of-day wrap up video:
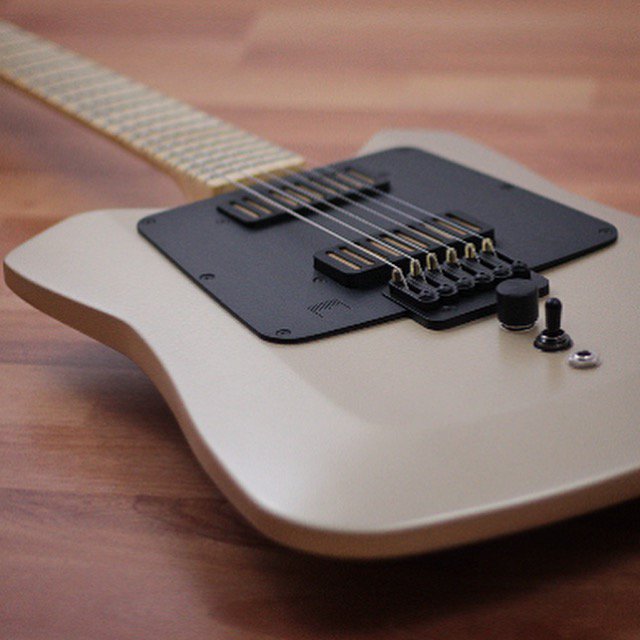
The other task I did out the workshop was work on the control-cavity cover for Älgen. Unlike regular guitars where the logo will go on the headstock, Älgen has no space for a conventional brand marking or name. I quite like that: the guitar speaks for itself in my mind. I like how Millimetric Instruments, who makes very distinctive looking guitars, just has a very subtle brand logo etched into the pick-guard and nothing else; again you don’t need it, as his instruments speak for themselves.
But I do appreciate that it’d be nice to have some traceability on the instrument, and at this stage in the build process the easiest thing for me to do is to put that on the control-cavity cover, as I’ll be laser cutting that.
I’ve toyed with the idea that for the phase 2 guitars I’ll probably move away from the Electric Flapjack brand and just use my name on them, so currently the cover design looks like this:
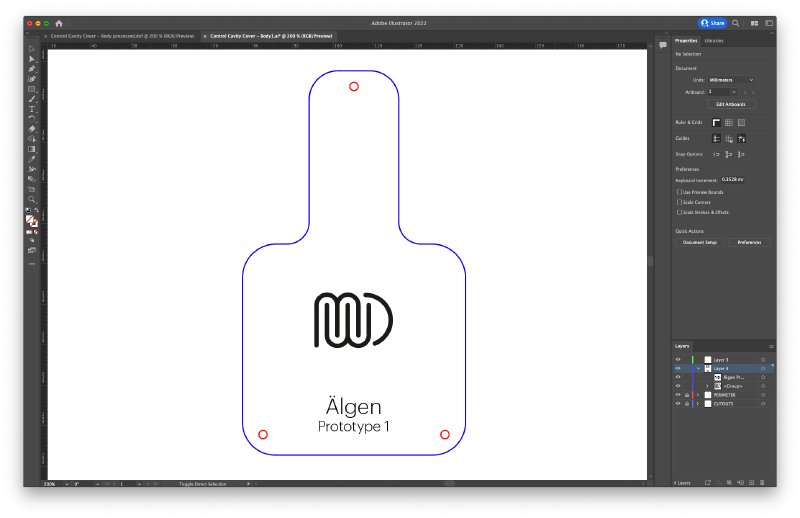
I did toy with adding my scrawling signature on there too, but that feels a bit much :) But I’m still unsure - let me know if you have any thoughts on this sort of thing!
Website
I mentioned before that I had added search to this website, albeit only working on titles and tags, but even that limited functionality was useful to me as this blog effectively is my workshop journal, and I use it to remind myself how I did things before. Doing the neck for the Delfin this week I wanted to remind myself of the order in which I shaped the neck for my last regular guitar build: was it radius fretboard, then carve the back of the neck, or vice versa? Älgen has broken my brain on this sort of stuff, as all my recent experience doesn’t apply - thankfully the answer is in the blog.
Given how much I used it, I spent a bit of time at the weekend and I now have full text search working over this site, which means I finally have what I’ve wanted ever since I migrated it away from squarespace, and makes up for all the effort. On one hand this isn’t really guitar building related, but I guess the thing to note is that it’s really useful to have a journal of what you did before, and it’s even more useful when you can find things in that journal quickly. No matter what form it takes, I really do recommend keeping a journal as you go for your projects.