A Week in the Shop
Published 3 Sep 2022
Tags: älgen, michael abrash, sanding
This week has definitely been another week worshiping at the alter of this great quote from Michael Abrash:
After you finish the first 90% of a project, you have to finish the other 90%.
I now feel that Älgen is in the home straight, but that doesn’t mean there isn’t a lot of work still to do, just that I feel the novel and risky parts are done, but if I want this prototype guitar to be something that inspires people to play it and hopefully commission one for themselves, I need to make it a great instrument now. So time to get on with it!
When last you saw this guitar I’d got it strung back up and I left it in the workshop with strings at full tension for a week to see if the neck would need adjusting. But a quick check with my slotted neck measuring stick (I’m sure it has a better name) showed me things were fine:
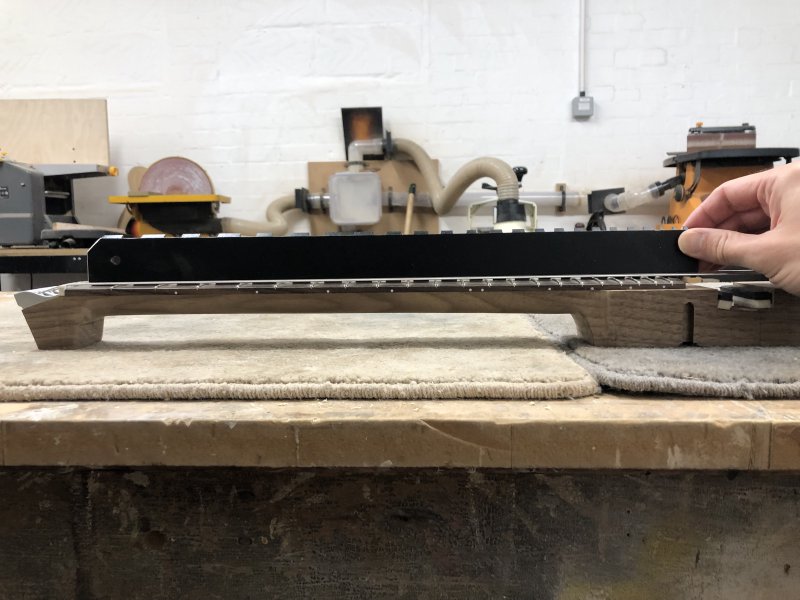
However, the action on the strings was still higher than I wanted. Now that I knew the guitar had settled with the strings on, I could begin to correct for that. Firstly I recut the nut, this time getting the strings down to the intended height:
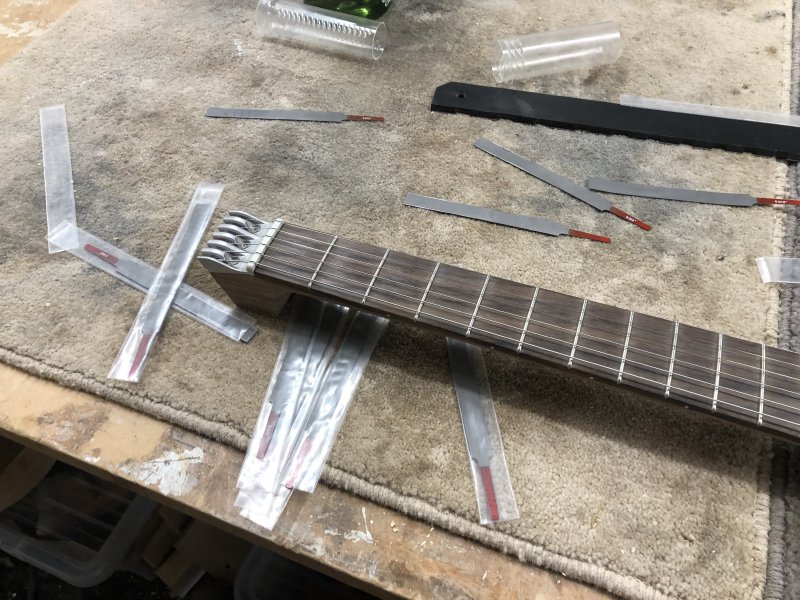
I have to confess, that whilst these files are better than the pipe cleaners I used to use, and it’s nice that they come in very small increments so I can match them to the strings, they are a pain to use. Or perhaps it’s this particular nut that’s being a pain. Either way, this was a tedious experience, so at some point I might have a chat with my workshop mates (who were not around at this point, it being a weekend) about what they use and if they like them better.
With the nut filed properly, the action was better but still too high. This basically confirmed what I kinda knew in my heart already, which was that the bridge recess needs lowered further.
Before I stripped the guitar down for what I hope is the last time before I do it for the final proper time, I had a look around the guitar for things that need fixing either now, or in the next revision.
First up, with the 3D-printed wings on, tuning the outer two strings is slightly awkward:
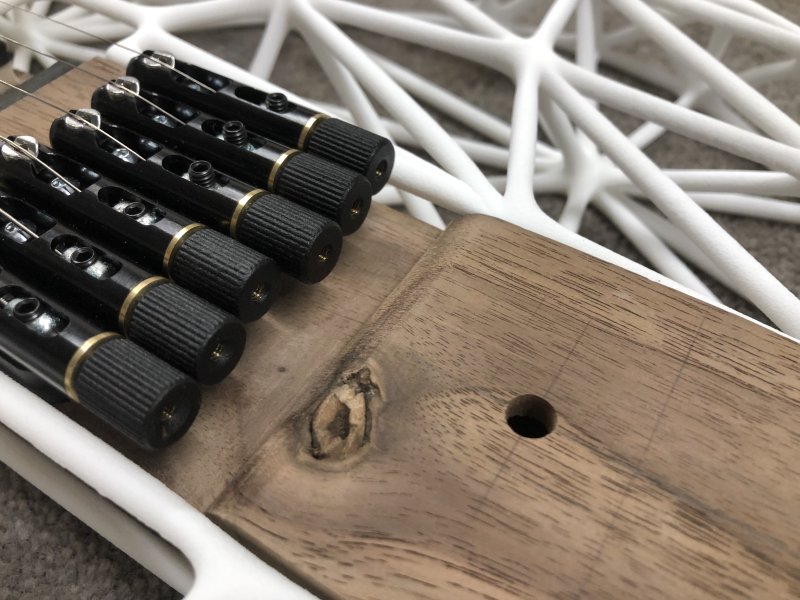
Whilst I’ve created more room around the tuners in the wood, I can’t really do that in the 3D-printed part, and that bar on the 3D-printed wing you can see there just gets in the way a bit. It’s not the end of the world, you can still tune them, but being the picky person I am, I’ll adjust that section of the 3D-print next time to duck down to follow the recess.
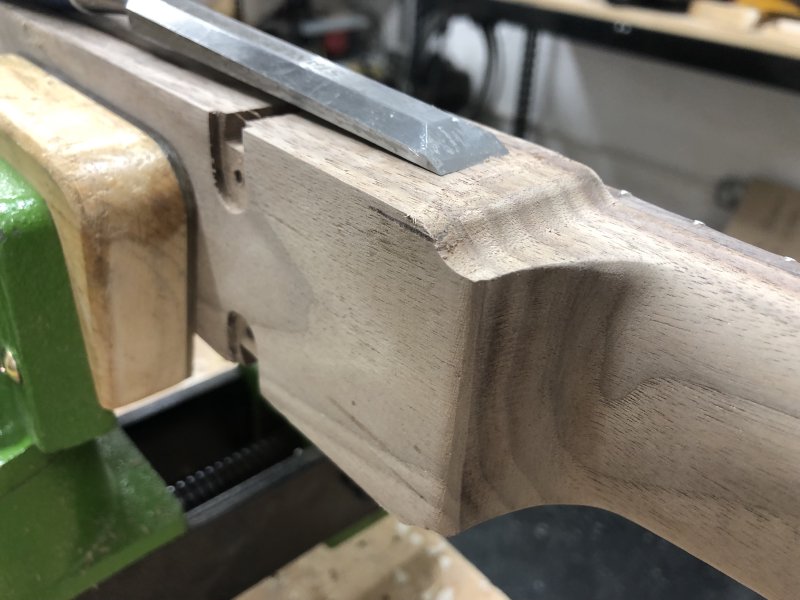
I’ve already mentioned last week, having played Älgen whilst it was strung up for a bit, that whilst I was happy with the neck carve overall, I wanted to adjust the transitions at both ends of the neck to improve playability a bit. The headstock end I want to just round out a bit more, as it was quite square still, and I want it to fit nicely into the space between your thumb and forefinger as you go for open chords, and then at the body end it was a bit pointy:
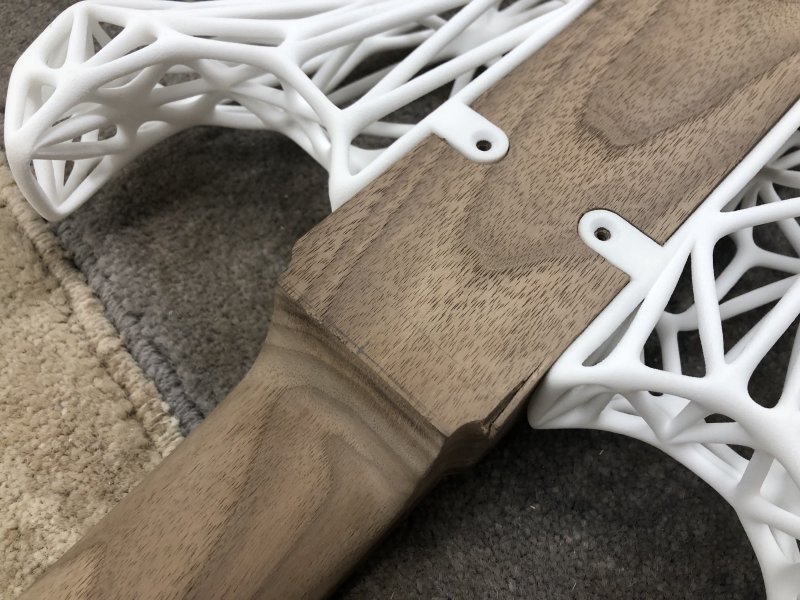
Ignoring the obvious tear out on the left there, the part where the neck joins the back of the guitar is not in the way much, but you feel where it comes to a point in the palm of you hand when playing the high frets, so I want to round that out too.
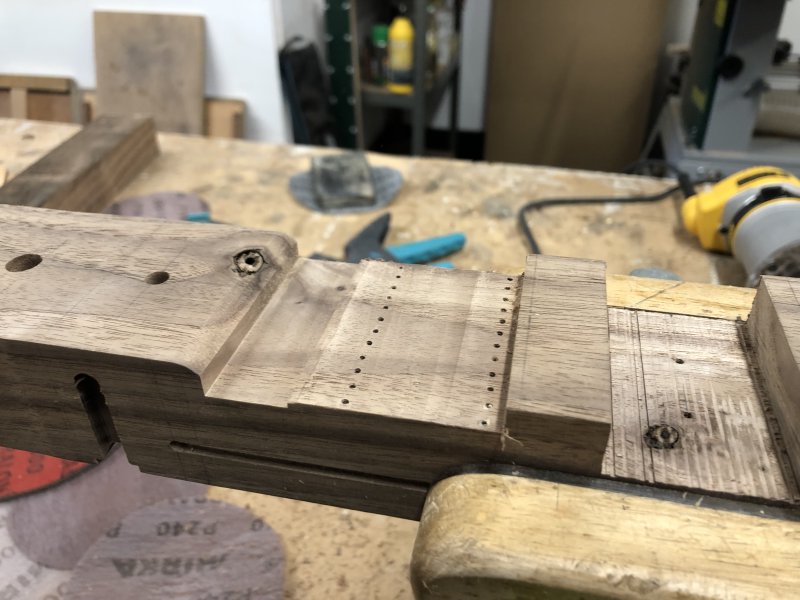
The other thing I noted was that I still had some glue to remove from the fretboard being stuck on at both ends of the headstock where it hand’t been removed when I was doing the shaping of the neck itself.
So it was a lot of rasp and sanding work next:
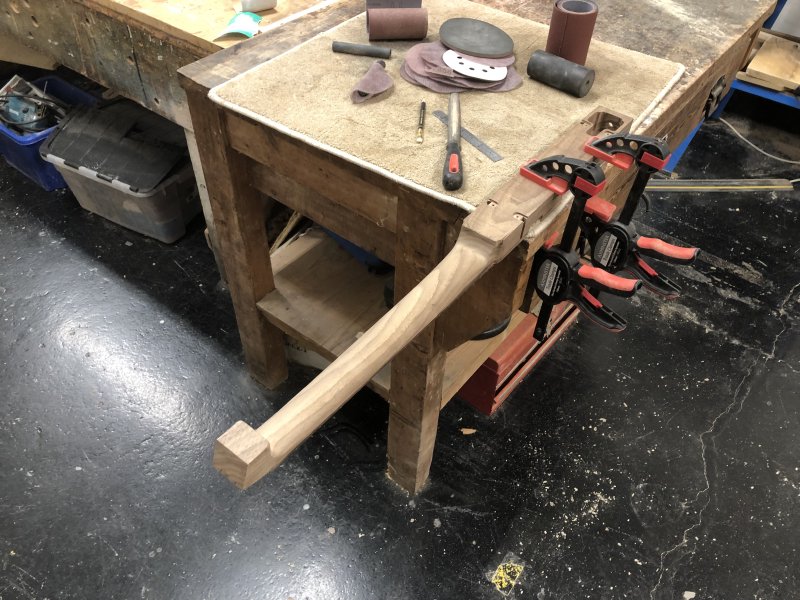
This is another one of those bits where you just need to adjust and test a lot. Ultimately what is “right” here is subjective, so whilst I do tend to use guide pencil marks to ensure I stay roughly symmetrical (though note your hand isn’t symmetrical), I just had to take a bit off, hold it like I’m playing it, work out what I wanted to do next, and repeat until happy.
Whilst I was doing this I also worked on the removing the remaining glue using a rounded scraper:
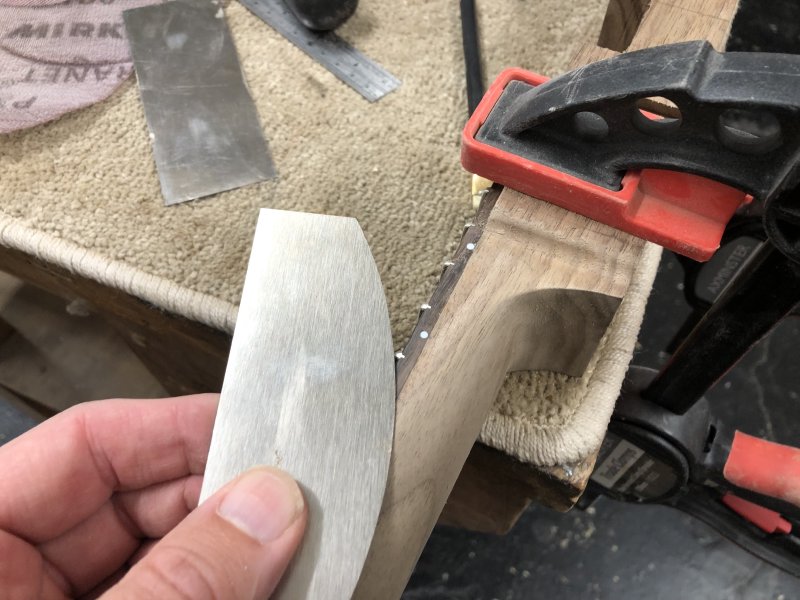
In the past I’d have sanded this, which is much more of an area-affect tool, whereas with a rounded scraper like this I can be quite precise with where I’m working.
You’ll note in the above pictures I’m clamping the guitar to a workbench, rather than using a vice. In part, this is because for neck carving a regular bench vice isn’t well positioned: it’s either a bit low down, and/or it’s not able to give me enough access to the neck. However, our workshop does have a much better option, just it was being used when I was doing the above, which is what is called either a Pattern Maker’s Vice or (if you’re buying one from Stew Mac) a Guitar Repair Vice or Luthier’s Vice.
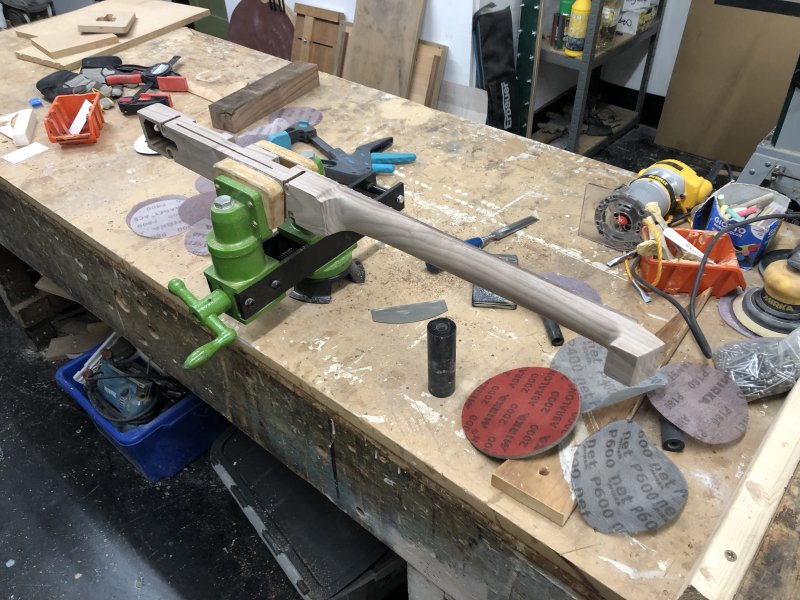
This vice belongs to workshop-mate Jamie, and for working on Älgen it is just perfect. Usually it’s used to hold the neck of a guitar, but given that the wooden part of Älgen isn’t much wider than a neck I can use this for pretty much everything beyond the initial outlining. It’s also nice and tall so I don’t have to stoop over as much when working on the guitar either.
If I make more of this style of guitar I’ll just bite the bullet and get myself one: this one belongs to Jamie so when he needs it obviously I can’t use it, and it being so useful he uses it quite a lot. But thankfully at this point it became free and I leapt at the chance to use it, it’s just that handy.
If anyone can tell me why it’s called a Pattern Maker’s Vice do let me know.
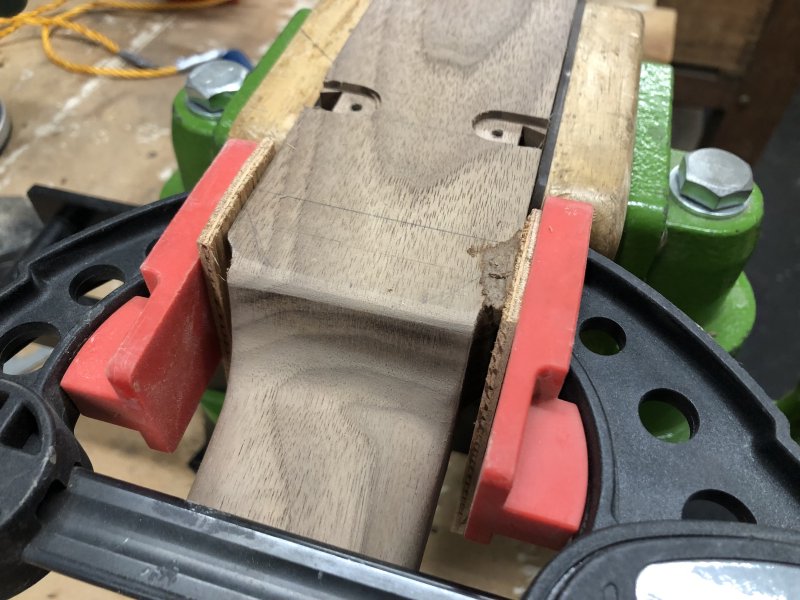
Anyway, having shapped the headstock end of the neck, it was time to look at the other end of the neck. The first task was to fix that terrible bit of tear-out, which was my lesson in how fragile walnut can be compared to the woods I usually use. For this I turned some of the off-cuts from the body into dust, mixed it with wood glue, and made a sort of cement, and then clamped it in place and left it clamped up for a while to set.
Whilst that was setting, I turned my attention to the other main task I needed to do, which was to drop the height of the bridge by a millimeter or so. Similar to the last time I did this, I made myself a makeshift routing template using two bits of MDF to support both sides of the palm-router as I worked:
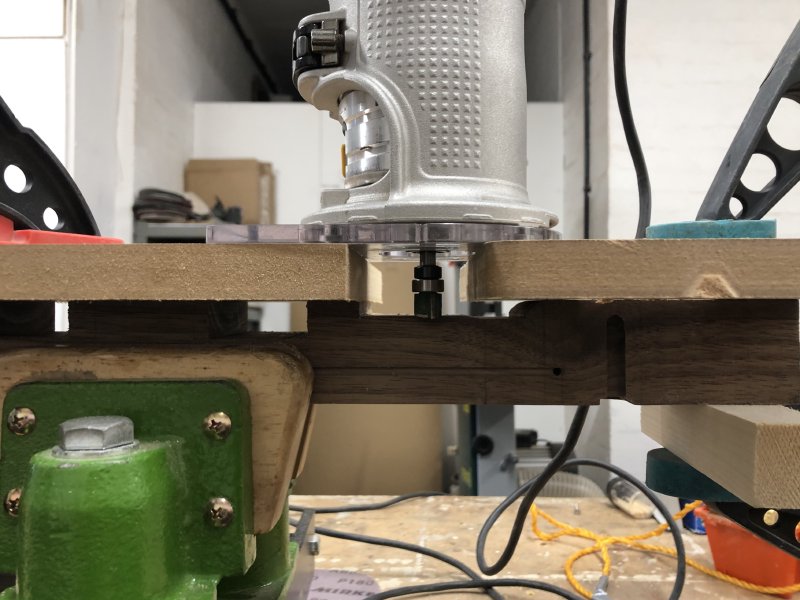
I repeated the process for the area behind the bridge also, to ensure the access to the tuners was still sufficient to get my fingers under them, and I took the slot for that slightly further back too in order to compensate for things being more deeply recessed:
With that done, before returning to the neck, given I had the palm-router out, I also used a round-over bit to round over the rear end of the body, and after which I gave the end grain, which was still quite rough from its original band-sawing, a good sanding to get that smooth:
With that done I finally went back to my patch job on the neck. I used the chisel to both remove the excess “cement” and to shape the area back to the intended curve: when the tear out happened I stopped immediately, but that meant that part of the neck wasn’t quite following the template. But as you can see in the picture, but a little careful chisel work things are looking pretty good now:
The cement is a bit dark, but once the body is oiled I doubt you’ll notice it. Indeed, if I show you a half 3D-printed guitar and the thing you spot is this little repair, then I’ve done something very wrong :)
I spent a bit of time sanding those that well defined edge you see above into something rounder so that you don’t feel it as sharp when reading for the highest frets.
At this point it’d been a long day of sanding and tweaking and routing, so I was quite tired and forgot to take a picture of the end result, but instead you can have a little review video I made just before wrapping up for the day:
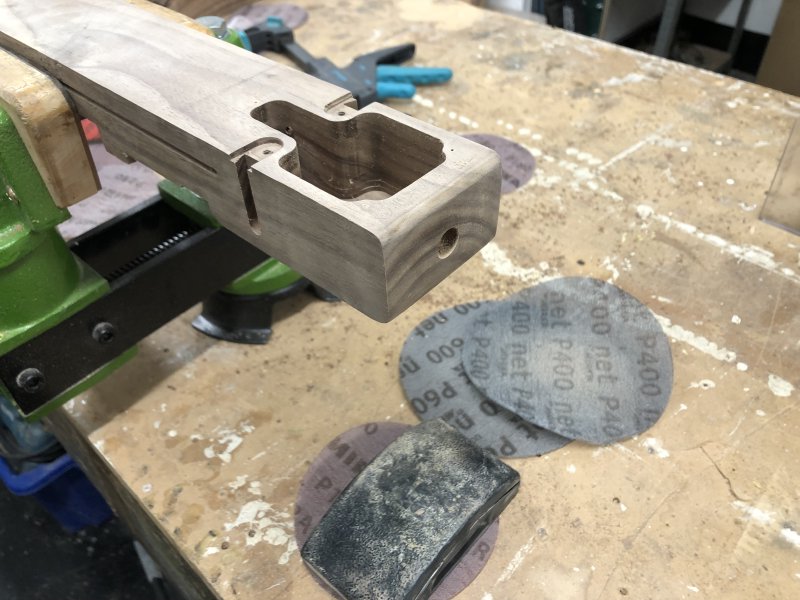
As I say, still more to do, but it’s not that far off the oiling stage. The one remaining job is to route the recess for the control cavity cover, after which it’ll be oiling time.
(Also, do you readers like video clips like that? Should I do more rather than interminable lists of pictures?)
And that’s it - nothing new and exciting here, but that is the second 90% on any project. Still, I’m quite enjoying the just getting on part of this project now.