Workshop Catch-Up: Hästen
Published 9 Feb 2024
Tags: hästen, painting, spraying
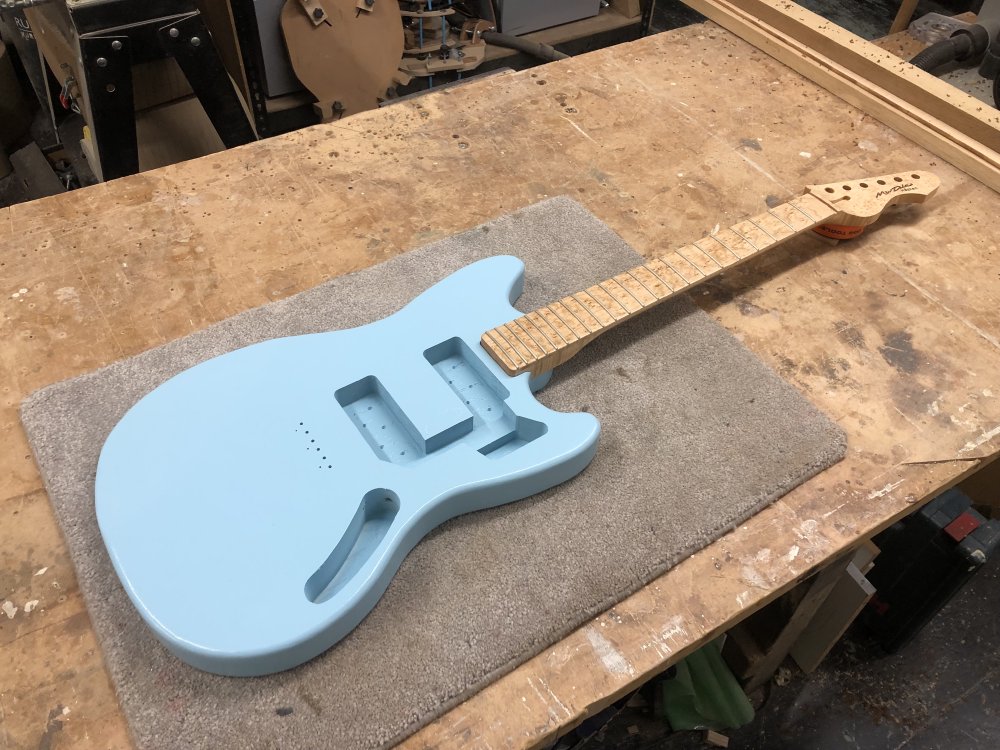
Following on from last week’s catch-up on Delfinen, this week we’re going to look at Hästen, which has been a long time in the making. Hästen (pronounced like “hesten”) is Swedish for “The Horse”, being this is a build based on a Fender Mustang, a hold over from the early days of my guitar building when I had a series of people ask me to build them Mustangs after I’d ask if anyone would like to me make them a Telecaster-style guitar.
When it was originally commissioned, the person requesting it had asked for it in sonic blue, a common Fender paint scheme, and I’d had to point out that I didn’t paint guitars: back when this happened I didn’t have access to a spray-booth. So given I’d taken my time over this build, and when I finally ended up in a workshop that did have a spray-booth, I felt obliged to go back to the client and offer to try painting it. This is a decision that I have come to regret on a number of occasions, though I certainly find it’s been an interesting learning experience getting to this point now:
Truth be told, both painting this guitar and Verkstaden (which I’ll cover next week), have been problematic enough that it’s caused me to question whether I’m really cut out for this sort of thing, and part of why I stopped writing weeknotes for a while. Hopefully this set of weeknotes will be a cheery mix of why painting a guitar well is hard, and show some light at the end of the tunnel for this build :)
Painting recap
Because it’s been a while, let’s quickly recap what’s involved in painting a body like this. I’m going for a satin finish on this body rather than gloss, so I needed to apply four coats of white primer (applied in two sessions, with coats applied about 15 minutes apart and then at least a day between sessions):
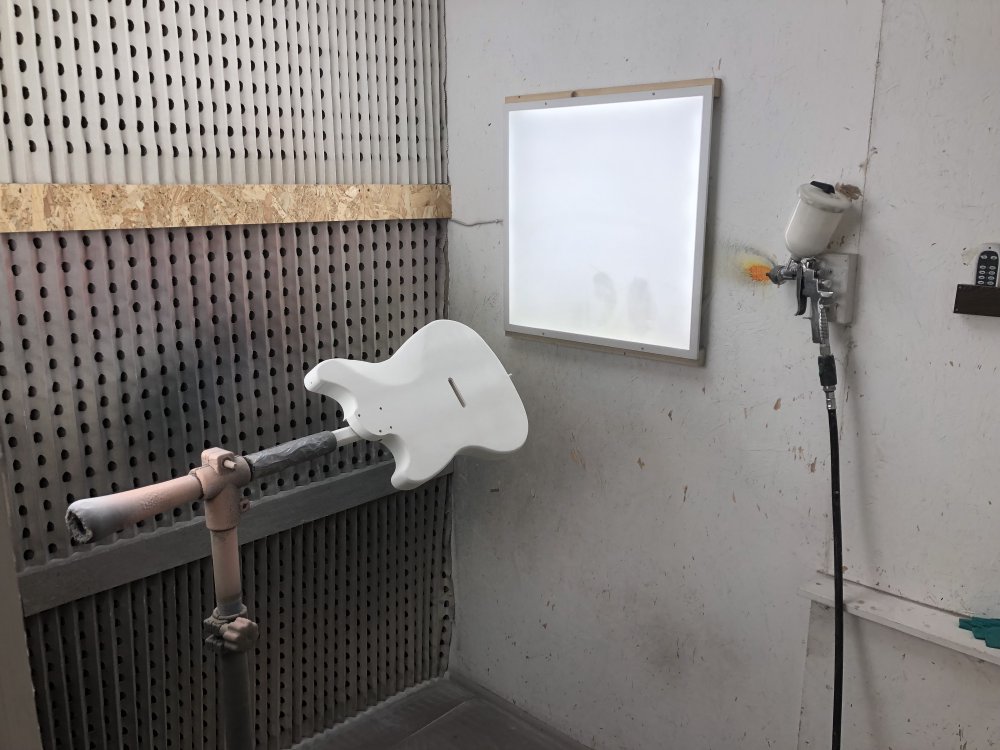
And then (in theory at least) for a satin finish where there won’t be a clear coat over the paint, I’ll be doing six coats of sonic blue paint, applied at the same schedule as the primer.
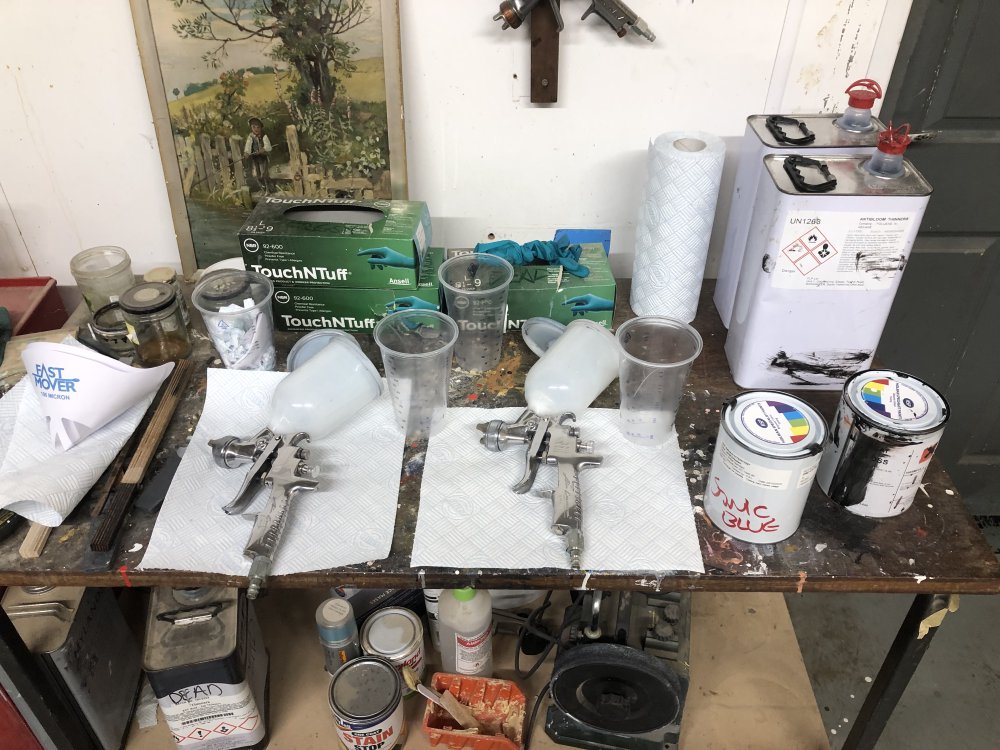
The first real challenge to guitar-painting at the scale I’m doing it is just that it is a slow process. For this guitar there will be four spray sessions (in theory at least…), and each of those sessions takes me roughly two hours. Firstly I need to vacuum clean the spray booth, both the room and all the filtering, before I start so that I don’t get any particles landing in the finish. Then, as I’m painting two guitars at once, but they both need different colours, I have to mix two batches of paint, and assemble and fill two spray-guns. All of this I have to do in my full PPE as the fumes from the paint and thinners is quite something. I’m easily at half an hour in at this point.
Then I do my painting: one coat on each, wait ten minutes, another coat on each, so about another half hour.
Then I have to strip and clean everything so there’s no paint that could contaminate the next painting session. Perhaps it’s because I’m not a regular at this, or perhaps because I’m being overly worried about cleaning as I’m using other people’s stuff, but this can take an hour, and is horrible work as I’m in my full PPE for all this, so it’s cumbersome work.
I think if I did this regularly, and was doing more guitars at once then the costs wouldn’t be so bad - the setup and tear down costs would be similar but I could do half a dozen guitars and have it take a similar amount of time. But for few guitars I build, it’s a large amount of overhead and stress compared with just doing my usual stain and oil. I can’t emphasise enough how much I’ve come to dread painting sessions - because of all the struggles (of which there will be more and different failures in next week’s final entry in this catch up series with Verkstaden) it really made going into the workshop not a thing I looked forward to. Overall, I feel it’s not really effective for me to operate in this way currently.
So where were we?
So when I last talked about Hästen back in November, I was on the sixth and final coat of paint when I got some over-spray on the bottom edge:
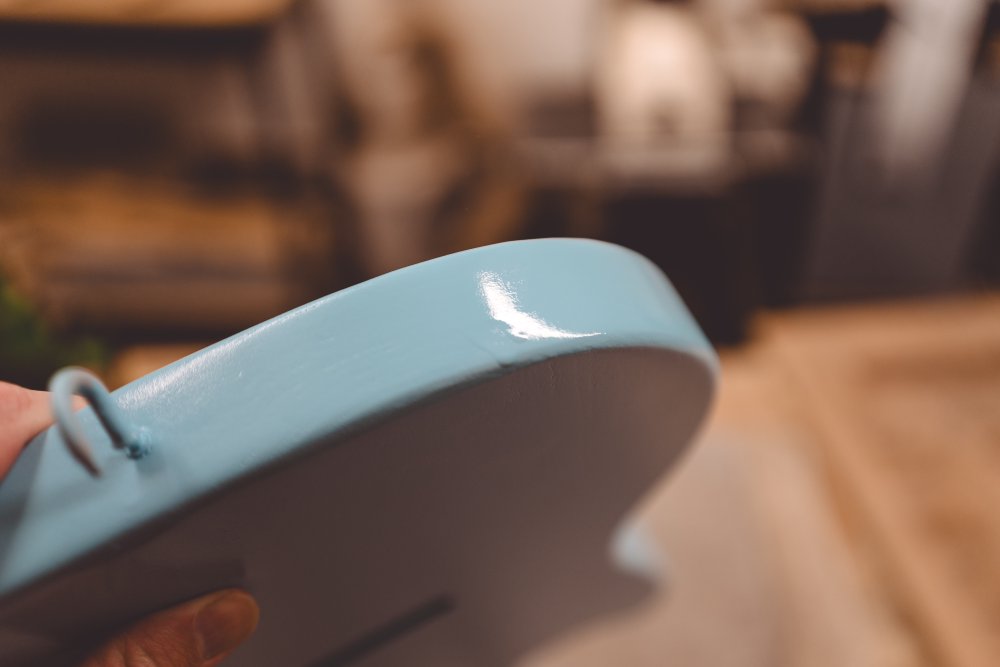
Sometimes you can be lucky, and once it’s dried it’s not obvious, but when I went back to the guitar the following week, it was still obvious that there had been drips on the side:

Thus I had to gently sand that down, and then it was back in the booth for another two coats of paint. This is annoying, but not the end of the world. Given I’m new to this, it’s to be expected that I mess it up somewhat my first time, and I’d already had to deal with that on Verkstaden - though thankfully that happened earlier in its painting process, so didn’t impact the session count.
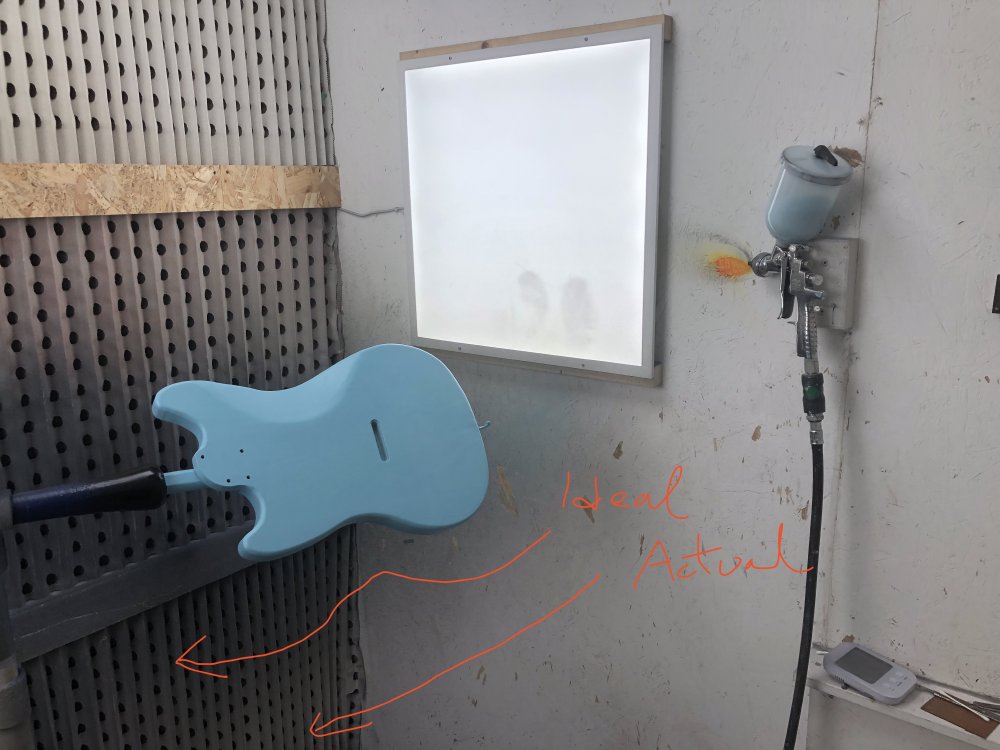
With painting, once the last session has been done, then the paint needs to be left for at least a week to fully dry, and then it’s time to work on the surface finish. Out of the spray booth the finish was not the best, with lots of texture to it rather than being smooth:
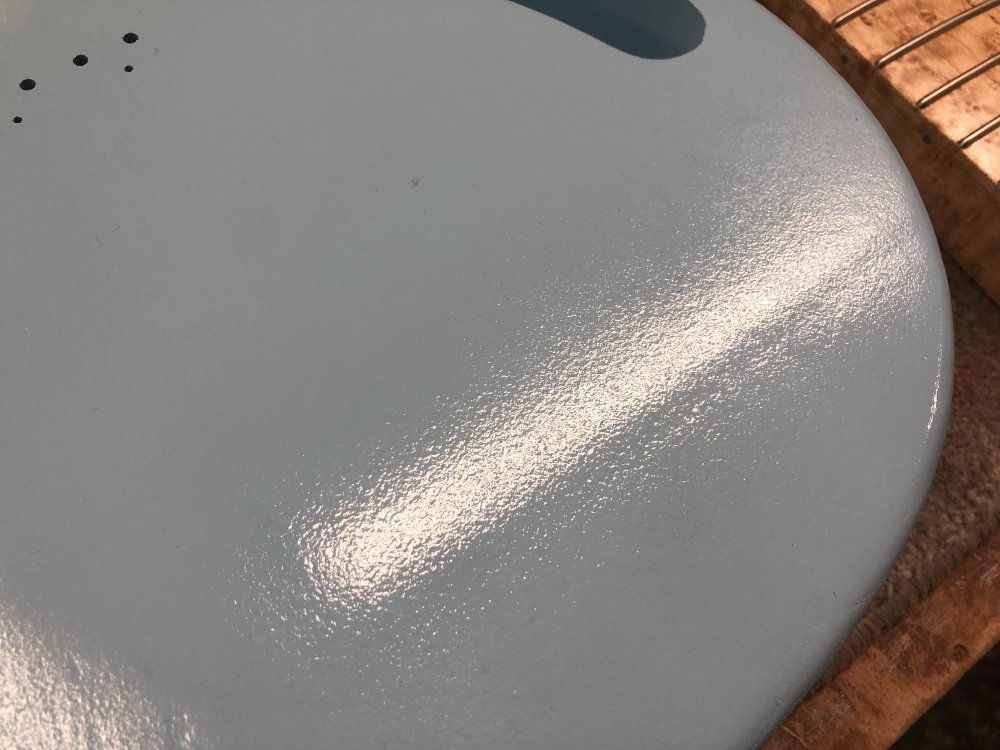
I suspect this is worse than usual because I failed to set the pressure on the air-compressor that feeds the spray-gun correctly, having it a little low, but it’s not the end of the world as I need to work the finish anyway to get to a satin or gloss finish. To do that I will dry sand at 600 and 800 grit, and then wet sand at 1000, 2000, and 3000 grit using an abrasive compound.
This is where the next setback happened; whilst sanding down the top surface to get it smooth, I managed to go through the paint to the primer, despite being two coats over what I had originally planned!
The likely problem here is that I didn’t properly follow the curve of the body whilst spraying. Again, there’s a lot to keep in your head when spraying: how fast are you moving the spray-gun, how far away are you holding it, where are you spraying relative to the last pass you made a moment ago, was that pass what you expected in terms of paint deposited? In amongst all this I suspect I wasn’t being consistent in the cut aways with my distance, going to straight rather than following the curve of the body:
This most likely lead to there being less paint on the inside of those curves, and so when I went to flatten the surface I ended up going through them.
I thought perhaps I could just touch it up, but my workshop-mate Matt said that given all the other things that needed to happen still in terms of finish, the only real solution is to put on some more paint, and so it was back to the spray-booth again with this body for another four coats. Thankfully I got these done before the xmas break, so it had two weeks when to dry properly. But to say I was disheartened at the end of all this was an understatement - I’d now spent an additional six hours on this body than intended, delaying it by a couple of weeks.
After the spraying is over
After xmas I took the body down from the drying rack with some sense of foreboding given the struggle so far, despite it looking good:
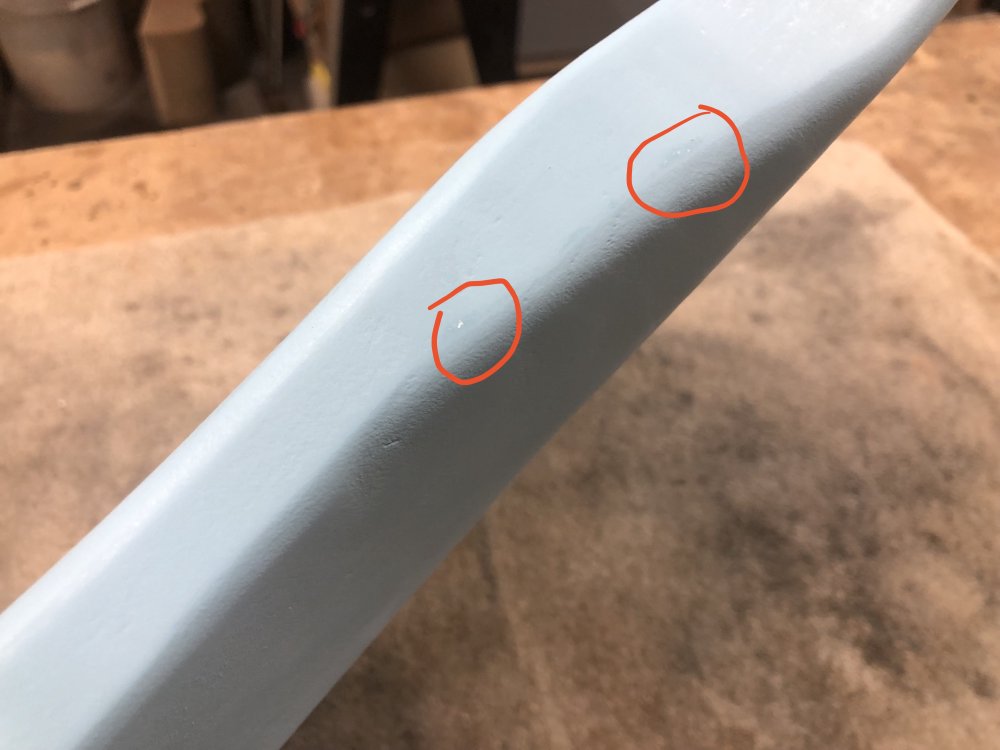
The first task was to remove the baton used to hold it whilst it was being sprayed, and having removed the first first screw, and as I turned the second screw it rotated the baton, causing it to hit the neck pocket 🤦🏼
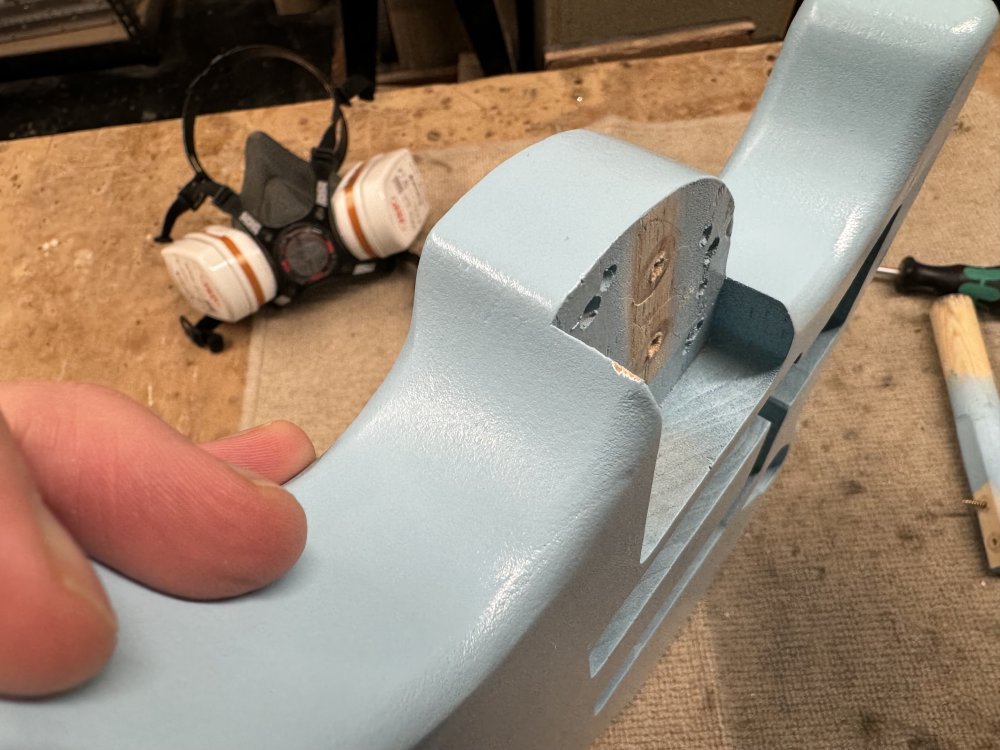
Thankfully, before I had chance to find something capable to starting combustion, Matt assured me that unlike the issue I hit first time in the middle of a flat surface, this kind of small chip there is very hard to avoid, but is repairable afterwards by just touching up with a paint-brush.
It’s something of a design fault to some degree, having such a small surface for paint to adhere to makes it super easy to chip, particularly since it’s quite proud too. It’s an interesting learning that over all three of the guitars I currently have in flight, there are small design tweaks I could make that would have helped at the finishing stages that were fine with my regular staining/oiling finish, but if I add binding or painting into the mix become more of an issue - next time I think I’m going to paint a guitar I need to consider that at CAD time.
Anyway, it was good that Matt said small edge chips can be touched up, as whilst sanding the edge of the sanding disk caught the lip for the string-ferrule-block (I’ve not idea where to hyphenate that one, so you get a possible free hyphen), and even that was enough to chip the paint:
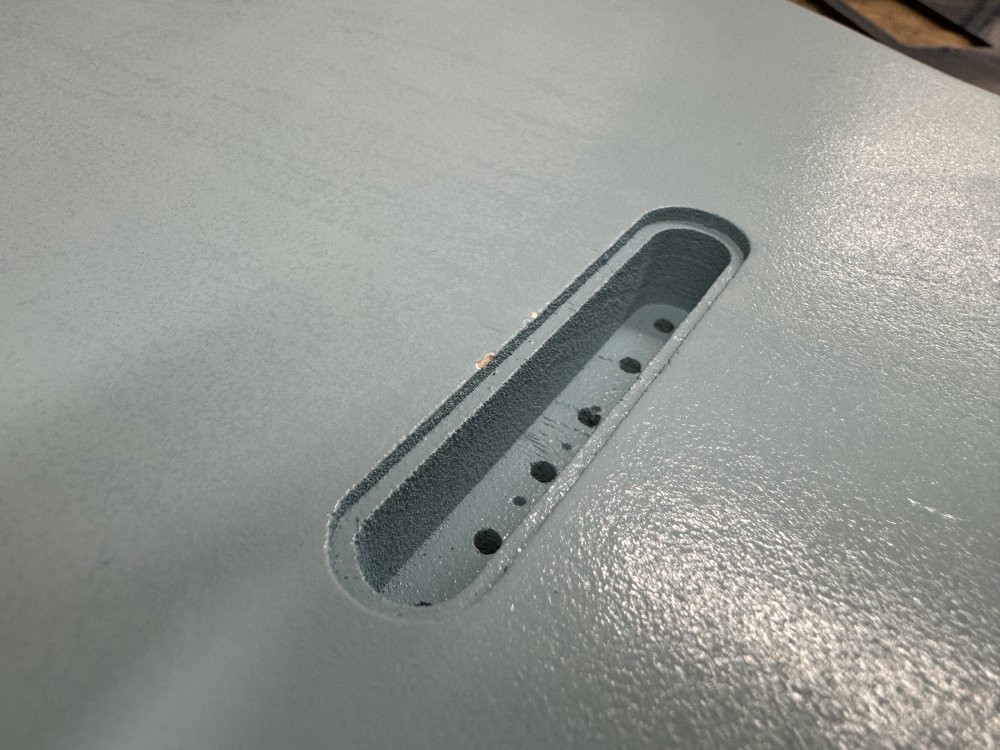
Now you can see why some guitar builders like Matt specialise in relicing. Whilst doing a good relic is not a trivial task, and Matt puts a lot of effort and research into getting it to look so good, issues like those I’m hitting are part of why he started down that route: chips like this can in general become part of the relic.
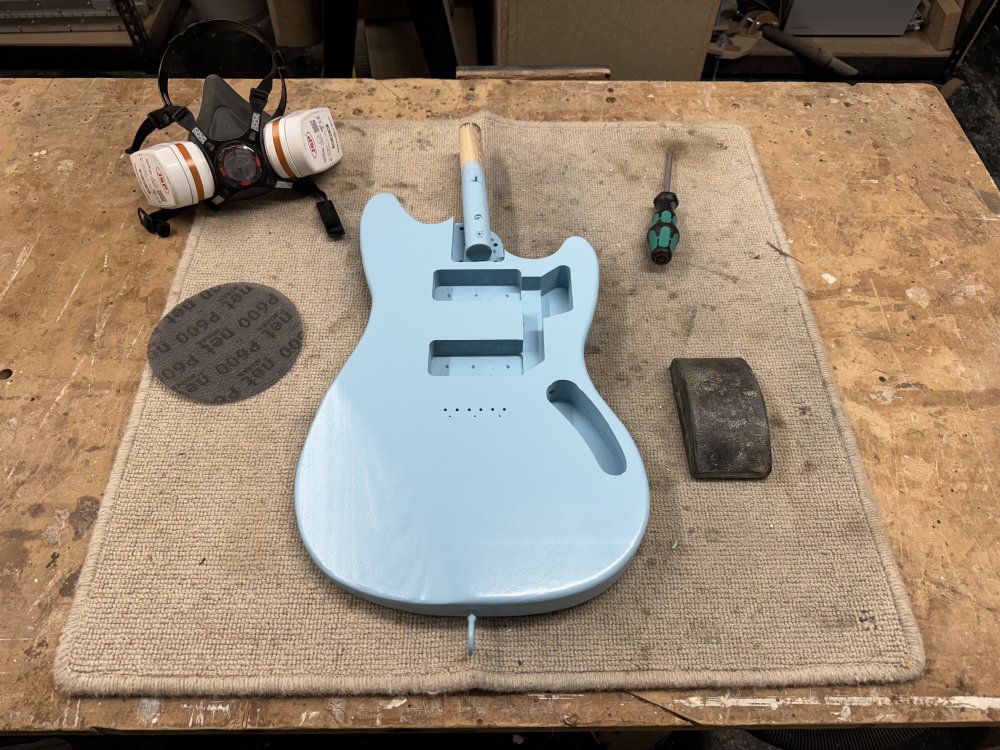
Still, these few small chips aside, the levelling and polishing the satin finish went well for a first go I felt. I worked my way up using 600 grit and 800 grit dry, before using Farécela G3 abrasive compound with 1000, 2000, and 3000 grit pads.
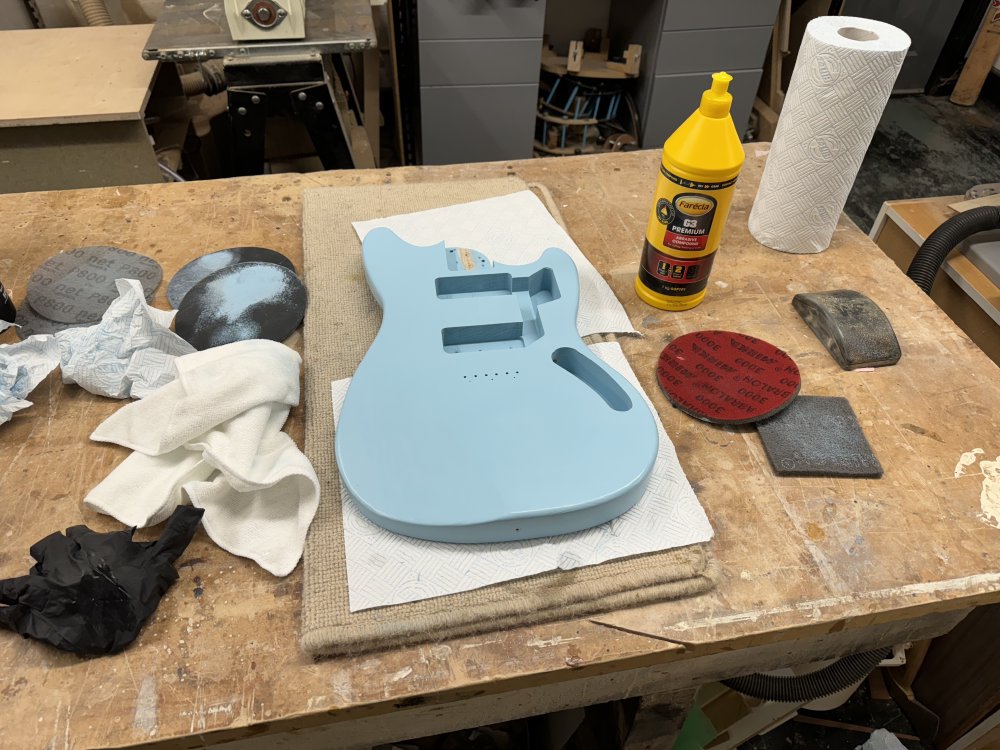
Now, I wasn’t starting from a perfect place, as this body was originally meant to be stained and oiled and showing the grain, and paint it turns out will show all the imperfections in your levelling or hidden machine marks that you didn’t think where there before, so this finish is not going to be a uniformly flat finish all around alas, but for a first go I’m quite happy with it, and the person receiving this knows they’re getting something of a prototype build here and so they’re hopefully going to be okay with the level I got to. I actually like that the wood grain is still showing through in the finish, as I think if you’re hand building a guitar being able to see the raw materials is important, otherwise I could have made this out of MDF and you’d never know. But at the same time, the fact you can see a line where the thicknesser-snipe was is something I’m slightly less pleased with.
In the above clip you can see the less well finished block in the middle, which will be under the pick-guard and so I didn’t work so much, which hopefully gives you an idea of how much flatter the finish is after all this polishing work. You can certainly compare it to the very textured surface I showed earlier after the painting finished. It’s also very transformative in the feel of the guitar - it really has a different vibe to it from my usual stain/oil finish.
Next steps
Before I go back and fix up the little chips, the next step is to just get the guitar assembled and playing, so that if there’s other chips waiting to happen I get them out the way first :)

It’s at this point again that you remember small details, such as paint isn’t infinitely thin, and indeed this guitar has now had 6 coats more paint than originally intended. This means that unfortunately the cavity I routed for the string-ferrule-block is now too small 🤦🏼
The inner pocket is fine, as I can easily attack that with some tools to remove the paint, but the same is true of the outer lip if I flip the block over. I’ll need to engage my brain on that one, but it’s yet another thing to add to the list of “things you want to adjust at design time if you’re painting a body vs oiling it”.
The flip side to this is that thankfully I had slightly over-cut the neck pocket gap, so there was no issue fitting the neck in.
On the front of guidat, things are mostly fine, but I really don’t like the gap I get using a hardtail-bridge with the standard Mustang pick-guard profile: that gap is quite large, so I’ll re-cut this pick-guard with that lower cutout less deep. Fender seem to go in for these odd gaps on some of the guitars, particularly if you look at the older Telecasters, but it’s not something I like. Recutting this will also let me pull the lower pickup-mount down towards the bridge slightly, as currently the top edge is exactly on the bit of wood that sits under the middle of the pick-guard.
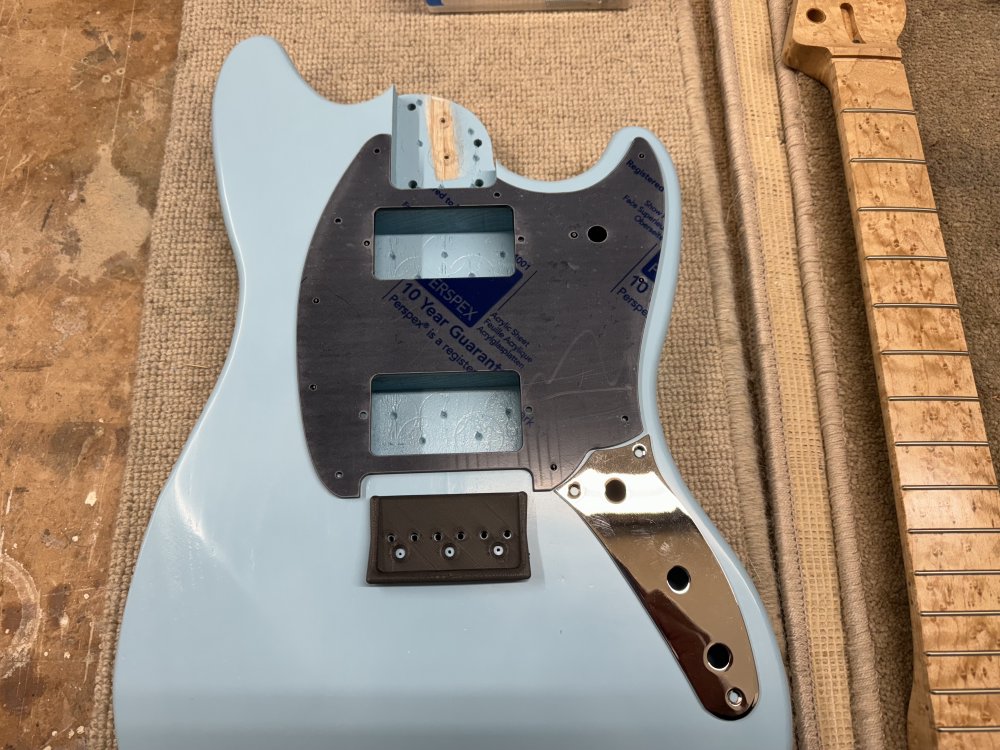
The neck is pretty much done, I need to make a nut, I need to 3D-print the controls, but otherwise I’m feeling this one is getting close!