A Week Out the Shop
Published 4 Feb 2023
Tags: 3d printing, bhm, blues deluxe, ef1, freecad, generative art, gibson, laser-cutting, sister rosetta tharpe
It’s easy to forget how mixing things up can be revitalising. My daily player for the last couple of years has been The Blues Deluxe, one of the first pair of guitars where I made everything myself. But this week, for reasons you’ll see down below, I was forced to switch over to my prior daily player, EF1, the first guitar I made, a blue tele I built from parts.
Whilst technically not as nice as The Blues Deluxe, EF1 has a totally different sound, and so it’s brought a breath of fresh air to my regular practice routine. I forgot how nice the split-coil sound on the neck humbucker is, slightly more opinionated than a strat single coil pickup, but still with that nice twang to it, and I can quickly switch it over to full humbucker mode when I need to switch from rhythm to solo.
At some point I’ll no doubt gravitate back to The Blues Deluxe, but it’s been a nice reminder that a bit of disruption can be a good thing when it comes to creative endeavours. I’ve felt my playing getting boring these last few months, and couldn’t quite work out how to fix it, but having the luxury of a second instrument to turn to has forced me to mix up my approaches to old tunes, and made things feel fresh and fun again. This is why I generally like to have a couple of guitar builds on the go - when one gets bogged down, I can take a break and work on another and keep the momentum going.
That said, no workshop time this week, thanks to day-job deadlines and an unrequested sofa-bed (don’t ask), but a lack of dust making doesn’t mean no progress: it let me get on with the jobs that I keep putting of as making dust is more fun generally, but as I say, a little disruption can sometimes be a good thing, and I had a little fun experimenting and learning this week.
Sister Rosetta Tharpe
It’s Black History Month, which means I’ve been seeing a good number of interesting things pop up on my social media, including a nice reminder of the under appreciated guitar talent that is Sister Rosetta Tharpe, who I first came across in She Shreds magazine. Her song “Rock Me” was, to the best of my limited knowledge, the first song described as “rock and roll”, making her, in my eyes, the inventor of that now ubiquitous art form, yet a name we don’t hear much about.
She is mostly noted as a gospel player, and whilst that certainly isn’t my go-to genre of music, if you’d never done so before, I encourage you to listen to Tharpe’s playing. Gospel isn’t, at least to me, known for being a home to interesting and diverse guitar playing, but as this youtube compilation shows, she really had mastery of the instrument, going between that light touch that I associate with BB King, to full on licks running up and down the fretboard:
I’m not going to rehash her life story here, others have done that much better, such as this one on the More Than A Muse podcast, but I just wanted to include some samples of her playing here, as that’s often not actually featured in stories of her, and as a guitar player that’s what really made an impact on me, once I’d dug in a little and listened to her work. Whilst I’m still unlikely to have gospel on regular rotation, I’m glad I took the time to dig out some of her work to listen to. To my ears, Tharpe’s playing reminds me of more subtle blues/rock playing, ala the three kings, that wonderful mix of rhythm chording interspersed with subtle licks, which is a lot of what I try to play for my own amusement.
Later pictures of her show her playing a unique white 3-pickup Gibson SG; it turns out she was a life-long Gibson player, and so it’s only appropriate Gibson have a nice overview of her too for last year’s BHM:
Being a white middle-aged man, it’s impossible for me to begin to appreciate what she went through to accomplish what she did, but you can hear in her playing how much we have benefitted from the art-form she helped shape, and so her name certainly deserves to be much better known that it is.
New bridge testing
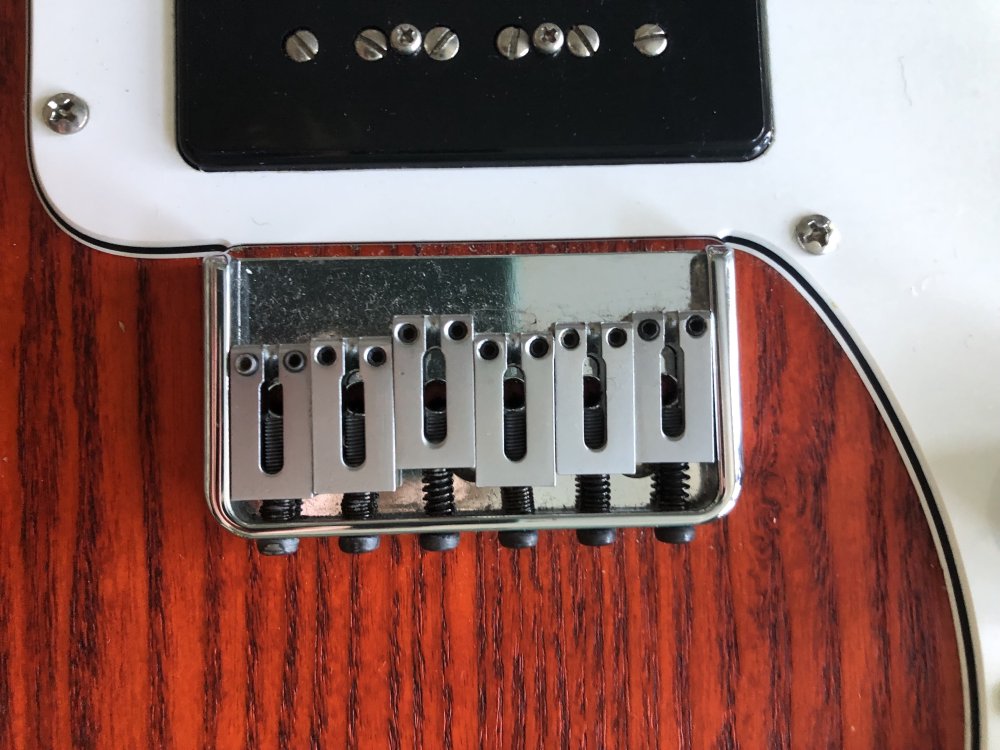
This is a case of feeding two birds with one scone. Firstly, for the in-progress Delfin build I’ve designed my own custom bridge, and before I get that printed in metal, I’ll want to do some usability testing. Secondly, when I was re-stringing my daily player, the aforementioned Blues Deluxe, I was reminded once again that it never properly intonates due to how the bridge was placed. I had a lightbulb moment that rather than waiting for Delfin to be finished to let me test the bridge, I could get some earlier feedback here and solve the problem with The Blues Deluxe’s intonation in a single go.
The problem with The Blues Deluxe’s bridge, which I’ve mentioned before, is that when I started out building guitars I was given some poor advice on how to place the bridge relative to the scale length of the instrument (you can read more about this on this post. This meant on The Blues Deluxe the bridge is mounted a little too close to the neck by a couple of millimetres, causing the lower strings to be a little sharp as you move down the fretboard. However, I can’t move the bridge because the strings run through the body, and I drilled those holes based on where I wanted the bridge to (incorrectly) be.
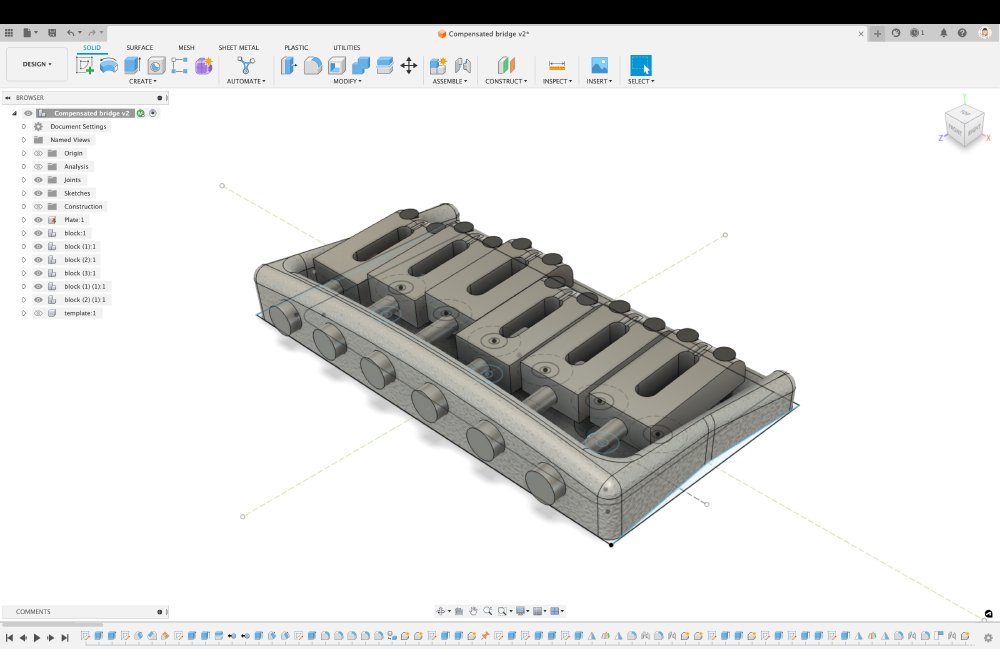
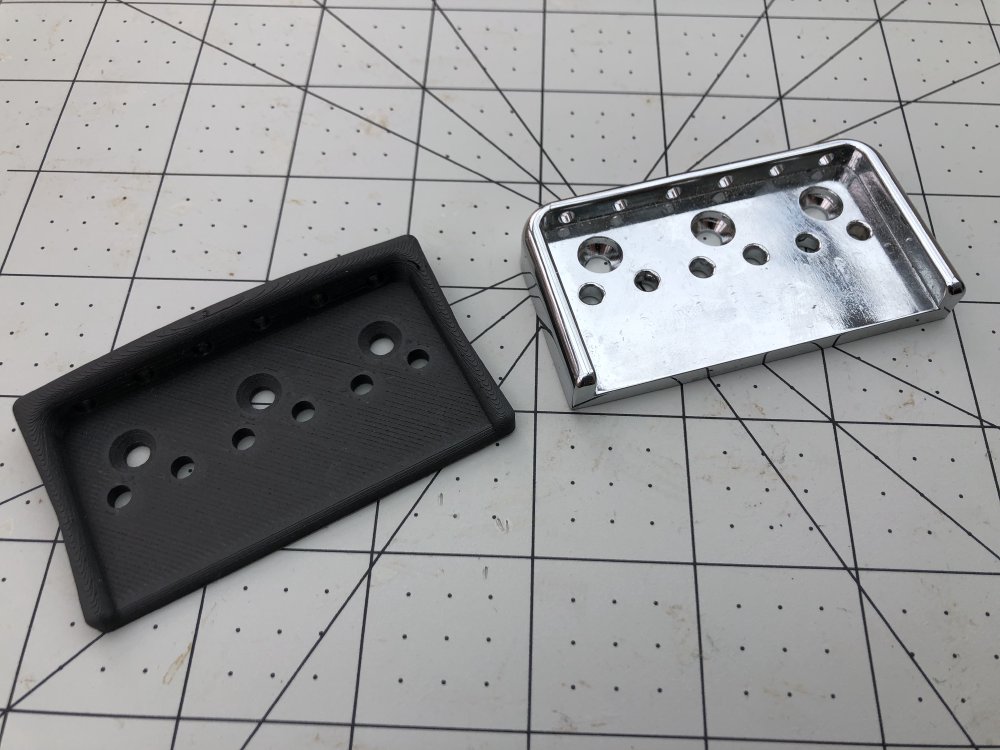
For the Delfin build I designed my own hard-tail bridge, where I’ll use saddles made by someone like Gotoh, but I’ll 3D print the bridge plate. You can read about the motivations for the change and its design in this old post here, but here’s a picture of it to help with context:
The realisation I had was that the problem on The Blues Deluxe is that the bit of the bridge that touches the strings, the saddles, are to close to the neck, and on the old bridge, if you look at the photo above, you’ll see I can’t bring back that low E saddle (the one of the left) any further back, due to the shape of the bridge plate, but in theory there is still some travel I can put on the string before the saddle covers the hole the string comes through.
So my plan was this: I was going to print a version of the Deflin’s bridge to let me test the design, but I was also going to customise it to this guitar, adding another couple of millimetres of travel for the saddles, to let me finally get the saddle for the low E far enough back that the instrument properly intonates.
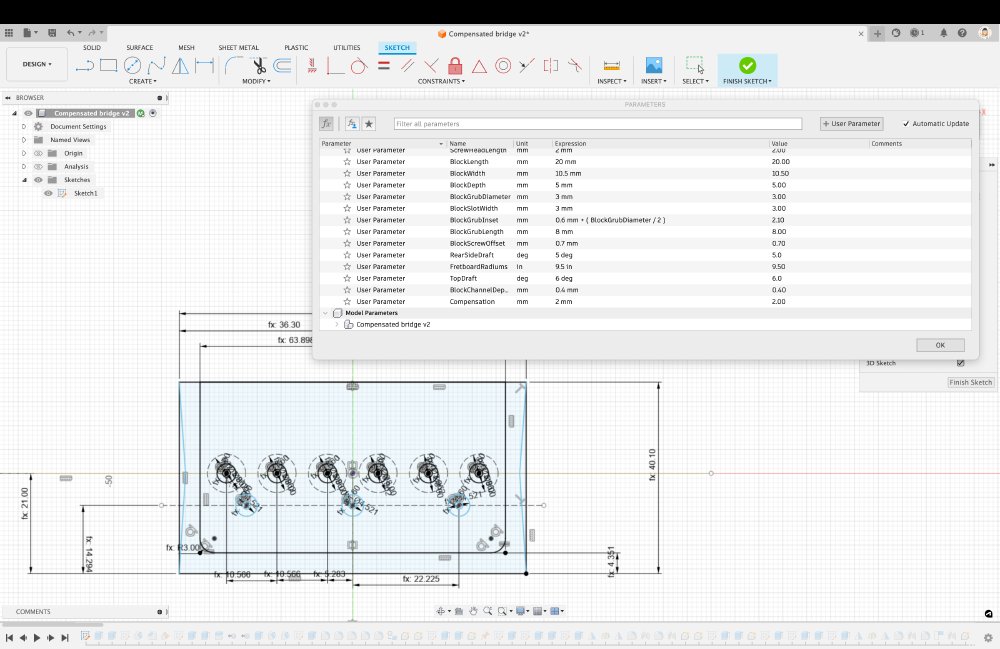
So I added a compensation factor to my CAD model, that pulls back the rear wall of the bridge by that amount, and set it to 2mm. That done, I then head over the Cambridge Makespace, the local maker space, and used their Markforged II 3D printer to bring my design into existence:

A note on the loads here. In this design, the bridge plate isn’t under a high amount of strain, which is why I’m happy using an FDM print rather than a full metal print as I did on Älgen. Whilst some guitars do anchor the strings to the bridge, in the guitars I build the strings are anchored on the back of the body, which means the main pulling load is there, not on the bridge. The bridge does undergo compression stresses, as the strings run over the saddles, and so I opted for a solid infill on this bridge, but given how thin it is that didn’t really significantly add to the print volume (which is directly proportional to the print cost :). If the strings were anchored on the bridge I’d doubtful that an FDM print like this would be able to take the strain without more mechanical engineering knowledge than I have.
The one other concern with a print in a plastic material, even the fancy carbon-filled Nylon “Onyx” material, is the impact on the tone of the guitar. In an ideal world the bridge will be very stiff, so as to not dampen the oscillations of the strings as they are played, effecting the sustain of notes. That’s not really something I can do much about with at this early prototype stage, but I don’t think we’ll have significant issues here: even if the Onyx isn’t metal stiffness, it’ll be being compressed quite hard by the strings into the body, so there should be very minimal dampening effect.
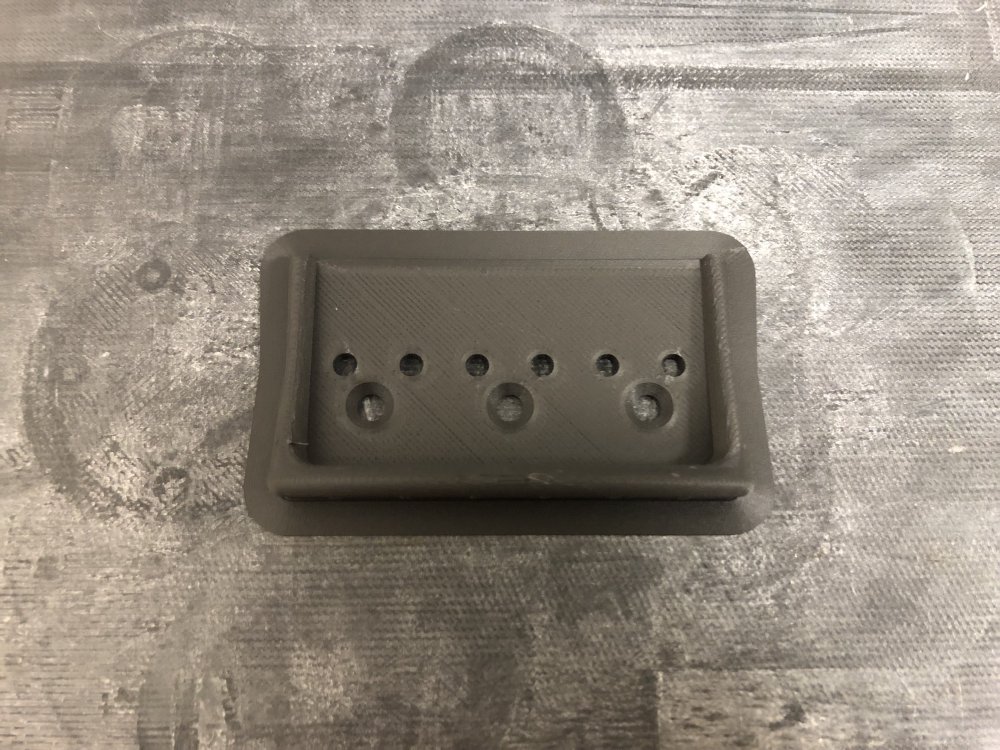
After a little bit of tidying up to remove the print brim and support material, I have a bridge plate ready to test:
Installed on the guitar, it looks pretty neat: the very dark grey of the Onyx print material matches of black and white theme that runs over the guitar quite well, and it certainly feels comfortable when I rest my palm on it whilst playing.
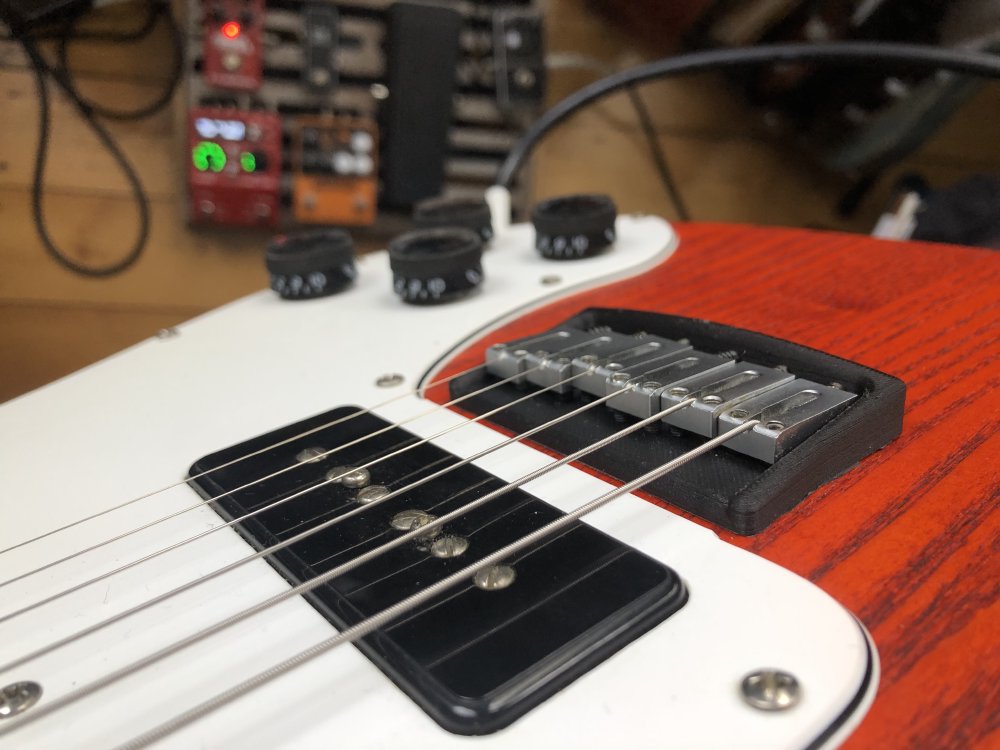
It still needs a proper setup, and I did all the mounting at home as I was too eager to wait until I got to the workshop to fit it, and so for proper evaluation of the bridge you’ll need to wait until next week after I’ve had access to my string radius gauges and all that jazz. But off the bat, it plays fine, and for the first time ever, the guitar is actually properly intonated on the low-E, so a success there.
FreeCAD
I mentioned a few weeks ago that on my todo list was to find some time to learn how to use FreeCAD, and open-source CAD tool that is quite popular in the maker community, and seems to be constantly getting better. As a long time Fusion 360 user, my motivation for learning FreeCAD is twofold. Firstly, whilst I used to teach Fusion 360 to people at the local maker space, I stopped doing that after Autodesk added significant limitations to the hobby user offering with little warning, making it less attractive to long term hobby users, and secondly I’d like to publish the designs for things I build in an open source fashion at some point, but Fusion 360’s file formats aren’t really aligned with that.
When I was up at DoES the other week and I mentioned this, both Jackie and Adrian immediately told me I should work through Jo Hinchliffe’s book, so I’ve started on that. I’m only three chapters in right now, and I don’t really want to do much in the way of comparison yet, but I’ll write up some comparisons once I’m done. My current aim is to try and replicate the simple kitchen-roll holder design that I’d make as part of my Fusion 360 teaching course, as that was designed to expose a wide variety of techniques in as simple a design as possible.
I should also state, I have no delusions that FreeCAD could replace Fusion 360 for a lot of what I do - Älgen’s lattice body and generatively designed headstock are not things that, based on what I’ve seen, FreeCAD could cope with today. But it’s always good to see what alternatives there are out there, and perhaps it’ll help me appreciate the money I’m paying for Fusion more :)
Generative Art
I wrote last week about my interest in generative art as a way of coming up with a new design for the headstock on my guitars, and I’ve been doing a little more noodling on that avenue, though without anything conclusive yet. I picked up a couple of art generators and tried etching them on wood using the laser-cutter at Makespace, and I got mixed results:
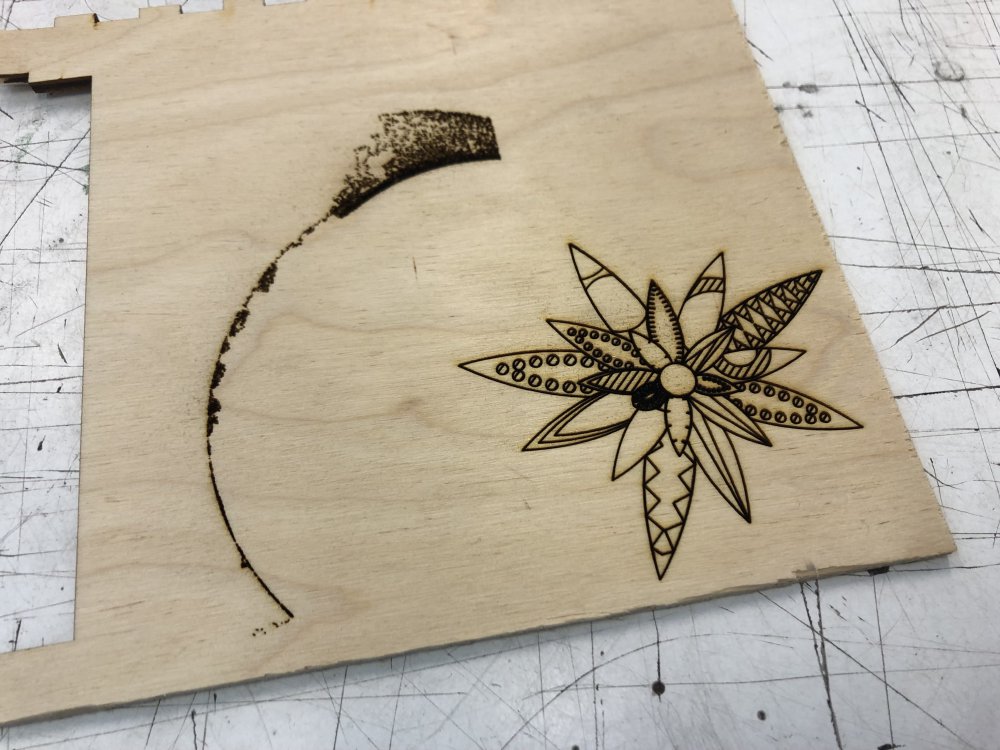
Here we have a flower that I generated with overflower and an aborted attempt to etch something that was more abstract generated with UJI. I’m quite pleased with how the flower came out: it’s a little over done, but the lines are nice and crisp, and if I ran the laser head faster I’m sure I’d be able to get it cleaner. The abstract one, which is what I used in the exaples last week, was a bit of a disaster.
You can’t tell from the picture, but I’ve almost burnt through the wood, as there’s just so many overlapping tiny lines in that one that they all keep burning over the same place. I had the laser-cutter on as low a power as it’d go, and I didn’t want to run the laser-cutter head any faster, as then you get wobbles in the cut as it changes direction, and so I think I need to go play with UJI and see if I can make a less dense pattery, or find a way to drop 90% of the lines in the pattern after the fact.
Still, I do like the idea now that I’ve started to make it real, so I’ll continue to explore this as time allows. I’ve been enjoying reading the writings by Anders Hoff, where he talks about the ways some of the fundamentals of generative art work.