A Week in the Shop
Published 1 Aug 2022
Tags: 3d printing, älgen, bridge, headless, strings, website
Sometimes, you need to take a break. Which is why there was no weeknotes last week. I went into the workshop, tried to do some bits on the guitars, and quickly realised that after a long week in my contracting work, and after all the push for Liverpool Makefest, I just needed to step back for a day before I did more bad than good as I got frustrated with myself. Instead, I had some down time: I did some baking, I played some video games, and I met a friend for coffee.
It feels bad to step away at times, particularly if you’re so close to some important milestone, but I’m glad I did step back, as I realised after a few days that what I was about to do when I threw in the towel would have been an irreversible change before I’d actually worked through the simpler alternatives that only occurred to me later as the ideas percolated in my head for a while. Whilst there are times it is important to press on, it’s equally important at times to let things sit for a bit whilst you recharge yourself.
As indicated in the last weeknotes, it was time to put the strings onto Älgen for the first time. Unfortunately, perhaps predictably, this did not initially go as smoothly as I’d hoped.
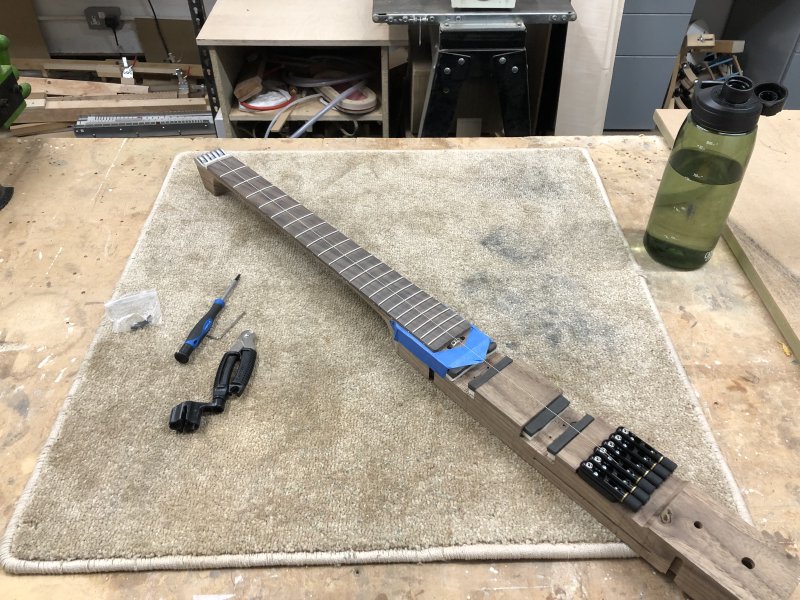
As may be obvious from the photos and previous posts, älgen has a bit of a weird string setup: the string ball ends anchor at the headstock in a custom 3D printed metal part and then we have the tuners built into the bridge, using the Mera Guitars Submarine 3 bridge. A lot of headless guitars use tuners like these, so I’d not really thought much about the practicalities of stringing up a guitar like this, I’d just assumed it’d all work fine. But it turned out in practice they needed a bit of time to get my head around. I’ll explain as we go!
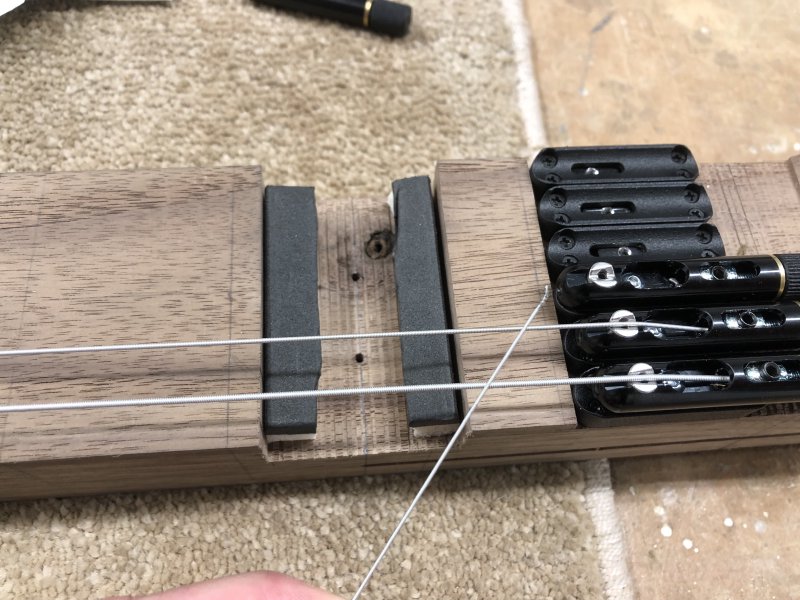
The first step was just to get a string on any sort on there, as I did expect to mess up stringing the guitar at least once. So I took a random left over string from an old pack and attached that first:
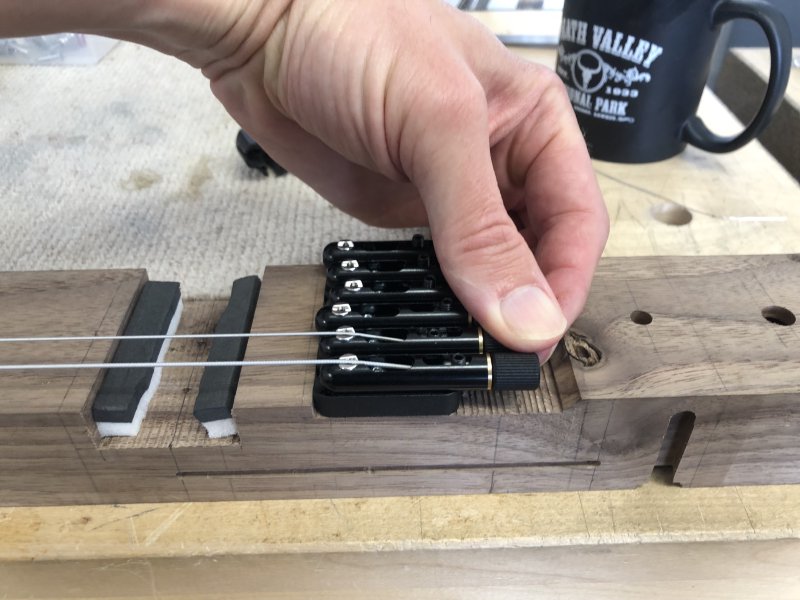
So, partial success! If you only needed notes D2 to B3, and no chords, then we could consider this done; but I suspect that’s a limited market :) The way the Submarine bridge works is that for each string you have a little sled with a grub screw in it that traps the end of the string (which you trim to length). You then twist the end piece and that pulls the sled away from the nut, lengthening the string, thus letting you tune it.
To get the string in place then you want to move the sled mostly to the nut end of the bridge, so you have plenty of room to stretch the string, you hold the string taunt over the nut and cut it a little past the grub screw, you then feed the string end into the sled, clamp it with the grub screw, and tune it.
It’s a little fiddly to get right at first, and it took me a few goes to get it down to where I didn’t think about it, but by the end of the stringing up process it was second nature. So, yes, it’s a fiddly thing to get right, but then so were regular tuners the first few times I had to string a guitar up.
As ever, it’s interesting to discover the things you don’t think about when you designed the guitar that crop up later when you come to put it together. In this instance, I couldn’t attach my clip on tuner to the guitar to let me tune it! Because clip on tuners are designed to attach to the headstock, and I don’t have a headstock, there wasn’t anywhere to put it. Something to consider in the future, but for now I was glad that I had the Fender Tune app on my phone which has quite a good built in tuner that’ll use the microphone (obviously when finished you’ll be able to just plug it into an regular electric guitar tuner).
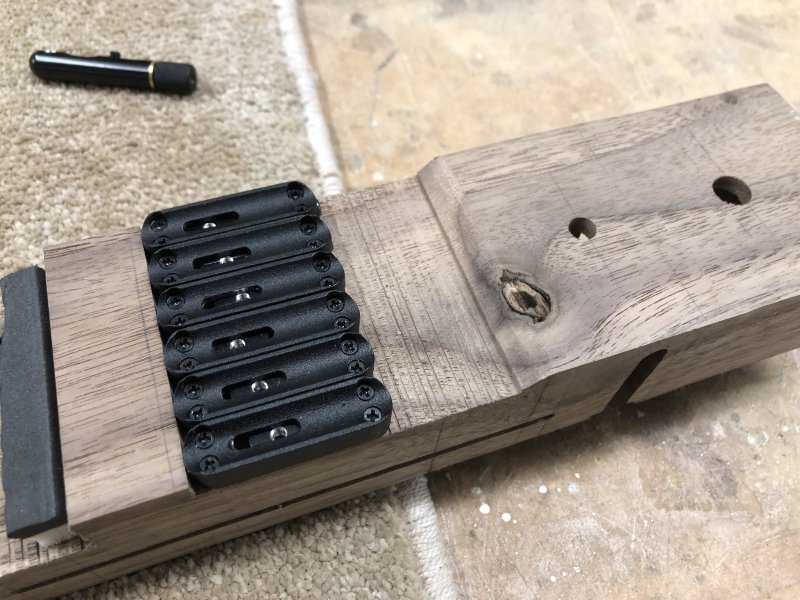
Having successfully installed my first string, I then went to install a fresh set of Elixir 10s, which are my usual string of choice. I got the low E on fine, but hit an issue getting the A string on:
One problem I hit with this style of tuner is that there’s no gearing in these tuners, so at high tension, I was struggling to be able to get the string tight enough to get it to the right note; I got as close as Gb, and I just couldn’t turn it any more.
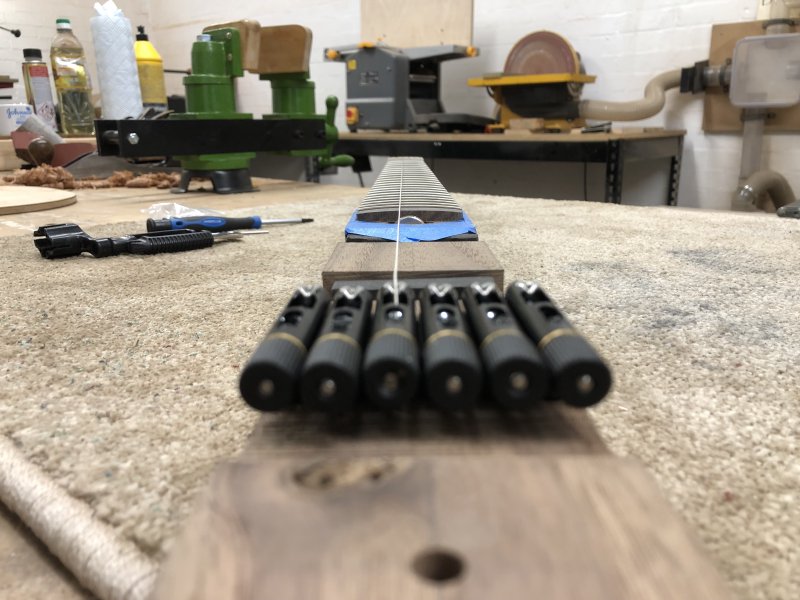
If you look at most guitars that use these tuners, you can see that they leave a lot more room around the tuners for you to get your fingers in - often just terminating behind the bridge so there’s just free space back there, whereas my design here really only has a small cut out for the tuners, and I just couldn’t get my fingers in to get enough grip.
It was at this stage, when I was about to take the guitar into the back of the workshop and cut out more material from that space without more thought, that I decided to step away from the problem. I was tired and frustrated and so, so close, and felt robbed, and thus there was a strong incentive to take immediate action to change the guitar design, but I’m glad I didn’t; as you’ll see that things worked out in the end.
As a quick aside, you might expect, as I did, that the tension on a guitar string is proportional to its diameter, so it seems odd that I could tune the E string but not the A string. In part that’s because the outer string’s bridge is easier to grip, but also it turns out not to be the case that the E requires more tension as I’d assumed.
A quick look at the Elixir tension guide shows that using a set of 10-46 strings on a 25.5" scale length (as älgen has) the low E is tuned to 7.7 kilograms, and the A is tuned to 9 kilograms, and indeed has the highest tension of the set. Not quite a classic example of “measure, measure, cut”, but similar root causes :)
When I came back the following week I started by going back to the A string, but first I removed the tuners for the other strings to give me full access to that one particular tuner for better grip. This way I could at least prove or disprove my theory about just not being able to grip the tuners well enough before I make irreversible changes.
Low and behold, it did work, which did give credence to my original theory. So I stuck back on the low-E string and then started to work my way back up the set, but I didn’t get very far before I got stuck again on the very next string:
I’m always amazed that a grub screw can hold a string in place, and for some reason this D string decided it also didn’t want to believe that it was possible, and kept slipping out as I got within a couple of tones of being in tune. I say slipped, but you’re effectively building a small string catapult, and it would leap for freedom across the workshop each time.
At this point I decided to switch to a plan-B: I had bought with me to the workshop this time a set of lighter-gauge strings. As much as I prefer 10s, I figured switching to 9s would make life easier if I was struggling, and I couldn’t get a set of 9s on then I was in trouble (as this is as light as most players will go). Clearly building a guitar that can only have 9s on it is not a long term solution, but again the idea here is just to explore what I can do before I start making changes that I might regret.
That said, having convinced myself that access was a problem, I did quickly round off that step behind the bridge to make it easier to adjust the tuners:
Longer term I’d want to drop that whole area a little bit, but even this little tweak was enough to make tuning a lot easier than it had been before.
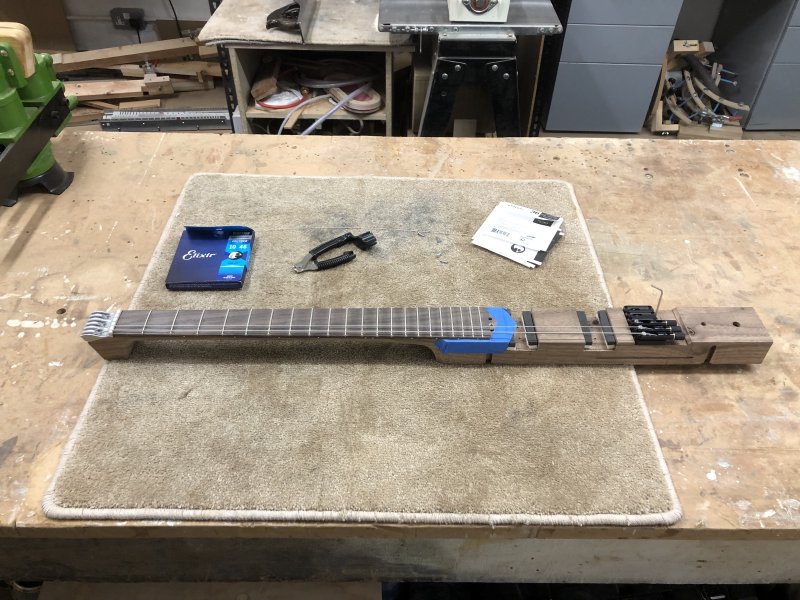
So, out came the pack of Elixir 9s, and a short while later, we finally get to that all important milestone: we have all the strings on this guitar for the first time!
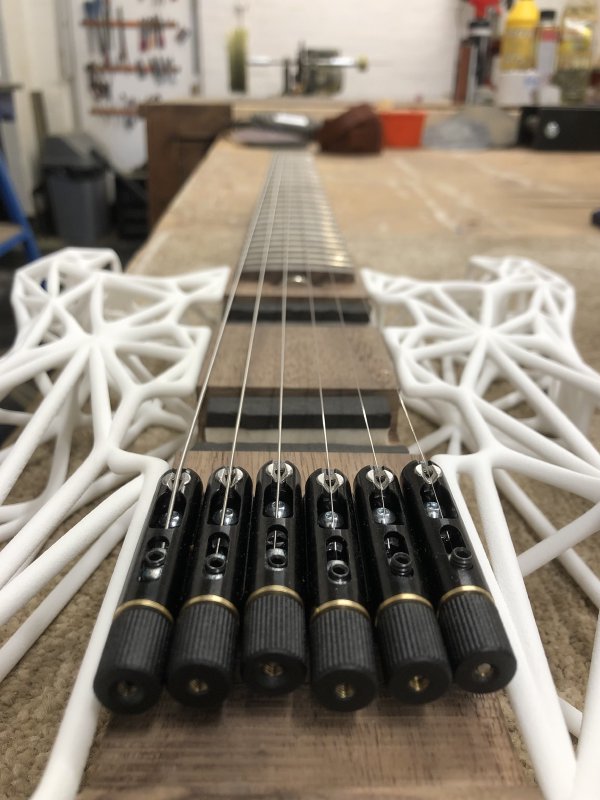
And from another view, because that’s how pleased I was at this point:
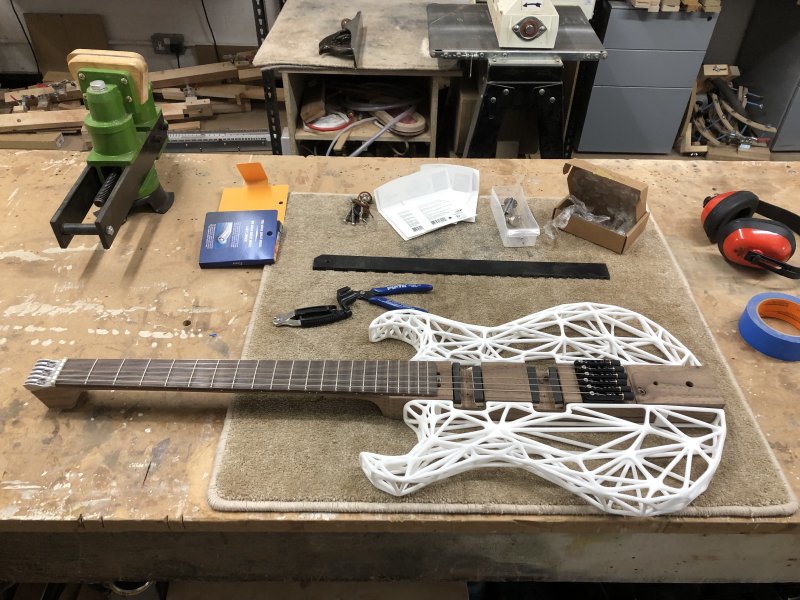
But, wait: does it actually, you know, play? Yes it does:
This is literally me playing the first few notes on this guitar outside of those tuning it. It’s hard to convey how important a moment this is for me: I finally know for sure that we have an instrument on our hands, not just an expensive art project (or perhaps at least know we have both :).
But, there’s clearly some work to be done here. Firstly, I do need to tweak the bridge access to give me more room to get at the tuners, and I need to then retry with a set of 10s to see if that was just user error or something more tedious to deal with. Secondly, the action on the strings is too high, so I need to lower the bridge at the same time:

I also need to file the nut down, but that’s something I can do once the bridge is in a better place. But whilst we’re talking of the nut, let’s celebrate another win: the 3D printed headstock works a treat:
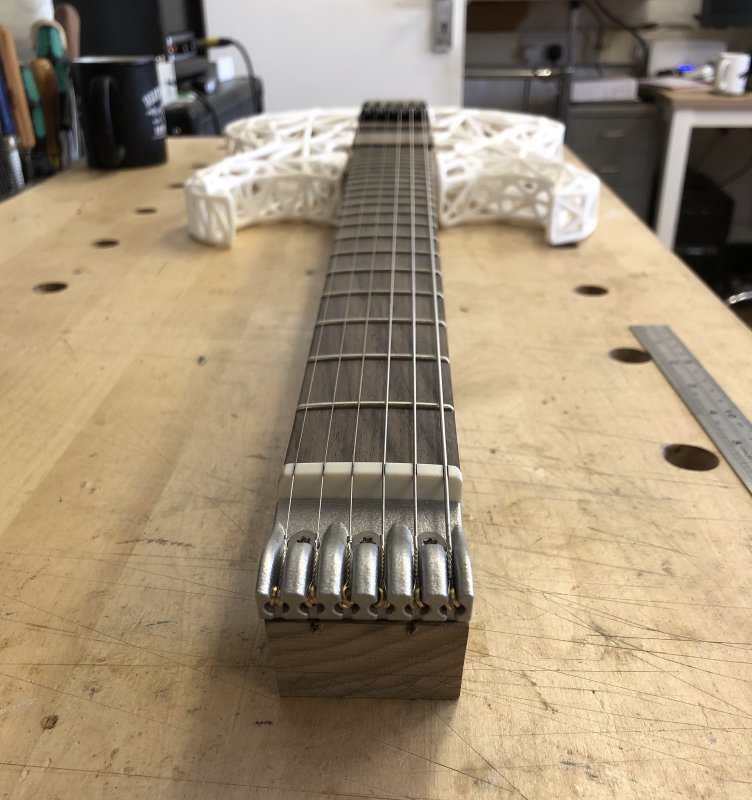
The strings seem to fit well, there’s no interference between the strings and the walls holding the ends in place. A definite success!
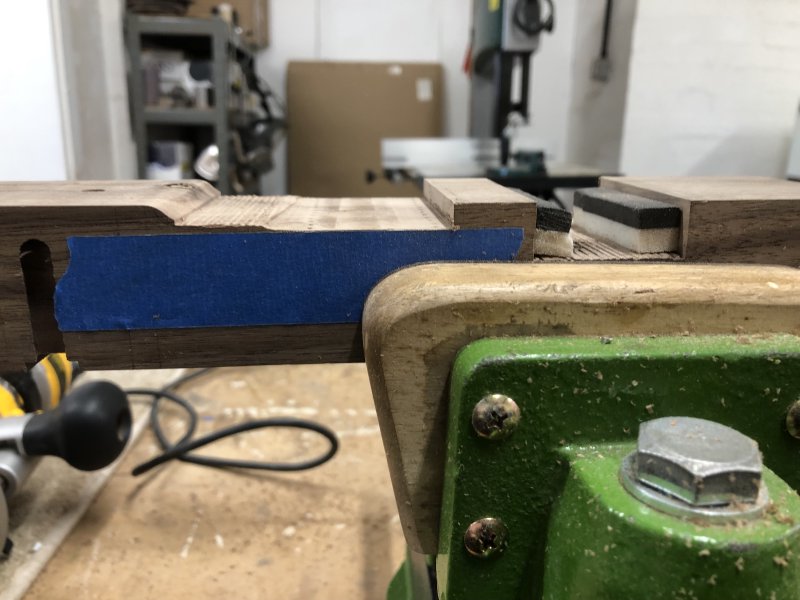
With the joy of playing it still with me, I now had to lovingly take it all apart again. To get the string action down to where it needs to be, I needed to take about 2mm out of the bridge recess, as shown here by my masking tape addiction:

When I originally cut the bridge recess I used the band-saw and chisel technique. I did this in part because I just wanted to use the same technique as I’d used on the pickup recesses, but also because I didn’t have a way to route out the recess either (and routing was a no-go for the pickups). But to go down just 2mm, I wasn’t convinced I could get that precise with my band-saw method, and I don’t have a table-saw which we mentioned last week might get you a more reliable result. So in the end I opted to improvise a template using some MDF I had in the workshop.
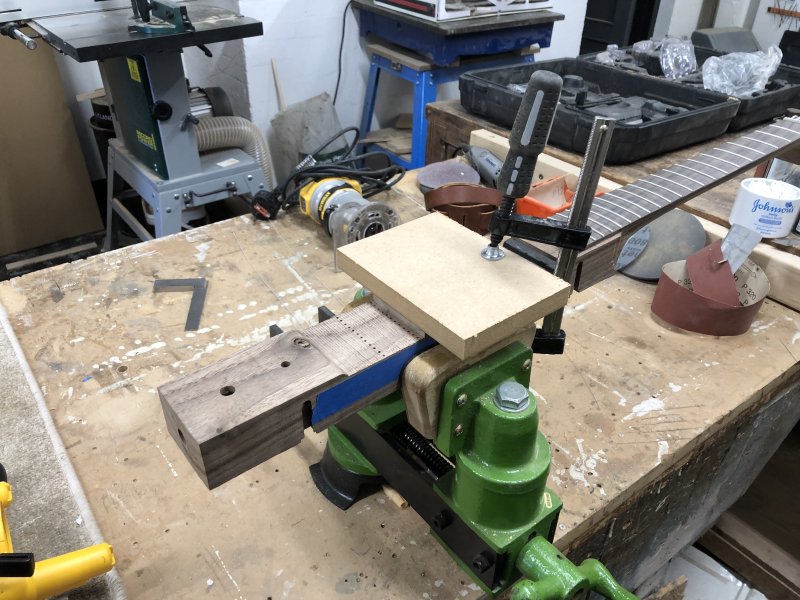
I say template, I basically cut a straight edge on the band-saw, lined that up by eye, and clamped it in place. But it got the job done.
I slowly edged my “template” back a bit at a time, but stopped before going all the way because I sensed the MDF was start to sag slightly. But that was okay, as I switched it around to the other end and and set the router a little deeper to give me that bit more clearance under the tuners
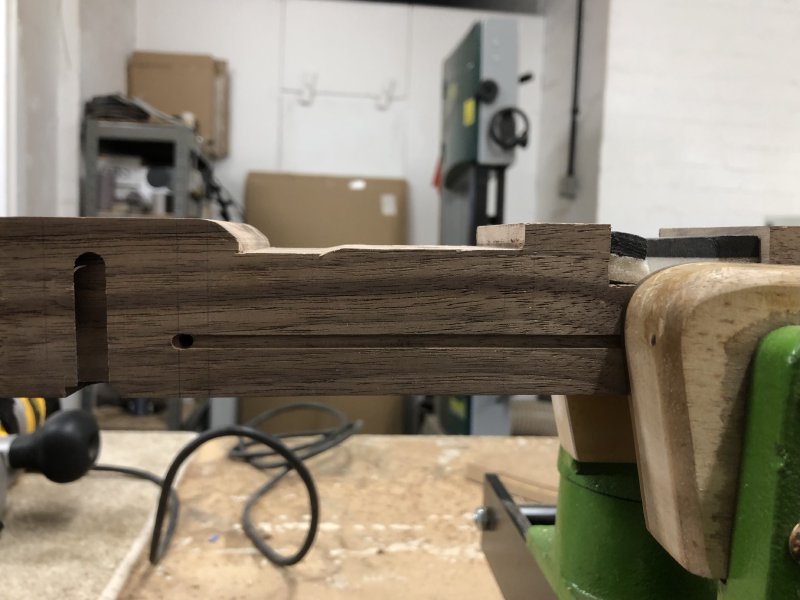
I then smoothed out the transition between the two parts and re-rounded the rear step using a mix of chiselling and sanding.
Unfortunately I didn’t manage to remount the bridge as it turned out two of the screw holes had wondered when drilling (even though I did use the pillar drill), and so no longer where in the right place after had removed the top two millimetres. Thus, it was hole plugging time:

I have shipped guitars that don’t contain toothpick plugs in them, but it’s fewer than I’d like to admit.
Anyway, this glue drying meant getting the guitar setup pushed into next week.
Alas my other guitar activity time was spent on the less glamorous activity of website maintenance. I spent pretty much an entire day moving this website from its old home on Squarespace to its new home on my own server; partly having to [write the migration script] and then partly having to write my own HTML/CSS theme.
I’d set up the Squarespace site when I first started Electric Flapjack, but other than this blog the site has gotten a little bit out of date, and I wanted to give it a bit more attention going forward as I’ll need to promote the new guitars a bit more in the near future. I found Squarespace a bit limiting in letting me do certain things that I’d like to do for that (and I was at my plan limits in terms of pages so would need to pay more money), so I took the plunged and moved it to self hosted.
This wasn’t the first time I’ve tried this migration, but this time I accepted that it’d be as polished as the old site out the gate, and just to got it moved over in some form. So there’s gaps currently, but the hard part is now done, and I can apply the polish and fix up missing bits over the coming weeks as time allows between other tasks.
This kind of thing is not as fun as being in the workshop, but it’s all part of trying to run a thing these days. And it’s already paying dividends: putting together these weekly posts was slowed down quite a bit by trying to get everything into the right shape for Squarespace, I’m saving at least half an hour doing this.
Oh, if you subscribe to the RSS feed for this blog, then you might need to update your feed. Whilst I have set up the server to redirect to the new location (which I’m forced to change for technical reasons), it seems some RSS feed readers don’t honour the redirect like they should. But all pages on this site (should) have the right headers in place, so if you add any page to your RSS reader it’ll hopefully do the right thing.
Now that I know älgen can play, I’m really keen to get back into the workshop and finish it off. There’s still a bunch of work to do, and some unfinished business like getting a set of 10s on there, but it’s such a relief to have played it at long last. Now I just need to get this finished and see if I can interest anyone in commissioning any…