A week in the shop
Published 18 Jul 2022
I was recently listened to a podcast where the presenter was interviewing Ken Kocienda, who was part of the original iPhone team; Ken was reflecting on the motivation for the work behind a lot of Apple’s things, and he highlighted that whenever anyone asked what Apple did Steve Jobs would often define it simply as: ”We make great products”.
Whilst Jobs may not be the best role model for many reasons, I did find this particular phrase resonate with me. I often find it hard to answer people who ask what it is I do, what between my guitar building and my parallel career as a technologist where I’ve worked on both software and hardware products, never sticking in one domain more than five years or so. But to me they all fit a similar shape, which I think this phrase helped capture: no matter which domain I’m tackling, I want to make great products. I want to make things for people to use and that people will want to use - whilst I do enjoy the challenge of the problems I take on in these disparate domains, I do so with that goal in mind.
Now, I don’t want to suggest that I always succeed in that aspiration of greatness (and Apple don’t have a 100% win rate either), but that is the bar I try to strive for. I want Älgen to be a great guitar: not just something that is unique because of its looks, or because it has unusual engineering to it, but I want it to be a great instrument to play. This is why I worry a lot about the details.
But at the same time, it’s easy to get lost in the pursuit of greatness, and I try to temper my desire perpetually tinker in the pursuit of perceived perfection with that other quote attributed to Apple’s former CEO: ”Real Artists Ship”. I’ve been guilty of times shipping something that I’m not 100% proud of, but shipping something that’s not quite where you want it is better than never shipping something because you were never quite happy, as you’ll never be truly happy if all you do is chase an unobtainable level of perfection.
Älgen
My focus at the moment is to get Älgen playable. Last week I made a late design change to help manage the routing of the pickup wires, which meant I didn’t get to ”hole complete” as i’d hoped (i.e., where I had no more holes to drill in the body). This week the router-bit I ordered last week to help me make the last-minute design changes turned up, so I had another go at wrapping up all the body tweaks Älgen needed.
As ever, regular readers will know the drill by now: new tool or new technique means first we do a test run!
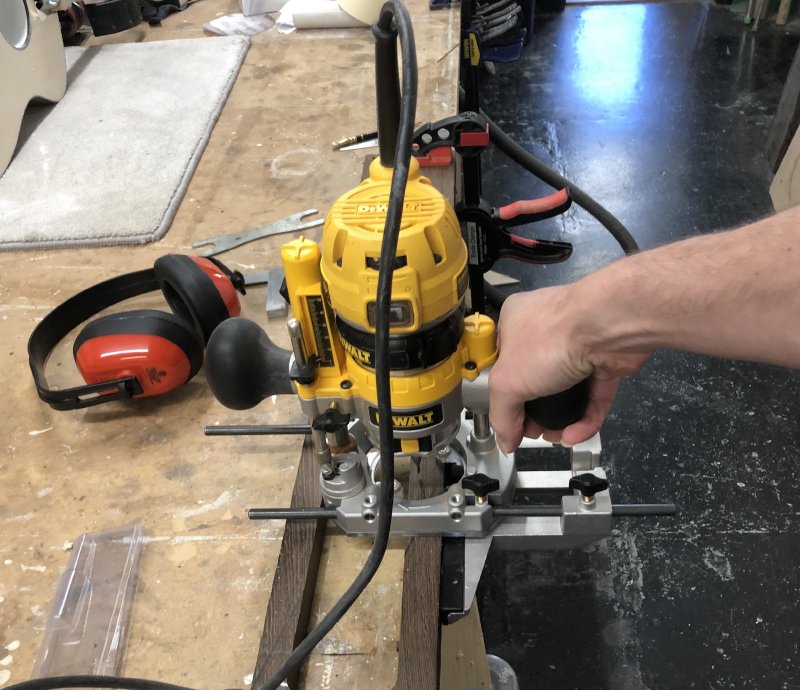
Workshop-mate Jamie had warned me about drift when trying to route a channel like this: you need to keep pushing the guide fence on the router towards the workpiece as you cut the slot, as the fence only prevents movement in one direction, and wood-grain can cause the bit to want to go towards the edge your running the fence along. A couple of practice runs and I was quite pleased with the results:
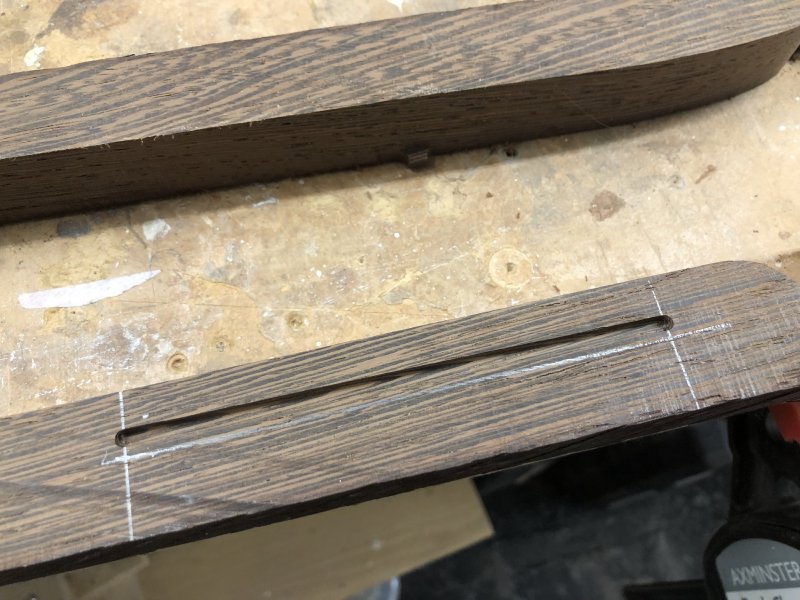
With that done, it was then time to repeat on the real thing:
I’m quite pleased with the results: I now have a tidy guide channel into which to pin the pickup’s output cable as I route it to the electronics cavity in the tail of the guitar.
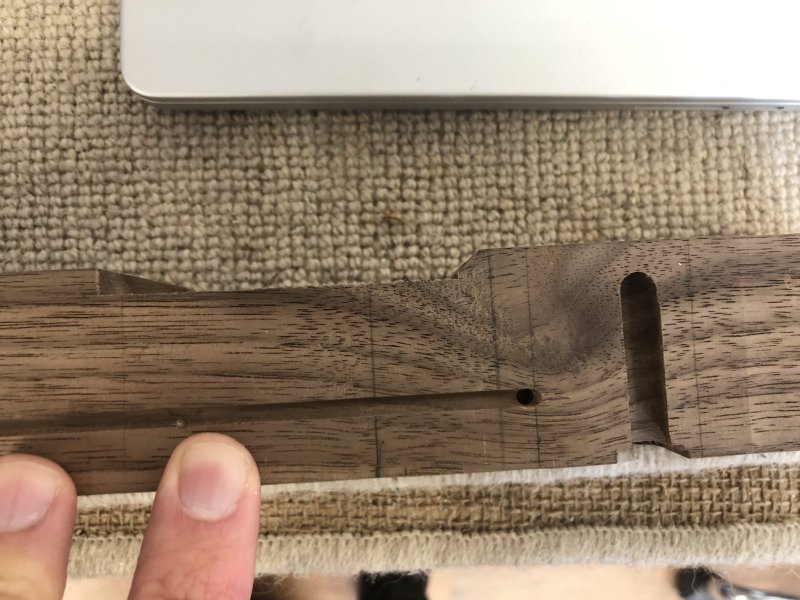
I still needed a hole at the end of the channel to go into the cavity. In hindsight I should have done this step first, as the drill bit didn’t want to cut into the rounded end of the channel, instead the tip drifted into the flat bottomed part before cutting, and so I got a hole that was slightly in from where I wanted it to be:
The lighting for this didn’t really work with my phone, so you’ll need to take me word for it I fear, but a lesson for next time: hole first, channel second. Even so, this is not going to be a detail that bugs the player as much as it bugs me, as the wire is smaller than the channel width anyway, so it’s not like it was going to be a perfect fit anyway, so I doubt it’ll look that odd visually.
But still, this is a good milestone: all the holes I need to make in Älgen have now been made (at least the ones I’m aware of :)
With the holes complete, we’re back onto the mission to get the guitar strung up. I have two remaining tasks before I can put strings on it: I need to cut the nut, and I need to finish the fretwork.
First up was shaping the nut:
Here I’m using a blank nut from graphtech: I’m generally a fan of their nuts, which are made from a synthetic material that has a low friction co-efficeint, so you don’t have issues when you do string bends etc.
This is the first time I’ve used a totally blank nut that I recall, and I think in future I’ll go for blank nuts in general as cutting the slots fresh rather than reworking the existing slots was actually less awkward, and gives a better finish overall.
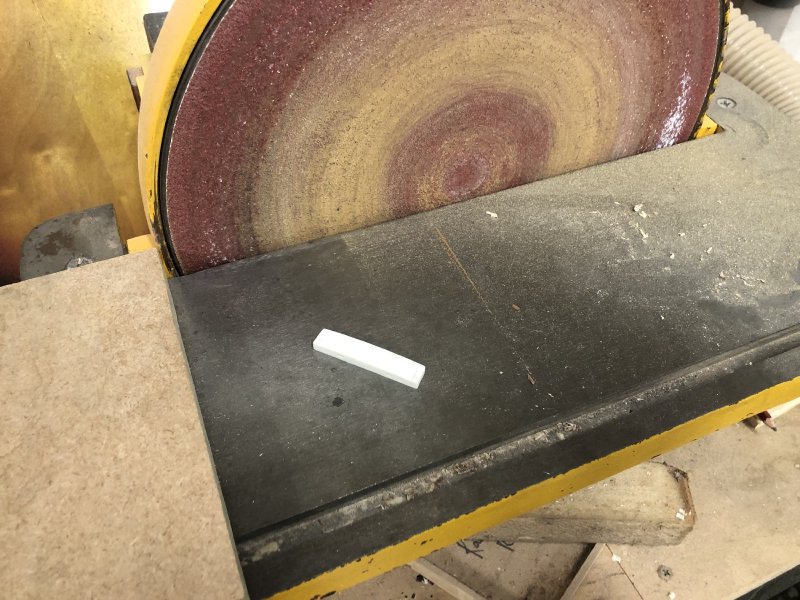
But I’m getting ahead of myself here: the first task was just to get the nut to the right overall shape on the disk-sander:
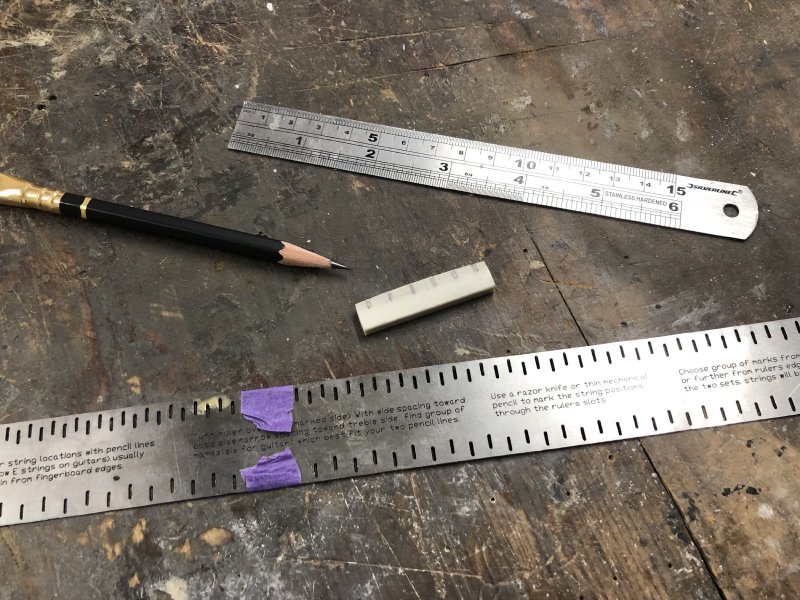
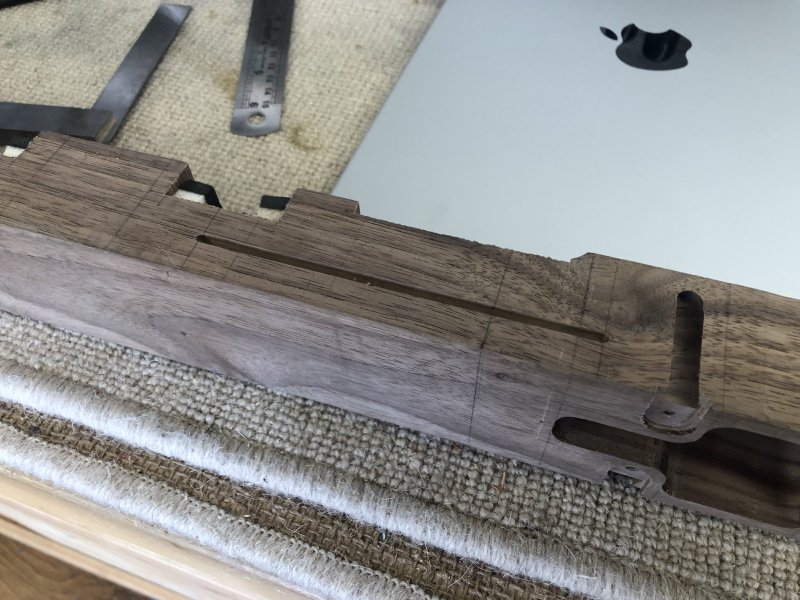
That done, I then used workshop-mate Matt’s fret-slot marking ruler (The bottom one in the picture) to make a note of where I needed to cut the slots. Because the strings on a guitar have quite a varied width (in this case, the low-E is over four times the width of the high-E) you want to compensate for this by having slightly wider spacing between the lower strings so they’re less cramped, making it easier for your fingers to pick just the right strings. To help with that I’m using this ruler rather than just using a regular ruler to measure out a fixed interval, as the slots in the ruler have a suitably uneven spacing between them. You just mark the position you want the two outer strings to have (say 3mm or 1/8” in from each edge), and then move the ruler until it you right the right number of gaps between two slots that hit the marks you made.
With the slots marked out, now it was out with the nut files to cut the slots:
At this point I was just getting the slots started, as I can’t cut them to the correct depth until I’m actually ready to install the strings. But this means I’m now ready to switch to that other task.
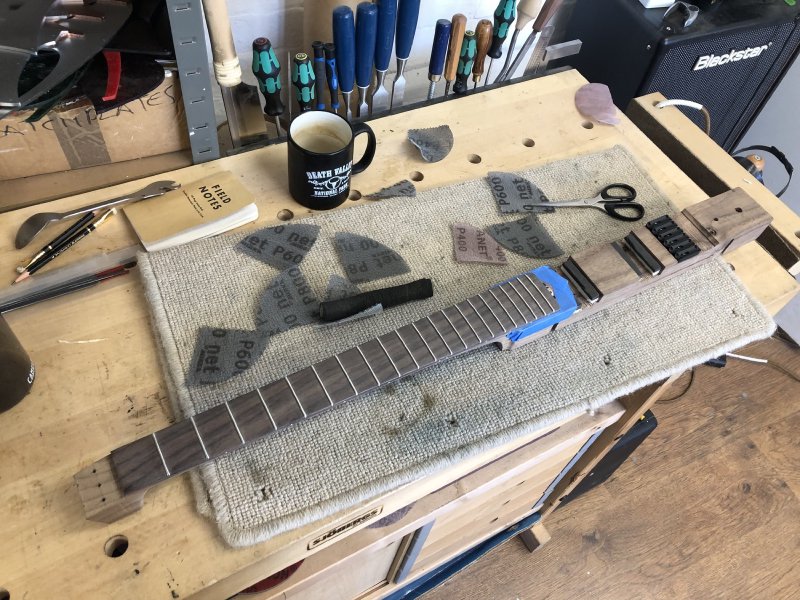
The next task was finish the fretwork. From the pictures on the webpage clearly the frets are installed and so you might be wondering what is left to do, but I’ve only just pushed the fret wire into the fretboard and trimmed the edges flush with the neck profile. At this point they still need to be both levelled, to ensure they’re all at the right height over the fretboard so you get the correct notes whilst playing, and have the ends dressed so they’re comfortable and don’t catch your hand as you move it from one position to another.

Whilst I’ve done both tasks many times, as regular readers will hopefully have picked up on over the last couple of months, my approach of late has been to reconsider the techniques I use, as the ones I learned early on have at times proved problematic - something sharing a workshop with more experienced guitar builders has made quite apparent to me. Thus I was grateful when workshop-mate Matt gave me an overview over how he does the frets on his guitars: Matt has to make many necks regularly, and so his process has been honed over the years to be something he can get through at a reasonable pace whilst still not compromising on quality. Both my workshop-mates have a very high fretwork game, and it is something that to me really makes the difference between and okay guitar and one that’s great.
The first improvement over my usual workflow has already happened by this stage: a few weeks ago I had used the arbour-press to insert the frets, rather than using a hammer as I’d generally done in the past. This means we’re starting from a better overall position, as the press ensures a good regular curve on each fret, whereas the hammer will generally leave the fret profile a bit wonky and needing more work to correct. The upshot of which is I’m only trying to do minimal work with the levelling here rather than major changes to the profile.
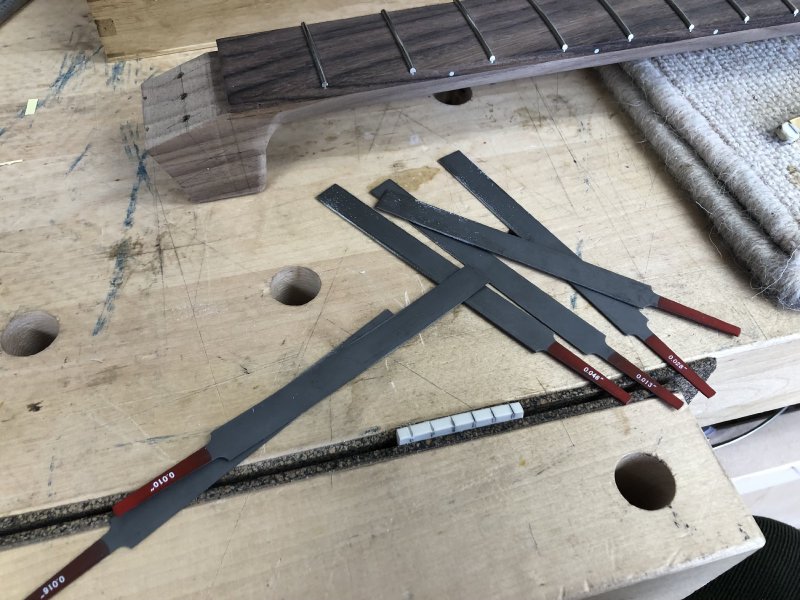
As such, rather than starting with a more aggressive file (like the one you can see under the neck in the above picture), I did the levelling of the tops of the frets just with a sanding bar (that you can see stick out the frame in the lower left). This is a double win: firstly the bar is a lot longer than the file, thus keeping the frets a more even height as I go over the neck length, and secondly it is less aggressive, so requires less clean up of marks in the metal afterwards.
Once the frets were levelled with the file, the next stage is then to round them back over, as I’ve just flattened the top of most of them. To do this I still used a file with a concaved profile, but rather than my own one which is made from metal and only has a straight edge, I used Matt’s more advanced one (similar to this one here) which uses a diamond abrasive and has both straight and curved sections to make it easier to target specific areas of the fret as you work over them. Matt’s file didn’t actually cost a huge amount more than my own, but is certainly a better tool for the job.
With the frets around over again, it was time to address the ends. There’s two ways you generally see people go with the fret ends: either they want a clear semi-circular flat face that looks nice and clean, is the easier of the two options to do, but in my opinion is a bit less ergonomic; alternatively they will round the edges into a quarter sphere, which is much nicer on the hands but a lot more work. Given my opening comments, it should be obvious that (like my workshop-mates) I’ve opted for the second approach.
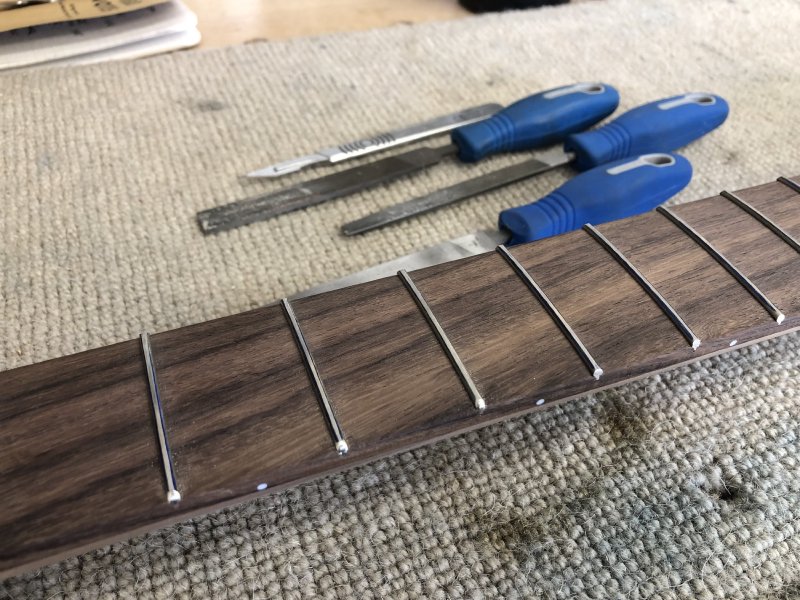
To achieve this rounded design I used a series of files to let me roughly shape the ends. Each of these files has a couple of abrasive sides and then at least one flat side, which is the edge you rest on the fretboard. The different shapes are there to make different types of cut: one let me generally round of the ends, one let me ensure the end was flush with the neck edge, and another ensured I could get into the corners at the end of the fret at the fretboard face to round those out. A scalpel also joined these to let me remove bits of swarf that the files generated - this last one I didn’t think I’d use much but made a significant difference.
Normally I’d tape up the entire fretboard to do this, but Matt’s guidance was not to bother, as the files all have smooth edges that you can rest on the wood, and if you don’t press too hard any marking you make (which is inevitable) will come out when you do the sanding passes coming next, as it’s just rubbing/compression marks not actual cuts or abrasive marks. Taping up the fretboard is a slow process, and whilst it can protect the fretboard surface from marks, you can also tear the wood fibres if our tape is too sticky, so neither approach is perfect. Normally I err on the side of caution and tape up, but I figured I’d give the new technique a go, as I really would like to try ramp up my build speed over the coming year and it clearly works for my workshop-mates.
However, I suspect this is where practice comes in handy, as somewhat predictably I did end up marking the fretboard a bit more than I’d have liked to. It’s not the end of the world, as you’ll only notice if you go looking for it, but it’s not up to the standard of my workshop-mates nor to where I’d be happy shipping it. But it’s only by doing we learn, and thankfully Älgen is just a prototype at this stage.
At this point, once the file work is done, you don’t have nice smooth round edges to the frets, they’re still very much facetted from the files, and quite scratched from the teeth on the files. But something magic happens as you sand the frets to remove any file marks:
I worked my way up from 400 to 3000 grit to remove all the marks I’d made in the metal and the rubbing marks on the wood, and by the end of this any remaining facets on the frets went away and I was left with nice smooth rounded fret-ends.
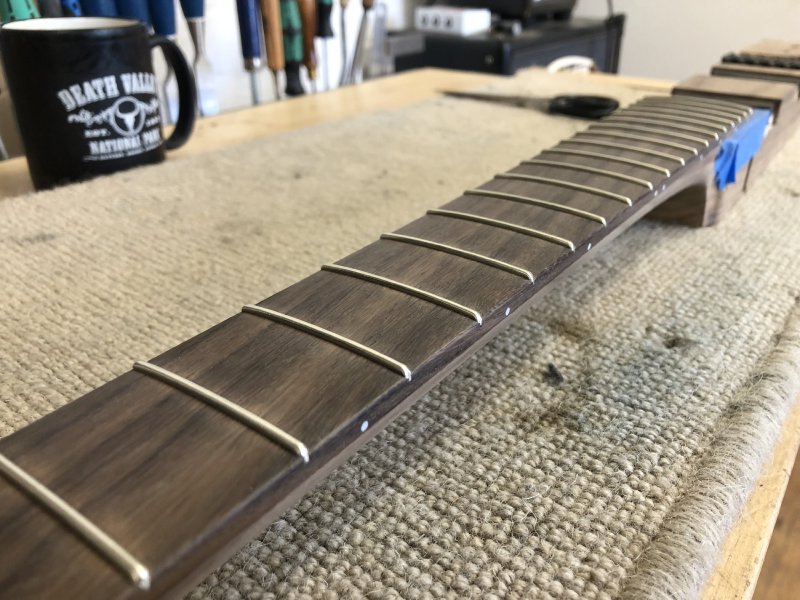
Overall I’m very happy with the approach: whilst I clearly need more practice to save marking the fretboard enough, the fret-ends are the nicest I’ve managed so far and took considerably less time than I’d normally take (sorry my phone didn’t do a great job of photographing them).
Unfortunately, although quicker than my usual technique, fretwork is still a slow process and took most of the afternoon, so this was as far as I got this week. However, next week should be quite interesting: I’m now in a position where next week my first task will be to fit strings to Älgen! Will it work, or will I find more work to be done? There’s only one way to find out…