A week in the shop
Published 25 Nov 2017
Tags: 3d printing, fretwork, tips and tricks
Normally the guitar building fits in and around other activities, but this week has mostly been guitar focussed, and to give you a taste of what’s fun and happening, I thought I’d write up what the week entailed.
The main thrust is finishing off guitars #3 and #4 at the moment, so there was a lot of moving those forward. This pair of guitars are the first taken from plank to guitar, including building the necks from scratch for the first time. This has involved some fun using the laser cutter to help with the fretboard production. which I’ll write up properly shortly so others can use the technique, but I just have an idea how to make it even easier I want to try that first. But neck building is just a lot of hard work for the most part - the body gets most of the attention in a guitar, but the neck is what takes the time to make sure it’s right. And whilst I don’t see anything wrong with buying in necks if that suits the build, building them yourself gives you the chance to build something special, like this amazingly pretty spalted tamarind fretboard for guitar #4:
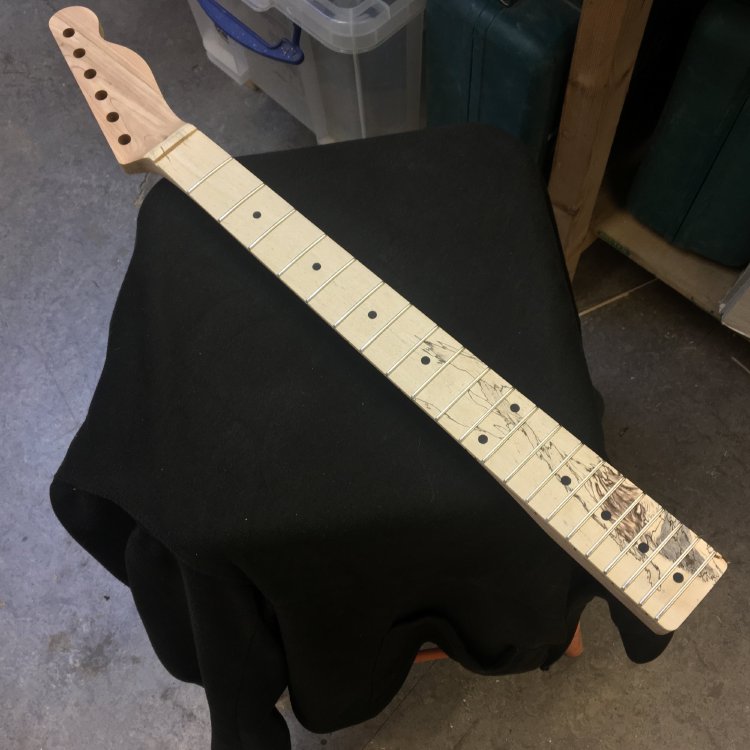
So pretty much a day was spent just levelling, shaping, and polishing the frets. Slow progress, but worth it. Hopefully this will get quicker with practice.
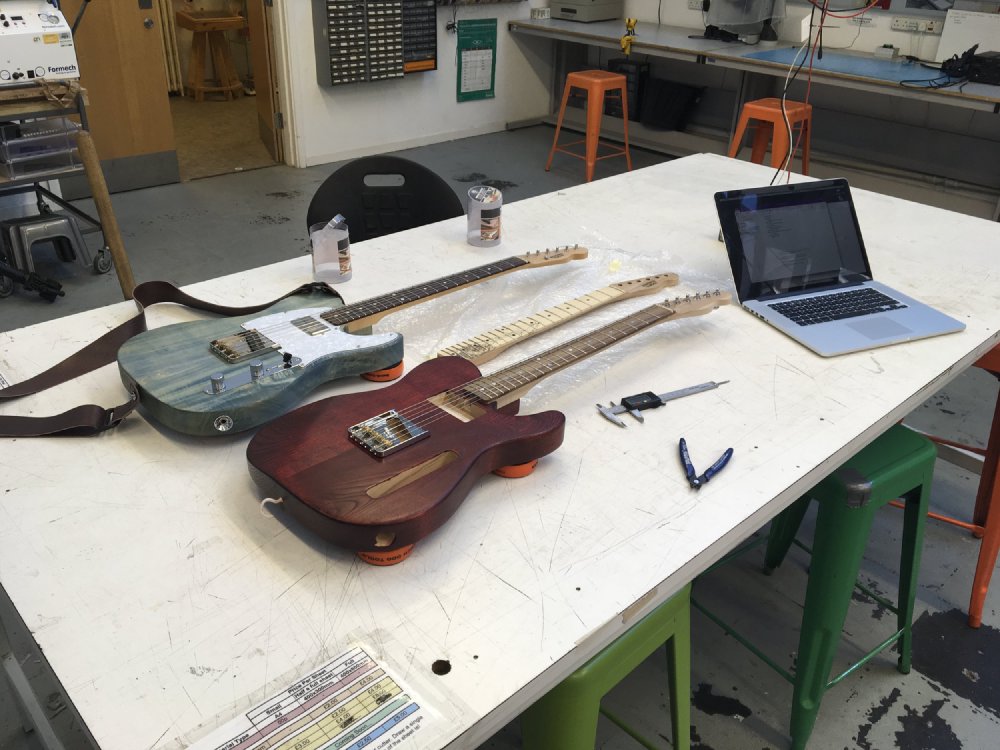
I also took the neck from guitar #3 and reshaped it, having made it quite chunky first time around, and after some playing I decided I wasn’t happy with it. As someone who has built digital hardware and software for the last couple of decades, free hand neck carving was something that I was scared of the first time: there’s no undo if you take too much off. As a result I was a bit timid on this neck and left on plenty of wood, but it was a bit too much for comfort up around the 1st fret. So, to make things a lot easier I brought back in guitar #1 and measured up the neck with calipers, and then took a rasp back to my first neck and slimmed it down a bit, making it much more comfortable.
I spent some time learning how to use the FormLabs Form-1 3D printer that is in Makespace (Makespace being the maker space in which I do my guitar building). Although I’ve used things like the Ultimaker before, which is what most people think of when they hear about 3D printing, the resolution on those isn’t great, and the finish isn’t smooth, so whilst they’re great for prototyping, they’re less useful for production quality parts. The Form-1 works a different way, firing lasers into a tray of resin to cause it to solidify where the lasers intersect. Whilst you still get some artefacts, you can do good resolution with the Form-1, and it’s much easier to sand down to a smooth finish. The flip side is it’s a lot slower, more expensive, and a lot more temperamental, as I discovered when my first print failed to make what I wanted, and instead made a random blob Still, I got there in the end and the results are great. I definitely want to use this to start printing my own knobs etc. for the guitars.
In addition to learning the 3D printer, this also started me off trying to learn Autodesk Fusion 360 properly. I want to move away from using familiar guitar shapes to my own eventually, and this is the tool my friends are recommending to me. It’s free to use for the hobby makers and small buisnesses, so it’s cheap to get started too. I also really like that I can send my design straight to Cura (the tool for printing on the Ultimaker) or PreForm (the tool for printing on the Form-1) without messing about with intermediary file formats.
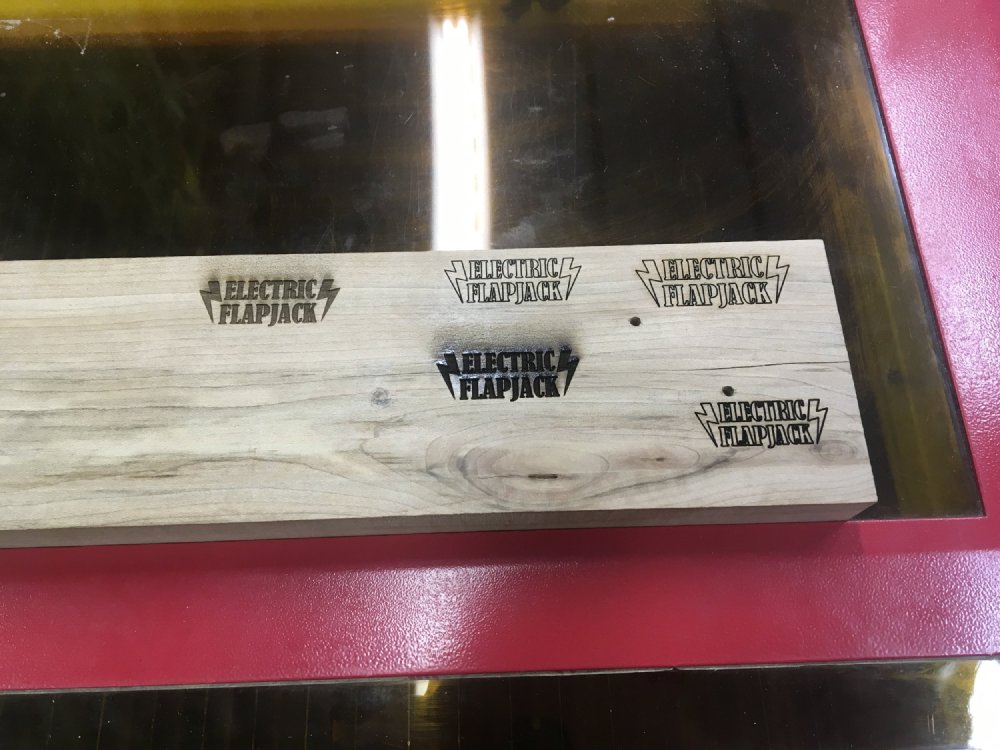
I also got around to ditching transfers on the headstocks, and laser etching them with the Electric Flapjack logo instead. Again, the advantage of hanging out in a maker space is they have kit like this I can use where otherwise it’d not feasible to justify buying it for such a trivial use. But given I do have it, it’s great. I just took the Adobe Illustrator file I generated last time which I sent to a transfer printer, exported it as an AutoCAD DXF file, imported into the software that controls the laser cutter, and after a number of test runs on a spare bit of maple I had (measure, measure, cut remember!) I got the laser power to where it was strong enough to etch the maple, but not burn it too much, and the results are great.
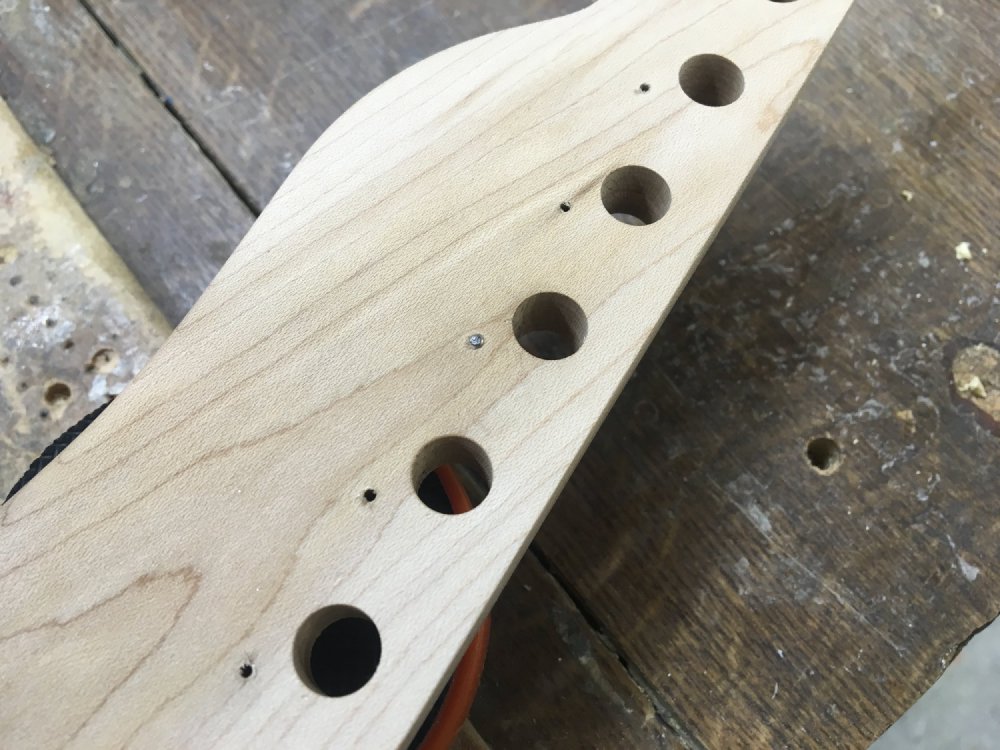
All the above makes it seem like I had a wonderfully productive week, but I also lost a lot of time learning to recover from a thing that went wrong. People don’t like to talk or share what goes wrong, but it’s inevitable and you just need to learn how to cope. My disaster was when mountin the machine heads into the nice tamarind neck pictured above, the head on one of the screws sheered off leaving me with the rest of it embedded in the maple without enough exposed to be able to grab it with some pliers:
So what to do? Well, this is where you find out the community of luthiers and makers is a lovely set of people. I posted this picture on instagram, and I got people telling not to fret (ho ho) this has happened to them, and then giving me suggestions on how to tackle this.
In the end the screw was removed successfully. Given I had a bunch of options that all looked tricky to pull off neatly, I applied a scientific approach to the problem: I got similar screws, embedded them in maple (which is a very dense wood, so it’d not be representative had I just used pine say), cut their heads off (many screws died for this) and then tested all the techniques. Having found one that worked repeatedly for me, I then executed that on the neck successfully with minimal damage to the rest of the neck. In the end what I did was drill two small holes next to the screw on the side where the machine head is, and manaeged to use needle nosed pliars to wiggle it lose enough that I could grip the screw and rotate it to come out. I then filled the holes using cocktail sticks and wood glue so I can re-drill it, and all the repair work is under the machine head, so won’t ruin the look.
Many thanks to all that suggested techniques, and especially to Matt of Fidelity Guitars who suggested the technique I used in the end!