Making your own dot inlays
Published 29 Nov 2017
Tags: fretboard, laser-cutting
With the current pair of guitars I’ve been making the necks for the first time. Whilst I see nothing wrong with buying a well made neck if you’re after a traditional style guitar, if you want something unique then a custom neck is the way to go. Of the two necks, one is a traditional maple neck with rosewood fretboard, and the second is going for something more unusual, with a maple neck again but using a lovely spalted tamarind piece of wood I found as the fretboard.
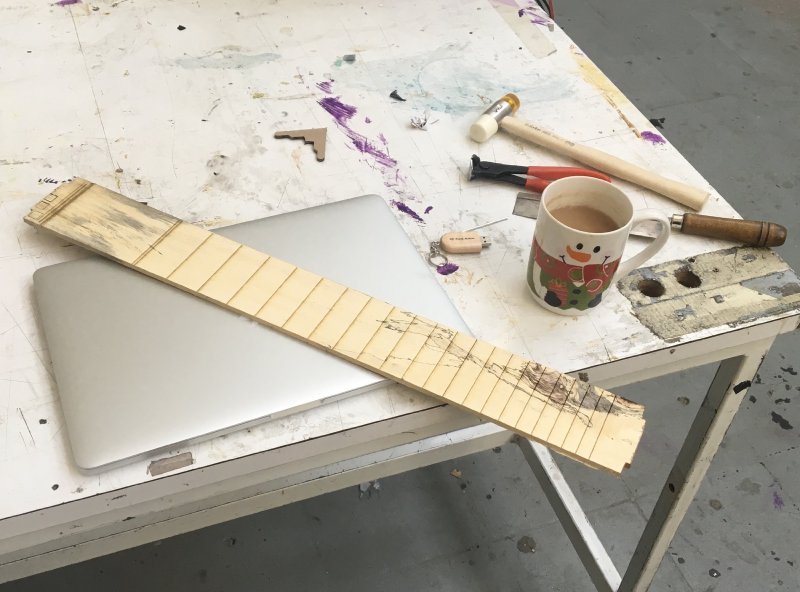
For both fretboards I wanted traditional dot style inlays: it’s a classic look and keeps things simple for my first outing. For the rosewood this meant just buying some dot markers of the right radius. These have a nice pearl type feel to them and are made of plastic. However, for the tamarind neck I wanted black dots to stand out, and you can’t buy black inlay dots (at least I wasn’t able to find any; I assume because plastic will scratch to white, which won’t show up on the white inlays but will on the black).
So, I decided to once again take advantage of having access to a laser cutter at my local maker space and make my own inlays, which turned out to be really simple to do. and look lovely. So for those interested, here’s how I did it.
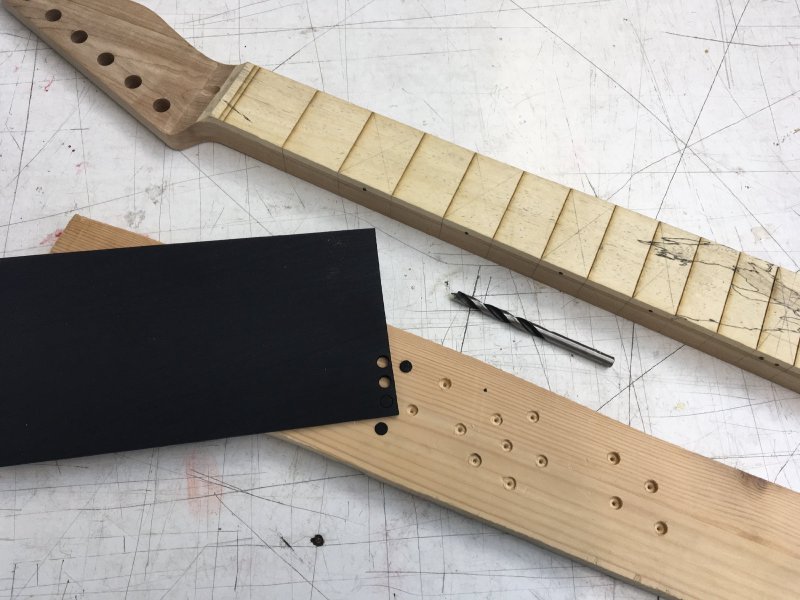
Laser cutters are great things, but you need to watch for the thickness of the material you’re trying to cut: too thick, and it won’t be able to cut it, and even if it can, you’ll end up with scorch marks due to the power you needed to get through. With inlays however we have the advantage that the dots only need to be a few millimetres thick, and as I’m after dark dots any scorching won’t show up much.
Thus I got a bit of 3mm thick rocklite ebona (an ebony substitute) that was billed as a headstock faceplate. This gave me a nice dark wood and something not too thick that I’d need to plane it down before cutting. Next up I did some testing to work out both the minimal power I needed to cut through this bit of wood and the size of the dot (the dot is just a circle, and most laser cutter/CNC software should let you do this, so I’ll not go into the drawing bit here). It took me a few goes to get the power to the smallest amount where it’ll cut through, and I till had to prod a little to get them to detach. But as mentioned already, it’s worth doing this as it’ll reduce scorching on the edges of your inlay. Once I had the power dialled in I drilled a few holes in a bit of scrap wood using the same drill bit I’d use to make the holes in the fretboard, and starting at the “same” diameter as the drill bit I changed the size by tenths of a millimetre until I had a snug fit: I found for my 6mm drill bit I needed to set the circle size to 6.1mm.
As you can see, it worked a charm:
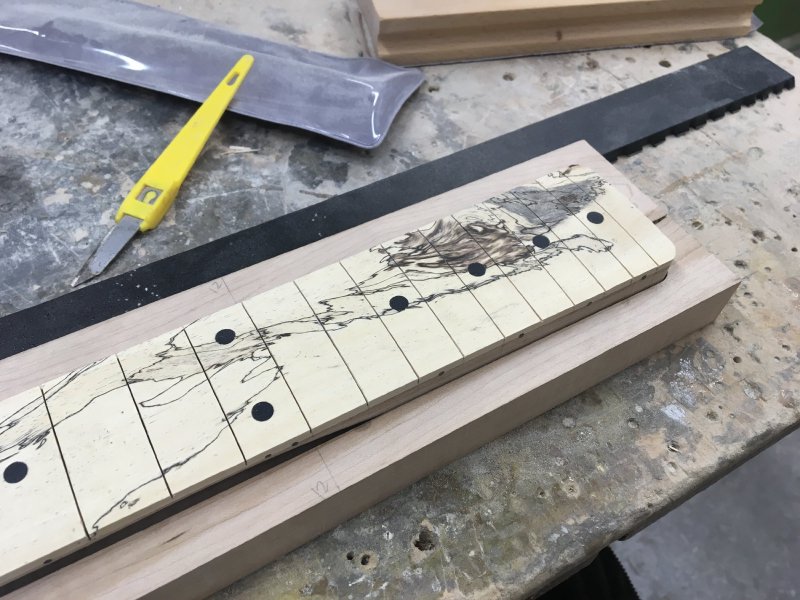
A nice bonus is it takes very little material to make the ten dots required for a traditional 21 fret neck, even allowing for the test cuts; so for my outlay of six pounds for that bit of wood I doubt I’ll need to buy more dot material for quite a while. It’s certainly a lot cheaper than buying plastic inlays, and I think looks nicer too.
Note that although with a light wood you will get some scorching, it’ll only be on the surface and should easily sand off as you radius the neck, so you shouldn’t have any issue doing the inverse with a dark fretboard and light dots, just go easy on the laser power as much as you can and remember to do a test piece first!