A Week in the Shop
Published 30 Jul 2024
Tags: electronics, hästen, laser-cutting, laser-etching, pick-guard
Being back in the workshop last week for the first time in a month, I was keen to press on with the nearly completed Hästen. It got so close last month, so I was keen to see if I could get it playable this week.
Pick-guards R us
When I last wrote about progress on Hästen I’d had to re-design the pick-guard slightly, to make it fit with the bridge better. The original pick-guard I cut was based on the batch of Mustang style guitars I built in 2018 and 2019, but that didn’t work with my new custom bridges so well, leaving an odd gap. I’d tweaked the the outline to fix that, and here’s a picture from that previous post with the test of the new design cut in paper:
My original design for the guitar had a black pick-guard, but in chatting to the person who commissioned Hästen they mentioned really liked the copper-lined cavities, and I wondered if I could do something to bring that to the front. So I ordered some different orangey/browny translucent acrylics, with the idea that I would paint the back copper, and let it glow through the pick-guard.
It’s a technique I picked up from workshop-mate Matt, who does this with his tort and smokey pick-guards (and indeed I used on this guitar). The process really gives those parts a glow as they move in the light and the lower copper layer reflects through the upper layers. So I figured I could try the same trick here, just more overtly.

After repeatedly convincing myself I really was about to spray the back of the pick-guard, I went ahead and did a couple of coats of paint.
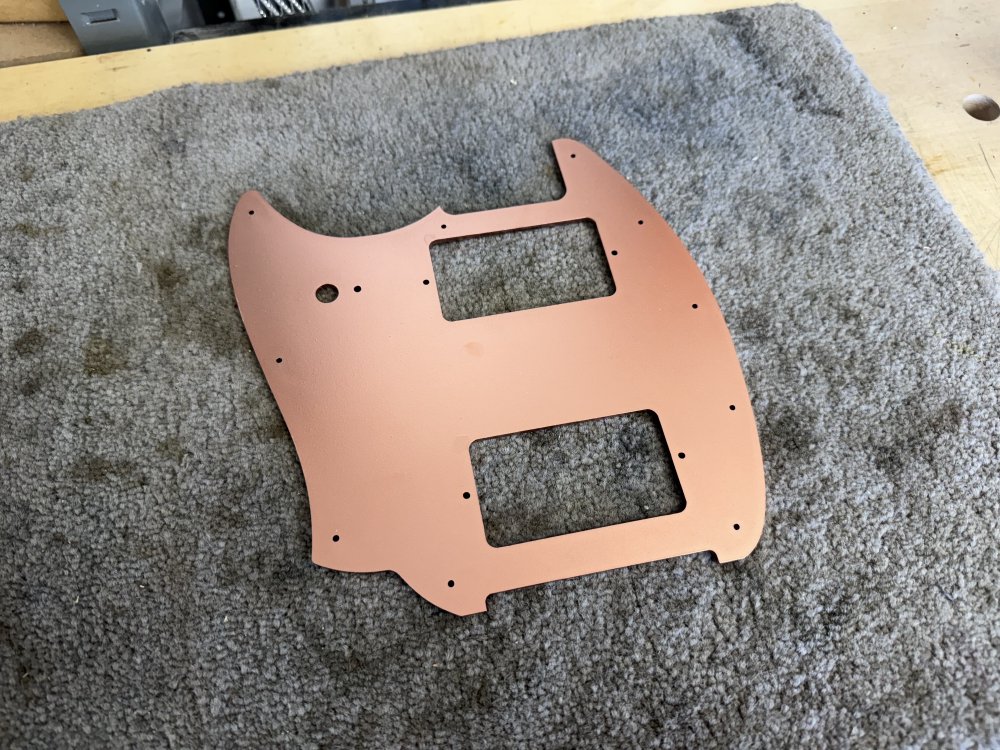
Again, my lack of experience with paint bit me a bit here: the first layer looked patchy at first so I kept spraying until it looked solid, but this put too much paint down, and I had sitting wet paint that ran around the edges. What I should have done was use the multiple coats to build up the colour. You live and learn, and at least pick-guards are a cheaper domain in which to mess things up than guitar bodies :)
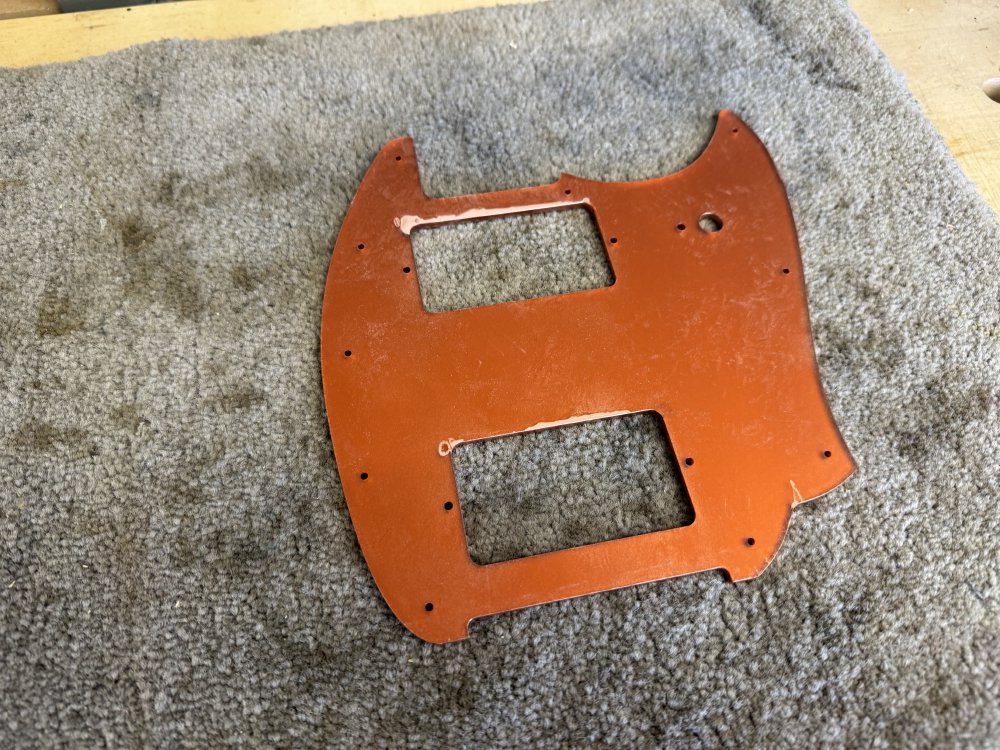
It’s not the end of the world, as I can clean up the over-spray using a combination of a scraper on the sides and the buffing wheel on the front surfaces, but I have to confess that the effect really didn’t make me happy, as I felt the copper effect wasn’t the best, and it wouldn’t really provide harmony with the chrome parts.
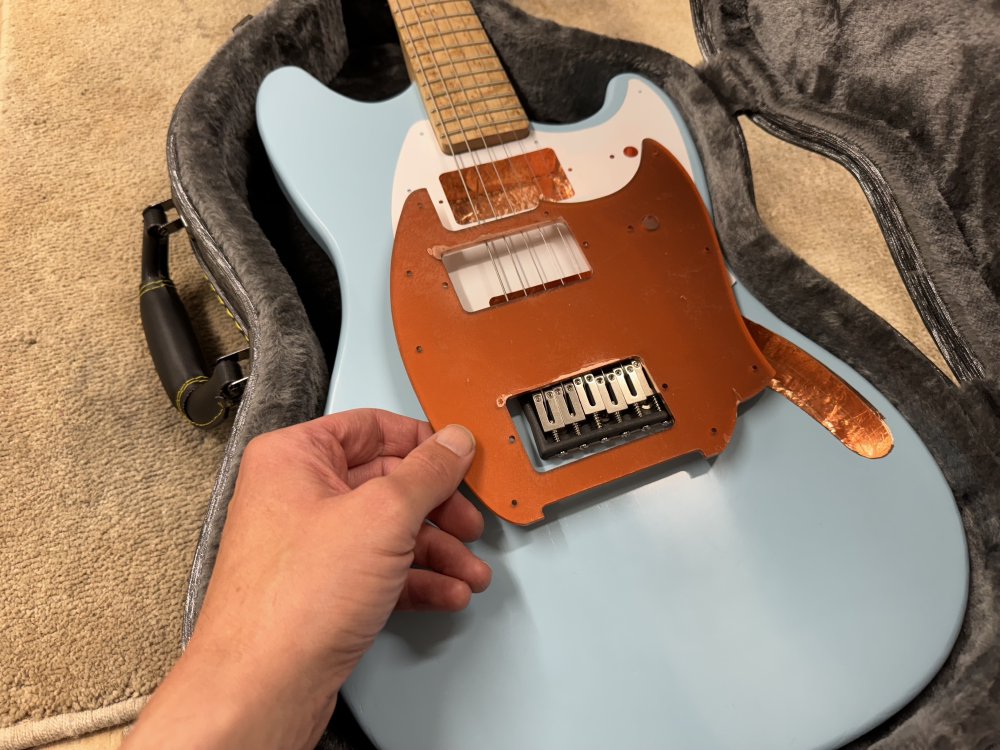
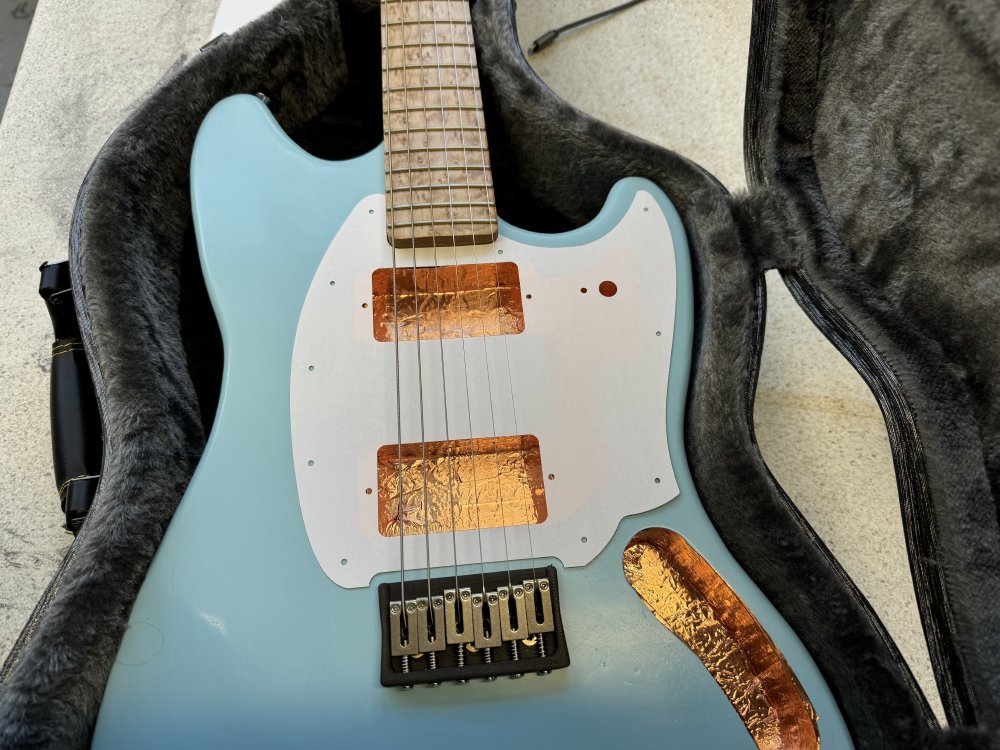
I think on another guitar it’d work, but not here. So I reverted to my original plan, and made a new pick-guard in a matt-black:
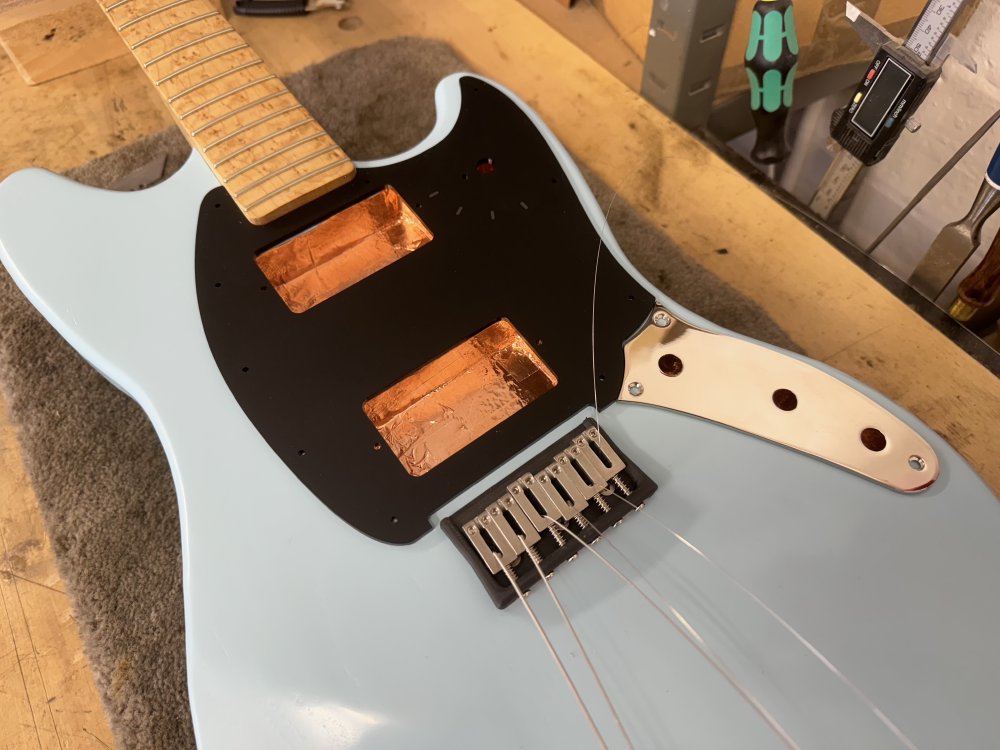
The pictures don’t do this justice - it’s a sort of chalk-board effect top surface, which I think looks really, really good with the satin finish of the sonic-blue paint job. I also etched in some markers for the pickup-selector switch, which I’d originally intended to paint white, but actually the etching came out smooth and subtle enough that I think it looks good straight off the laser-cutter.
Now, whilst I say I cut another pick-guard, it took me three goes to get it right 🤦🏼
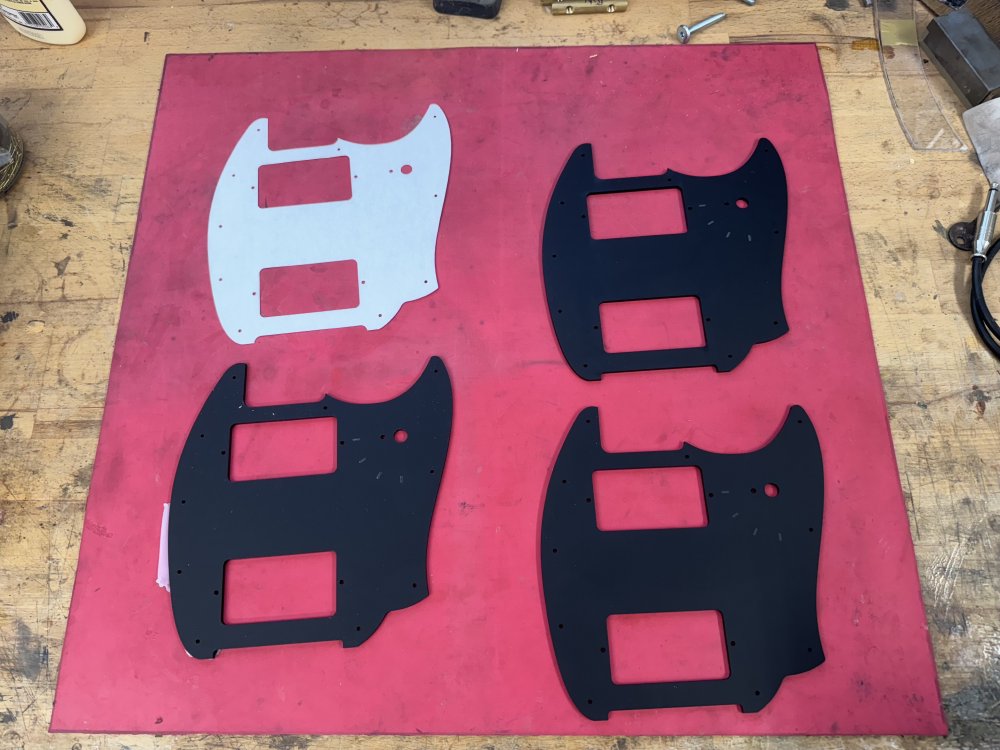
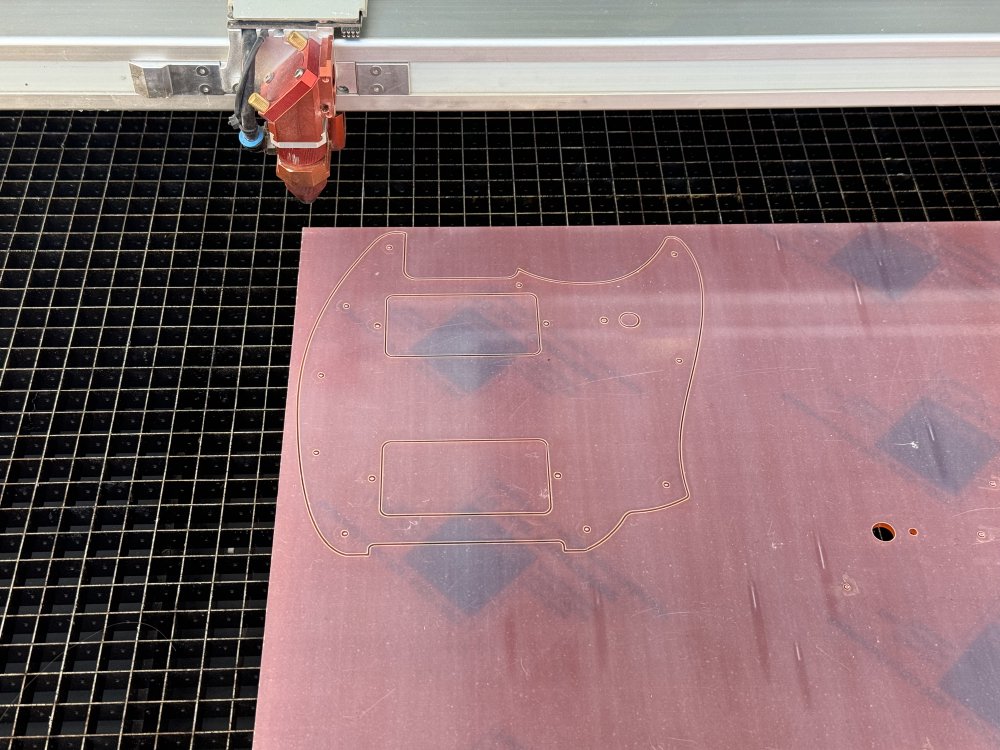
The first attempt I’d left the protective film on the acrylic when I cut it, as both when you cut acrylic, but particularly when you etch it, the vapourised acrylic can end up being deposited around the area, and it’s hard to clean in some cases. Unfortunately, all I did was sort of melt in the protective film into the plastic for those pickup-selector markers, which didn’t look very good.
So I then removed the protective film, and re-cut it, but the matt black really did show up the vapour deposits, worse around the areas I was cutting, but all over in general. What I should have done was coat the top surface with something like washing-up liquid or Vaseline, which acts as a barrier to the vapour and prevents it marking. So for the third and final version I coated it with Vaseline, and all was good.
Anyway, for those who think I know what I’m doing, I hope this has suitably corrected your opinion :)
Getting the Vaseline off afterwards is a bit of a pain, but my partner, also an experienced maker, directed me to try using isopropyl alcohol (IPA) to remove it, after I’d failed to get it all off just using soapy water, and the IPA did an excellent job. Once the front was cleaned I went around the edges with a razor-blade scraper just to clean them up - laser cutters never give a perfectly crisp cut in my experience, so for laser-cut parts on the guitars I now given them a once over around the edges to make them smoother.
So a lot of faff: in the end, not including paper prototypes, I cut five pick-guards to get it right for Hästen. Not a very resource efficient process, but somewhat the curse of low-volume and every guitar is different manufacturing.
A quick aside about guitar pickups
I’m going to talk about the wiring on Hästen in the next half of this post, but I realise that some of the readers of this post are here as more general makers rather than guitar nerds, and so I wanted to cover two details that will help make it easier to understand why I’m doing what I’m doing below. If you already know the ins and outs of guitar pickups feel free to skip this section!
Firstly: why is there more than one pickup on a guitar anyway? It just gives you different sound options from the same guitar. Even if the two pickups are identical, the placement does make a difference. You can hear this if you take a guitar not plugged in and just pluck the strings in different places: if you pluck the guitar next to the bridge you’ll get a sound that emphasises the higher frequencies and is somewhat nasal sounding for want of a better term, versus if you pluck the string closer to the neck you get a more mellow and rounder sounding note. They’re still the same note, but the way that note is presented changes. And so having a neck and bridge pickup lets you switch between those two sounds all else being equal. Why might you want to do this? Well, traditionally the rounder sound is used for rhythm parts where the guitar is behind other instruments or vocals, and the bridge is used when the guitar is meant to stand out above other parts. You don’t have to use them that way of course, particularly once you throw an amp and pedals into the mix, but hopefully that explains why you might have two.
Many guitars have either different styles of pickups to further separate the two sounds, or the same type of pickup with with a different magnet and winding composition. A common use for this is to have a “hotter” (aka louder) pickup in the bridge to further punch the lead guitar over other instruments.
So, hopefully that explains why we have multiple pickups.
The next bit is a crash course of humbucking pickups, the style of pickups you see in Hästen. A pickup is made made of a coil of wire around some magnets, and that coil has current induced in it as the strings vibrate. But the coil of wire also acts like a radio antenna, so will pick up other radio noise in the area. Notably in the past this was things like the mains frequency, which in the US is 60 Hz, and so is referred to as “sixty cycle hum”. These days auditoriums often have other radio gear in play, and I’ve had guitars pick up very high frequency sounds from remote mics.
To counter this, or to “buck the hum”, some pickups have two coils of wire, the second one of which is round in the opposite direction to counter the noise picked up in the first one. In guitars like Hästen both coils are hidden under a cover, but you can see them here on Delfinen which has uncovered humbuckers:
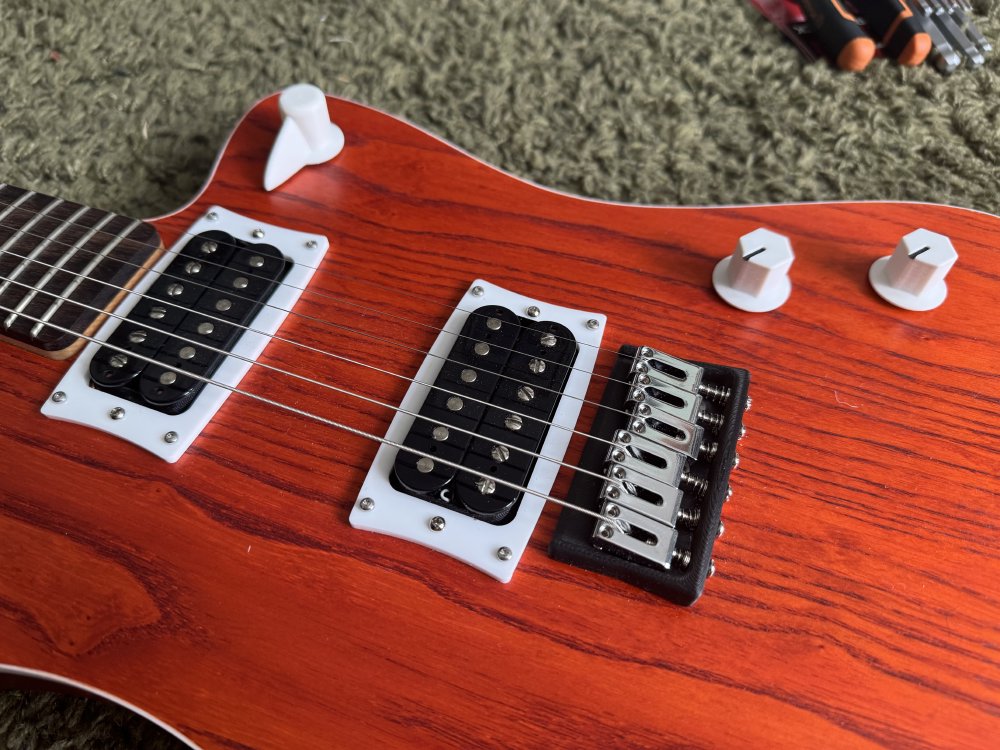
At this point you might wonder, as I used to, how this second backwards coil cancels out the ambient radio noise, but not the signal induced by the guitar strings. The reason for this is that the magnets in the second coil are reversed, and so while the radio noise is cancelled out, the string signal is doubled up, making the pickups even louder!
There’s a lot more to all this, but that should hopefully be enough to set you up for the ins and outs of Hästen’s somewhat complex circuit (well, complex as guitars go).
Getting weird and/or wired
Have you ever had this sensation where you think I’ll do that here, and another idea to do something else there, but when time comes to do the thing, you realise you’ve bitten off more than you actually know how to do? That’s how I felt when it came time to wire up the electronics for Hästen. I’d opted to do two different modifications away from what would be standard for this guitar, both of which independently I’d done before, but I’d never really thought about how they might interact until I stood at a workbench covered with parts and thought “oh, I see” to myself.
Both the things I had in mind were relatively innocuous on their own: firstly I wanted to have a four position pickup selector (as you can see on Delfinen in the picture above), and secondly I wanted to add a coil-split to both pickups, letting me disable the second coil, providing access to a second different quieter sound profile from each pickup.
The four way selector on the pickups lets the player access both pickups independently, both in parallel (which you’d get normally as the middle position for a two-pickup guitar) and then in series (which runs the two pickups one after the other creating a much louder sound). The coil-splits just provide a way to earth out point where the two individual pickups are joined, removing one from play, making the pickup both quieter and changing the overall profile due to the resistance change. All this makes for a super flexible guitar: there are 12 different configurations of pickup available before you start fiddling with the volume and tone controls. Whilst I doubt you’d use all of them regularly, having that flexibility means this guitar can cover a lot of tonal ground and let you find the few that are just right for you.
So why then the “oh, I see” moment? The challenge was two-fold here. Both these changes play games with where the ground wires go, and so I need to be mindful that what one circuit thinks of as ground has to respect changes made in the other circuit - I can’t just naively assume all grounds are the same. The second challenge is one of room - all these changes require bigger components and more wires running around the guitar body, so I have to plan a bit more carefully due to space constraints. As an example here’s the volume and tone potentiometers that also have the coil-split switches in them:
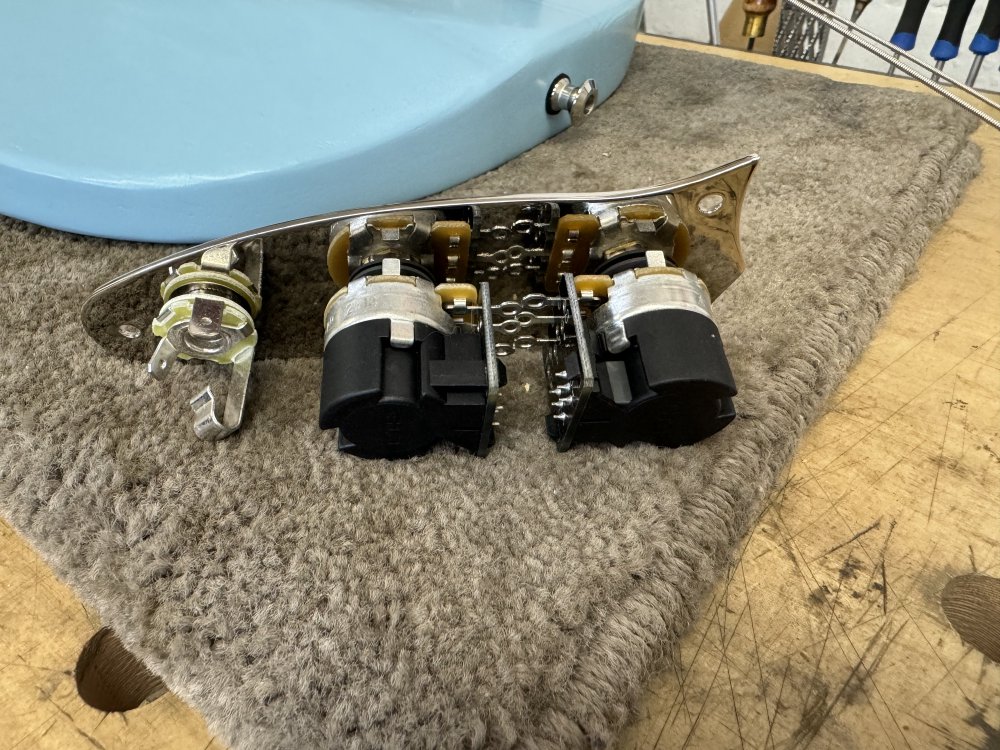
These bigger components fill the entire depth of the cavity, making it harder to route wires around, particularly as the volume control now blocks the usual tunnel point for running wires between the two cavity sections on the body.
So in the end I did two diagrams as I tried to work things out in my head: firstly a logical diagram of what the circuit needed to be, an then another one where each page represented each one of the two cavities, so I could plan out my wiring before I started and know what needed to be ran where.
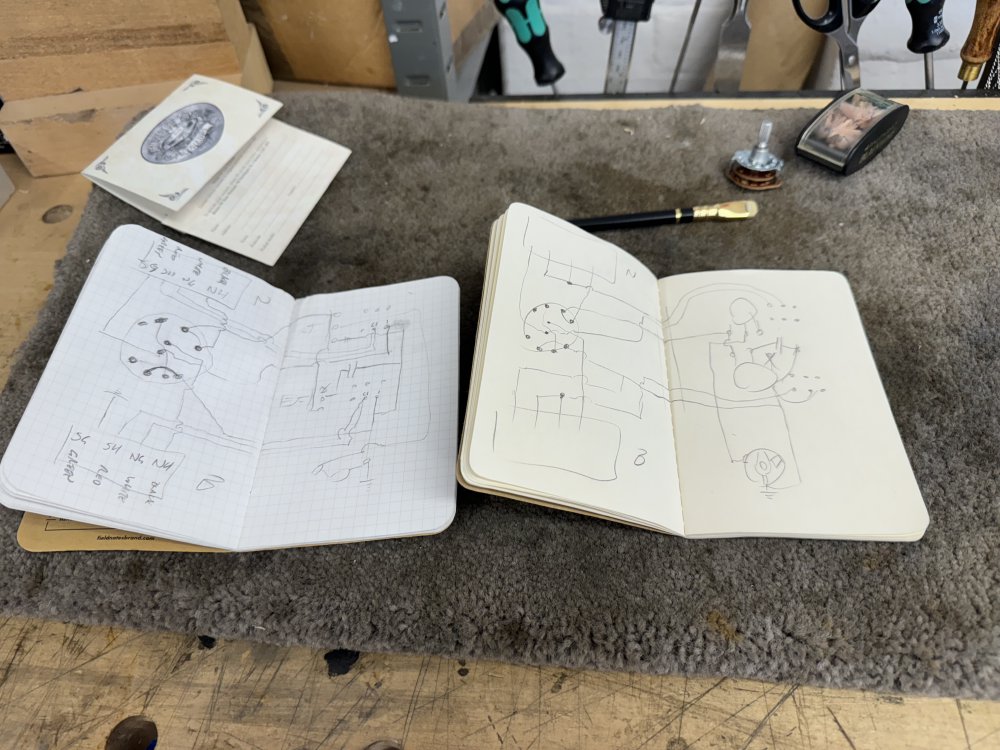
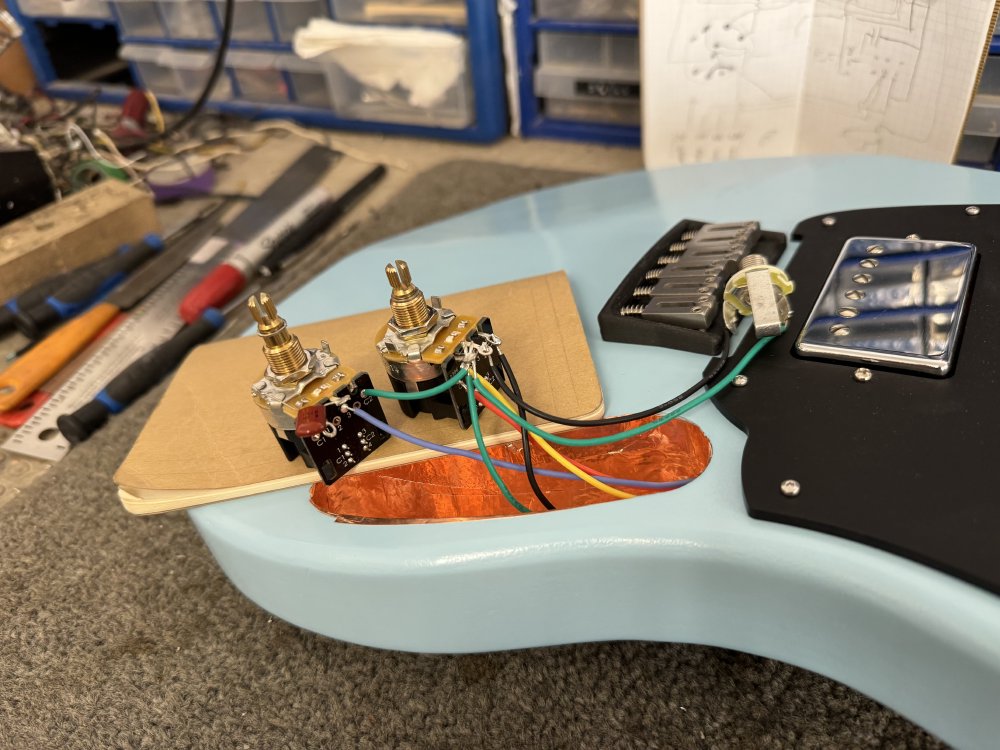
This planning may seem excessive, but I have to confess that I find the routing of wires in guitar builds to be fiddly and thus frustrating at the best of times, so this let me manage that and avoid getting cross with myself during the build. Here we have the completed top half of the circuit, where you can see I’m using quite a bit of heat shrink to help me control where the wires run in addition to the usual use-case of covering exposed parts.

With this done I could then drop in the top half ready to repeat on bottom half, and you can see that having two notebooks really does come in handy when doing this sort of work…
It was slow progress, I’m sure others would have been faster, but I was trying to avoid rushing and getting stressed about fiddly small wires, and also I was being very pedantic about checking things as I went along. With these Fender designs where you have parts under the pick-guard, in order to test it you need to close everything up and install strings, and if you got anything wrong then you have to remove the strings and open it up again. To combat this I was fastidiously testing with a multi-metre at ever step along the way: I measured the resistance of each pickup in both open and split when I started, and as I went along I could then check the pickup-selector and coil-splits were doing what they should each time, so when I closed the lid on both cavities I was fairly confident I’d done everything right.
So with that done, there was only one thing left to do, which was test it. And I was sufficiently confident for once, that I filmed it so you can see how it went on that first test! A note, I look quite puzzled at the start of the video, as the amp was making some odd sounds, which is because, as we discover, some weird effects pedals are still plugged in from how the amp was last used before I did my testing. That threw me a little, but the camera was rolling so I just had to plow on :)
As you can hear hopefully, it lives! Needs a bit more of a set up, the intonation sounds to be a little off, and it needs some knobs attached to the controls which I still need to 3D-print, but will be in a similar vein to what I’ve done for Delfinen above.
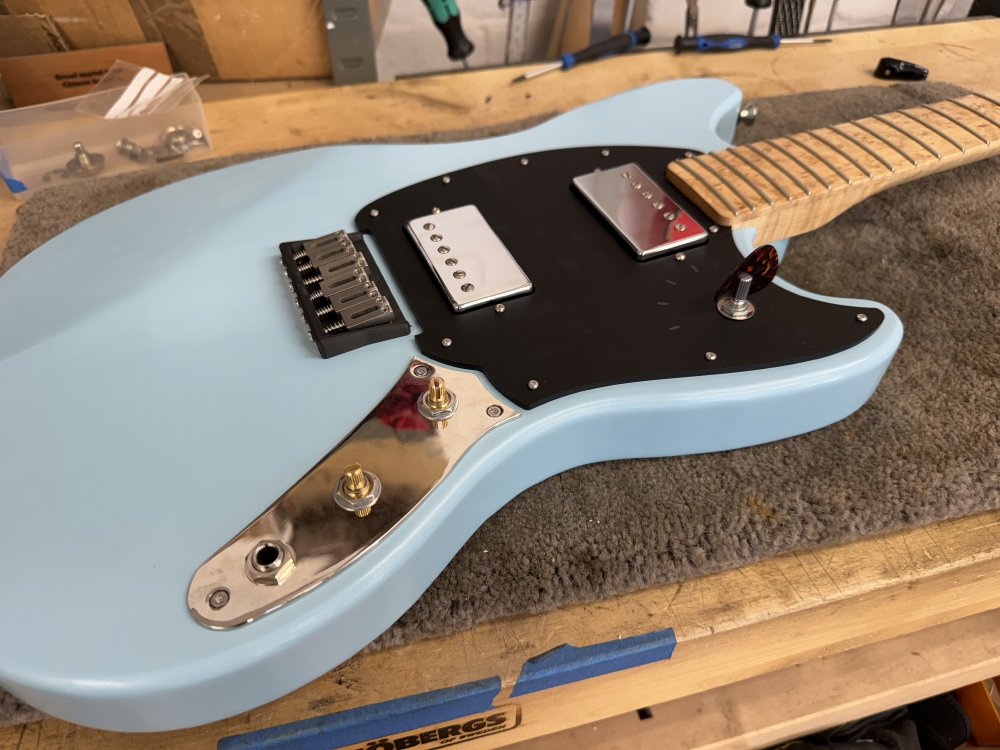
Close to a wrap
It’s lovely to see this guitar come together at long last:
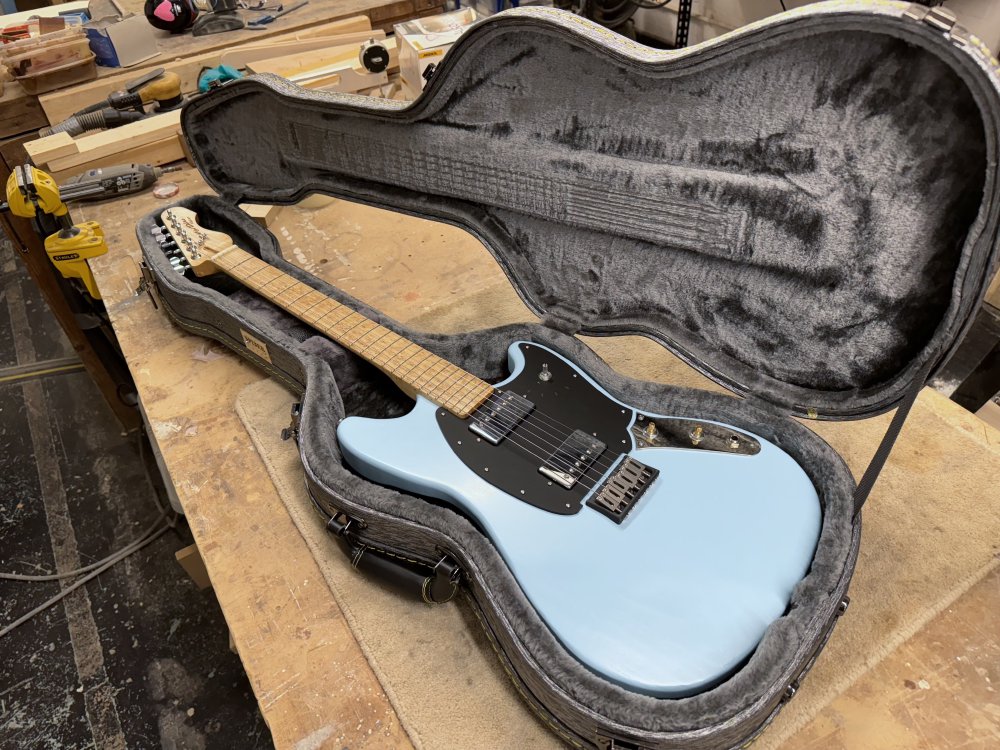
The build for Hästen has been a long one, interrupted as it was by the pandemic and having to move workshop, and then me trying to become a better luthier as I learned from my new workshop-mates. I look at Hästen now and I can see in the details how far I’ve come over the last couple of years. Even thought this guitar is one that is based directly of an existing model, compared to the other builds in this style I feels much more like my interpretation of that guitar, whereas before I was trying to do more of a guitar in that style.