A Month in and Out the Shop: Hästen
Published 10 Jun 2024
Tags: hästen, pick-guard
As promised, here’s part two of my trying to catch up: this time we’re looking at Hästen, another build that’s been a long time coming. Hästen was started back when I made a small batch of Mustang style builds around 2019, but I was struggling with the other builds, and so this one was delayed, and then I had to move workshops, covid hit, and I started to question my ability as a builder, so it got put on hold for a while. Thankfully the friend that commissioned this guitar has been quite patient, for which I’m quite grateful. I do think for that they’re getting a better guitar now that I’ve had time to grow as a builder, but then in theory that statement should always be true and isn’t really an excuse for not shipping.
I’ve told this story before in these notes, so why am I reiterating it again here? Well, because Hästen has, like its sibling guitars, finally hit a fairly major milestone in my drive to clear out my build backlog.
Inner beauty
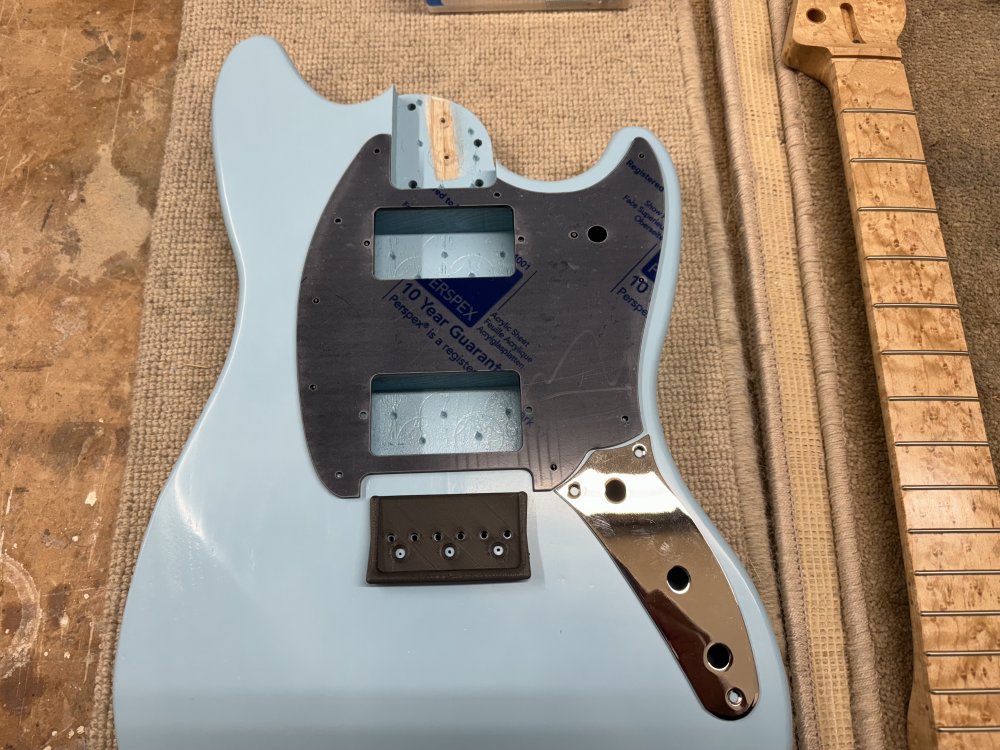
The first act of this set up updates was a fairly gentle one: apply the copper tape to the electronics cavities to provide some electromagnetic isolation. On Verkstanden in last week’s update you may have noticed I didn’t use copper tape, as on that guitar I’d used conductive paint for lining the cavities, but not on this build, so it was back to the copper tape:
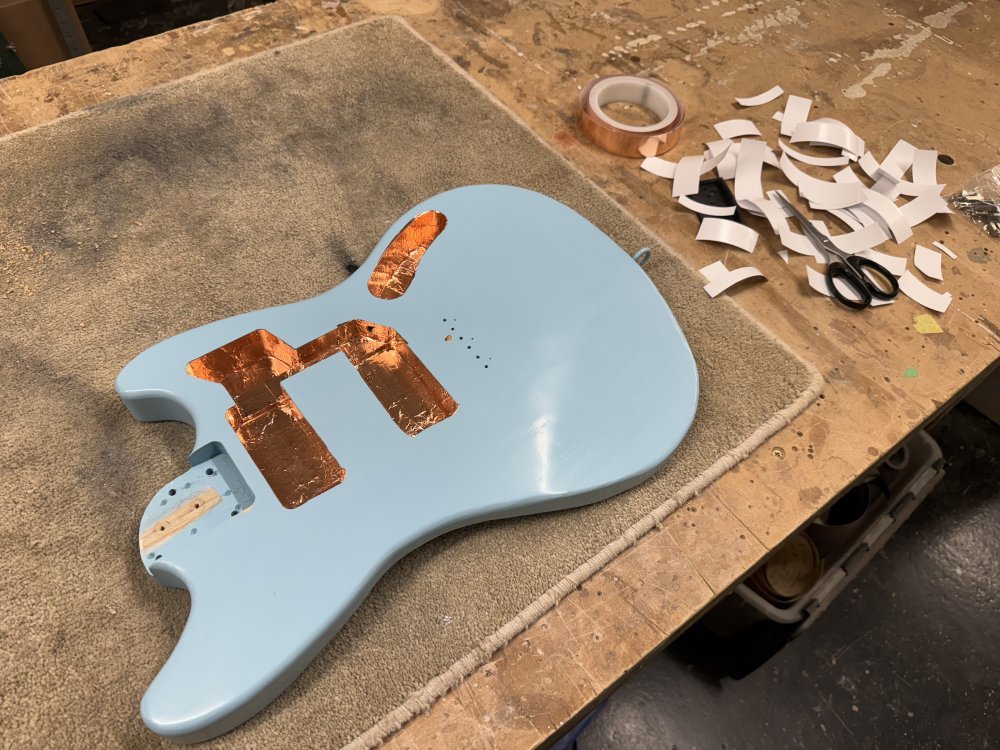
Whilst this is more fiddly to install, and once the guitar is put together no one will ever see this, I love this look, the hidden inner beauty of the instrument.
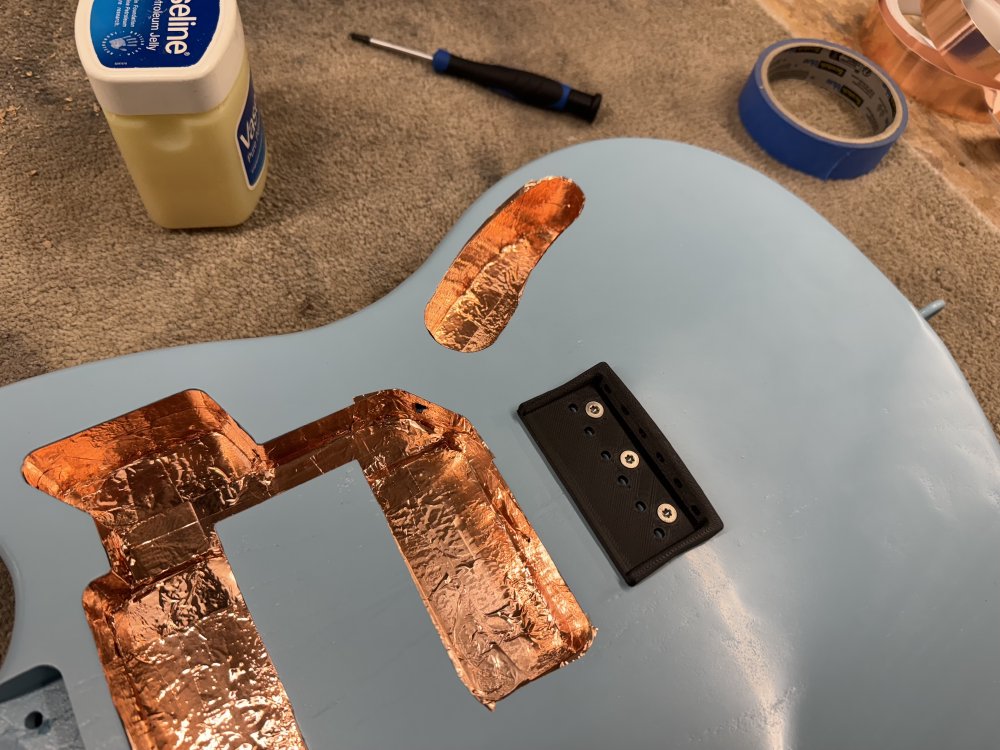
At this stage I also drilled the hole to let me connect the bridge to the lining to provide ground to the strings. This was a bit fiddly, as although this body is quite light for swamp ash, it’s still quite dense, unlike the almost too soft poplar I used on Verkstaden. So getting the hole through was hard work, but I got there in the end. I really need to remember to add this hole before I do the finish on the body, as it just adds to the stress.
With the cavities lined and the bridge ground wire added, I could add the bridge itself, which is a custom 3D-printed carbon-fibre bridge part, as I’ve been using on all these recent builds:
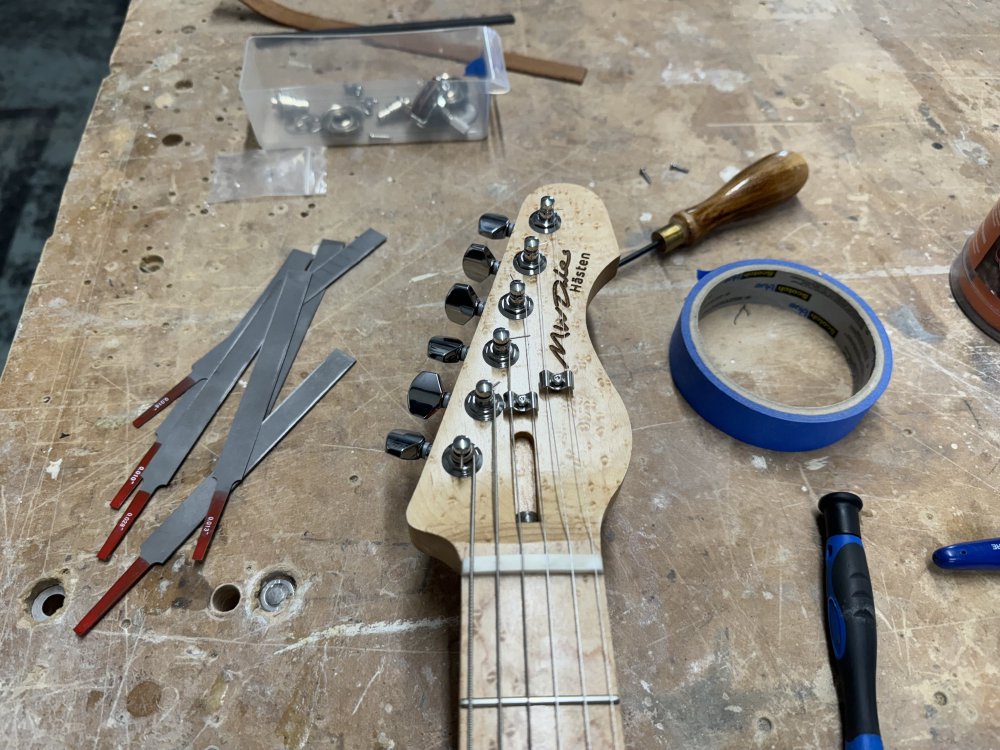
With the bridge on, I then added the strap buttons (well, the bottom half of these Dunlop locking strap-buttons that the guitar’s eventual owner requested), and with that on went the neck:
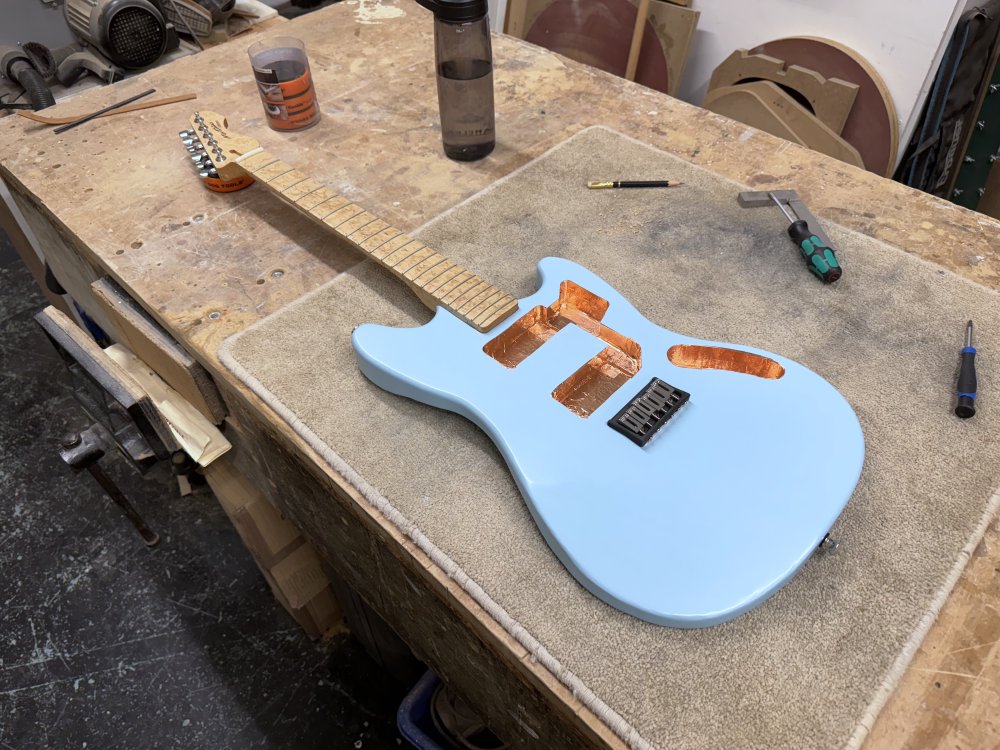
And at this point it’s starting to look a lot like a stringed-instrument, but it’s missing a little something…
Strings on
It was time to finally add strings to Hästen! As ever, a magical moment when a collection of bits actually becomes a musical instrument.
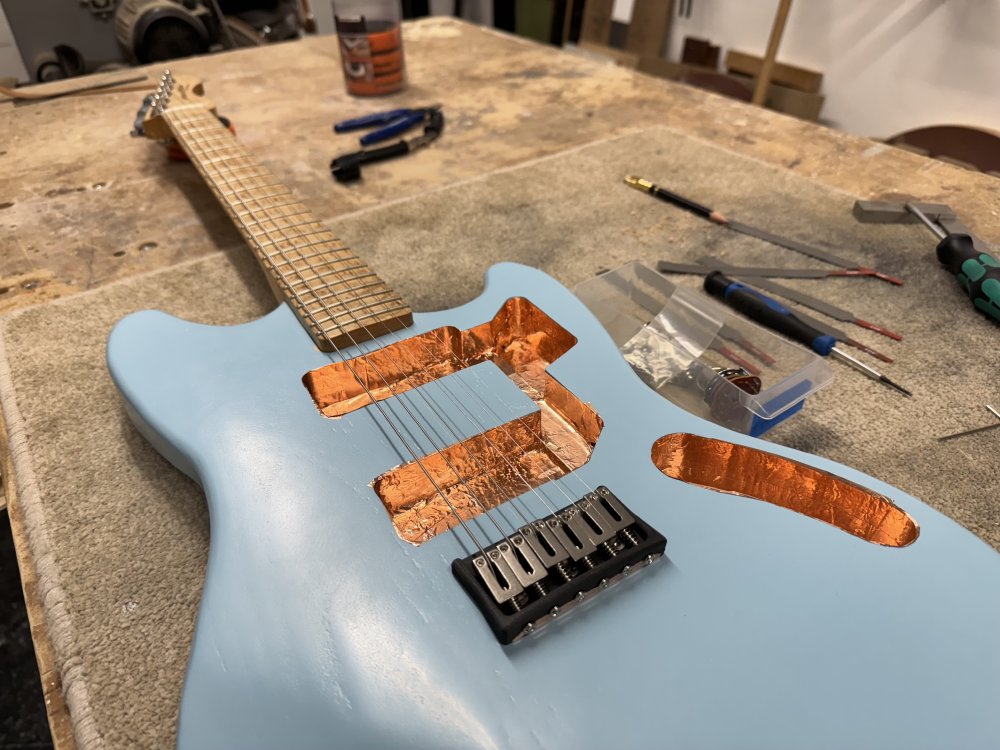
I did about half a set-up on the guitar, getting things like the nut and bridge saddles to roughly the right position, but I’ll let them settling in before I go any further. Still, it was enough for me to have a quick noodle on the guitar, and it feels like it’s reasonably close to where I want it.
As with Verkstaden, I went for the double string-tree arrangement on the headstock:
With that, the guitar will sit under tension for a week, and then I can hopefully add all the missing electronics. But for that, I’ll need one more piece of the puzzle.
Pick-guard
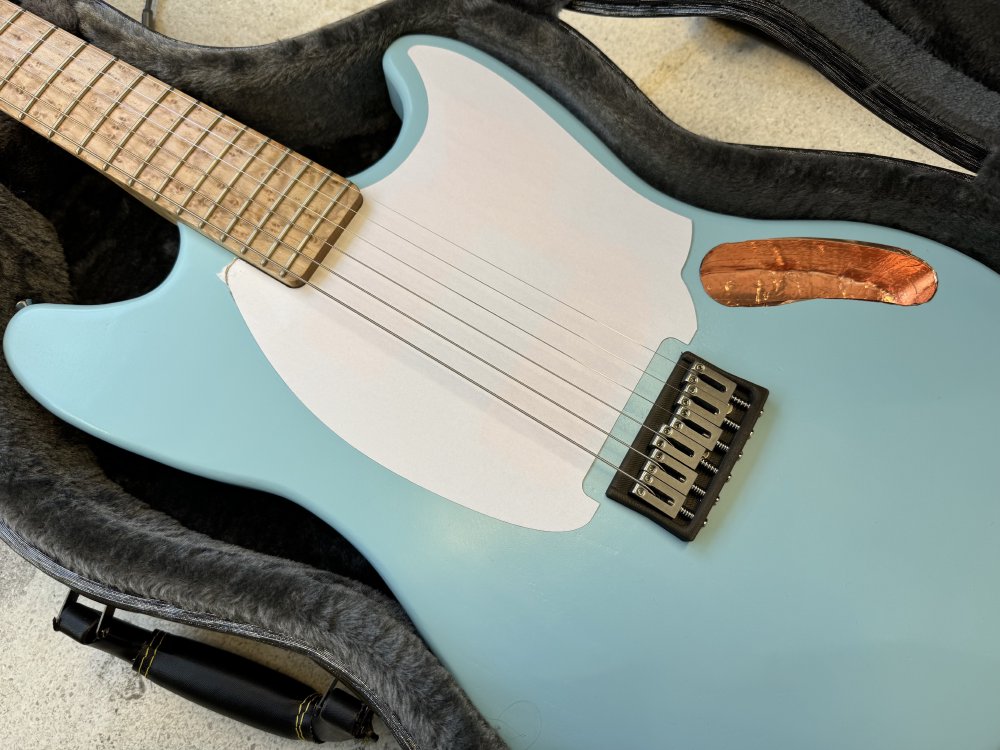
I originally cut a pick-guard for this guitar back in February, but I wasn’t happy with the spacing:
The gap between the bridge and the bottom edge of the pick-guard doesn’t match the gap to the sides. This is a sign of me learning: on the original Mustang style builds I placed the bridge a bit too far forward, meaning to intonate them correctly I had to bring the saddle on the low-E back to the very edge of the plate. Having learned more about how to position a bridge, I’ve now moved the bridge further back, but it does mean I need to update the pick-guard design.
Although I measured it in the workshop, I didn’t want to end up wasting material with pick-guards that didn’t look right, so I took Hästen for a road trip back to the maker-space where the body was first made, and make a bunch of paper-prototypes on the laser-cutter there:
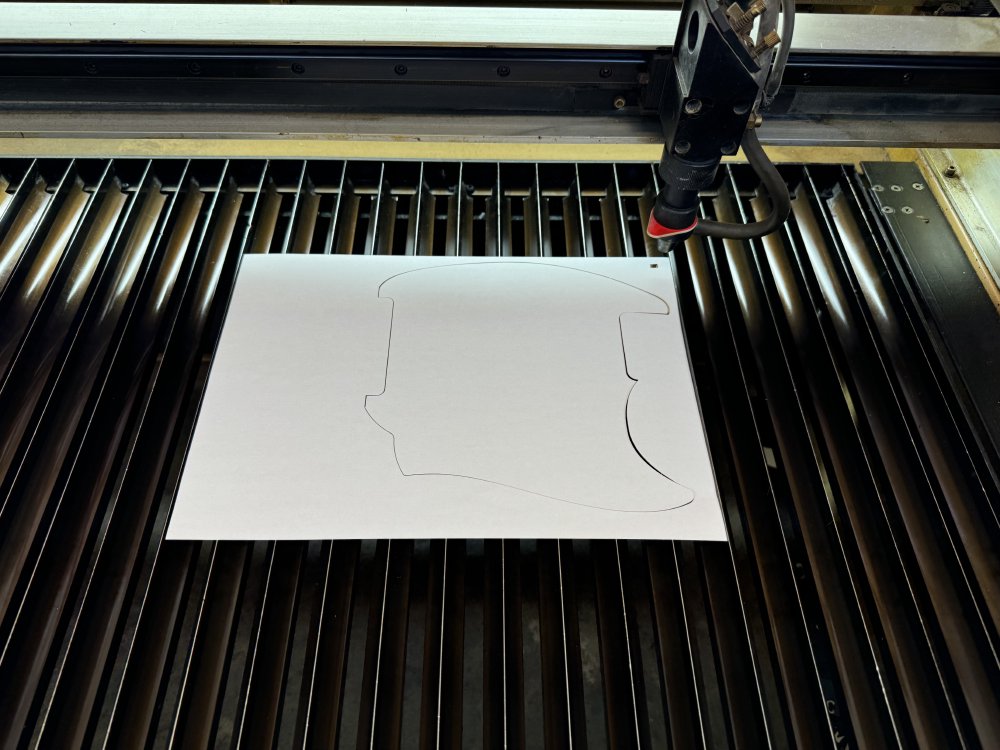
This is one cut at the original size:
Kinda reminds me of an old Fender Esquire with the thin white pick-guard with no pickups in it.
With that done, I then made a new one updated for the new measurements:
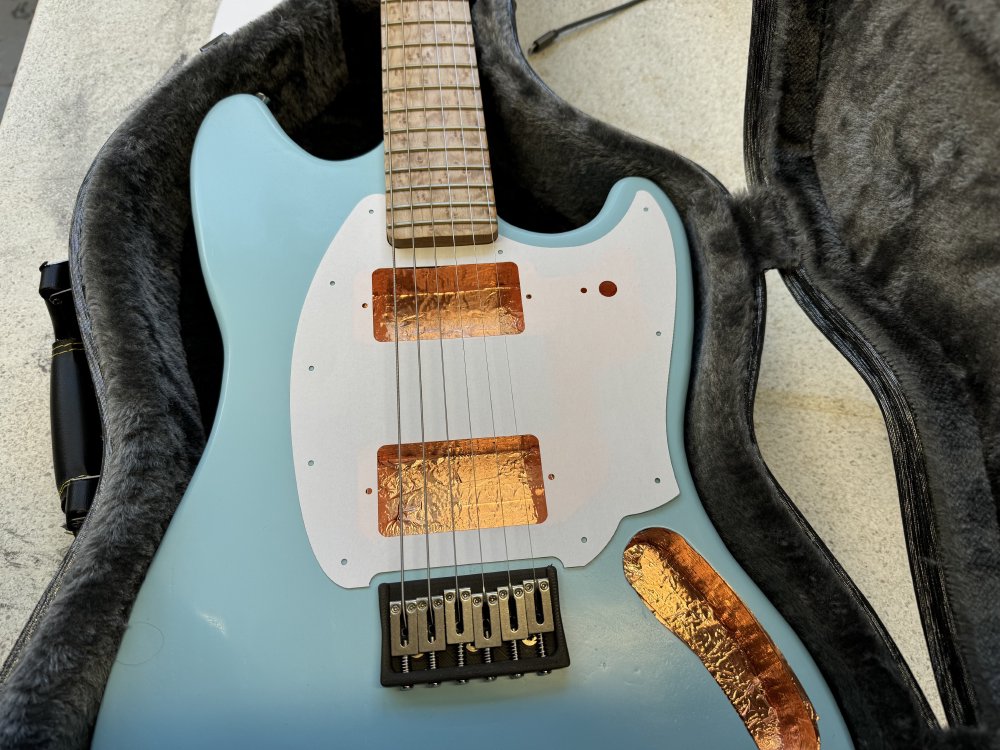
That feels a bit more harmonious. I might yet tighten up the radius of the corners, but at least I know the spacing looks good. Now I just need to get some more material to cut the plate from and we’ll be good to go!
Soon Hästen can leave the paddock!