A Week in the Shop
Published 10 May 2024
Tags: cleaning, hästen, nut carving, verkstaden
A bit of a rushed set of week notes here today, as I get ready to head off to my brother’s wedding! But lots has been happening, so let’s get to it.
Verkstaden
My goal this week was to get strings on Verkstaden come what may: it was so close at the end of last week, and I didn’t want it to escape me a second time. As mentioned in the last update, I’d swapped the pickups I intended to use in Verkstaden at the last minute, and the new pickups are slightly larger than the previous ones due to being covered versions, and so I needed to remove a little more wood.
I probably could have used a rasp or a small saw for this, but it’s just so convenient for me to laser-cut a template and then use the palm-router for a job like this, so that’s how I roll (template DXF download link here).
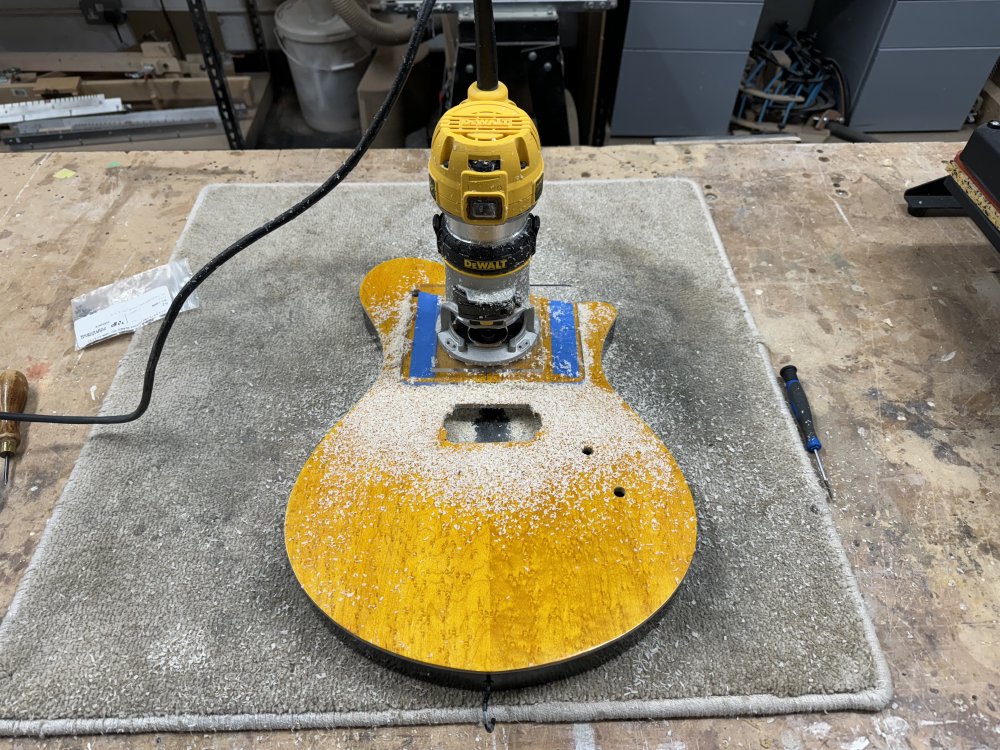
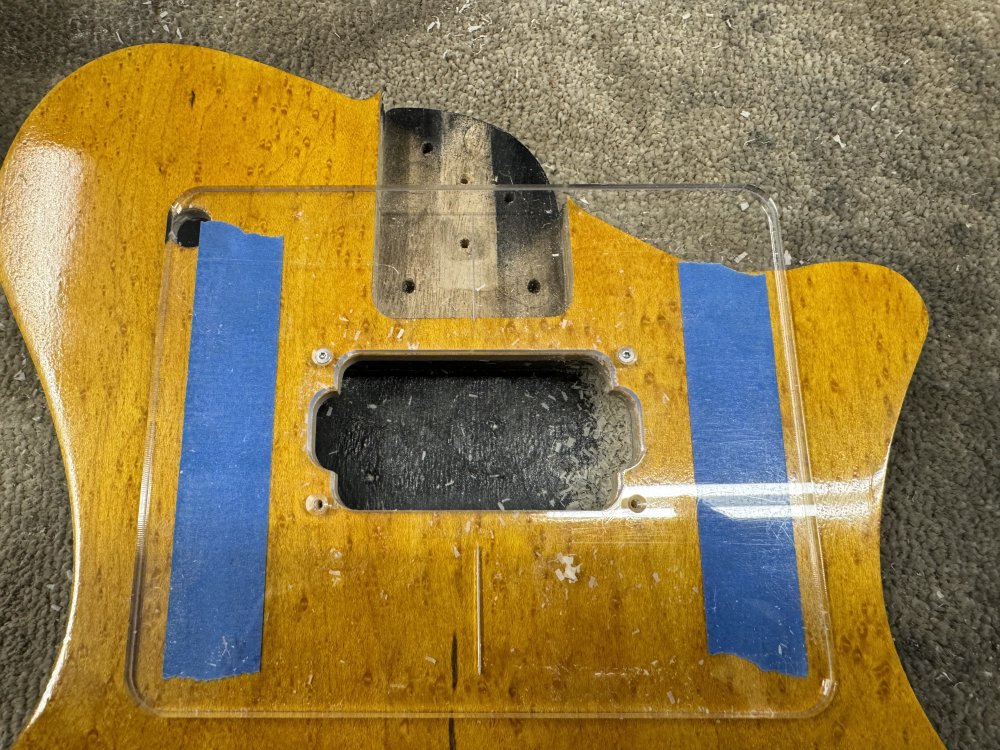
Once the dust had settled, I had a nice, clean pickup-sized aperture in the cap:
With both done, finally the pickups were in place:

It amazes me that in practice this works, as the gap between the edges of the hole I had cut and the outer edge of the pickup mount ring is around a millimetre, and so I was worried you might see a hint of the hole from the outside of the mount ring if things didn’t line up perfectly. But using a template like this rather than free-handing it also means I can have confidence that it’ll align just right, as there was no trace of the hole underneath once the pickups were mounted.
For the curious: the vaseline you can see in the picture above is there to help with screwing things into maple. If you have a hardwood like maple or wenge, then it can be difficult to get the pilot holes large enough to make the screw go in easily without risking making it too loose. The tip I was given a long time ago by one of my early make mentors (hi Adrian!) was to use a little vaseline on the screw, making it easier to screw into the wood, reducing the risk that you’ll end up fighting the screw and deforming the head. The maple-cap on this guitar is quite tough, even if the poplar under it is quite soft, and so to make my life easier I was using vaseline for the pickup-mount screws and the bridge screws.
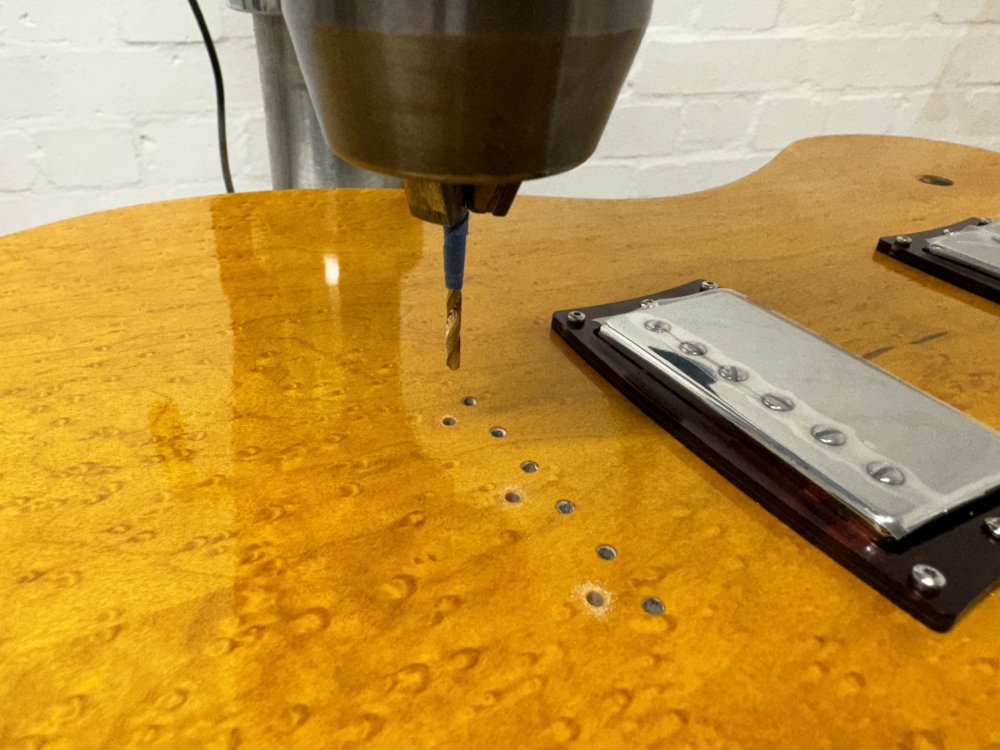
With the pickups in, the next job was to mount the bridge. Whilst I’d made pilot holes for the bridge-mounting screws a long time ago, I’d not actually gone through the process of then making them the right diameter for the screws I planned to use, so it was over to the pillar drill once more:
And then on goes one of my 3D-printed carbon-fibre bridges:
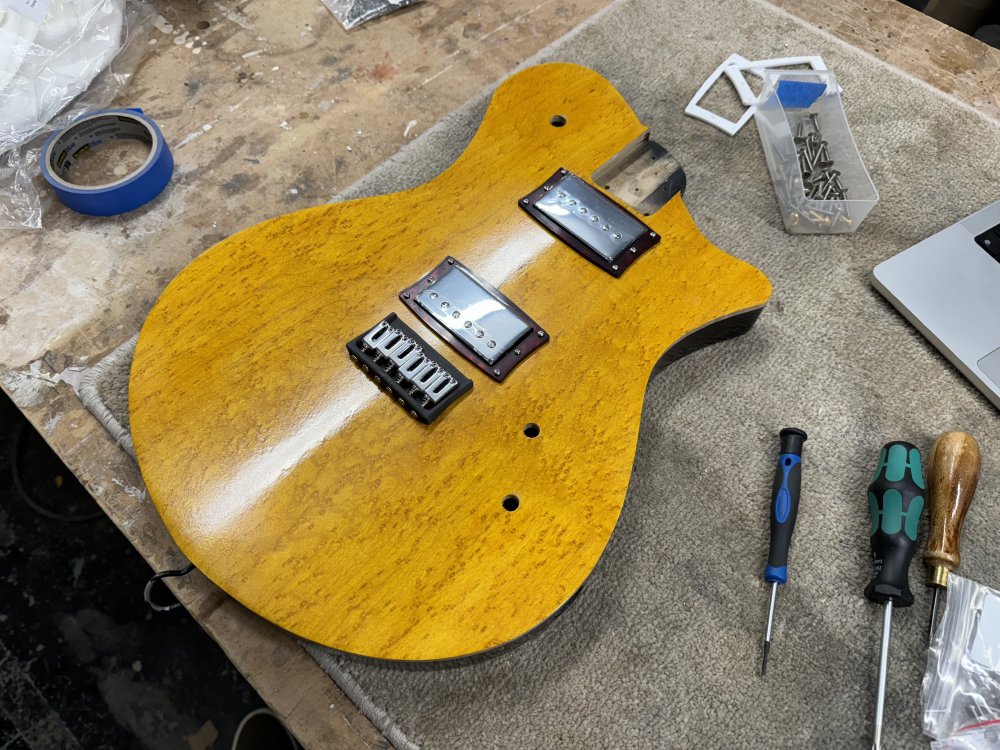
For now, that’s all the parts needed to get the strings on I need to worry about: the rest of the electronics can wait for another day.
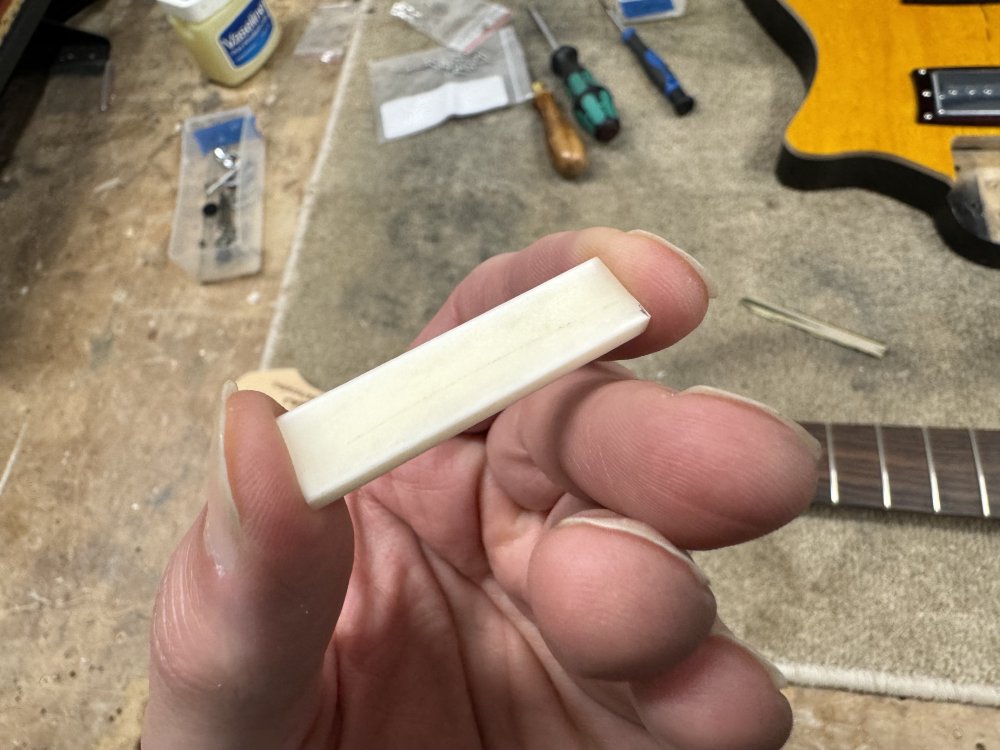
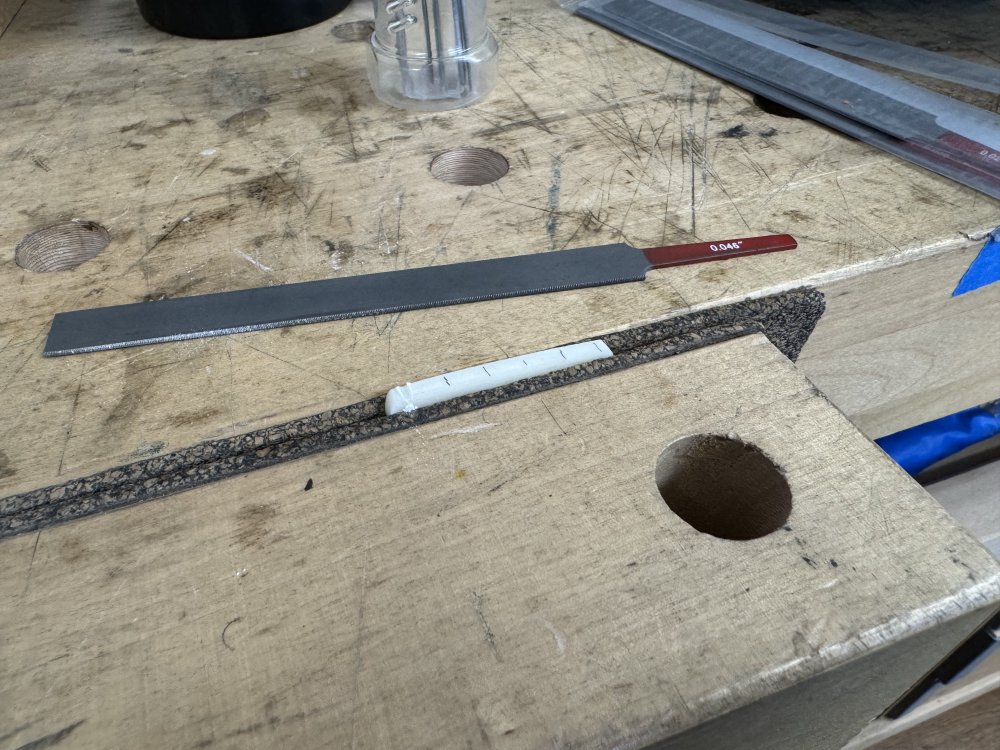
With the body ready, it was time to go to the opposite end of the guitar and deal with the headstock. First job was making a nut from a blank. In the past I’ve used graphtech nuts, which I’m very happy with, but for these guitars I’m making my own nuts from bone blanks. I showed the start of this process last week, showing that the main tool initially is the disk sander to get the blank to a rough size where it fits the slot, and then taking it down the last few tenths of a millimetre using 240 grit sandpaper until I get it to this point:

The next job is to reduce the height obviously, and the luthier trick for this is getting a pencil, cutting it in half lengthways (I actually use the disk sander again for this), and then placing this over the first few frets to project the height of the missing fret in position zero:
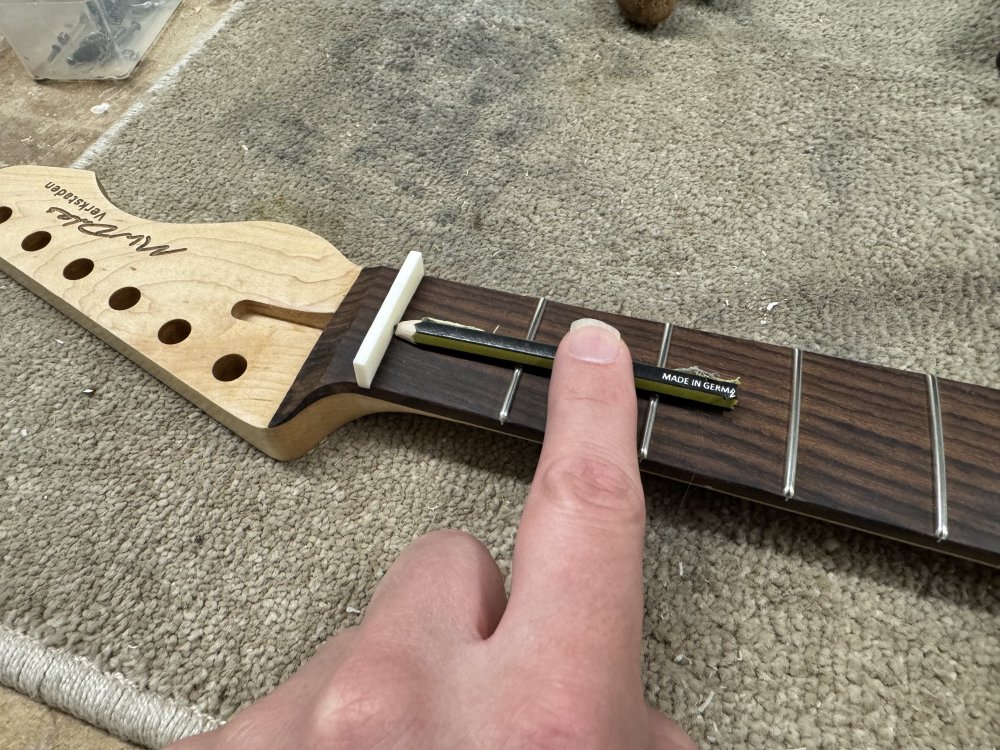
This then gives me a guide line for where the strings will want to rest:
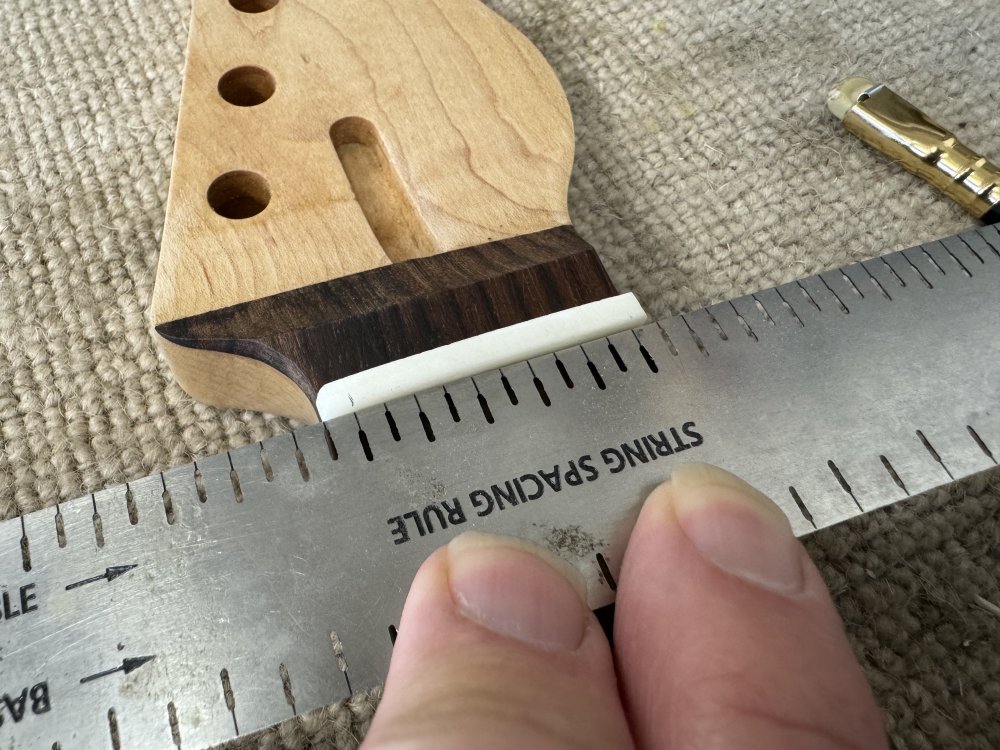
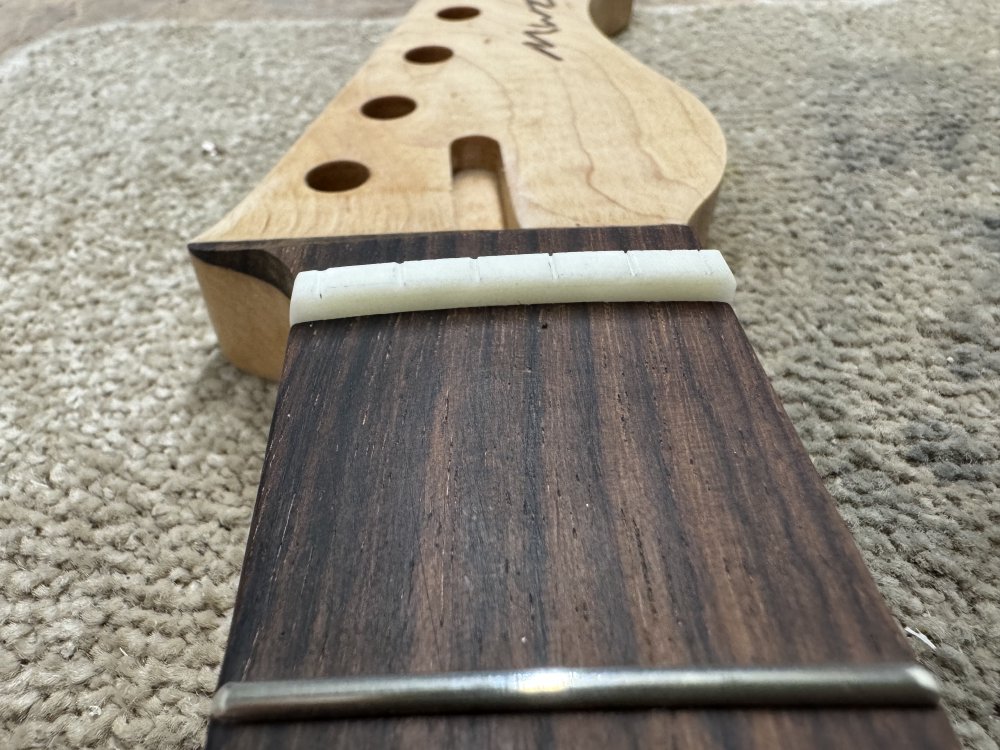
I then go back to the disk sander and take down the height leaving me about 1mm above the line I’ve drawn.
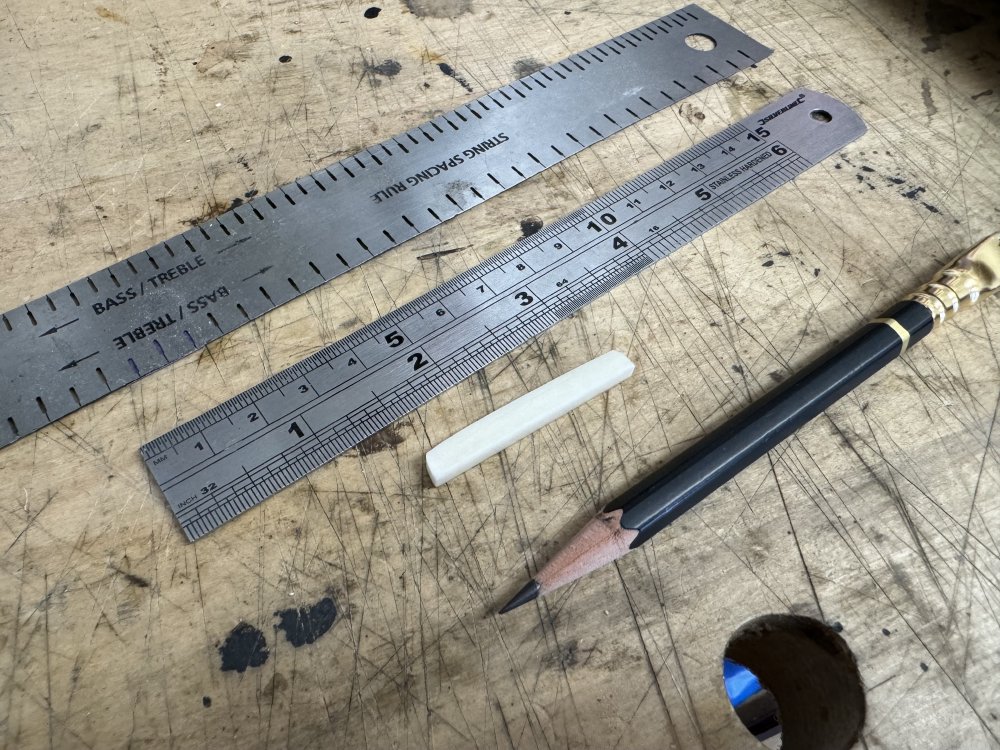
With the height set, I now need to find the position of each string, and for this I use a string spacing rule. I measure 3mm in from each side, and then find the position on the ruler with the right number of gaps that fits between the two marks I’ve made.
I then use my nut-slot files to carefully get each slot started, but I don’t cut much in at this point, just enough that a string will sit in position. The depth I’ll cut properly when I do the guitar set-up.
And voilà, we have a nut made for this guitar:
There’s nothing wrong with buying pre-made nuts, but given I have the tools to make ones that are a perfect match for the instruments I’m working on, it’s a nice skill to have learned.
With the top and bottom ends of the guitar sorted, I discovered I had a bit of work to do in the middle. The pockets I’d cut for the ferrules that support the neck screws had enough paint and lacquer in them that the ferrules no longer fitted. So once again I made myself what I’ve taken to calling a “luthier’s shiv” (this is why I’m not allowed to name things) to carefully scrape away the paint from the sides of the pockets.
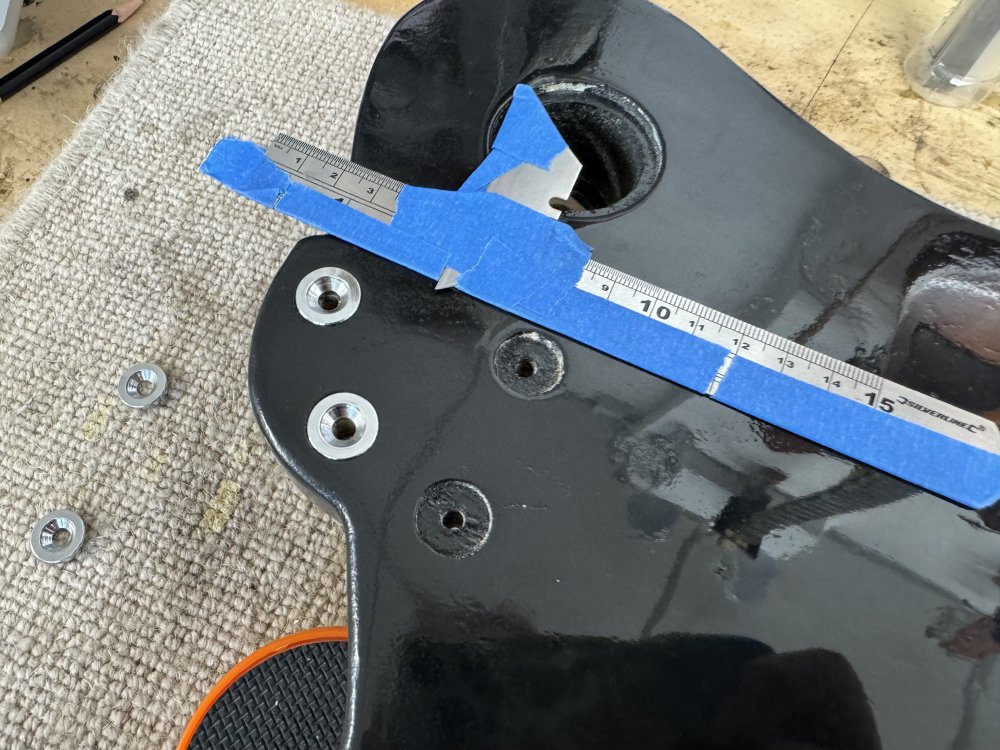
It was slow and careful work, but I got there without damaging the finish around the holes. This is definitely a lesson from these first guitars that I’ve painted: paint and lacquer are not infinitely thin :) That said, the ferrules come in round numbers of millimetres in diameter and so do drill sizes (which is what I use to make the recess), so without having some unsightly large gap I’m not sure what I’d do next time. I guess I might find an imperial drill bit that is just large enough without being a full millimetre bigger. A problem for future Michael.
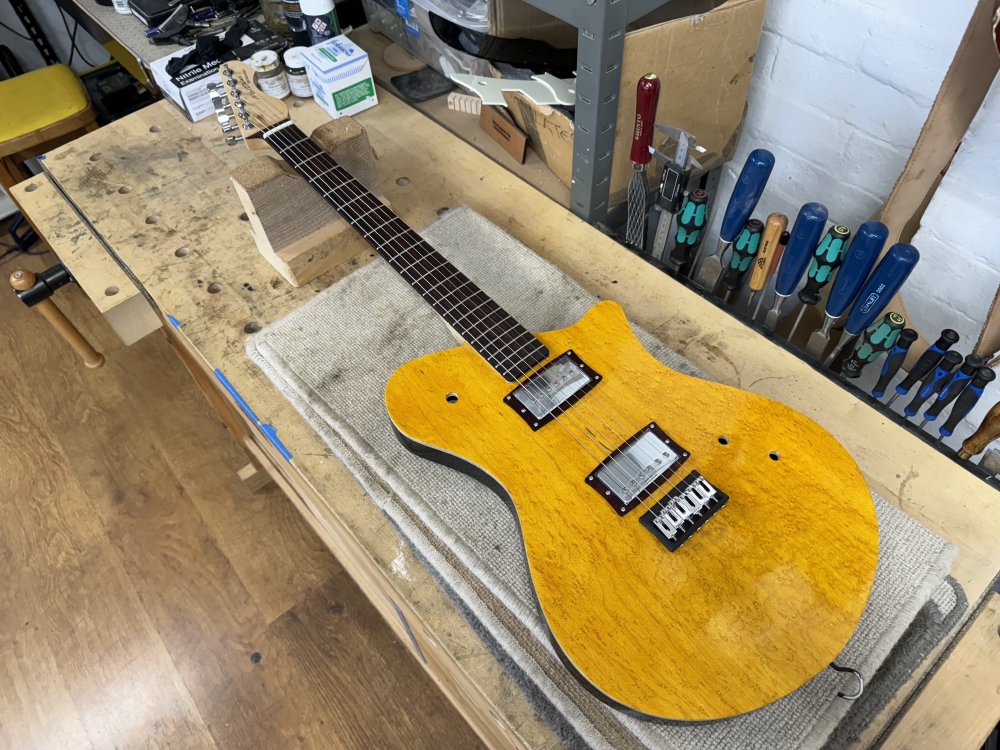
It was a long day, but after these and many other small jobs, I finally got to that magic moment: strings on!
It’s rather static there, so here’s the video I recorded for my youtube channel, where you can probably get a better sense of the shape of the guitar:
It’s always a magical moment in a build putting the strings on for the first time. It’s this moment when you get to know if this is going to work as you expected or not. I’m really happy with how the shape of Verkstaden feels, and how it all ties together visually.
The body, which is made from a light poplar and a maple cap is really quite light, and so makes me feel I want to start doing this construction method for more of my builds. Even for all-ash bodies, I might follow in my workshop-mate Matt’s footsteps and still use an ash cap on an ash body as a way of both making electronics routing easier, and you can add weight-relief cavities if the wood is at the denser end of the spectrum.
But I’d also like to do more caps with birds-eye maple like this, as it’s quite stunning, even if I just oil it rather than all the paint and lacquer that I did here.
Hästen
Whilst there was a lot of time on Verkstaden, I didn’t forget its workshop sibling Hästen. As I noted last time the fretboard seemed to have shrank slightly and I could feel the fret-ends protruding ever so slightly from the wood. This week I gave them a light going over with a sanding-bar to get everything flush again.
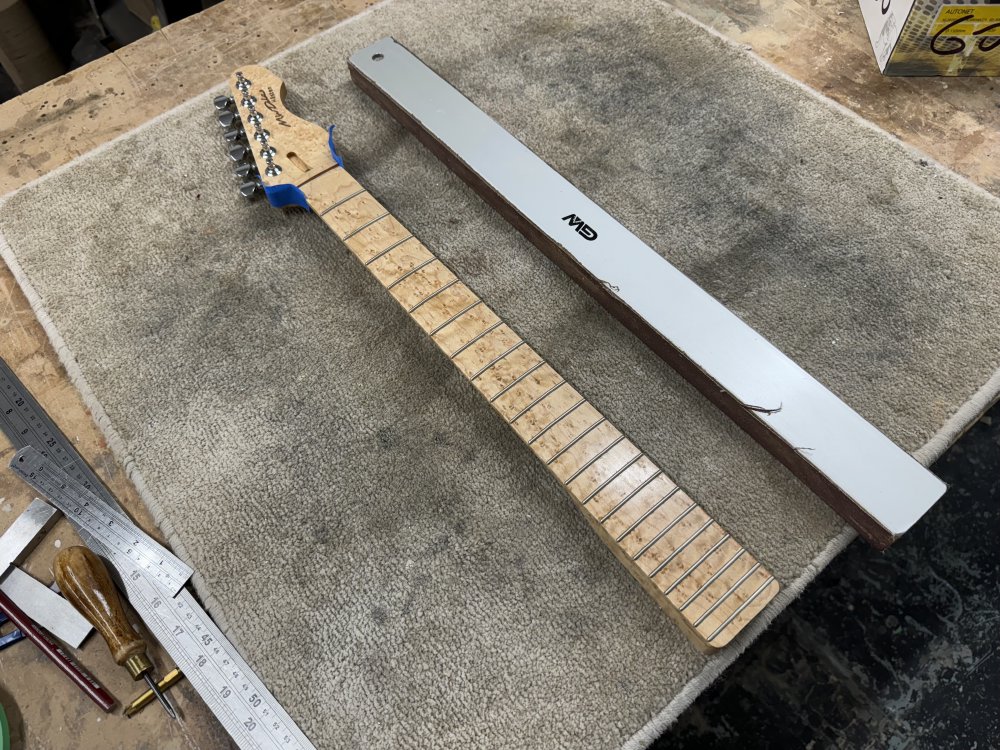
It didn’t take much effort at all, which is good, as it minimised the re-finishing I needed to do. Whilst I was at it, I also took down the heel width slight to compensate for the neck pocket being slightly smaller due to paint:
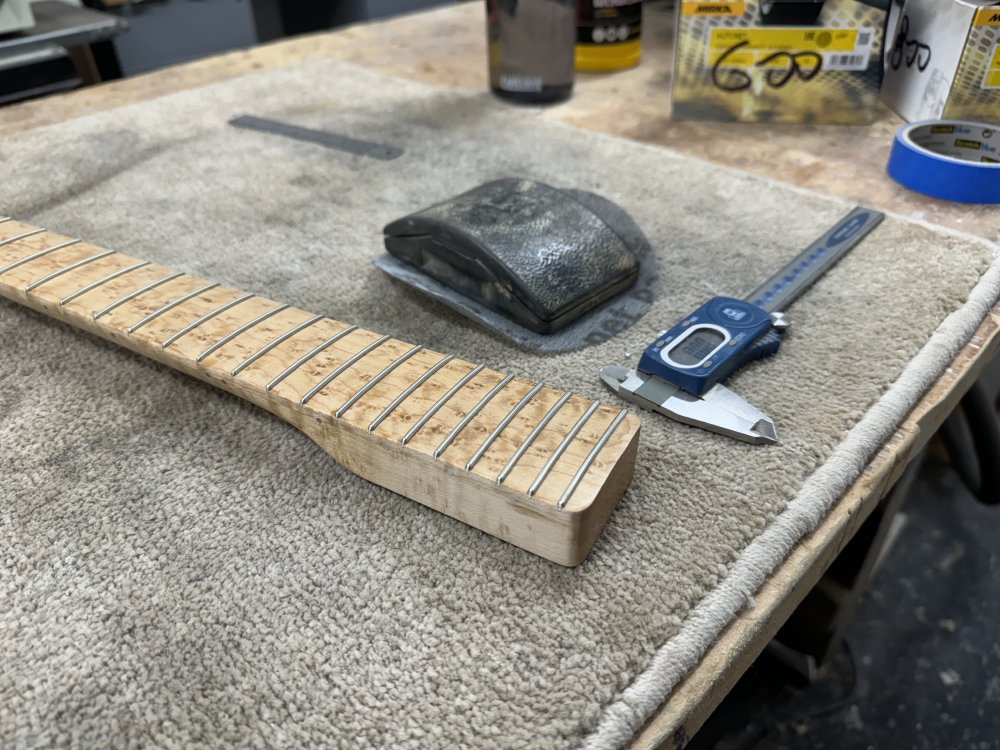
Once both of these were done I applied some more oil; I managed two coats and it’ll need a couple more. Thankfully oil finishes are somewhat forgiving to this sort of re-working.
OG Guitar
Last week I filled in the chip in the neck on the old strat-clone that’s been going around my family for three decades, filling it with a paste made from a mixture of rosewood dust and wood glue. Because the paste shrinks as it dries, I had to apply a liberal helping, so this week I started from this point:
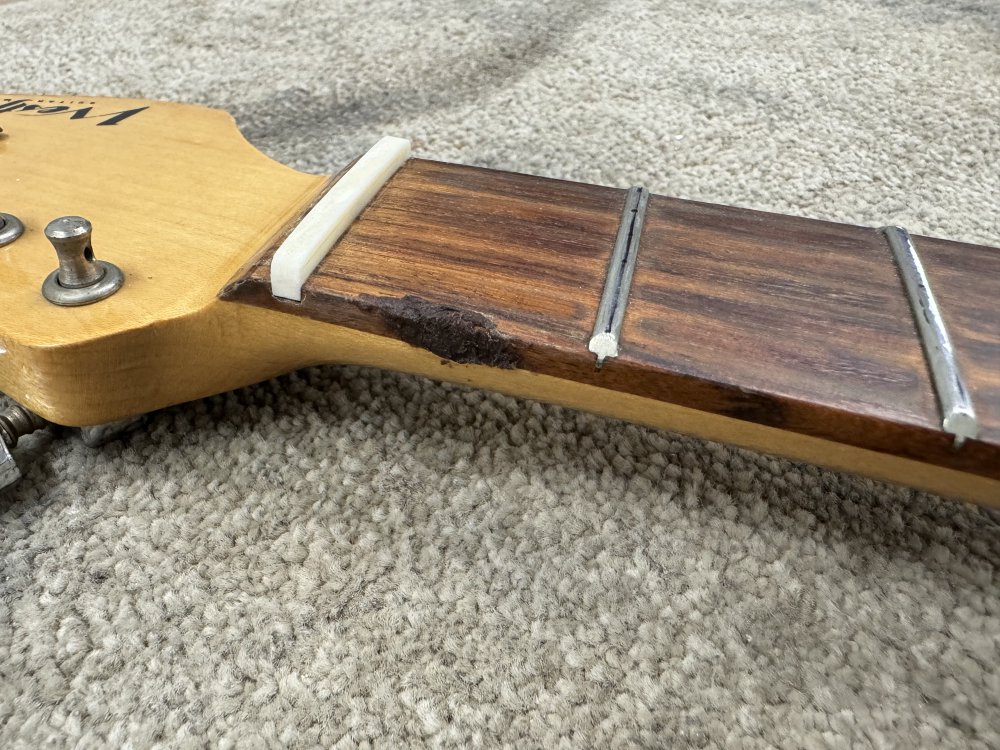
I worked it down first with a chisel and then with some very gentle sanding, and before too long I had it feeling unnoticeable under the hand. It’s a little dark as you can see, but once oiled, given the light/dark grain mix on this neck, I doubt you’ll notice it much given the rest of the guitar is somewhat worn over all this time :)
I next went to sanded and polished the frets after I gave them a gentle re-crowning last week.
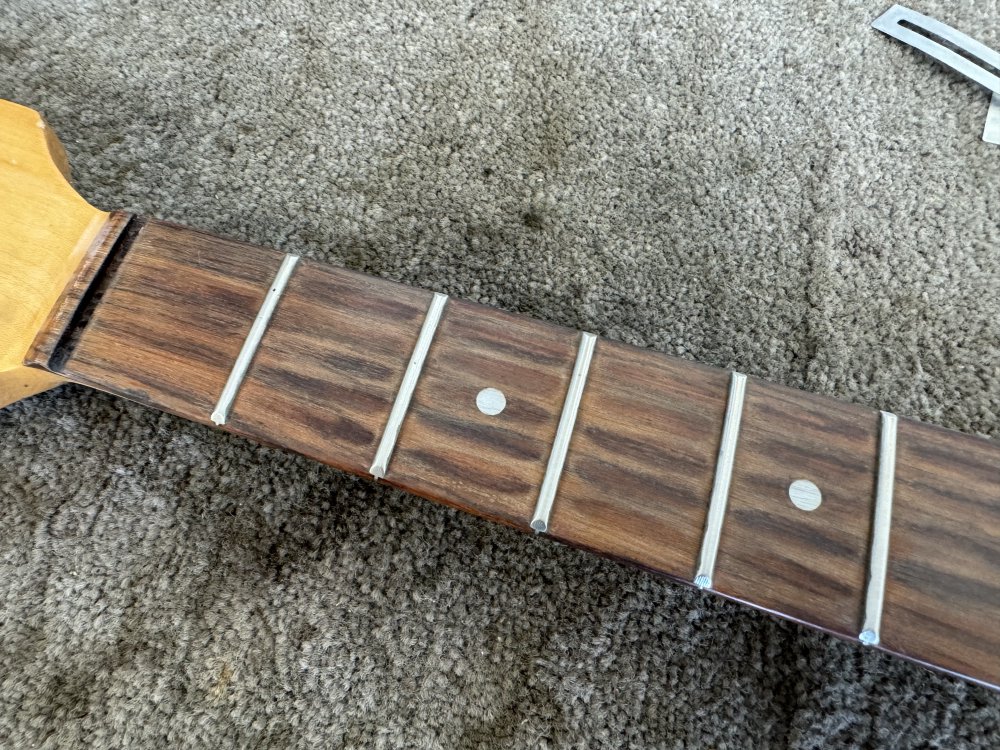
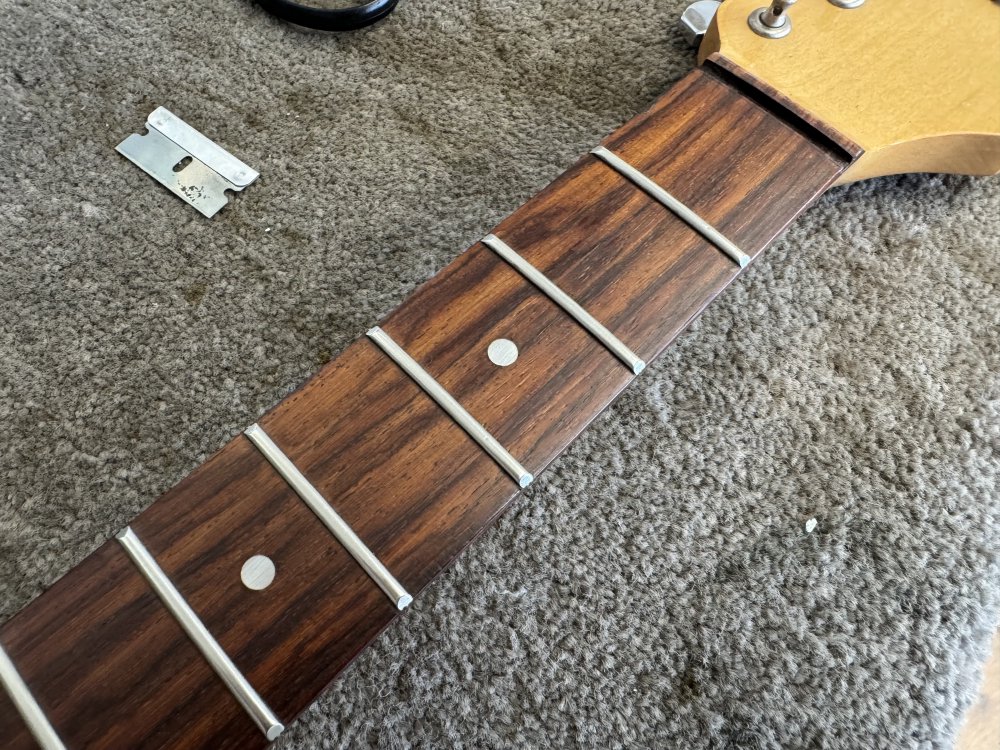
However, it was at this point I realised what I thought was just patina on the rosewood was a lot of compressed dirt. When I first took this instrument apart I’d given the fretboard a good cleaning, twice, with wood cleaning fluid, to remove all the gross ick that builds up on a fretboard over thirty years if no one thinks to clean it, and I assumed the markings left were just where the wood had been worn down.
But the moment I touched it with sandpaper as I went to polish the frets I realised that it was in fact compacted dirt 🤢 You often see this pattern on old tele neck, where the lacquer has worn through, and that’s a nice thing to see, but on this rosewood fretboard it’s nothing so desirable!
So I busted out a razor blade to act as a tiny scraper, and with that and a hover worked for 20 minutes to remove all the built up dirt, and then went over it once more with cleaning fluid, and now the rosewood looks almost like new!
This here is the downside of non-sealed fretboards I guess. Most woods you seal with a layer of lacquer, but rosewood you just soak in oil occasionally but it’s still open to the elements, and so all this dirt had built up. Let this be a reminder to clean your fretboard when you swap your strings!
Off to Scotland
And that’s a wrap for a couple of weeks, as I’m away in Scotland next week for my brother’s wedding. Whilst there I’ll be picking up the guitar I built him and brining it back down with me and into the workshop for a bit of TLC, as the pickup selector switch broken. It’ll be nice to get it back for a bit, and I have some thoughts on other tweaks I can make to it - it was the second guitar I made, so hopefully I can apply some of the things I’ve learned since then to help it play even better.