Workshop weeknotes: Delfinen becomes an instrument at last.
Published 1 Mar 2024
Tags: binding, delfinen, finishing, laser-cutting
I was hoping to get back to regular weeknotes after doing a catch up on all the individual builds, but time has been short, so to constrain these I’m going to loop back around to Delfinen, and just focus on that guitar again, as it’s had the most done to it since we last saw it - the other guitars are increasingly up to date note-wise, and doing this enables me to remove the feeling of being overwhelmed covering everything else in these notes. Normal services will be resumed shortly, as soon as we’re sure what normal is.
This is quite a long one still, so if you want to skip to the end and finally see a guitar assembled and strung up, I recommend you don’t miss that bit :)
Clearning the top of the binding
When we last heard about this guitar, I’d been clearing up the binding on the side, removing orange stain that had got under the tape, and I was pondering what to do about the top edge, which also needed cleaned up, but is only a millimetre or so thick, and isn’t bounded by a straight line in the same plane, so I can’t just put tape on the wood to protect it as I had done on the sides.
Back in my previous notes I ended with this note about how one might tackle this, and the challenges of it:
One trick I’ve seen used here is to put a razor blade into a stick so that only a millimetre or so sticks out, protecting you from going to much across the body, but that assumes that the binding is of a fixed thickness, which it won’t be due to the original scraping to get it flush with the body and the scraping I’ve just done to clean the sides.
Despite my scepticism, this is indeed what I tried. Not having a saw blade thin enough to hand that it would hold a razor-blade and nothing else, I McGyver’d something that I have now christened a “luthier’s shiv” using a ruler, masking tape, and a razor-blade:
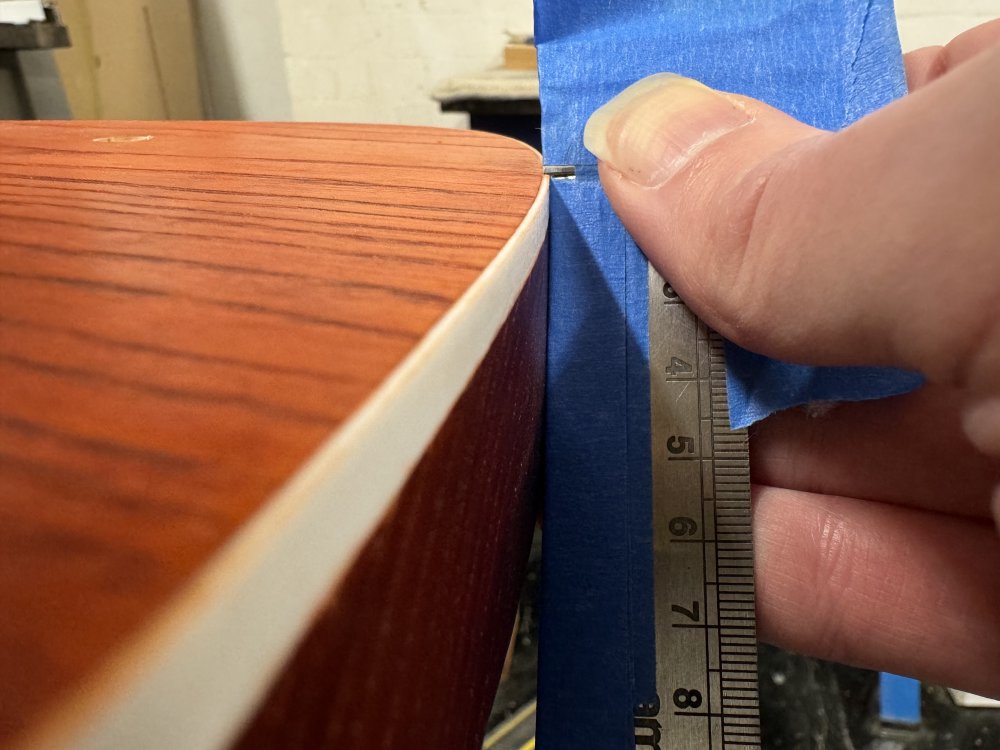
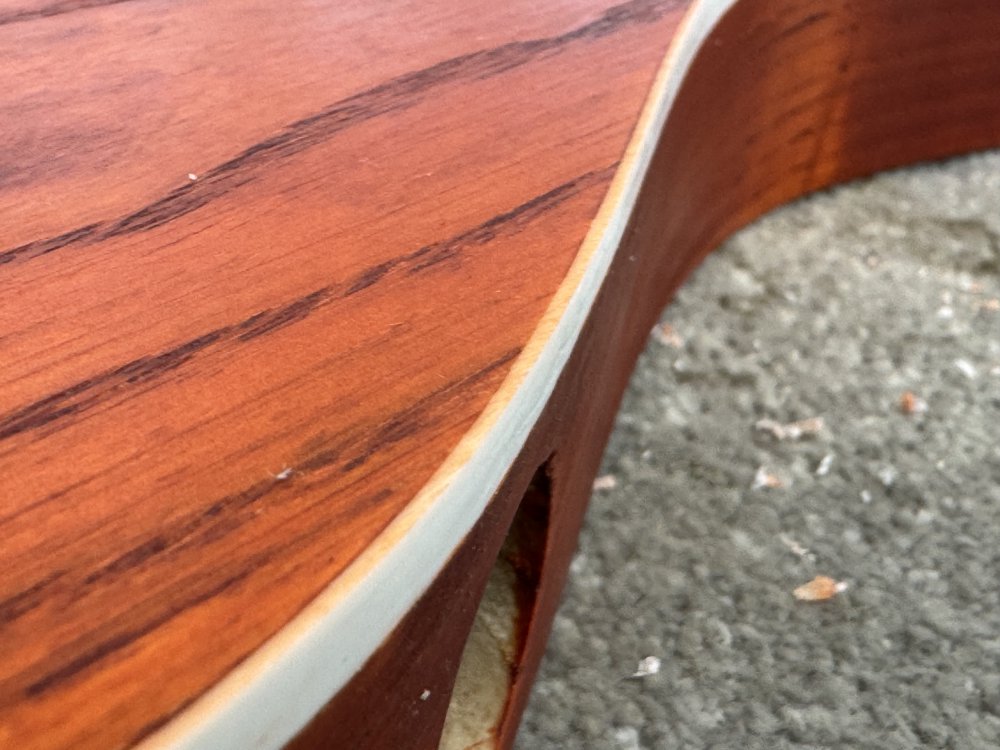
I used tape to both hold the blade and to provide protection for the body from the metal ruler I had re-purposed. The tape on the ruler also helped me fine tune the depth of the blade more easily: I added three or four layers to get me to just the right amount of overhang on the blade. The tape holding the blade itself isn’t ideal in that it has some give in it, but then I don’t want to be using lots of force here, so it wasn’t necessarily a bad thing. It actually worked really well, as you can see here in a before (on the left) and after (on the right) shot.
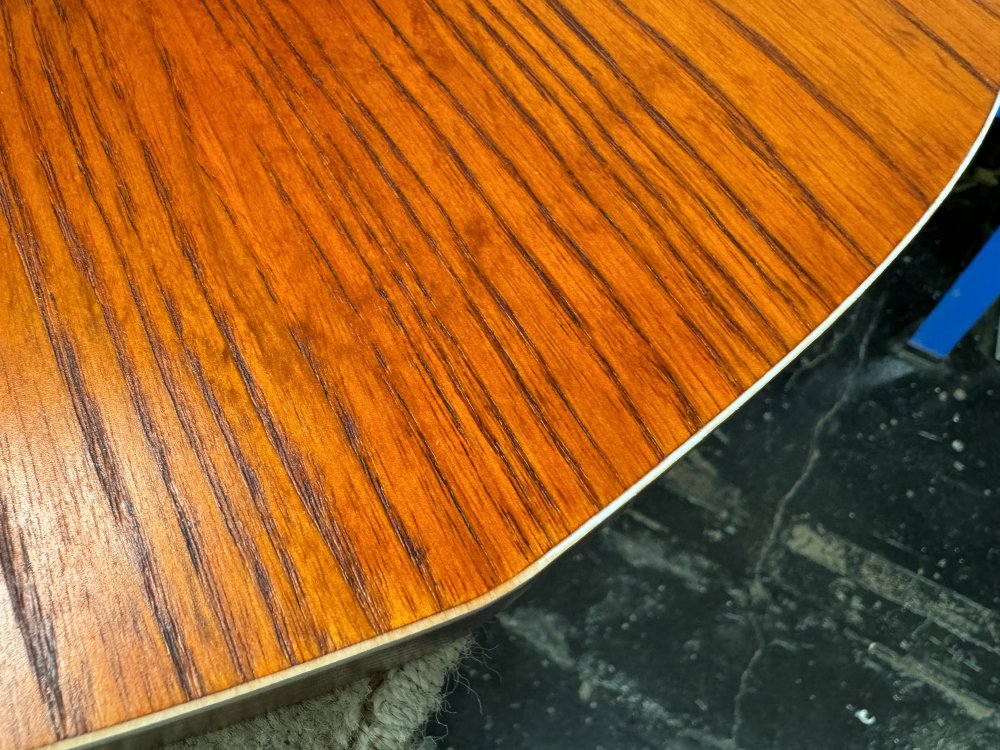
Even though the binding isn’t of a constant thickness, the shiv was actually easy to work with despite its odd look, and so I never went over the line, so to speak. In the end I got a nice clear binding, which really makes the orange stain on the front of the guitar pop, even though you don’t see much binding on that profile.
So after all the stress this binding job has given me, I’m super pleased with the results. It really does amplify the look of the already vivid finish on this guitar up a notch, and I think justifies the effort. Now I know what I’m doing (somewhat) I do think I’d go for this look again, just being aware that it is much more fiddly than not doing it. Is it perfect? No, but you have to look really close to see that, and the impact in general is really impressive I think.
On the topic of the binding, I received a missive from my friend and woodworking mentor Graeme, who suggested that the most likely cause of the binding coming off was not the binding shrinking, but the wood expanding across the grainline. It feels silly in hindsight that I didn’t consider this, plastic being somewhat inert and wood being know to shift over time. Graeme noted that wood will move around in light of moisture changes, and I do use water-based stains, so I’m effectively wetting and drying the body repeatedly, all after I’ve put the binding on.
I wonder then if next time I do this I could head off this issue by either fake staining the body before adding the binding by just doing the same process with water, or perhaps it might work better if I shifted to using an alcohol-based stain that would cause less movement in the wood as it dries quicker? I’m not sure, but it gives me something to chase before I try the binding again.
Anyway, big thanks to Graeme for his notes on this topic!
Ferrule fitting fun
On both the painted guitars that make up the rest of this trio of builds I had noted that the string-ferrule-block no longer would fit in the cavity I’d originally cut due to paint build up. Whilst that is in part true, I discovered that there was something else going on also, when I came to fit Delfinen’s block and it also no longer fit:
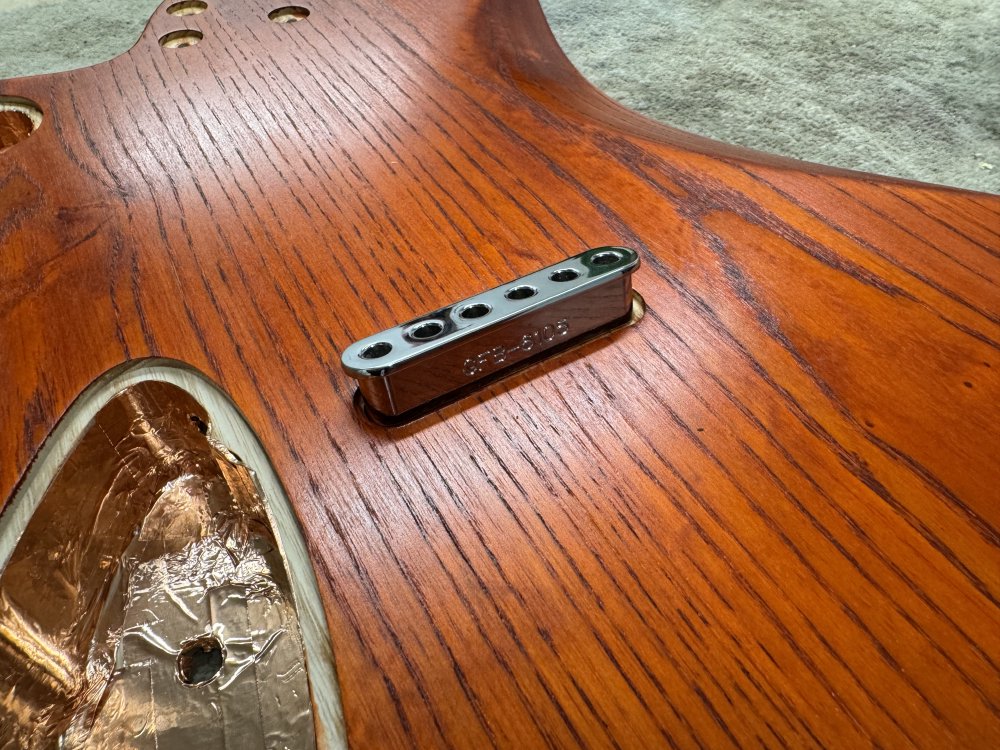
This confused me, as whilst I can believe that some finishing oil got into the slot and made the fit a little more snug, I doubted it explained this. On a whim I got the callipers out and checked all three blocks, and there I found my problem: the original block I’d bought and measured was not the same as the subsequent two blocks I ordered, despite being the same part notionally:
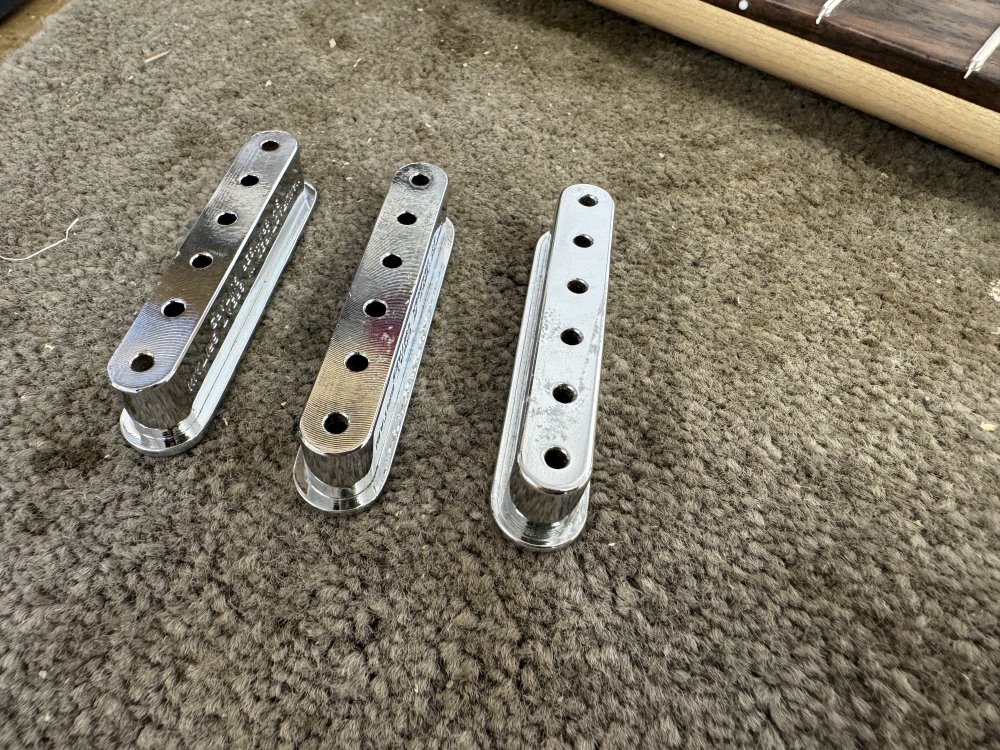
You can actually see that, dirt aside, two of them have been made differently from the original block. These are the newer two I bought, and they are the tiniest fraction of a millimetre bigger (10 mm vs 10.1 mm by my callipers), but it makes all the difference when trying to fit things like this. What I didn’t do, and what I should always do, is make sure I measure the actual part I’ll fit before I cut the hole, rather than assuming that if I buy parts a few months apart they’ll be identical.
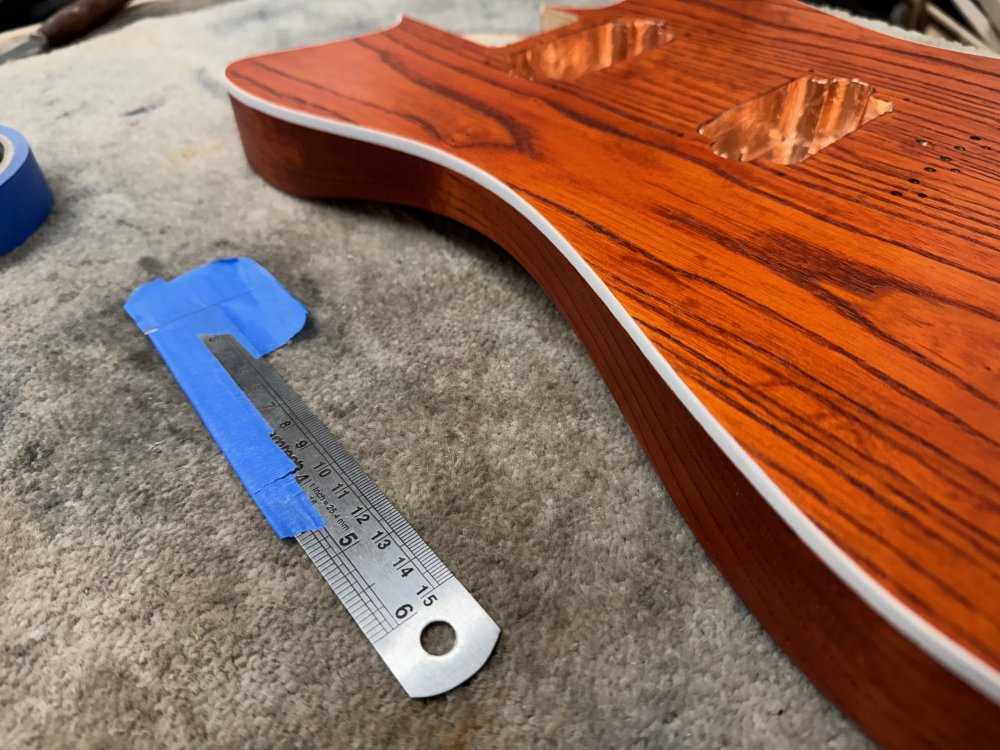
Given that of the three guitars Delfinen has the hardest wood to work with, I opted to put the original, narrower, block in this guitar. But even with that, paranoia got the better of me and I decided to make the channel fractionally deeper. In all the measuring of the bodies and the blocks, I noted that the cavity was just a hair less deep than I measured the block, and I didn’t fancy having to try extract the block if it didn’t sit perfectly flush, so it was time for a little bit of delicate work to take a tiny amount out the bottom of the cavity, just to be sure:
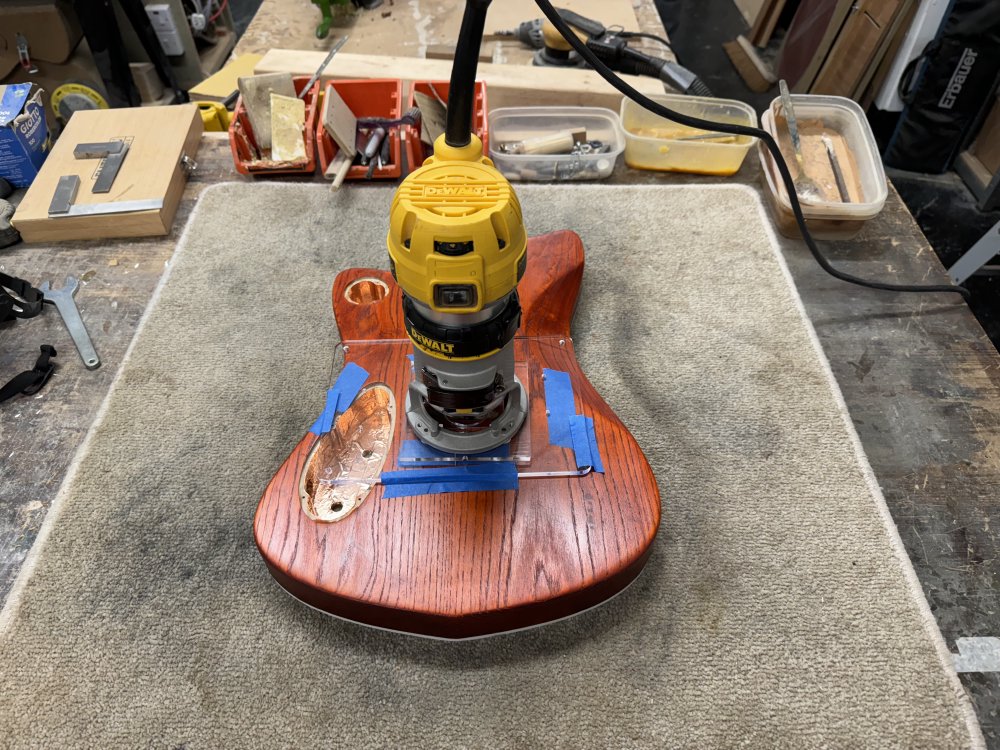
I like that I’ve reached the stage of my woodworking career where I can describe using a router as a delicate work :)
I didn’t need to do much, just a very gentle pass with a small router bit with a guide bearing to remove a tenth of a millimetre or so from teh bottom of the cavity. Here the acrylic template wasn’t acting as a guide, just a platform to protect the finish on the back of the guitar.
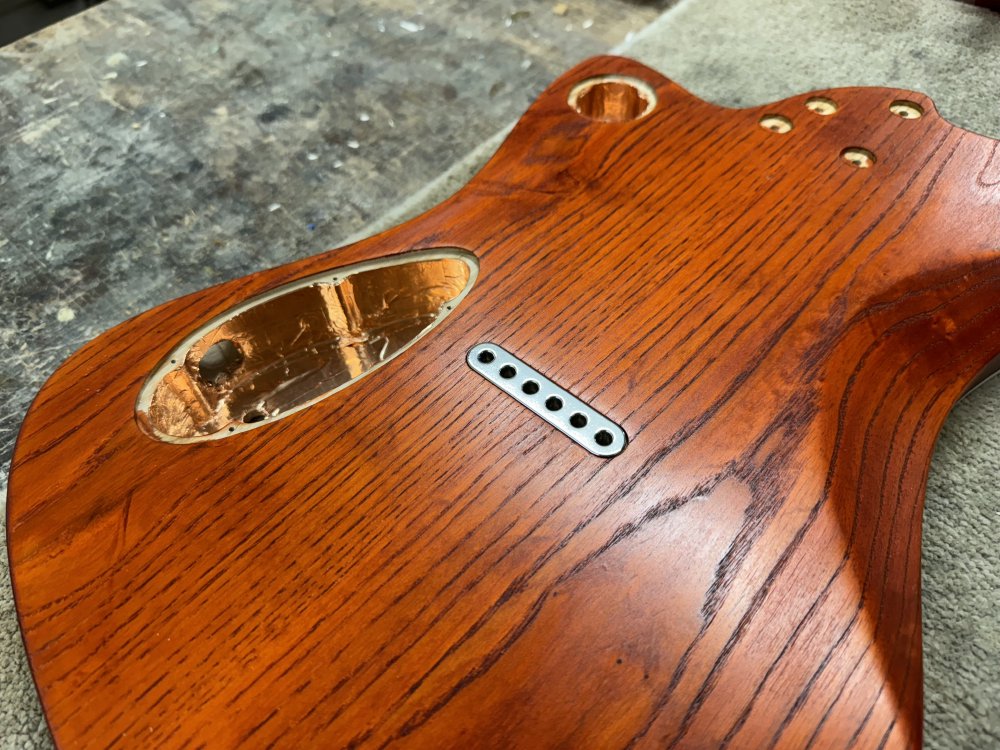
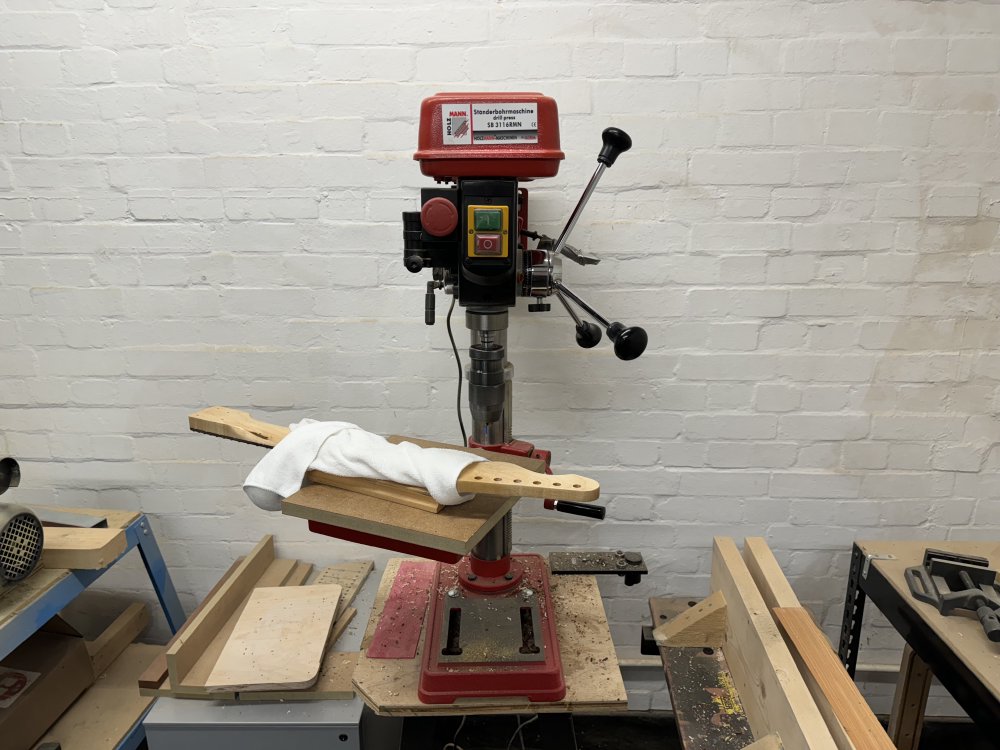
That done, then came the moment of truth, fitting the ferrule block. This is a friction fit, and so the walls of the cavity are tight, and so I used the drill-press with rod in the chuck to help press the block home. Once in, getting this out would be very hard (though not impossible in theory, if you drill through from the front). I get very stressed at this non-easily–reversible operations, hence the aforementioned delicate router work, but thankfully it fit as I wanted:
My first string-ferrule-block based guitar, and again, I’m happy with the results. I switched from individual string ferrules to the block as having to hand-ream each hole to get the ferrule to just fit was a very slow and tedious process. This block, as you’ve seen, isn’t totally stress free, but it is less stressful, and looks tidier, so again, I’ll probably stick with this in future. The perfectionist in me does note that there is a slightly larger gap on the right-hand side of the block than there is on the three other sides, but that’s what I get for not using a CNC-router. It annoys me a little, but I can live with it - but I think is a good example of the unachievable tension in my head between wanting things to be precise whilst also wanting to build everything by hand.
Getting the neck ready
With the body now complete, it was time to get the neck ready for mounting. The necks for all three builds I have going at the moment are in a mostly complete state, and have been for a while as the finish on the bodies dragged on unexpectedly, but there’s final little details that needed doing on all three.
First up, was fitting the tuners on all three. Hästen is getting locking tuners, so I did that one separately, but both Delfinen and Verkstaden have standard Gotoh tuners, and so I did those two as a pair:

With the tuners test fitted, I needed to drill the pilot-holes for the screws that align the tuners on the back. Being me, I do this with the pillar-drill to try ensure this is as true as possible, though I could probably get away with doing this with a hand-drill.
A little careful work later and I have my pilot-holes drilled:
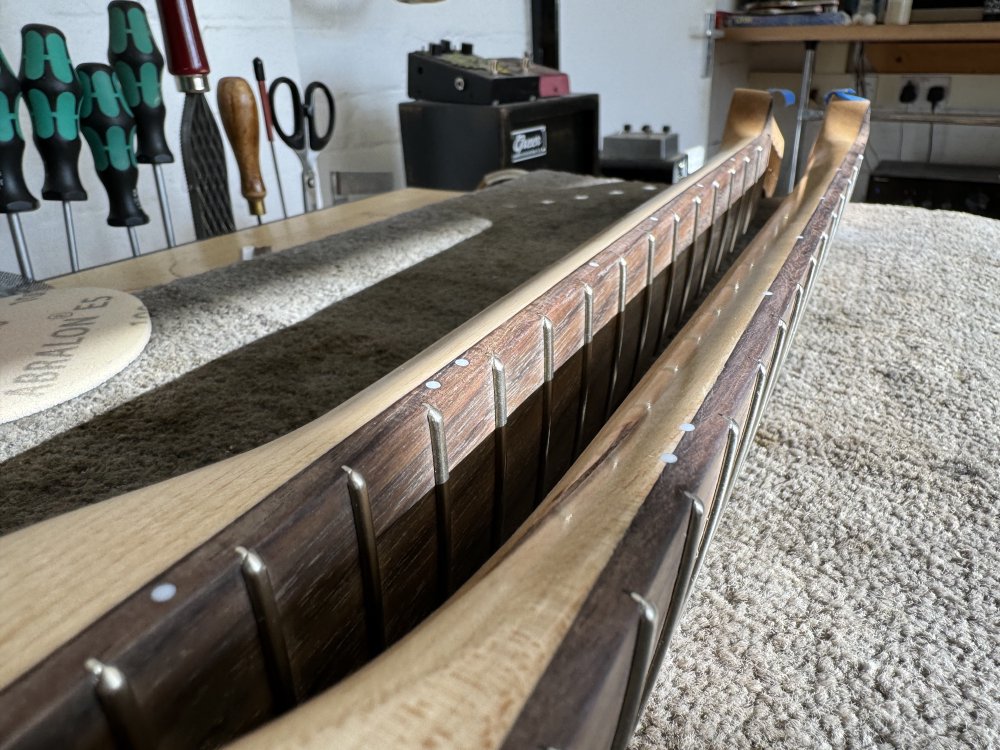
As a change of pace from doing stressful jobs that are hard to undo if I mess them up, the next task was a nicely therapeutic one. Both these necks have a rosewood fretboard that has a different finish from the maple wood. Rosewood is kept “damp” with a light oil finish that is topped up occasionally, whereas the back is oiled to build up a light lacquer. When oiling the maple I put on masking tape to protect the rosewood, but that means I end up with a line that you can’t really see but can feel, where that oil build up on the maple is higher than the rosewood, and it’s right where your playing hand is, and so I needed to work that edge to be flat.
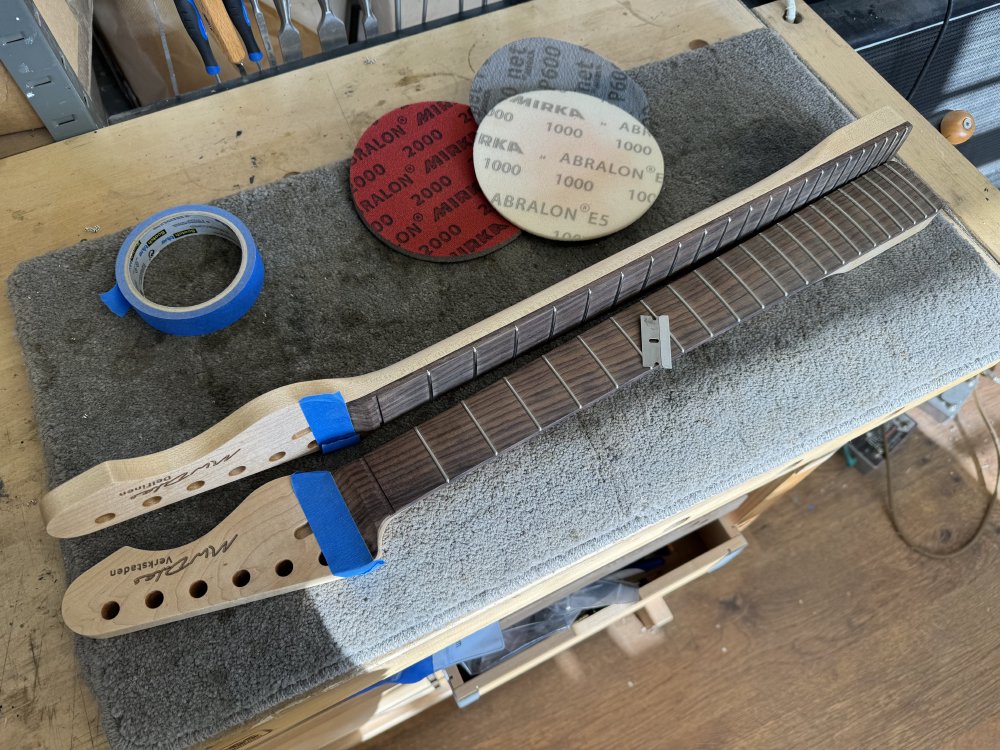
The main tool I used for this was again the razor-blade, using it as a small wood-scraper, but in places I did use a little buffing with the sanding disks too. It’s nice tactile work, and one I enjoyed doing, reminding me that the process of building guitars is meant to be something I enjoy as much as seeing someone play the end result.
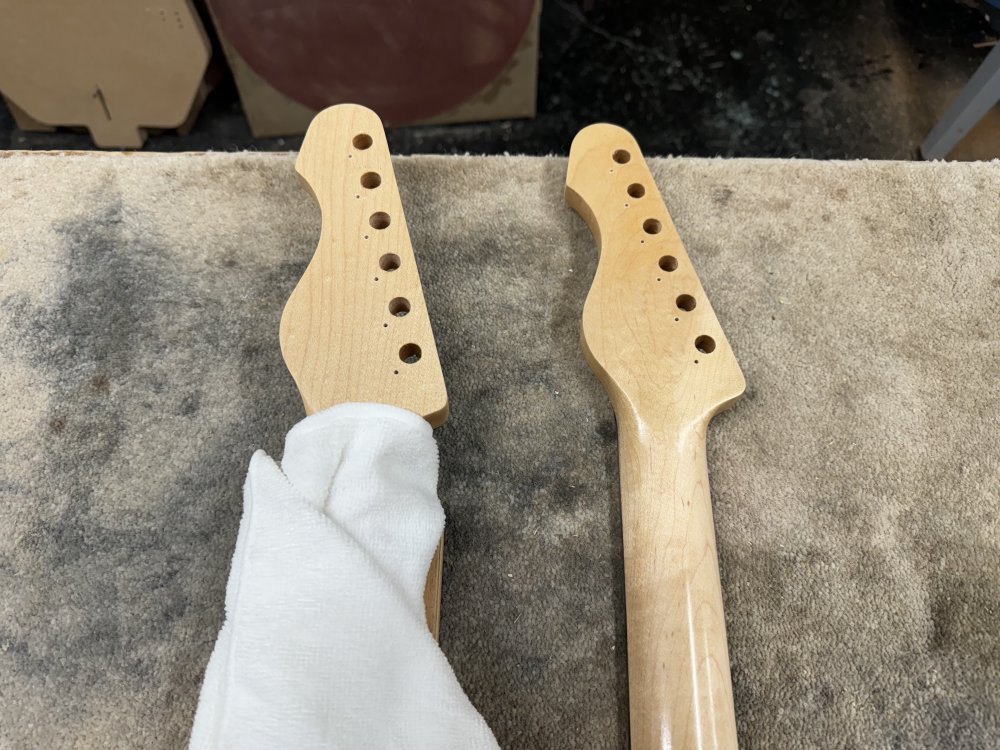
It also amused me to be reminded of how my process keeps evolving. Like a lot of guitars, I used to always put the side inlays on the neck at the boundary between the front and back wood, but for Älgen I couldn’t do that for practical reasons, and so put the inlays in the fretboard instead. This I also did for Delfinen’s neck as I liked the look of it, but Verkstaden’s neck is older so has them in the more conventional position.
This job done, I then gave the fretboards a full clean up using cleaning fluid, and left them to dry for a week, ready to oil the fretboard. I also did work a nut to roughly fit Delfinen’s neck.
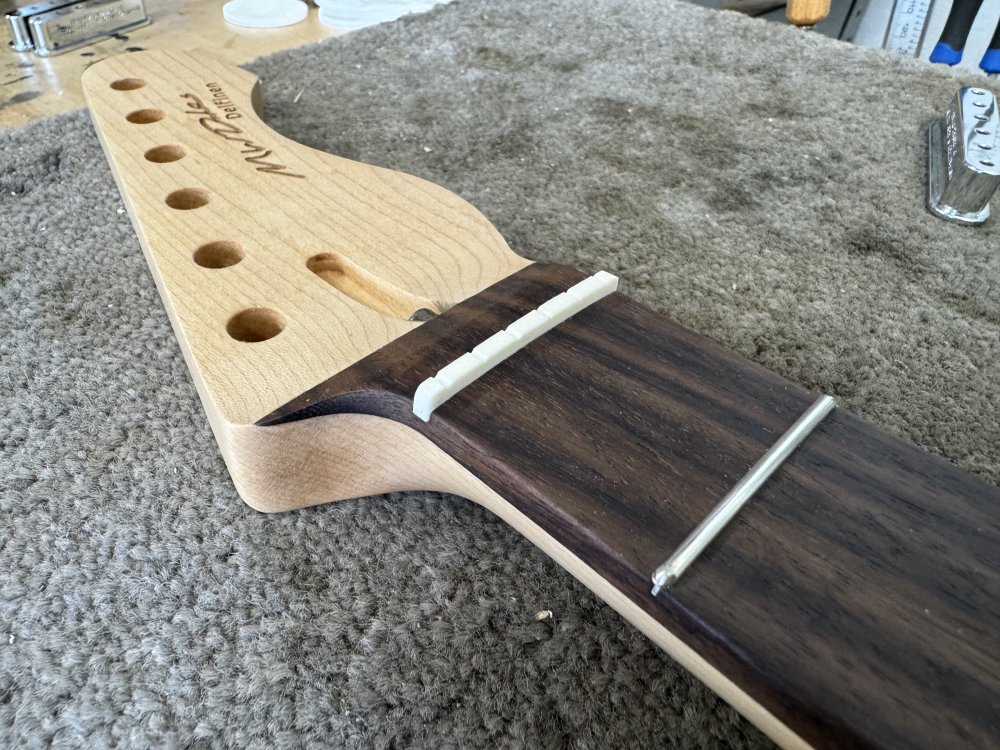
I can’t properly set the nut up until the guitar is properly assembled and tweaked, but this did mean I ready to put strings on it…
Firing up the lasers
Okay, body ready, neck ready. There’s just a few parts I still needed to make for this guitar, and for that I had a trip to my local maker-space, Cambridge Makespace to use their laser-cutters and cut the pickup-rings and cavity-covers for both Delfinen and Verkstaden.
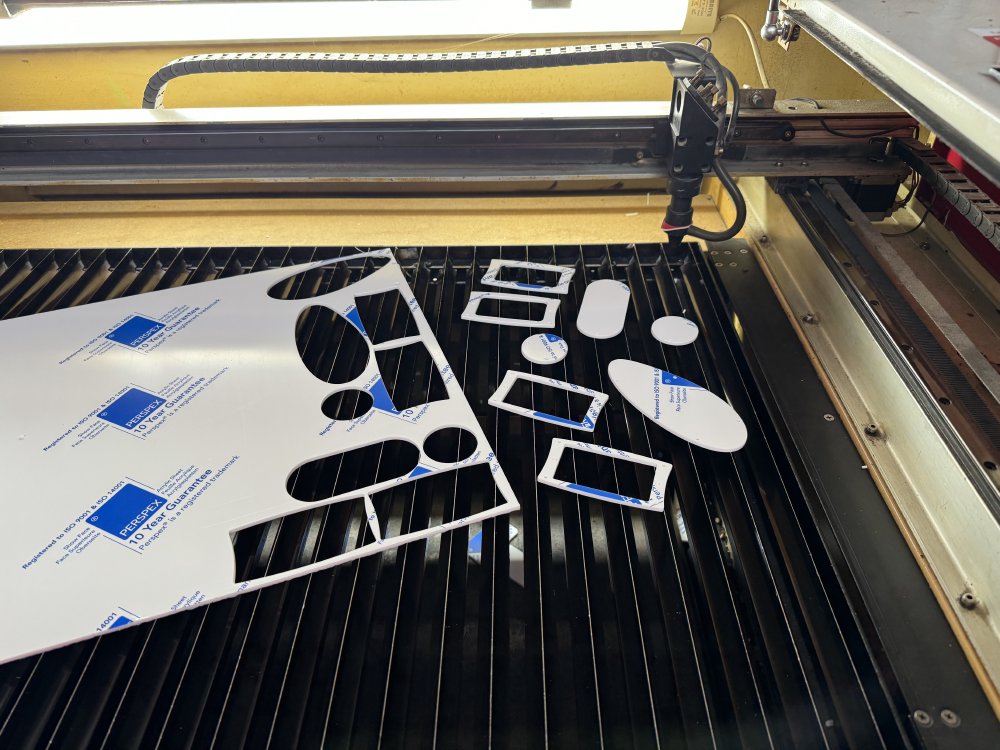
I was excited to find that Makespace had upgraded one of their laser-cutters to a newer, more-capable machine. Unfortunately for me it seems to have problems with DXFs with splines in them, cutting the lines that make up the spline definition rather than the spline curve itself. You can just about see the edges caused by following a series of lines in this profile photo:
Most frustrating, but at least they didn’t upgrade both of their laser-cutters, so I can still cut the odd-curves I’ve put on my designs, albeit much slower than I otherwise could. But I could cut them, and that’s the important bit!
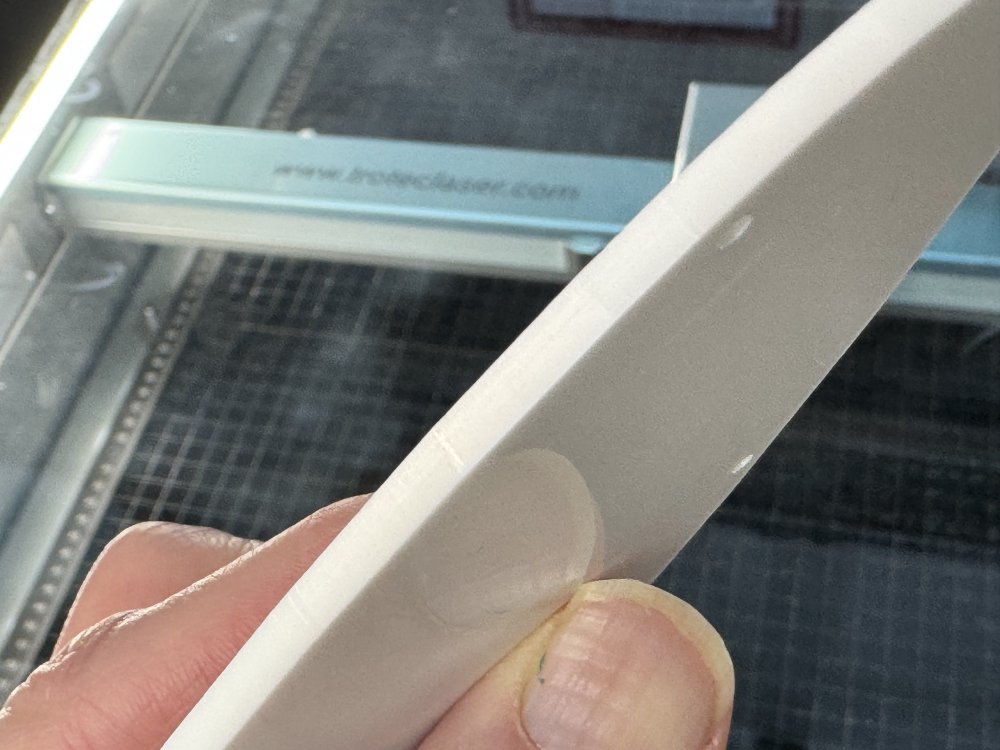
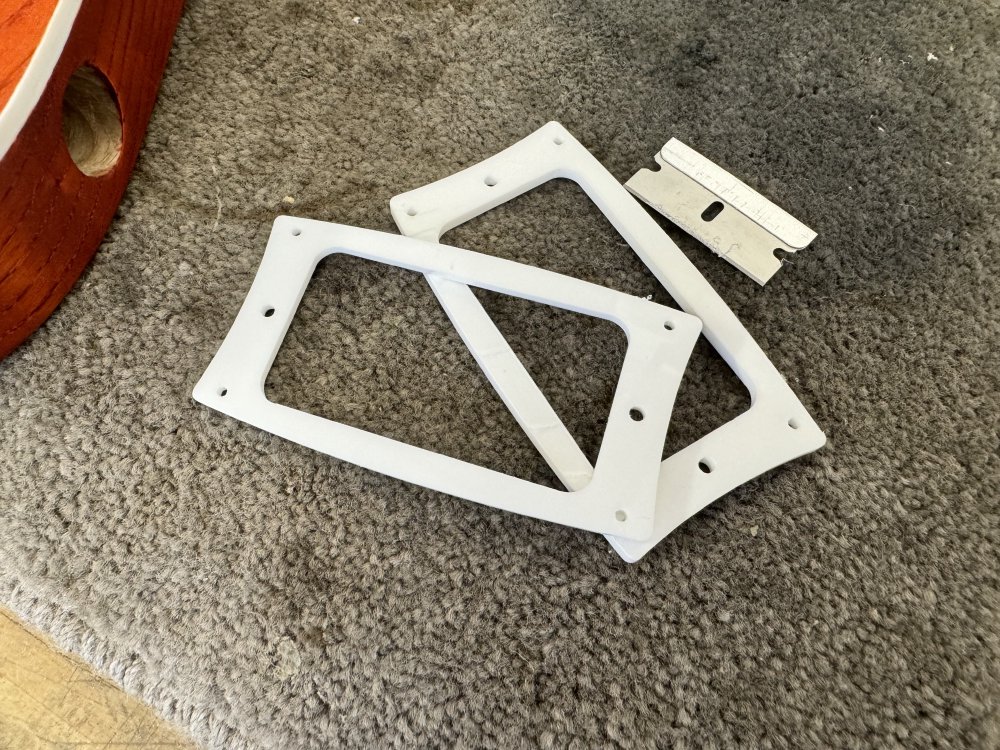
Once back at my workshop with all my parts, I set about tidying them up. I discovered that hanging out with professional luthiers means you can put extra finish on any surface, and now I’ve become the kind of person that works their laser-cut parts to remove the hash edges along the cut-edges and to smooth out any marks.
I have to confess though, mostly this made me realise I need to recut these at some point. On both of Delfinen’s pickup rings, but in different places, there is an overcut, like you can just see here, where there is this weird step in the profile.
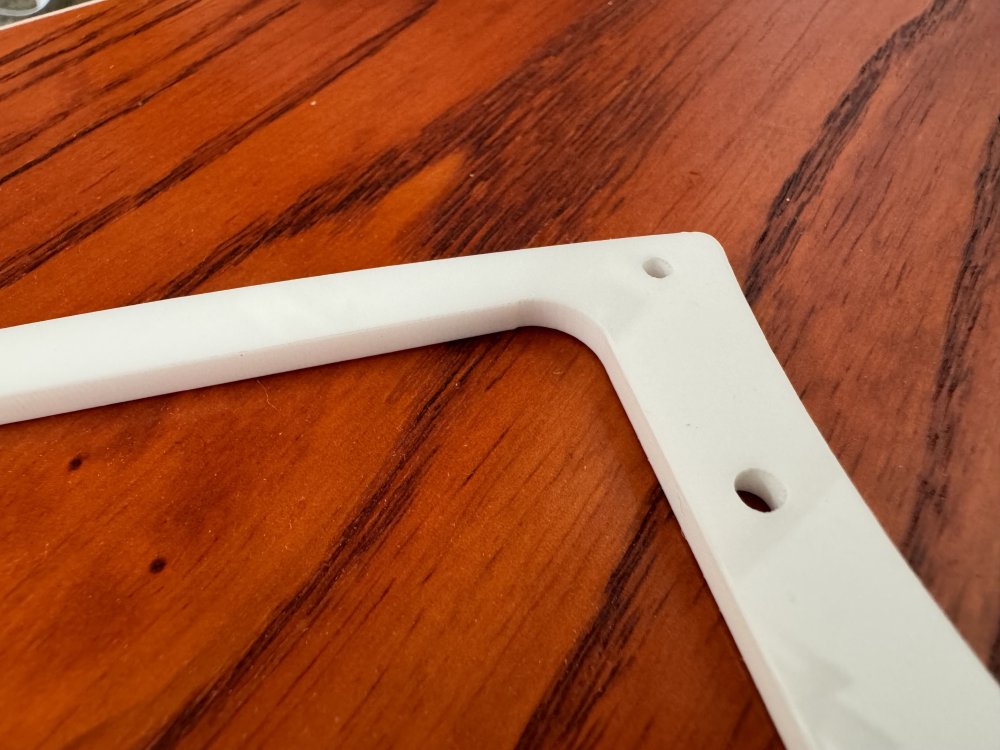
Looking at the design files there is no change here. Chatting to my friend Jonathan who has a lot more laser-cutter experience than me, the best theory we have is this is from the laser-cutter head wobbling as it moves from one part to another. I did all these parts in a single job, and so at times the laser-cutter head has to move a fair distance, and it does so at high speed, and then (we theorize) that when it stops and starts cutting there is a little wobble in the head still, causing it to overshoot slightly. This is why I tend to use slow speeds for laser-cutting my work, but that only impacts the cut speed, not the speed the head is moved between cuts.
I’m not sure if I can change the inter-piece move rate in the software we use to control the laser-cutter, so I might just need to do each part one at a time to eliminate this. More on this once I’ve had a go at re-cutting them.
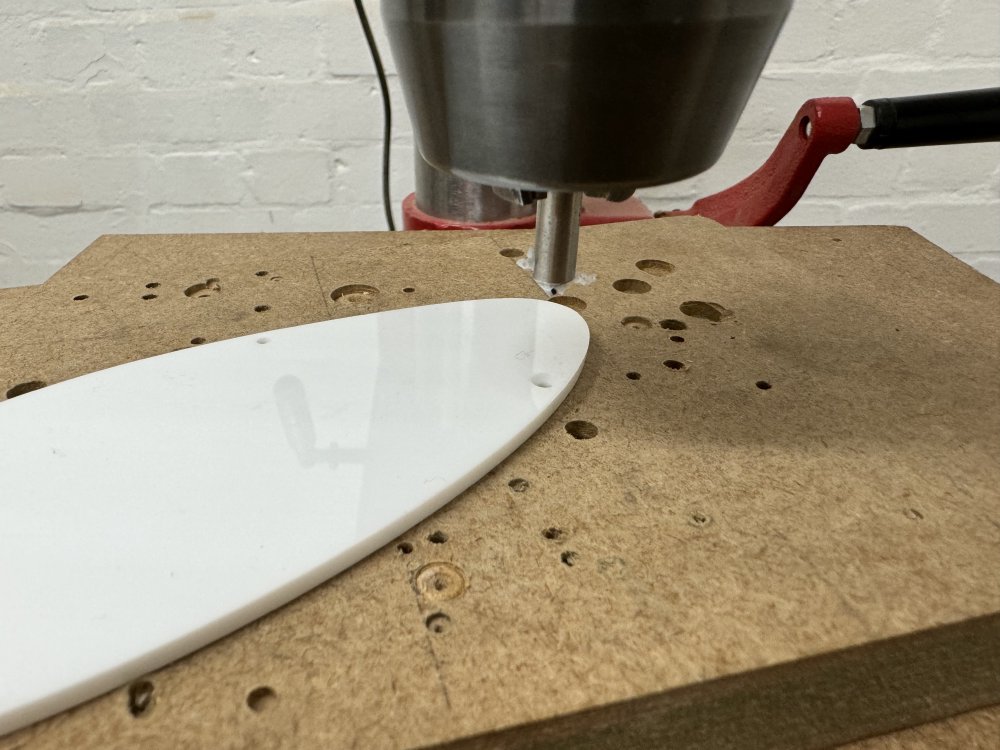
For the parts that were up to scratch though, they then had their screw-holes countersunk so that there’s nothing sticking out the back of the guitar to catch on people’s clothes:
The first string up
With that done, I got to finally assemble Delfinen and put some strings on it: it feels like it’s been so long since I reached this stage on a build, and it did wonders for my spirit to get to this stage once more:
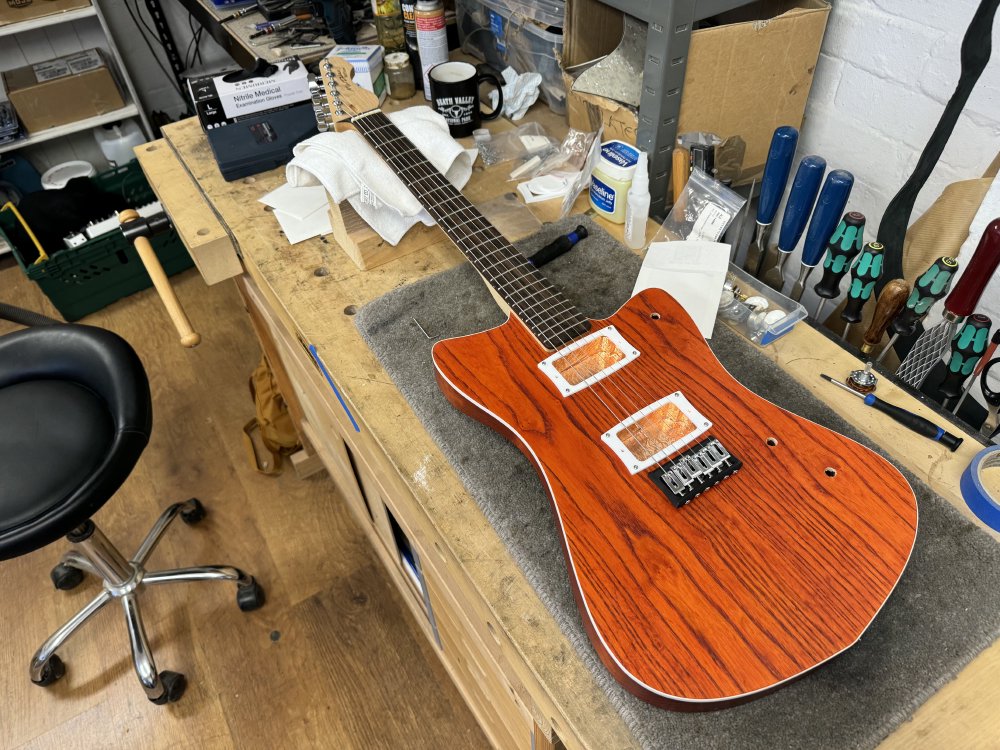
And from the back:

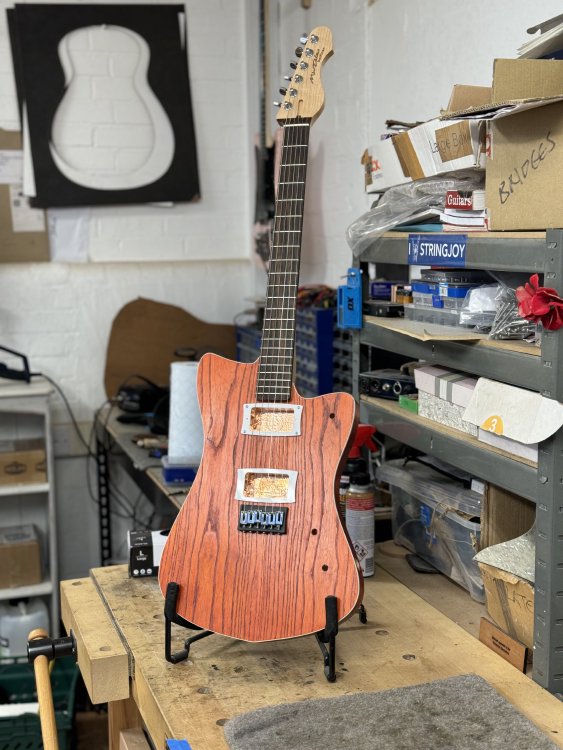
It’s clearly still missing a few parts, but I’m loving the look already. It may not be as unusual as Älgen, but it’s my own design, and to see it finally come together is wonderful. On one hand it’s an evolution of lots of threads from prior guitars, but it’s also the best conventional-style guitar I’ve built yet. Both it and Älgen show the fruits of my time spent in a workshop with professional luthiers, which has lifted the quality of my guitars immeasurably. I still have a long way to go on my journey, but it’s nice also to take a moment and appreciate where I’ve got to with this batch. And at the same time, it’s my guitar design - it looks nothing like what they build, and it’s not based on any other guitar: I feel I’m finally establishing myself a little now as not just a builder but as a designer of instruments too.
Unfortunately no demos - Delfinen will still need some tweaking and setup, but I want to leave it under tension for a week to let the neck settle. My instinct is that I’ll want to make the neck pocket a touch deeper, as I had to set the saddles on the bridge quite high and they’re still buzzing, but as the neck settles that might change. We shall see.
So for now, I can feel a sense of relief that we’re getting close to the end with this one, and I just have to get to the same point with Hästen and Verkstaden now.