A Couple of Weeks in the Shop
Published 1 Oct 2023
Tags: Delfinen, Hästen, Laser-etching, Logo, Painting, Verkstaden, Westfield
A couple of weeks since the last post, as I’ve been away visiting my family and friends up on Scotland. It was lovely to be up there, switching off from things, and reconnecting not just with the people, but also (making it more a relevant topic for this forum) with the original family guitar I first learned to play on, of which more later.
In the workshop it’s just been heads down trying to get the current trio of guitars finished: Hästen so I can get it to the client who ordered it, and both Delfinen and Verkstaden so I have my set of own design guitars (adding in Älgen) so I can start to try drum up new commissions in the new year. On that note, I currently am clear in 2024 of builds, so if you want to commission something before I get stuck into my next iteration of Älgen, now would be a good time to get in touch :)
But before I get there, there’s work to be done in the workshop…
New headstock logo designs
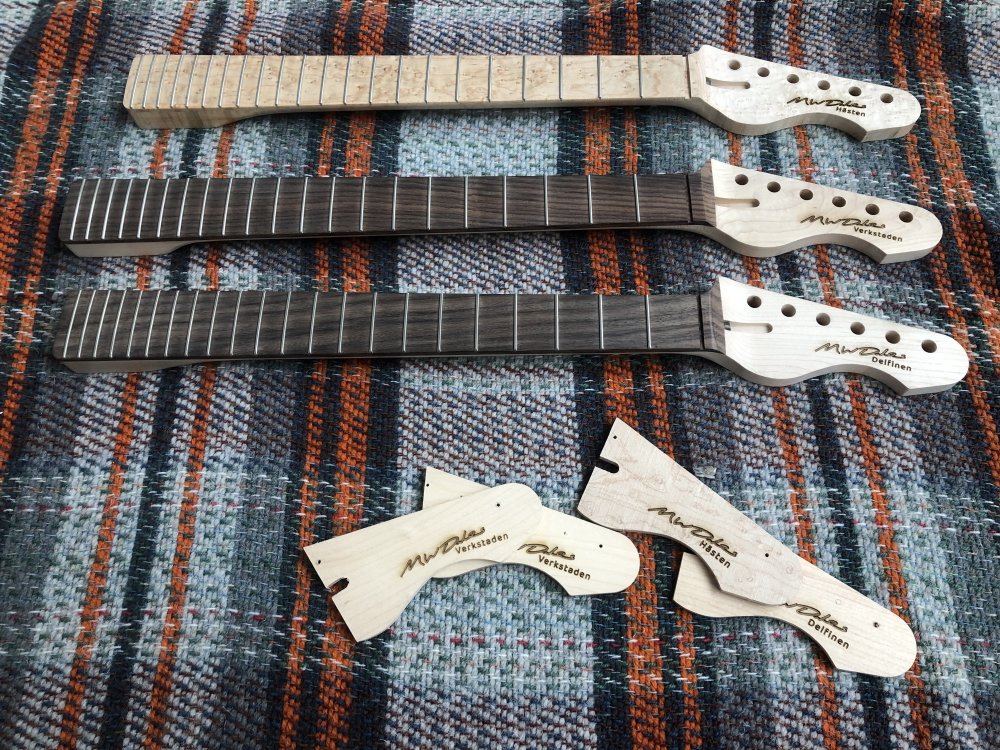
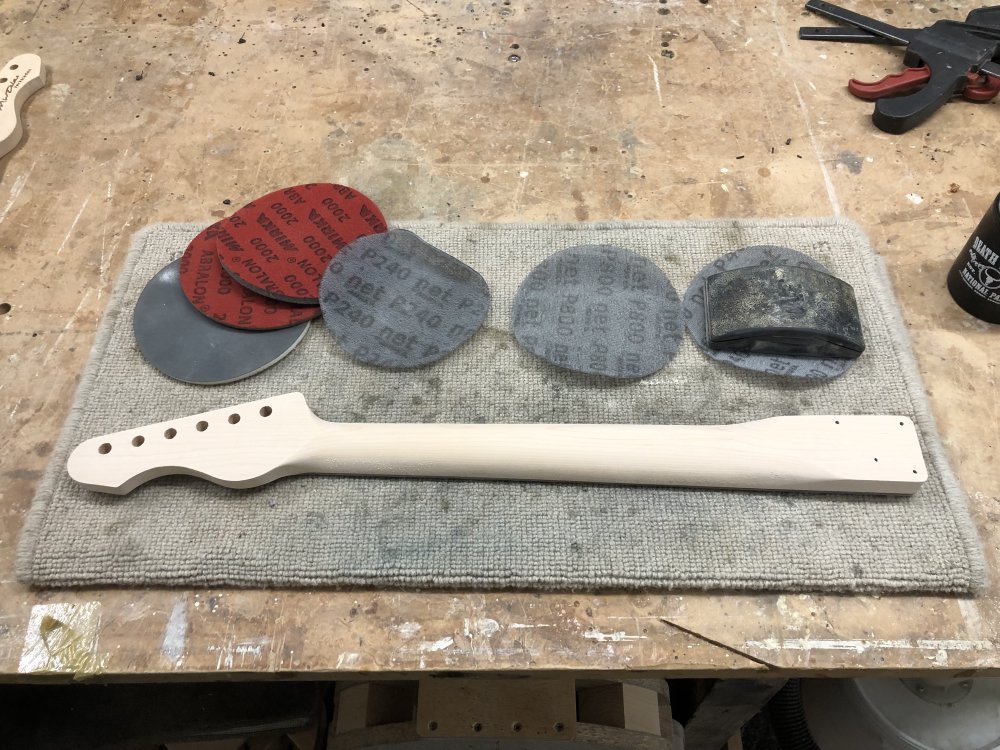
In the previous update I’d tested out my new headstock logo on some scrap wood, decided it was good enough to run with, and thus I had to do the scary part of taking three near-complete guitar necks I’ve been building and put them under the laser-cutter to be suitably branded. Thus I wrapped them up in blankets and carted them over to the local maker-space to do the work.
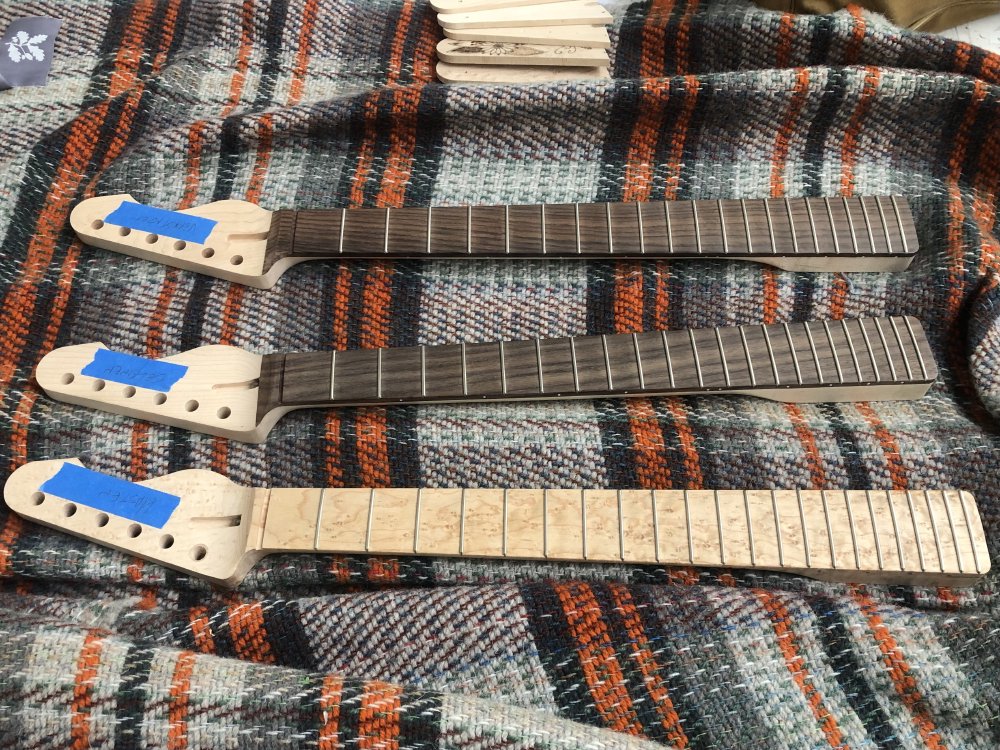
Because I know how easy it is to lose track of even just a small number of pieces when dealing with tricky jobs, I stuck the name of each guitar to the headstock, so I’d be forced to double check that I put the appropriate designation on the correct headstock as I went to do the job, as the logos each have the name of the instrument in them. I also tested each design before putting the neck in, again so I’d see the name of the guitar I was about to etch on the test piece, then confirm the tape matched, before putting the neck into the laser cutter. Perhaps an overly elaborate process, but messing up at this stage is quite expensive in terms of sunk time!
There’s a bunch of tricks to a job like this, not least of which is that of aligning the neck up with the laser cutter so it puts the logo in the right place. Normally when doing anything with computer-controller machines, like the laser-cutter or the CNC-router, you need some way to mark an origin position for your work. With a machine like a CNC-router, you can move the head until it touches the workpiece in a know place for instance and note that position in the control software, but with the laser-cutter there’s nothing to align with. The laser-cutter’s head does have a laser-pointer attached to the head that is there to give you a rough idea of alignment, but it’s not good enough to take a proper origin from if you really want to be accurate.
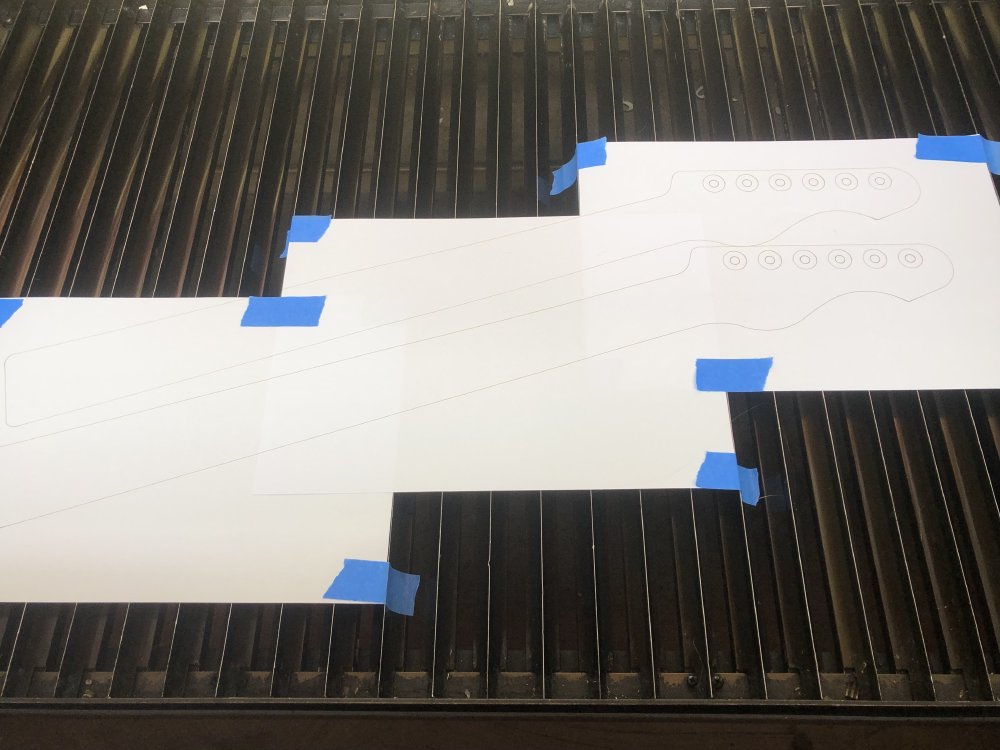
My solution to this is that I load up in the laser-cutter software the entire neck outline with the logo, and then I tape sheets of paper to the bed of the laser cutter, draw the outline of the neck on that, and then I know exactly where to put the neck for the actual logo etching. If you look closely at this picture you can see the outline of the neck has been faintly scored on the paper - it was to be faint otherwise I’d just burn the paper away :)
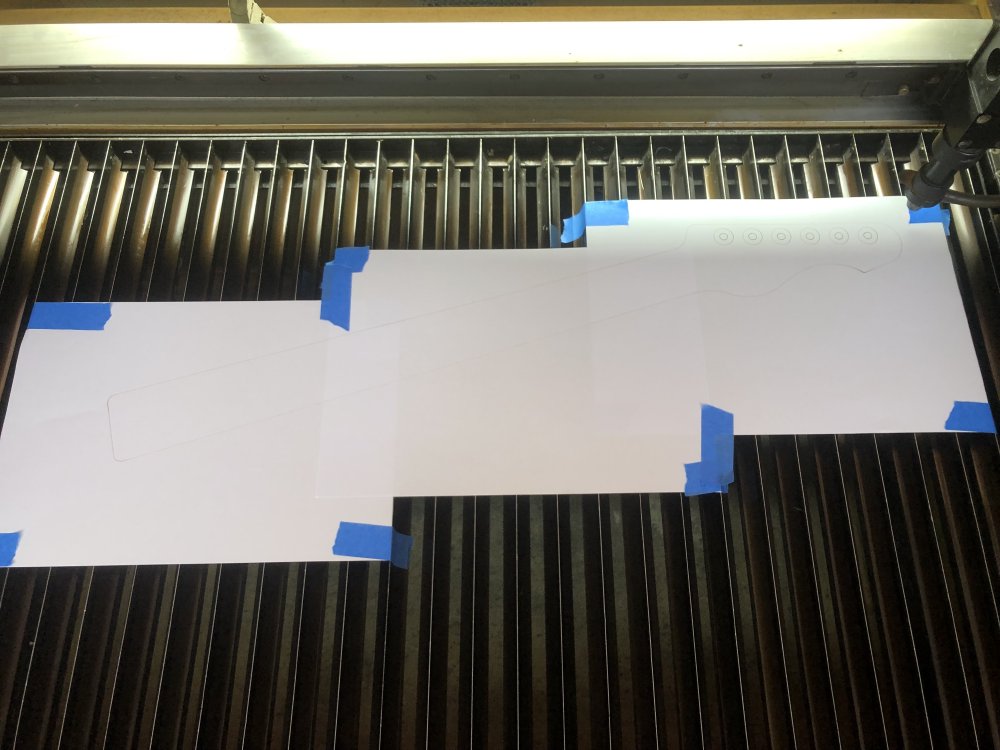
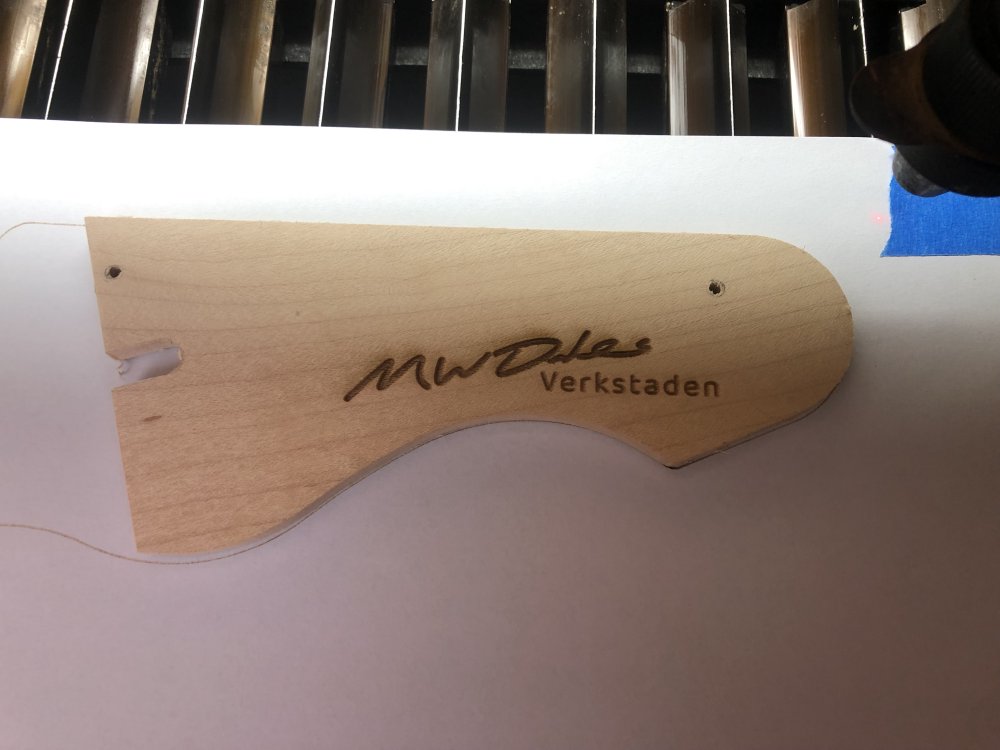
Then, using one of the offcuts from making the neck itself, I can verify everything is indeed lined up and I have the correct design loaded before I put the correct neck in place. This is why I tend to keep these bits around.
This is a fine plan in practice, one I’ve done before, but you do need to be vigilant about then never resetting your origin as you change between necks, otherwise you need to re-do the paper stage. As it was, whilst I’d set up all my files to let me avoid needing to re-origin, the elderly laser-cutters the local maker-space are staring to get flakey, and at one point they got into an error-state where I had to reboot the machine (a hat tip to Jonathan for helping me out here), which meant I had to re-origin everything once more before continuing.
It’s quite unsettling to have the laser-cutters fail like this when the cost of failure is so high, but Jonathan convinced me that once setup the machine was unlikely to fail again, and so I crossed my fingers and a lot of careful checking along the way, I got my job done. Here’s a video of one, sped up four-times:
You can see that it does the etching top to bottom, and then it does a final pass where I lightly do an outline burn just to assert the edges more. I’ve noticed with these laser cutters that it doesn’t turn off hard when it reaches the end of a pass, the entry side is well defined by the exit is less so. You can improve this by having it do alternative lines in opposite directions (which is also faster) but doing an outline pass like this really does give it a crisper edge.
And the final result ready for transport back to the workshop:
A closer look back at the workshop, and I was really pleased with how these have turned out after all that stress both about the production and not knowing how I’d like the new design before seeing it in place:
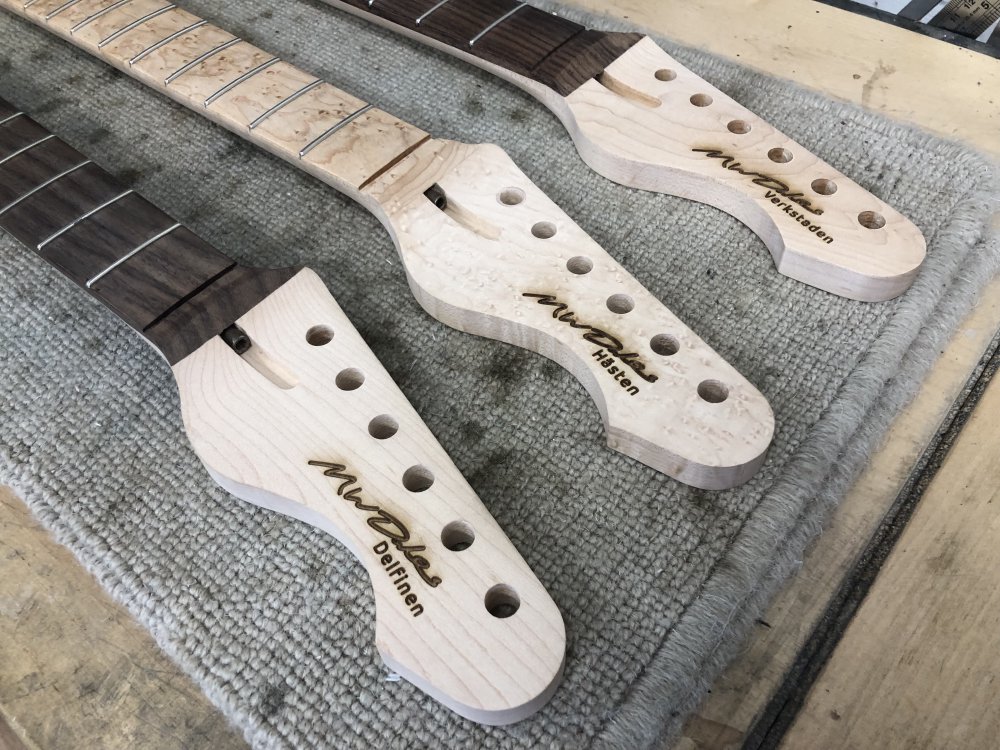
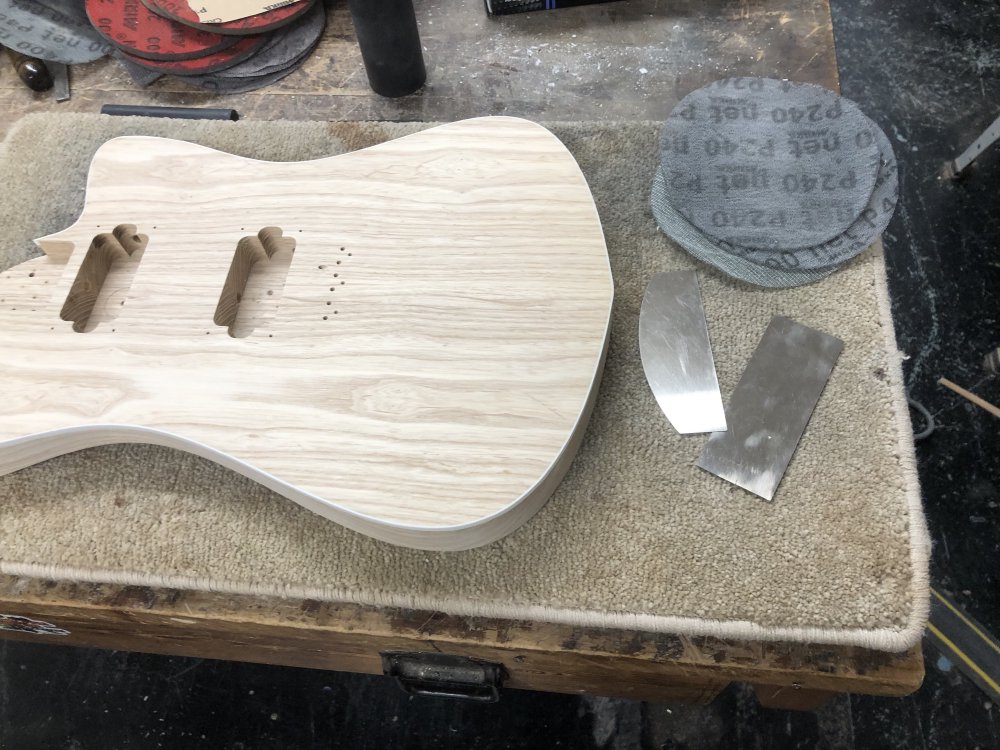
They were still a little dirty at this point due to the crud left around the etched area by the laser-etching process, but a little bit of sanding later they were looking nice and sharp:
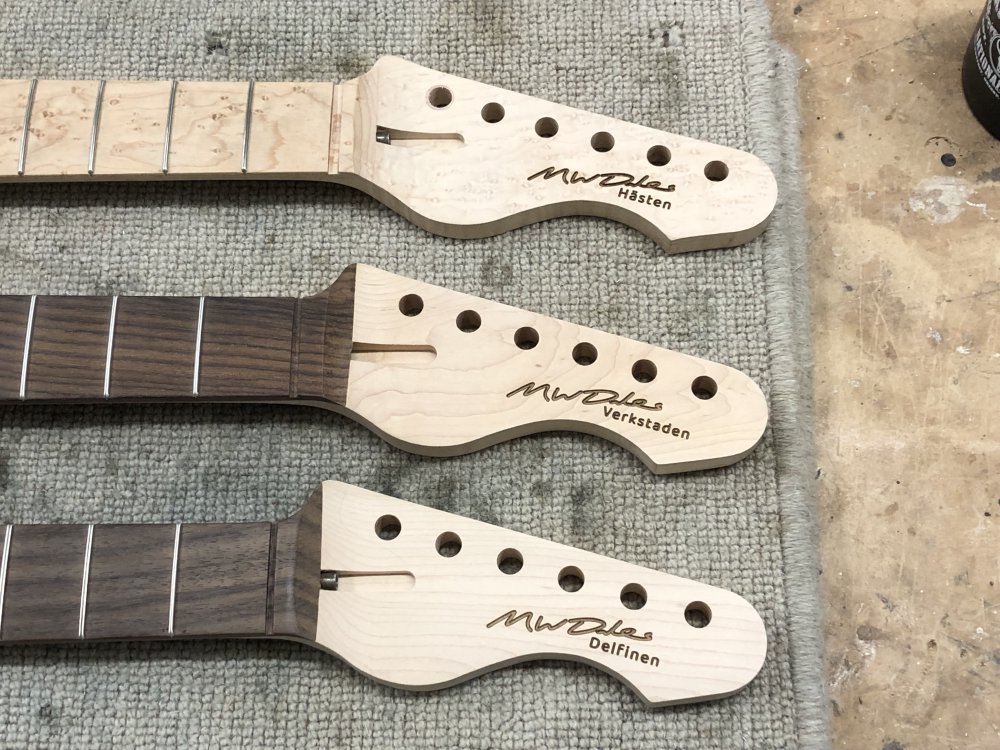
There’s quite a variety in darkness of the logos - all totally acceptable, but it’s a nice reminder how wood varies. All three of these necks are maple based, but each one reacted a little differently to the burning. In theory I could adjust the power, but dialling it in to get all three to the exact same consistency would be a lot of effort and it’d never be totally perfect.
So after a lot of angst, I’m really happy about how these turned out. Perhaps at some point I’ll return to the Electric Flapjack logo, but as an evolution I feel this has come out quite well. I feel it better reflects that these are hand-built guitars by an individual, something I feel is more relevant as I’ve moved into making my own designs rather than building instruments based on the designs of others.
Delfinen
On the topic of my new designs, here is Delfinen sat on the workbench together with its freshly etched headstock:
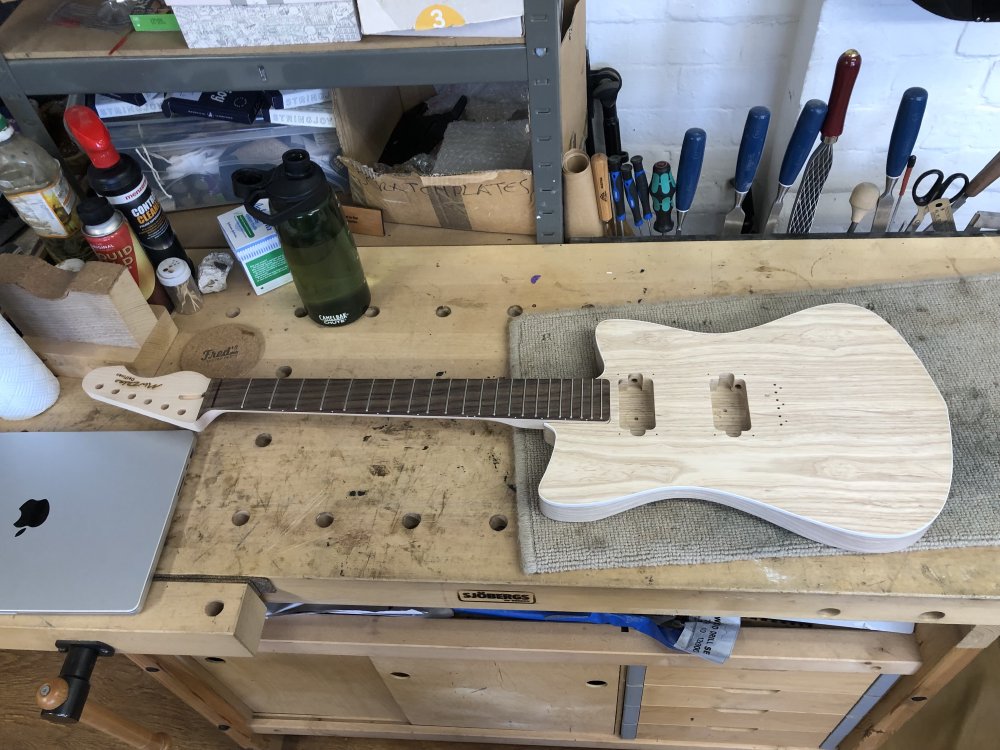
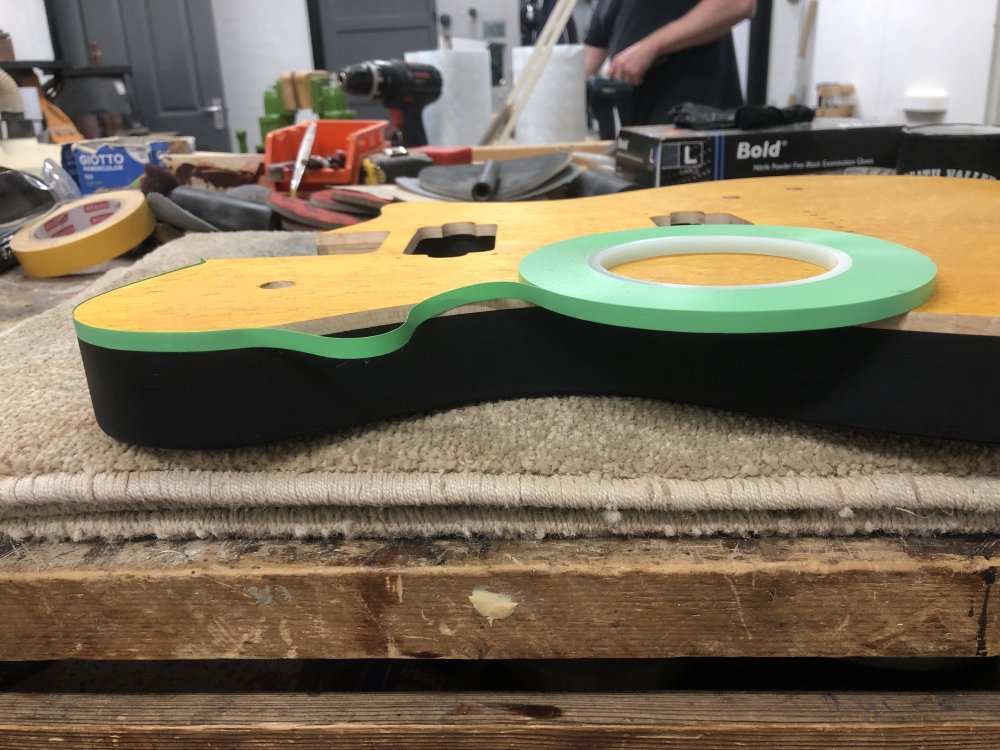
It’s a bit self-indulgent, but I’m really pleased with how this design looks. A small scale-length offset guitar, with a hint of Danelectro to it perhaps. But it’s a shape that feels fresh to me, and I’m really pleased with how it looks so far. I can see it sitting there next to my Apple laptop, and I think that’s perhaps in part why I like this design: in contrast to the noise of Älgen, this is a much more elegant shape, particularly with the binding defining the edge cleanly.
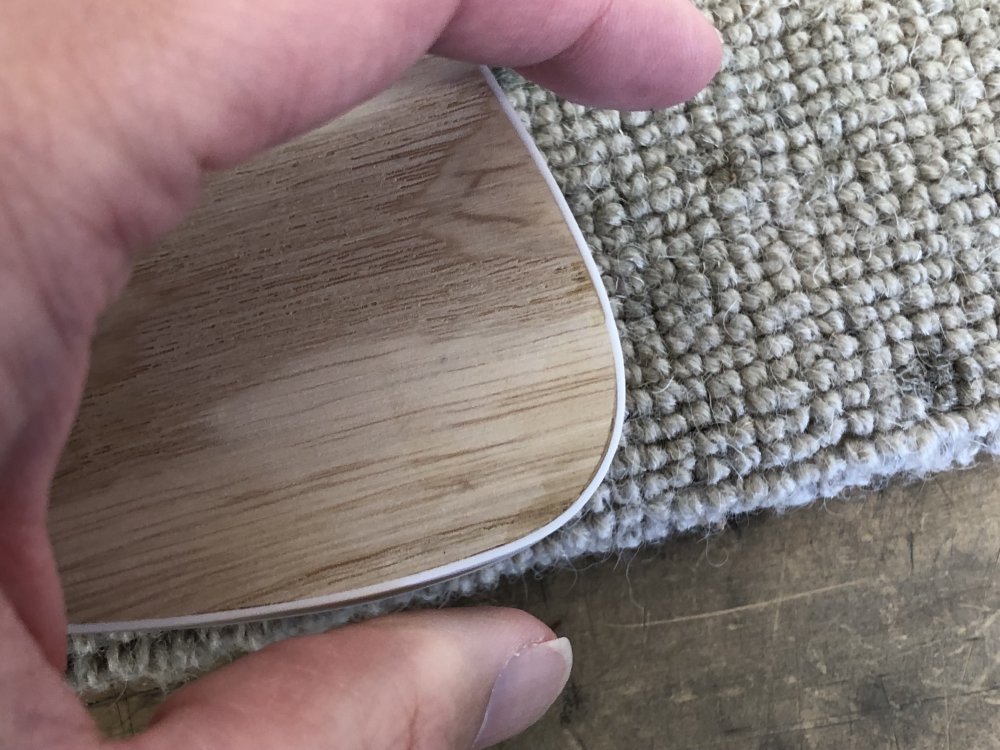
That said, the binding is still something that I kick myself of taking on, despite how well it looks, as binding is really quite tricky to get perfect. In the previous post I took a look at how the glue had spilled out of the channel and where I wired it away there was still evidence of the glue in the grain if you got it just right in the light, and so I took another crack that trying to clean that up a bit:
The risk here is that if you take too much away you’ll make the binding notably thinner in that spot compared to elsewhere. So whilst I got it better, I didn’t go for perfect for this reason. We’ll just have to see what it’s like once it’s stained now.
The binding also had started to peal back at the tightest corner of the guitar:
This is the second time I’ve had to fix it, and the root cause is that I didn’t get the binding tight enough around the corner when I did it originally: I probably needed to apply more heat to that spot to get it to bend better. I applied some high-whicking super-glue to it and held it in place by hand this time - I think the last time didn’t take because I used a clamp, and getting that corner to clamp well is a pain. So I just used my hands and was very careful not to stick myself to the binding, as that would have been embarrassing.
Here’s the results a little while later:
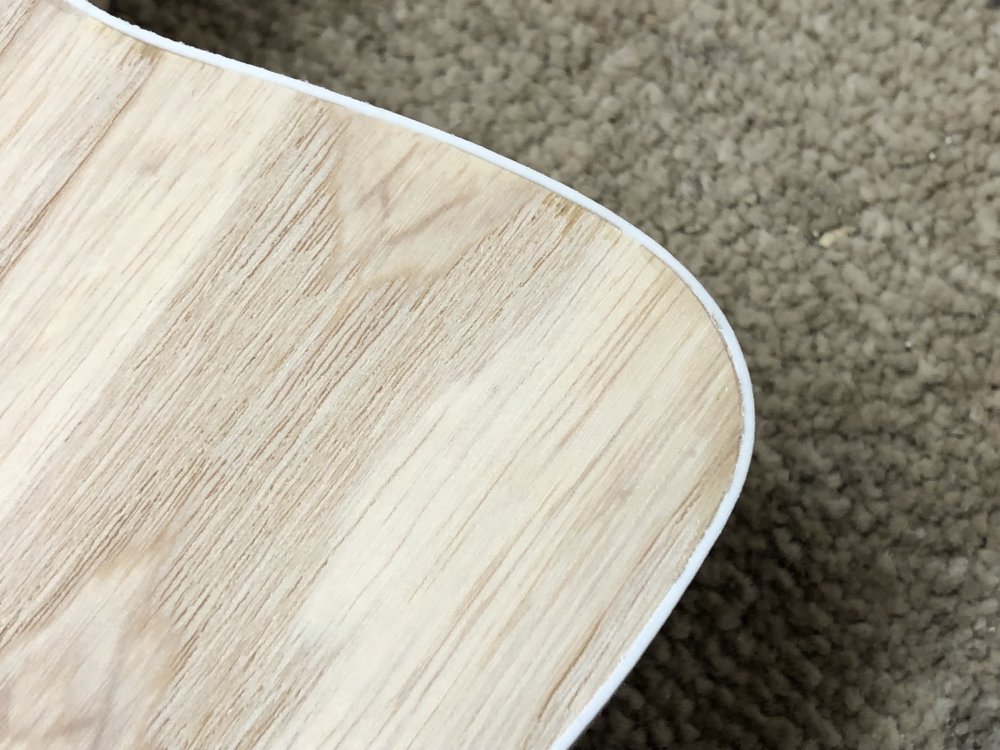
It’s not perfect, there’s an obvious glue line there, but because I have too much binding here, I’m not sure that short of cutting it and effectively removing a tiny sliver I can do much better, and at this stage I think it’s good enough that when you stand back from the guitar it looks fine, and it’s certainly not the first thing you’ll notice with everything else:
Certainly I’m not happy with it, but I think getting that perfect right now rather than getting on with the rest of this instrument prototype would be an unwise investment of time. I’ve learned to be more careful next time, and for now it’s good enough to be getting on with. I’ll just have to accept that nagging voice in my head every time I look at the instrument :)
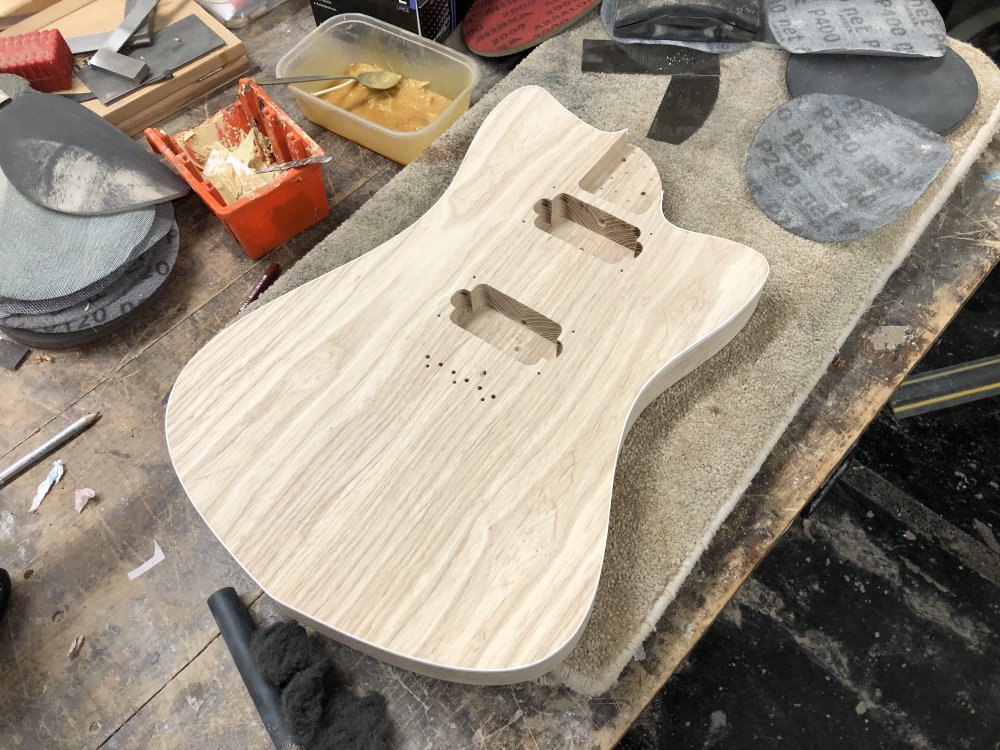
The next step then is to do the staining, which I’ll start next week. I dug out all my wood stains to check I had enough:
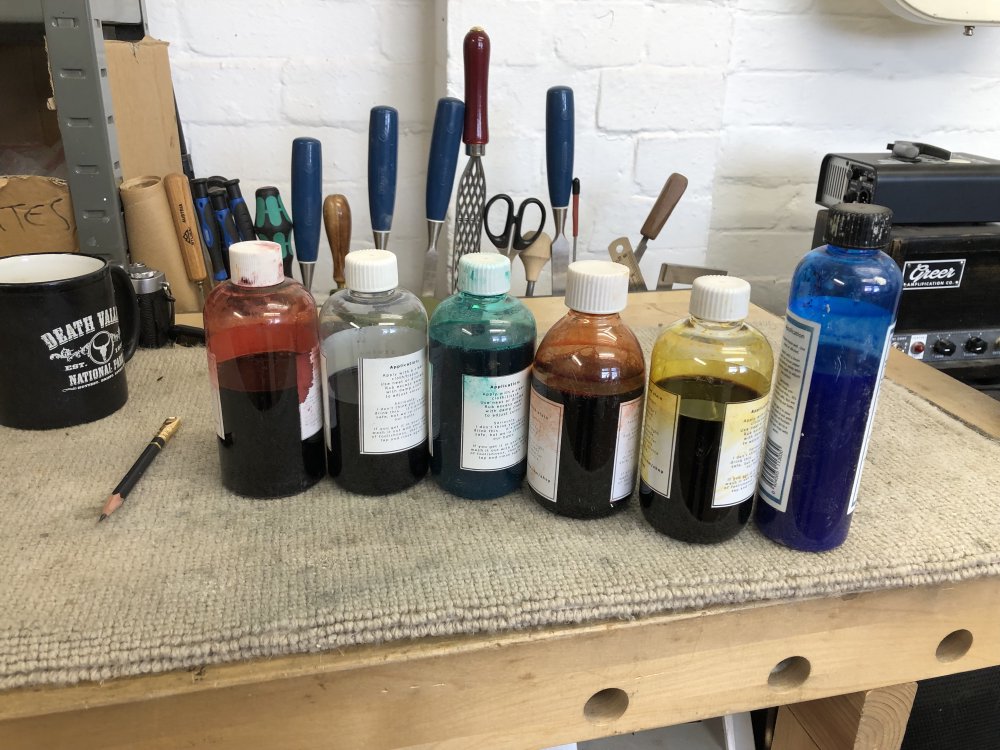
My plan is to stain it orange, but now is the time I get to second guess myself given the range of colours I have to hand :) If you want to sway my opinion before then, drop me a note!
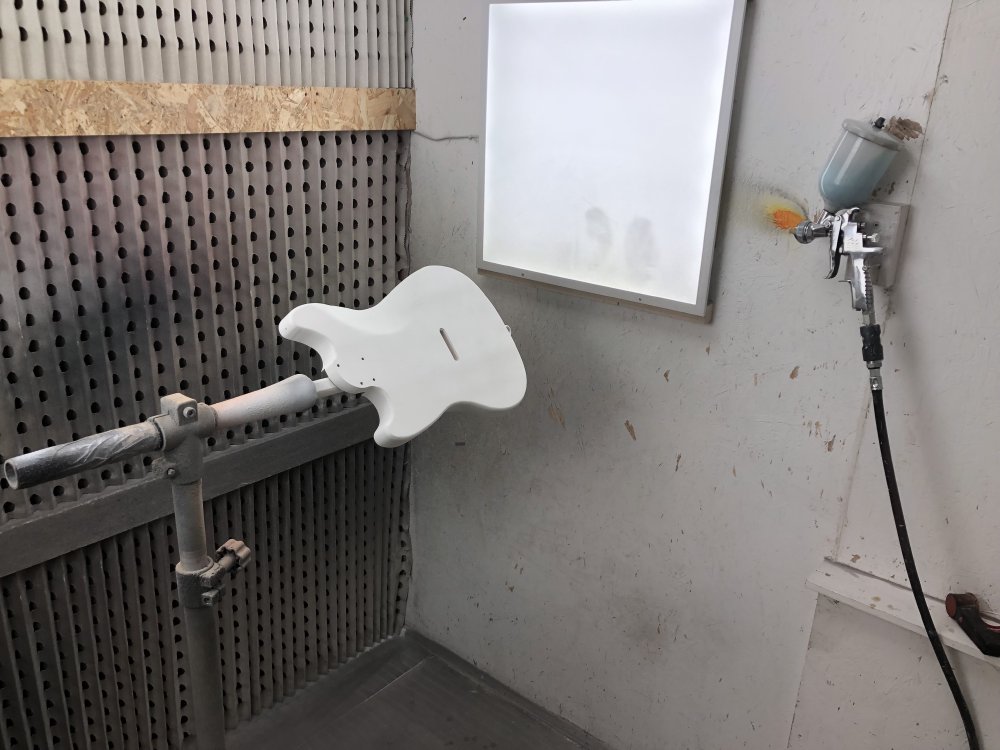
Painting
It’s been a few weeks since I got into the spray-booth to work on the bodies for Verkstaden and Hästen, between travelling and the strange hot spell we had. But it was time to pick that back up, and actually get painting. Thus far both bodies have had four coats of primer, and now it was time to get onto what I think of as the main event, but is actually just a tiny part of the process: applying paint. I’ll just do two of paint, before then doing 4 to 6 coats of lacquer. It’s another one of those processes where the bit you think you’ll spend your doing is really just a quick bit in the middle of prep and finish.
Before painting though, I once again needed to sand back the last two coats of primer on each body, starting with Hästen here:

And then Verkstaden:
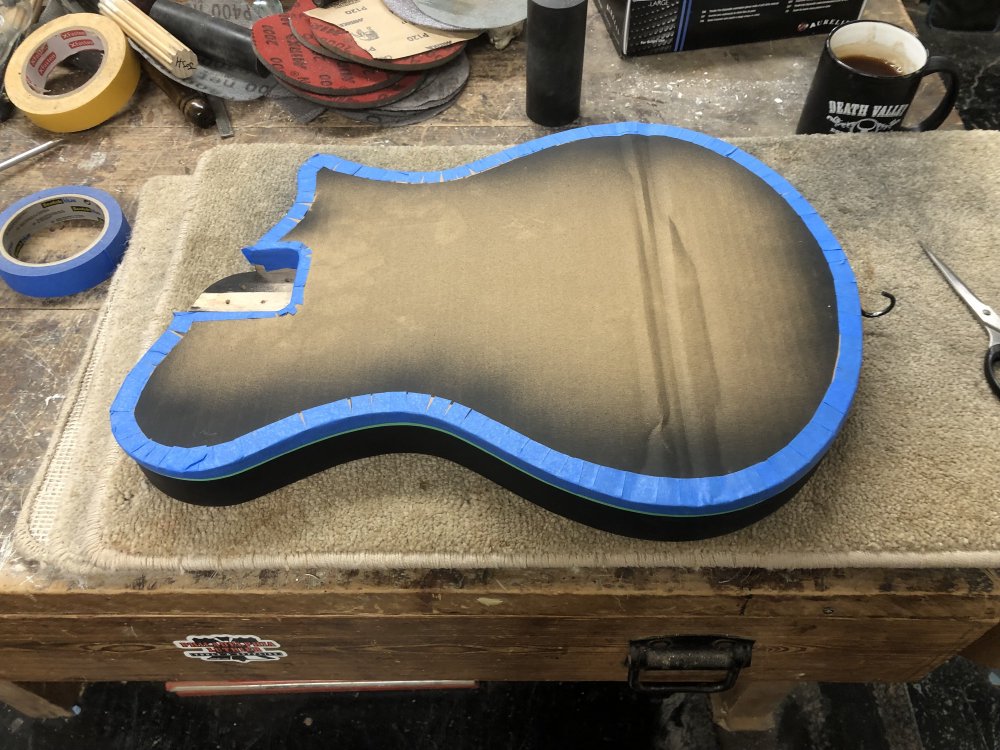
At this stage my workshop-mate Matt, who is mentoring me through the process, advised that I remove and re-tape up the top of Verkstaden, as there’s a risk if I have too much paint build up on the tape line I’ll pull away the paint when I remove it. So I had the joy (it isn’t a joy) of re-taping up Verkstaden to mask the yellow top surface and the natural wood binding again.
Once I’d protected the natural-binding edge, I then taped back on the cardboard template I’d laser-cut to protect the front.
With that done, it was back into the booth:
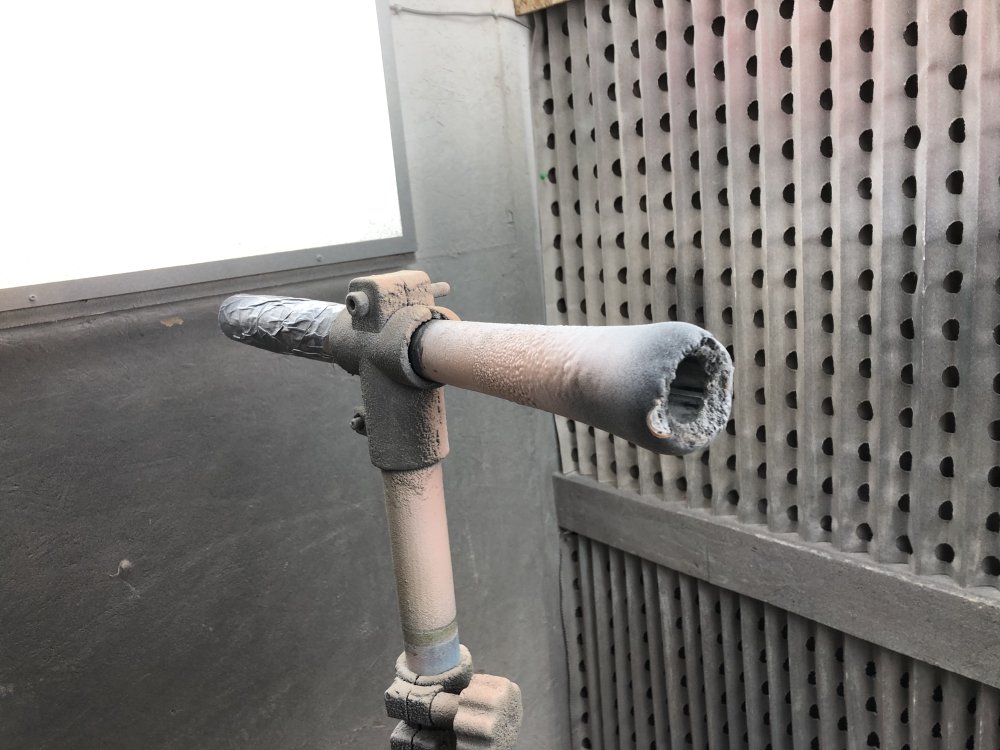
I just want to take a moment to appreciate the stick into which the guitar is mounted on the stand there. You see how it flares out towards the end? That’s a couple of years of Matt painting guitar bodies right there - the stick is a consistent thickness, all the flaring is just built up layers of paint!
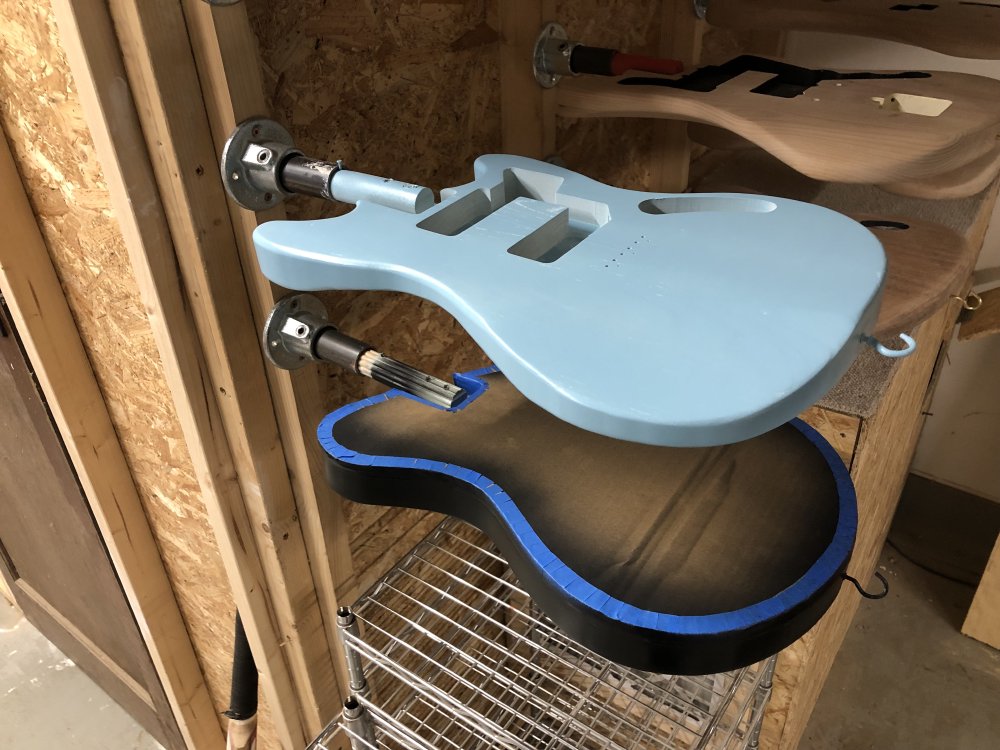
This is both bodies after their first coat of paint. Hästen finally getting a coat of sonic blue after all the white primer, and Verkstaden getting another coat of black.
Paint is a long thinner than the primer I’d used before, which means you have to be much faster with your movements, and not let too much build up in any spot otherwise it’ll run. Whilst on Hästen this was easy to see, going as it was from white to blue, on Verkstanden it was much harder to track doing black paint onto black primer, and I overdid it on the sides in one area. I tried to take a photo, but given the lighting in the workshop (outside the spray-booth) you can’t tell, but this meant it got just one coat of paint and I had to stop. I’ll need to gently sand smooth the area I over-sprayed before going again. Frustrating, but given this is my first go at painting I’m not surprised. And Verkstaden was a guitar I started to let me test out new workshop processes on, so it’s living up to its name!
Hästen did get its second coat though, which filled in the colour nicely:
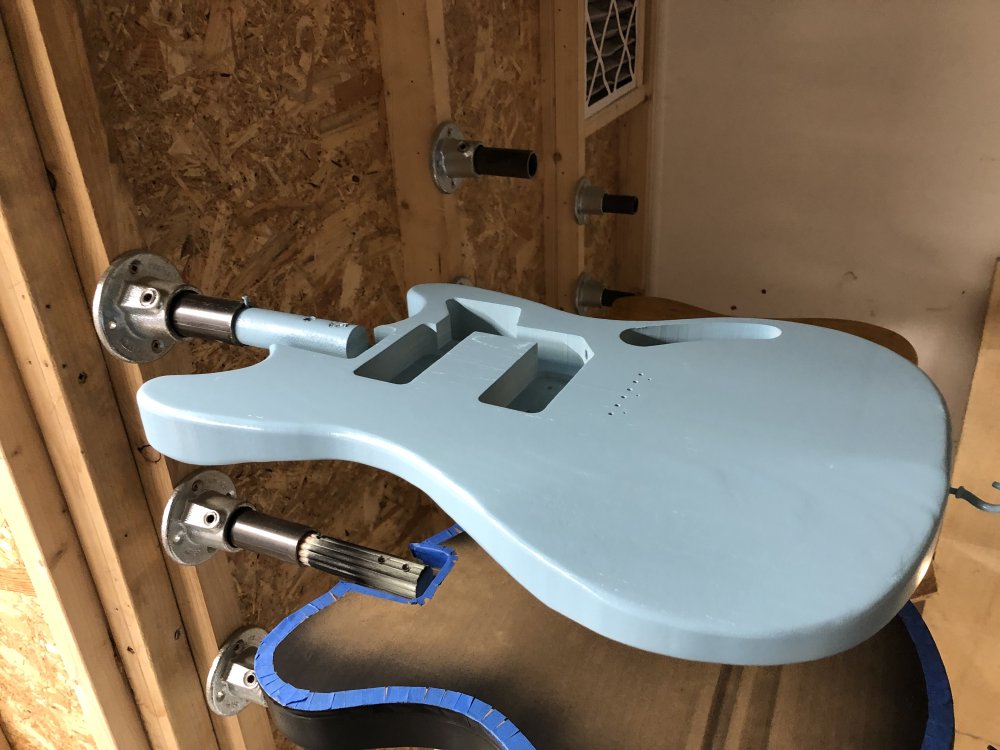
It’s looking super rad in the sonic blue. Despite having built quite a lot of guitars thus far, this is the first that I’ve tried to paint, and it gives the guitar a totally different look and feel (I guess literally, but I mean more metaphorically). I’m really excited to put this one together and see how it comes out.
I’ll let this dry now, and see next week if I want to do any more colour layers, or whether I’ll move onto the lacquering.
Making dust
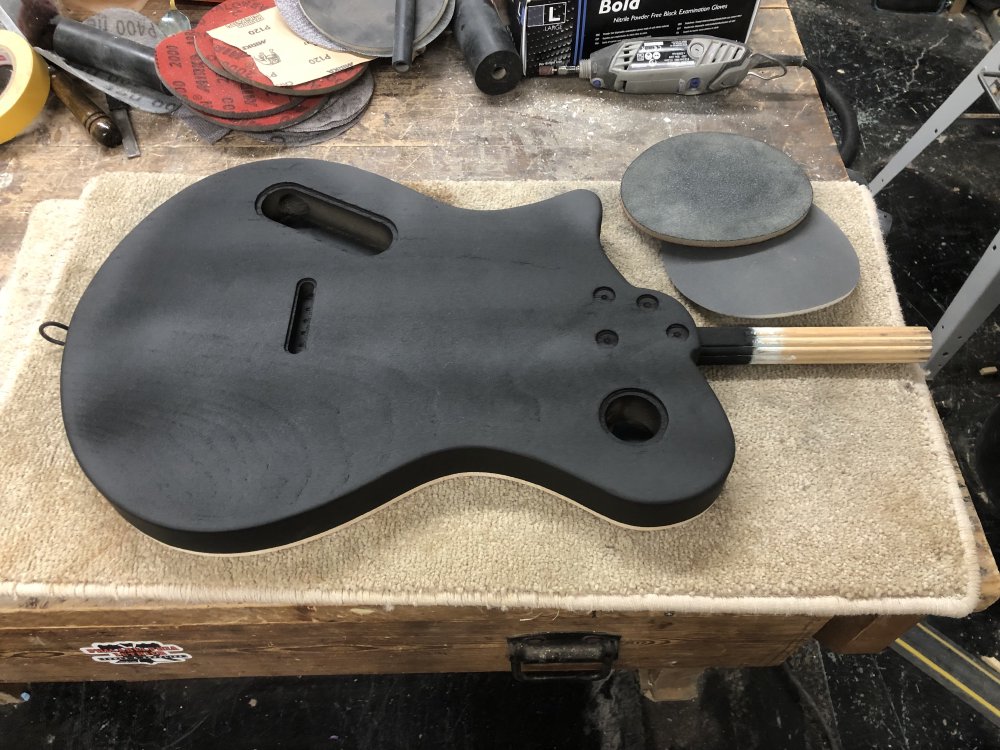
And that’s all the exciting bits in the workshop. Otherwise it’s just been making dust, and trying to get those three necks ready for oiling, which involves just a lot of sanding to get any marks out of them from when they were carved, removing any final bits of glue from the fretwork, etc.
I went through all three necks over the course of an afternoon, and I think they’re about ready to go. I was quite tired by the end of it, so I’ll do a final check next week to see if they’re up to scratch or if any more work is needed.
I do need to also order some more wood oil, as I don’t think I have enough left from previous batches to get all three done.
My first guitar
As I mentioned in the opening, whilst up visiting my family I got to take custody of the OG family guitar that my Dad got in the early nineties. It’s a Westfield strat-copy, which I assume was a budget friendly strat alternative at the time, and a company I know little about other than this guitar. I see that they were based in Scotland and formed only a few years before we got this instrument, and now are still going (albeit under new ownership), focused on acoustic instruments.
We’d never been an obviously musical family before, and I’ve no idea if he could have predicted the impact of this instrument over time: my brother has now been in several performing and recording bands, both as a guitarist and drummer, one of my sister’s children who had this is now applying to university to study music, and for me there’s all this that you’re reading about now.
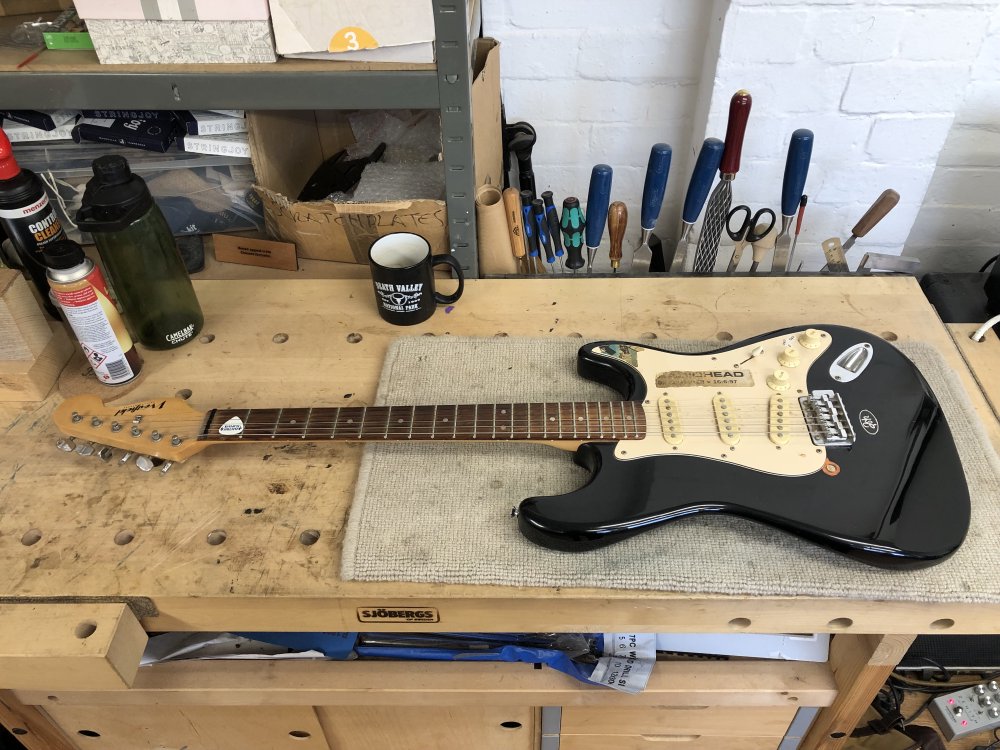
My Dad got this back when I was in the later years of high-school, and at a similar time my friend Dave also got a guitar, and so started my connection with the instrument. I played this for a couple of years before buying my own first guitar, a Mexican Fender Telecaster, after which this guitar went to my sister (where it got the stickers - when I was playing this I think The Bends was just hot of the press, and OK Computer was a surprise waiting to happen), and then down to her kids. They’ve now both got their own guitars, and this was sitting unused for the last while, and so I’ve now got it back in my hands for a little while.
Amazingly it still plays quite well for an instrument that’s been passed around the family for what has to be about thirty years now. The electronics are in need of some love (two pots are seized and the switch crackles if you look at it let alone knock it whilst strumming), it has a chip out the fretboard and the nut is cracked, and it’s missing one strap button (I have no idea how that happens). Yet despite all this I plugged it in at the workshop to our amp setup and it sounds not bad - certainly much better than I was fearing given the strings probably haven’t been changed in what seems like a decade.
My plan is just tidy it up, giving it new pots and a new switch, replace the cracked nut and the missing strap button, and see if I can patch the chip out the fretboard. But other than that, I’ll play it a little for nostalgia, and then release it back into the family, hopefully ready for another thirty years of service.