A Week in the Shop
Published 9 Apr 2023
Tags: älgen, harley benton, staining, verkstaden
Less time in the workshop this week, as my partner and I went on vacation to Wales to meet with my family who were there for the week. It was lovely to see them, and before you ask, yes I did take a guitar with me, and yes I did take it with us when we went hill walking so I could get a silly photo for the blog… I hope you all appreciate the things my partner has to put up with :)

It was lovely to be in such dramatic landscapes again; I grew up in Scotland, but now live and work around the very flat fens of Cambridgeshire, so I miss views like these a lot. We had a limited time there, so I couldn’t just stand around and play guitar in that landscape, but it was very tempting all the same. Certainly this is the most scenic place I’ve every played guitar, and something I should try and do more often, even if that is a little difficult where I live.
My nibling had brought their guitar with them too, which was a Harley Benton Fusion-III HSH EB FBB (names like this make me feel less bad about my Swedish guitar names), and so I got a chance to play that. It’s always fun to play a new guitar, no matter who built it and how much it cost: every instrument that can make music is worthy of attention in my book. That said it is interesting as a builder and engineer to see what a few hundred pounds can get you guitar wise these days; I was both interested to see yet again much better guitars are for that money these days compared to when I started playing, and also to work out where I’m justifying the cost of a hand-built guitar given how good off the shelf builds are these days. Whilst I can see some areas where the polish isn’t as good as more premium guitars, the fact that I happily sat there playing the guitar for fifteen or so minutes before being required to head off tells you they must be doing something right :)
More Staining Tests for Verkstanden
Last week I was trying to do some experiments with wood stains, trying to get a nice burst effect, and I did some more of that this week. This was how the samples I made last week turned out having dried off properly:
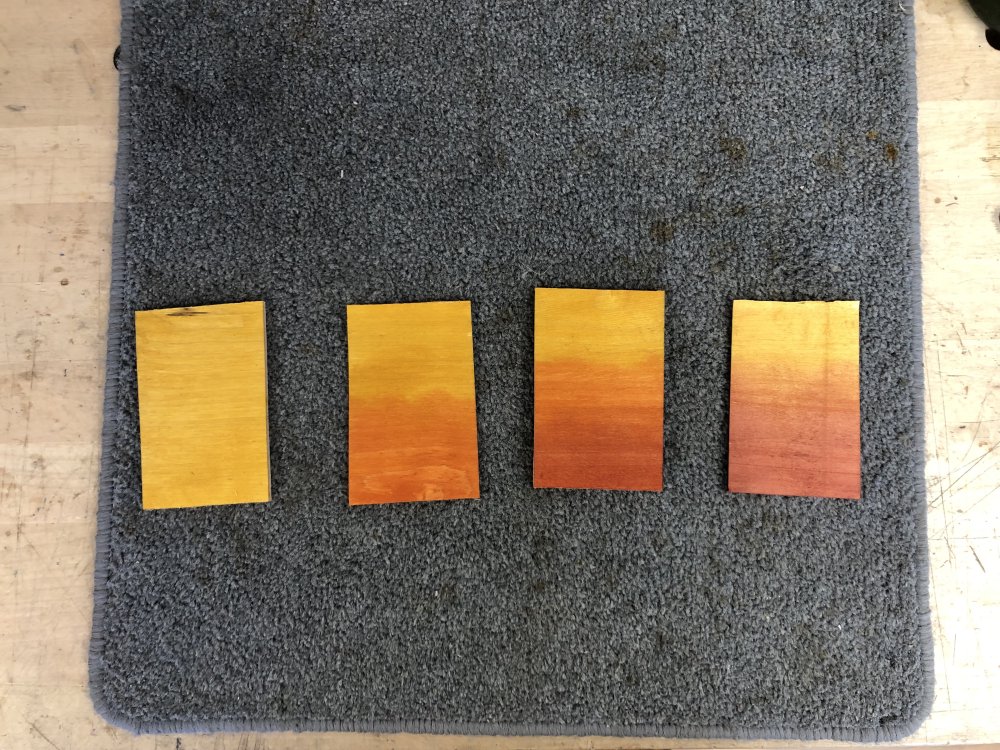
It was a mixed bag, with the orange and yellow one (second from left in the picture) being the best colour-wise, and the red to orange one (right most) being the best fade-wise. The cherry red definitely didn’t match the other colours, as it’s much less vibrant - another type of red stain might have worked better here. Overall I wasn’t convinced that any of it was good enough that I’d be happy to do this to a guitar body yet, so I flipped over the samples, and tried again.
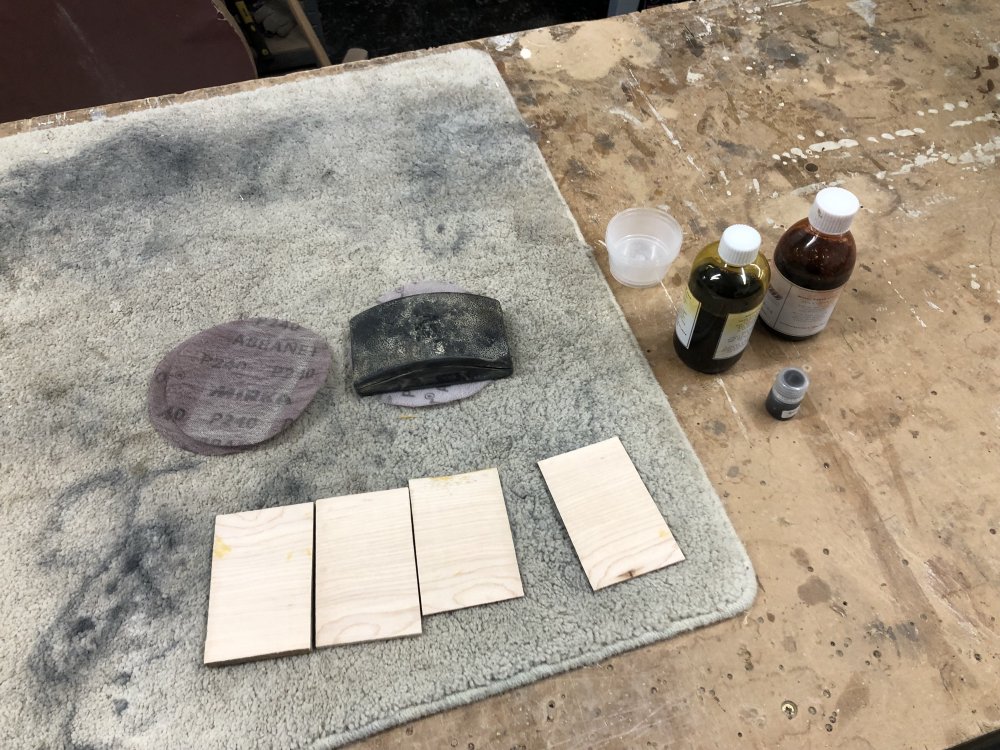
Last time I’d not sanded the wood before applying the stain, so this time I did a basic sanding pass to see if/how that would change things, working my way up to 240 grit. In the past when I’ve stained guitar bodies they’ve been sanded up to 2000, but I was low on time here, so it was a bit of a compromise in how far I went. Having eliminated the cherry red stain I had, this time I added a mixed blend of yellow and orange to try and help me get a more gradual fade, and out of curiosity I also tried using a brown stain sample I had, as I felt perhaps what I wanted was a darker outer colour.
Again, none of these left me that happy. The brown didn’t work at all, it just being a very muddy colour that didn’t match the yellow, and it didn’t really fade well like the red had. The various yellow to oranges were okay, but they mostly convinced me that these were all a bit too bright for what I had in mind. Part of the problem I suspect is that the stains I’m using are designed to be built up in layers to get a deep rich colour - normally I’d do four to six coats, and so with just one coat things felt a bit flat. That said, the one time I’ve used this yellow stain on a guitar a few years ago, it actually turned out orange after four coats! Thankfully this guitar wasn’t a custom request, so I could just roll with it, but it goes to demonstrate why you need to do testing with your stains before you use them in anger!
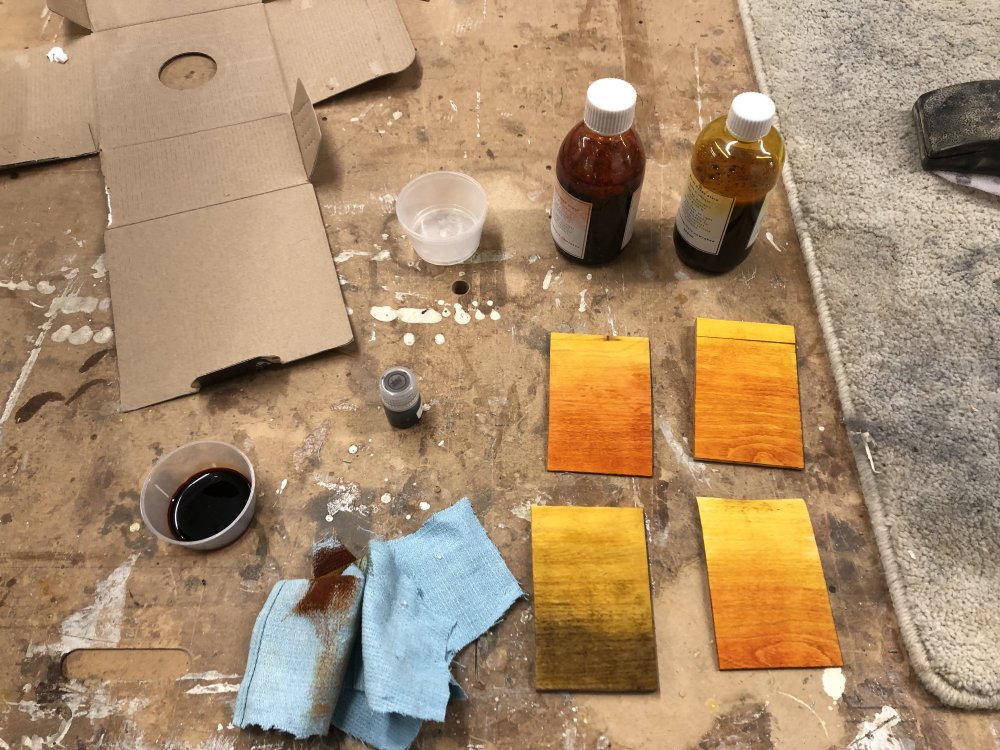
Anyway, the end result was that I still wasn’t happy with the results. At this point I had a chat with workshop-mate Jamie, who has used stains on some of his EL electric guitar models to create lovely bursts. Jamie’s bursts are much darker than what I want, but are undeniably beautiful, so I enquired as to how he got them. He used Joha alcohol-based stains, and had a wider range of tones than I had from my water-based stains, covering various golden yellows, oranges, and browns, and he was kind enough to let me try them out:
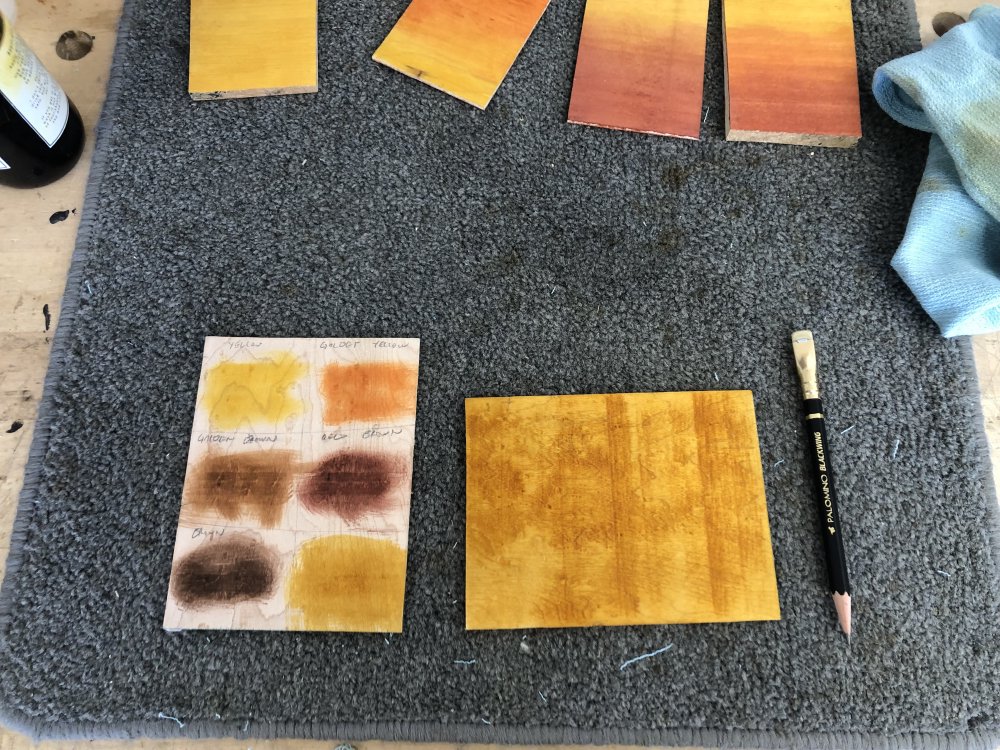
The colours were definitely more rich than my previous attempts, though still not quite popping, but then I realised belated perhaps I need to oil them to get that effect, so that’ll be my next stage. Jamie didn’t quite have the colour I was after, a sort of richer yellow, so I tried mixing some of my water-based yellow with some of his alcohol-based brown, which really shouldn’t have worked, but it did seem to emulsify and I got something more approaching what I wanted, which is what you see on the second sample in that picture.
The main difference between the water-based and alcohol-based stain is how quickly they dry. Alcohol based stains will dry very quickly, which can be useful, but perhaps less good if you’re going for a blend using the technique I was using before, of applying one solid base colour, and then overlaying the second colour. When Jamie does his bursts he doesn’t use an overall base, rather applying in bands one at a time, so perhaps I could try that.
At this stage I suspect I shall scale back my ambitions to do a burst on Verkstaden’s birds-eye maple cap, and instead work on getting a suitably rich single coat that is a deep yellow-tobacco or such. I think the next thing I’ll do when back in the workshop is oil those samples and see what that does to the depth of the colour.
Related, I had a chat with my other workshop-mate Matt about what’s required to use the spray-booth in the workshop. The main thing I need to do is get a suitably good set of filters for my respirator capable of filtering out volatile organic compounds, such as the 3M 6055 filters, and something to practice on that isn’t as complicated as any of the guitars I’m currently working on :)
Verkstaden
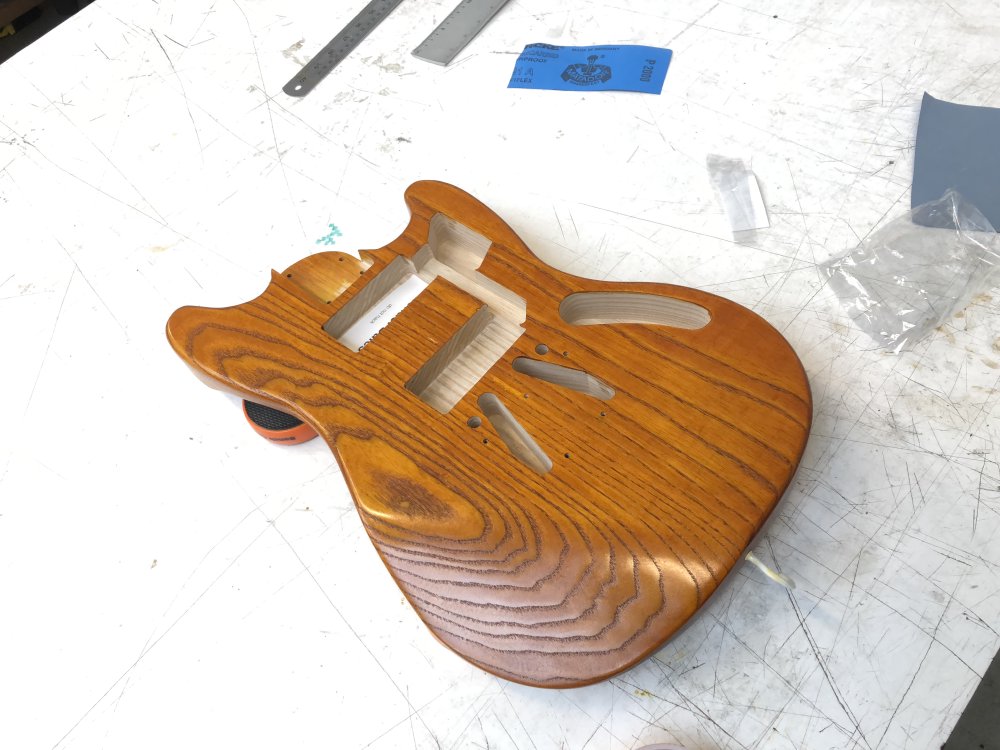
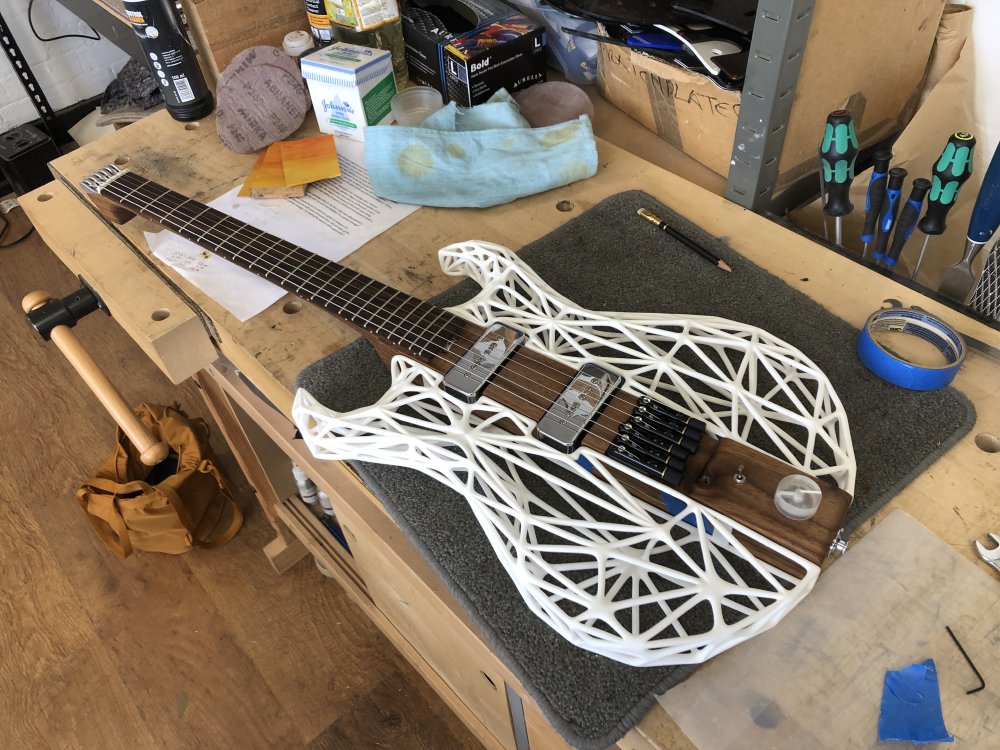
Besides trying to figure out how to stain the top of Verkstanden, I did some odd jobs on it. I thought I was “hole complete” on the body, but realised I was still short the neck mount screw holes. So I dug out the original template, which surprisingly is still in one bit despite a workshop move and not being used in a couple of years, and worked out where to put the last four holes. This was also a fun opportunity to again see how the shape of this guitar has evolved over time:
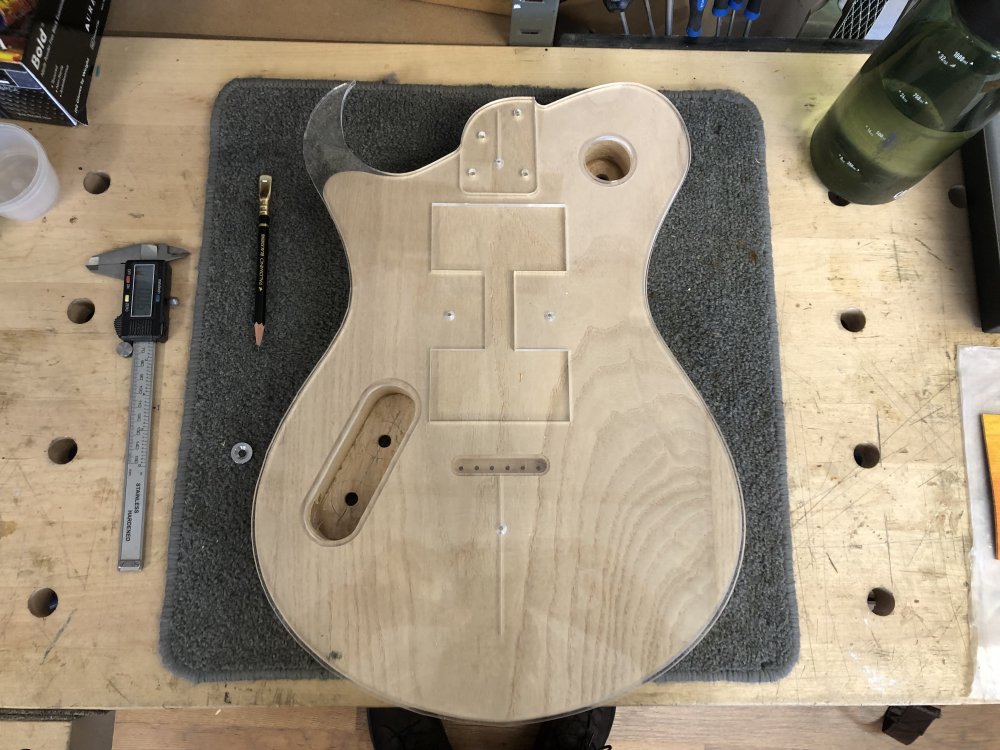
It was a moment then to draw the location of the neck screws with my pencil, and mark the centres ready for drilling with my bradawl:
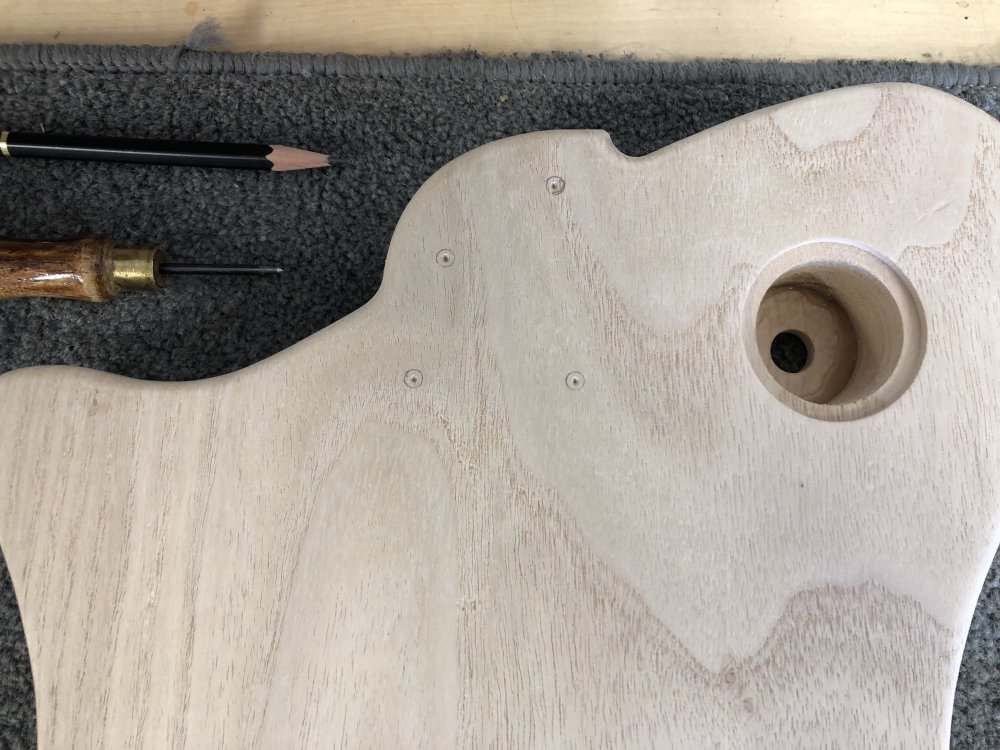
Then it was over to the drill press to make some holes. I use neck ferrules rather than a plate to secure the screws on the back of the guitar, so I made some recesses with a Forstner bit first, before drilling all the way through with a drill bit just wider than the neck screws.

Once that was done I then marked up the corresponding holes on the neck, by holding it firm in the neck pocket and using a screw to make the indent on the neck where I needed to make a pilot hole. I then drilled to just before the fretboard in each location. I failed to get photos of this, but I used a sanding radius block to hold the neck flat on the drill-press, as the fretboard was already radiused at this point.
I also did a bunch more sanding, trying to get the body ready for finishing. I’ll save you the pictures of me cursing as I find yet more marks to sand out each time I thought I was done. In part this is the poplar back, which is just so soft that it picks up marks in next to no time. I’m hoping that by grain filling, priming, and painting the back it’ll be tough enough to handle without issue.
I had hoped to put the frets in the neck, but I ran out of time, so had to instead just make do with cutting the fretwire I had down to size.
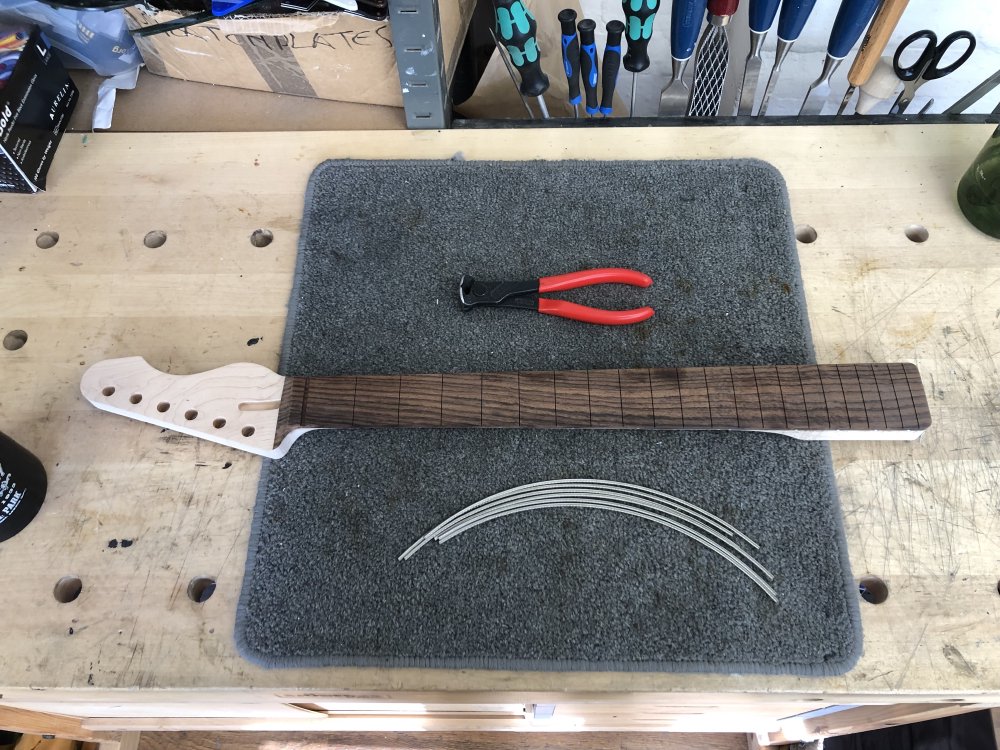
Normally I use Jescar FW55090 fretwire for my builds, but when I ordered the fretwire for this build my supplier was out, and so they subbed some Sintom’s fretwire instead (they did check with me first!), and so it’ll be interesting to see if this is any different to work with.
Älgen
Last week I was processing the custom clear-resin volume knob for Älgen that I’d 3D-printed, clearing up the print supports and painting in the line indicator. I mentioned then that painting the line indicator, as I was using acrylic paint, took a few coats to get a solid colour, and over on the Scope of Work slack Brad Avenson, who builds audio gear which requires a lot of detailing of etched lines on face plates and controls, pointed me to things like Markal paint-stix that people use for this job. They’re designed to fill in etched lines on control faces and the lines on knobs like this, and so I’ve ordered a couple in different colours to test out, as the painting technique is a bit slow and hard to get a consistent finish.
Overall, I have mixed feelings about this particular control. I think the clear look works well in this context, and ergonomically it is perfect: when playing Älgen I can easily find and subtly adjust the volume without looking. Both the position and the knurled edges I gave it, plus the relatively large diameter, all come together to let you adjust it easily whilst playing without having to change focus. If you’re the kind of person who likes to use an amp or fuzz on the edge of breakup and use your volume control to ride that wave in a song, this is great. But it is a bit clunky looking too to my eyes, but that might just be because the heights need a bit of refining - I didn’t make the cavity under the control deep enough so it sits quite high on the guitar. I’m hoping that fixing that will make it feel less visually clunky without ruining the ergonomics that are just on point.
More frustratingly I seem to have a problem with one of the tuners: I keep breaking D-strings. All the other strings are fine, but whenever I have to unstring and re-string the guitar, I almost always break the old D-string I was using, and this week I even broke the new string I was adding. I thought perhaps just the strings I tend to use might not work well with this unusual style of tuner, but I tried a different brand and got the same result.
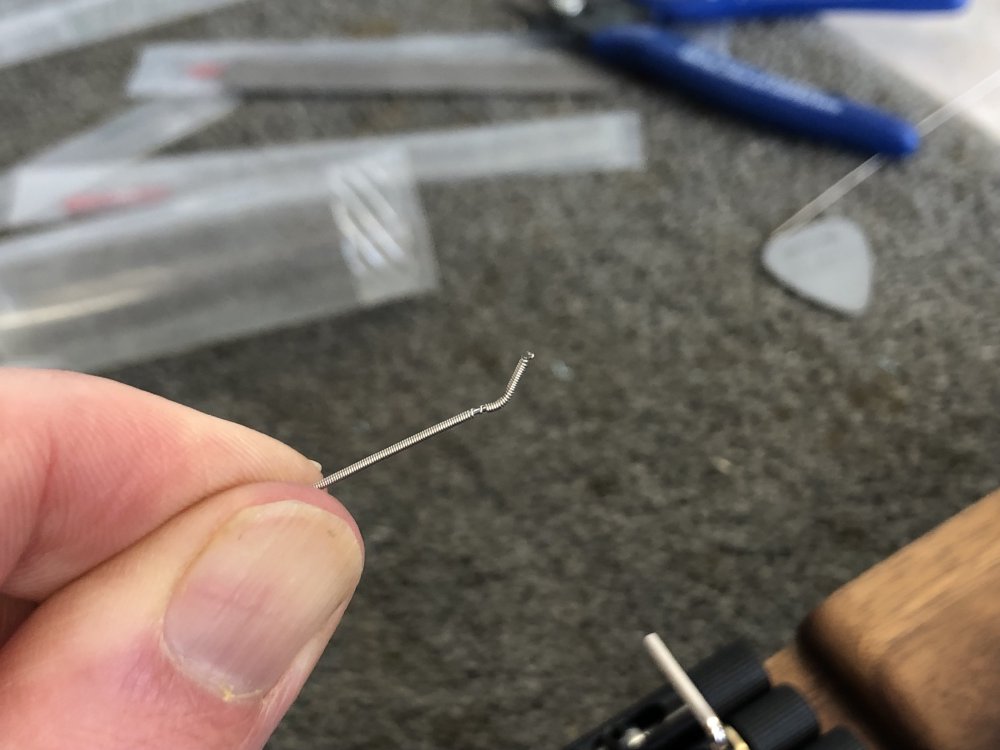
The problem seems to be that on the D string the outer windings are coming undone, which makes the string slip whilst I’m tuning it, and eventually causing it to break fully before I get it into tune. You can see in the picture that the unravelling happens on the body-side of the place where the string is clamped, so I infer from that that it’s not the clamping that is the problem: if I clamped too hard I’d expect the outer winding to break at the pinch point, and if I was not clamping hard enough I’d expect it to just slip dragging on the other side of the pinch point. It could just be that I’m clamping the outer and the inner core is slipping, but I’ve tried varying degrees of tension on the clamping screw with different strings and had them all fail in a similar way.
I had a chat with Jamie, and his suggestion is that the bridge saddles might have some internal burring from when they were machined that is catching the string as it exits. To try combat this I used an old bit of wound guitar string and pulled it back and forth through the mechanism, and that did seem to make it slide better. Unfortunately I ran out of D-strings, but thankfully Strings Direct will sell individual strings, so I’ve ordered a bunch to let me test this. But that does mean it’ll be another postal cycle before I can see if this is fixed or not!
So close to being finished, but still not there!