A week in the shop
Published 15 Jan 2022
Tags: 3d printing, älgen, cnc routing, fusion 360, jigs, laser-cutting, templates
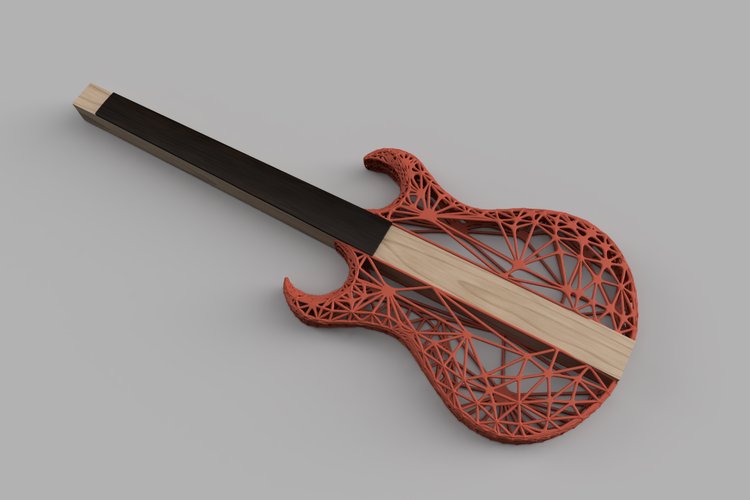
What feels like a good while ago, I made a mockup picture of this crazy idea I had for a guitar, where it’d be part 3D printed and part hand crafted:
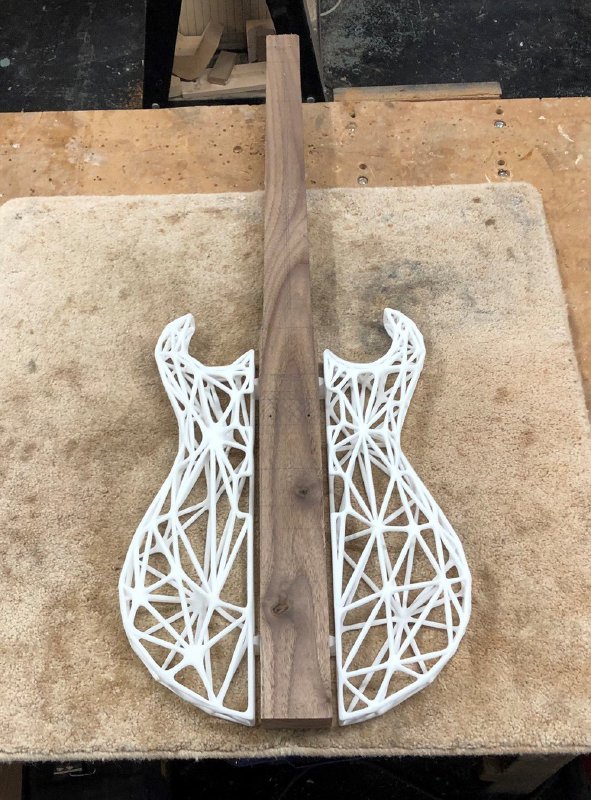
This week, it was a rad moment when I got to see the actual guitar get to the same stage of finish as my original quick mockup:
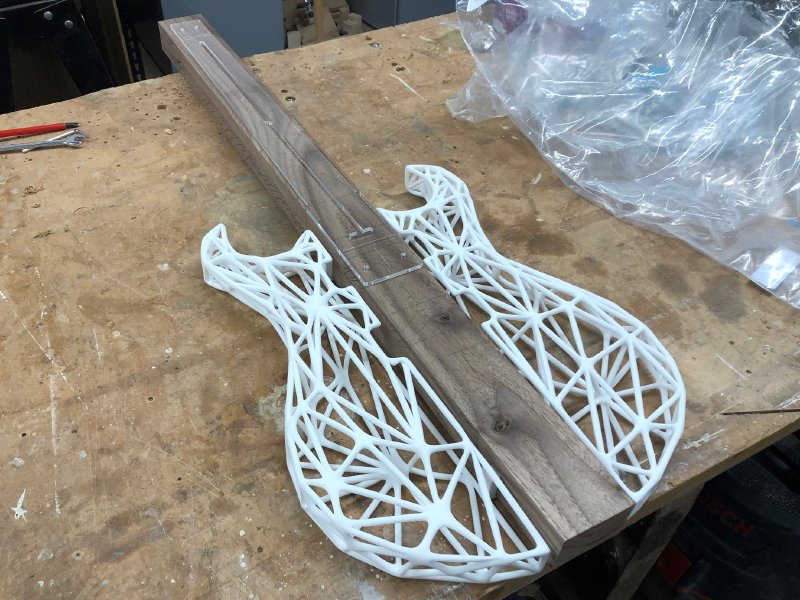
Suddenly, my Älgen guitar design feels an awful lot more real. Whilst it was amazing last week to see the 3D prints when they arrived, now I’ve introduced them to the rest of the guitar, I get much more of a feel for where this is going to go, and I’m genuinely excited now to get this guitar built and out there, as it’s such a cool thing to see in the flesh. After months of seeing it in CAD, I finally have a sense for the scale, and how it’s going to feel and it really is everything I hoped it would be at this point.
But it’s not a guitar yet, so let’s get on with the rest of the job!
Now I need to get that core bit of wood heading towards the right shape. Whilst some of the shaping I plan to do using just a pencil and ruler to guide me and some hand tools, some profiles on the neck will need templates to ensure they’re spot on (after all, this is a musical instrument at the end of the day!).
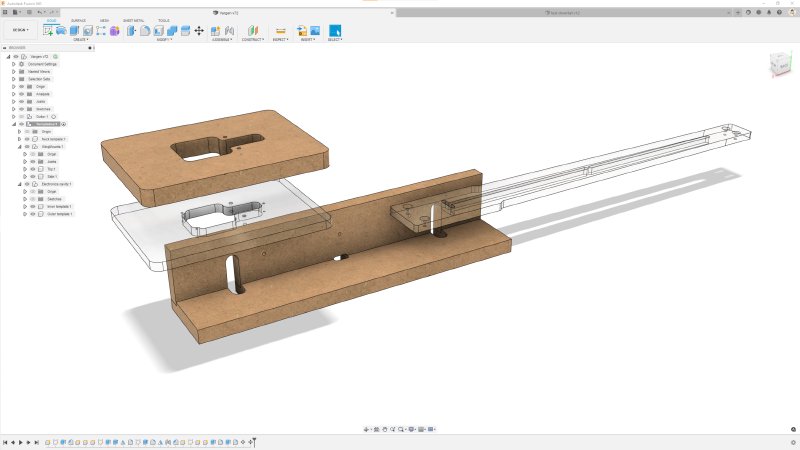
I’m going to use four templates in total to help me get the construction made:
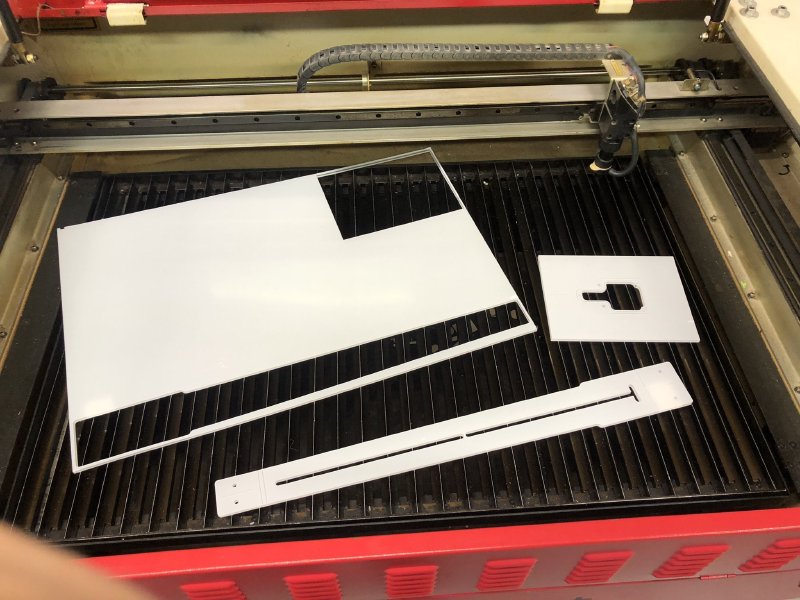
In last week’s notes I was still fiddling with template designs, but all that work paid off, and this week I went into the Cambridge Makespace and cut all the templates I need. Two were laser-cut in clear 5mm acrylic (it looks white as it still has the anti-scratch cover on):
The other two templates needed more depth to them, so for that I had to go pay a visit to the CNC-router to cut them in 18mm MDF.
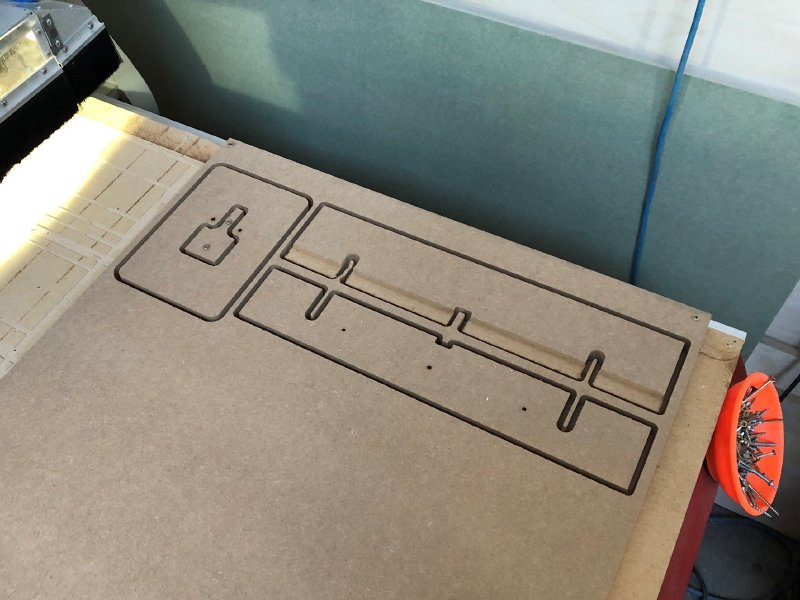
I was delighed to note that in my absence from Makespace that someone has fitted a new bright light to the hood on the CNC router, which you can spot just off to the left here. Great job whoever did that, as it really makes it easier to keep track of the state of the job.
With all my templates cut, I headed back to my own workshop out in the fens, and got set to apply all these new tools.
The two larger parts you can see on the CNC-router above are for the two-axis jig that’ll let me make the mounts for the 3D printed body wings - you can read about how that’s meant to work and see my prototype of the jig in this earlier post. That jig needed gluing, so my first job was to clean up the rebate of MDF fluff, apply glue, and clamp it up: I’ll get to try that one out on my next visit to the workshop.
So instead, to conclude this week I set about shaping the neck end of the wooden core using the larger of the two templates I laser-cut:
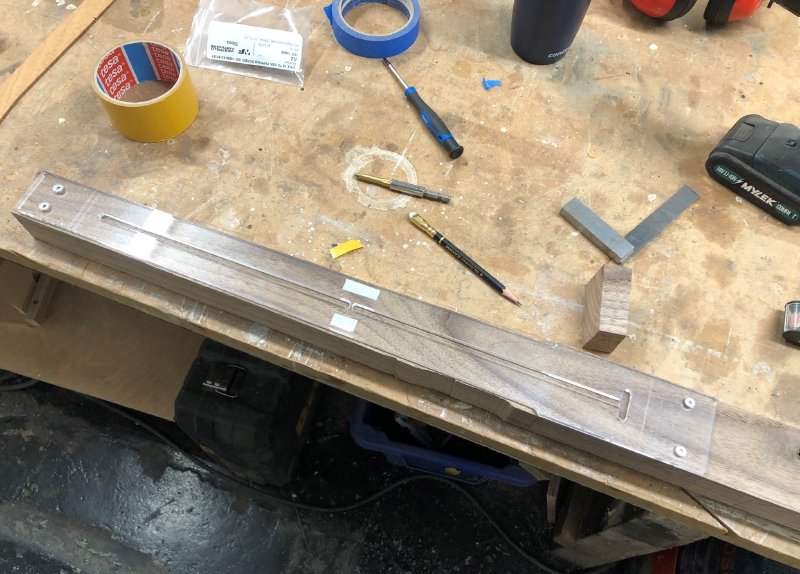
You can now see it is actually made of clear acrylic! I use clear acrylic because it lets me put guide markers on the back to let me align the template with things like the center-line and the zero-fret which I’ve marked on the body already.
I’ve used this style of template for my regular bolt-on necks in the past, but one area that I think the laser-cat acrylic falls short compared to my MDF templates is in lateral rigidity when the templates get narrow. This is in part self inflicted, because I try to use the same template to let me both route the outer neck profile and the channel for the truss-rod, and at the same time just use screw mounts at the far ends of the neck: on a regular neck I’d use the mount holes at the body end and the tuner peg holes at the top - here I’ve put screws where the neck pickup will be and in material that will eventually be removed at the other end.
All this combines to mean that the middle section, despite being made from reasonably thick acrylic, is somewhat flexible, and gives me concern that if I press into the template too hard with the router the template will deform, leading to me cutting off too much material.
To try and make the template more rigid you can see that I put a break in the channel for the truss-rod, connecting the two sides and trying to improve the rigidity. Whilst it did make the template more rigid in that section, you can also no doubt see the double-sided tape I ended up using, as it wasn’t rigid enough for me to be totally happy with it. Next time I’ll make the gap in the channel big enough to let me put a screw in there to secure it.
Still, with the tape in place the template did the job, and after a quick visit to the band-saw to trim off the excess, I went around with a hand router and trimmed the neck flush (making a satisfying mess of the workshop as ever).
Unfortunately, having not worked with walnut before, I wasn’t quite prepared for how easily it tears, and on the very last cut I made with the hand-router things went a bit Pete Tong and the wood split:
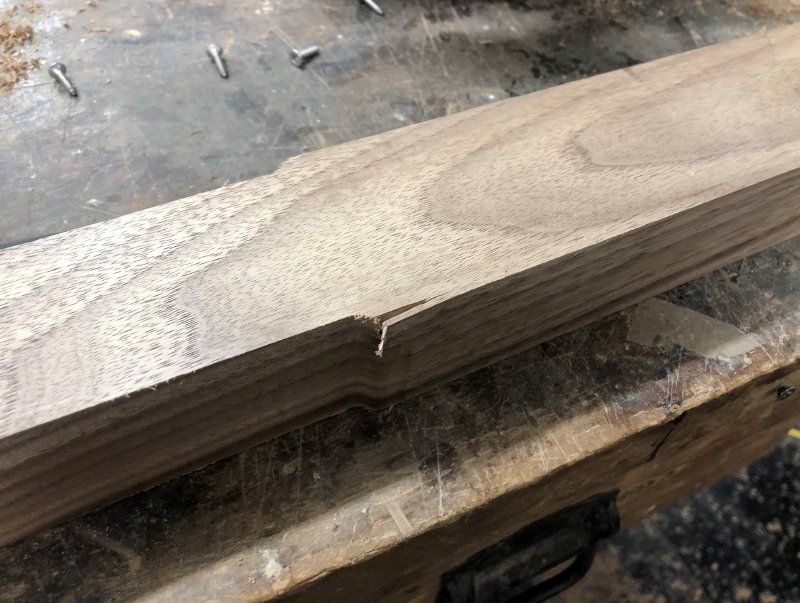
n reflection, I should probably have ran the router the other way for this particular shape. It’s conventional to run a hand-router counter-clockwise when doing an outside profile, as it stops the router running away from you under its own power. However, here it means the blade is pushing the material away from the core of the wood, and on this step it just caught the grain and pushed it out where there was no more material to support it. I’d been lucky for all the other passes as I trimmed this to various depths, but on this very last cut I made my luck ran out.
Thankfully this is just a prototype, so I’m not too upset about it. There is some material loss between the two sides of the split, so I can’t just glue it down. I could use the old wood-dust in glue trick to fill it, as I have some off cuts from the body to use for that, but I think for fun, I’ll use a kintsugi kit we have at home for mending crockery, and fill it in with gold resin, heading the advice my friend Jason gave me a few guitars back when I had to fix a particularly gnarly upset caused by an errant CNC router.
To be honest, short of total disaster I don’t think much could have dented my mood: the guitar that I imagined is starting to take form, and I’m too excited about this project to let a little thing like this take that away from me!
Next time I’m in the workshop the two axis jig should have set, so I’ll hopefully be able to attempt cutting the mount channels for the wings and actually get it sit together. Definitely exciting times!
One thing I can tell already, despite the main parts not not yet being joined up, is that this is going to be quite a light guitar: I imagine its going to have more of a feel of an acoustic guitar to it than a traditional solid body electric. I suspect if someone wanted it with a more traditional heft to it I could switch the neck to something like mahogany, but for now I’d rather stick with a more sustainable, locally grown wood. It’ll be interesting to see what people think when I finally get to put this in people’s hands.