Corvette Catch-up
Published 21 Oct 2021
Tags: cnc routing, fusion 360, purpleheart, the corvette
It’s been some weeks since I last did a workshop update (vs a design work update), and so rather than try to cover everything I’ve been up to in the workshop since, I’m going to just focus on the Corvette build for this week’s catch-up.
When we last saw this build on this blog I’d just been stymied by the fact that the bridge I’d bought for it turned out to be warped:
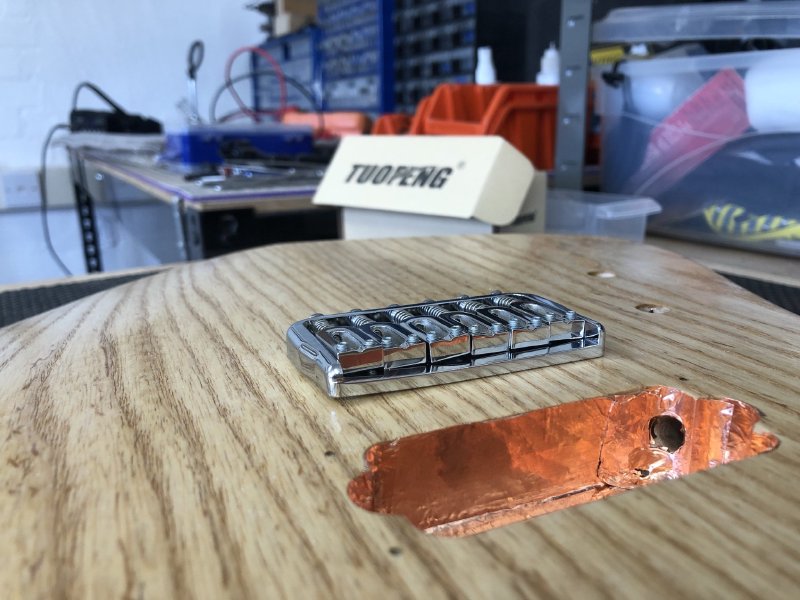
Unfortunate, particularly as it was not a cheap part, the shop I bought it from had refused to replace it, and the original manufacturer hasn’t responded to my contact attempts, so I’ve been left out of pocket on this one. So with the better part of a hundred pounds down the drain I wasn’t inclined to give either company any more of my money. However, I’ve built the guitar with this part in mind, so I didn’t want to just drop in a random alternative bridge that didn’t suit the look I was going for.
My plan, perhaps foolishly, was to make a replacement myself - once a Maker always a Maker I guess. In hindsight, given how long this process has taken, I probably should have swallowed my pride and just bought a replacement and got this guitar shipped already. But at the same time, it is an opportunity to make this guitar even more special, so I don’t regret the contents of the tale I’m about to tell. Just a note to those of you who might see this and think it’s a plan with no draw-backs - remember that your time is precious, and you should pick your fights accordingly.
To make the replacement I opted to use the same purpleheart wood that I’ve used on this build for the fretboard, the pickup mounts, and the rear cavity covers. The idea being that it would continue the theme of the guitar without looking out of place despite being an usual material for an electric guitar bridge.
It’d be perfectly reasonable to question the use of wood here for a part that was originally made of metal, but I set out on this with the logic that the bridge plate itself isn’t normally under much stress: the strings come through and wrap over the saddles (which will still be metal), so the main forces are the strings pushing the saddles into the bridge plate, and on that front a tough wood such as purpleheart should be fine, and purpleheart really is particularly tough as woods go.
So, with that in mind, I ordered a block of purpleheart wood that I could use to make the bridge out of.
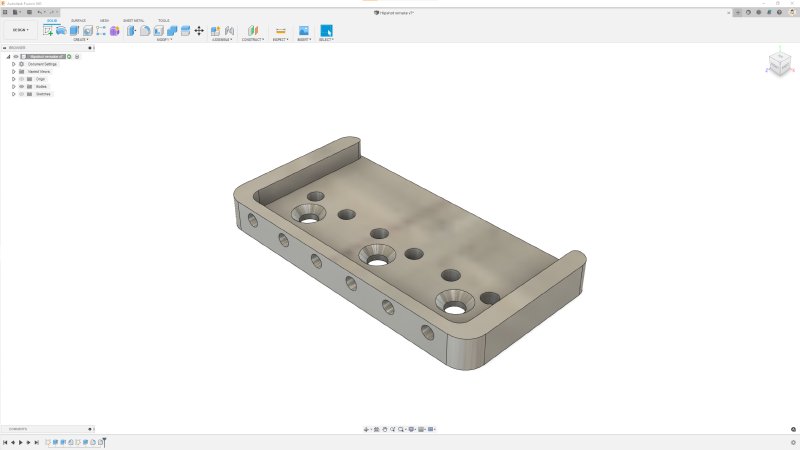
Although in general I’ve foresworn CNC routing as a guitar production technique (just for personal reasons about what I get out of the process, nothing against it in general), in this instance it was the right tool for the job. I already had an approximation of the bridge modelled in Fusion anyway, which I did just as part of the initial spec of this guitar:
From that I generated a set of toolpaths for revealing the bridge hidden within the block of wood:
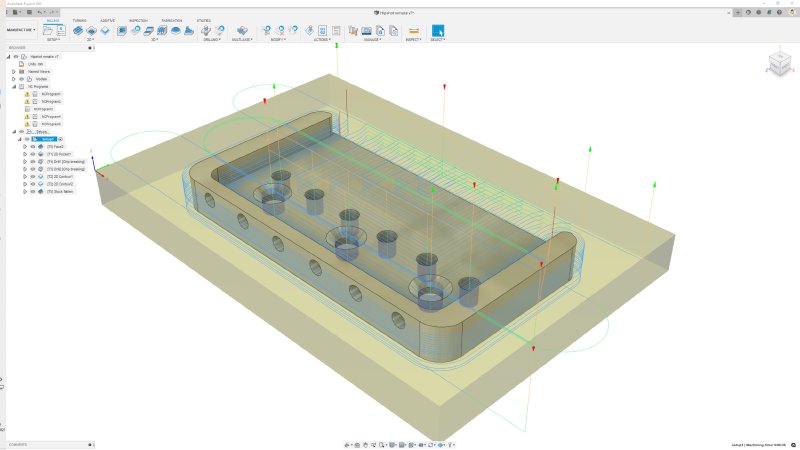
I must confess that, the last time I used a CNC router in anger (most likely literally) would have been before the pandemic hit, so I took my time to refresh my memory of how to approach the toolpath generation; CNC toolpath generation is much more human lead than people tend to assume, particularly when you’ll need to be using different bits for different cuts.
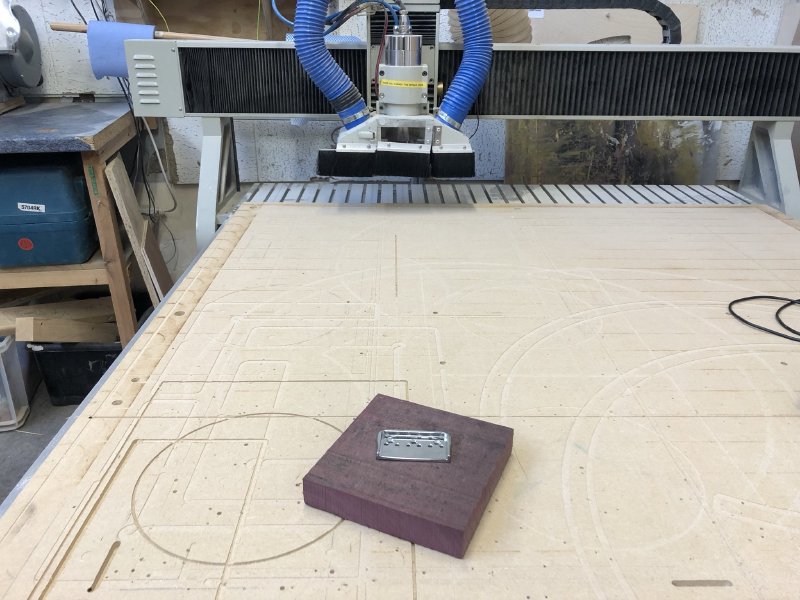
After a quick visit to our friend The Bandsaw, I got the oversized block down to a set of blanks closer in size to what we needed and went a-CNCing.
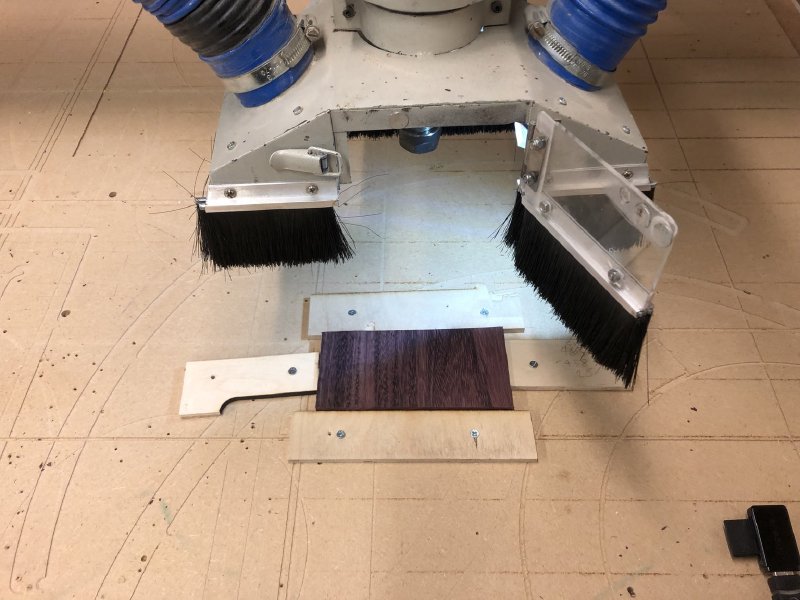
The first job on the CNC router was to get the blank level on both sides (with both sides true to each other), and for that I used (quite crude admittedly) chocks to hold the wood in place whilst I did 0.5mm passes with a 1" wide bit. Whilst I cut the blank close to the correct depth on the bandsaw, I’d deliberately left a couple of mm over as I knew the CNC would get a more true finish than my bandsaw would. Once I was down to the right level I then removed the chocks and used screws to hold the blank down…
Well, I did that the second time :)
The first time I did this I tried to do everything with just the chocks, which in theory should have worked given when CNCing like this there’s no upward forces generally. However, I suspect given how tough Purpleheart is, and how low profile my chocks were (normally I use this technique on much thicker bits of wood) my bit caught the grain just so and lifted the wood enough to have the blank lift out of the chocks, leading to a wasted blank:
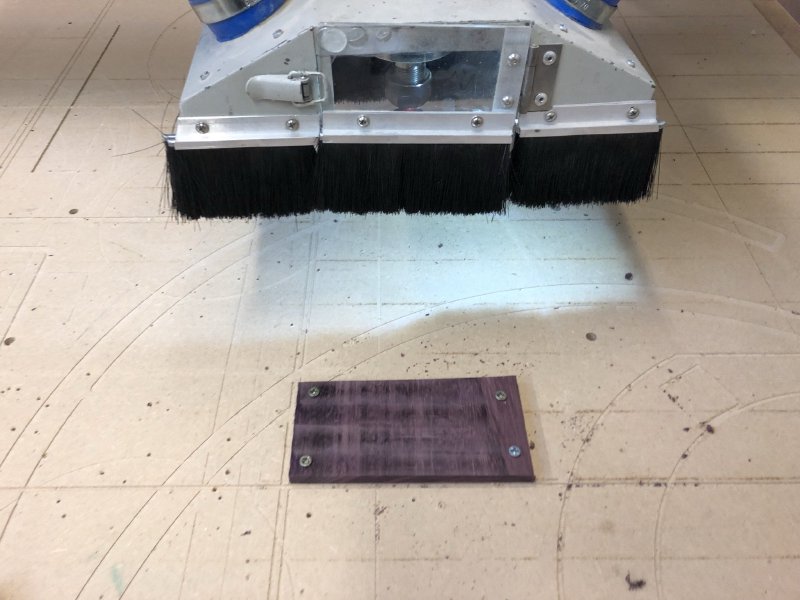
So, lesson learned, the second time I just used chocks for the facing off stage, and then used screws to hold the piece to the bed for the second go:
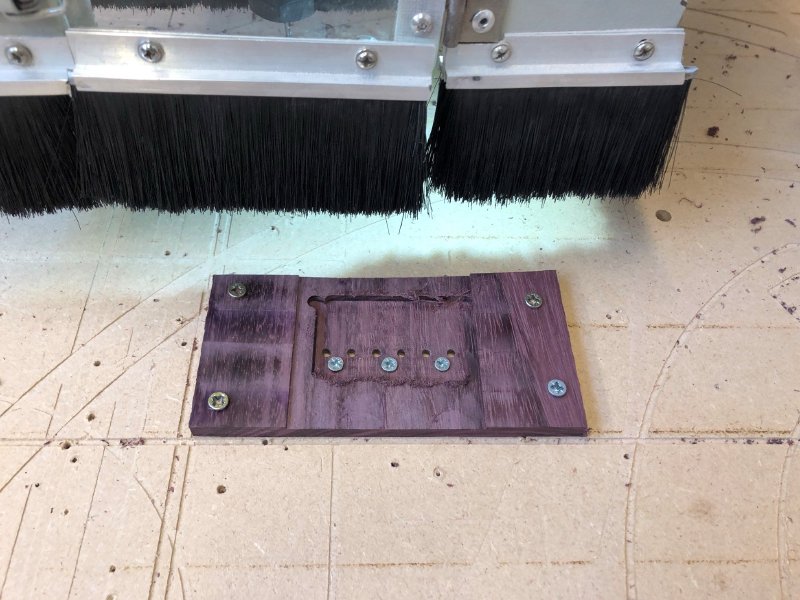
One trick I’ve used in the past that I repeated here was I made sure to drill the screw holes in the bridge early on in my toolpath roster, so that I could then screw down the actual bridge part to the bed mid process. Doing this means that when I cut the bridge out from the blank as the last pass, I didn’t need to leave tabs holding the bridge to the blank that I’d have to manually trim and smooth out later:
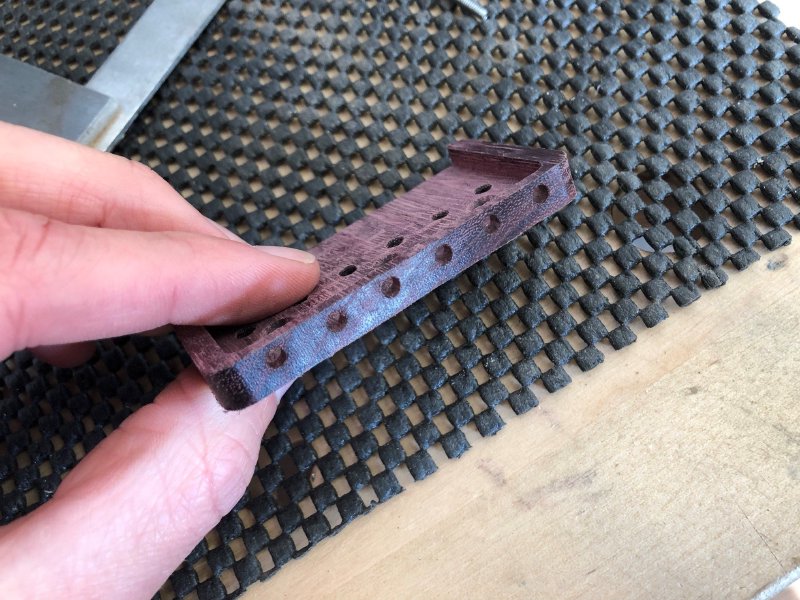
A few more cuts later, and the replacement bridge was free, and looking somewhat like it’s metal likeness (albeit with a flatter profile!):
Even allowing for my mishap, I was pleased with my first bit of CNCing in a long time, particularly as for the Älgen guitar I’ll need to CNC some jigs even if I’m not CNCing the guitar itself. I didn’t even leave any profile marks on the sacrifial bed, which is a skill I tried to teach inducties when I looked ater the Makespace CNC router, so I was pleased to see I still had the CNC knack.
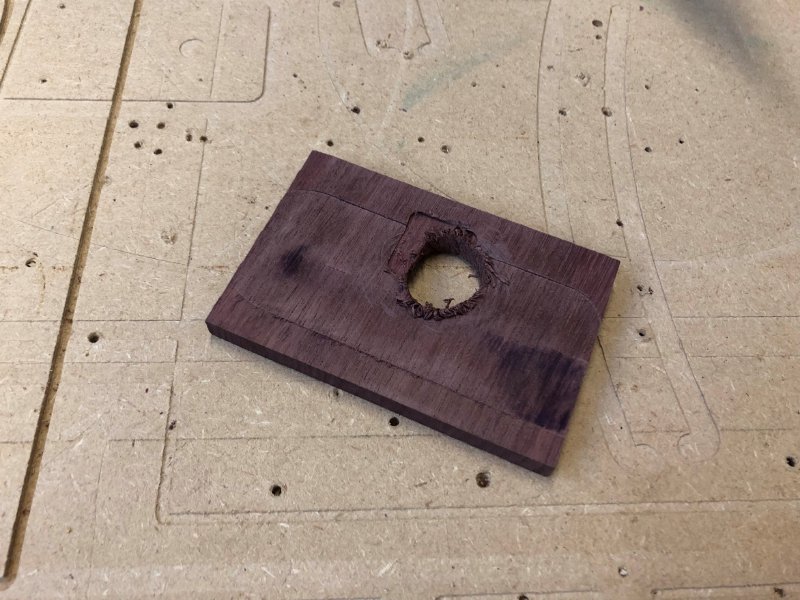
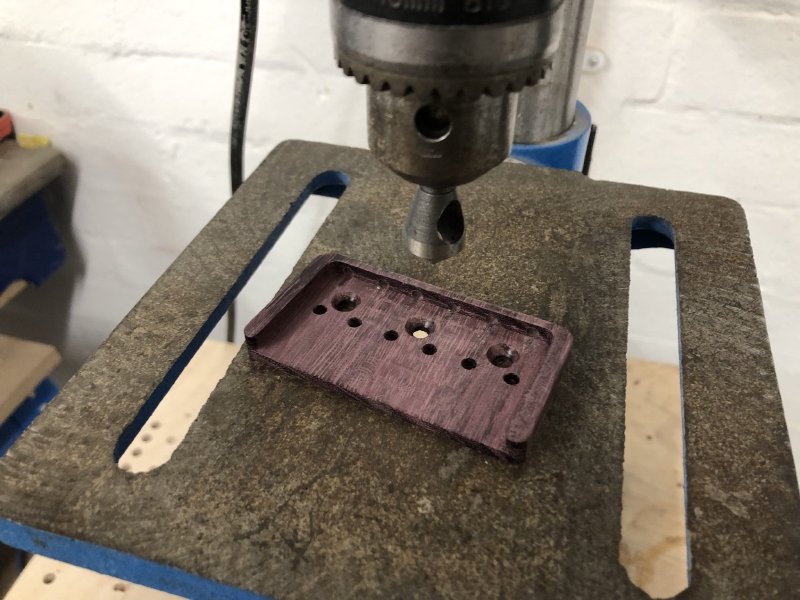
Although the CNCing phase of the build was over, the bridge was not yet finished. Firstly I had to make the holes needed to attach the saddles, which I couldn’t do on the CNC as they were in an axis perpendicular to that I was cutting in, so these I had to do by hand. This was mildly stressful, as there was very little room to manoeuvre here and I didn’t fancy spending another 90 minutes sat nursing the CNC router to make yet another one of these.
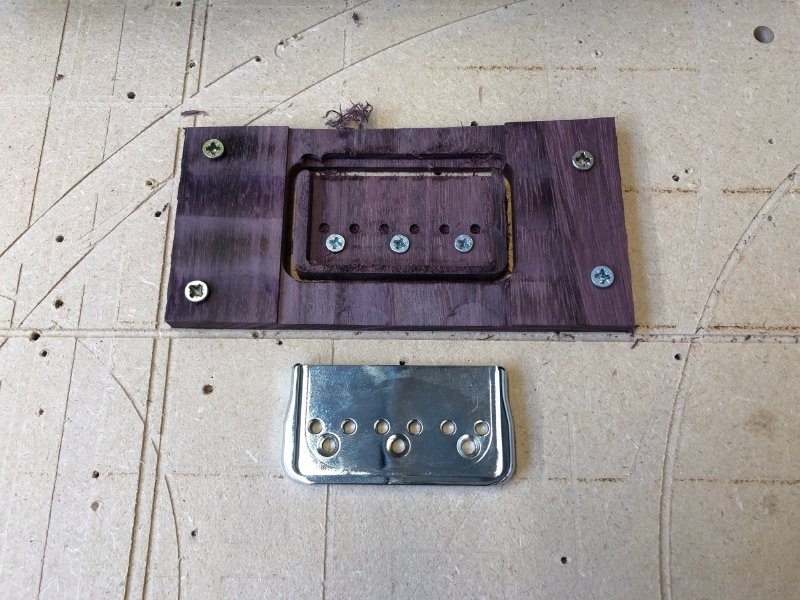
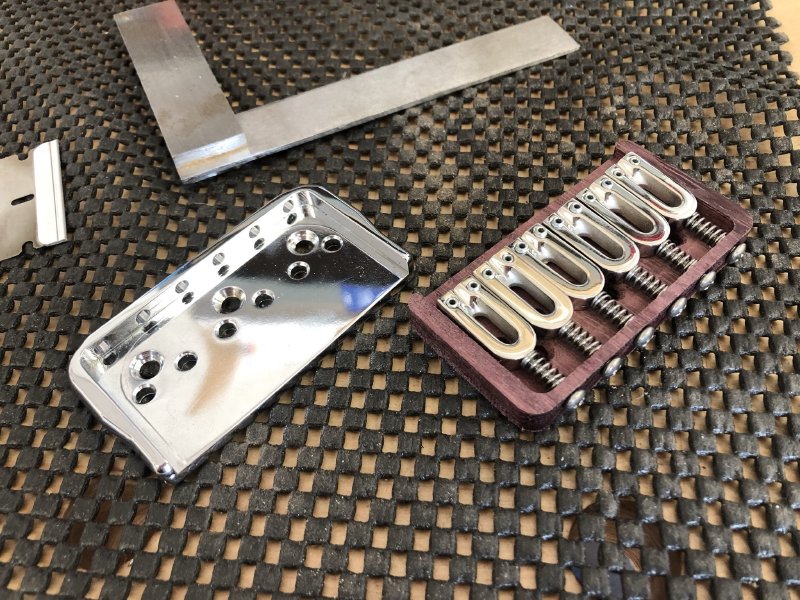
To mark out the holes I simply placed the two parts back to back, holding them in place with a clamp to keep things aligned:
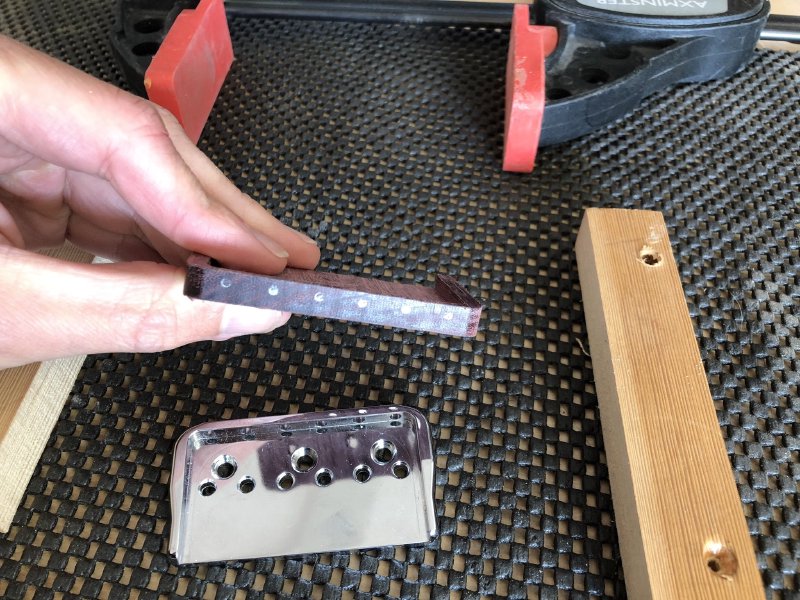
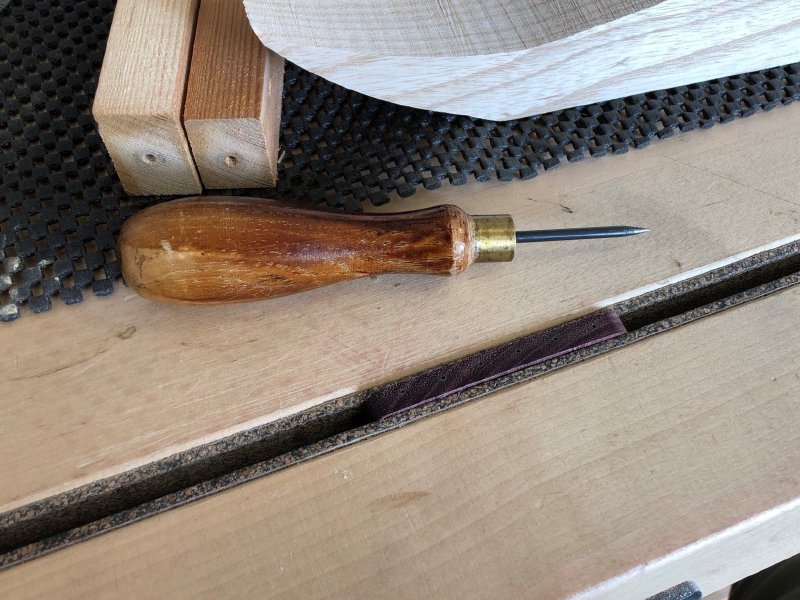
Then it was out with my trusty bradawl to get the initial impression in for where I was going to drill the holes. Ultimately this is where any inaccuracies in where I drilled will have stemmed from, and in retrospect I should have perhaps taken more time at this point to ensure my marks were more true. In the end I was close enough, but if I did this again I’d certainly try to do better at this stage to ensure a tighter alignment.
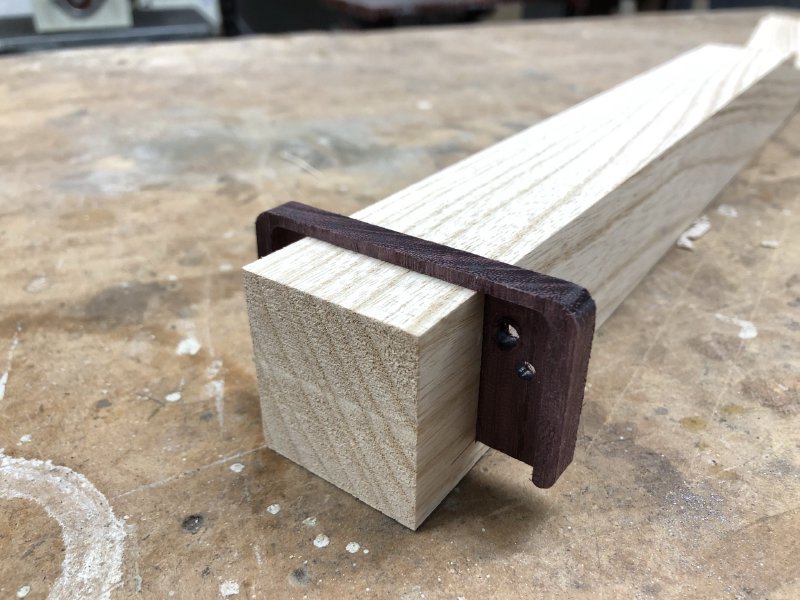
To help me drill the holes I found a bit of scrap ash I had left over from making the body of the guitar, and with the help of my bandsaw made a quick jig (or should this be a fixture Adan? :) to hold the part in place whilst I drilled. Another tweak I’d make to this is that naively I made the jig to hold the bridge at perfect right angle, but as we’ll discuss later, that probably isn’t optimal.
I started drilling the holes with a tiny 1mm drill bit and slowly widened the holes a few tenths of a millimeter at a time, until I could fit the saddle screws through with just a little wiggle room, but fear of making the back piece too weak stopped me from making them quite as wide as the holes in the original bridge - you can see how close I’m getting to the top of the piece with these holes, and whilst they’re like that on the metal part, I suspect here I need to have more wood than they need metal.
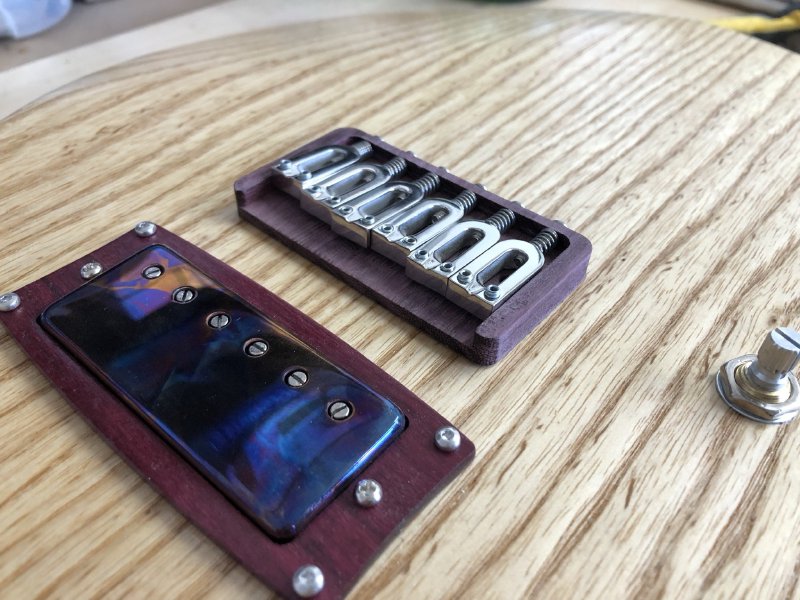
A quick test mount of the saddles and all looks jolly spiffing: I think the metal saddles on the wooden bridge look really good:
The other thing I had to do manually was counter sink the mounting screw holes, for which I used this lovely zero-flute bit that Jamie had: these zero flute bits are just wonderful, with no chatter at all compared to the fluted bits I was using before. I can’t recommend them enough:
With the holes counter sunk I could now mount the bridge on the body:
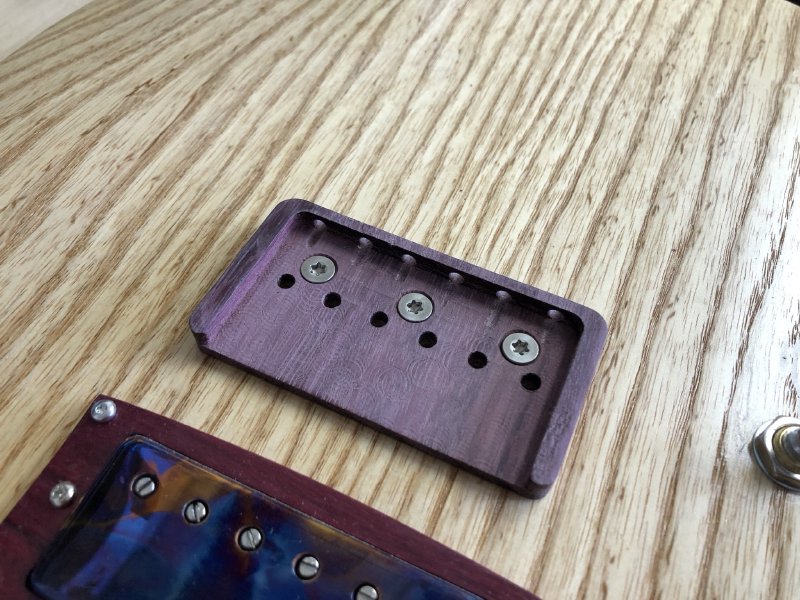
Looking good! But as with any V1 it’s not without its issues, so now that we’ve made the part, lets look at how it works in practice.
At this point, you might spot I’m using atypical mounting screws - certainly the original bridge did not ship with the torx screws! The reason I’m using these is because the original philips screws that came with the bridge have a domed top, which works fine in the original, but I ended up placing the saddle holes in that back wall slightly lower than those in the original mental part, as I was concerned about how thin that top bit of wood is.
Really, if I was to do a version 2, I’d not stick to the original bridge dimensions so closely (blindly) and make that back wall slightly taller. As a result of placing the holes lower, the original domed screws were interfering with the saddles as you moved them back during setting intonation. Thus, whilst I generally use these torx style screws anyway (they’re much harder to accidently deform compared to philips screws), in this particular instance they’re also serving as a flatter profile than what was originally required.
Indeed, in the above picture you can see how much I’ve nudged the holes down by the channels that I cut as the drill bit went through. I went that extra distance to allow the saddles screws some more space to move. Speaking of which…
The other issue with these holes is, because I didn’t make them as wide as the originals (again due to concerns over the weakness of that back wall), the saddles have less room to move around, and so they’re awkward to adjust overall. It might have helped had I drilled the holes slightly off straight, with a slight up-angle, given that the saddles don’t sit flat to the bridge bed anyway, as you can see here:
So, what I’ve made seems to work, but having made it once I can definitely see ways I’d improve it if I repeated the process.
Whilst I still need to go through the finishing process on the bridge - smoothing it off, oiling it, etc. - I didn’t want to go to all that effort if the limitations on saddle movement are going to mean I can’t get the guitar properly set up - there’s no point it looking good if it doesn’t function good. Thus the next stage was to assemble the rest of the guitar and get some strings on there at long last!
First, that meant bolting on the neck, which I did using similar, but chockier, torx screws as I had used on the bridge (I also used the same screws as I used on the bridge to attach the strap buttons):
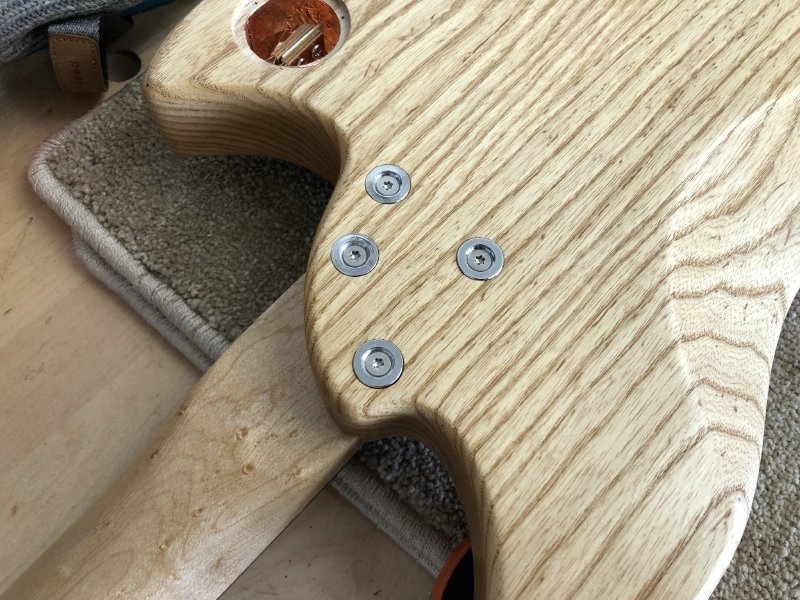
This is the first neck I’ve made using this technique, and I’m definitely pleased with both the look of the neck joint and the accessibility that the shape gives being free from the constraints of the off the shelf neck plates I’d been using until now.
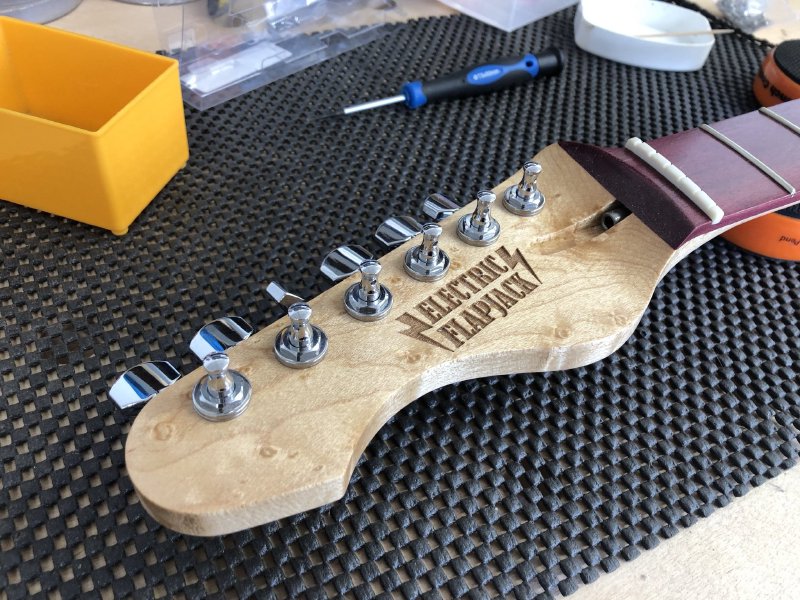
I also mounted the tuners to the head stock, and as I know you’re wondering, yes, I did use tiny 2mm torx screws to pin them at the rear. I never trust the screws that come with tuners since I’ve had the head on one come off in the past, so I always use screws I’ve bought myself where I’m happy that they’re of a good quality - normally from Westfield Fastners in the UK.
With those bits done, I was finally able to get the strings on:
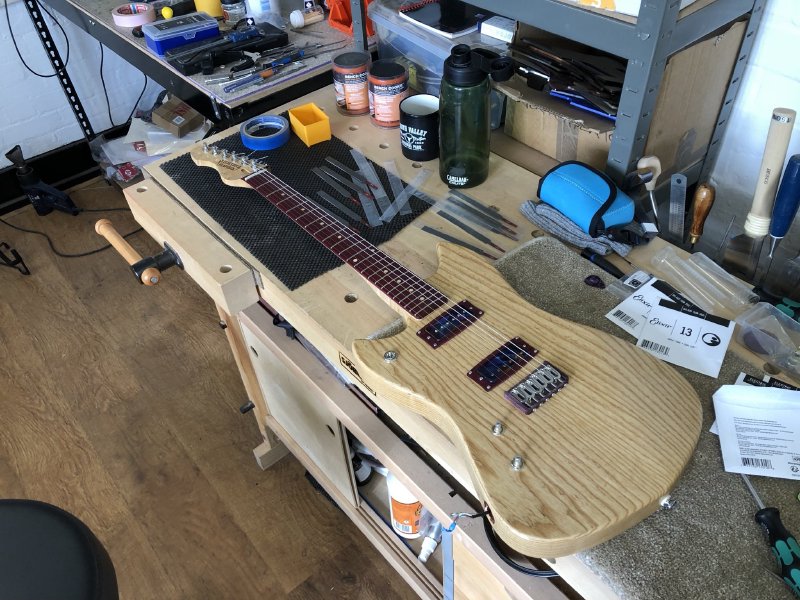
Whilst I did tune it up and get the nut and saddles roughly started, enough that I could quickly knock out a few licks (within the limits of my ability to play a left handed guitar), before I properly do a set up on this guitar I now need to let it rest for a few days under full tension. The neck will slowly adjust to being strung up, so I want to let it bed in before I try to get the nut carved and the action set up.
I feel this set of notes has been unlike my usual scattershot set of notes where I cover a wide range of topics and I’ve spent untold amounts of your time just looking at one tiny part of a single guitar build, which feels odd, but is just how guitar building is at times, particularly if you’re going to be the kind of builder to sweat the details. I know I’m not perfect, but I really do try to ensure each bit of the guitar works the way I want it, not just based on what was to hand, and some times this leads you down a rabbit hole like this.
As mentioned in the opening - I spent an innordinate amount of calendar time on this when you factor in waiting for the wood to arrive, waiting to get access to the CNC router, shuffling bits between my workshop and the maker space I use. It really is logically hard to justify the overhead versus just having bought a replacement for the broken part. But hopefully the subjective results make all the effort worth it.
Certainly though it was nice on my last visit to the workshop to have arrived with a set of parts parts, and leave with something that now looks and sounds like a guitar - albeit a poorly set up one. On my next trip to the workshop I’ll get the set up to a place I’m happy with, and then I’ll have to disassemble the guitar to let me wire up the electronics, and so I can take the bridge away for finishing. Fingers crossed, in the nicest possible way, I’ll be rid of this guitar soon!