A week in the shop
Published 27 Jan 2020
Tags: 3d printing, squire bass iv, the green tiger
At long last, commission #10 is almost complete, bar a little more 3D print tweaking for the controls. At the end of last week I strung the guitar up and set it to one side for a few days to let the guitar settle under tension. This week, I finally got to hear it sing as I took it through final setup.
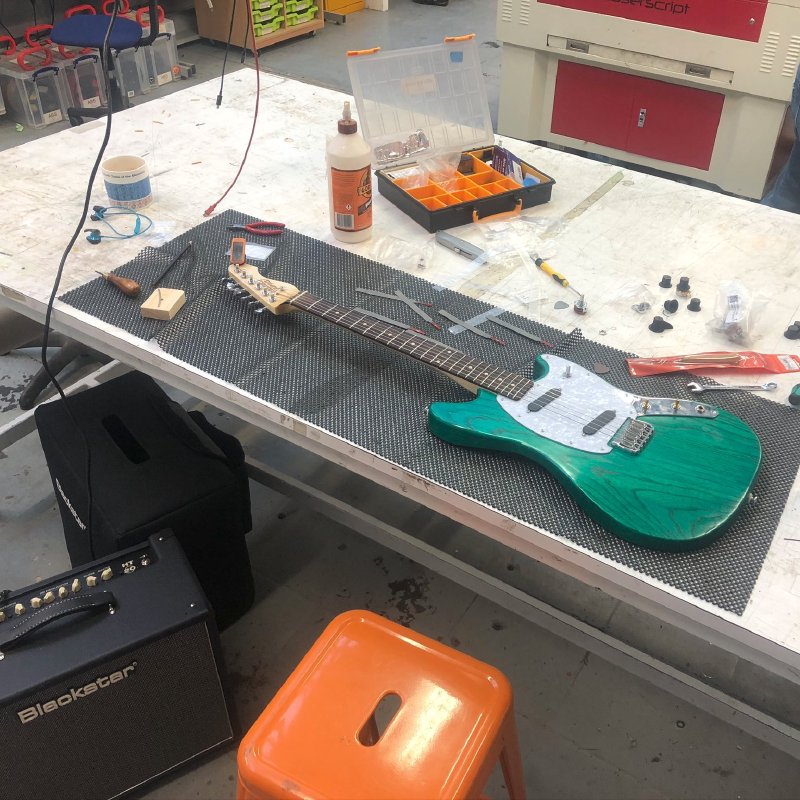
I have to confess, I was a little nervous - this build has had such a tortuous path that I was just waiting to be hit by the next unfortnate disaster, but thankfully it wasn’t to be. As I dialed in the intonation, cut the nut and adjusted the pickup heights, the guitar was sounding great. Rather than using my usual little Blackstar Fly, I broke out the Blackstar HT20 (a 20W tube amp) and I have to say, Matthew at House of Tone Pickups has really made a killer set of pickups for this guitar, particularly on the neck.
There’s a video of me playing the guitar as I started the set up process up on instagram if you want to have a listen, but that clip really doesn’t do it justice.
The final part then is getting the custom controls to a place where I’m happy with the finish. This has taken a lot longer to get right than I anticipated:
When I had access to a FormLabs resin printer this was a lot easier, in terms of getting the finish where I was happy with it and getting a print that reliably fit. For all my issues with the FormOne we had a Makespace, I’ve never had to go through so many revisions to get a part right.
Still, it’s been educational: let’s for instance look at this failed print:
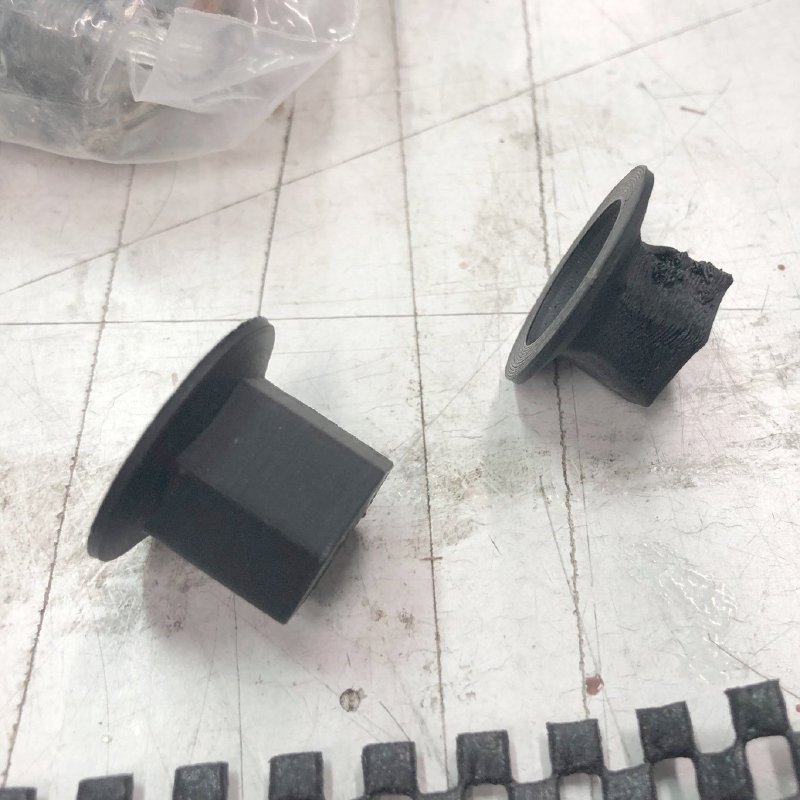
You can see the print on the right (which I aborted once I’d spotted it wasn’t going well) is very deformed compared to the one on the left. I printed them with the same printer settings, the same material, and close to the same design (just a couple of tenths of a millimeter difference on the internal shaft diameter), so why is that?
The difference is that I printed the one on the right as part of a group of three, and the one on the left as a one off. To understand the issue, first you need a peak inside the controls I’m printing:
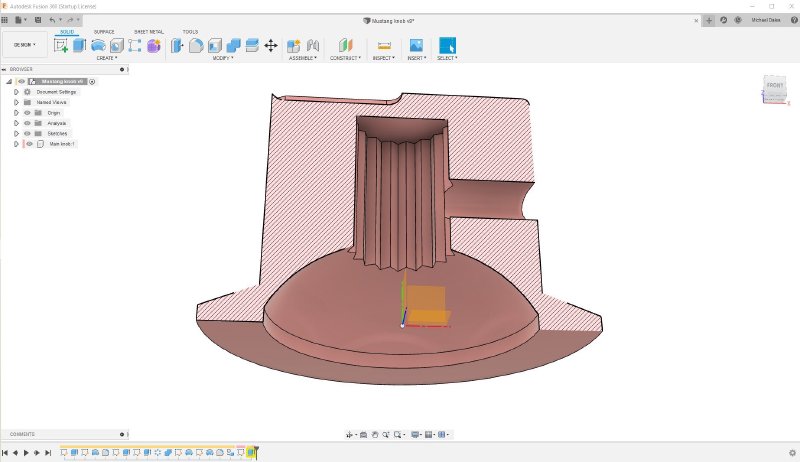
I print them the right way up, as shown here, and you can seen in this cross section there’s quite a large cavity in the controls, with a reasonable overhang. I was printing these controls without support material underneath, as I didn’t want to have to try remove it from such a confined space inside. Most people who know 3D printing would express surprise that I got away with this, as I have quite a lot of unsupported material there, and indeed, when I printed them one off they did finally fail. However, because the guitar has three controls on it, I was always printing in sets of three, and that meant that each layer in the set took longer to print, so had time to cool down and be more rigid when the next layer was applied, saving me from gravity. But when there’s just one control being printed, each layer is still warm and soft, so could not support the weight above it.
So, an interesting learning - the bigger each layer of your print is, the better your chances are of getting away with less support. I remember Liz in the 3D printing group at Warwick University explaining to me that they had similar issues with their very large 3D printers, so it was interesting to hit the same issue on a smaller scale.
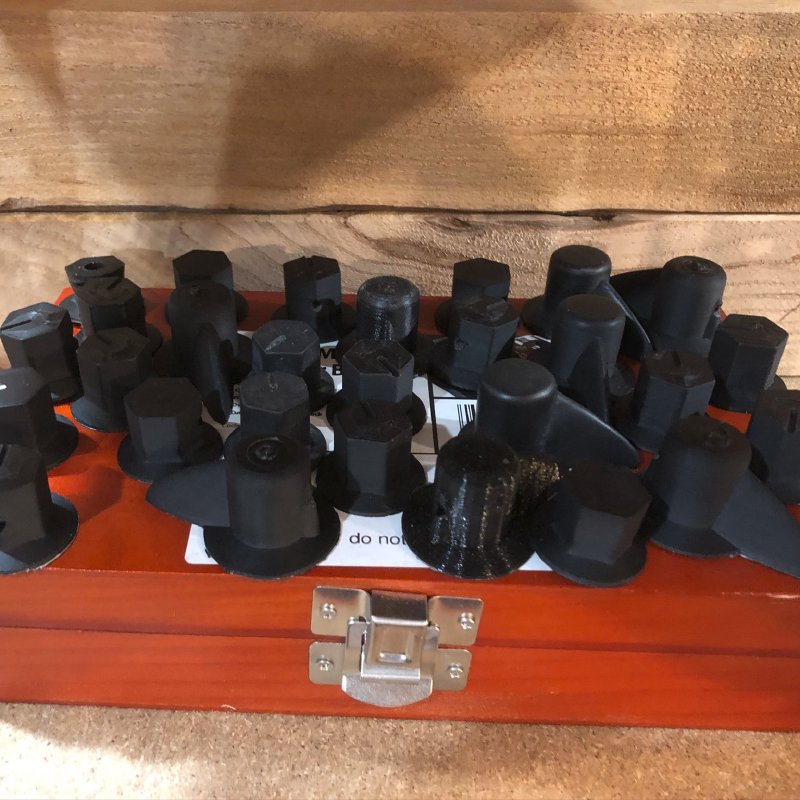
Still by the end of the week I had one well fitting set that remains un-sanded, so has a bit of 3D print texture I’d like to sand out, but it was still lovely to see all the bits in place:
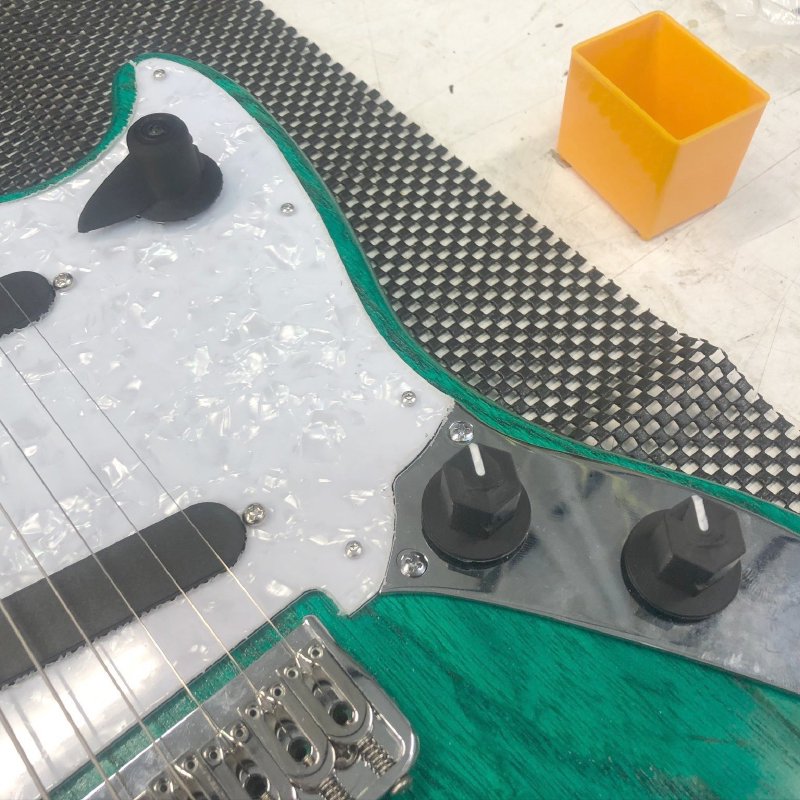
You can just see the 3D printer marks on this, and it’s those I’d like to remove. This set I’m going to keep as is, and the last thing I did at the end of the week before heading home was kick off some more of the same design that I’ll try sanding down tomorrow. If I can’t get those spot on then I’ll just run with these.
Almost there!
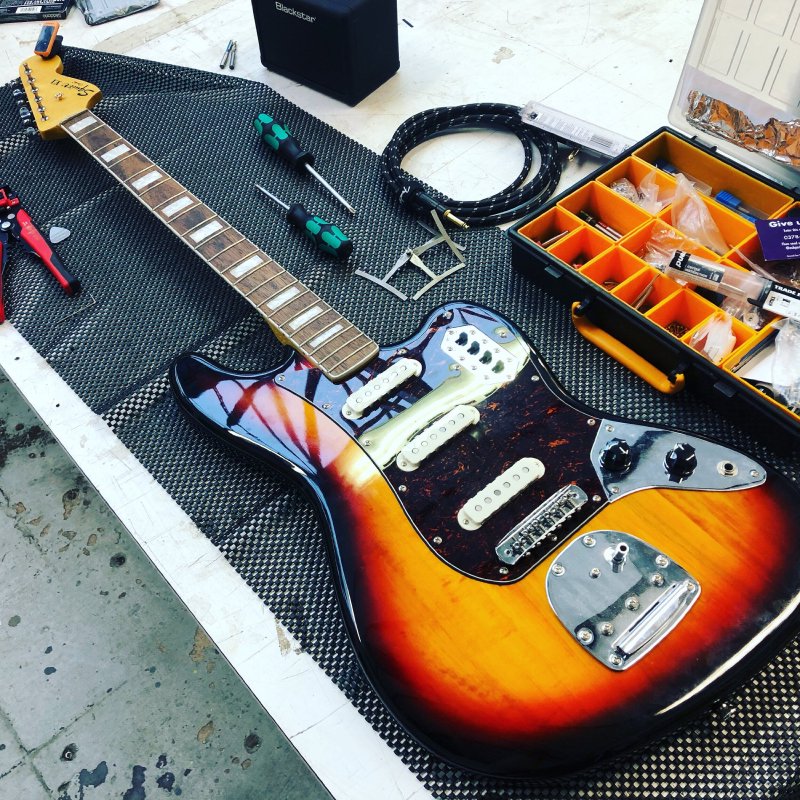
They say never meet your idols, and I think I went through this a bit this week when someone asked me to set up a Squire Bass VI guitar they had.
I’ve always been interested in the Fender Bass VI guitars ever since I saw the bassist in FELL playing one at Wilderness a few years ago. I’d never seen one before, and after the set said bassist was happy to talk me through it, but I didn’t dare ask to have a go.
For those, who like me back then, are unfamiliar with the Bass VI, it’s a short scale bass guitar with six strings, designed to appeal to the guitarist that wants to try a little bass. Whilst, at 30", it has a similar scale length to a barritone guitar, it is tuned E to E, making it sit below a regular guitar like a full bass guitar would (baritone guitars are usually tuned B to B). I love the concept, and have always wanted to make one at some point.
As the owner made clear when he asked me to take a look, the guitar needs a good bit of TLC. The setup was not very playable, and the electronics weren’t in the best of condition either. I’ve made a start on this, but it’s an interesting challenge to say the least. My research into setting these guitars up shows that they are a bit of a pain to set up, so rather than just run through the setup process in my week notes in parts, I’ll save it all to the end and do a proper documentation of how I set this one up.