Catching up in the shop
Published 22 Aug 2021
August has not been a productive guitar building month due to other things getting in the way: I’ve had all hours I can throw at it soaked up with contracting work, and had to travel for family visits, and these combined with the stall I wrote about last time from missing parts sapped my momentum. And that momentum is definitely much harder to maintain in the post pandemic world than it was before.
One thing I miss about working out of a maker-space (for both guitar building and at times my contact work) is that the energy in such places is infectious. Whilst the same is true for my new workshop, it has a much more limited focus, and so if I’m not directly working on guitars, I’m not there, and doing contract working at home it’s so easy for a few weeks to slip by without making progress on guitars. Similarly, whilst I’m learning a lot of cool stuff about guitar building from Matt and Jamie in the workshop, I do miss exposure to other inspiring things about 3D printing, textiles, electronics, etc. that you get exposed to in a maker-space that often are the source of ideas and motivation to try new building things.
In an attempt to address this gap, I’ve recently joined a sort of virtual maker/builder/design community, hosted by The Prepared newsletter, where I get to join a couple of calls a week where we talk about what cool makery things have caught our eye and what projects we’re working on, and I also can hang out on the slack and have some visibility beyond my contracting world on a daily basis. So far I’ve already found this to be a helpful connection to others both making things and struggling to get time to make things, and I’ve found inspiration from what others are doing there.
The closing down of the Corvette build continues to be an exercise in frustration. When last I talked about it I was missing the neck ferrules I needed, having misplaced them at some point during the workshop move, so I was blocked on those being delivered. I now have those, and several spares, so at least I’m ready to attach the neck:
And the neck fits - first time I’ve attached it since I finished oiling both parts:
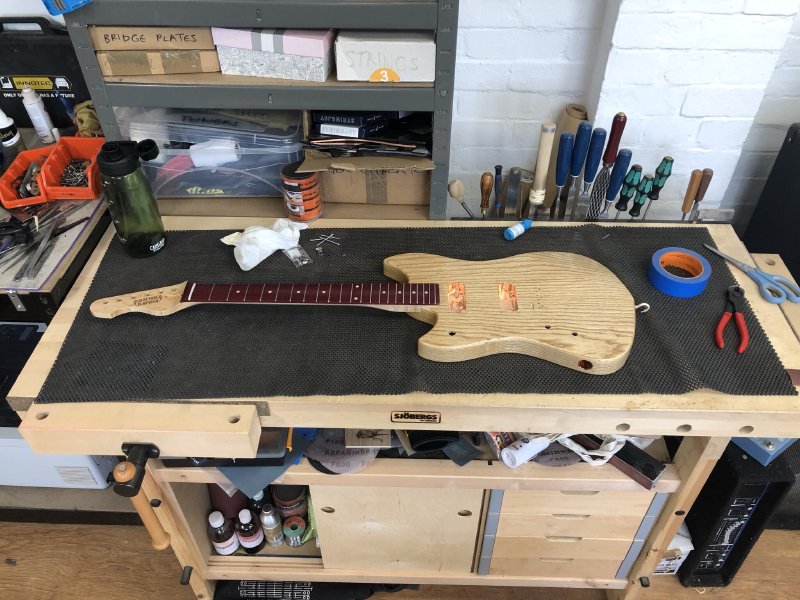
But before the neck gets too comfortable there, I wanted to get all the other parts on the body in place, as it’s much easier to work on the body before the neck is bolted on.
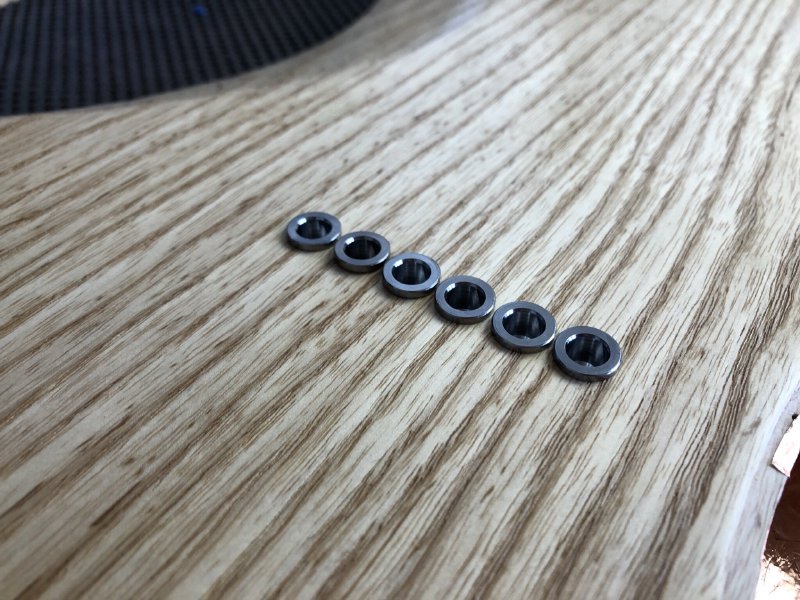
First up, was to fit the string ferrules on the back of the body. On the last guitar I built I’d made the holes for the ferrules fractionally larger than the ferrules I had to hand, so I ended up needing to get bigger ferrules. This time I’d gone the other way and made the holes too small by half a mm and had to ream them out by hand:
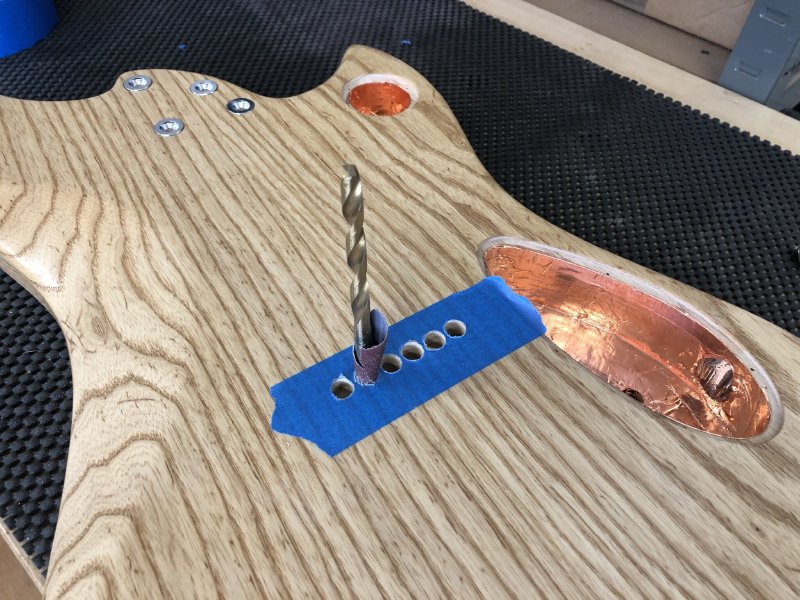
Normally if you want to make a hole in wood slightly bigger you’d use a pin-hole reaming tool, which is a long tappered thing that lets you work away the edges of the hole slightly. But that’s a long tool, so requires an open hole all the way through your piece to work, and thus won’t work for these holes which are only 15mm or so deep at the full width, going down to just 3mm for the rest of the strings’ journey through the body. So lacking any better tool I resorted to the McGuyver reamer of drill bits with sand paper wrapped around them, working my way up through drill bits until I got the size right. Great for getting blisters if you’re not careful, so wear gloves is my recommendation when doing this. It took way to long, but I got there in the end:
As I’ve said before here: 99% of things that go wrong guitar building come down to not following measure, measure, cut, and once again I could have saved myself a lot of effort by double checking the ferrule sizes.
String ferrules in, I next turned my attention to the front of the guitar, and the other side from the string ferrules: the bridge. First up was putting in place the grounding wire between the bridge and the earthed copper shielding. If you don’t ground the bridge then you’ll get a nice crackle every time you move your hand to or from the strings. You can just see the grounding wire poking out here:
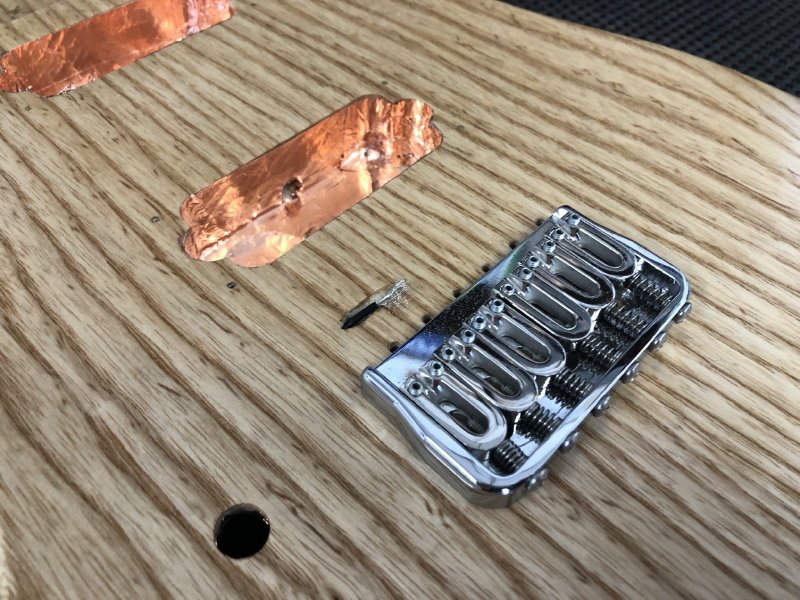
That part done, I mounted the bridge, which looked great at first glance:
But less so from the other side :(
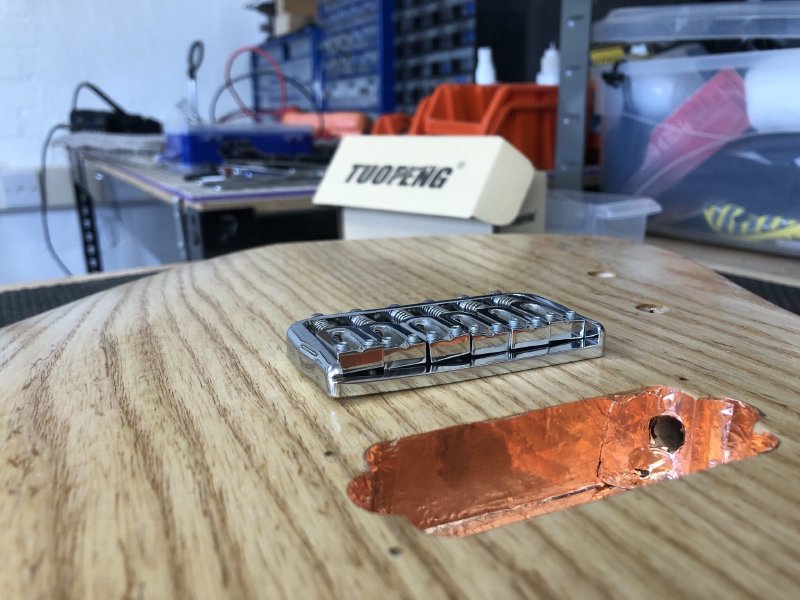
I initially assumed that I’d messed up when sanding the body, taking it down on one side more than the other, but a quick check with a straight edge showed that not to be the case:
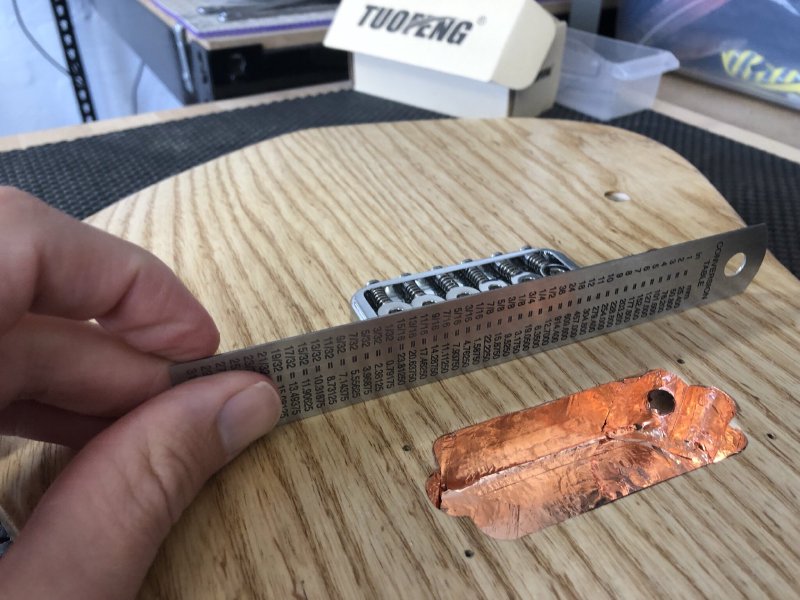
I removed the bridge and put it on a levelled surface and you can see, the bridge plate is just warped :/
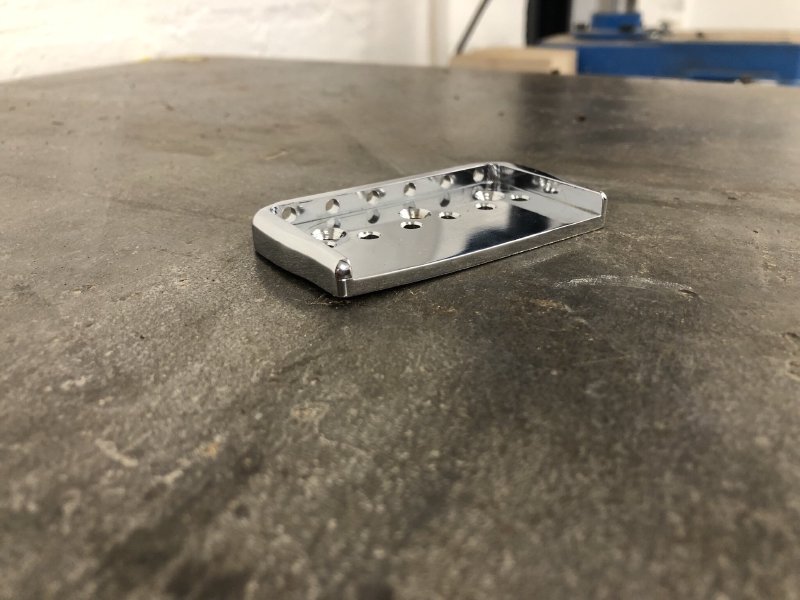
Very frustrating, as I don’t have another one in stock, so once again I’m block on parts I thought I already had.
I can only assume it’s warped in casting, or at least before the chrome plating was added, as the part is very thick, and has sizeable side walls, so if it’d been bent at some point there should be marks from where the pressure was applied to get that sort of bend, but the finish is fine.
It’s particularly frustrating as this is not a cheap no-name bridge from ebay, but rather one I paid £70 pounds for this back in 2019 when I last stocked up on these, and in the post pandemic world they’re now £100 from the same supplier. I’ve reached out to them to see if I can get the part replaced, but given I bought it almost two years ago I’m concerned they might not want to. And if not, then I’m not exactly inclined to buy the same again based on this experience, but then I’ve measured the bridge position based on this model, so I’m loathed to try something else. Perhaps time to make my own, but that’s yet more delay.
Mostly though I’m frustrated as yet again I’m stalled for another week or so whilst I get yet more parts I thought I already had. My mistake was, again, not measuring: I should have checked the part when I got it, but having used this same part on my previous three builds and it being from a reputable brand I’d assumed it’d all be okay.
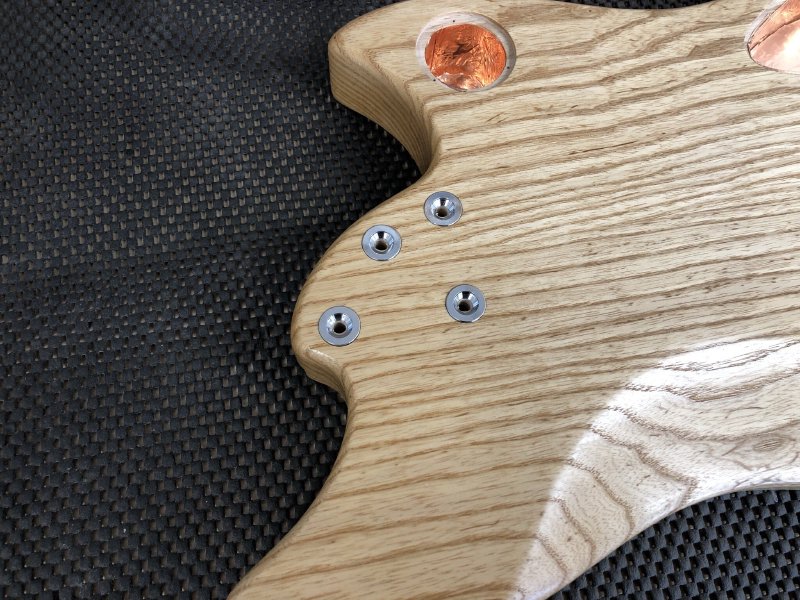
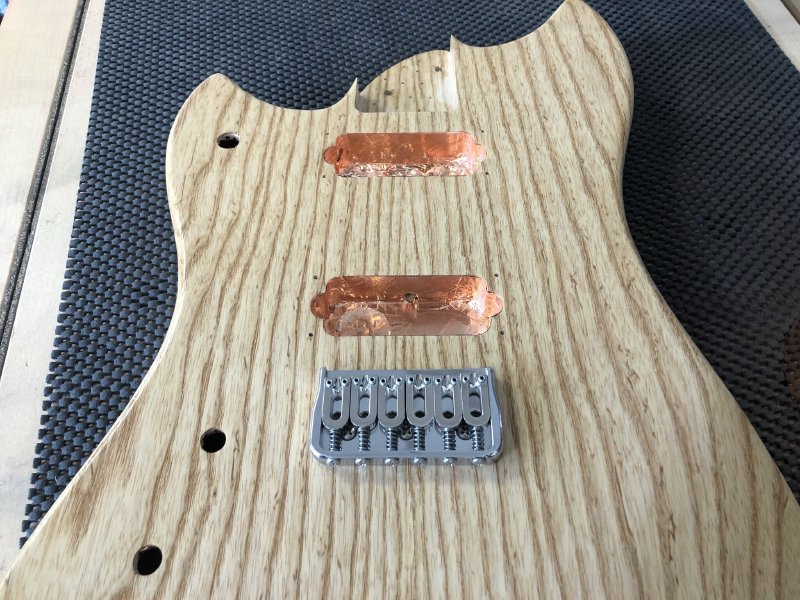
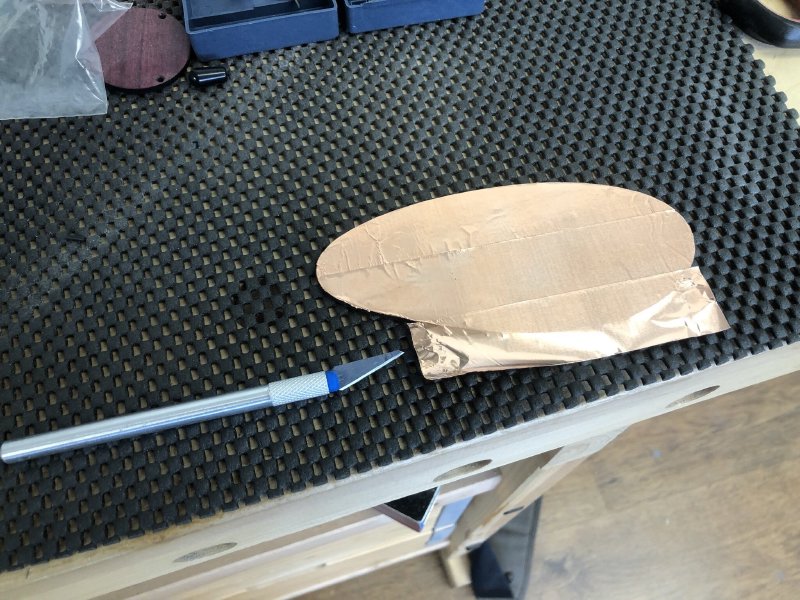
Even though the bridge situation means I can’t string the guitar up, I finished off the rest of the body assembly as such I could ready for the day when I have a new bridge. First up, I got the cavity covers I made and gave them the copper shielding treatment on the inside face:
I then took the pickup rings I’d custom made and mounted the pickups in them, which lifted my mood after the bridge debacle:
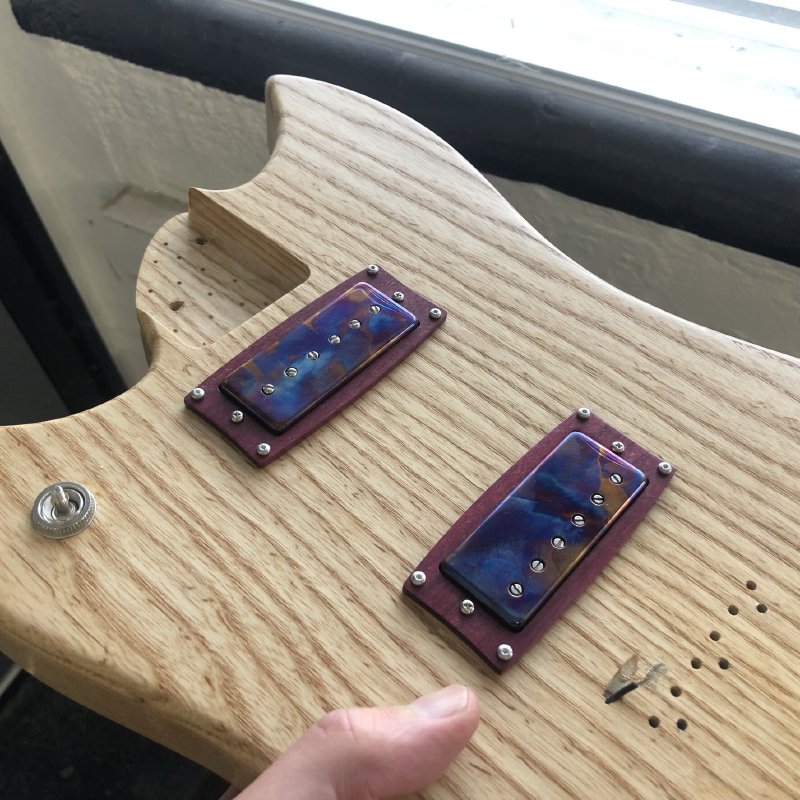
These burnt chrome covers from House of Tone Pickups really work well with the purpleheart wooden mounts; despite being a bit sceptical about whether they’d work out or not, I’m very pleased with these.
I was similarly impressed by how quickly it was that someone spotted that I’ve got three different types of screw per pickup :D I haven’t yet figured out how to get a posidrive in there, but give me time…
I also fitted all the other electronal components but didn’t wire them up yet: I’d rather solder that up at the point I can test it, and until the bridge is on I can’t do that. So once again this build is stalled once more. Fingers crossed the bridge issue will be resolved soon!
The only other task I did in the workshop was give my bandsaw a once over and get it humming away nicely. I never get tired of telling people how good a well tuned bandsaw is: you don’t need to fight it, it’s much quieter when set up properly, and you can get very precise thin cuts if you want that sort of thing rather than just seeing it as a roughing tool.
This bandsaw spent a lot of time not being tuned since I got it, as I installed it in the old workshop and then lockdown kept me from using it, but others were using it regularly (which is good - it’s a tool to be used!) but hadn’t the experience to tune the setup. So in addition to installing the extraction system I mentioned buying in the last workshop catch-up:
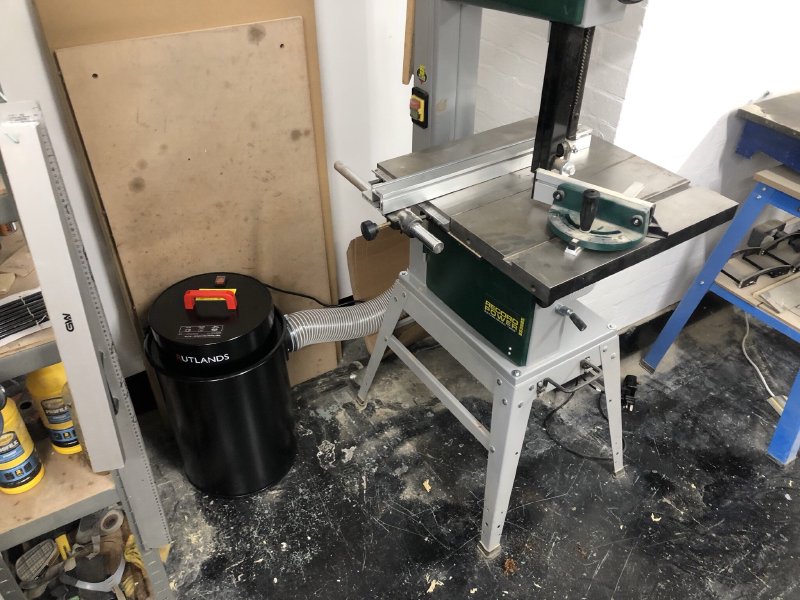
I also got it a new blade from Tuff Saws, and then made sure the tension was set correctly, the guides were correctly positioned, and the fence set correctly.
At the end of this setup, which doesn’t take more than ten minutes, it was reliably cutting consistent 2mm slices of my test piece of wood without batting an eyelid. It felt good to have it back in near perfect operation. I say near perfect, as the rubber bung in the middle of the table where the blade runs through has sunk slightly creating a small lip, so next up is working out how to replace that, as it looks like it’s glued in.
The extraction system seems to work, and is VERY LOUD, which is a bit frustrating, but that’s a function of placement really. We’ll see in the coming weeks how well it works in terms of keeping dust under control.
Non workshop wise, I also got a new desktop PC, as the 3D printed guitar design was making my laptop weep. I thought about building a PC myself from parts to the spec I wanted (something to be suitable for both my day job contracting work and heavy Fusion 360 usage), but I realised this would just be yet another project when I’m already finding I’m not getting into the workshop enough - it’s important to try and pick your battles where you can, even though it’s tempting to do yet more.
In the end I just bought something close enough to my ideal pre-built by a custom PC builder company in Wales, JCPC Customs. They did an excellent job and were well priced, so I’d happily recommend them if you need that sort of thing yourself.
As an indicator of the difference this has made, doing the high-resolution renders of my new guitar design would take about half an hour on my old laptop, and now take a little over two minutes on the new PC. I suspect this is partly a reflection on how good modern PCs are and how inappropriate for heavy CAD work my laptop was :)
I must confess I had been procrastinating on moving forward the last stages of the CAD model for the new guitar design because I need to refine the mesh 3D printed parts, and those are what was causing my laptop to struggle. Until now I’d only been swapping in the mesh parts for renders for this blog, and the rest of the time using a solid body stand in. Now I have no excuses!