A busy week in the shop
Published 16 Nov 2020
The first act upon getting into the workshop last week was completing the band-saw setup. Although last week we got to the stage of cutting scrap, I still wanted to change the blade from the one that shipped with the band-saw to something more suited to guitar building.
Your band-saw blade choice depends on many things, such as the thickness of the material you’re cutting, the kind of radius you want to be able to cut if doing arcs (or don’t want if you want to make veneers say), just to name a couple of variables. Rather than guess what might be best for my use case I asked my friend Graeme for advice, and he pointed me to Tuff Saws, who are a band-saw blade specialist shop, with which he’d had good results from before. I had a small email exchange with their support person, and explained the uses I had in mind for my band-saw and they recommended a couple of blades: one deeper blade with a variable tooth pitch for roughing out bodies and necks, and a stiffer narrower blade with a higher tooth count for fine work like cutting the headstock face on the neck and making inlay veneers.
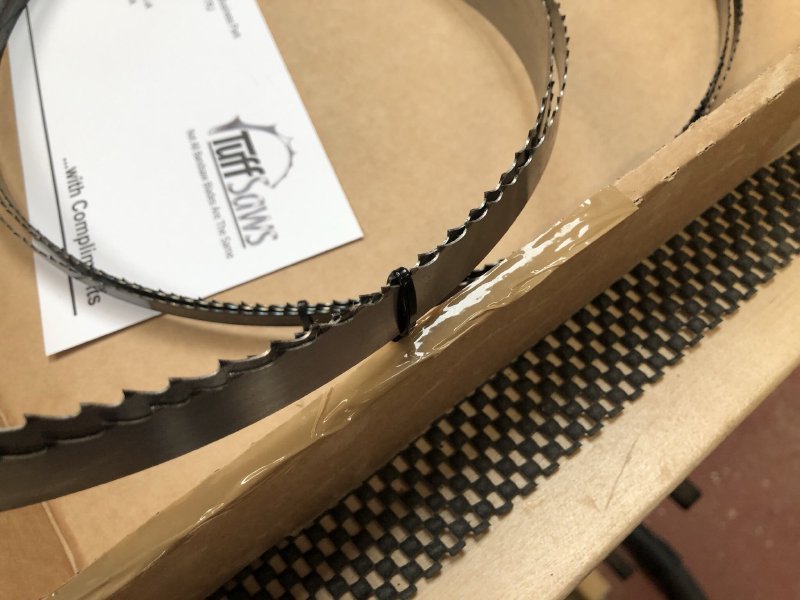
Thankfully swapping the blade on the Record BS350S band-saw I have is relatively easy: it has a cam leaver to quickly disengage tension on the blade to let you swap them over quickly, after which you can just dial in the tension based on the blade depth and adjust the guides as necessary. The really hard bit is just folding the blade up afterwards for storage :)
I think a common misconception of band-saws (at least speaking for myself from a few years ago) is that they’re roughing instruments, and whilst they do that, they can do precise work too if you get the right blades and spend a few minutes getting the blade tensioned and the guides set right. I think a related misconception (again, speaking for myself) is that you only change the blades when they wear out, rather than you might change the blade between specific jobs. Whilst it’s not as easy as changing a drill bit say, I’m glad that the band-saw I have makes this job relatively painless so that I’m more likely to spend the few minutes switching the blade when I need to rather than using the wrong blade for a job and then having to compensate in some other way (such as sanding - I really hate sanding).
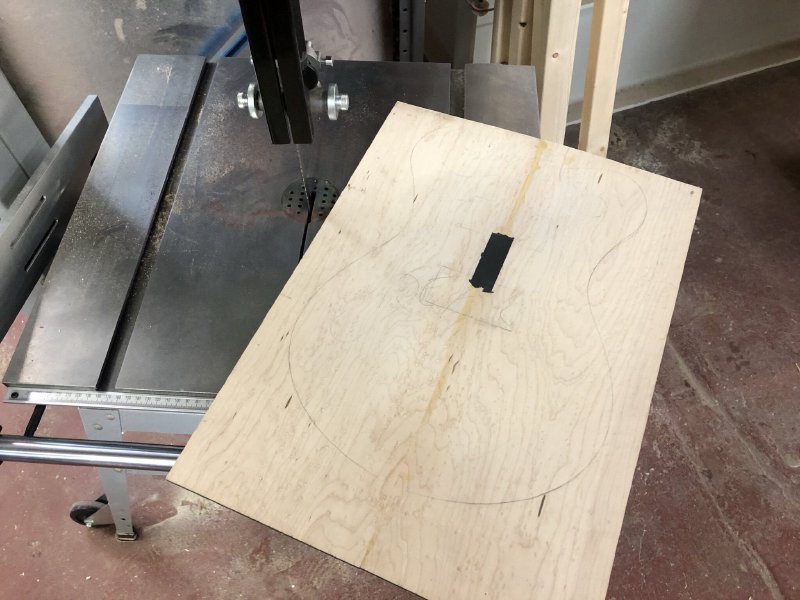
With the band-saw finally set up how I wanted it, it was time to get cracking on actual guitar building again. I had two jobs I’d been putting off until I had a band-saw, both on the perpetually un-named prototype guitar: trimming the neck after I glued on the fretboard a few weeks ago, and trimming the cap for the body so make it easier to clamp when I glue it.
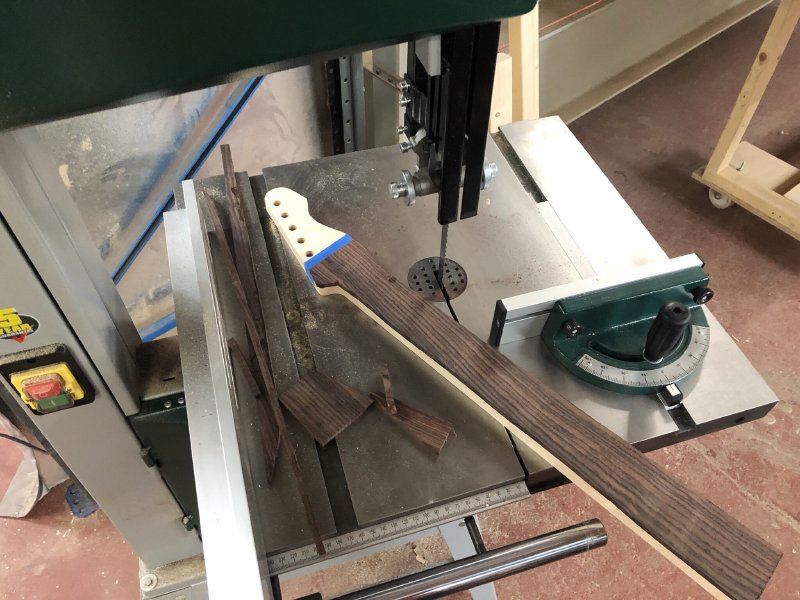
After gluing on the rosewood to the already shaped neck, I ultimately want to use a hand-router with a follow-bit to trim the fretboard flush with the neck. However, a hand-router is generally a finishing tool, and so I use the band-saw to remove most of the excess, leaving me with just a few millimetres all round to remove with the hand-router. I also use the mitre fence with the neck in a jig to cut the overhang over the headstock (the one side where I can’t trim it on the bed).
Once the band-saw part was done I ran around the neck with the hand-router to get all the sides flush, and then it was over to the spindle sander to put in the rounded transition from the headstock face to the fretboard:
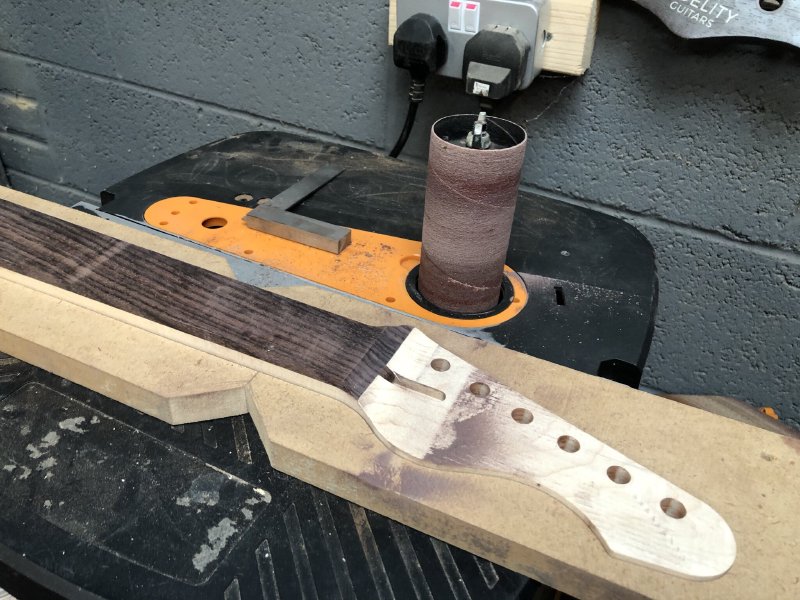
The jig I use to put the neck straight (as the neck itself has tapered sides) isn’t that deep, and so I’ve always been worried that the 18mm edge isn’t really enough to keep the neck perfectly level against the spindle. If I don’t get the neck parallel to the spindle then you’ll end up with visually distracting wonky lines where the fretboard and neck join.
In the past I’ve tried clamping things to the back of the jig top give me a more stable base, but that also is a pain to line up properly and never makes things as easy as I hope, with the clamps being a bit unwieldly. So this being a prototype, I decided to do away with that and rely more on keeping an eye on how much material I removed and adjusting the pressure I pressed against the spindle with towards the top or bottom of the spindle to correct for being out one way or the other, and I have to say, it took a little care and attention, but it worked out great and was less hassle.
Next up this neck needs to go into the laser-cutter to have the fret-slot and inlay positions etched into it, and for the headstock logo.
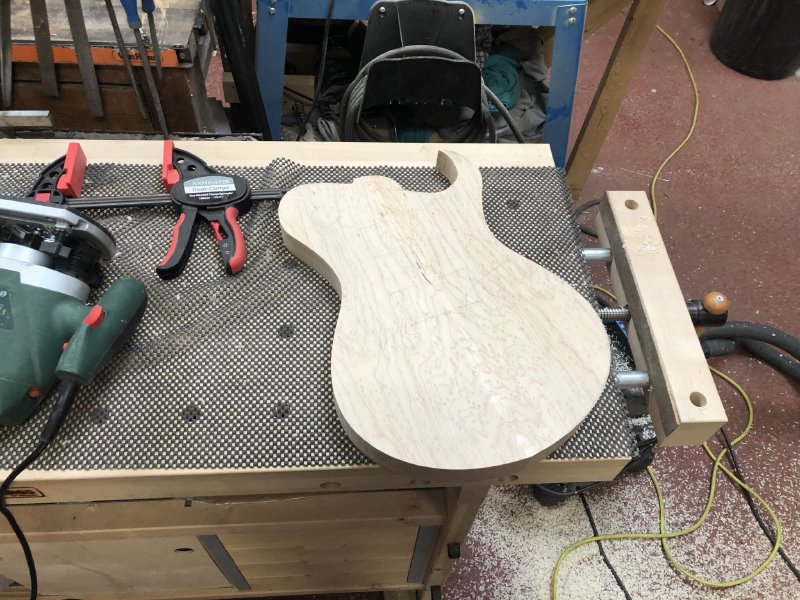
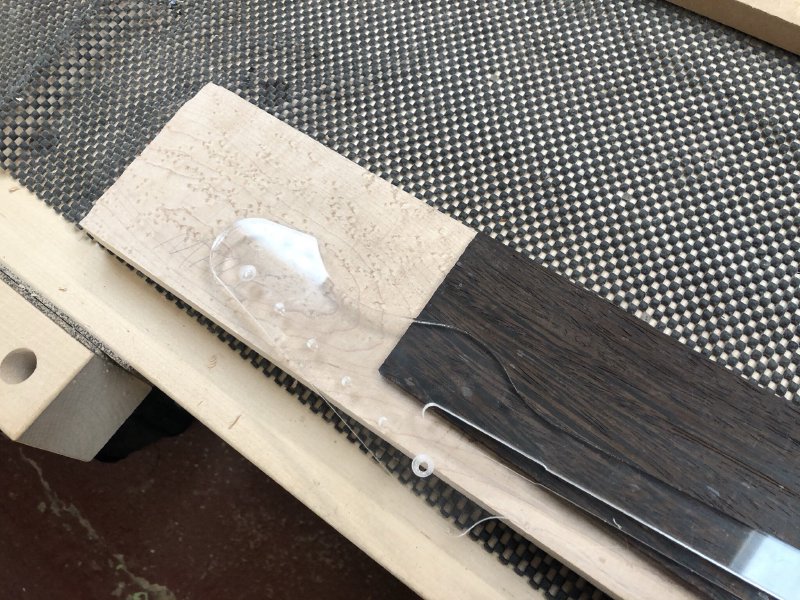
The other bit that went immediately on the band-saw was the maple cap I made when I first started back at the workshop a couple of months ago:
With this I just wanted to trim the cap down to 5mm or so excess compared to the body so that it was easier to clamp for gluing. Here you can see the cap post band-saw under the body it’ll soon be joined to:
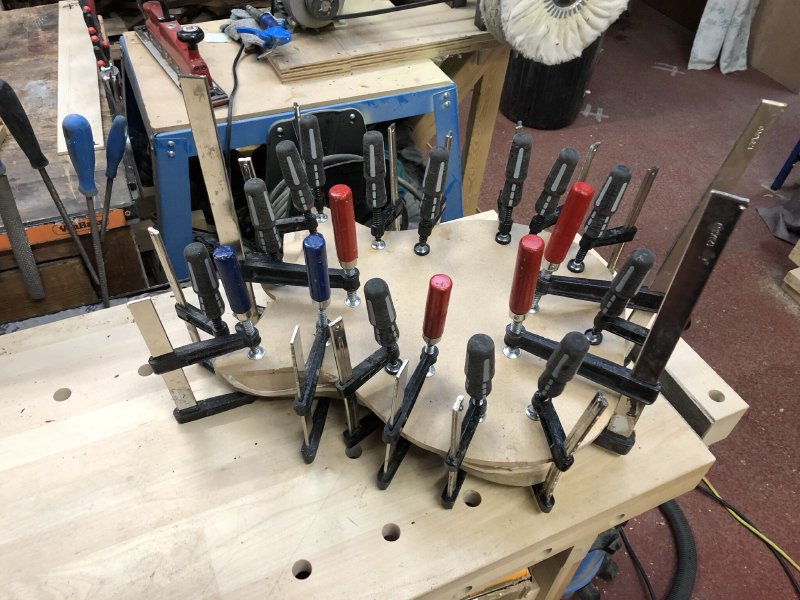
For joining them together permanently I applied glue to both the cap and the body: just a thin layer on the cap to make it tacky, and then more generous layer to the body itself, and sandwiched everything between a couple of old templates to help spread the pressure and avoid clamp parks in the body and cap; the poplar of the body is particularly prone to marking.
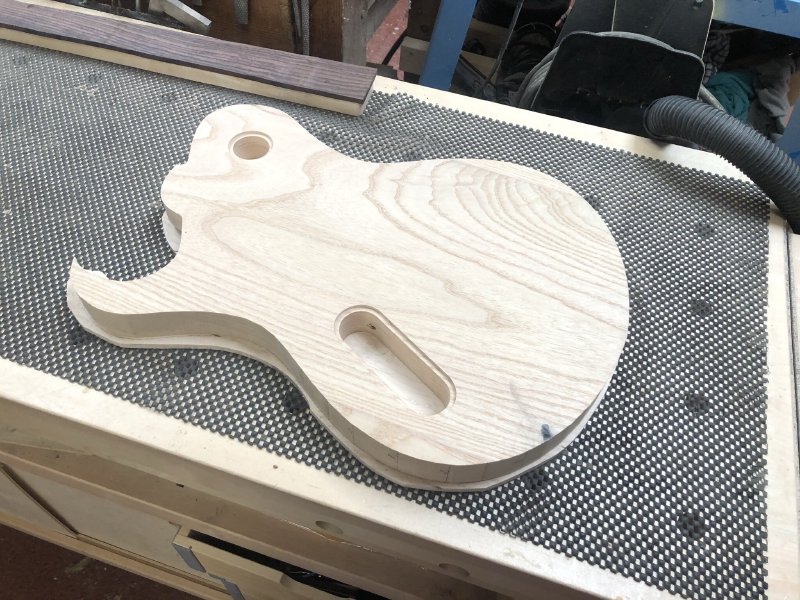
I left that overnight for the glue to dry, and the next day I unclamped it and used the hand-router again to get everything flush:
By the end, I was happy with a very tidy result:
Well, almost everything was tidy. Note the neck pocket isn’t trimmed, but there is a neck pocket cut into the lower part of the body: so why not the top? Well, it turns out the bearing on my router bit and the bolt that holds it in place is too big to fit in the gap the pocket on the body alone leaves:
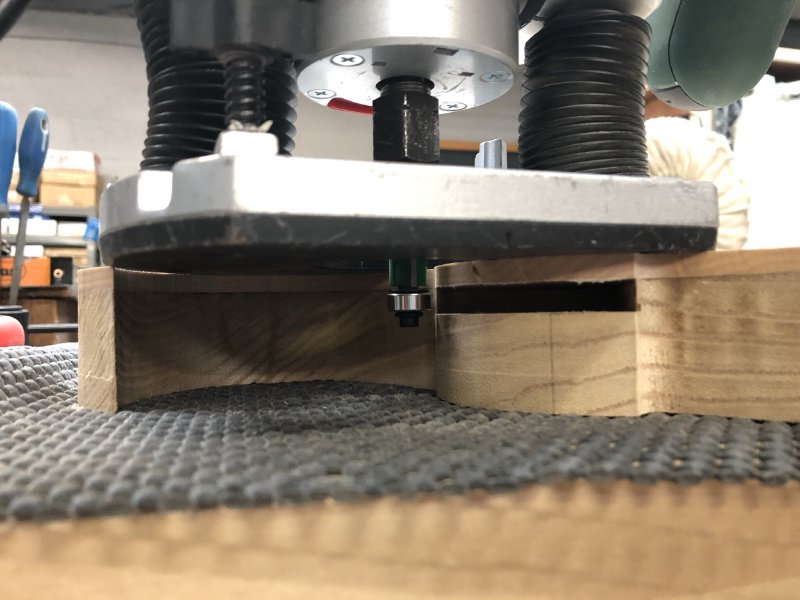
Doh! I need to either find a router-bit with a smaller bearing (which I’m not sure I’d trust having had smaller bearing router bits fail on me in the past) or I need to use a template to re-cut the pocket as I did on the body originally. Unfortunately the original template got damaged, so I’ll need to cut a new one.
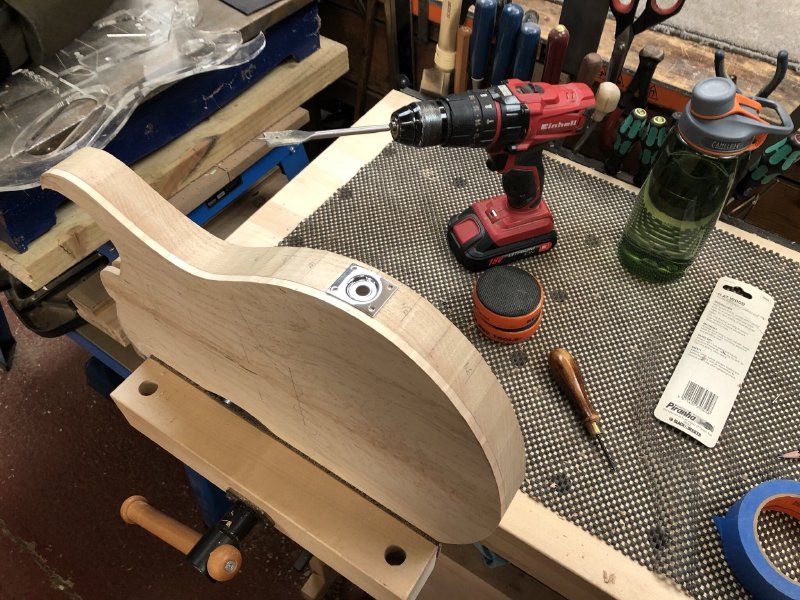
The last bit I did on this guitar was to drill the hole for the cable jack, and this is another proof to the rule that all my mistakes come down to missing the second “measure” in “measure, measure, cut”.
I’m not a huge fan of using spade bits for drilling large holes in wood, I’d rather if I can use a forstner bit as I find them to be more precise and less likely to fear. But for jack holes in guitars I have the right size of spade bit, which is an imperial measurement because everything on guitars was set in stone in the 1950s - generally I don’t let that guide me except in instances like this where the part you need to fit (in this case any jack plate) as made to this old standard measurement.
I already had a bunch of pencil marks on the side of the body from where I’d been checking it’s thickness earlier in the build, and I picked to use one of those for my reference for drilling the hole. Unfortunately I was so worked up about the technicalities of the drilling operation and trying to avoid the soft poplar wood tearing when I drilled into it, that when it came to mark up and drill the actual hole I’d accidently switched to using the wrong pencil reference line. So everything went fine technically, but because I didn’t measure a second time before I cut the jack hole is more towards 3 o’clock as you look at the body, rather than more like 4 to 5 o’clock as I wanted.
It’s not the end of the world, and this is just a prototype to let me get my technique back into gear in the new workshop, so I’m glad I did it here and not on the Corvette build, which I also need to do this on. It certainly won’t impact the instrument as a playing thing, it just annoys me as a perfectionist that I got it wrong.
One reason that I got confused was that the angle I drilled at makes sense when compared to the angle of the control cavity - it just looks like the right line as your eye is drawn to regular angles like 30 and 45 degrees, and subconsciously I let that guide me. I need to make sure in future I have clearer reference markings on the body before I drill so as not to get led incorrectly when my mind is on other matters about the process.
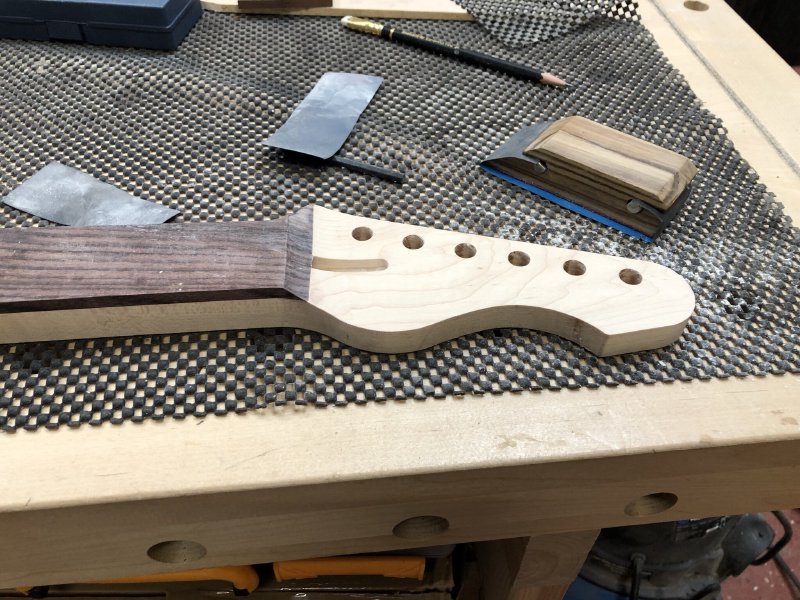
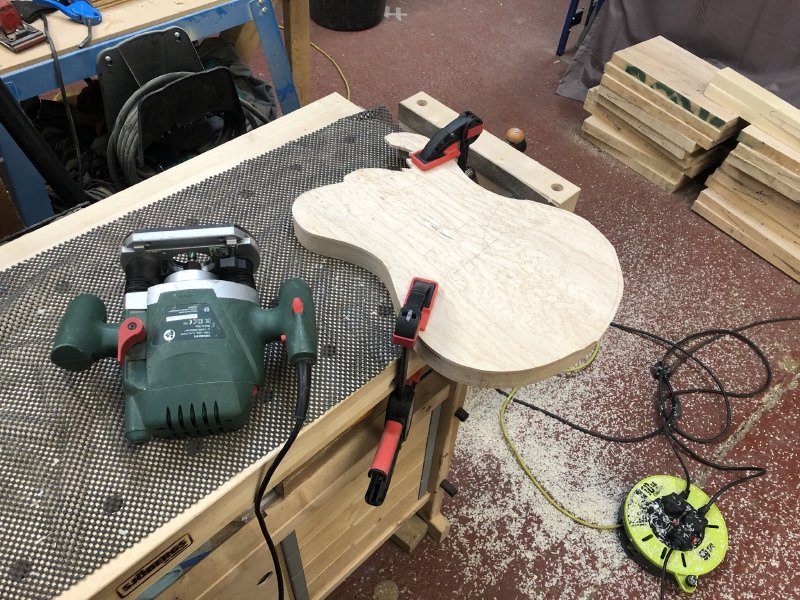
Still, self-flagellation aside, I’m really pleased with how this guitar looks and feels with the neck and body starting to reach their final form:
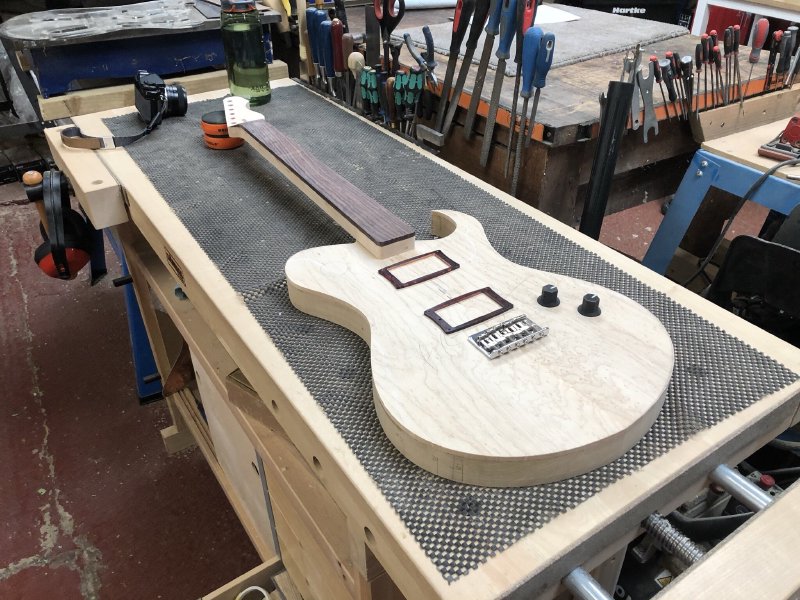
There’s still lots to do, but it’s great seeing this one come together.
There’s not much movement on the Corvette guitar build, as that’s awaiting pickups before I do anything else there. But I did start to make the neck for another build I have on the books that’s been delayed since last year, for a final Mustang style build that was ordered way back, but keeps getting delayed as my workshop has had to move around, lock down gets in the way, etc. Now I have the band-saw and I feel my new workshop is where I want it to be, I want to try get this build moving forward again. All I did was select the wood for the neck:
I thicknessed both the neck blank and the fretboard here, and next up I can use the band-saw to rough out the neck and get this thing moving in the coming week or so as time allows between the other builds. I don’t want too many guitars on the go at once, but there’s always gaps between builds where it’s useful to have another guitar on the go so that I can switch focus when I get blocked.
I did the final bits to my friend’s strat clone and got that ready to return to him:
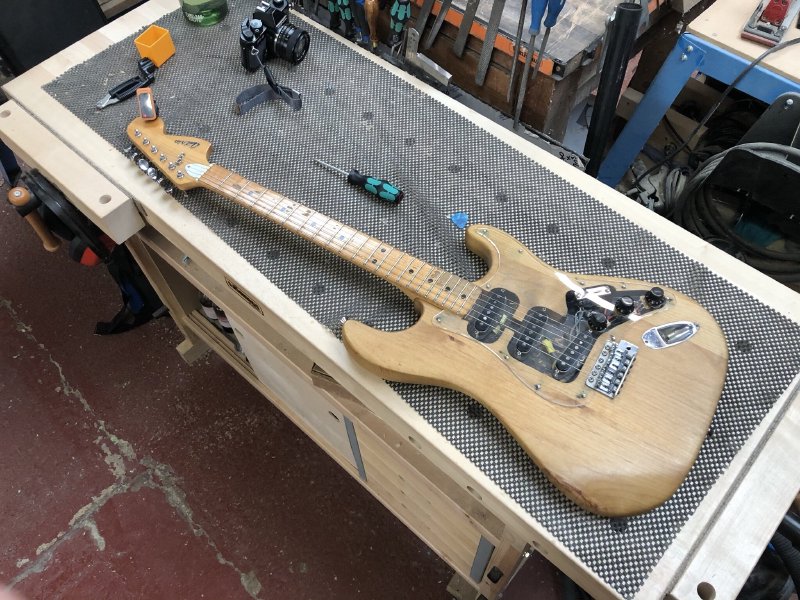
I have to say, once I’d strung it up and dialled in the intonation, those old pickups which caused me trouble with the pick-guard due to their non-standard size do sound lovely, so I’m glad we were able to keep them and adjust the pick-guard to fit rather than the other way round.
I mentioned last week that I was trying to work out how to drive Matt’s X-Carve CNC Router from Fusion 360, and it turns out that Inventables, the maker of the X-Carve, actually have an officially supported post-processor for Fusion 360. Matt and I tried using this with a simple test design to cut some air (i.e., we made the X-Carve go through the motions but didn’t cut any actual wood) and it did exactly as I’d designed the toolpaths in Fusion 360 to do.
I was particularly interested whether I could use the more complex 3D carving toolpaths from Fusion, as this is something the X-Carve’s own software, Easel, does not support. Easel is aimed at getting people with little-to-no experience up and running, so it makes sense that it doesn’t offer more complex toolpath options, but I was curious to know if that meant the hardware on the X-Carve wouldn’t support G-code that would do things like cutting arcs and slopes in the Z-axis given Easel doesn’t support that. It turns out that the X-Carve hardware is fine with these commands, so with Fusion 360 you can get the X-Carve to do more complex designs than with Easel.
This is exciting, as it means I can potentially help Matt out with some of his designs getting things in 3D, and using the X-Carve for some of my own jobs in the future.
And finally, on the topic Fusion 360 - this coming week is Autodesk’s big conference, Autodesk Univeristy, where they have lots of talks about how to use their productions, including the tool I use, Fusion 360. I believe normally this would be a paid ticket event, but this year it is free and fully online, so if you have an interest in CAD/CAM it’s probably worth checking out the sessions to see if any are of interest. Whilst a lot of it is specific to Autodesk tools, and I’m looking forward to learning some new tricks with Fusion, there are some more general CAD/CAM sessions about different types of 3D printing and so forth that might be of more general interest.