A week in the shop
Published 7 May 2019
Tags: 3D printing, fettling, fuzz, maintenance, pedals, the corvette, workshop
This last week was one where I didn’t feel like I achieved anything, but writing up these week notes I realise I had a lot going on. This is a useful feature of keeping a diary or doing a weekly review (even if you don’t share it): weeks like this where you do lots of little bits on many things don’t feel productive, but so long as you’re moving things forward then you’re in a good place: the trouble is when you have nothing to write…
Last week I wrote about making the body for the Corvette guitar build, and now I need to make a start on the neck. Given the CNC Router is unwell yet again (my usual goto for thicknessing wood in Makespace, which doesn’t have a proper thicknesses), I called upon my friend Matt who has one, and in return for the promise of future beers he let me fill his workshop with dust.
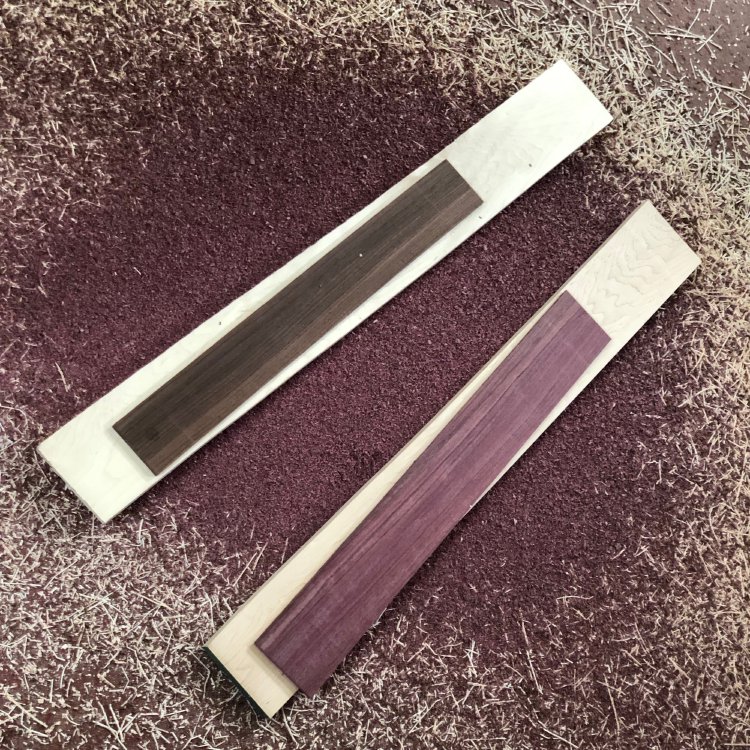
I thicknessed enough wood to make two necks: one for the Corvette, and a potential replacement for the neck on The Blues Deluxe, as I’ve never really been that happy with the neck on that guitar for various reasons.
The fretboards are almost at the right thickness, with just the last bit that’ll be removed during the radius sanding left, but both the maple blanks I left a little bit more meat on to remove by hand back in the workshop. One of the maple blanks has a light birds-eye to it, and a planer thicknesser will tear at those features, so you need to finish that by hand. The other neck had multi direction grain in one area that was tearing, so I stopped short again on this one for effectively the same reason, letting me finish it by hand. This one also is slightly bent in plant form, and whilst the thicknesser got rid of most of that, I want to get it dead straight using my giant No 7 plane.
Given my new found confidence in using the hand plane to get things into shape I then got ready to finish these, but I discovered my plane wasn’t cutting that well despite my having re-honed the blade. A closer examination showed that the edge on the blade just isn’t staying sharp with such tough wood: the downside of buying a cheaper plane. I’ve now ordered a new blade of a higher quality, at which point I can then resume getting these blanks down to the final thickness.
On the topic of hand planes, the Makespace workshop team (Graeme, Jim, and myself) spent and afternoon turning two vintage Stanley hand planes from being rusted relics into working quality bits of kit.
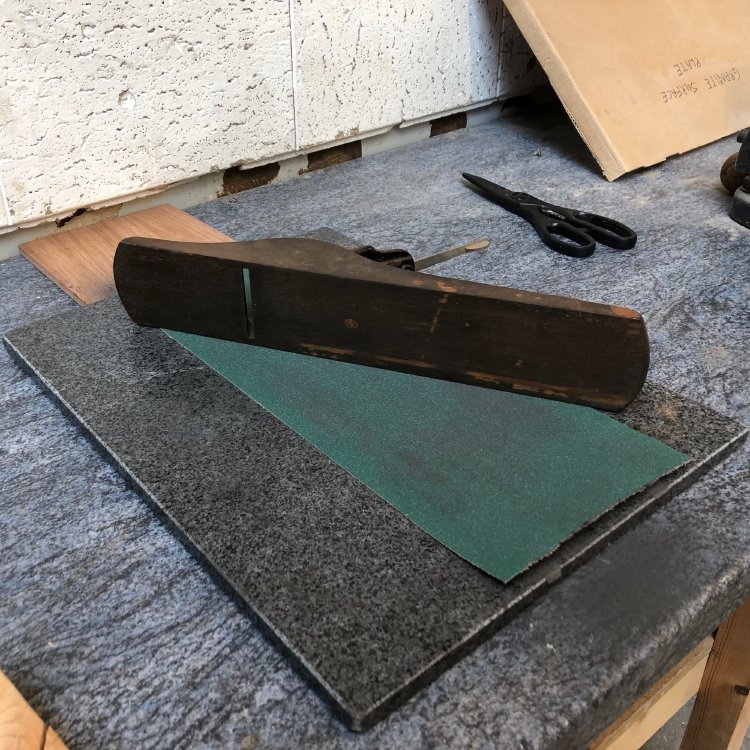
Between the three of us we re-ground the base and sides using some tough 80 & 120 grit sandpaper mounted to a surface plate (a known true flat surface), we reground the blades to give them a new working edge, and we stripped and re-oiled the wooden handles. It was a lot of effort, but in effect we took two cast offs that cost next-to-nothing and for a small investment in time (having three people definitely helped) we turned them into working units that are better than most of the cheaper hand planes you can buy.
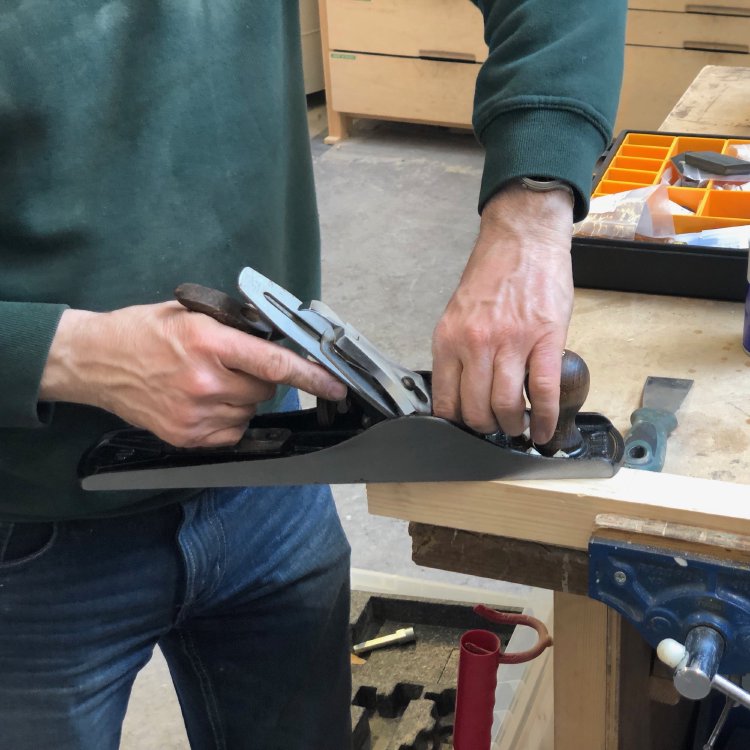
The problem (I’ve come to discover having done this myself) is that cheaper hand planes just aren’t built to a good quality: the bottoms aren’t perfectly flat, the blades are of a cheaper material and quite thin, etc. And whilst it may not seem like it, a hand plane is a precision instrument: once set up just right and kept there it’ll make your life a lot easier, but otherwise you end up just fighting it a lot.
It’s hard to justify spending several hundred pounds on a hand plane when you’re starting out and unsure if you’ll be using it lots or it’ll just end up at the back of the cupboard, but getting an old one that looks beat up can, as we demonstrated, be put back into action with a little effort. And it saves on resources for the environment, so it’s a win-win.
I tried to laser cut another neck template, this time for the second neck which has a longer scale-length (25.5” for The Blues Deluxe compared to 24” on the Corvette), but this failed to cut properly, due to the power on the Makespace laser cutters being at a low ebb. An unfortunate waste of material, but is a lesson to me to do more than just one test cut to check the power.
The power levels of a laser cutter will vary over time as it is used: despite extraction, dust and vapourised particulates will build up on the lens, the alignment might shift slightly, etc. I suspect the Makespace laser cutters are having a bit of a success failure: at times they’re almost in constant use, so the mean time between maintenance needs adjusting to compensate, but there’s not enough volunteers right now to make that happen I suspect. I’d volunteer, but I already have my hands full with looking after the woodwork shop and CNC Router at Makespace.
On the topic of looking after the woodwork shop at Makespace, I realised I was struggling to keep on top of the workshop todo list: some people will talk to you in person about things that need fixing, some will email, some will use the mailing list. Then there’s multiple people looking after the workshop, so you have no idea who, if anyone, has responded. This was driving me slightly batty, so I decided to try following the example set at DoES Liverpool and create a GitHub issue tracker for the woodwork shop.
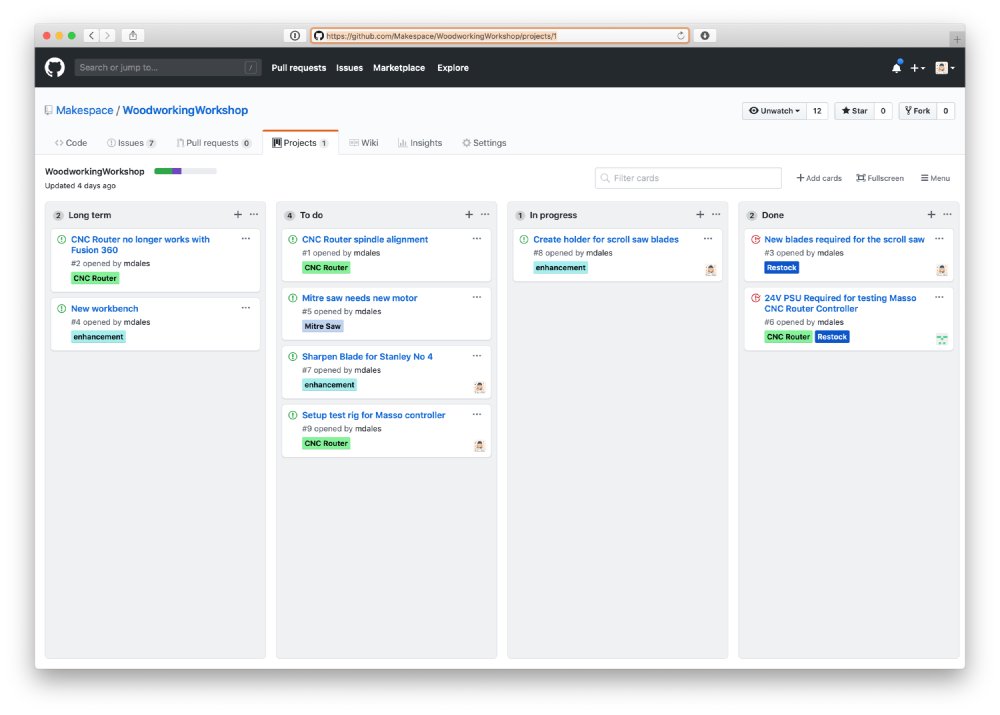
There was quite an interesting discussion behind the scenes about this. No one disagreed that we needed to do better, but there were some justifiable concerns about how to ensure that things are picked up are actually responded to and that it doesn’t fill with moribund issues. To that end I’ve said for now I’ll ensure a weekly triage happens, and I’m quite happy to close things as “won’t fix” if they’re nice to haves but have no real hope of happening in the near term. The death of systems like this is that they’re not properly weeded, and so the price for me of getting this going is some effort in maintaining it.
Fretwork is hard; I think I’ve said that here before. It doesn’t help that one of the steps in the process I use is that I hammer the frets in, which makes it more effort to level them later, as you’ve effectively created an individual un-even top surface on each fret. The alternative that people use is to have a fret press, where you use an inverse radiused bit that fits into a drill press or an arbor press, or even you can buy a full press setup from places like Stew-Mac.
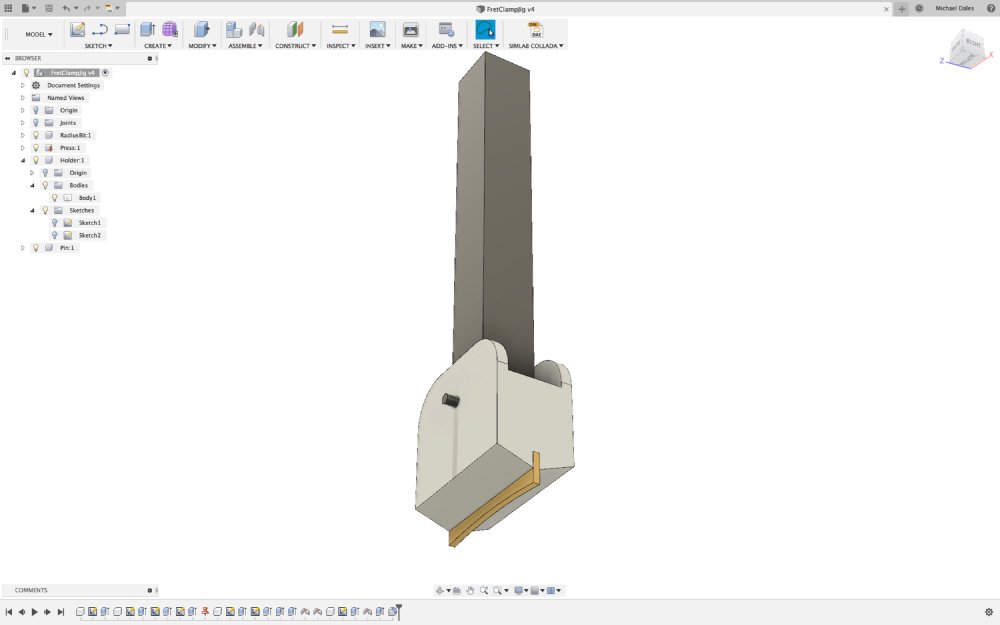
We have an arbor press at Makespace, and I bought a press bit for it, so I decided to have a go at making my own adapter for it (spurred on by Jim, who has a good habit of challenging me to remove blockers like this :). As a first pass I made a mock up of the press and bit in Fusion 360, and then modelled a block that would take the bit and align up with the mount holes on the press. The idea is that the block will pivot, to allow for any slight misalignment with centring the fretboard under the press.
One day later, I had a 3D printed part, which almost fits, but not quite:
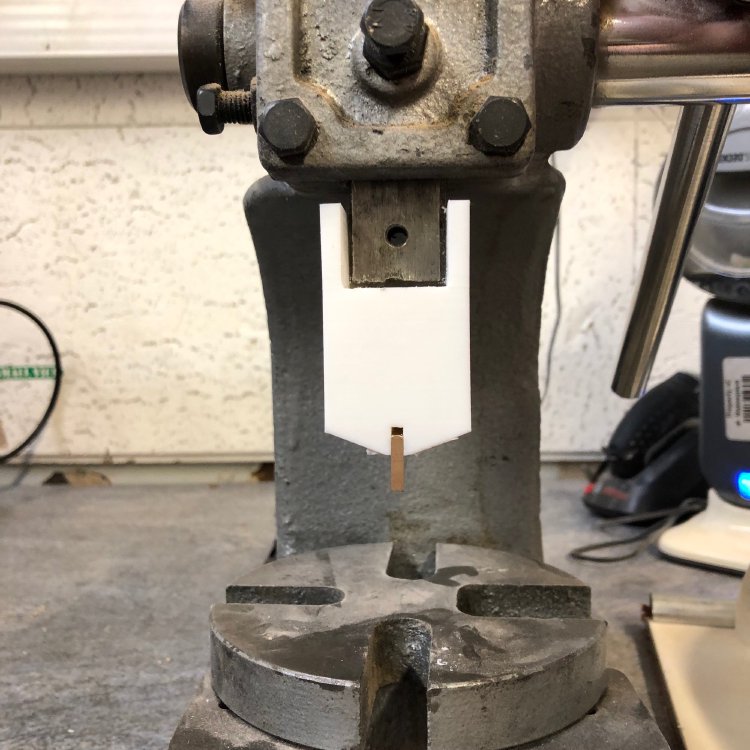
Whilst I measured everything, I had two things working against me I think: the 3D print expanded slightly from my design, and also after years of abuse the bottom of the central block of the arbor press has flared out slightly. I’ll need to do a re-design of this, and then do some test pressing to see how it holds up strength wise.
We had another successful Fusion 360 Show & Tell night at Makespace. This is an event I run every other month to try get all the Fusion 360 users at Makespace to share how they made things, so everyone else can learn new ways to make things.
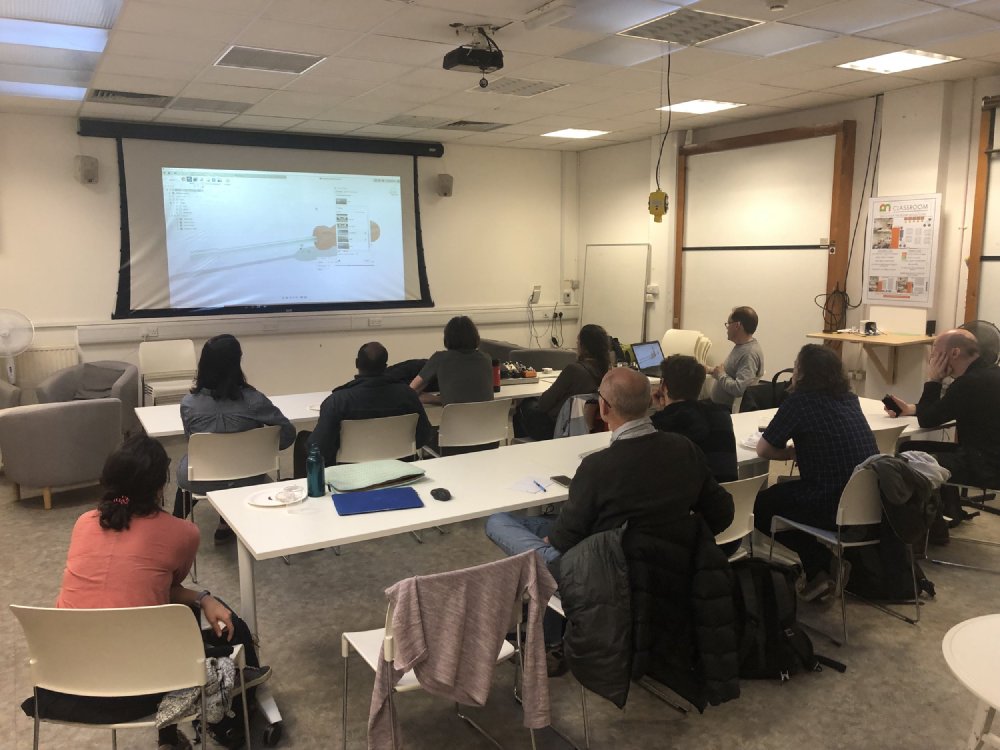
This week we had Greame talk about how to get the best out of using Fusion 360’s rendering facilities for making pretty previews of your design. I’ve used this feature when communicating guitar designs to clients, but I’ve never felt I got anything to look amazing with it. The main learning from Graeme’s talk I took away was to pay attention to the defaults in the rendering options: they probably all need a little tweak. For example, a little bit more exposure than Fusion 360 has by default, making things a little bit more bright, had quite a big impact.
I also did a talk this time, covering how to use the sheet metal features of Fusion 360. In particularly I was keen to get across that it’s not just to make things with metal (as I did with my pedalboard), but also in wood (as I did with my fuzz pedal), acrylic, and leather (thanks to a design shared by Jason). I can see why they named it what they did, but it’s actually a way more applicable tool than the name suggests.
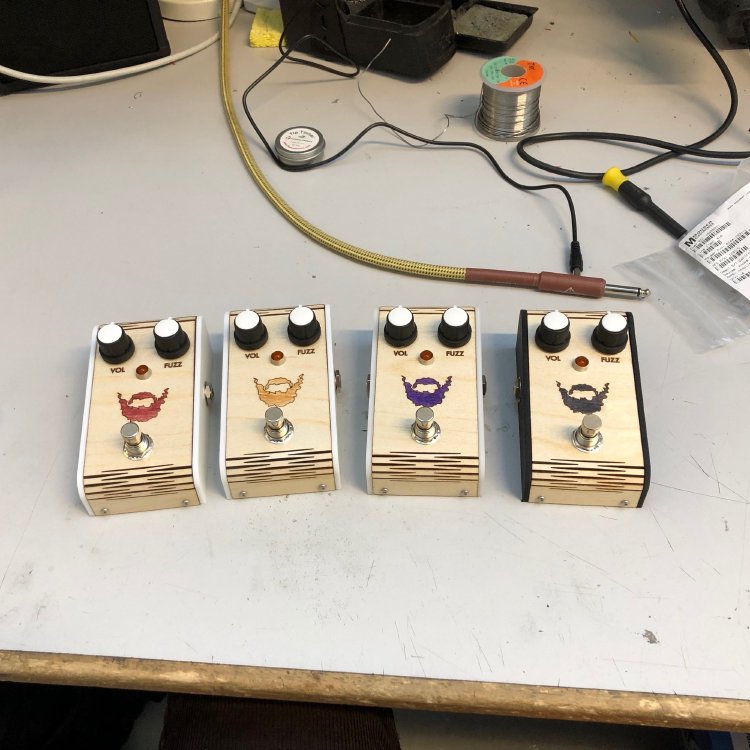
Speaking of the fuzz pedals, I finally closed the chapter on those. The four additional prototypes I made recently have been sent out for prolonged field testing.
I’ve learned a lot making this small batch of pedals, from soldering the boards up, to making this unusual wood/plastic fusion case, to the problems created by making something that is put together this way (top tip: if you’re making something with multiple connectors, don’t have them on both halves of your case, put them all on one part, otherwise it’s a pain to assemble).
when just making one of something you’re so focussed on “can I do this”, and you miss a lot of things about “can I do this at scale”. Whilst 5 isn’t exactly a large scale, it quickly brings out a bunch of issues not apparent in the first one. I’ll try and summarise it all as an individual post at some point.
For now, just like research satellites that pass out of the solar system having examined the inner planets, they are on one final longer term experiment: I sent four pedals out to different (types of) guitarist I know to see how they survive long term. The wood and plastic case is nice visually, and it is very nice that it can be entirely fabricated in Makespace using the 3D printers and laser cutters, but how will it actually last as people use them over a longer period? Will it stand up to repeatedly being stood on? Will the plastic and wood age badly? I don’t know the answer to those, but I want to know, so getting these pedals out is another of those win-wins: four people get a nice sounding fuzz pedal to play with, and I’ll get feedback as to how well they last.
Finally, a reminder that I’ll be appearing at a couple of events over the summer, both of which were announced officially this week: I’m going to e exhibiting how to build guitars from bits of wood at Liverpool Makefest on June 29th, and I’ll be speaking about some interaction of guitar building and community workshop involvement at Wuthering Bytes Festival Day up in Hebdon Bridge on August 30th. Both events are awesome (despite me ;) so you should put them in your calendar.