A week in the shop
Published 23 Dec 2019
As I write what is possibly the last week-in-the-shop of 2019, It’s hard not to end this year feeling it’s been an overall unfortunate one on the guitar building front - things certainly have not gone smoothly of late. However, in any endeavour, when all feels like an uphill struggle it’s important to find a way to remind yourself how far you’ve come despite the frustrations and set backs.
I was feeling particularly low about it all earlier this week, when my other half reminded me that I’d bought a copy of the issue of Hackspace Magazine that featured my guitar building in to give to my grandparents. Unfortunately my timing was poor, and I never did manage to pass it on to my gran who passed away earlier this month. However, as I wrapped up a copy for my other gran and one for my parents, I was briefly taken aback to remember that here was a magazine article with pictures of guitars I’d made earlier in the year, about someone who looks and sounds like they know what they’re doing (at least some of the time). Seeing it in print suddenly reminded me how far I’ve come in a short time, and put things back into perspective a bit.
So a brief huge thank you to everyone who’s supported me on this journey over what’s been an at times difficult year. As ever, there’s people who I’ll miss out here, so apologies if I’ve forgotten you, but here’s some particular shout outs to those who have helped give the year it’s highlights, in no particular order: Jonathan Woolf, Adrian van den Heeven, Graeme Durant, Jim Cain, Stewart Matheson, David Walsh, Tristan Dales, Jason Morley, Andrew Black, Andrew Gregory, Dan Lynch, Caroline Keep, Denise Jones, Steve Upton, Matt Oram, and Jamie Swannell. And obviously particular thanks to Laura James, my other half, who’s been so very supportive of all this.
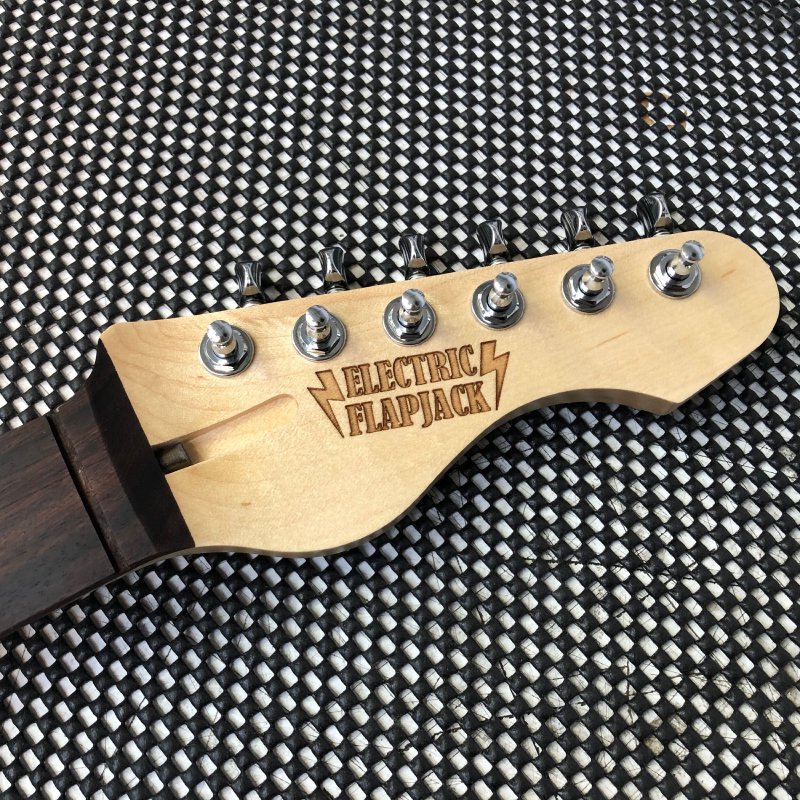
With commission #10 having its neck repaired and re-oiled, I *finally* got to that magic moment where the body and neck are joined, and the parts of the guitar start to assemble. First up I fitted the Gotoh tuners:
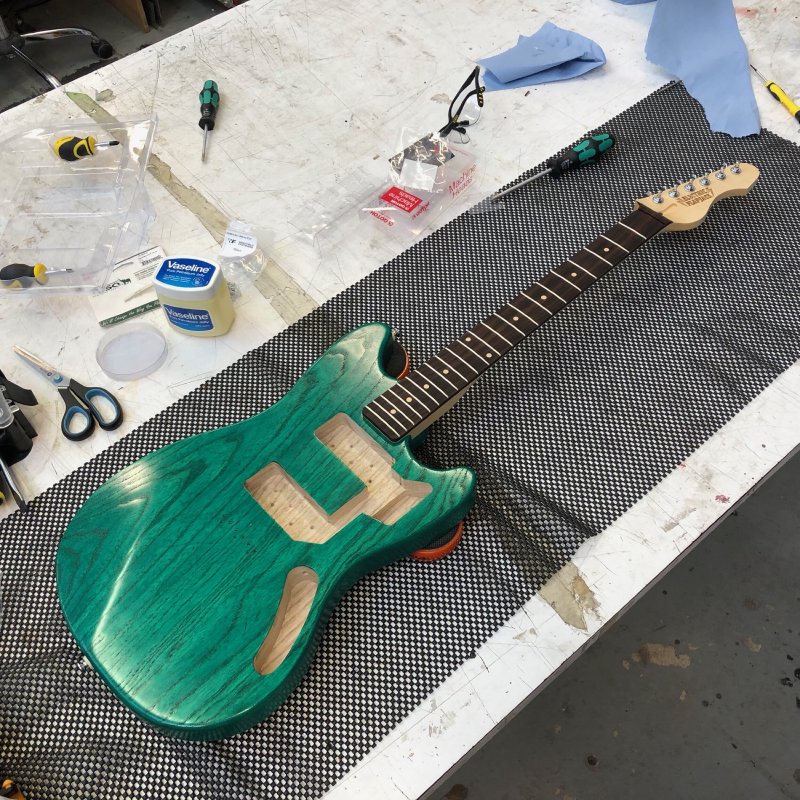
I then assembled the two halves together and fitted the strap buttons:
Before I could fit the bridge, I had to put in the shielding in the pickup and control cavities. If I was sensible I’d get the shielding paint for this, but I have to confess that I just like knowing that hidden inside each guitar is this beautiful layer of copper, so I doggedly stick to copper tape, despite the nasty “paper” cut I got doing this:
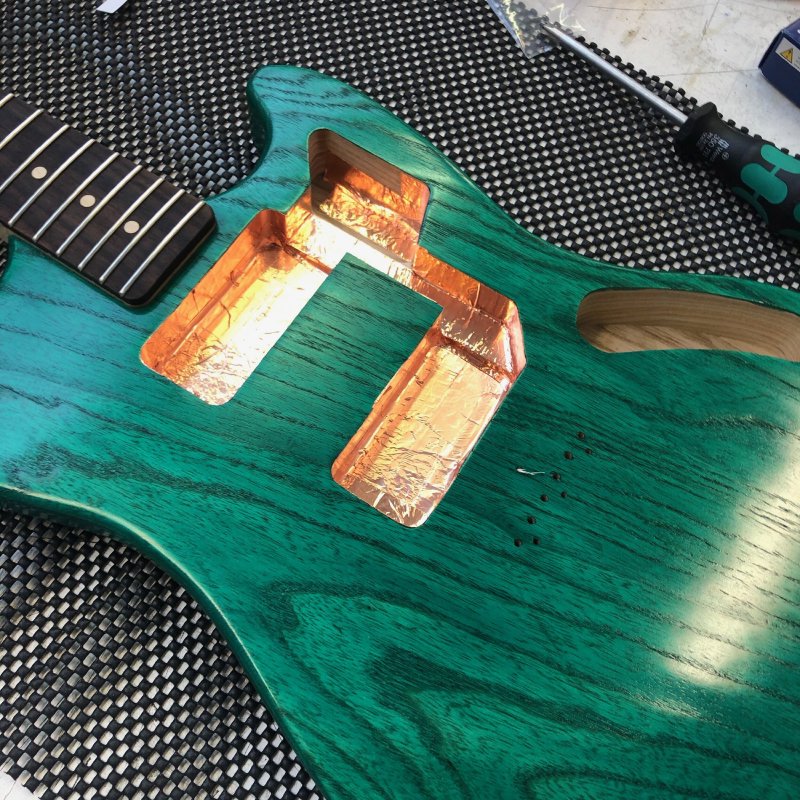
The mustang is an odd design (in my not so humble opinion) for many reasons, one of which is the separation between the control cavity and the pickup cavities, which here I need to make sure have an electric join on the shielding. This also has to be extended to the bridge: you can just see the wire coming out where the bridge will be mounted, which connects to the copper shielding, which in turn will be connected to the ground on the guitar cable.
With the shielding done, I could then mount the bridge. The eagle eyed of you might have noticed the vaseline in one of the above pictures: it’s somewhat useful at this stage to help get the screws to self tap smoothly. Despite drilling pilot holes, you find that harder woods, particularly maple, but also to some extent ash, are resistant to having self tapping screws make their initial mark, so just putting a light amount of vaseline on the screw will help prevent the risk of the screw head sheering off (which I’ve had before on the tiny screws used to hold the tuners in). The downside is the odd comments you get from other workshop members :)
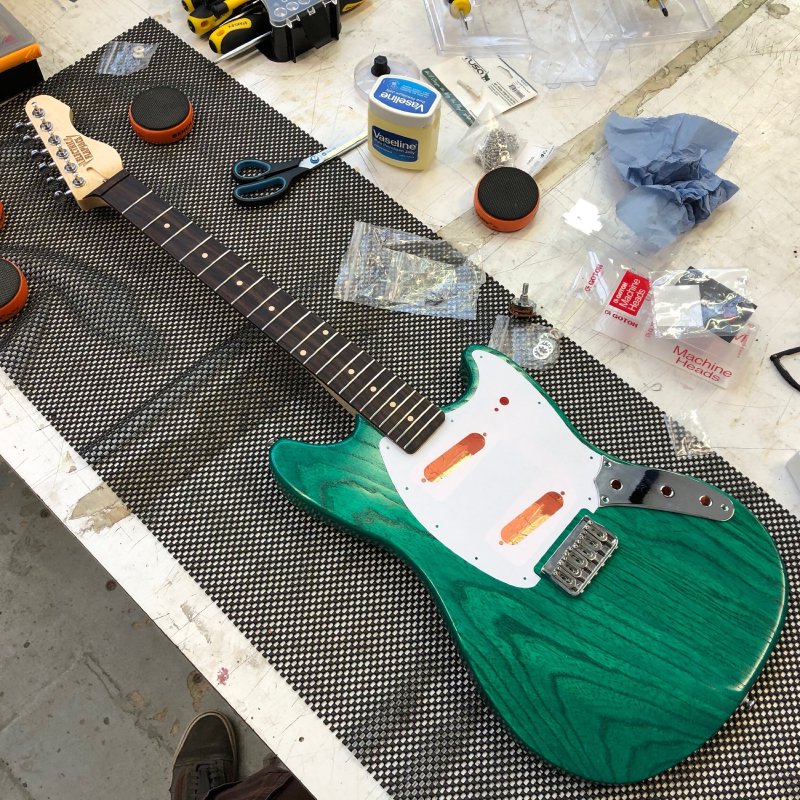
Once the bridge was on, I did a first test cut of the pick-guard to test fit:
It was here I realised that in all the confusion this month, I’d forgotten to order new pots for the volume and tone controls, and it being xmas, this stopped me getting the guitar finished this week due to postage being slow. Let’s back up and see why.
The mustang has this odd arrangement between the control plate an the pick guard, where it has this wavy line that joins the two. I hate this line. To get a good join between the pick-guard and the control plate I need to know that everything perfectly lines up between all the bits in place that dictate how the pick-guard sits: the neck, the bridge, and the control plate. Because the control cavity for this design can’t be much wider than the volume and tone pots (due to the size of the control plate), any slight variation in how I cut the control pocket relative to the neck neck pocket will mean I need to adjust that interface. This is why I do test pick-guard cuts using a laser-cutter first with paper to get a general sense, then with cardboard with the pickups and switches mounted, before CNC Routing the final thing: literally measure, measure, cut*.
However, without the pots to hand I can’t check the alignment of the control plate, so everything on this guitar is literally stuck behind getting those pots in the post. I ordered them at the start of the week, but by the end of the week still no luck. This I failed to get the guitar ready by xmas as I’d hoped - sorry David :/ This was oversight on my behalf, as I was convinced I’d ordered them, but with everything going on this month I’d clearly just overlooked them. On the todo list for 2020 is to bulk buy a bunch of these things rather than just order them on demand.
When I go in the shop later today I’ll see if they’ve arrived, in which case I’ll try to at least get the cardboard prototype done, but otherwise it’ll be the week after this before I’m back in the shop - so final frustration to end the year on, and one of my own doing.
* As an aside, I was delighted to see that someone had left two pairs of callipers on the wall next to the CNC Router this week rather than just one, presumably just so they could do measure, measure…
In the mean time, I did spend some time dealing with one other part to the build that I know in theory I could do, but hadn’t actually put into practice: making the custom controls for this guitar.
When this guitar was commissioned, one of things specified about the guitar was it used the custom pickup selector I designed for the Orange Surf offset that I built. Here I’d made a large rotary pickup selector switch that made it more ergonomic to pick between your pickups. At the time I made these using the FormLabs resin 3D printer that Makespace had, as that printer gave great results from a finish perspective. However, that kind of printer doesn’t tend to suit the kind of prints most Makespace members make, so we made the decision to get rid of it in order to get more of the conventional filament 3D printers that are hugely popular with the Makespace membership. Whilst these printers are much easier to use than the FormLabs printers, the downside is the finish isn’t nearly as good. As a result I wanted to see if I could apply some manual finishing to get the output to a standard I was happy with.
First up, I tried using a special filament called Polysmooth that behaves like PLA but that you could smooth with isopropyl alcohol. The controls printed fine (albeit with the usual obvious 3D printer surface issues) but without having the dedicated machine to make the IPA vaporised I couldn’t get that to produce a nice effect despite trying several different ways to apply the IPA. I’d like to try this some more later, but for now I put this idea to one side.
Instead I turned to using ABS printing filament and my favour pastime: sanding (hint: sarcasm).
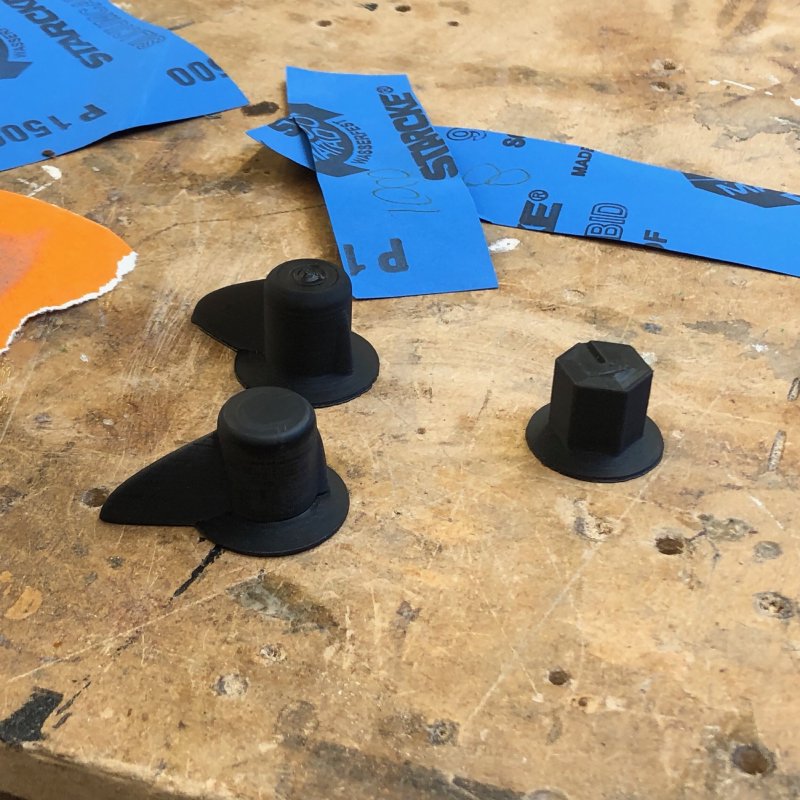
This approach seemed to generate nice results, particularly if you look at the top of the unfinished control at the rear and the smoothed one in front of it. However, the main problem with sanding was getting into the creases on the design where sandpaper wouldn’t reach: there was a clear discontinuity between where the sandpaper had and hand’t reached. To solve this workshop regular Graeme gave me two suggestions: Scotch Brite and steel wool.
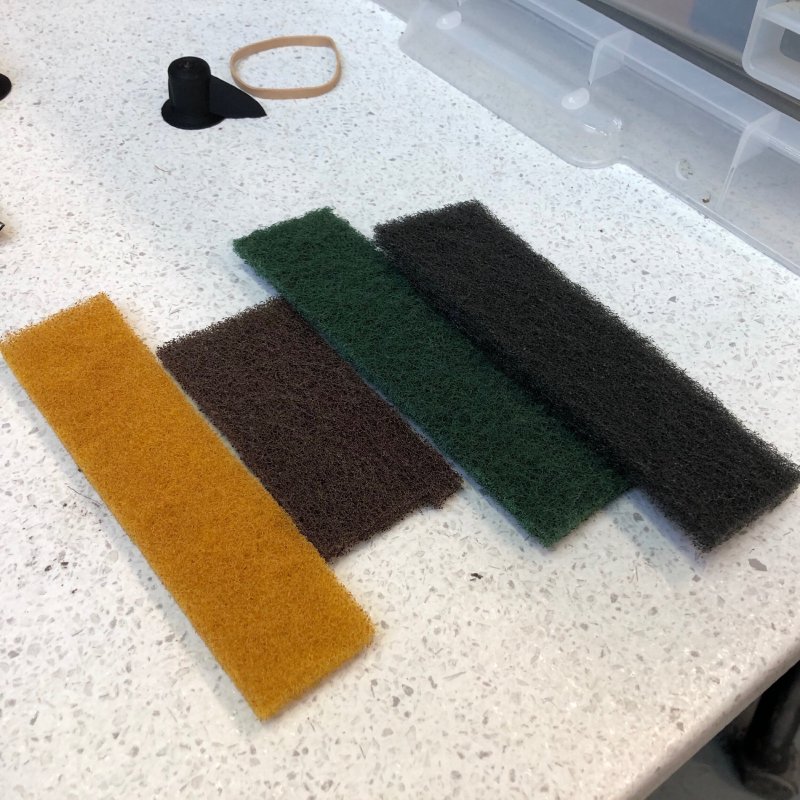
Scotch Brite is like a the stuff you use to clear dirty pans and dishes, but comes in different grads of abrasiveness, and most importantly its flexible so will fit into corners and folds better than sandpaper will. I found that the heavily abrasive ones were too much for this application, leaving the ABS badly scratched, but the finest one was similar to middlingly high sandpaper grits (say 600 to 1000). Steel wool is something that I know some people use on wood to get a fine finish, but is something I keep well away from my guitars: I find that you get little fibres of steel getting stuck in the wood grain that you then can’t remove. Horrible stuff, on wood. However in this case wet sanding with steel wool produced the best effect.
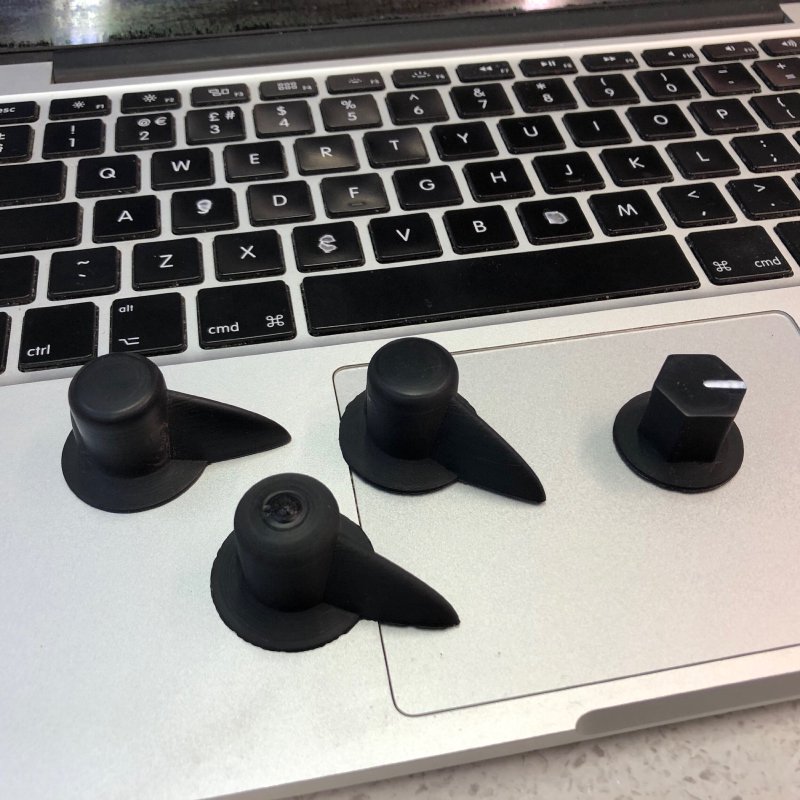
The black controls come out terribly in pictures, but you can just about see how the top of the control in the foreground was smoothed nicely using a mix of sandpaper, Scotch Brite and finally steel wool to make a nice smooth top surface as per the rear middle version.
Just to record it to save others trying: I also tried using a jewellery buffing bit on a dremel, but it was far too aggressive on the ABS print, leaving it pitted and unusable. I went through quite a few prints doing all this, leading some in the workshop to question my sanity:
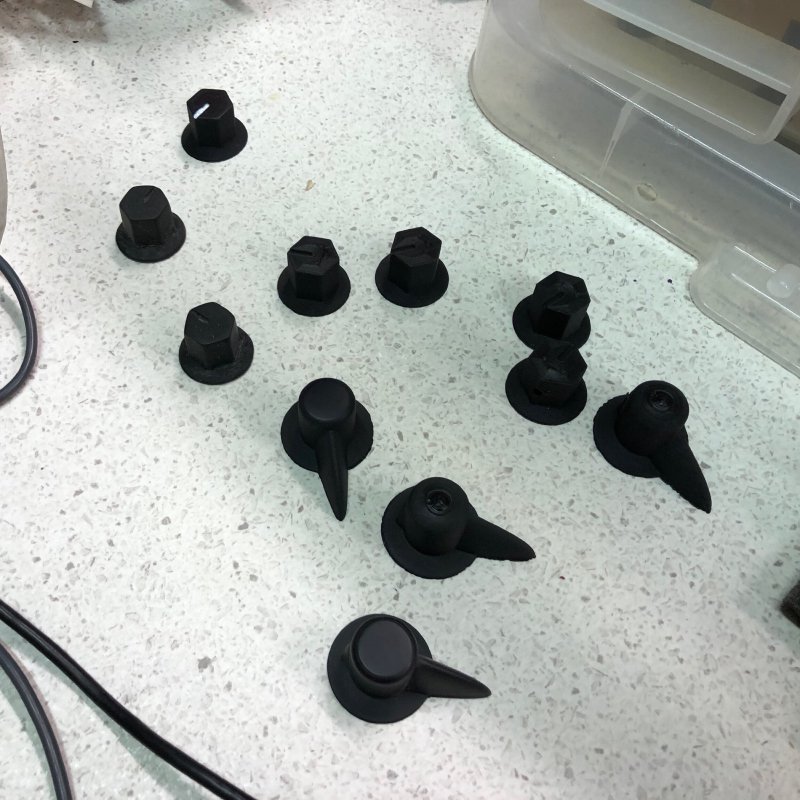
I can stop printing controls any time I want, honest…
In all seriousness, whilst I’m happy to do this as a service for clients, note that in no way do I advocate 3D printing your own controls in general. It costs more per part to 3D print them and then you have to go through all this to polish them, so you’re generally better off buying them. The exception being when you really do want to make something custom.
The last thing I did in the shop to pass the time whilst I waited for the post was recreate a toy from my childhood. My Grandad, who passed away earlier this year, made a very simple marble game using some bits of old wood, cutting notches into it and assigning scores based on the size of hole. A simple thing, but something that has great sentimental value to us grandkids. Thus I decided to make something similar that I could then pass on to my siblings and cousins so we’d all have one.
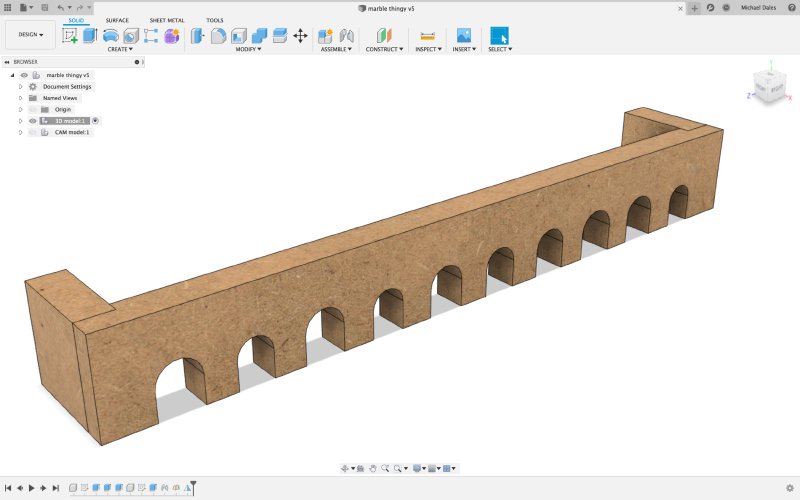
Making this design in Fusion 360 was surprisingly complex given the superficial simplicity. At first it seems easy enough, but because each hole is a subtly different size you can’t use any of the regular pattern tools or some magic formula, which means you end up drawing it all out by hand manually. This obviously isn’t the worst problem to have, but it’s very similar to how I can’t use Fusion 360 to generate my fretboards, and I use the external tool I wrote instead.
I suspect the best way to do this would be to write a plugin for Fusion in Python - which is on my long term todo list for my fretboard generator also.
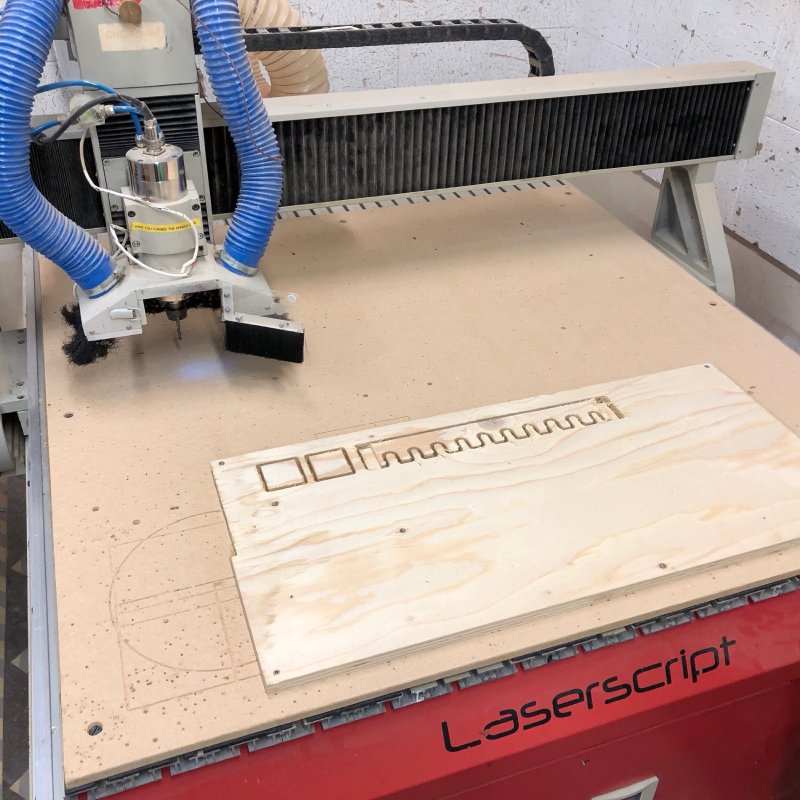
Still, design made, it was over to the CNC:
And a bit of gluing later:
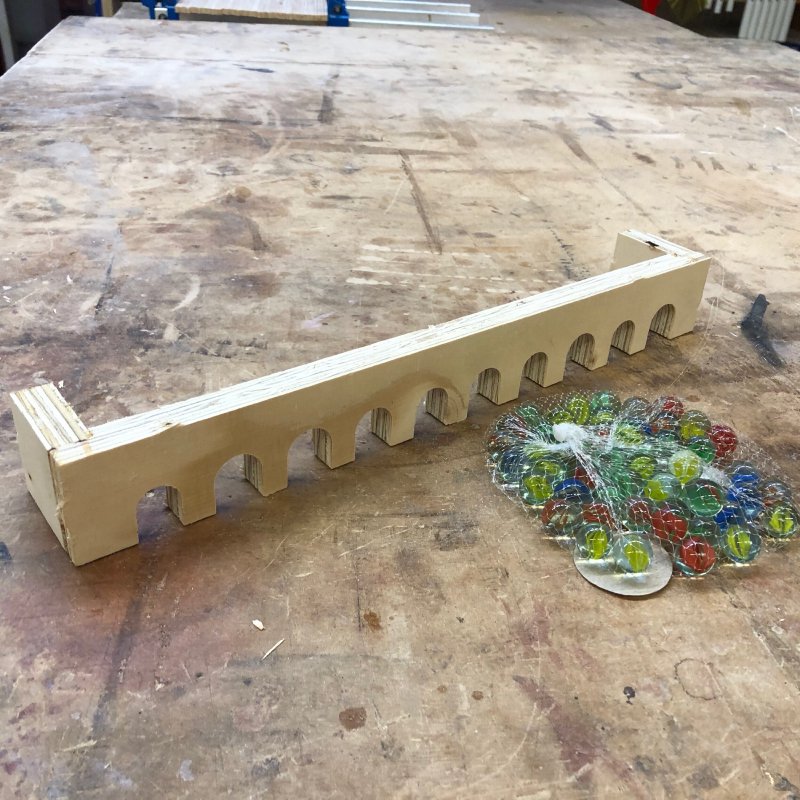
Done! On this prototype I’ve made the holes a bit too big, thus a little too easy to play, so I’ll tweak that for the next rev. I’ll also laser etch the point values on the holes on that one too. Again, not ready in time for xmas, but still, it’s a good time to be thinking of making things for family.
The other shop related activity I did this week was start looking for a new shop! After the trials of the last couple of months, and earlier incidents in Makespace that at the time didn’t seem so bad but are clearly part of a similar pattern where other members don’t value the work that goes into the guitars I’m building, in 2020 I need to find a new home before I can resume guitar building.
The main thing to note about this is that I don’t need to move all production at once. For now I just need to find space where I can work on the guitars once they get to the point where any accidentally damage becomes hard to fix: as a rule of thumb that’s the point at which I start sanding the guitar body and neck down. For all the initial production and rough shaping etc. I can still do at Makespace: I currently have enough storage space so I think the risks here acceptable for this early stage. As a consequence my requirements for a new space are much easier to meet in the short term, as I just need space enough to have a bench, and some storage for the in progress guitars where people can’t interfere with them, and some tool storage.
Longer term I will move guitar production out of Makespace entirely though: if nothing else I just don’t like the idea of moving things between locations, it’s just an opportunity for things to go wrong again, half the time I’ll be wanting a tool I left at the other location, and so forth. In the end I want to have somewhere I can do most of my building and only nip to Makespace for occasional atypical things (which is a fairly common usage of Makespace).
To this end, I’ve started talking to people I know who have set up their own workshop to understand the costs and issues, and looking at commercial light industrial rental units just to get a feel for what’s out there and how much this is going to cost. I’ve had a generous offer of some space in a workshop of a friend I can use in the near term (in return for sharing some of the rent), so hopefully I can take advantage of that, but otherwise I’ll keep looking in the new year.
My ideal longer term solution would be to be in another shared workspace, just one that is more aligned with people trying to finish things to a high quality rather than as a space for people to hack things together, and could be either a guitar focussed workshop, or a more general woodworking and related projects workshop. There are places around the country that offer out benches for rent (again, both guitar based or more general woodworking based), so this is a thing that can be done, but I just need to avoid the trap of ending up putting more effort into the space than the reason I want the space.
Again, I want to stress there’s nothing wrong with Makespace being a place that is aimed at hacking things together: it’s a wonderful place because of the ethos behind it, but because it has to deal with limitations in space and dealing with a large diverse membership, it can’t be everything to everyone; at some point compromises have to be made, and I just happen to be on the wrong side of those compromises with my guitar building. I’m acutely aware that any workshop I try to create for myself or to be in with others will have it’s own set of different compromises - e.g., making the opposite tradeoff Makespace has made in terms of accessibility vs storage space (or rather space to having things out whilst drying where they won’t be interfered with).
Anyway, this is now my unexpected project for early 2020 - finding a new shop to write about each week!
Not sure If I’ll do much in the workshop over xmas - I suspect I need a break, so this might be the last notes of the year, in which case my heartfelt thanks for reading all these, and I hope you have a good new year, and here’s to building cool stuff in 2020!