A week in the shop
Published 4 Nov 2019
Tags: the green tiger
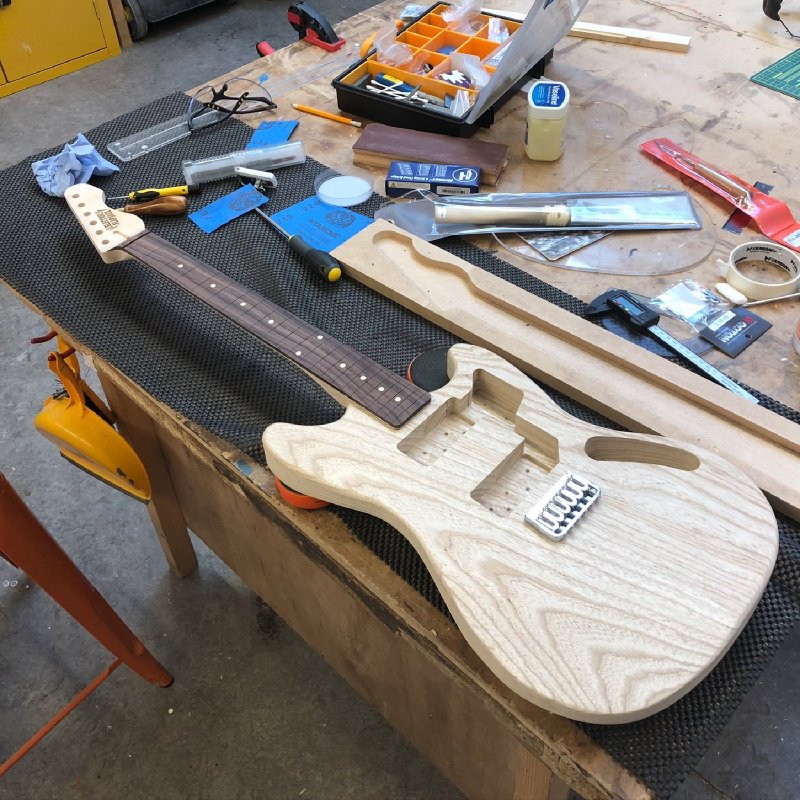
The main task this week was to get the body for commission #10 to be completed, which involved adding a few more holes to it. This I did, but it was a lot more involved than I expected, including spending an entire 4 hours working out how to reliably and repeatedly drill 6 stepped holes in a neat line.
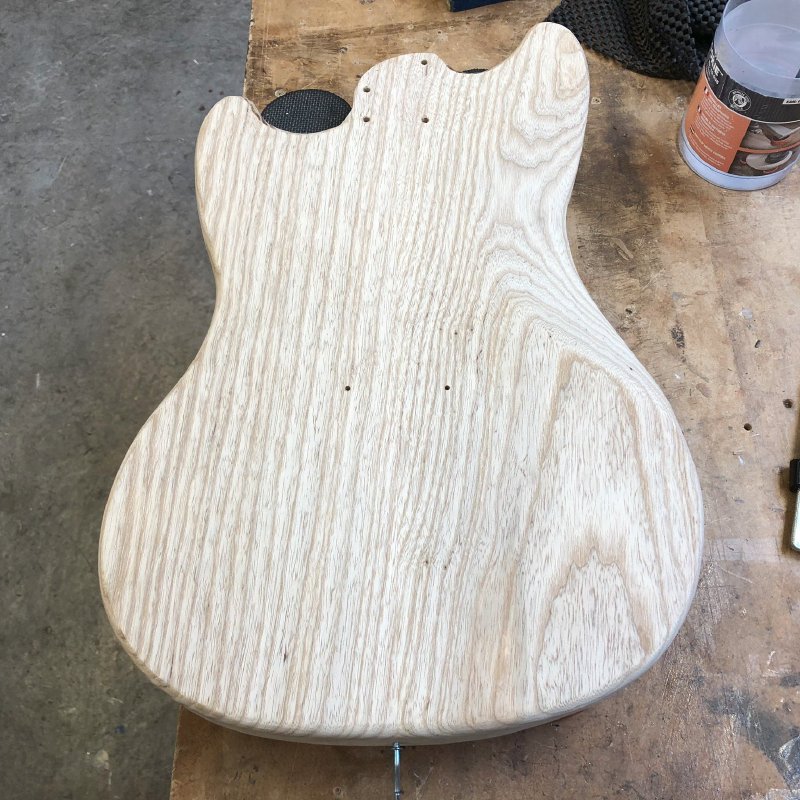
The first holes I added were the easy ones: the ones for the strap buttons and the neck mount. Drilling the neck holes means the guitar hit that important milestone where I could trial mount the neck to the body, which is always a lovely moment in a build:
The final set of holes I needed to drill were to mount the bridge (in the above picture the bridge is just laid roughly in position). As I’ve mentioned before, there’s only a few things you have to get spot-on when building an electric guitar, and most of that is to do with building the neck: namely the position of the nut and the frets needs to be accurate (relative to each other) as that is what defines the notes you play, and is what differentiates between a guitar being a musical instrument versus a complicated bit of sculpture to hang on the wall. However, there is one other important measurement which is related to those of the frets, which is the position of the bridge on the body relative to the neck. The position of the bridge defines the other end of the strings, and again influences whether you’re making a musical instrument or not.
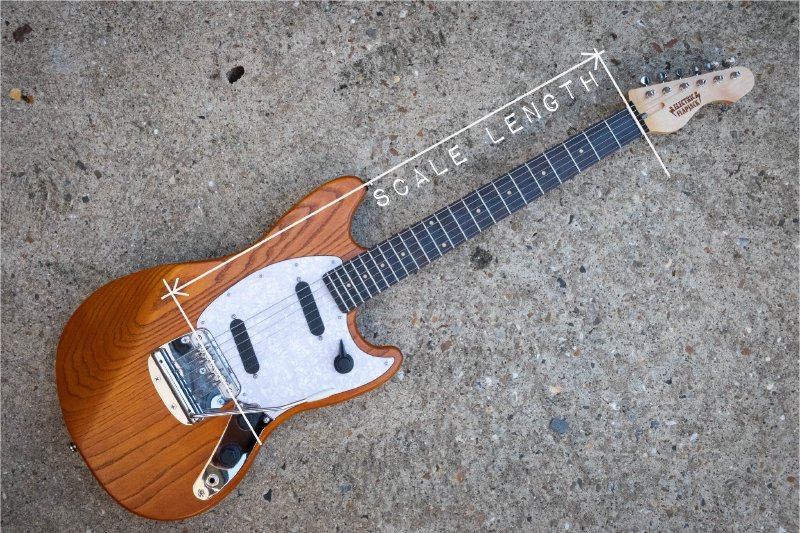
The distance between the nut and the bridge is known as the scale-length of the instrument, and the position of the frets are actually defined relative to that measurement. Ultimately the only real difference between a guitar, a ukulele, and a bass guitar is the scale-length: the ratio that defines the fret positions on each is the same regardless. For a Telecaster or Stratocaster the scale length is 25.5", for a Les Paul it’s 24.75", and for a Mustang type build like this it’s 24".
Whilst that sounds simple, the scale-length is just a rough average across the strings: each individual string will need to be slightly shorter or longer than this to intonate properly (and the strings aren’t perfectly parallel either, which complicates thing futher). However, to compensate for all this, the bridges on most modern electric guitars will let you adjust the saddle position, moving it back or forward to adjust the string’s length minutely so each string can be perfectly intonated.
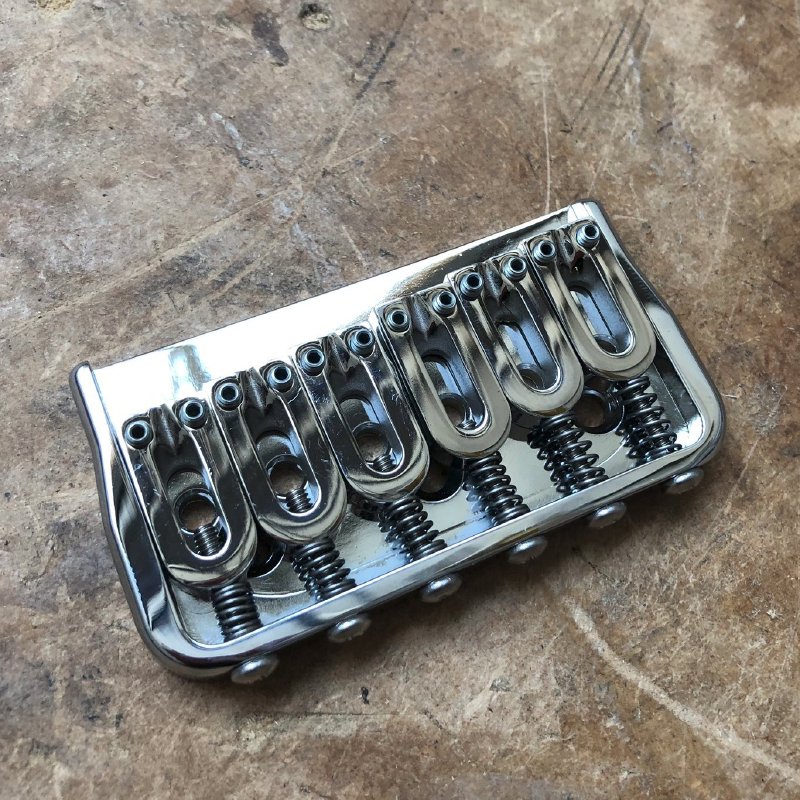
Note that on a bridge like these the saddles are quite big, but in terms of scale-length you only care about the point where the string leaves the saddle, which is actually quite high up on the bridge.
The rule of thumb for installing a bridge then is you want to find the range of travel of these saddles and pick somewhere that’ll give you a couple of millimeters movement either way, and then where the top tip of those saddles is where you position the scale-length line.
One thing to do here is actually get you bridge and check the range of movement, not just assume what it is based on pictures or technical diagrams. On the very first guitar I built the bridge will never perfectly intonate as I assumed the saddles would move much further than was possible: it looked like I had more room, but in practice the position of the screws holding the bridge down limited their range, and now I can’t get the saddles as far back as required. It’s close enough for blues, but was a useful lesson in measuring you bridges properly!
So, with that brief bit of theory out the way, let’s look at how we get this bridge installed on the body.
The first thing was to mark the position of the scale length on the body, measuring along the guitar’s centre line using a ruler:
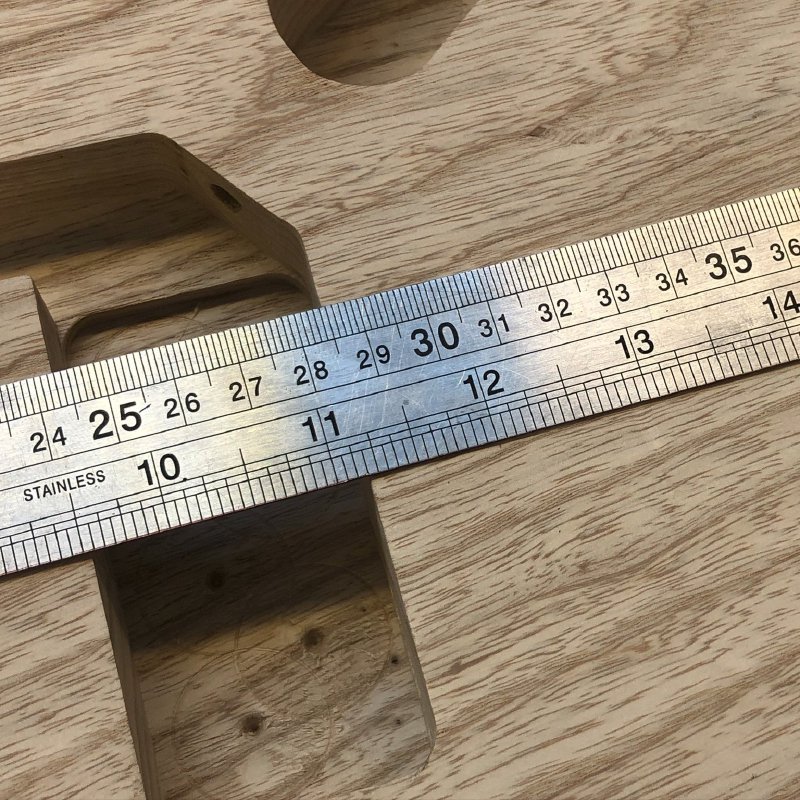
The sharp eyed will notice that I said the scale-length on this particular guitar is 24" but I appear to be measuring 12" - that’s because the 12th fret is the exact midpoint between the nut and the bridge, and I used that as my reference here rather than measuring all the way from the nut. I then used a protractor (remember those from school?) to let me get a line perpendicular to the body’s centre line at the scale length. This is where I want the centre of the saddles’ travel range on the bridge to sit.
With the scale-length marked, I then positioned the bridge on the body and mark out where it needs to sit relative to this. For this particular bridge there’s two lines of holes I need to make: one is a line of three screws that will hold the bridge to the body, and then there’s a second line of six holes that will take the strings through to the back of the guitar. On the back of the guitar will be a corresponding row of metal ferrule that will anchor the end of the string.
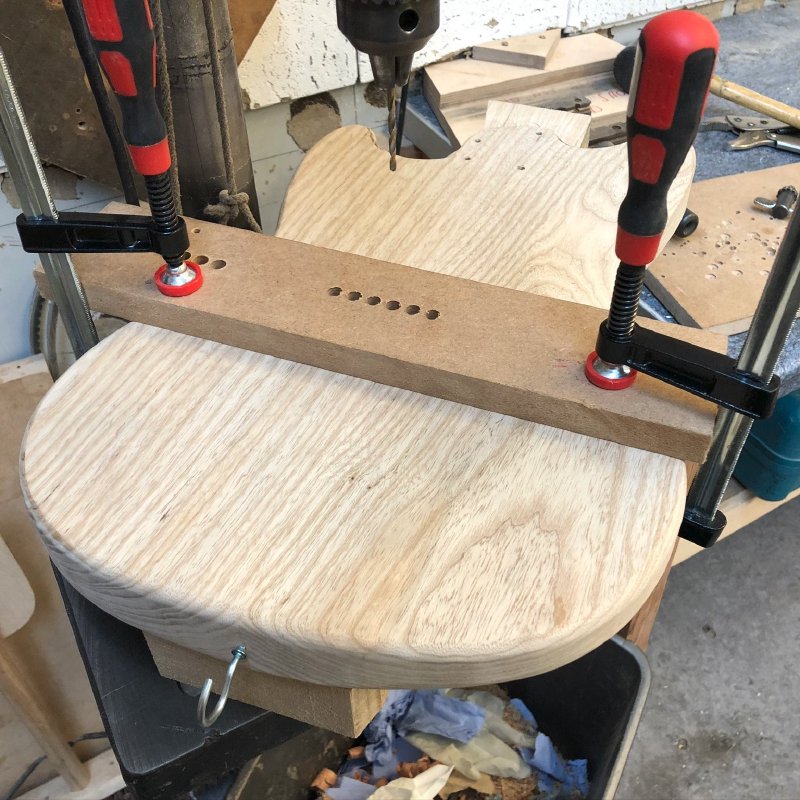
Having marked out the two lines where I’ll need to drill the holes on the front, to actually get the hole spacing correct I turn to technology briefly, and I laser-cut a jig that’ll let me do a small drill hole to just mark the location of the holes I need:
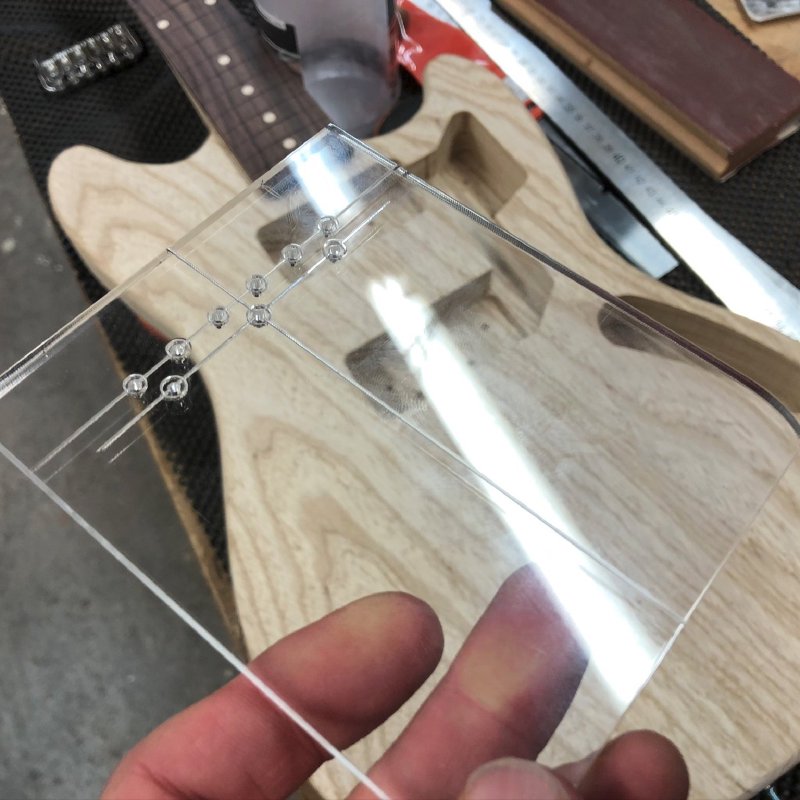
In this case this was easy to make as Hipshot, who make the bridge I’m installing here, make available clear technical drawings with all the important measurements on for all their parts, so I can quickly design this jig in Fusion 360 and laser-cut it. Otherwise it’d be out with the calipers and probably a few interactions to get it right.
I made the jig longer than needs be with a mark for the centre line to help me line it up with the guitar body’s centre line, building in the protractor (thanks to Graeme for that suggestion!). Jig made, I then carefully position it on the body relative to all the marks I’ve made, and then tape it down securely with masking tape, and then drill a small 1.5 millimeter hole in each location to give me a mark for where to drill the holes proper.
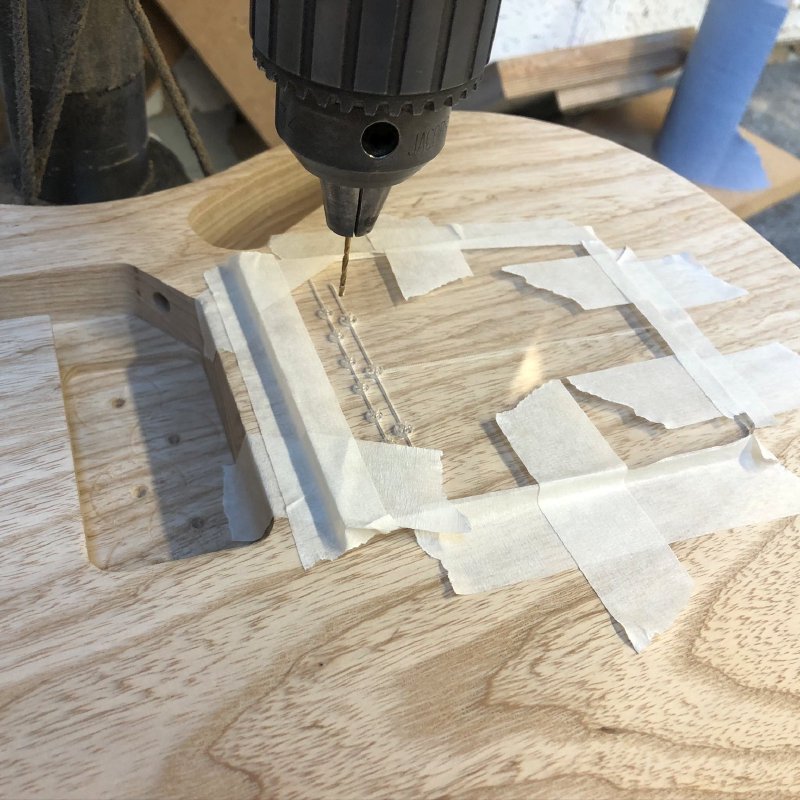
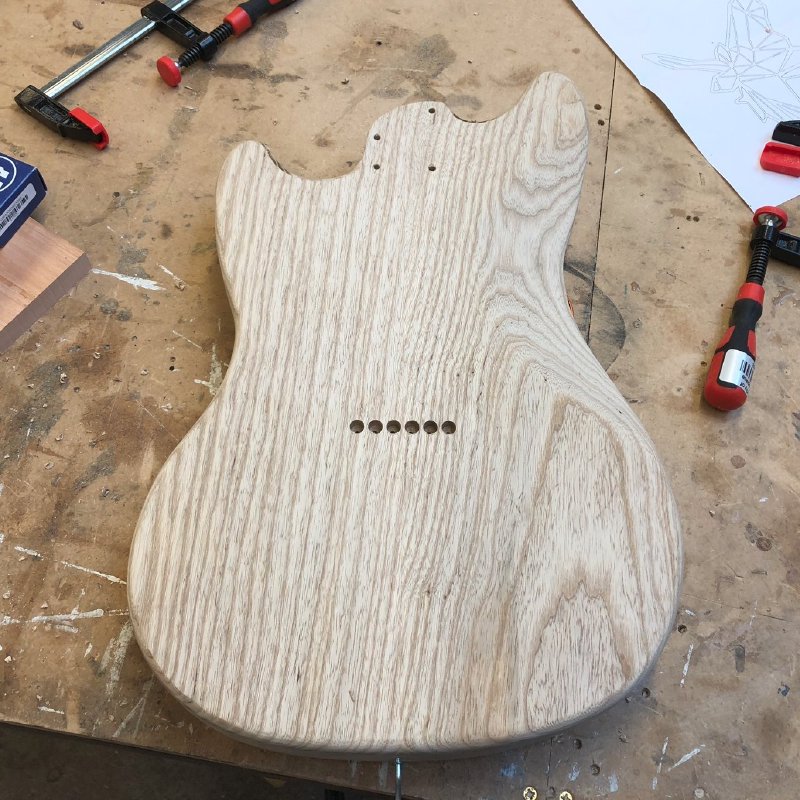
The results after this are we have nine nicely placed holes:
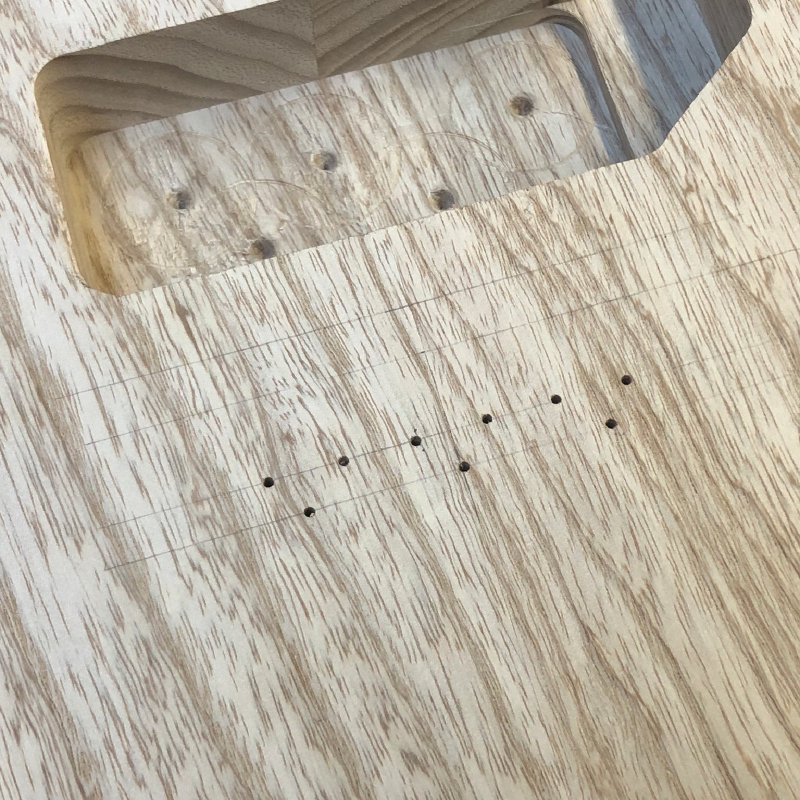
The three screw holes for mounting the bridge I just re-drilled with 2mm and then 2.5mm bits to get then to the right size for the mount screws, and the job is done. The six remaining holes were much more challenging.
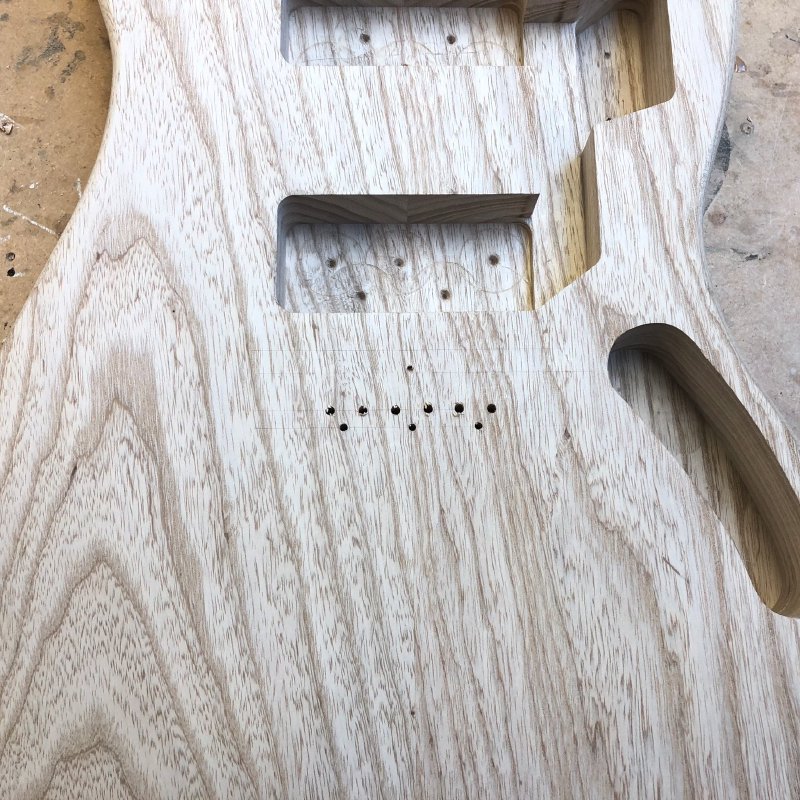
The challenge with the string holes is that I need to drill them both from the front and the read of the guitar body. From the front I want to drill a 3mm hole that is wide enough for the string to pass through, and on the back I need an 8mm hole that will let me insert a metal ferrule to hold the end of the string. Easy enough, but I want the six ferrules on the back to line up neatly, as I’m a stickler like that. With a CNC Router, this was easy, as it’d get everything perfect (when it worked at all), but by hand it’s much harder to get that level of precision, particularly when your reference points are on the other side of the guitar!
You might reasonably expect that I could just drill the six holes from the front and then use the marks that makes on the back to drill the bigger holes, but the organic nature of wood gets in the way here. As drill bits, particularly small drill bits like I’m using here, pass through the wood the grain direction will cause the drill bit to wander around slightly, so what starts off as six straight holes on the front are unlikely to exit in a perfect line. Indeed, this is what happened on the first guitar I made, where the the ferrules on the rear look like British teeth do to american eyes :)
That said, if you look at high-value vintage guitars their rear string ferrules are not perfect, as they were originally made to low cost and cut by hand, and it’s only late in life they’ve gained special status despite their imperfections. But given I want this guitar to be as perfect as I can make it, I want to try get these holes all lined up on both sides. Thus I spent an entire afternoon trying lots of different approaches with different drill bits and jigs and chewing through my stack of offcuts from this body as I tested ideas out.
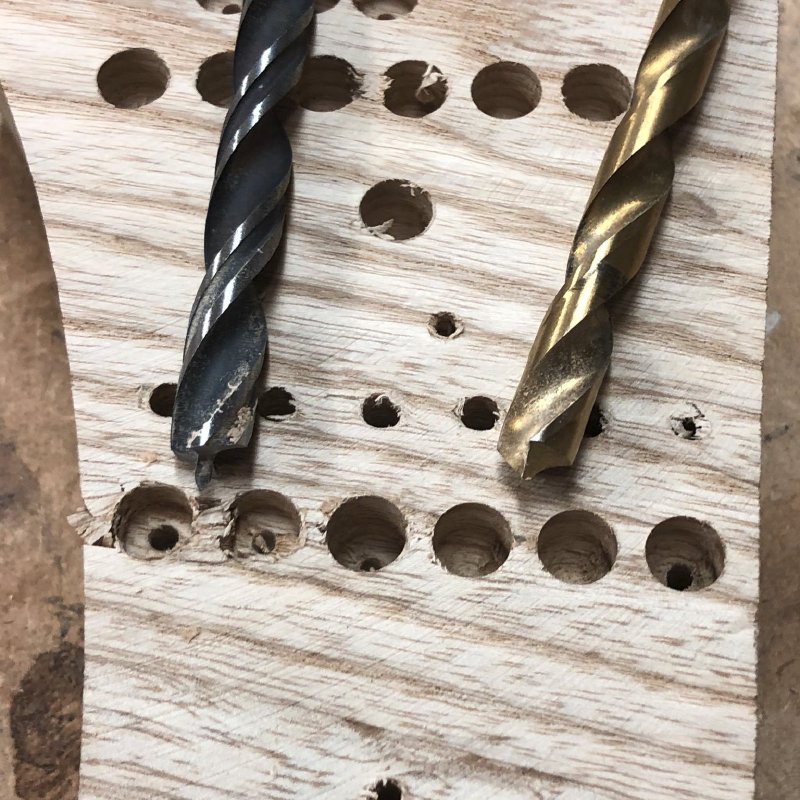
In the end I settled on an approach that I’ve seen recommended online in places, which is that you first drill the outer two string holes all the way through from the front using a brad-point drill bit. The brad-point bit will minimise the amount of wandering the bits will do, but they will still deviate a little, but hopefully not too much to be trouble.
Next you make a jig that has the correct spacing for the 8mm holes required by the ferrules and visually line up the outer two holes with this jig. Then using this you can drill the 8mm holes required for the ferrules, and they’ll be in a line. The line itself may not be perfectly perpendicular to the centre line as a result of the drill bit wandering around, but it’ll be close enough you can’t tell at a glance, and importantly all the ferrules will be in a straight line, which would be much more obvious if they weren’t aligned:
One tip here: I made this rear jig out of 18mm MDF on the CNC Router, as I wanted it to have quite a bit of depth to it to guide the much larger drill bit. Before you use this in anger, drill out the holes with the same bit you intend to use on the guitar body, as at this point fractions of mm can make a big difference to how smoothly the drill bit follows the jig, and you want to get it smooth before you use it on your loved guitar body to give you the best chance of success. The results of all this work are then some nice straight holes on the back of the guitar:
These holes are drilled using a regular 8mm bit rather than a brad point as the ferrules are shaped to match the hole shape made by a normal drill bit.
All that remains then is to drill through the remaining middle four string holes. To minimise the impact of drill wandering these are drilled only half way from each side. On the front I used the brad point again, but on the back I just used a conventional 3mm drill bit as the top of that sat nicely in the bottom of the ferrule holes.
Phew - all done!
I practised this technique a few times on offcuts from the body before executing it for real on the actual guitar body. Now I’ve done it once successfully I’m happy to repeat this process by hand in the future, but it was quite nerve-wracking the first time!
But this means I’ve managed to get every step of guitar building away from CNC machining now (outside of jig making, which I don’t count :). Not that it really matters outside of personal pride whether it was done by CNC or by hand, but I’m currently quite pleased with how much I’ve managed to move to being fully hand made over this last year.
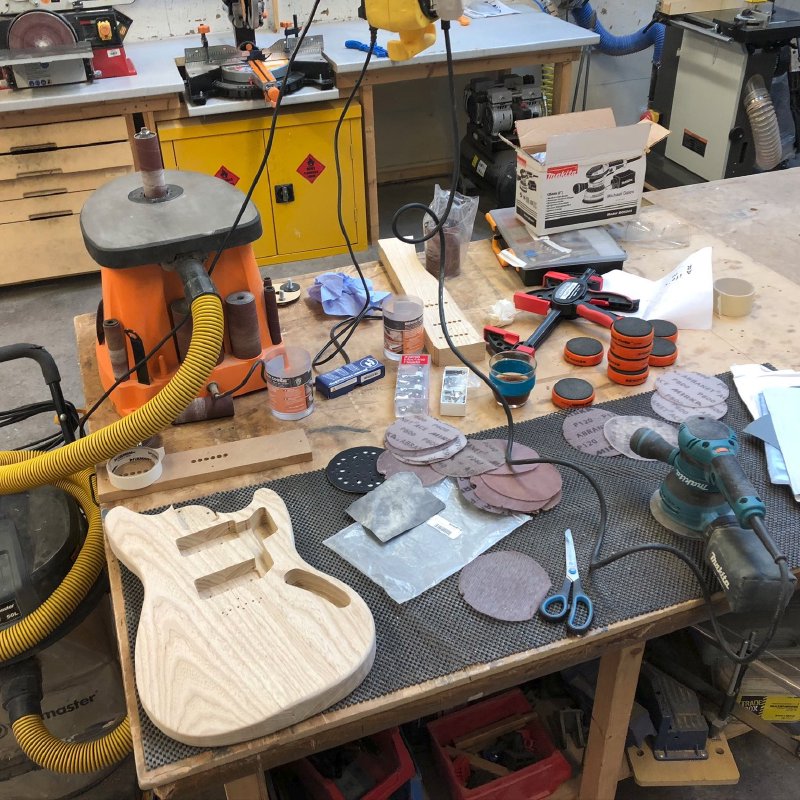
With all the holes in the right place on the guitar body, it’s now time to start getting it ready for finishing. Which means sanding. Lots of sanding.
The only remaining physical construction part on this guitar is doing the frets on the neck, which I hope to get done next week.
The one other thing I did this week was one more tweak that acoustic guitar someone had asked me to adjust for them. Last week I talked about adjusting the bridge saddle, and I decided having played it a little more to also adjust the nut down a little, to make it a bit easier to get those cowboy chords down.
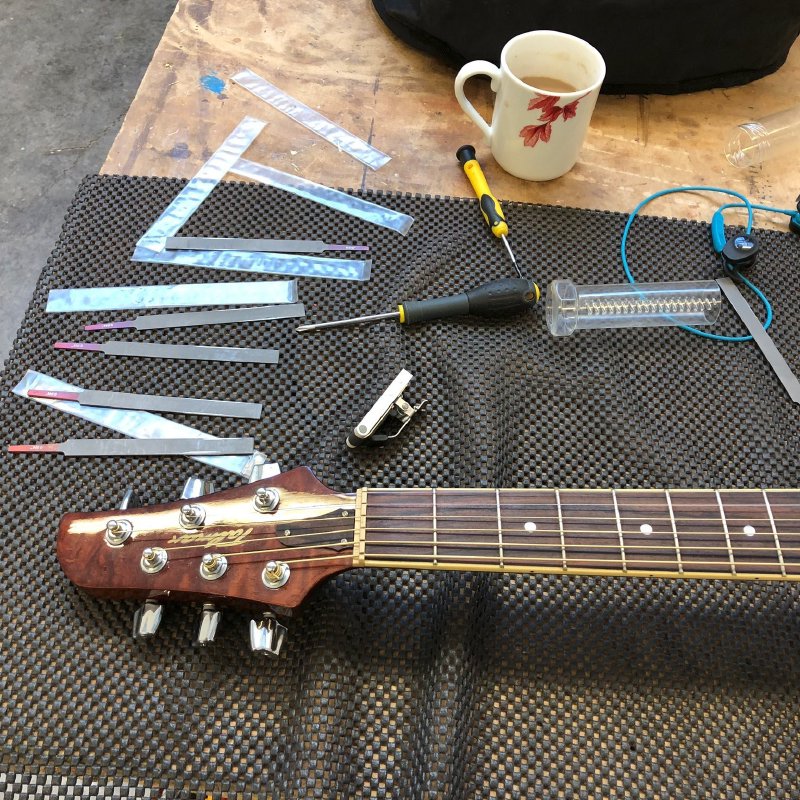
By the end I was quite pleased with the way the guitar played compared to how it arrived, and the client seems happy with the improvements too. With luck that guitar will now have some playing in its future!