A week(end) in the shop
Published 28 Oct 2019
Tags: 3d printing, house of tone, pickups, the green tiger
This last week was mostly spent with my non-guitar hat on, earning my keep, but I managed to spend the weekend in the workshop catching up. As it is with any passion project, all this building guitars and other related things doesn’t pay all the bills, so when contracting work picks up I have to take advantage of it. That just means I’ll make up time when I can as this side of things is important to me, particularly as I have some deadlines on this side of the fence coming up.
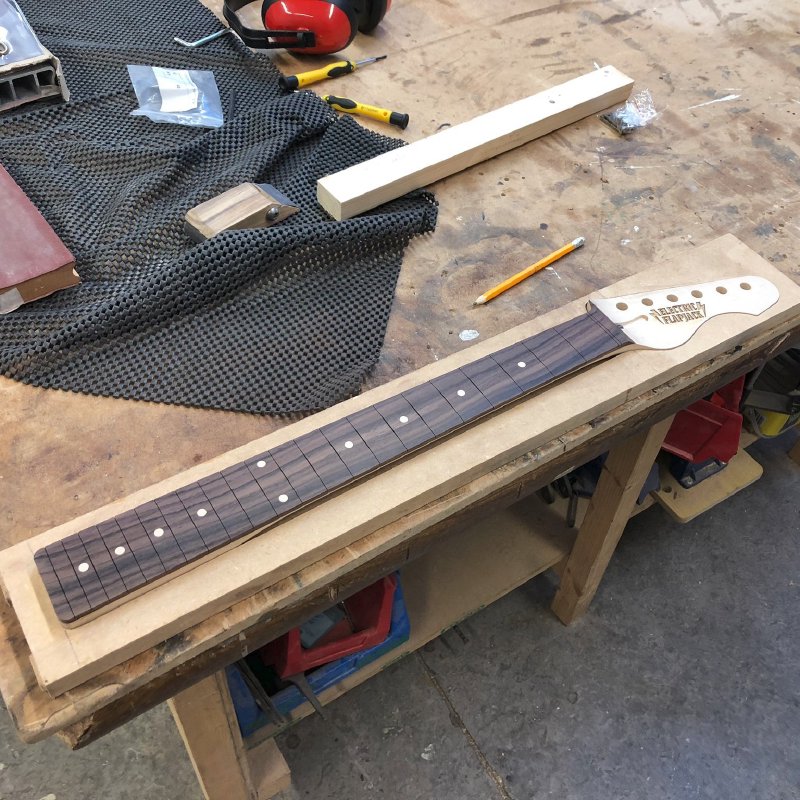
The first deadline I’m focussed on is getting commission #10 completed, and all effort right now on this build is on the neck. At the end of last week I had laser etched the fretboard to mark where the frets and dot inlays need to go, and marked up in pencil where I needed to drill for the side and my guides for carving the neck, and I’d cut the fret slots by saw.
There’s an order in which I need to run through the tasks on the neck so as to make my life as easy as possible, which mainly involves trying to hold on to straight edges and surfaces as long as possible. For example, I drill the holes for both the fretboard inlays and side dots before I carve the neck, as that means I have nice flat surfaces on all sides of the neck when I put it on the pillar drill, making it much easier to keep stable. Similarly I carve the neck before I radius the fretboard, so that I have a nice flat surface where I clamp the fretboard down to the bench for carving. It’s not perfect, as ideally I’d install the frets before I carve the neck, which contradicts the last statement, and I can’t get a perfect ordering alas. But the idea is that should plan ahead your tasks as best you can to give each stage the best chance of success.
So, first up I drilled the holes for the inlays, and installed the side dots.
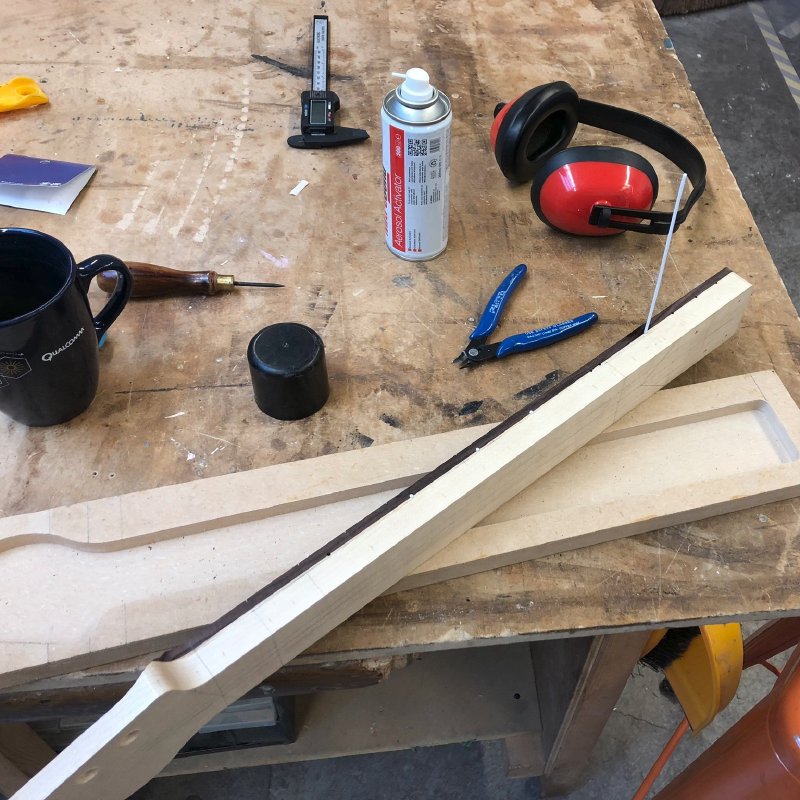
As I mentioned the other week, I used a set of engineering drill bits which go up in 0.1 mm increments to find the drill bit that will produce a hole in the neck that makes it easy to install the plastic dowel for the side inlays without giving it too much room to wobble.
However, I don’t yet install the main fretboard dot inlays as they’ll protrude from the surface of the fretboard until I radius it, making it harder to clamp down to carve the neck. Ordering!
Next up was carving the neck, which was a nice two hour workout.
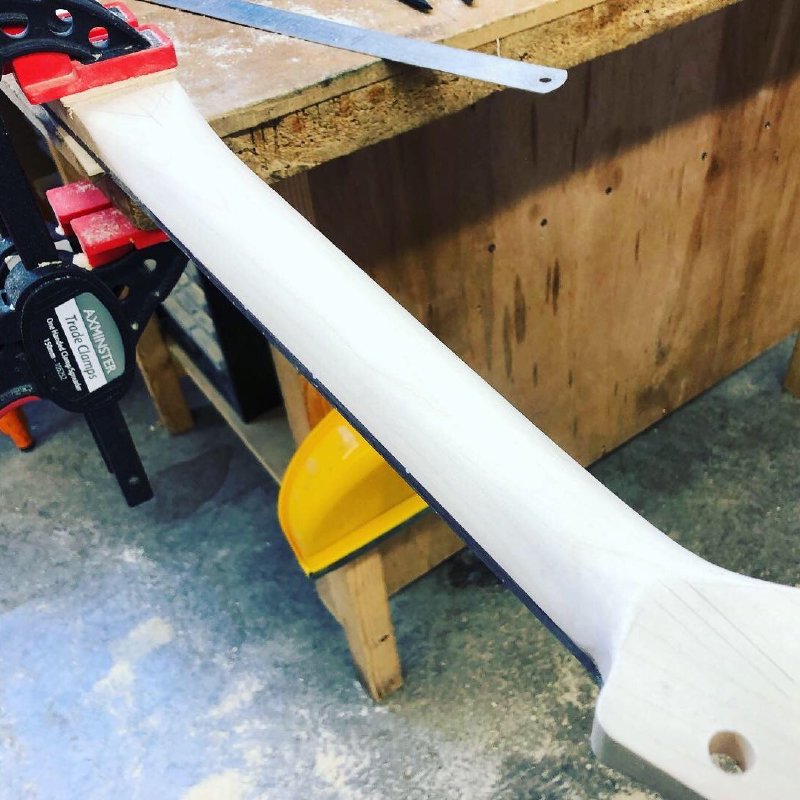
With the back of the neck carved, now I could next make the fretboard inlays. I’m continuing my trend of making my own inlays out of maple using the laser cutter I have access to at Makespace, as I explained a few weeks ago:
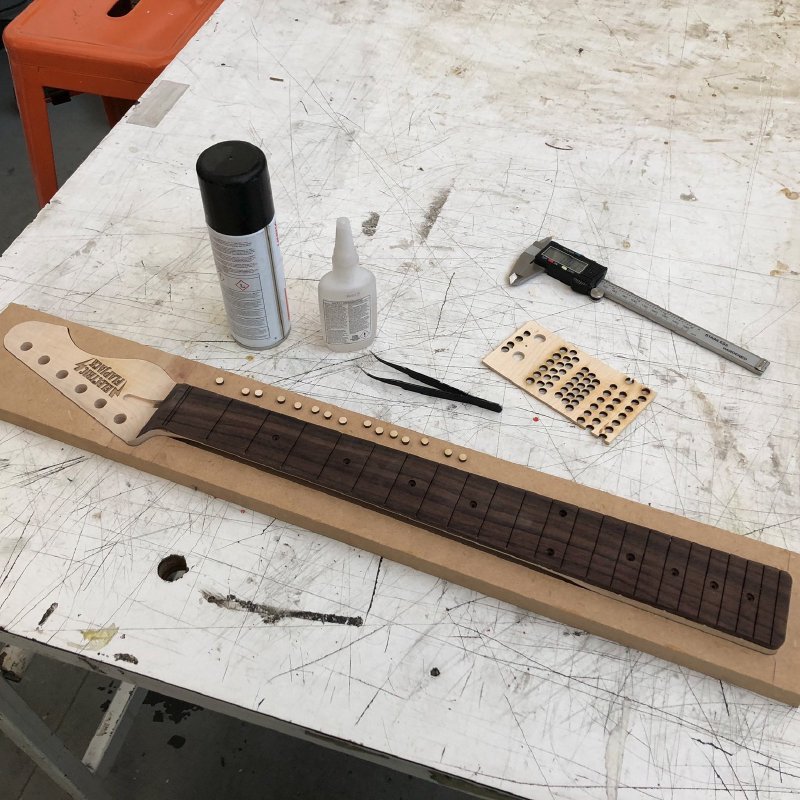
As with the side dots, the main inlays are glued in place using superglue, which then gets a squirt of activator to try prevent me sticking myself to the neck. Touch wood, this plan has thus far worked.
Inlays in, I could next radius the neck:
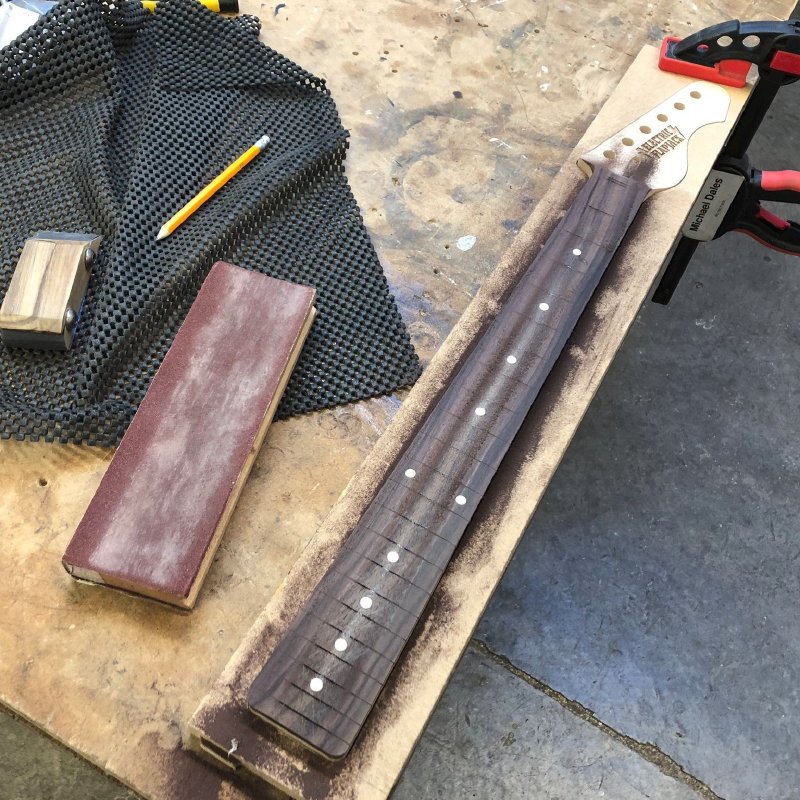
This is slow and careful work. Although I have both a small and large sanding block with the correct radius in it, and although I use a guide for a lot of it to keep me straight, I have to constantly check that I’m not biasing one side or the other with my weight as I press down. I also need to stop to re-cut the fret slots periodically which are initially straight but need to be an even depth across the curve by the end.
This actually takes me as long as carving the other side does. Still, by the end of the weekend the neck was looking beautiful, if I do say so myself, with the indian rosewood looking lovely:
This coming week it’ll be getting the frets in, and returning to the body again.
I had to do some parts ordering for commission #10, as I needed to replace the tuners that were meant for this build but I used last week on getting The Blues Deluxe ready for Oggcamp. I also needed to order some more pickguard material, so there was a lot of internet ordering at the weekend. I was reminded to do this as the pickups for both this build and The Corvette build arrived in the post from House of Tone Pickups:
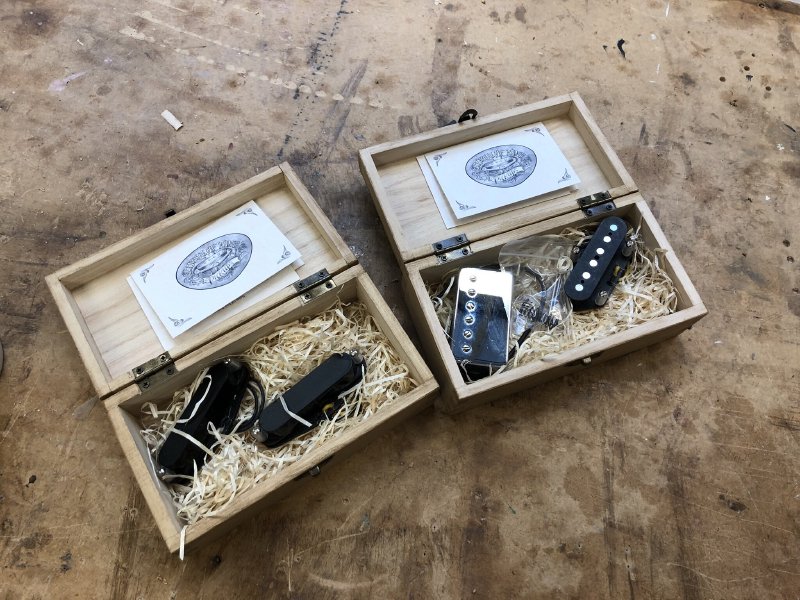
Mmmmm. Matthew does does a good job on his pickups, I’m looking forward to hearing them. For all that I work hard on the guitar, if I don’t have good pickups it’s all for naught, so it’s not lightly I place my trust in Matthew to deliver the tonal goods.
The other task I had to do this weekend was do the setup on the electro-acoustic someone brought to me to see if I could reign in the action a bit.
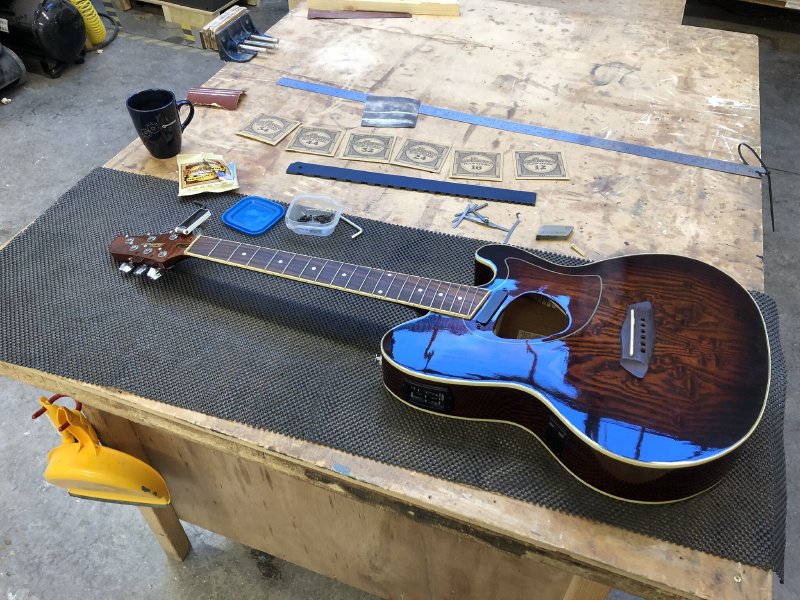
I spent some time on this, and it’s certainly more playable for my effots, but I couldn’t quite get the action to where I wanted it. Unfortunately this guitar sat strung up unplayed for years as I understand it, and I think the neck has just bent over time; I’ve adjusted the truss-rod as much as I dare, but it still has a reasonable amount of relief in it. With the saddles on the bridge lowered it’s now definitely a lot better though, so hopefully the customer will be happy with what I’ve managed.
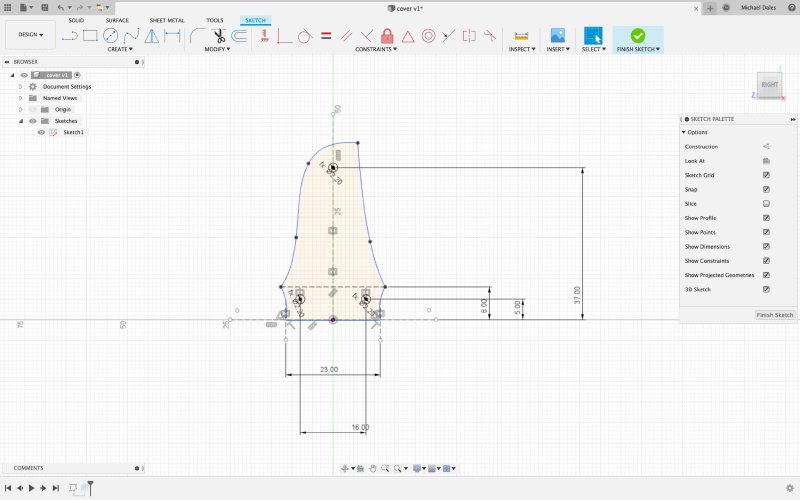
In addition to the setup and giving it a bit of a clean, I noted that the truss-rod cover was missing, so I decided to make a replacement for fun. First of I used a bit of paper along with my bradawl to mark out where the screw holes where to let me measure the distances:
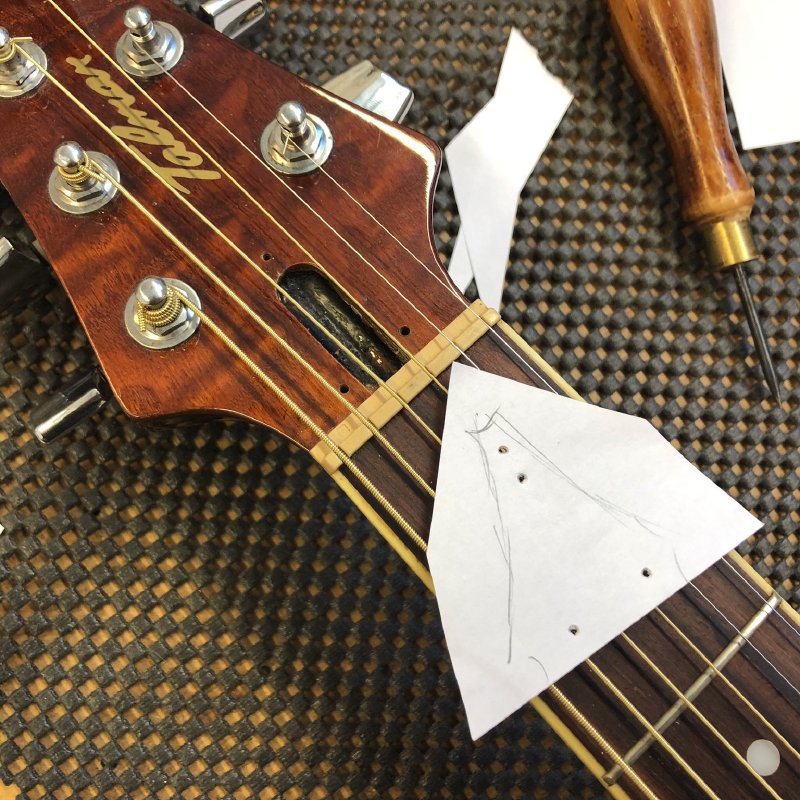
I then took these dimensions into Fusion 360 and made a design that echoed the outside profile of the headstock:
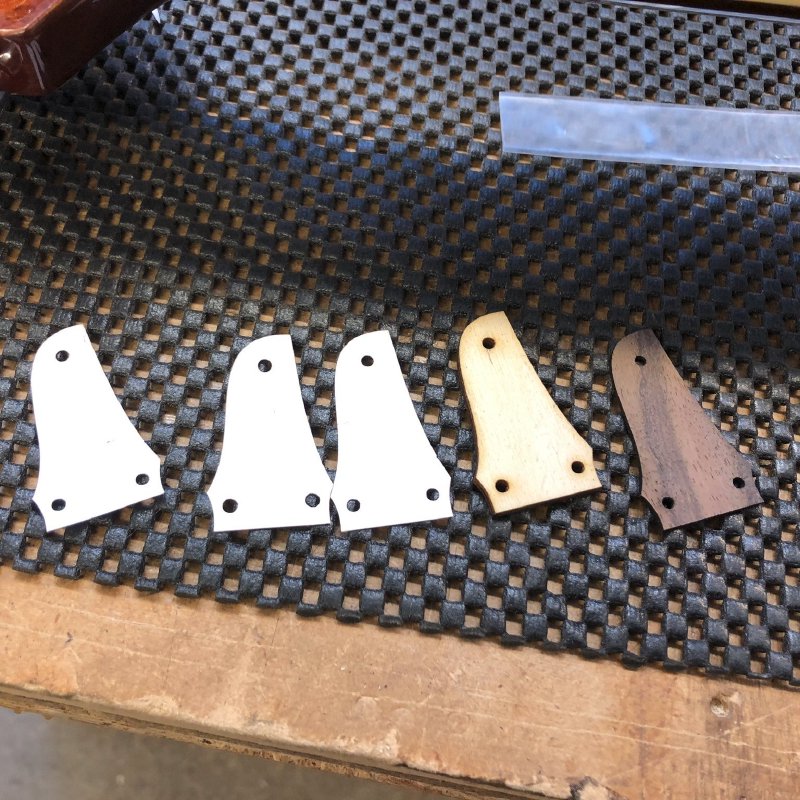
I then did a few test laser cuts in paper to get the placement of the screw holes perfect, and one in scrap ply just to have a rigid version to confirm I’d got things spot on, before making one in some left over rosewood from another guitar build. I used the bandsaw to take the 6mm fretboard material down to a 1.5mm veneer (have I mentioned how much I like our new bandsaw at Makespace?) before cutting it on the laser cutter:
Sat in place I think it looks the business:
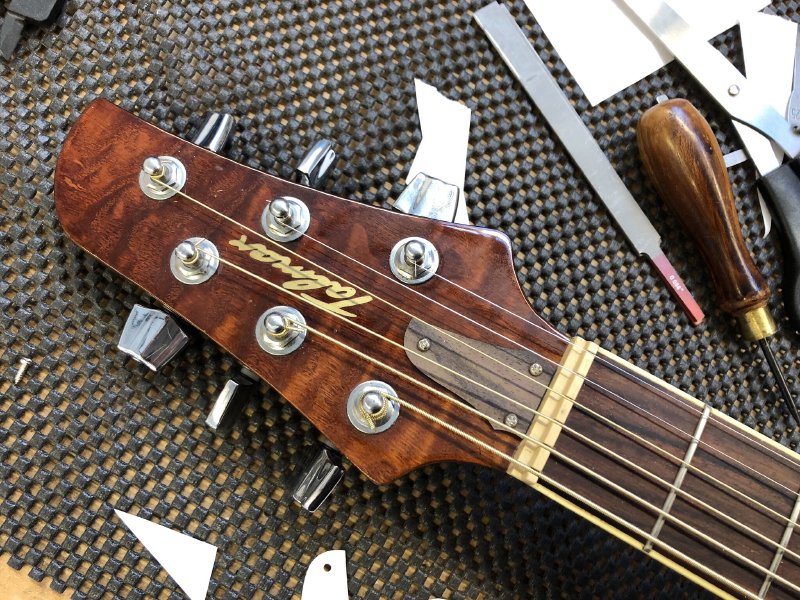
The cover is now just getting a coat of oil, which will make it a bit darker/glossier match the rest of the wood in tone. It only took 15 minutes or so for me to do that, but easily worth the effort given how much nicer it makes the instrument look.
The one other thing I did this week for a bit of fun was 3D print a bit of the moon:
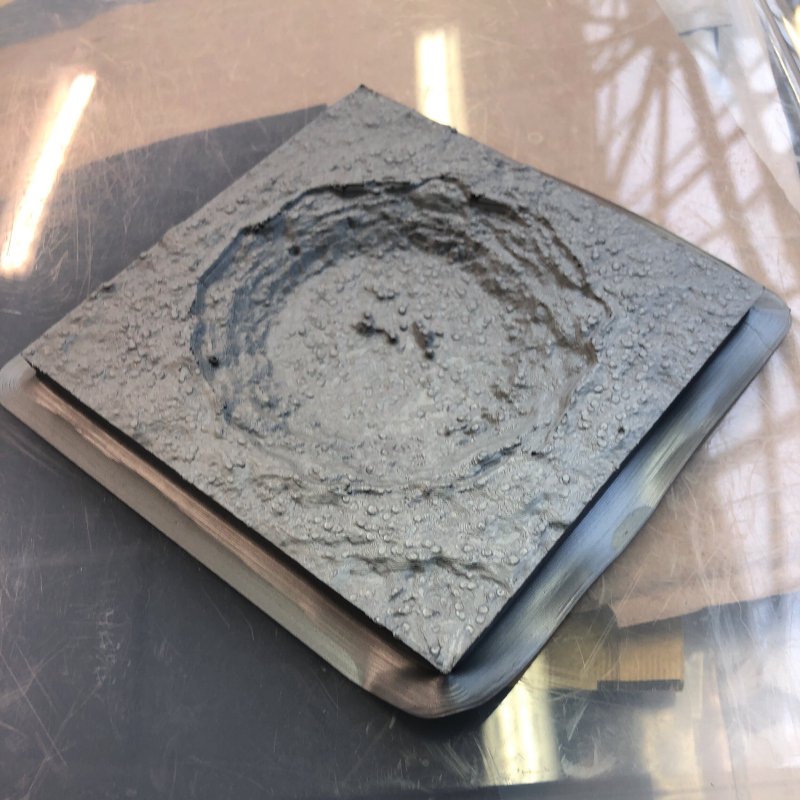
This is Copernicus Crater, which I generated with The Terrinator, a website my friend Dan made that lets you select an area of the earth, moon, or mars and then generate an STL file from it for 3D printing. The earth has been up for a while (I have a bit of Scotland that I love printed that sits in my house to remind me of home), but the moon data is new.
At some point I’d like to try milling this in wood, but the print came out not too bad considering the limits of using filament extrusion type printers. Can you imagine being able to order a guitar body with say a bit of terrain milled into the body, like a river or canyon bed?