A pick and mix sort of week in the shop
Published 27 Jan 2018
Tags: amp, blues deluxe, form 1, formlabs, fusion 360, red rocker
It’s been one of those weeks where you do lots of little things which keep you busy but don’t feel like they add up to much progress to show. You can’t always have big exciting weeks in any project, and this was certainly one of those. In part, this is down to my three ongoing builds dragging on longer than I’d hoped (more on those below). Projects always have phases like these, and you just have to keep pushing, and that is in part why I do these week notes each week, to remind myself that things are moving forward despite the times it feels like I’m standing still.
I started the week on the amp build, drawing out the plans out for the electronics. Literally drawing them out, on a large A3 sheet of paper: from mains power and guitar signal input through to speaker output. I wanted to validate I knew where every single component in the chain was going.
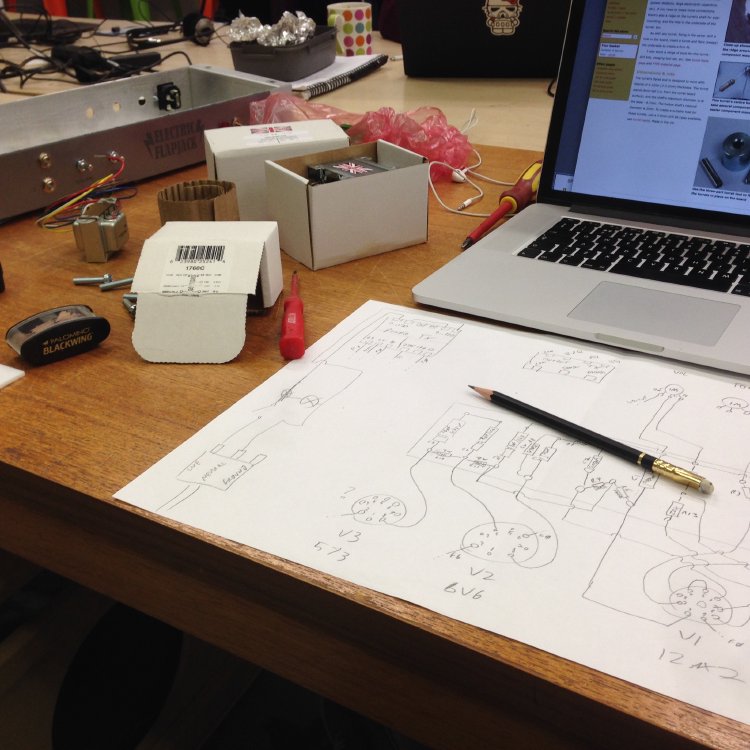
Although I’m following a fairly standard amp design, this is my first proper electronics build for a long time, so I wanted to work out both the layout for the circuit board (which will be old school turret board, not a PCB) and just validate I had all the correct components. It turned out to be a good job I did this, as I’d accidentally ended up with the wrong type of power transformer for the type of amp I wanted. Power transformers take your mains voltage (in my case 240V AC) and turn it into a higher voltage needed for the valves in the amplifier (in this case 650V AC). But, not only do the valves want a higher voltage, they also want DC, not AC, so you have to run you AC current through a rectifier circuit to straighten that AC into DC. I’d planned to use a valve rectifier for this based on a 5Y3GT tube typical of old basic Fender amps, but to do that I’d need a power transformer designed to drive a valve rectifier, and in fact due to not doing enough homework ahead of time, I got one that was designed for the more modern diode based rectifier circuit instead. Doh.
But in each setback there’s an opportunity to learn, and it was a fun exercise to understand where I’d done wrong with my understanding when acquiring the parts, and I learned not just about diode vs valve rectifier circuits, but also the different types of valve circuit you can get (e.g., why some amps (like old Fenders) use 5Y3 tubes and some (like old Voxs) use EZ81 tubes, and how I could make my design use either if I wanted). Thankfully the chap who sold me the power transformer was happy to refund me after I explained my misunderstanding on ordering, and I have a replacement on the way. This does all mean I have now a new problem, which is the new transformer will require me to cut new access points on the metal chassis I have to make it fit, but I think I have a plan for how to do that using the tools available to me in Makespace, so you should find out next week if that succeeded.
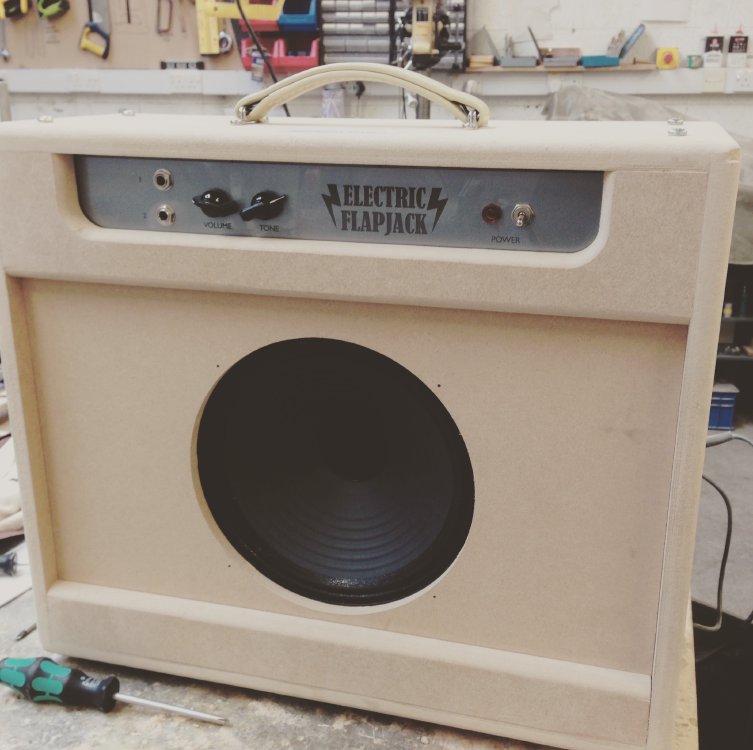
I also redid the control panel for the amp with a nicer bit of laminated perspex, as the original one I cut did the job but wasn’t good enough quality, as the perspex had warped where the logo was etched, I assume due to too much prolonged heat for such a large etching compared to simple text. The new one is much better I think:
I mentioned at the start of the year that the neck I made for guitar #4, whilst serviceable, wasn’t up to the standard I’d hoped, but talked a bit about working through the recovery process from warped to playable. Well, I decided that I’d take one more pass at it in the workshop due to deciding that the frets were not quite there after some test playing. Fret levelling is something I find a little tedious at the best of times, but it’s made slightly more tricky when the neck in question is slightly wonky. But, an afternoon of levelling and polishing the frets, and I finally got it as good as its ever going to get, and got the reward of being able to plug it in and hear those House of Tone P90s in all their glory, and it’s such a lovely sounding guitar when cranked up. So, a valuable lesson in neck building, but now it’s a fun rough and ready blues machine. I’ll hopefully post a video of it in action shortly.
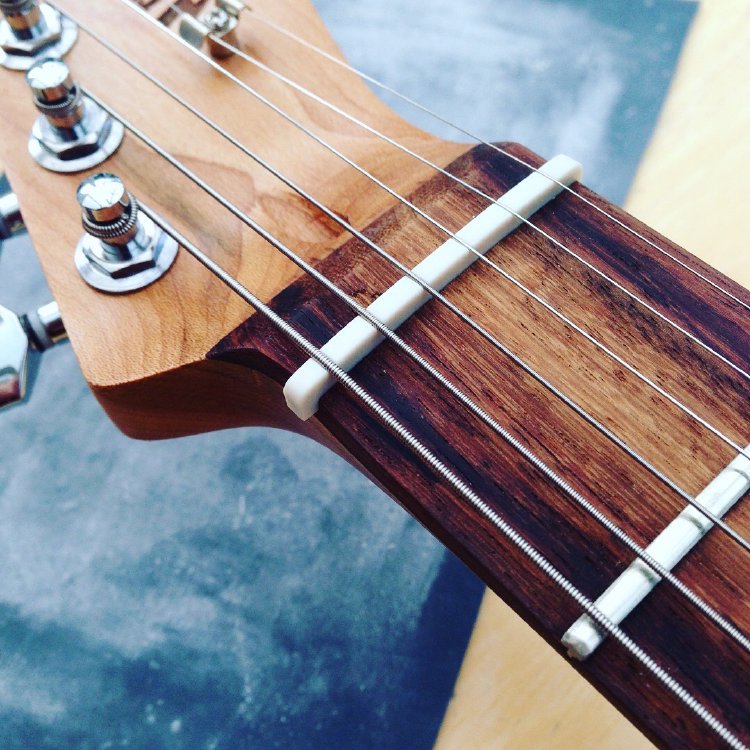
Those of you who’ve been following recent progress will know that I was hoping to 3D print guitar nuts with the FormLabs Form One printer we have at Makespace, which makes nice smooth resin models. Unfortunately, I’ve had to declare that experiment postponed for now due to a couple of reasons. Firstly, I’ve not been that happy with the prototypes I’ve been playing with, as they seem to catch the string too much when bending and tuning. I had planned to tweak the design and get some string lubricant to see if that helped, but with the FormOne printer at Makespace being so temperamental of late I’ve had to just abandon the idea for now until I can get the printer to be more happy again.
So in order to finish off guitars #3 and #4 I ordered some Tusq nuts, made from a man-made ivory substitute, to see if they’re worth the fuss. Certainly initial impressions are that they’re quite nice, having filed them down they have a nice finish, and they seem quite happy with excessive bends whilst playing. Will need to put them into proper action at a jam night to see if they’re worth extra cost (they’re over twice the price of a regular nut).
If nothing else, filing the nuts gave me time to catch up a little on all the NAMM videos and podcasts coming out this week.
To help move along the 3D printing side of things (as I do have plans to print guitar parts like custom volume/tone knobs) I’ve now become an “owner” of the FormLab’s printer at Makespace, so I’ll see if I can beat it into working order. First task is to get some newer resin, as the resin does have a limited shelf life, and it could just be the supplies at Makespace have been there too long without being used.
The final bit of the week was moving more of my guitar design workflow to Fusion 360 (you may have seen I started with the neck last week). Whilst to me the joy of guitar building is in a large part the hands on process, having a fully modelled design in CAD is useful for many reasons: for each guitar I can produce a render in advance to make sure the customer has an idea of what they’re getting, it makes it easier to do custom body shapes and variants, and it’s just much easier to do what if experiments in CAD than in wood. I use a CNC router to get the basic 2D outline of the guitar before hand shaping it, and to date I’ve been using design files I found out on the Internet which I can’t readily modify; making my own design files in Fusion 360 means I can really start to make these things my own.
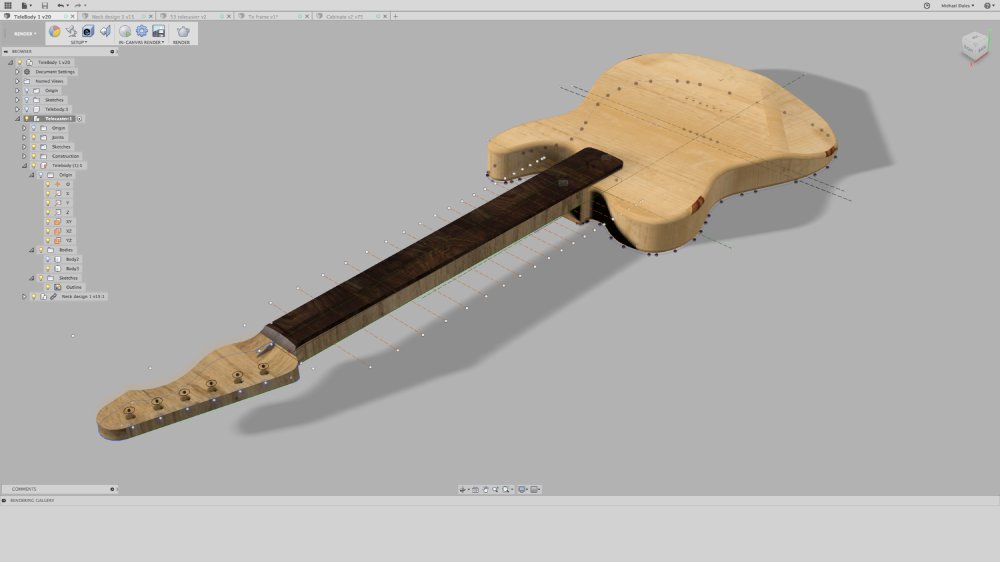
Doing the amp design in Fusion was really a good starting point in terms of experience at modelling, thanks to its regular shape. Doing the guitar design above has been much more challenging, but I’ve been able to leverage all the tricks I’ve learned on the amp to keep it manageable with only mild burst of profanity on occasion.
For those that think using a CNC router is cheating, I don’t use it for anything more than a regular luthier will typically do with a template and a hand router, so it’s no more or less automated than any other hand built guitar out there. I’m just letting the machine do the roughing, and then I take over and make the rest by hand.
You’ll note the design is still a t-style shape at the moment, just like all my other builds. As I’ve mentioned in the past, with each guitar I like to push forward on one new front, whilst keeping the rest familiar so I don’t over reach and put myself in a position where I’m guaranteed to fail or become overwhelmed and give up. As such, guitar #5 will be another t-style, but it’ll be totally from my own design files. Once I know those design files make sense I’ll be in a good position to start doing more variations (though, if you want a t-style made, I’m obviously happy to oblige!).