Refining the design of my new guitar model
Published 25 Jul 2021
It’s been a while since we looked at the design for the next generation of guitars I intend to start building next. I’ve been wanting to write up more about this, but I’ve also been trying to make progress on both the design refinement and spend time in the shop as I try to wrap up the current Corvette model build. As ever, there just aren’t enough hours in the day! But I’ve managed to make enough progress refining the design that I feel there’s something to document, so here we go.
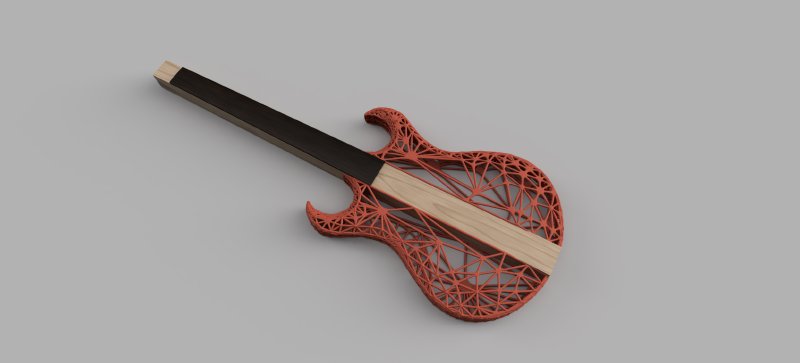
As a reminder of where we left the design when we last looked at it, we were still on the sketch I made originally that looked like this:
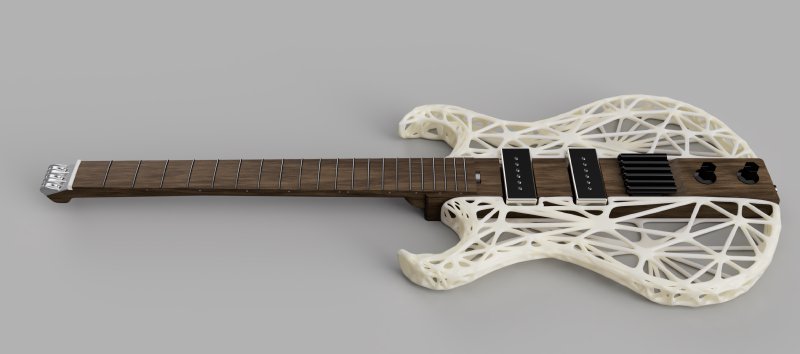
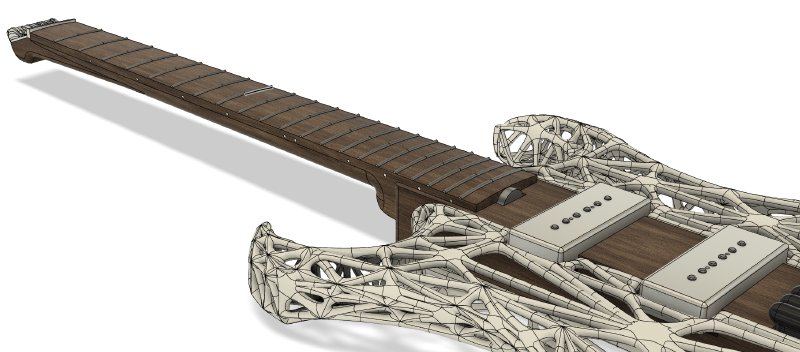
and now, we’re starting to get somewhere more convincing with the design, and I’m getting really excited to see it come so much more closer to life, with it looking like this:
Let’s talk about what’s changed and what we had to change and compromise as I’ve gone from sketch to a design that I can actually build.
First up, let’s talk about the colour - it might seem a trivial thing, but a guitar is there to inspire you, so how it looks is just as important at times as how it plays. I like things to have a splash of colour about them, and I had hoped to be able to offer my clients a range of colours from which to select for the body, similar to how with current builds I offer a range of wood stain colours.
But unfortunately I failed to realise that whilst 3D printing service Shapeways can print a part large enough for what I want in their Versatile Plastic process, and they also offer nine colour options for that process, they don’t do both at the same time: you can have a smaller print in colour, or a very large print in just white.
So, whilst I’d look to improve on this situation in the future somehow, for now I’ve updated the design to reflect that, and selected a darker wood to provide some contrast. I chatted to Jamie, of Swannell Guitars, who has done a lot of research around guitar building and sustainable woods, and he suggested walnut might be a good darker wood to try: it has the strength and stability properties needed for a guitar neck, but is also grown in the UK (compared to say, mahogany, which has great physical properties but grows closer to the equator).
In terms of colour down the line, one option I might have is dying the print: Shapeway’s Versatile Plastic is Nylon 12, and it seems that you can possibly dye that, but for now I’ll keep things simple and stick with the raw white print (but a tip of the hat to Adan Akerman for the suggestion of post processing the print).
The other limits I hit with Shapeways were slightly more virtual: when I tried to upload an early version of my design to get a rough cost estimate for printing the body that they have a file upload size limit of 64MB and a part can not have more than one million polygons, and even one side of my guitar design happily blew through both these limits, given the organic nature of the shape.
Thankfully they do allow you to zip up your design, so that’s 64 MB compressed, so in the end between dropping the level of refinement for the STL file I exported from Fusion and compressing the file, I was able to get it uploaded to Shapeways and get an estimate. The price was about what I expected, just shy of $200 per side - though that price will change I imagine with each tweak to the model and vary depending on the density of the struts I use. But still, it’s a bearable price given the cost of wood materials for higher end guitar building.
I do wish I’d known about the polygon limits before I did the prototype print, which I exported at high resolution from Fusion, as now I don’t feel my test piece is representative of what I’ll get for the body prints. Hopefully it won’t be too far out, but that will now be something I find out when I do a trial print of the body itself.
The next detail I wanted to refine was truss rod access. The last set of design notes I wrote were about the new head-piece I plan to 3D print to anchor the strings at the top of the neck. One thing that might not be immediately obvious but is quite important is that my design rules out being able to access the truss rod at the neck end of the guitar.
For those who’ve never had to tweak a guitar’s set up, the truss rod is an adjustable metal bar that runs the length of the neck through the middle to provide both rigidity against the pull of the strings and a way to adjust that rigidity to match the particular set of strings you’re using. Most guitars today will have a way to insert an allen key at the headstock end of the neck to adjust the truss rod, and my head-piece design rules that out. Less popular but not uncommon are guitars where you adjust the truss rod from the heel of the neck, though this is less popular as often it requires removal of the neck or the pickguard to let you get at the adjustment point.
Now, there is no neck-heel in a guitar design like mine, but I can route out a channel that will let you access the truss rod adjustment point at the body end of the fretboard. In particular, to make adjustment easier, I want to try using a truss rod with a spoke wheel adjustment, like these ones you can get from Stewmac:
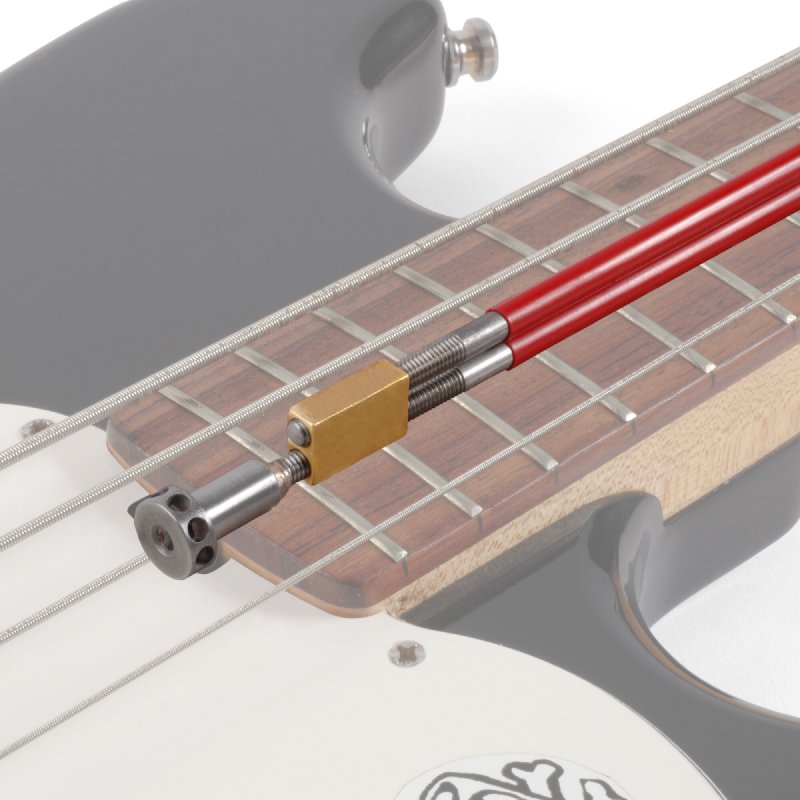
This seems by far the easiest way to have a truss rod adjustment from the base of the neck, rather than requiring a tool to work at right angles.
The only issue is that I’ve not found a good UK supplier for these yet, so I suspect I’ll have to order mine from US based Stewmac. Still, I think this makes the most sense for what I have planned.
Speaking of ordering parts from places far away, I was delighted that the bridge parts I ordered have turned up from Mera Guitar Parts in the Ukraine already: it took a few weeks for build and ship, but certainly they arrived faster than I’d expected, which is why I ordered them as one of the first parts for the guitar before I’d finished the design (for a recap on how I selected the Mera parts, you can read that here).
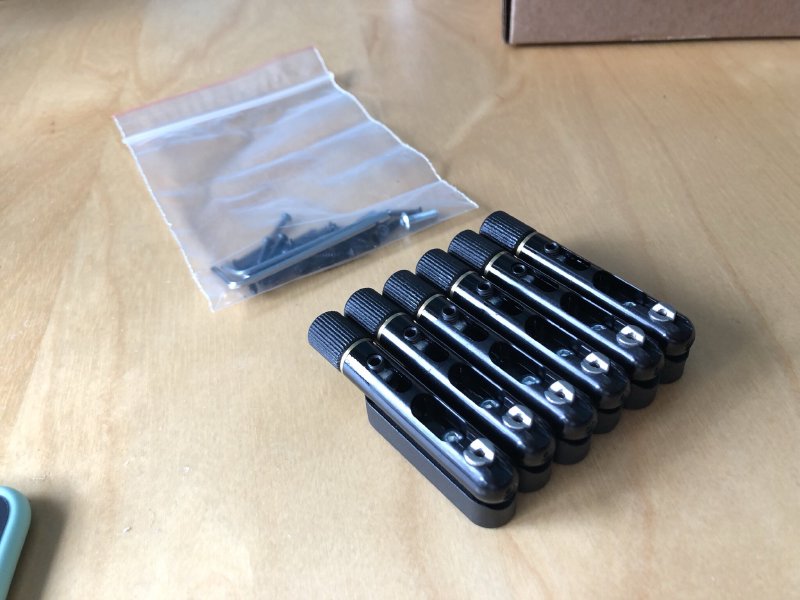
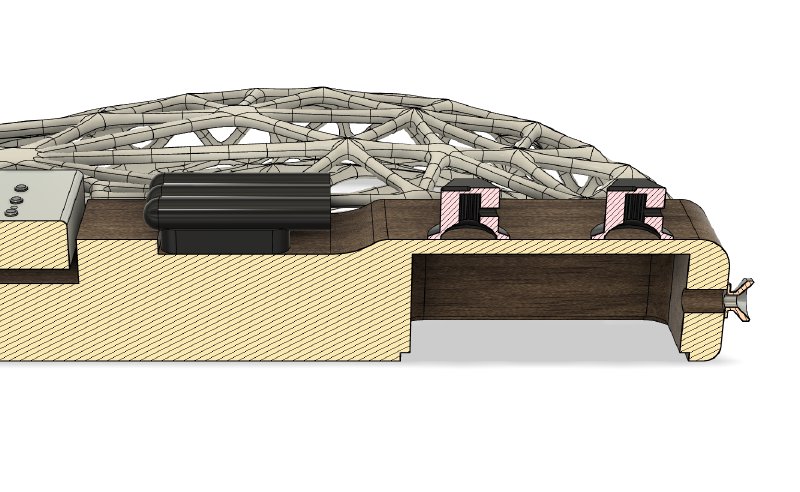
Quality wise they look great, and they’re lighter than I expected, coming in at just 31.3 g per string. I can now use these to check the measurements on the CAD model I have. Particularly in terms of checking how wide a set of six are…
Which is important, as the width of the bridge will be one of the defining metrics to determine the width of the wooden part of the body.
In the original sketch I just drew the body as being the same width as the end of the fretboard, which is about 56 mm. However, I need to be able to mount both the bridge and the pickups to this section, so I knew that I’d struggle to make a body that narrow in practice. The question is just how narrow can I get away with and still be able to mount everything on it?
I started with the bridge, as I wondered if I could just extend the taper of the neck along the entire length of the body, that being the simplest from a construction point of view. However, each of the Mera tuners comes in at 10.5 mm wide, or 63mm wide in total, and that’s still wider than the body would be if I just extended the neck’s taper. So in the end I decided to just accept the body section will need to be at least 63 mm wide and have a step where the neck pocket would normally end. There’s precedence for this in design terms: for example, a Gibson Flying-V guitar has a similar step where the neck joins, presumably to similarly balance having access to the higher frets with a wide enough body to fit that neck pickup comfortably:
But then what of the pickups in my case? Pickups normally extend between 85 to 100 mm or so wide, depending on the type being used, and usually are mounted with screws to the side, meaning the mount would have to be 100 to 120 mm or so wide. I started trying to come up with clever solutions to this that wouldn’t require making the body wider when I realised that on the guitar I play daily, I already had the solution: soap-bar style P90s!
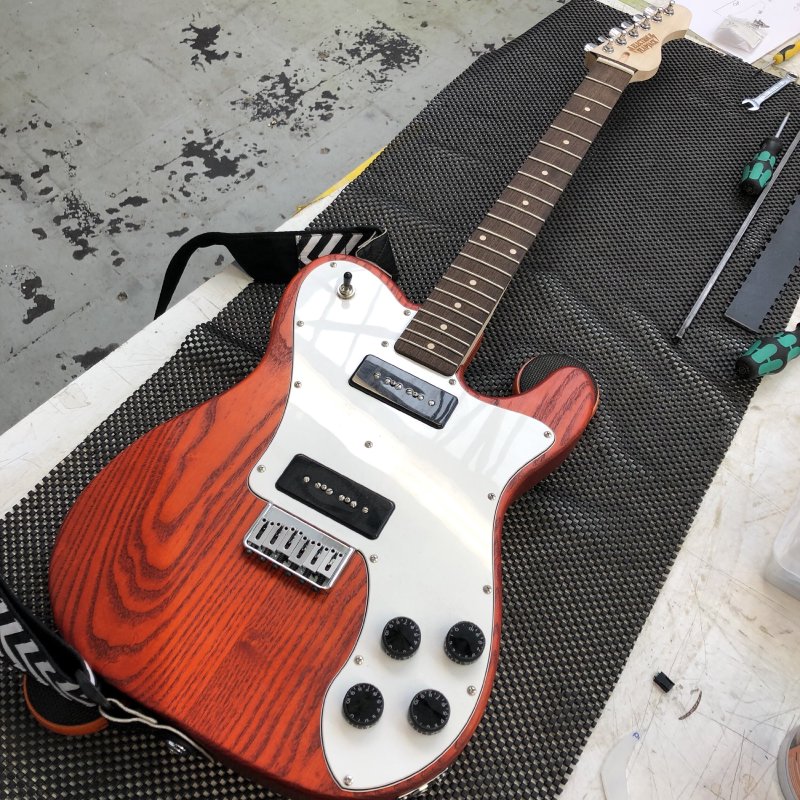
It’s a little hard to tell from the above picture, but the pickups in my guitar show here are mounted by screws through the middle of the pickup rather than at the side: the screws can be seen if you look closely, hidden amongst the per-string poles in the pickup. These mounting screws are spaced 20 mm apart, well within my 63 mm target body width.
Now, not everyone will want this style of pickups, but I can’t solve every problem at once, so I decided to roll with this limitation for now, and I can come back to it once I have one guitar built with some pickups. I do have other options to mount say humbuckers or strat style pickups, but for now I’m happy enough that a P90 can be wound to suit a range of tastes that I don’t think this should stop me moving forward.
This means I now have everything hardware wise that needs to mount to the body section able to do so, at least those bits that will dictate the width.
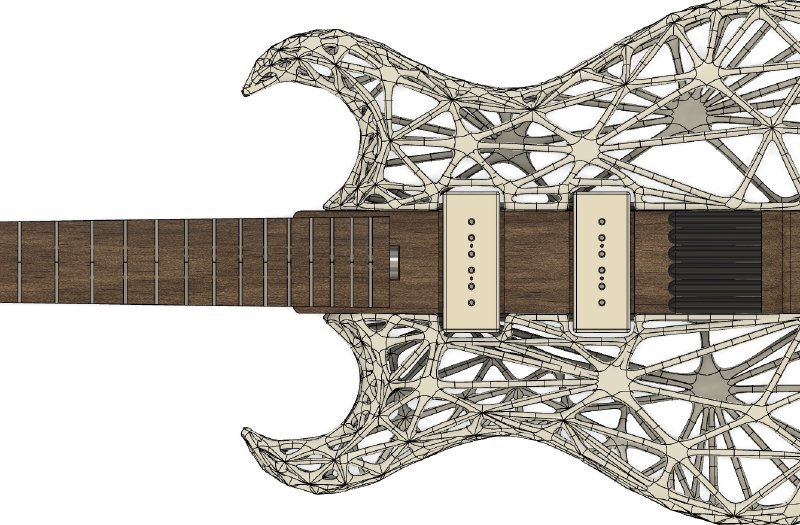
So having placed those pickups, I next need to worry about where to place the bits they’re connected to…
The last bit of the puzzle for this week is where to put the electronics for the guitar. Normally they’d be in the body to the side of the centre section, but this guitar is just all centre section. I did toy with the idea of trying to mount them in a suspended cage within the 3D printed body parts, but I decided that would place awkward constraints on the shape and design of those body wings, and for now I wanted to avoid doing that.
In part the inspiration for this came from chatting to Adan again, when he explained about the Ukulele he built with a piezo pickup in it, where the jack came out the tail end strap button, something common on electro-acoustic guitars. It struck me that I can just put a control cavity in the tail end of the body, and hide everything away in there. I’ll need to be a bit careful with how wide I make the cavity, so that the strap button itself has enough material to hang on to, but an acoustic guitar made of very thin panels can get away with this, so I’m fairly sure it’ll be fine here.
Note the strap button I’ve used there is just a regular one, not one to accommodate a jack, I didn’t have time to fix that before writing these notes, but you hopefully get the general idea.
This also leads to an obvious place for the volume/tone controls and pickup selector, which on the tail. To my eyes currently this layout does look a bit weird, though I think that’s in part because I’ve used quite large control knobs in my CAD model at the moment: again these were just the controls I had modelled in the past I could drop in to help me get things pinned down quickly; I hope if I get some smaller controls it’ll look slightly less out of place. I did consider alternative arrangements, such as sliders which would have a lower profile, or having side mounted wheels that would just protrude slightly at the front, but I wasn’t convinced on the usability on either of these options: for my volume controls I find that most of the time I’m either fine tuning the volume between 75% and 100%, or I’m whacking it down to 0% to mute my guitar, and the conventional control arrangement is just really efficient for these modes of operation, and everything else makes that slightly more awkward. We’ll see - this may yet evolve, but for now, as with my pickup choice, I have a way forward.
The design is almost there, but not quite! The final piece I need to refine is how to mount the 3D printed wings to the wooden core, but I ran out of time before writing these notes to finish that bit off, so hopefully that’ll be something to look forward to in the next design notes! Until next time!