A busy week in the shop
Published 27 Aug 2019
Tags: wuthering bytes
A lot to get through this week: due to delays with bandsaws and software work getting in the way I was a bit behind on guitar builds so locked myself in the workshop for all of the bank holiday weekend to try catch up (as such, these notes are actually covering 8 days, as I’ve included the bank holiday Monday in here).
However, before we leap in, just a reminder that I’m gong to be speaking at Wuthering Bytes festival day this Friday up in Hebden Bridge. If you’re in the area the festival day for Wuthering Bytes is always interesting (I’ve been the last three years I think), so do stop by and say hello or just listen to some fascinating speakers.
Now, on with the week! It was actually wonderful to just spend a bunch of days working on building guitars rather than working on how to build guitars or improving the workshop.
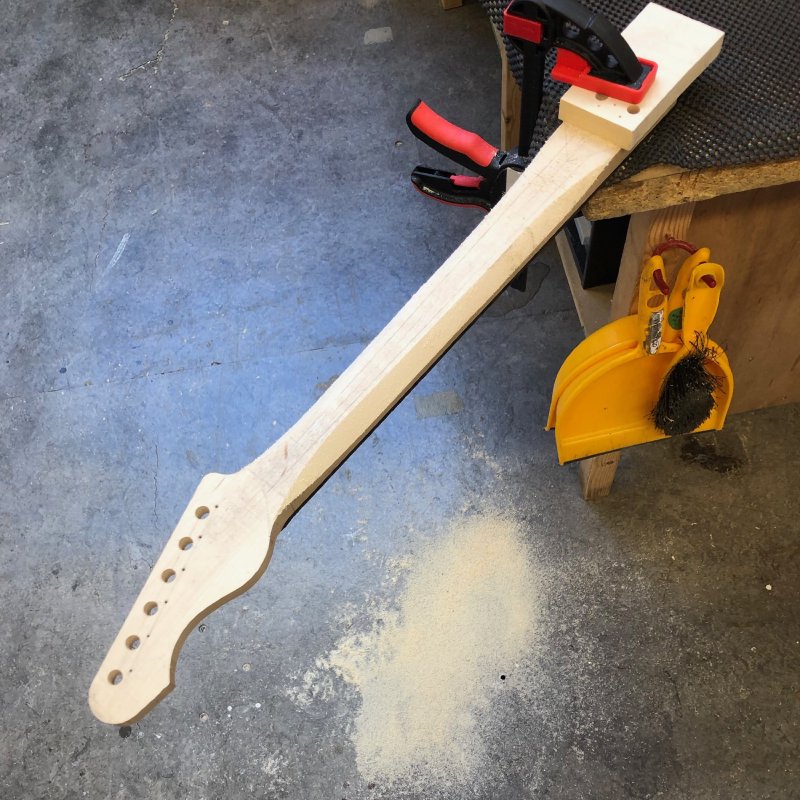
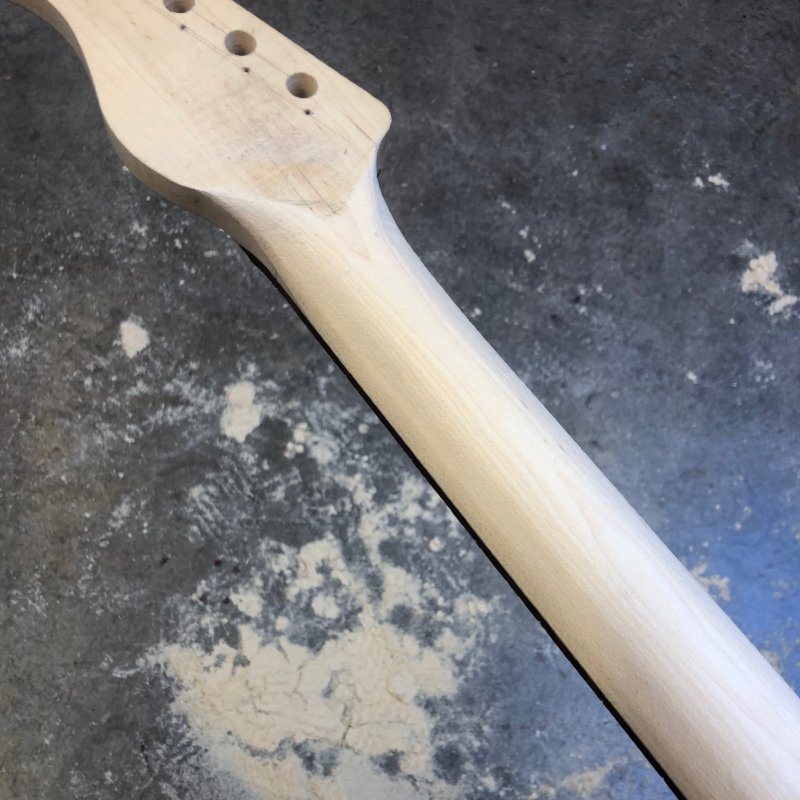
On Monday I was still on a high from the fun of 3D printing a guitar body last weekend, and I wanted to at least do something with it whilst it was fresh in my mind, lest it get forgotten for an age. So, to give it more life I dug out an old neck I’d started making 18 months ago that hand’t properly glued up and adjust that to fit the neck pocket on the 3D printed body.
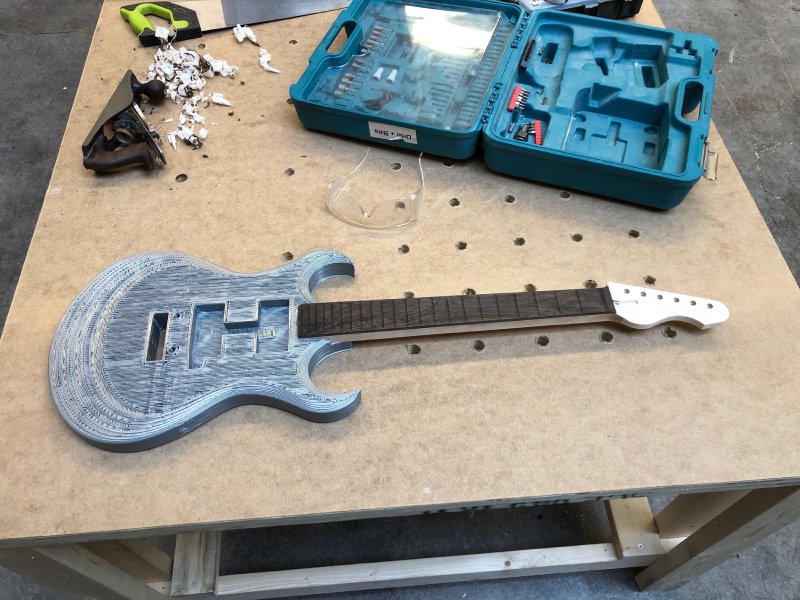
As I expected, the neck didn’t fit the pocket on the body straight out the gate as it was slightly too wide (I tend to make the necks slightly too wide to start as that’s easier to correct for than the alternative). Rather than just sand the neck to fit I used a hand-plane to get it down to size, and much to my surprise the gaps between the fretboard and the main neck body that caused me to reject this neck initially pretty much vanished during that process, so the neck is actually usable now. Glad I held onto it rather than throwing it away!
Fitting the neck to the 3D printed body revealed a few details that I’d fix on a second print run. As an ergonomic prototype I need more than the neck on the body: I need at least strap pins, because to feel the guitar in its normal position I want to be stood up with it on a strap. However, because we didn’t plan for that there’s no support material where I’d attach the straps given how little infill we used. So whilst I’m still happy with the looks of this design with the added neck, I’m still not sure on its ergonomics. I suspect I may just glue in some strap pins and see how they hold.
Because it looks so close to a real guitar, it feels sad that I can’t string it up. Given that this was a spur of the moment thing and we were limited for time, it’s totally understandable that the body isn’t structurally sound it being effectively hollow, but if I was to do it again I’d definitely try to make it so, as once you’ve got a neck on there you’re most the way to it being playable. That’d mostly just add time to the print job, along with some weight, but given that at 1.2 kg this body is lighter than a real guitar body, I think we could cope with that.
This design also needs a tweak to get it strung up, as the tremolo cavity on the back is actually filled in to save on support material, so there’s some other fixes needed design wise, but I’m going to see if I can get Liz a new design in the near future so that when she has a chance she can try printing one that we can then play.
On the topic of necks that I incorrectly assume are unusable, there is the one I was working on the last couple of weeks that went wrong, and I still haven’t got around to saying why it was wrong (I think). The reason was that I pre-etched the fretboard with the fret positions on it, and when I glued the fretboard on it shifted slightly so the fret position marks I’d made didn’t line up with the neck properly.
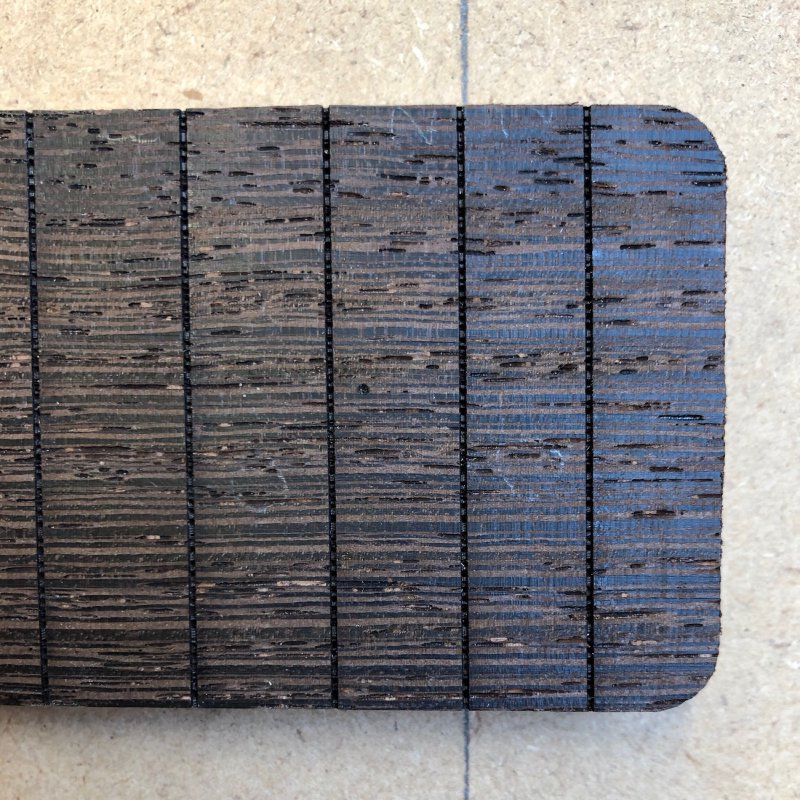
Normally I’d do the laser etching of the fret positions on the fretboard after gluing it to the neck, but given I spent the last few weeks waiting for the new bandsaw to be operational so I could start making necks properly, I was looking for tasks to do to fill the time. In the past I have successfully glued fretboards to the neck with the slots either etched or fully cut, but it is a more risky way to proceed, and I should have just been patient, as this was the result.
Now, this neck isn’t important in terms of deliverables, I’m building this one to let me prototype my CNC-free build technique before trying it on commissions, but rather than just give up on this neck, I figured I could try removing the etched fret markers and re-burning them. When I laser etch the fret markers it’s only a few tenths of a millimetre that I burn: just enough to guide my saw blade gently when I cut the slots proper, so I don’t need to remove much material. That said, the neck was already at target height, so anything I remove here is going to leave the neck short. But, at this point, there’s not much to lose, so I did the unthinkable and ran the entire neck through the thicknesser :)

With a few passes I was able to remove most the signs of the wonky slot markings. It was interesting to see that the laser etching had penetrated much deeper in the light bits of the wenge texture than the dark, so after a couple of passes I’d removed most of the etching, but there was still some traces there.
However, given that I was fairly close to the right position, this faint remainder will be covered by the fret itself, so I stopped removing height before I’d removed all evidence, but just enough that it’d be obvious when I re-etch the fret slots which one was going to be correct. (For those wondering why I don’t laser cut the slots themselves, the profile of a laser cut slot is broader at the top than the bottom, whereas I need a very straight profile).
With this done, I then checked the height. I’d lost about a millimetre from the neck height, down from a target of 25mm at 24mm. This isn’t the end of the world, as I could put a shim on the back of the neck at the heel end of the neck so that it still sits proud of the body by the right amount, but before I did that I went to check the neck on the old guitar that this one will be replacing.
It turns out that this neck is also slightly shorter than my target height, even more so, at 23.5mm, so no shimming required. Always measure before you assume you have to do something like this!
With the old slots cleared, it was back to the laser cutter to re-etch the slots.
Given I was at the laser cutter I also did the headstock logo. As ever, I had to do a bunch of test etchings before doing the logo on the neck itself. The laser cutter’s power output is quite variable depending on how heavily it’s been used since it was last cleaned (you end up with particulates building up on the focussing lens) and each tree is different (just think of the bodies I was showing recently made from the same wood yet one was half a kilo lighter than the other), so between these two it’s vital you check the settings before each neck even if they’re both in theory the same wood (unless you know they’re from the same tree).
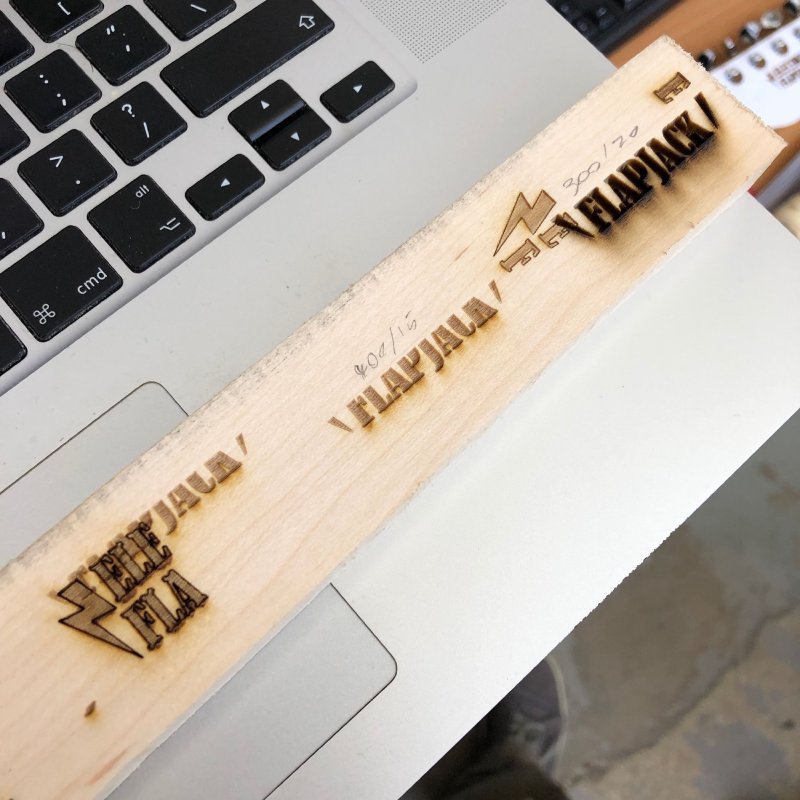
For fun this time I tried adding an outline to the logo to make it more distinct at the edges. Post burn it looked fine, but it’ll be interesting to see if it looks as noticeable once the headstock has been sanded down and oiled.
With the neck back in action, the neck job was to do the rest of the jobs that it’s easier to do whilst the back of the neck is still squared off, giving it nice flat sides for drilling etc.
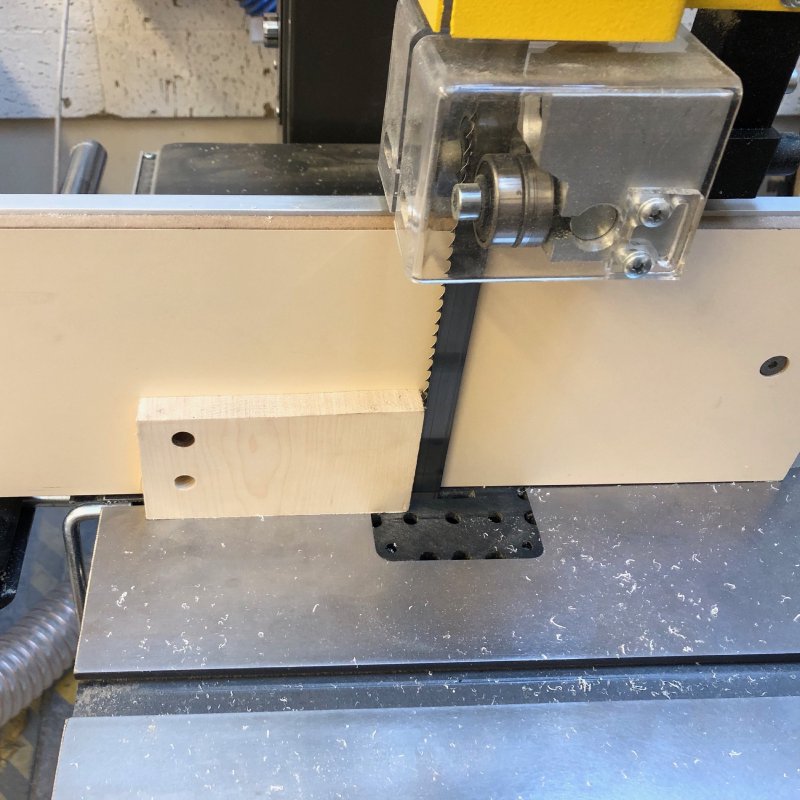
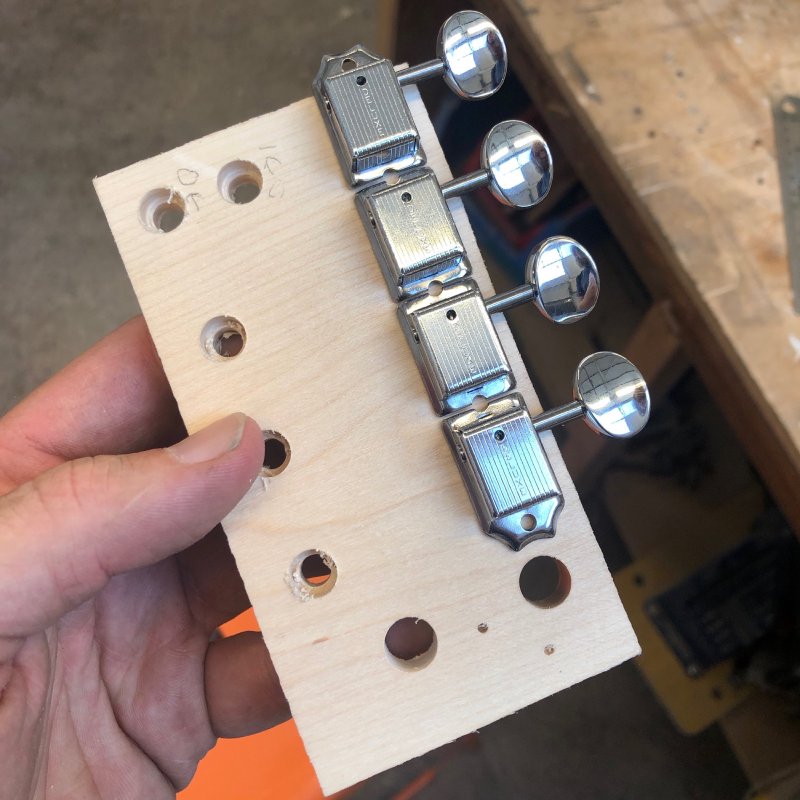
First up it was drilling the holes for the machine-heads (or tuning pegs or whatever you wish to call them) on the headstock. Normally I’ve preferred using vintage style tuners which use a stepped hole in the headstock which is narrower at the rear than the front, but here I was just going to take the old machine-heads off the old neck, and they’re modern style which just needs a straight 10mm hole.
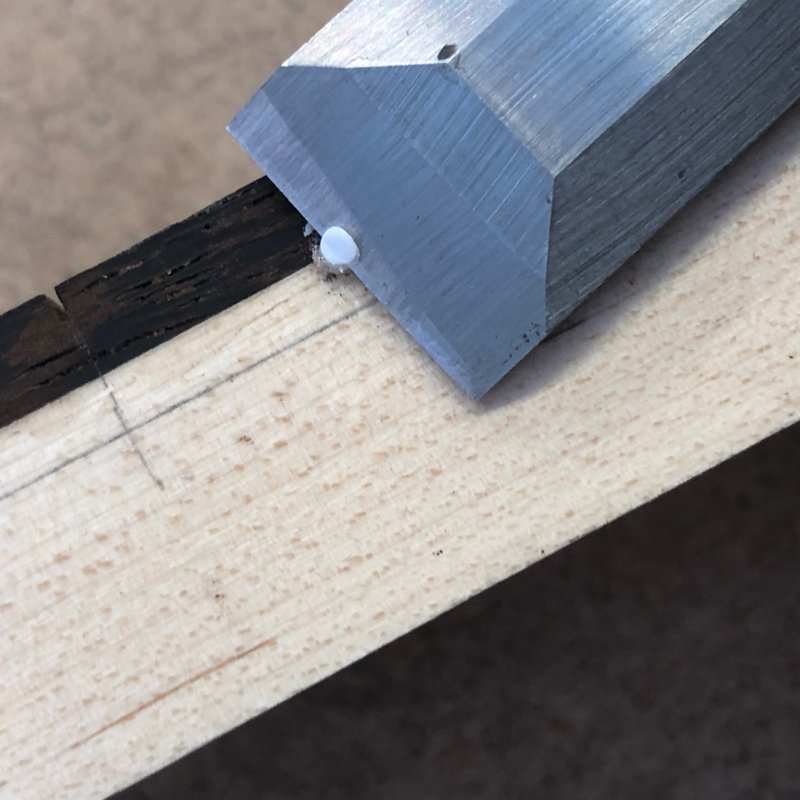
Here I had a question in my head: should I drill this hole with a 10mm brad point bit, which is what I’d normally do, or should I use the 10mm Forstner bit that came as part of the set I ordered last week (more on these later). In the inimitable words of philosopher Harry Hill, there’s only one way to find out: fight! I took a maple offcut I had from the neck, and drilled one hole with each bit. The hole made with the brad point had a cleaner exit but a slightly less tidy entrance, and the Forstner bit had a cleaner entrance and was slightly less tidy on exit, but really there wasn’t much in it. In the end I used the Forstner bit as they were new to me and I wanted to get used to them.
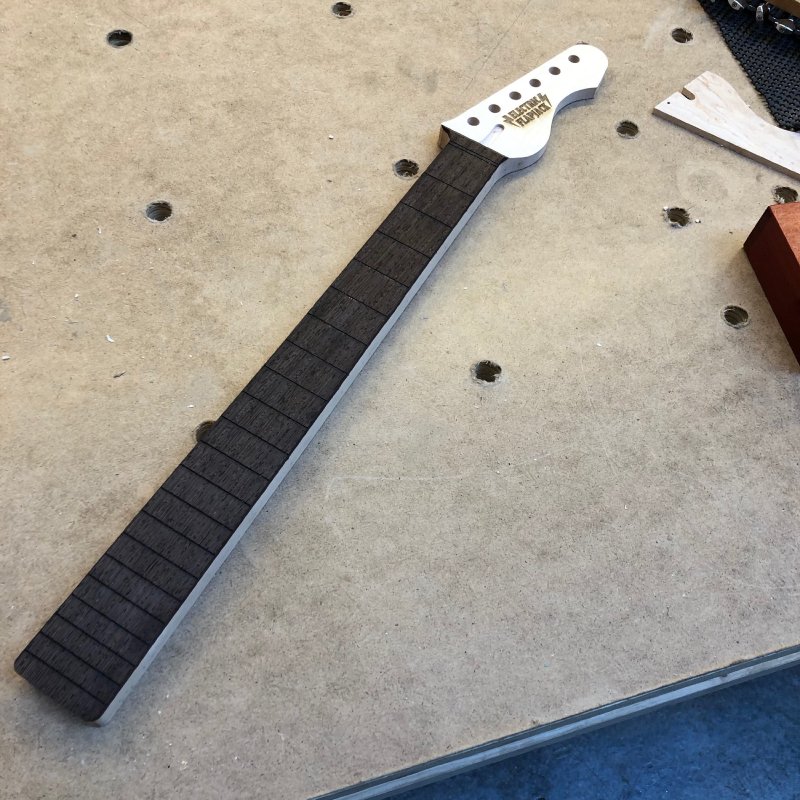
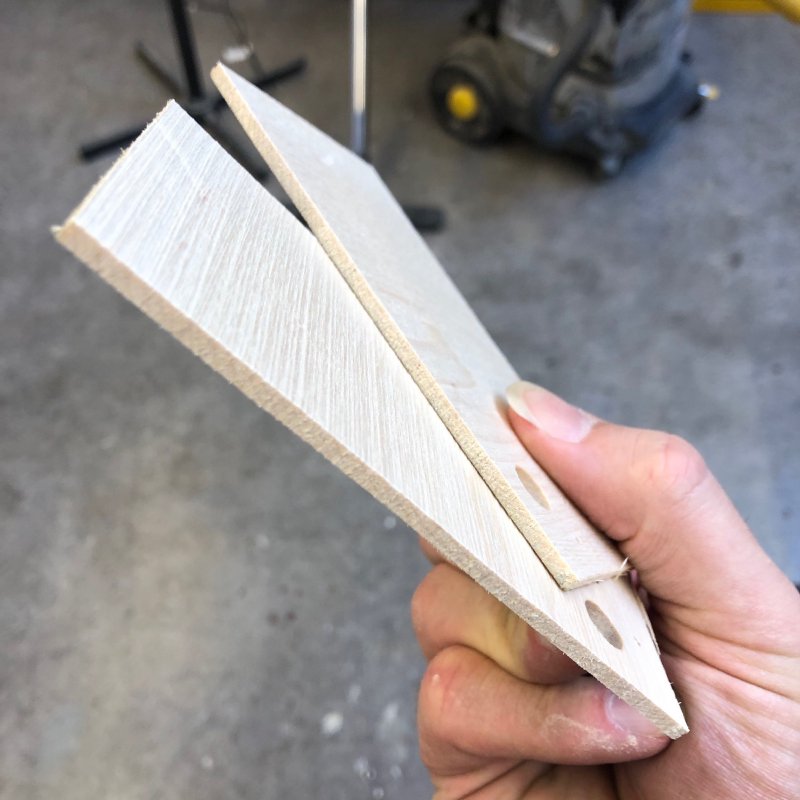
Headstock holes done, I then drilled yet more holes, this time for the inlays, both on the side of the neck and the face of the headstock. For the holes on the side of the neck, I avoided an issue I’d had in the past getting the plastic 2mm dowel to fit in the holes by using a pair of callipers to realise that the stock “2mm” drill bits we have in Makespace are actually 1.9mm, and hunting around the workshop (like a weird obsessive) until I found a drill bit that was actually 2mm proper. Using this meant the side dots went in a dream. I can also recommend if your cutting them flush to only roughly cut them short with side cutters and then use a sharp chisel to get them properly flush - it does a much better job than the cutters can.
I also drilled the fretboard inlay holes at this point but didn’t yet put the inlays in just yet: they’ll protrude at first until I sand them down as part of sanding the radius into the fretboard, and right now I want the fretboard totally flat so I can clamp the neck down for carving the back of the neck.
The final act I did at this stage before carving the back of the neck was patch the chip in the fretboard I mentioned last week. To do this I took some offcut wenge (really, never throw offcuts out until you’ve shipped, they’re so useful), used a saw to generate sawdust, mixed it with a little bit of wood glue to make a cement that I then packed in and around the tear out.

It looks dreadful here, but once the neck was sanded down you really can’t tell at all that it’s been patched. Had this been a lighter wood I’d have not been so successful, as the wood glue will dry darker than the maple you see here for instance. But on wenge it works a treat.
Next up was carving the neck, which I do freehand using rasps.
You can see a few things in the above picture. Firstly, the use of pencil guides to give me some structure to removing material with the rasp that gets me close to the right shape. So, whilst I am doing this freehand, it’s still a structured process.
Secondly you can see one of the new clamps I bought last week in use. Those two one-handed clamps I bought last week from axminster have been amazingly useful this last week, I almost wonder how I got on without them. In the past the quick-release/one-handed clamps I’d found to use weren’t strong enough for jobs like this, but these axminster ones are great for anything where you’re securing a part to work on it (I’d not use them for gluing, I’d still use G-clamps there).
Thirdly you can see the block of wood I’m using to protect the neck from getting marked by the clamp is the test piece I used to test drill bits above :)
After a couple of hours I then have a carved neck. What isn’t so immediately obvious is that the neck tapers: it’s about 21mm thick around the 1st fret, compared to 24mm around the 12th fret. To check that I use a straight edge and have to manually adjust as I go along.
For the inlays, rather than use plastic mother-of-pearl effect dots, I decided to make my own, something enabled by the new bandsaw at Makespace.
I took that same offcut of maple again and a couple of 3mm thick veneers from it.
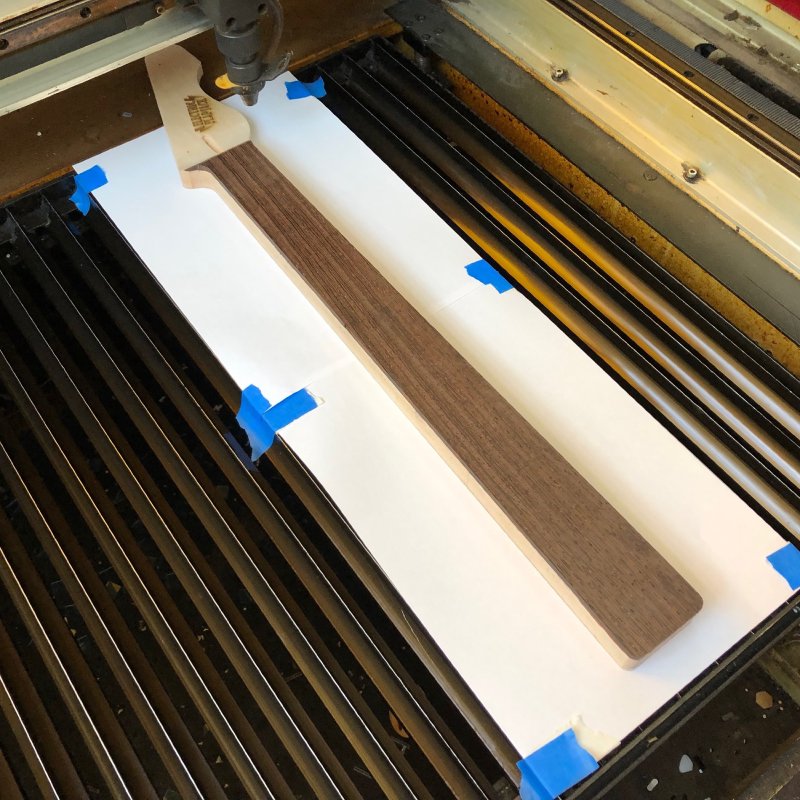
As I’ve said before, there’s a tendency to see a bandsaw as a crude bulk cutting instrument, but if the blade is properly set up and sharp you can do quite precise work with it. Once I had the veneers I headed over to the laser cutter again to cut out some dots.
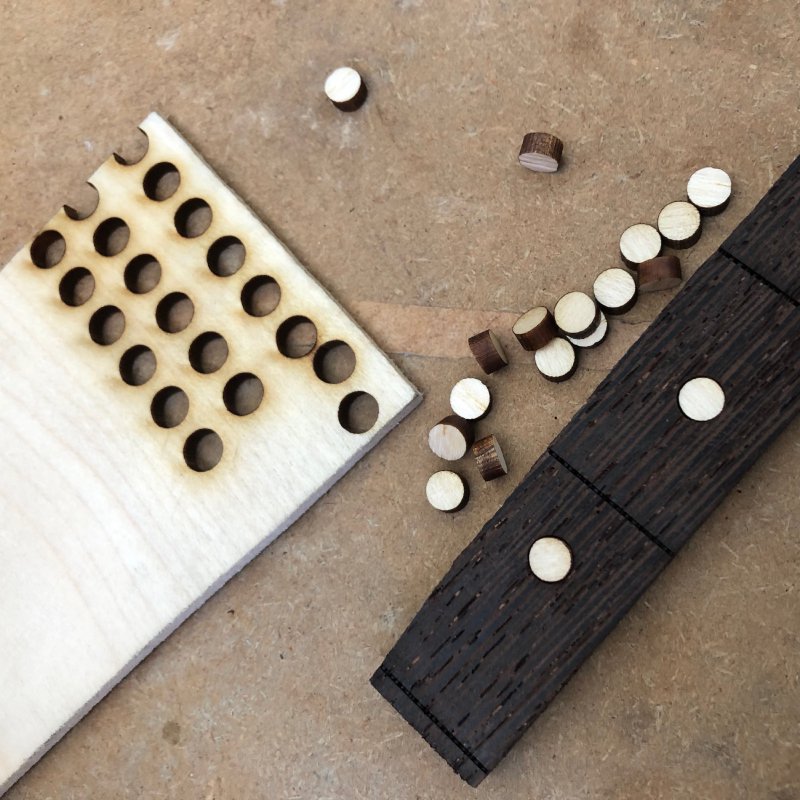
The laser cutter will remove material as it cuts, so I had to do several test dots, checking them against the drill bit I used to make the inlay holes, to get one that fit perfectly (hey look, I’m using some fretboard offcuts - it’s like I have an unhealthy obsession with offcuts!). Once had the right size I then used superglue (along with some activator to stop me sticking myself to the fretboard) to stick them in.
The final bit I managed on this neck this week was to put a radius on it. For this I ended up using both my long and short radius block, and using jigs to make sure I got everything flush.
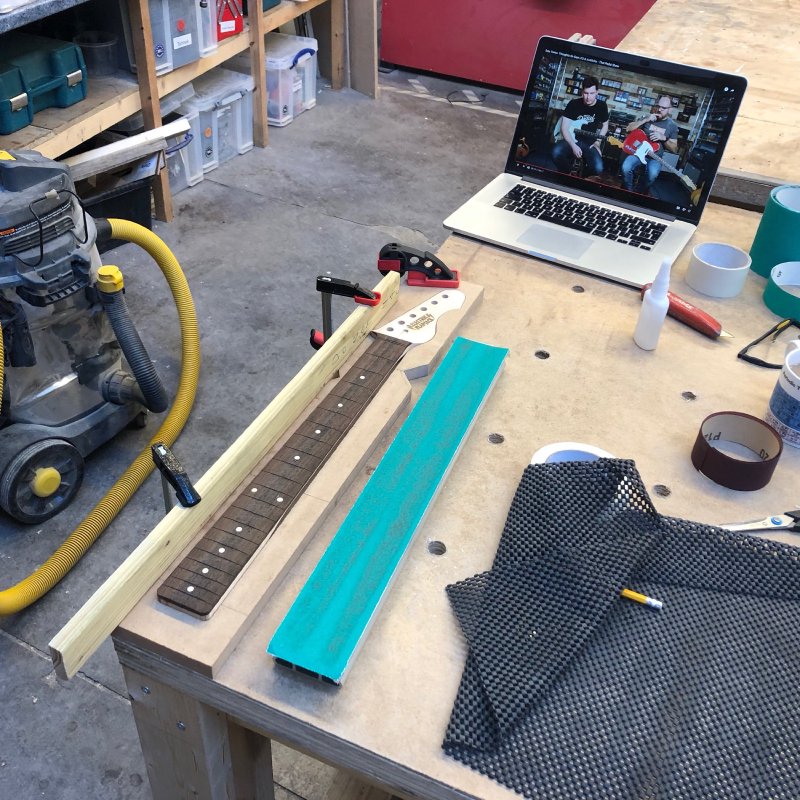
I’d not used jigs before to guide my sanding, but it makes a huge difference. Freehand sanding his you discover that no matter how straight you try to be, your arms will move in a curve naturally. You can compensate for this, but the jig setup I have in the above picture, as crude as it is, lets you get things done faster and more accurately.
That’s as far as I got with this neck this week. This neck isn’t really what I should be working on right now in theory, as it’s not on a commission, but it’s let me pioneer a bunch of techniques and just get back into practice at jobs I’ve not done for a while, it’s been useful. I’m now confident that post-CNC-router I can make a quality neck again.
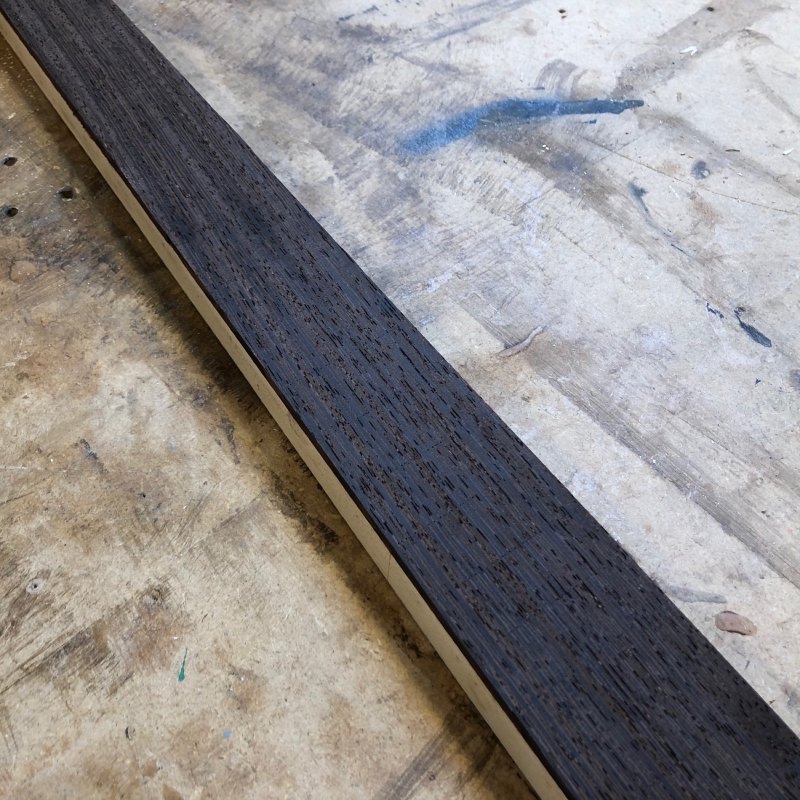
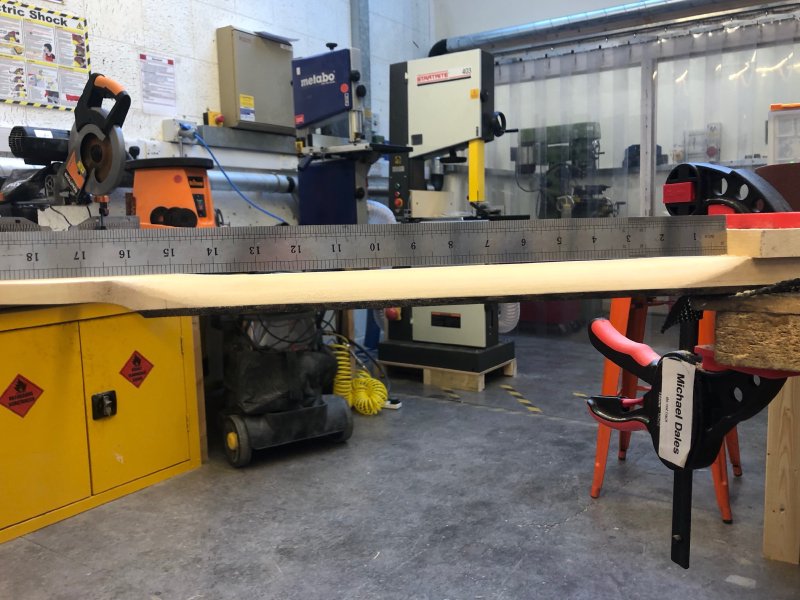
Commission neck wise I did do some prep on the neck for guitar #10, in that I thicknessed the wood for that neck ready to get shaped.
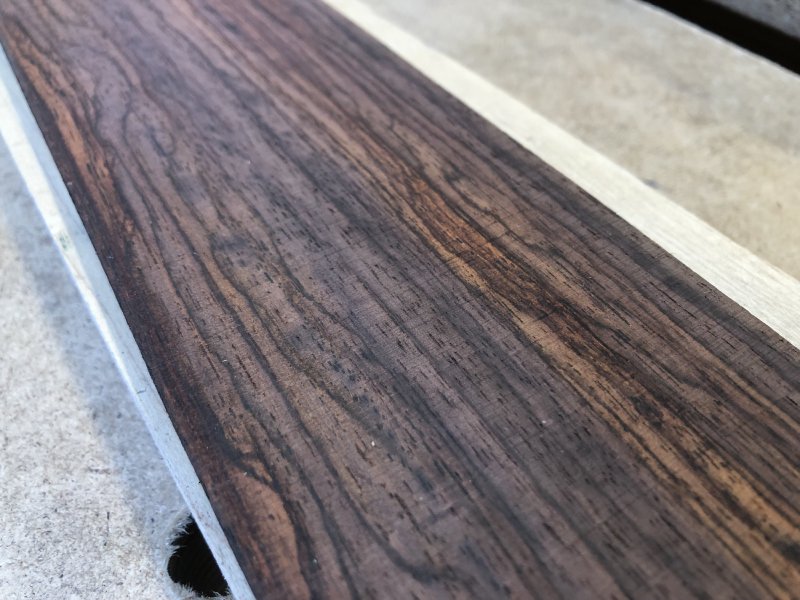
The fretboard is a particularly striking bit of indian rosewood, and it might just edge out olive wood as the wood that most makes the workshop smell nice when you cut it up. Rosewood gets its name from the fact that it smells nice, and this particularly piece made the workshop smell lovely as I got it down to size.
On the body side I made progress with all three bodies I have on the go right now: there’s the Corvette prototype (guitar #8), and two Mustang-style offset commissions (guitar’s #10 and #6). Whilst the Corvette is not an urgent piece, it not being a commission, I am again using it to test out new non-CNC-router based techniques before I carry them over the commissions. In this instance it was mostly around using my new set of Forsner bits to help me bulk remove material from cavities before hand routing the remainder using templates to guide me. Whilst in theory I could just use the hand-router to remove all the material for the cavities, I tend to view the hand-router as more of a finishing tool, and where possible I’ll get rid of as much material as possible using other means first.
First up was the easy one: the switch cavity on the Corvette body is like that on a Les Paul, a single cylindrical hole that happened to be the same size as the largest Forstner bit in the set I bought.
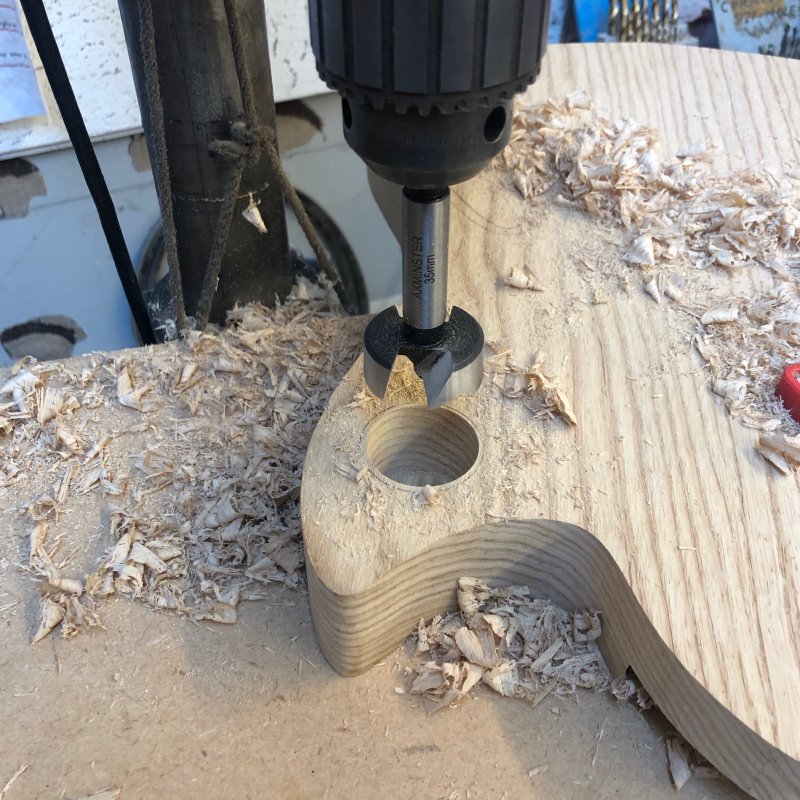
I had assumed that I’d have to drill this out and then route it out manually, so it was a pleasant surprise when I realised the sizes matched. Next up was the control cavity on the Corvette, which I definitely did need to drill out then route out.
Drilling done, you can see I’ve got rid of most the material here already, and I’ve done so using the pillar drill which is a much safer, predicable, and restful tool to use than a hand-router, so a total win. The one thing to be aware of is that the spikes on the tip used to guide the bit do go 3mm lower than the main body of the bit, and as such I didn’t drill out all the way. This cavity wants to have a 5mm wall at the bottom of it, and 3mm spikes into that seemed a bit close for comfort, so I stopped 3mm short and cleared the bottom few millimetres of the cavity with the hand-router.
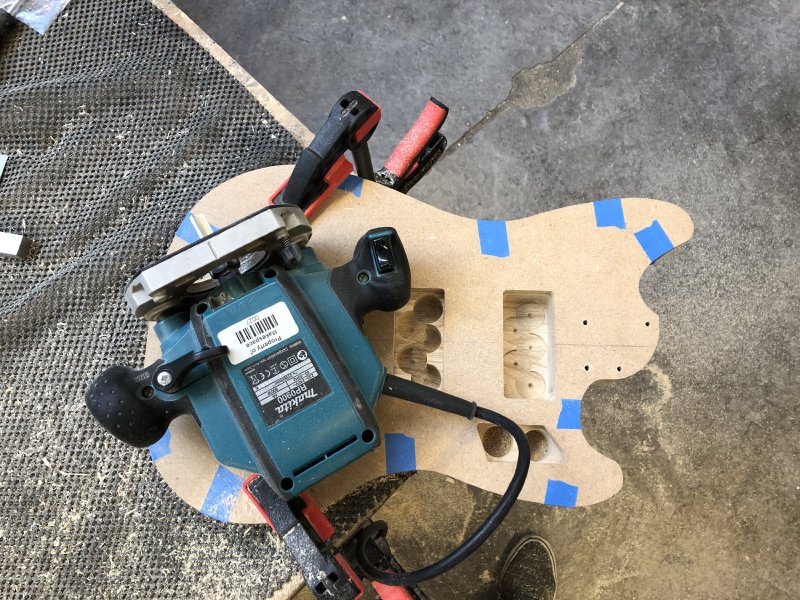
After hand-routing, it looks perfect, so then it was on to routing out the pockets on the bodies for guitars #10 and #6. First I did the neck pockets (for those interested, #10 is on the left, #6 is on the right). Next up it was the same again for the control cavities:

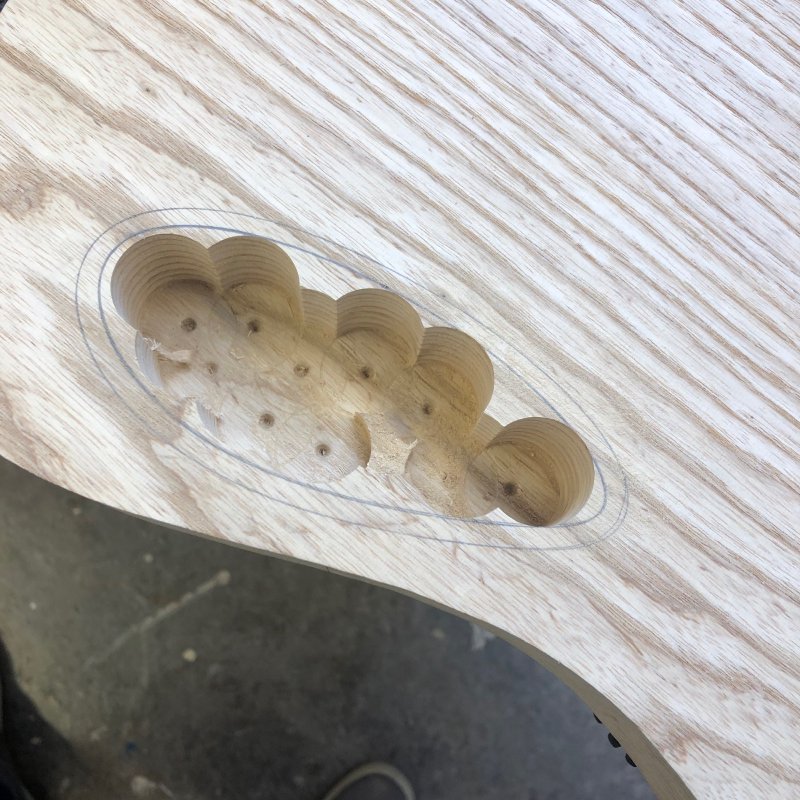
And then finally the more complicated shaped pickup and switching cavities for the Mustang-style offsets, which required me to almost treat it like four individual pockets despite all being connected:
You’ll note that some of the templates I use are made of clear acrylic and some are made of MDF, and the only reason for that is the MDF ones I made a year or so ago before I discovered the advantages of using clear acrylic to let you see features behind the template.
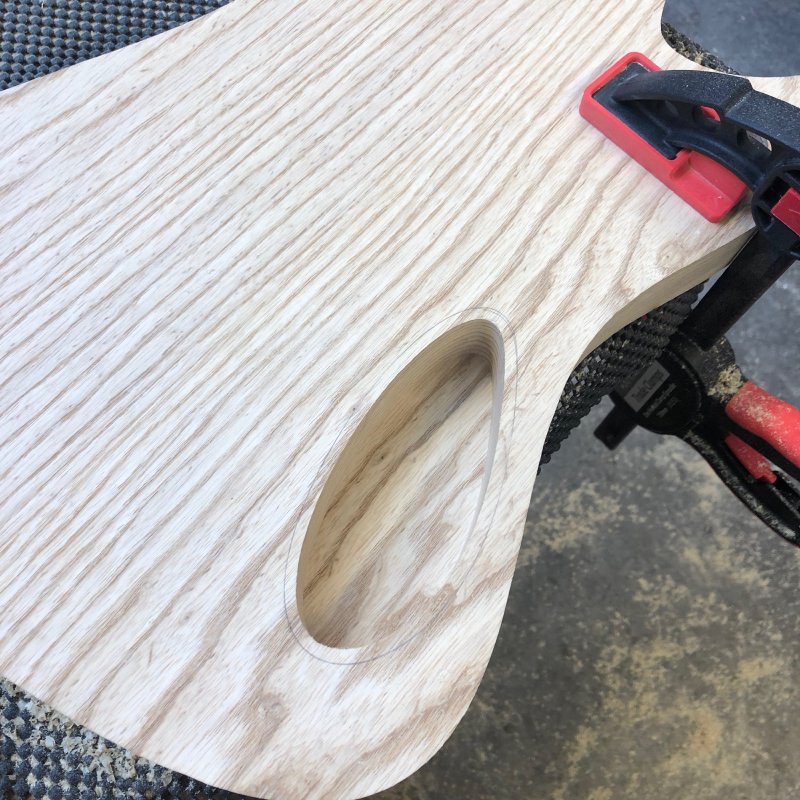
After a lot of dust was generated, I had both bodies routed out (this time #6 is on the left, #10 on the right):

I’m delighted at the results on all three of the bodies. In theory this should all have been obvious: this is a well tried and tested technique I’m using here. But there’s a difference between theory and execution, and so it’s not until I’ve tried it I know what’ll work well, and what’ll work for me given my particular skills. Here I’ve delighted at both how relatively easy this was to execute, and how good the finish has come out. You can see there’s some indents here from the tip of the Forstner bit, but in all cases it’s where you won’t see and there’s not functional impact. And, as you saw on the Corvette body, had I wanted to remove all trace of that I could at the cost of a little more hand-routing.
The final learning of the week was that it’s time for me to switch from vintage style machine heads to modern ones, or at least in terms of the wood work required. Vintage style machine heads require a stepped hole in the headstock, being 6.5mm at the bottom and 9mm at the top; modern machine-heads use a straight 10mm hole. I was curious as to how well I can make the vintage style holes by hand, vs using the CNC router to do it, and so I did a bunch of testing, as is my way:
I discovered that whilst I can do it, to get a good finish using the bits I have was time consuming when compared to cutting the 10mm hole as I did earlier in the week using the Forstner bit. In general I find most people don’t care about the hole spec, they just want good working tuners, so I’m going to optimise here for reliability of manufacture (knowing I can do it if asked, just it’s more time I need to allow). With the CNC router it was just as easy to do the vintage style, and being a slightly vintage style of person I went with that, but here it makes sense to change.
Sorry that was a lot of things, but it was great to get into the workshop and just make progress on guitars for several solid days without having to wait for new tools to be delivered or help set up new machines in Makespace etc. - all of which is important, but at times can feel like it is dominating what I do. This weekend it felt like all the time I’ve spent this last half year trying to find out how I make guitars in a post-CNC-router world are now coming together and I’m hitting my stride again with what it is I really want to be doing: making guitars. There’s still bits to understand and learn, and I’m sure there will be more upsets down the line, but for now it felt like I could claim to be a guitar builder again, rather than someone who worries about guitar building :)