A week in the shop
3 Mar 2019
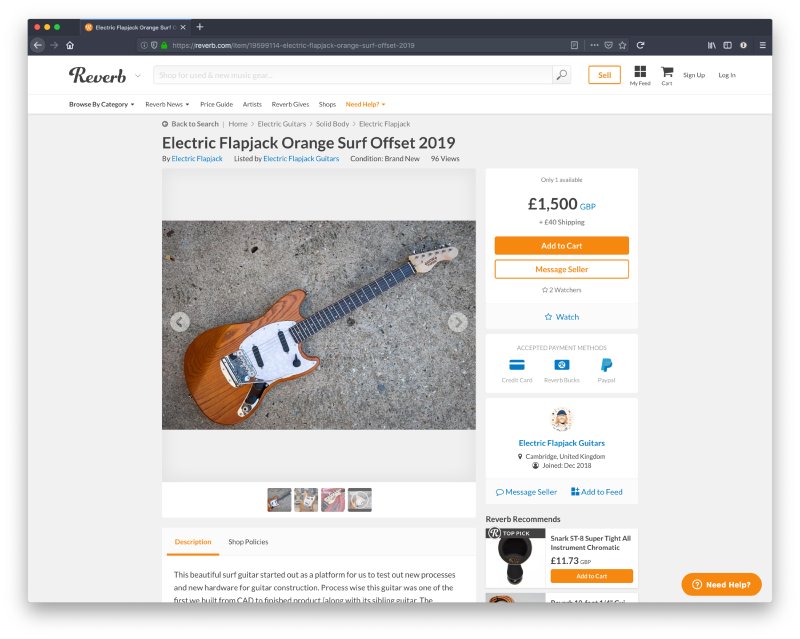
Last week I shouted about how I have a guitar up for sale, The Orange Surf, and at the time I was still trying to set up a Reverb Store set-up for both that and other things I want to sell in the future. If you’ve not come across Reverb before, it’s a site dedicated to buying and/or selling musical equipment. It’s been around for a while, and seems much more popular in the US than it is in the UK, but that seems to be changing over time.
I finally got my store set up this last week, which means that now if you’d rather buy the guitar via credit card or PayPal rather than direct bank transfer to my company you now can. You can check out my store here, or from the link at the top this website.
I also used this as time to do a little house keeping across this site - nothing major, but just a few things that seemed a little broken due to an update Square Space did a while ago.
I continued to do the finishing on the Recovery Offset. The Phthalo Blue stain from Crimson Guitars has come out an amazing iridescent peacock blue, going through greens and purples in places as the light catches it. It’s not at all what I expected from the label colour guide, but then that’s why in general you should use test pieces before you splash stain onto a guitar body. In this instance, given I just wanted to do something with this body to get the ball rolling again and wasn’t too fussed so long as it didn’t look horrible, I just pressed on, and thankfully it’s turned out better than I’d expected.
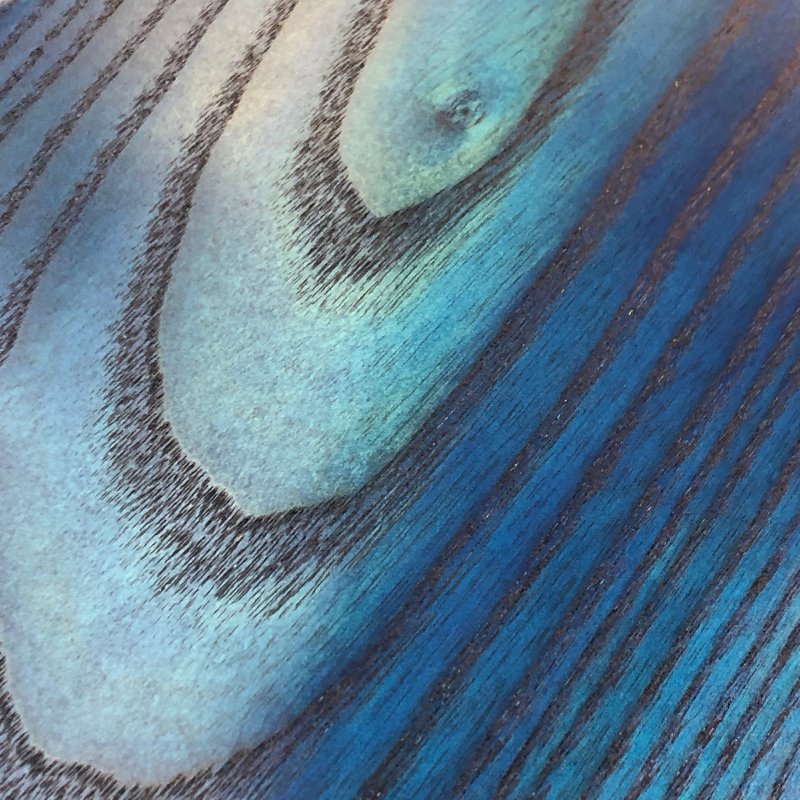
Usually I apply about half a dozen coats of stain to get a nice solid colour, however I’ve stopped at three this time as the range of colours at this stage was lovely, and I was worried the more I added the more I’d lose that magic it seems to have.
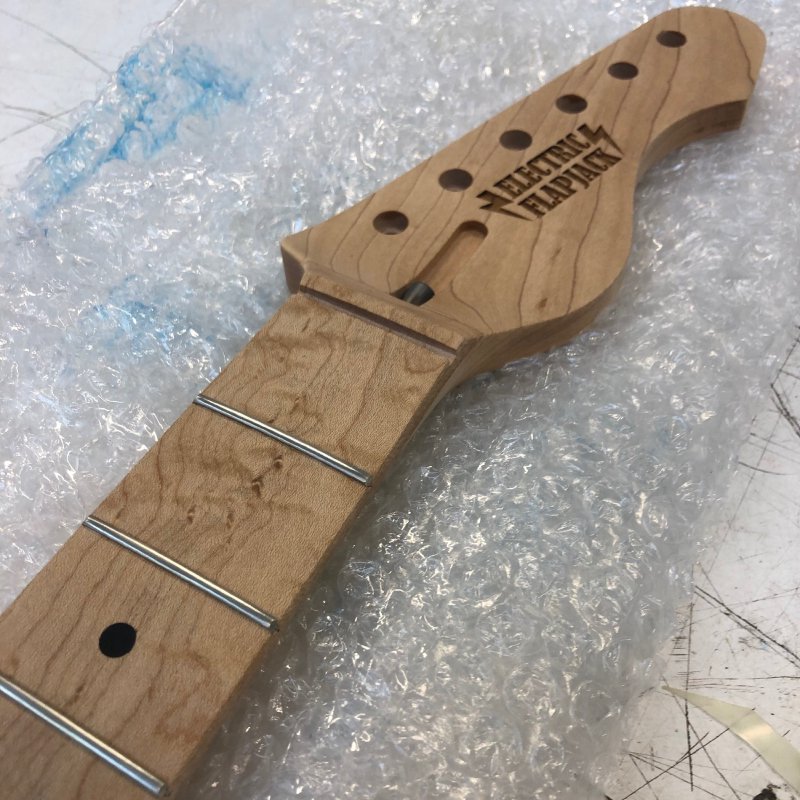
This means I went on to the oiling stage for both this and the neck quicker than expected. Both are looking quite lovely.
The only downside to the amazing blue stain is that it doesn’t really go with the red turtleshell material I had in stock that I was going to use for the pick guard; the texture of the turtleshell was meant to add interest to what I expected to be a flat blue colour, and now they just fight a bit and so I’ve been looking for another approach. After trying looking through many different materials nothing really made me happy until I hit upon the notion of perhaps doing something in copper, as shown in this quick mock-up in Fusion:
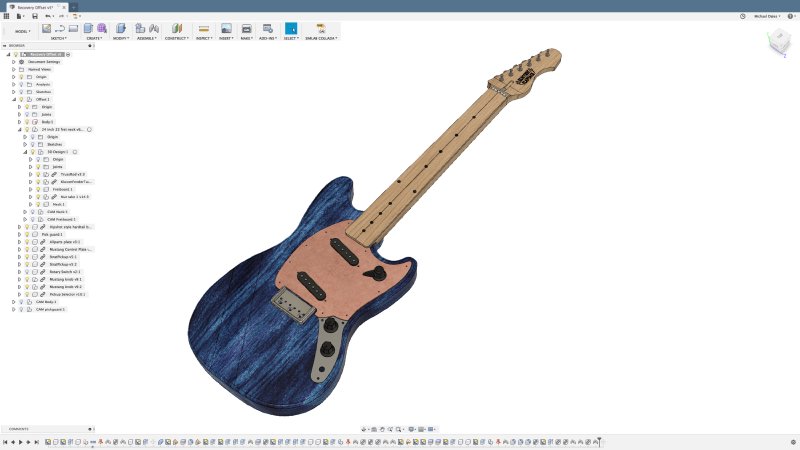
This direction might just work. I started looking into how to apply copper leaf, but that’s now on pause as my friend Matt at Fidelity Guitars thinks he has some iridescent acrylic that would be a good match, so I’ll try that first. I’m quite excited to see how this is going to turn out.
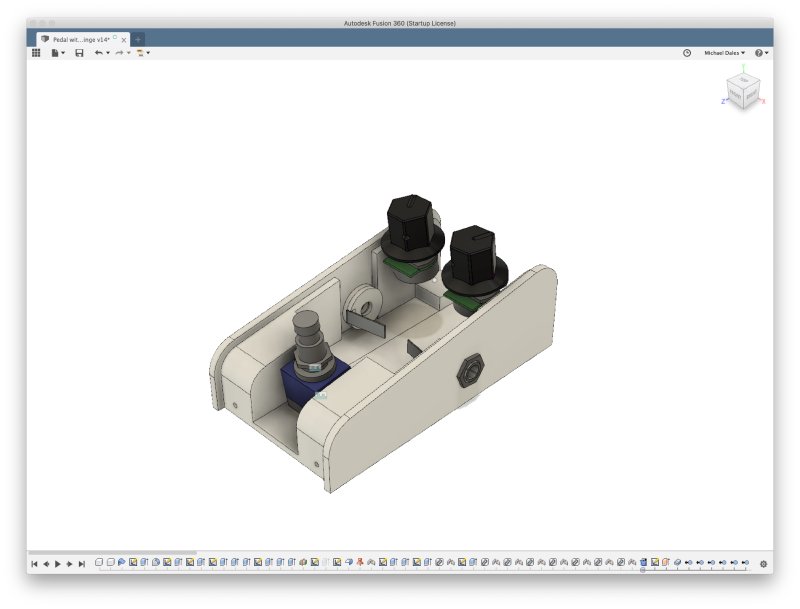
Last week I talked about my little pedal project, where I prototyped the case for the little fuzz face circuit I breadboarded. I’ve pushed that prototype case all the way through to where I’m happy all the bits fit, and now I just need to find time to make a veroboard of the fuzz circuit that’ll fit.
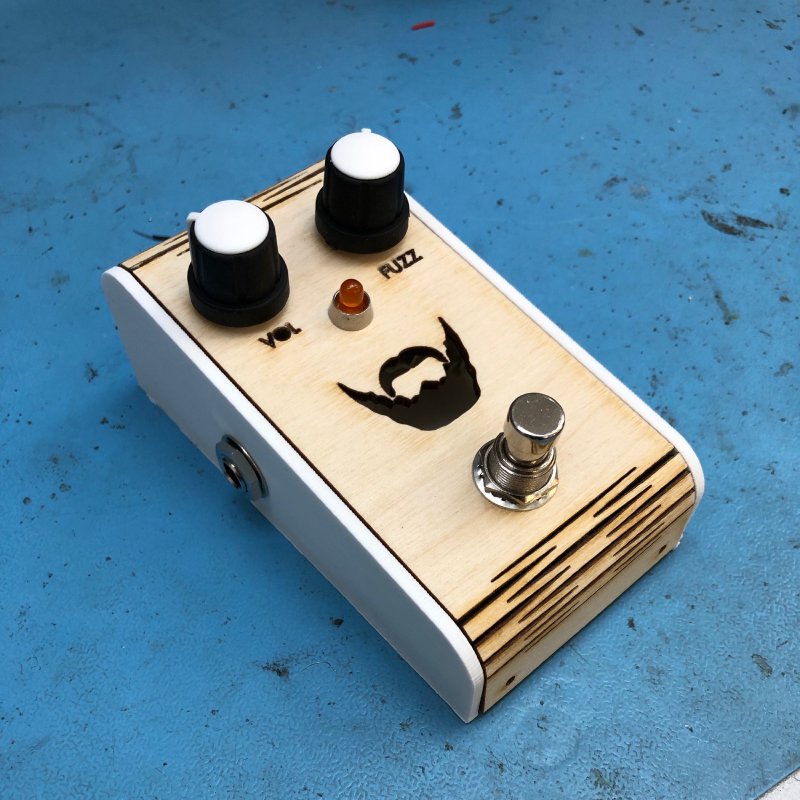
The beard is a sort of pedal-pun: it’s a fuzz-face pedal, geddit? No? Sorry…
The case took me a couple of goes to get it such that the components all fitted together. The main failure on my first 3D print of the case was I made the wall too thick for the audio jacks, and thus I had to tweak the design to thin the walls around that area. I also added a little bit of height to give me a little more room under the foot switch, as the one I’d modelled was slightly smaller than the bulk set of foot switches I ordered.
The first comment most people say when they see it is surely the wood won’t take the pressure of being pressed on, however, underneath the lower end of the pedal I’ve made the 3D printed part quite solid, with just enough room for the foot switch, and that seems to provide plenty of support in testing.
Beyond the fun of it all, part of the reason I’m doing this is I have an idea for a different style of exhibit for Liverpool Makefest later this year. I’ve been fortunate enough to have an exhibit at Makefest the past two years, where I’ve shown how guitars are made, going from planks, to an in-progress guitar, to the final thing that they can play. However, I fear for repeat attendees to the festival that’ll start to get boring, and so this year I wanted to try mix it up a bit: I’d like to try and explain to people where that classic rock electric guitar sound comes from, and making a pedal I can easily attach oscilloscope probes to is part of that.
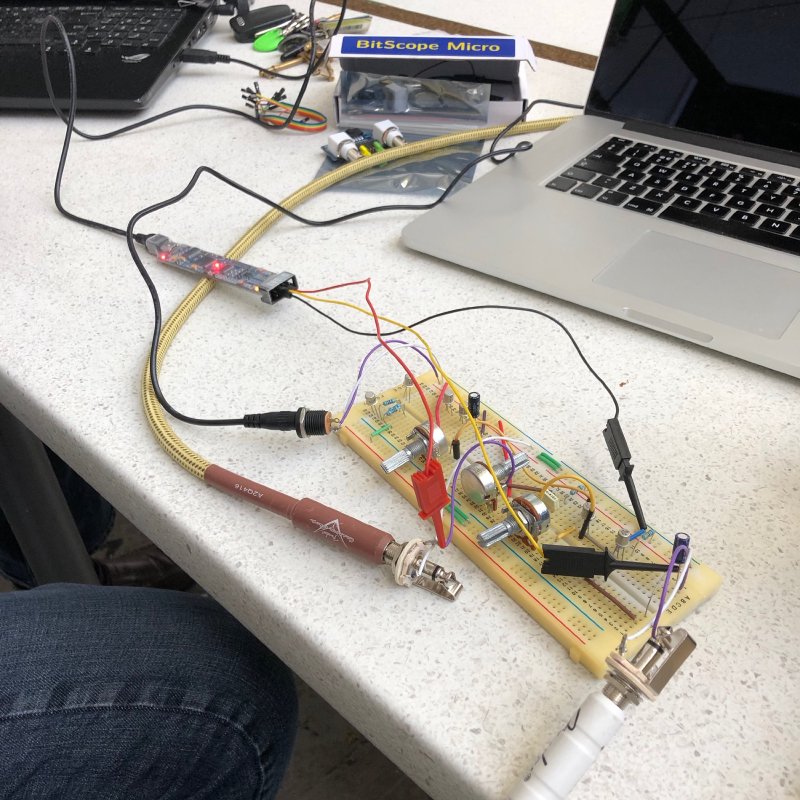
The rough idea is that I’ll have a guitar, an amp, and this pedal, and I’ll use an oscilloscope to visualise the clean waveform so you can see what an undistorted guitar signal looks like, and then you can turn on the fuzz pedal and not only will you hear the difference, you’ll get to see how it alters the waveform on the oscilloscope screen.
Depending on how well that works, I’d also like to try and show the frequency spread of a guitar, and what say a tube screamer does and why that’s important in a band context. I’ve no idea how well this will work in practice, so I’m going to try do a dry run at the Makespace birthday party later this month. It might be a disaster in practice, in which case I’ll be back to piles of wood for Makefest, but I figure it’s worth a shot.
To help me understand pedals a bit more I also got the bible of pedal-builders this week on amazon: Brian Wampler’s book on how to modify guitar pedals. I look forward to having a read through this: my electronics from university is very, very rusty, so having a layman’s explanation of what each part of an effect pedal circuit does sound wise rather than just the mathematical explanation of what a capacitor or resistor does is very appealing.
I was delighted to see that my good friend Jason wrote up the clock case we built together last summer. Jason lives in California these days, but last summer he spent a couple of weeks in Makespace and we worked together on building a beautiful wooden case for the nixie clock he designed.

I wrote bits about it on this blog at the time, but that was fragmented over the weeks we worked on it, and Jason’s done a lovely retrospective of the project as a single post. For me it’s a great reminder of fun little project, and in general it’s a nice post that shows you don’t need to be a seasoned pro to make something beautiful with wood, you just need to plan and test as you go (measure, measure, cut!).