A week in the shop
Published 2 Dec 2019
There’s a week towards the end of a guitar build where you touch the guitar every day, but progress is very slow: oiling the wood. Last week I applied the stain to the body for commission #10, so this week’s main task was to oil both the body and the neck.
For the neck, that means I had to do the final sanding prep: working my way up through the grits to 2000 to get it silky smooth, then giving it a going over with a damp cloth to get the grain to stand up again after which it’ll feel all fuzzy, and then once that’s dried, going back through the grits up to 2000 to get it silky smooth again properly. If you don’t do the damp cloth stage, you’ll have a similar thing happen when you oil it, so it’s jut easier to get through this stage just using water. This is definitely worth doing as it saves a bunch of effort around finishing, and is something I wish I’d learned on guitar #1 not #10.
Once the neck prep was done, I then taped up the fretboard, as the maple and rosewood will be getting different finishes:
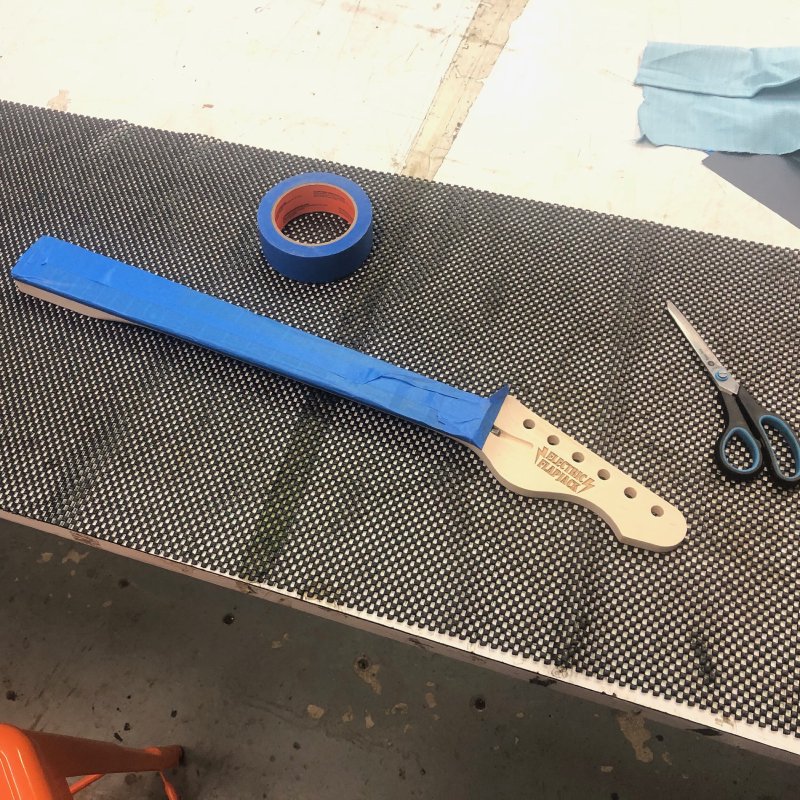
Unlike maple or wenge fretboards, you don’t tend to lacquer rosewood fretboards, rather you just give them oil to keep them moist rather than sealed. Over time this will dry out and need re-applying, but gives a more natural feel to the playing surface.
Once taped up it was the slow process of giving both the body and the neck a coat of oil every half day (or day, depending on my schedule), with a total of 6 coats on the body, and 4 on the neck. The body tends to take more knocks, so I give that a better coating of the oil, and the neck needs to feel smooth under the hand, and I find 4 coats leaves that feeling better for playing.
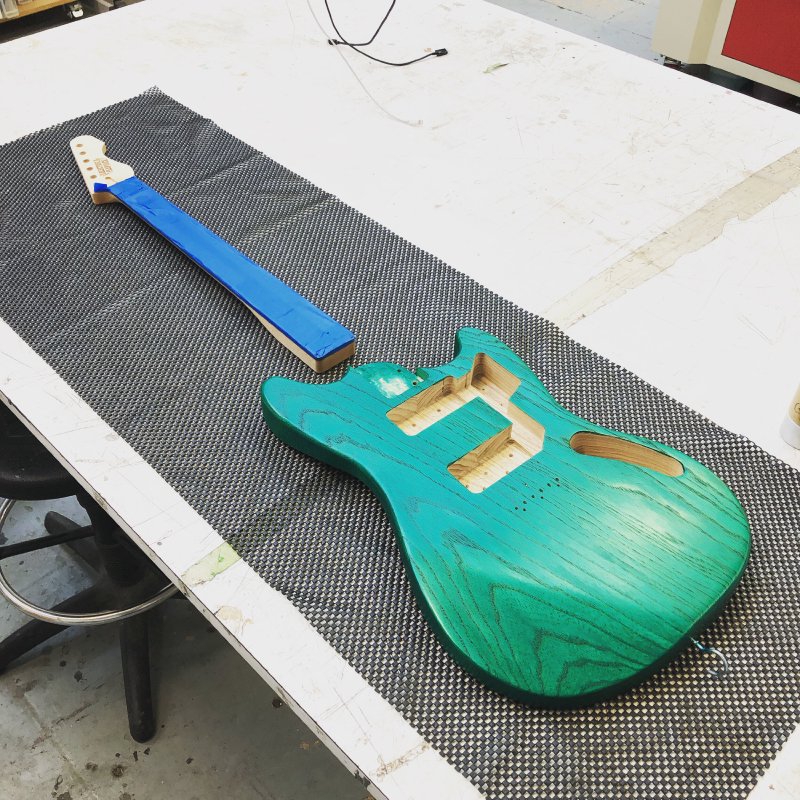
Once completed, I then need to leave it to rest for a few days just to cure before I start putting it together. I’ll also need to give the fretboard one last sanding pass (tape will tend to raise the grain also) and then oil that, but that’s a single pass with no cure time required.
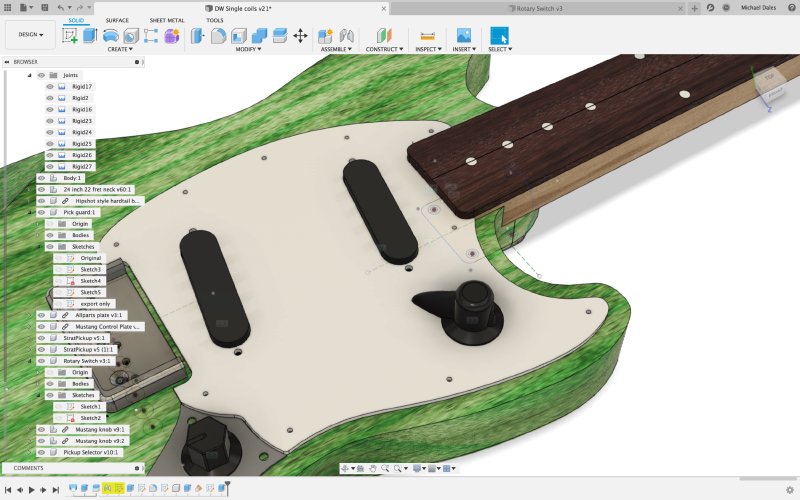
Whilst the body and neck were being oiled, I did some prep for the final assembly. First up I needed to tweak the pick-guard and pickup-selector control knob from the last time I did this design. This guitar will use a rotary selector switch, and in the past I’ve removed the locator pin on these so that I didn’t have an extra hole in the pick-guard to cover up, but in practice that leads to people over-turning them and I have had to go back and fix them on the older ones. Here I just accepted that I’d need the extra hole and I had to make the brim on the rotary knob a little bigger to hide the extra hole:

And a zoomed out view showing things look nice in context still:
Now that I’ve designed the updated pick-guard I just need to wait for the oil to cure, then I’ll make a card-board prototype to check everything works in situ before making the actual pick-guard on the CNC Router.
I also did a couple of high-res prints of the updated controls to check I was happy with the new shape and confirm it also looks good in reality vs on screen.
As this commission draws to a close, and as my contract work has hit a quiet period, I need to turn my focus back to the other two guitars I need to complete that have less pressing deadlines. One is another mustang, and the next step on that is to make the neck, so it’ll be hand router time on that very soon.
For the corvette model I’ve been making, there’s two things I need to do next. First up I need to make the bridge mount and route out the pickup cavities. I went through all this for the mustang styles guitars, but this is using a tele-bridge, so I needed to generate new templates for making the bridge mount holes. This in turn means checking my Fusion 360 model against reality though the power of lasers and paper:
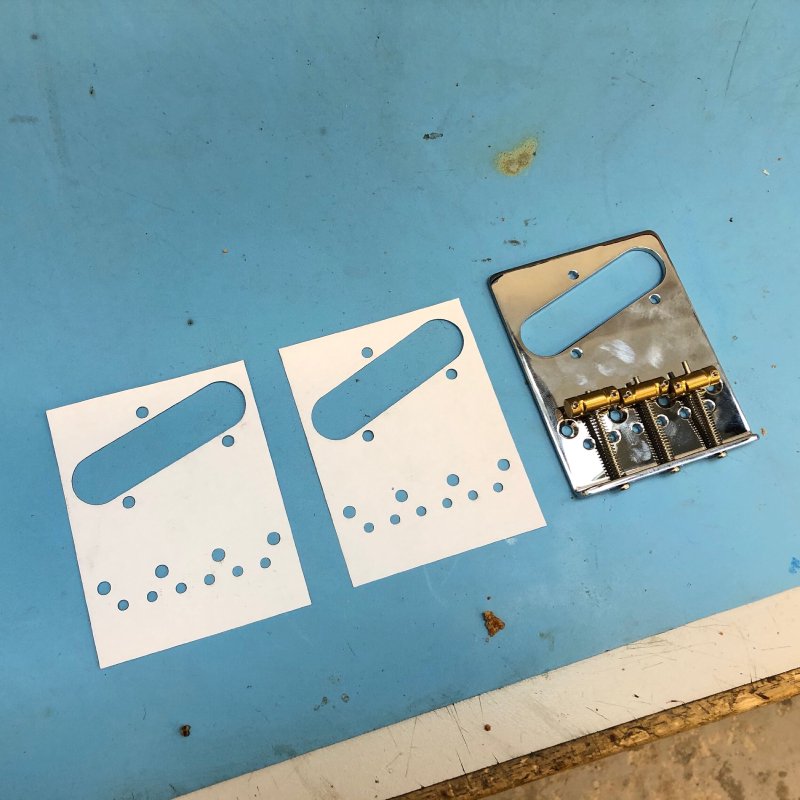
One problem I have with CAD modelling is that transition from mocking something up good enough to get an idea of how it’ll work as best you can, to actually using those numbers to make a thing. The temptation is to assume the thing in CAD is correct as you entered a bunch of numbers that you either measured or took from a data-sheet, however in practice things are never quite as they seem. Thus doing a test validation like this is hugely important, despite the allure of assuming the computer knowing best. Here it turned out the angle I had for the pickup slot was slightly was wrong, and it was a good job I caught that now before I made the more expensive templates or worse cut expensive wood.
The second task on the Corvette is fretting the neck, and for that I’ve ordered some alternative fretwork, as I’ve been unhappy with the quality of the last spool I got, and I want to see if that’s just how it is, or if another brand will be better or worse. Fretwork is just hard, and whilst it’s tempting to just accept that, whilst my existing fret-wire is okay, it’s definitely worth occasionally rechecking your assumptions and seeing if anything else out there might make things better.
I had a quick play with Fusion 360’s generative design mode. Nothing serious, I just fed it the design for a simple raised cup stand, with a disk for the base at the bottom and a disk for the cup to sit on, and then a bar between them.
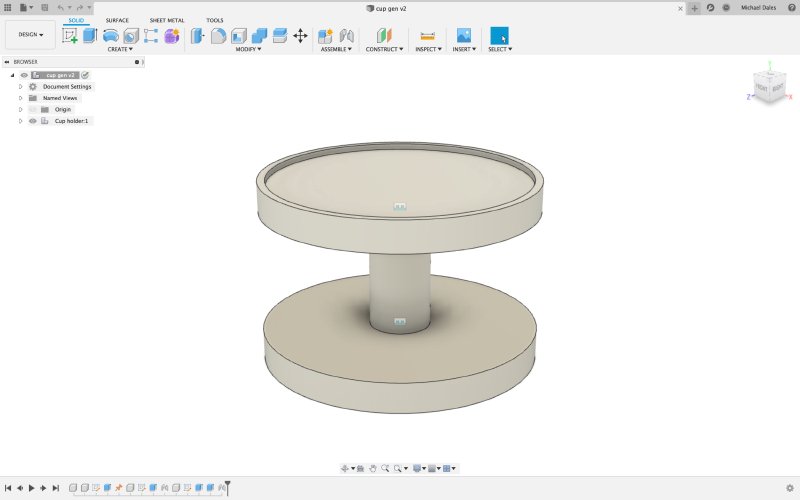
I then told Fusion to remove the middle bar, and generate a structure that would support a heavy cup. The results were, well, interesting:
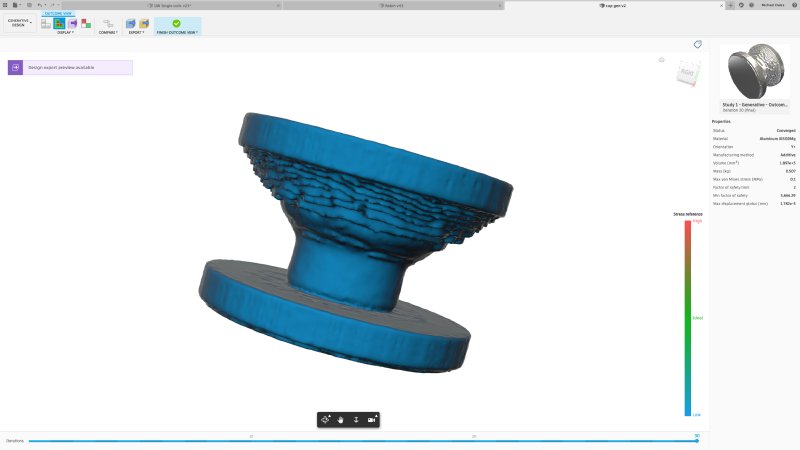
The above looks like you might kinda expect as a lay person, with the stresses being distributed down through the sloped section. However, the next one was quite unusual:
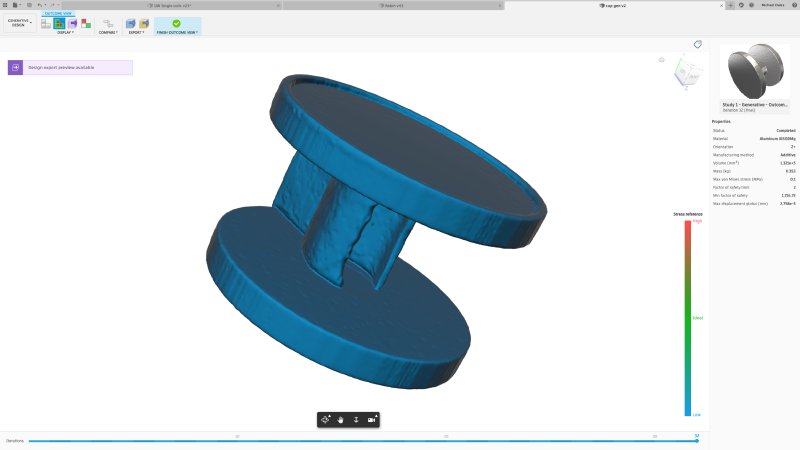
Here you can see it’s made a hollow mid column here, with a support on a single side. I’ve no idea what’s its’ trying to optimise for here, though I did wonder if it’s expecting this one to be printed on its side? But really I don’t know. I’m sure it’s a valid solution to the problem, just I don’t understand the working.
All this was fun, but it did tell me that for most of what I do this isn’t yet a useful feature as I don’t work in the areas this is targeting (e.g., automotive and machine design). For instance, whilst it does support 3D printing techniques, it doesn’t do so with any of the materials I have ready access to (just supporting aluminium and resin printers). Hopefully over time that’ll shift, and it’s never a bad thing to learn something, but for now I suspect I’ll be designing guitar bodies myself for the short term future :)