A week in the shop
Published 16 Jan 2019
Apologies for the lateness of the weeknotes, contracting work has kept me rushed this last few days. But, the week notes must go on: here’s what I did last week.
After the previous week’s setback with the CNC router, I decided to just use the slightly damaged pick guard I had made and spent the better part of a day putting together most of the rest of The Clydesdale. This was partly just to check everything else was okay and there were no more surprises waiting in store as I brought all the bits both made and bought for the guitar together, but it was also a bit of a cathartic process for me to let me see the guitar looking like a guitar.
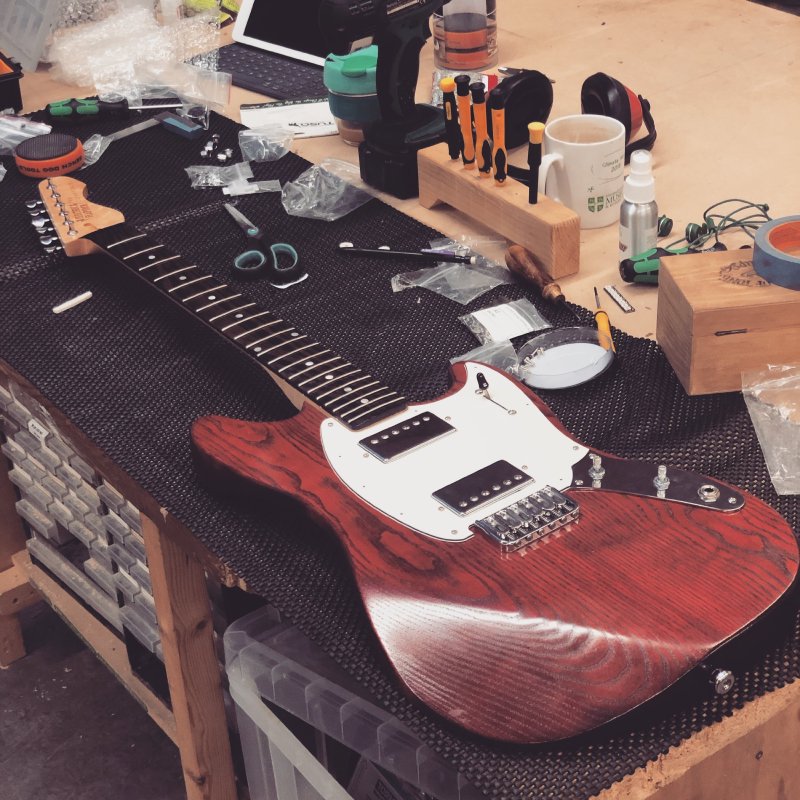
As is inevitable on a project that goes wrong so many times and drags on long beyond what you expected, this guitar has become something of a weight on my shoulders and mostly a thing that brings me negative emotions, as I view it as a series of personal failures leading it to be over six months behind schedule. Seeing it put together like this though helped remind me why it’s worth all the pain: the guitar just looks beautiful. The dark crimson stain sets off against the cream pick guard just right, the birdseye maple neck with the wenge fretboard is wonderfully rich in texture, and all the bits hang together just right.
I was going to solder up the electronics and string it up, but the Mustang design on which this is based is quite fiddly to do wiring wise and so I’d rather just wire it up once (when I have the correct pick guard) rather than do it now and then have to dismantle it when I replace the pick guard. But for now it was motivational to see it in this form.
A tip I learned whilst putting They Clydesdale together that I didn’t know before: how to shorten screws reliably. When you get pickups they have to come with long screws to allow for whatever mounting you might use, but I find then that they’re too long for the cavities I make in the body for the pickups, and so I have to cut them short with a hacksaw. This is a fiddly process, but a friend of mine (thanks Graeme!) explained his trick to getting reliable cuts on the screws: use two nuts to create a guide for the hacksaw blade.
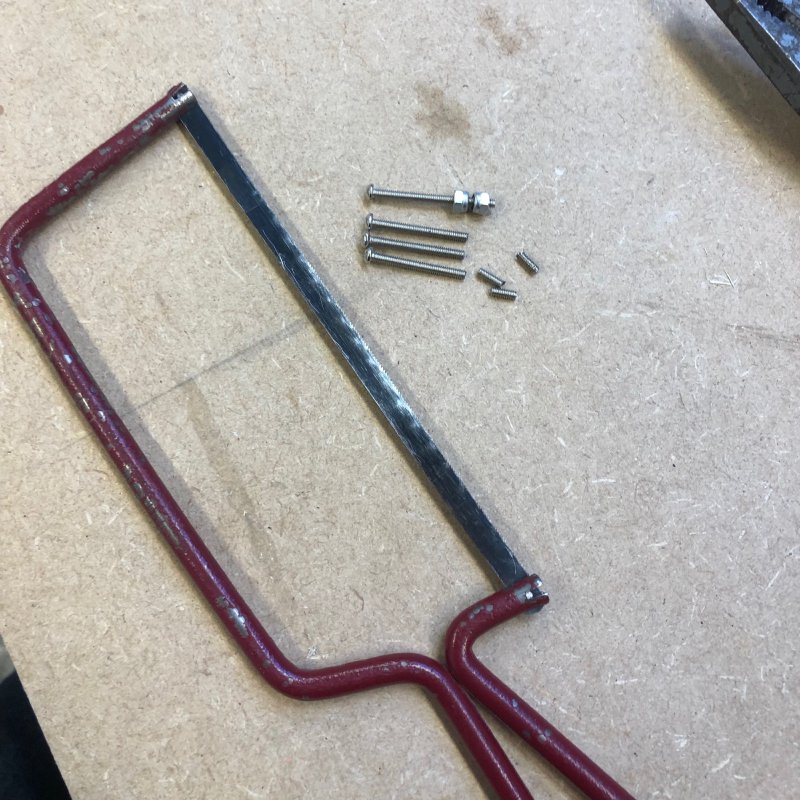
This lets you get the position right and fixes it so that you don’t lose your place when you measure and then go to the vice for sawing. It also helps keep the ends neat by containing the material in something, so you don’t have ragged ends of your bolts. You can additionally sand the ends whilst in the nut for a better finish.
To do the setup for The Clydesdale and the prototype offset I finally ordered a proper set of nut files. Nut files are really quite eye-wateringly expensive, and so until now I’d been getting by with a set of the blowtorch nozzle cleaners, but whilst they do get the job done, they’re slow and frustrating to use. I think at this stage I want to be making things easier to get right rather than fighting with tools still. I do enough of that with the CNC Router :)
As I mentioned in the last weeknotes, I decided that I needed to rethink my guitar building plans for 2019. Even once the CNC Router is back online, I don’t think I’ll trust it for anything complex for a while, so I want a simple design that I can make using templates and the hand router, and nothing too complicated. At the same time I want it to be related to my future designs, so I’ve come up with the following design for my next guitar builds once The Clydesdale is done.
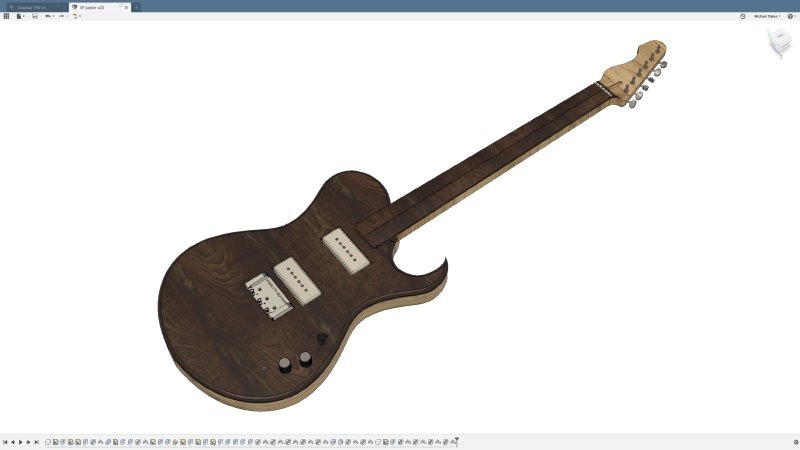
Whilst I had bigger ambitions for the next set of guitars, I’m still quite pleased with how my more complicated design has made the transition here to something simpler, but still has elements of what I wanted. This particular example is a baritone scale length with a reverse headstock, as that’s what the customer was asking for, but I’ll also do a conventional scale length version to, with a either a reverse or regular headstock depending on the preference of who’s the customer will be.
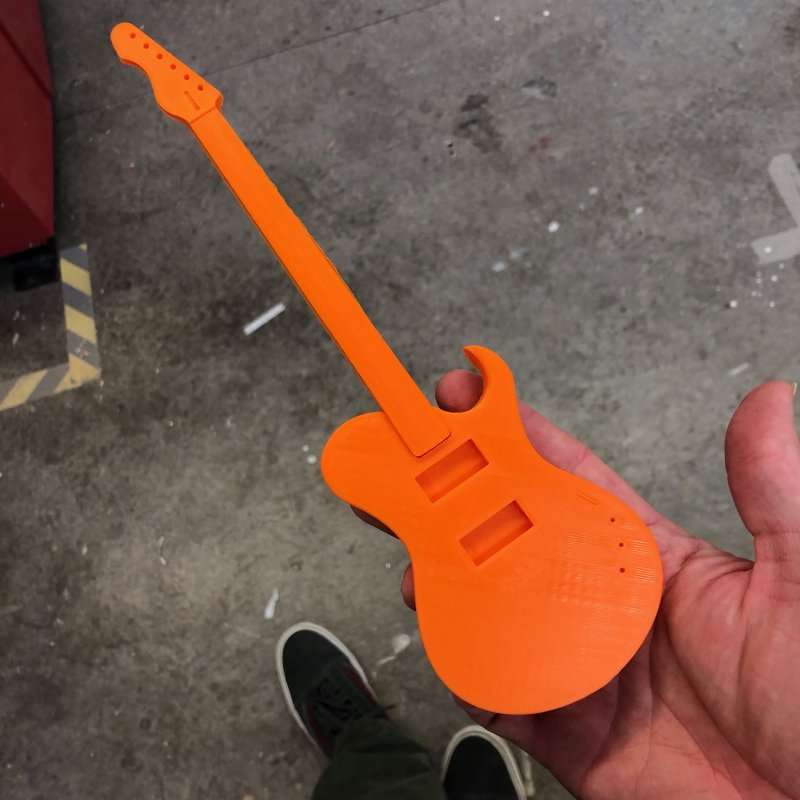
I did a quick 3D print of this and sent it off to my brother who spec’d the baritone and his feedback was that he’s happy with the shape, which is top news.
So the plan for this will be to make some MDF templates, then make the body and neck using the hand router and using a rasp for the comfort carves. Fingers crossed that this’ll move me forward more quickly in the first half of 2019 than I did in 2018.
It was quite nice to spend a bit of time in CAD again: it’s a technical challenge that I quite enjoy. I’m not alone in that, as the third Fusion 360 Show & Tell session I’ve organised at Makespace ran this last week, and we had a good turn out yet again with people sharing their tips and tricks on how the designed made made stuff.
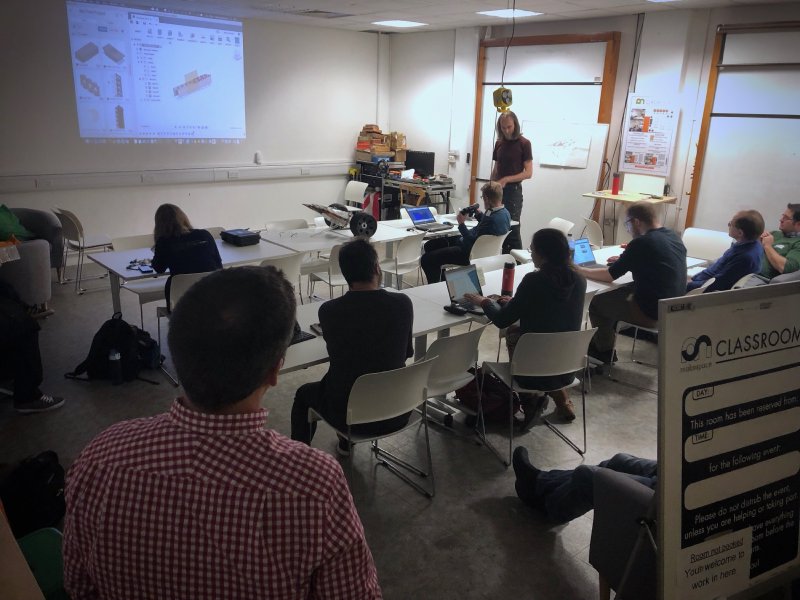
It’s been quite a nice community event at Makespace, and we seem to be meeting my aim for this meeting that everyone leave with at least one bit of knowledge they can apply to their next project.
Related to that I’m looking forward to engaging with another community of makers up at DoES Liverpool: I’m going to be back up there for other reasons at the end of the month but am using the opportunity to make good on my promise to run the Fusion 360 training course I run at Makespace for their community. As DoES has a different set of equipment and different kinds of activities going on, I hope for me this is a way that I can find another set of people who’ll in future inspire my design and making process as has happened at Makespace.
The other thing I did was spend a bit more time on the electronics for my pedal switcher design. Slowly managing to remember bits of electronics, but slowly :)

Still, with other things blocked at the moment, it’s been a good mental exercise to keep me moving forward on this guitar side of the fence.