A week in the shop
Published 16 Apr 2018
Making guitars is hard, which is also what makes it intersting and rewarding; I suspect this is true of most things that one chooses to apply oneself too. I know that’s why I enjoy working in software and hardware so much. Like software and hardware though, it’s very easy to get ahead of yourself and forget how hard some things are after some success (this is why software engineers are classically so bad at making time estimates).
With the prototype guitars, this month was when I finally admitted that doing the offsets was different enough from the t-styles I made before that I was going to end up assembling both a prototype body and neck before cutting wood on guitars #5 and #6. I was already building a prototype neck with cheaper wood, for the sake of a week or so I may as well do a trial run of a body. So it is I’m now assembling guitar #7, a prototype offset that will act as a guide for guitars #5 and #6.
This won’t add too much delay to guitars #5 and #6, as I don’t need to finish guitar #7 off to a high standard immediately, I just want to get it to the point where I’ve strung it up and checked it makes notes and the intonation is correct. The electronics and the final finish are bits I’m familiar with and I can do after guitars #5 and #6 (or at least alongside for the finishing stages, as that bit is so slow anyway).
When I set up the prototype series, the idea was I was already well versed in making t-styles, so it’d be a fairly quick and easy job to do a couple more. Due to what customers asked for, I ended up not doing t-styles, but rather these to being offsets, which has pushed me a lot more, and has been fun and interesting. But with the additional troubles caused by machine madness this last month and the gluing failure, my confidence has been knocked a little, and I want the guitars I ship to my customers to be the best guitar I can build. So to remove my doubts about the new design and process, I’ll apply what I preach with measure, measure, cut: guitar #7 will let me be confident that guitars #5 and #6 will be as awesome as I expect, and more importantly, as awesome as my customers expect.
Overall the impact will be a minimal delay on starting on #5 and #6, all being well, but I’ll be a lot happier in the end result, and over the lifetime of a guitar a week or so is not that significant. It’ll also cost me a bunch of money to validate the design, something potential luthiers should factor into their costs better than I did; but eventually #7 will become another demo guitar, which is handy as one of my demo guitars just shipped out.
I really don’t like delaying guitars #5 and #6 more than they already have been with the CNC router adventures of the last few weeks: I’m acutely aware I have people waiting on me, but I’m also not going to ship something I’m not happy with, and this extra prototype will let me get there.
So, that explained, let’s go see what progress we achieved this week.
At the end of last week I’d got the prototype neck to the stage where it was glued and the fret slots cut. This week I moved it through until all that remains is the fret levelling and shaping.
First up, the inlays. Normally, if you’re going for traditional dot inlays on a dark wood the neck, you’d just buy some plastic pearlescent disks and glue them in, which does look lovely (I did this on guitar #3), but if you look at the vintage guitars they used clay inlays, and I’ve seen quite a few custom guitar builders do the same of late. I was interested to try this technique and see how it works, and the prototype neck seemed a good opportunity to give this a whirl. There’s two approaches one could take here: make the inlays apart from the neck and glue them in, or drill the inlay holes in the neck and fill them with clay and sand them down. I opted for the second approach, as it felt like less steps, and in the future it might be nice to do unusual shapes, where moulding the clay into the neck would make more sense.
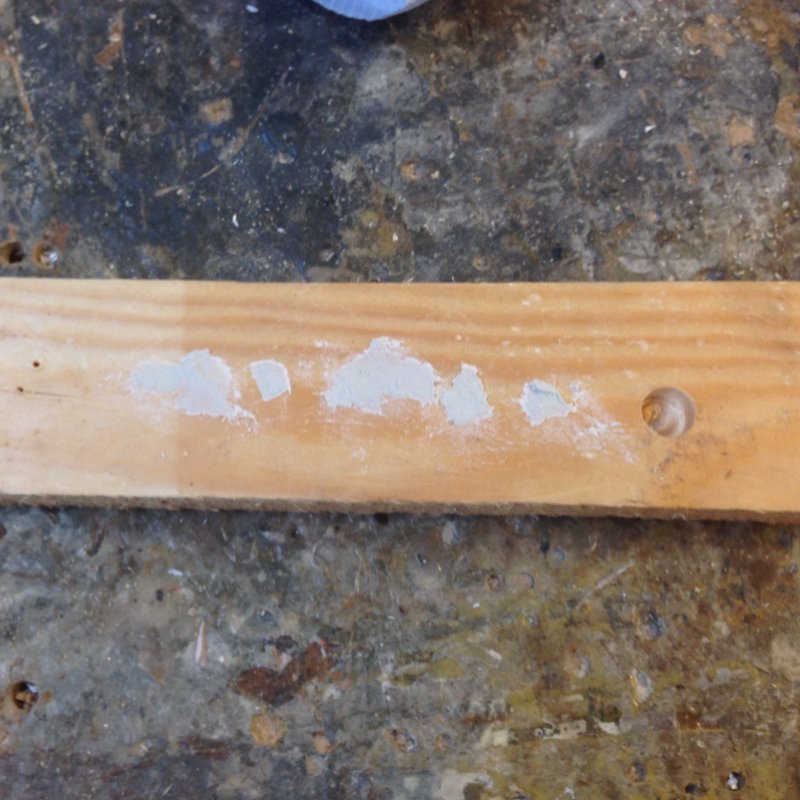
Before applying it to the neck, I did test this technique on a scrap bit of wood. I drilled some 5mm holes in the wood and filled them with some air drying clay (with the best will in the world, one probably shouldn’t fire a guitar neck, and besides, it won’t fit in my oven ;). This is the scrap immediately after putting the clay in:
Then after leaving it to dry for 24 hours I sanded it down and I got this:
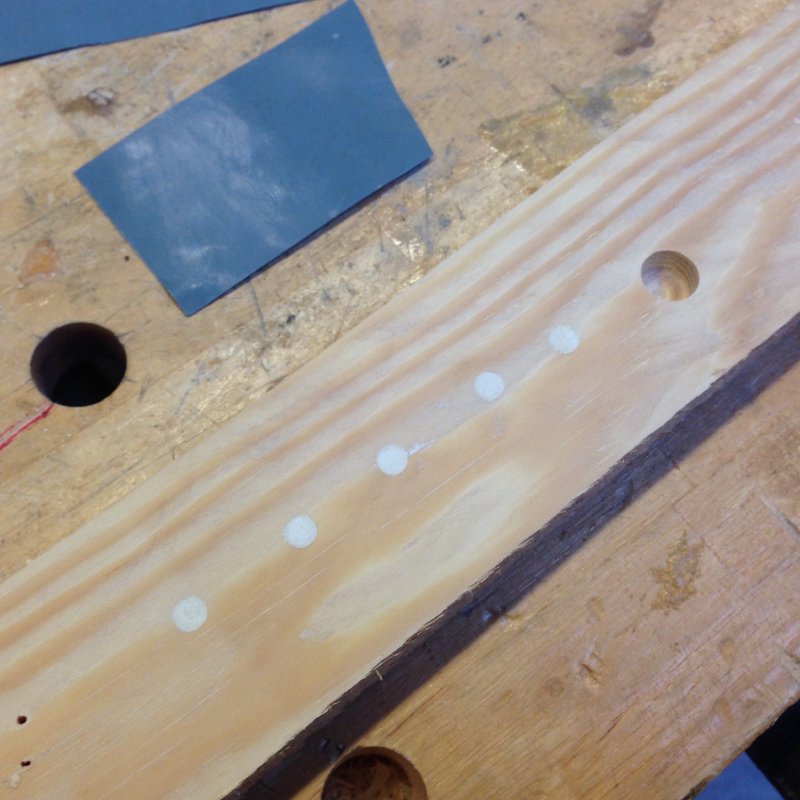
I’m quite pleased with the results, though it’ll be interesting to see how well it wears over time. Still, I was happy enough that I applied this to the prototype neck I’ve been building.
Inlays sorted, I then went on to hand carve the neck. I used to fear this bit when I started, but now I’ve done a couple, I really enjoy the process of hand shaping a neck. In theory could do this in Fusion 360 and get the same result, but it’d take me several goes before I could know that the Fusion design felt right in my hand, whereas with hand carving the neck I constantly take both quantitative measurements with callipers and qualitative measurements with my hand to check it feels right. It’s amazing to me how much a change of just 1mm on the neck profile will lead to a completely different feel in the hand.
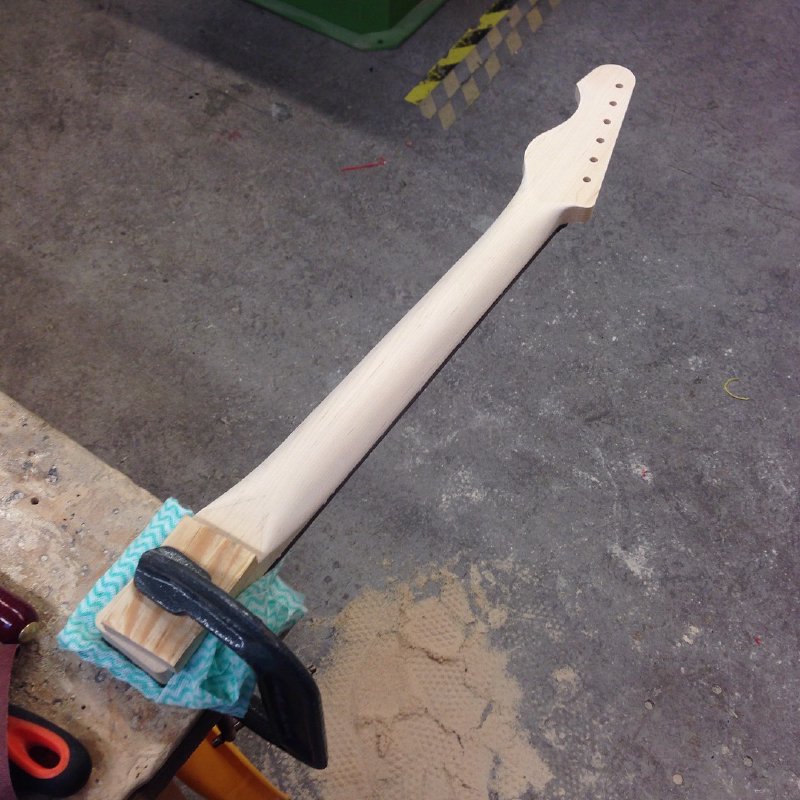
The back of the neck carved, I then radiussed the fretboard down, really bringing out a wonderful pattern in the wenge. It was also here that I sanded down the clay I’d put in the inlay holes I drilled to finally see how the looked in a real neck, and they look great to me.
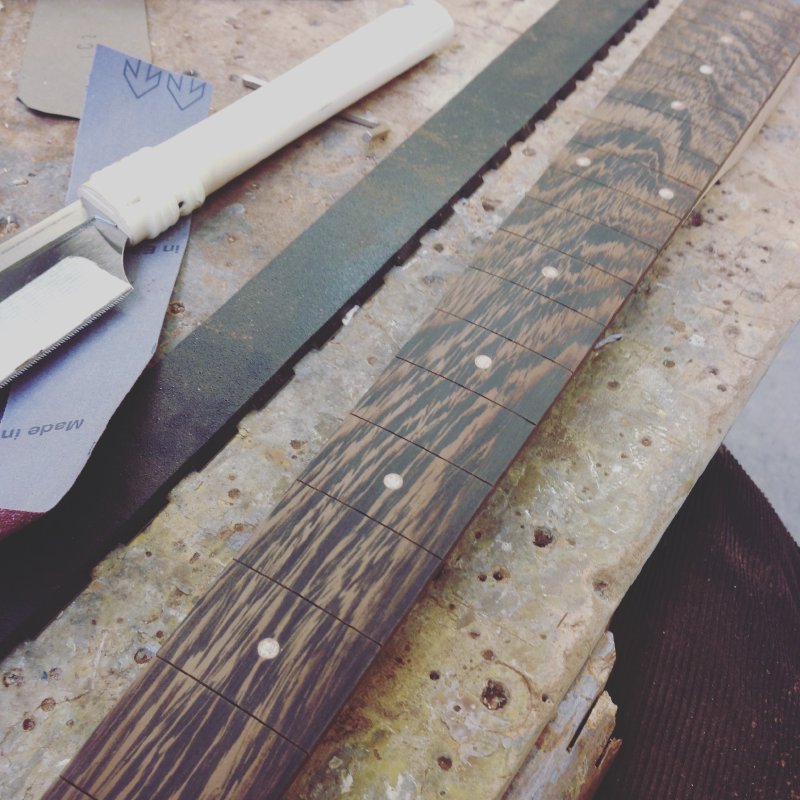
The final stage here was to fret the neck. I went into this bit full of confidence, and it was at this stage that I was knocked down a peg or two (sort of the inverse of how I feel about carving the neck). This was my 4th fret job, so I thought I was getting to be an old hand at this, but immediately I was struggling, with the very first fret refusing to go in and making a mess of the nice clean fret slot I’d cut. On reflection I’d done several things wrong, which I’ll share here to hopefully save someone else the frustrations.
Firstly, I’d not fretted a neck for a a few months, and you forget just how hard you have to hit them to get them home. If you’re about to do a fret job and haven’t done one for a while (or at all) I’d strongly recommend getting some scrap, ideally of the same wood as your fretboard so it has the same hardness characteristics, and just knocking some frets in. You spend so much time being gentle with the wood on a guitar to protect the finish, having to really hammer hard the frets in feels (at least to me) alien and wrong. But if you don’t they won’t go in neatly, and there’s a risk they’ll start to deform the fret slot if you’ve not got them lined up perfectly. Swift, very sharp, taps are the order of the day here. It took me several frets to get back into the swing of things.
Secondly, I’d over radiused the fret wire, making my life harder for myself. Fretwire ships at a very shallow radius (about 12" or so). Ideally you want your fret wire to have a slightly tighter radius than that of your fretboard: this means you can then tap in the two sides of the fret wire into the slot, before just tapping the middle home. With this fretwire I made it a tighter radius than I needed, so I had quite a bit of more work to do getting the centre home, which means the sides are having to shuffle more than ideal. Basically I made things hard for myself here, so don’t make your fretwire radius too tight.
Finally, I’d never used wenge before on a neck. Wenge is a funny wood: the two colours you see on it are very pretty, but one is quite soft and one is quite hard. The hard bits didn’t want to give when I hammered the frets in, and the soft bits were happy to deform any time I struggled. Urgh. With the previous necks the wood had been quite uniform in nature, and that seemed to help. Wenge is definitely usable and it’s just me not being experienced that is the issue here, but then that’s another reason to practice on scrap before you try on a real neck.
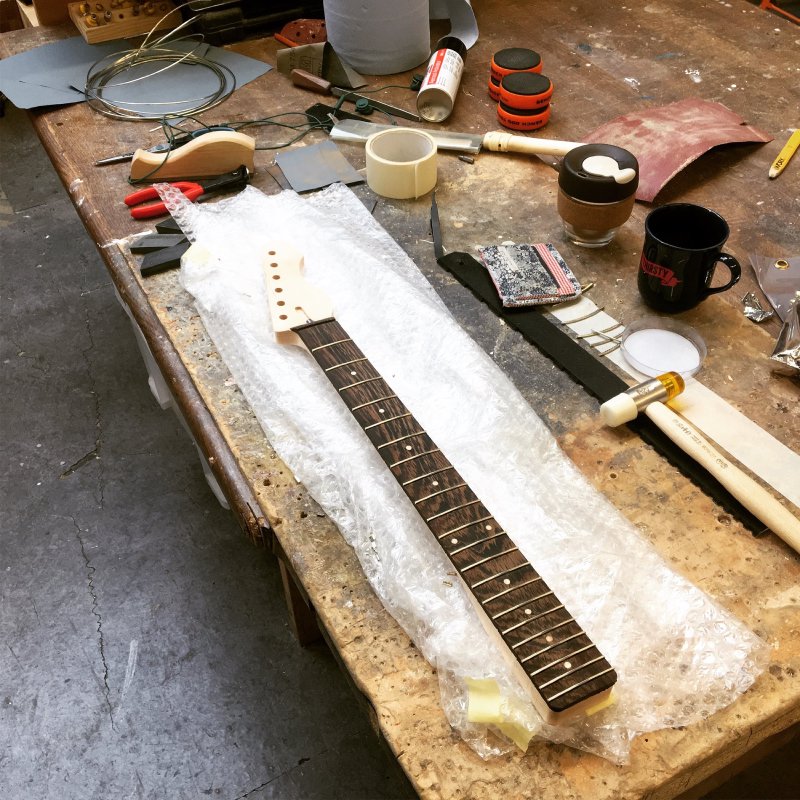
Anyway, after much stressing and sweating, I got all the frets home and reasonably level. First job for next week is to level and polish the frets so I can then put this neck on the prototype body, and string it up to check my measurements are as good as I think they are.
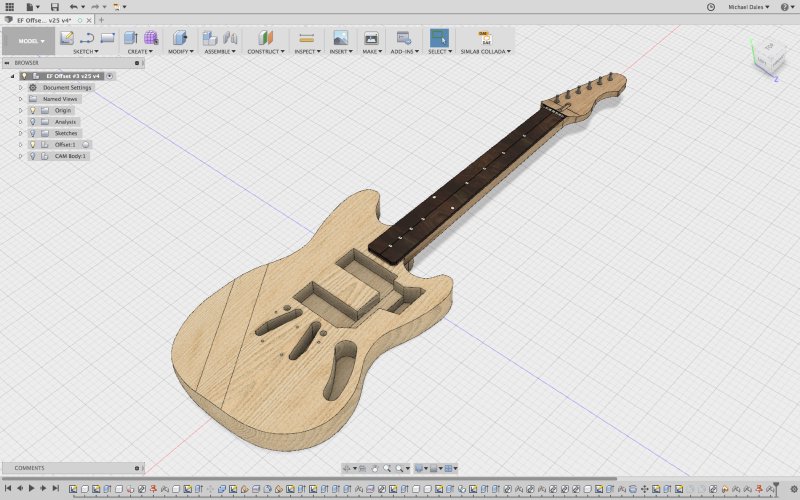
Given the issues with the CNC router, I was still a bit nervous about how well it’d cope on a longer job, despite the fact it’d cut the neck well, so I decided to cut a test run body that cemented the idea of building guitar #7. This is very similar to the body for guitar #5, but rather than use a hardtail style bridge, which I think is actually the better choice for a working instrument of this style (and this is probably why hardtail are the only option Fender make any more on this type of guitar), I opted on this one to go for an old style dynamic vibrato bridge with a floating bridge and tremolo arm. Why do this? Mostly just because of learning: I’ve at least made four guitars with fixed bridges, and none with floating bridges, so given the opportunity I thought I’d go with the termolo. From a making of the body point of view there’s only a very minor change: rather than drill the string holes through the body and bore out the ferrule holes on the back to seat the strings, you instead carve out two cavities for the springs on the bridge, and bore two holes to hold the pegs for the floating bridge. The complex bits of the body, the overall outline and the cutaways for the comfort curves, remain untouched.
So, design tweaked slightly for the new bridge, I set about making my first offset body in wood. Making a guitar body on the CNC router is a two stage process, as you need to do both sides in separate passes. To make sure everything is aligned you use a technique called pinning: you drill four holes equidistant from the center of your design in the corners of your material on the first side, then when you finish side one you remove the material and drill the same four holes in the CNC router bed, put metal dowels in the bed, and mount your material the other side up on those pegs. Now your design is perfectly lined up for you to do the second side. I’d always advocate doing the pinning holes first, as once you’ve made these, you can even abort your design run and come back another date: although the origin on the router may change, so long as you have reference holes on your material you can always make new reference holes in the bed and get back to a know position. During the making of this body about half way through the first side I knocked the material out of the mounts I was using, but because I had already made the pinning holes this wasn’t a problem, as Just flipped it over, made pinning holes on the other side, and then could get back to being properly aligned.
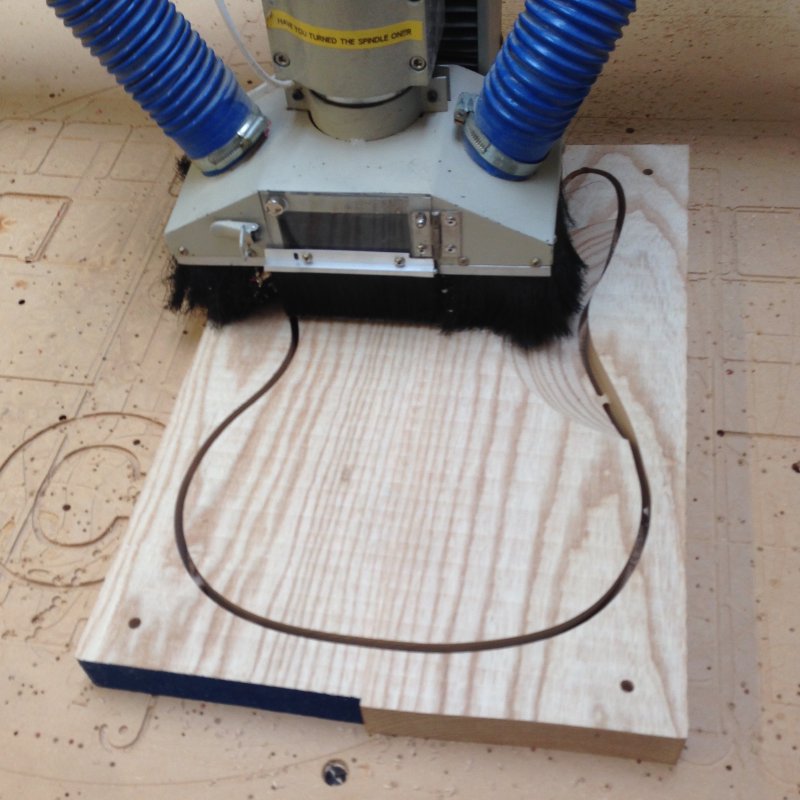
It took 5 hours to route the body, tweaking the Fusion toolpaths as I went. This is the first full body I’ve made from Fusion and the first time I’ve routed one with properly 3D surfaces, so it required a bit of reworking as I went along. After that it took me a few more hours of sanding and tweaking with hand tools to get to the shape I wanted. I don’t do everything in Fusion, there’s still quite a bit of hand work I do to the body afterward to get it just right: I rounded all the edges with a hand router, I adjusted the comfort carves to be just right using hand rasps and sanding, and so forth. Oh, and lots and lots of sanding, as the routers never give you a perfectly smooth finish.
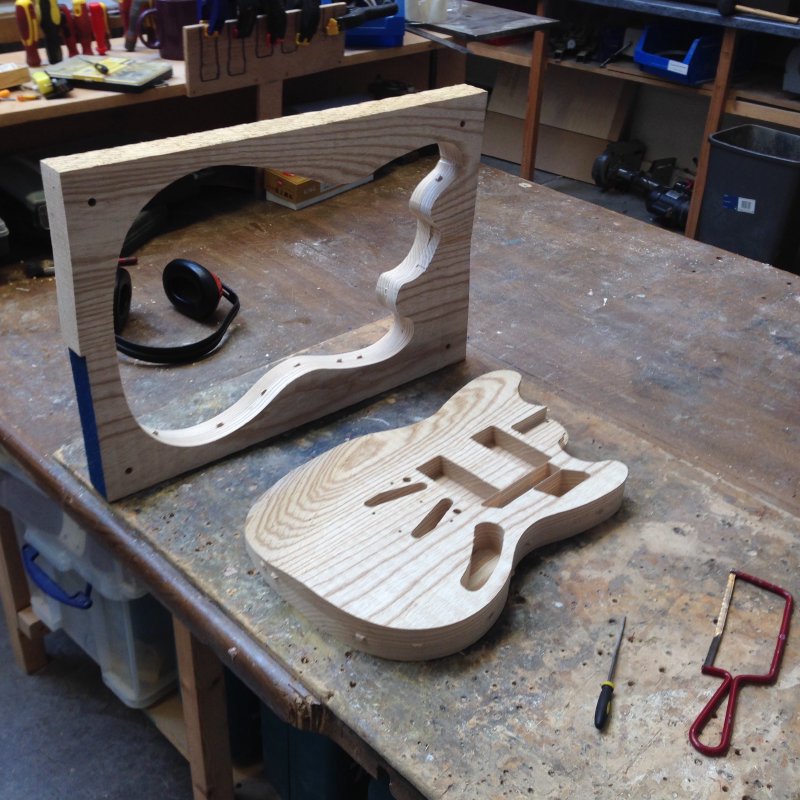
Although it worked out all good, it was much more relaxing to do this on a non-customer body, and I’m now ready to cut the bodies for the customer guitars. The only thing holding me back is just double checking that I’ve got the intonation right by finishing the prototype neck and stringing it up.
The one other thing I did this week that took up a bit of time to prep for was I ran a class teaching Fusion 360 to other Makespace members. I taught 10 people how to use Fusion to make a simple device (a kitchen roll/tape dispense) and then how to fabricate it on 3D printers and the CNC router.
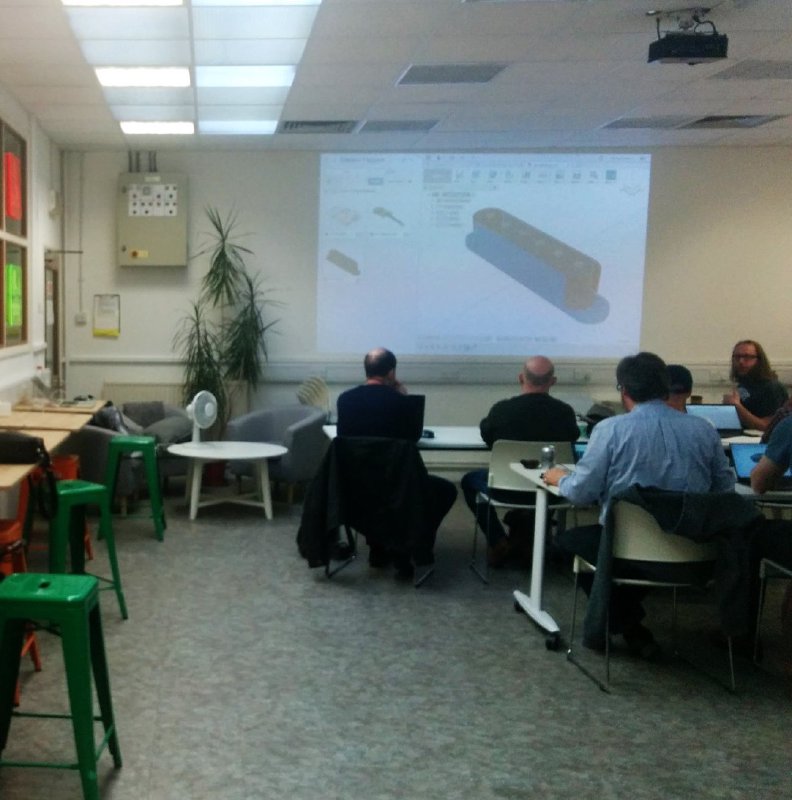
I did this mostly because people had asked, but it is also good for me: the more expertise there is using Fusion 360 in Makespace and the more people use it to target the machines in Makespace the better it’ll be for me when I get stuck and need help. I’ve already seen people who were in the class doing things in Fusion I’ve never tried, which is great!