A week in the shop
9 Sep 2019
Most of this week guitar wise was spent in the workshop, but I did hit a couple of snags I had to fix with my design tool of choice, Autodesk Fusion 360.
The first one was initially quite worrying: it seems some recent update broke a lot of my guitar designs! The designs load fine, but the moment you cause Fusion to re-evaluate the timeline, it was hitting an issue with my use of the split body tool.
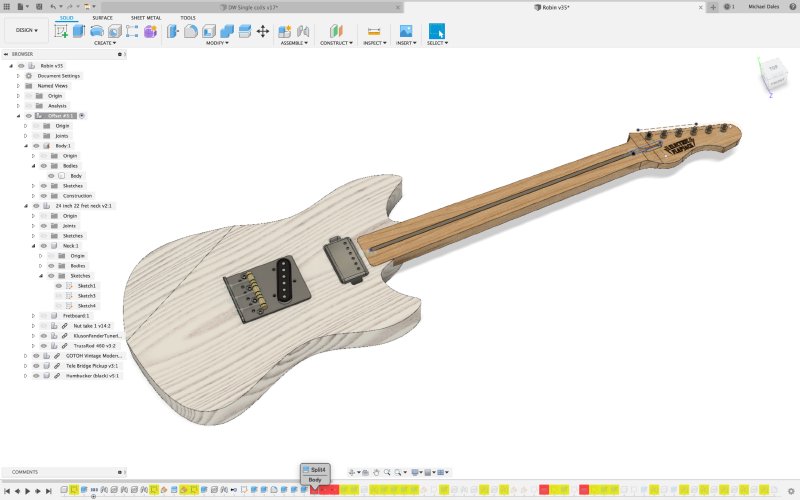
The way I define the neck pocket on a guitar body is to design the body without a pocket, position the neck where I want it, and then use the neck design itself to split the guitar body into two parts along the outer surfaces of the neck. Unfortunately that now fails, with a complain that the result can’t be manufactured for some reason; I’ve no idea what has changed, but it was thankfully easy enough to solve using a technique I learned from a tutorial video of making living hinges. Instead of using the “split body” command, I now use the combine command on the guitar body and the neck, which seems counter-intuitive at first, but the combine command has an operation type selection, and instead of joining the two parts, you can select the cut operation, which will use the second body to cut away bits of the first.
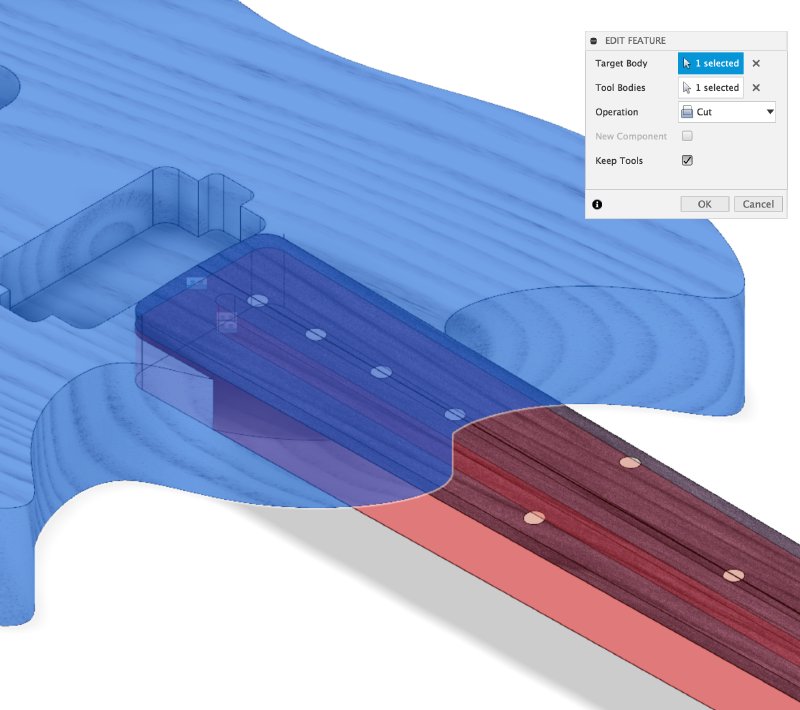
Do note the important “keep tool” option, which by default isn’t selected: if I’d not selected that not only would the material for the neck pocket be removed, but so would the neck!
The second snag was that the recent UI refresh to Fusion 360 broke one of the few add-ons I use regularly: the excellent [DXF For Laser](The second tweak was that the recent UI refresh to Fusion 360 it broke one of the new add-ons I use regularly: the excellent DXF For Laser. This add-on lets you select a surface face and then generate a DXF file that face to be cut on a laser cutter, and has options to compensate for the laser cutter’s kerf etc. I still recommend this as the best way to get laser cutter designs to the laser cutters at Makespace, as the DXF it produces is compatible with the out-dated DXF parsers in most laser cutter software I’ve come across, but to get it to work now you need to manually patch the script, as per the comments on the add-on page I linked to. It’s a bit gross having to fix the script like that, not sure why they haven’t just uploaded a fixed version, but it’s worth doing given how useful this add-on is.). This add-on lets you select a surface face and then generate a DXF file that face to be cut on a laser cutter, and has options to compensate for the laser cutter’s kerf etc.
I still recommend this as the best way to get laser cutter designs to the laser cutters at Makespace, as the DXF it produces is compatible with the out-dated DXF parsers in most laser cutter software I’ve come across, but to get it to work now you need to manually patch the script, as per the comments on the add-on page I linked to. It’s a bit gross having to fix the script like that, not sure why they haven’t just uploaded a fixed version, but it’s worth doing given how useful this add-on is.
Enough computers, and into the workshop. I started the week progressing the neck for the Corvette build, which has become a test piece for my new hand-building everything process before I do it on the commissions following along closely behind this build. Now, the observant will have noted I was making a replacement neck for an old t-style I made with the claim that this was to be the test for my new hand-built process, however I belated realised that that neck’s scale-length (25.5” rather than 24” on the Corvette and the two commissions) meant I have much tighter tolerances around the truss-rod access, and so I wanted to check my calculations on the Corvette neck first.
Thus, having made the body of the neck the week before last, I glued up the fretboard first thing to get that moving again.
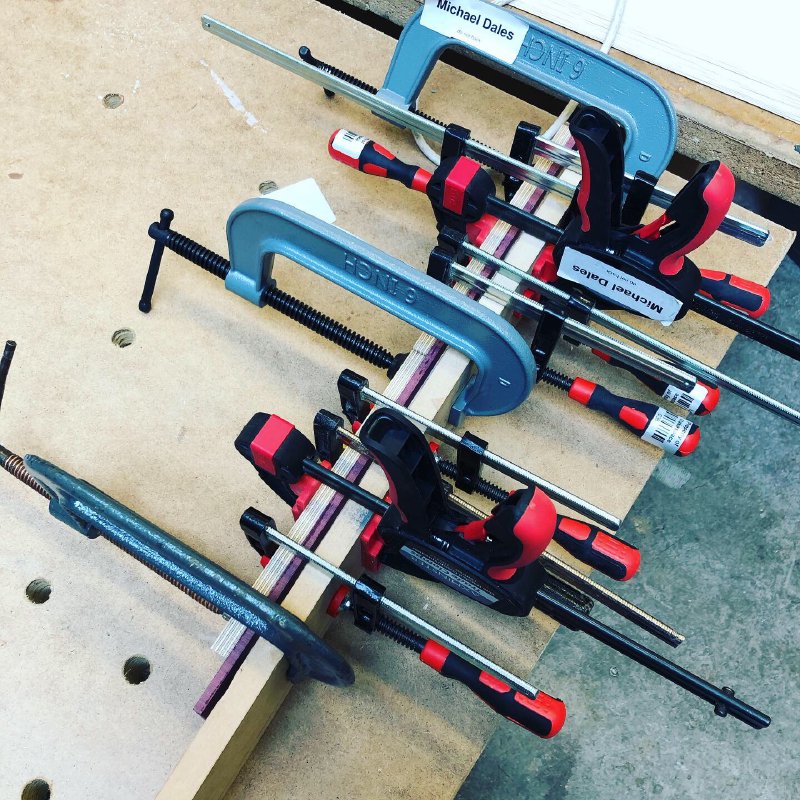
After leaving the glue to set for 24 hours, I then trimmed around the excess wood with a bandsaw:
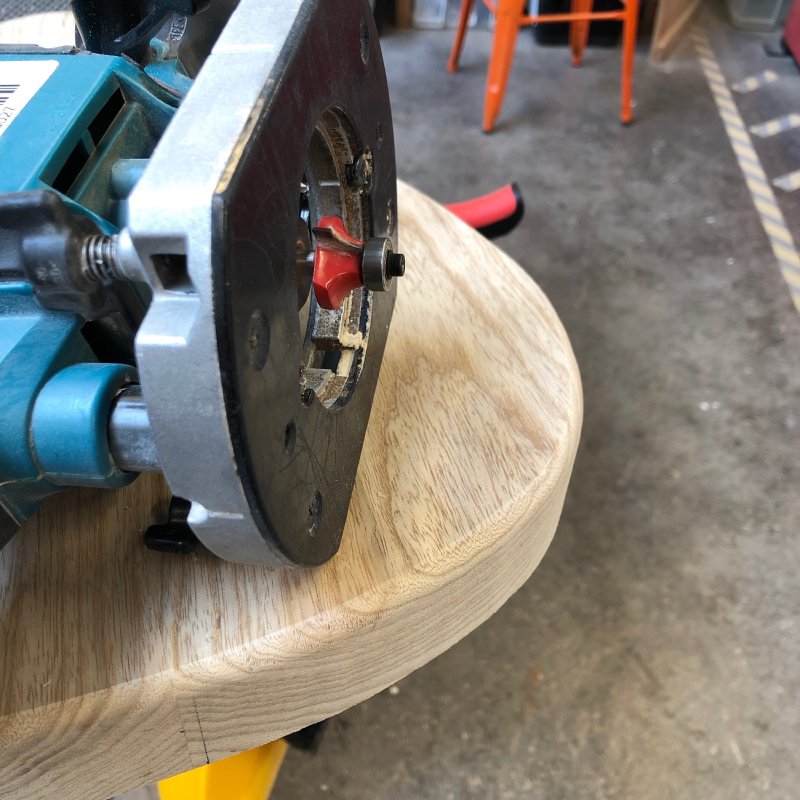
After this I then trimmed everything flush: using a hand-router on three sides, and using my pull-saw on the headstock side where you can’t get to with the hand-router. Afterwards I took it to the spindle sander and rounded off the transition from fretboard to headstock:
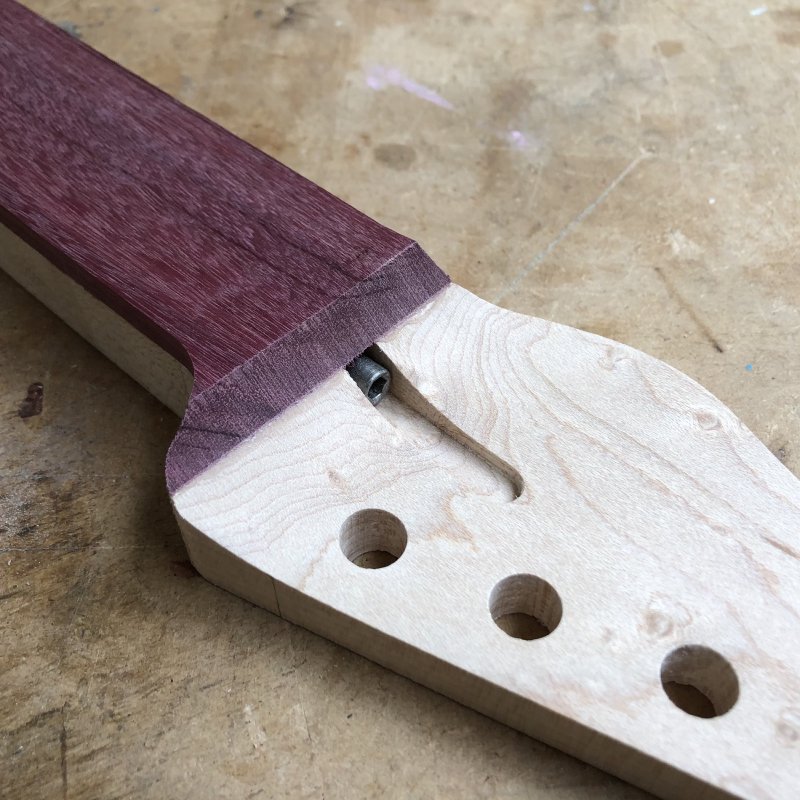
As you can see, the transition comes very close to the the truss-rod adjuster, which is what I was concerned about, but the technique works fine. This means I’m able to go ahead with the other necks.
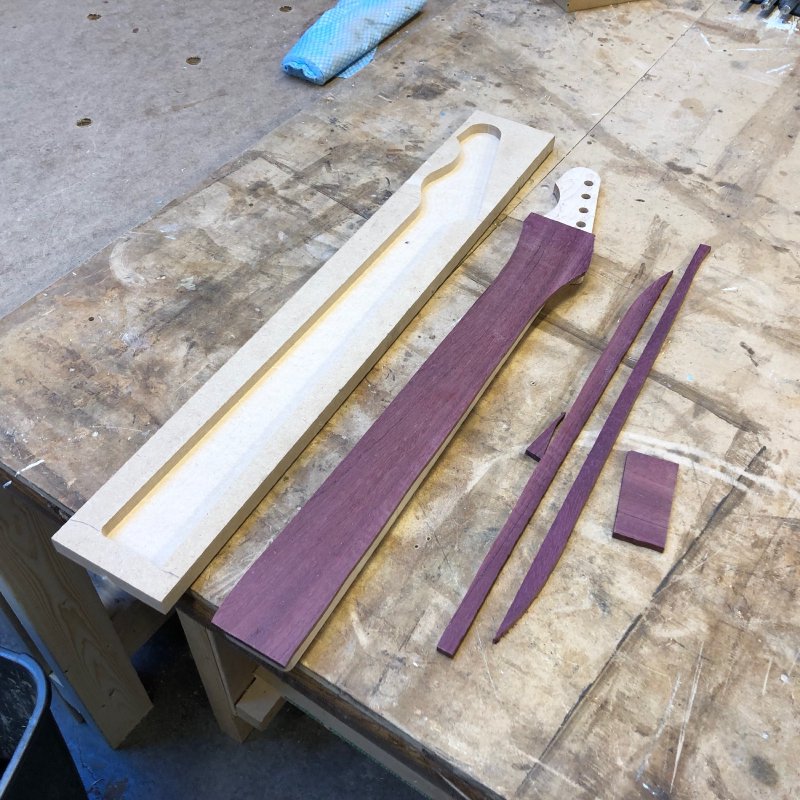
I got started on the neck for #10, but to do that I first had to make another laser-cut template (which is when I hit all the Fusion 360 issues above). Although the commission necks are the same scale-length and outside profile as the Corvette neck above, they are right-handed rather than left handed, and have a slightly different pattern of body mounting screws, so I couldn’t just re-use the Corvette’s neck template.
Still, this was a good opportunity to fix a couple of minor niggles that I’d spotted on the old template. Notably I subtly tweaked the spacing on the tuners to be a round number of millimetres, making it easier to mark out with a ruler and pencil. Back when I was CNCing things the fact that some of my measurements were factions of millimetres didn’t matter, as the computer took care of that, but now I have to do these things by hand, it’s easier if I stick to whole numbers of millimetres where possible. I’d not spotted these odd measurements before I made the template for the Corvette, only realising when I came to measure out for drilling the headstock:
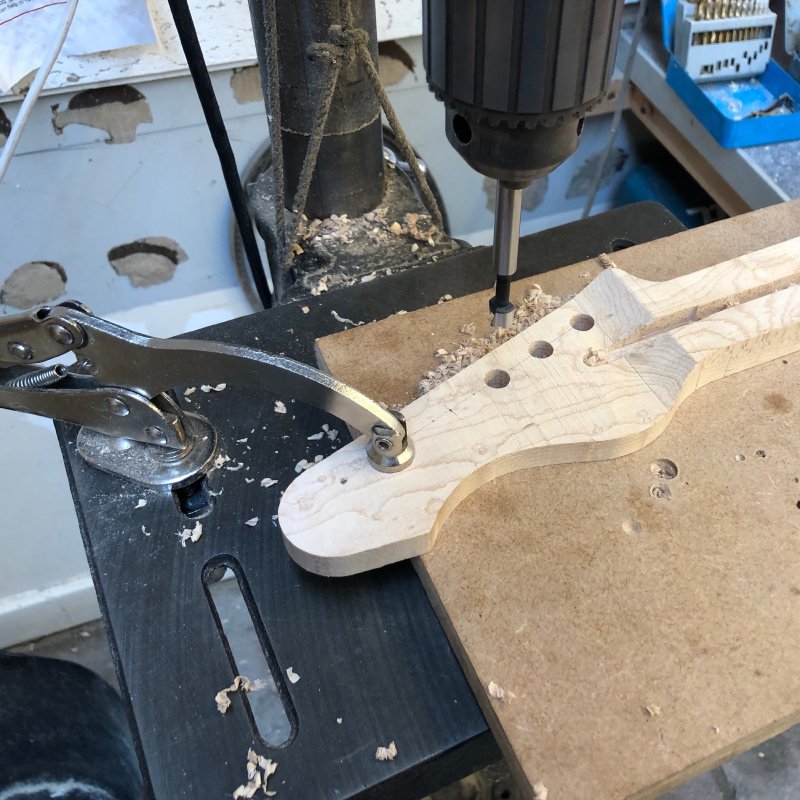
With the measurements tidied up in Fusion, I then cut a new template and got to work making #10’s neck:

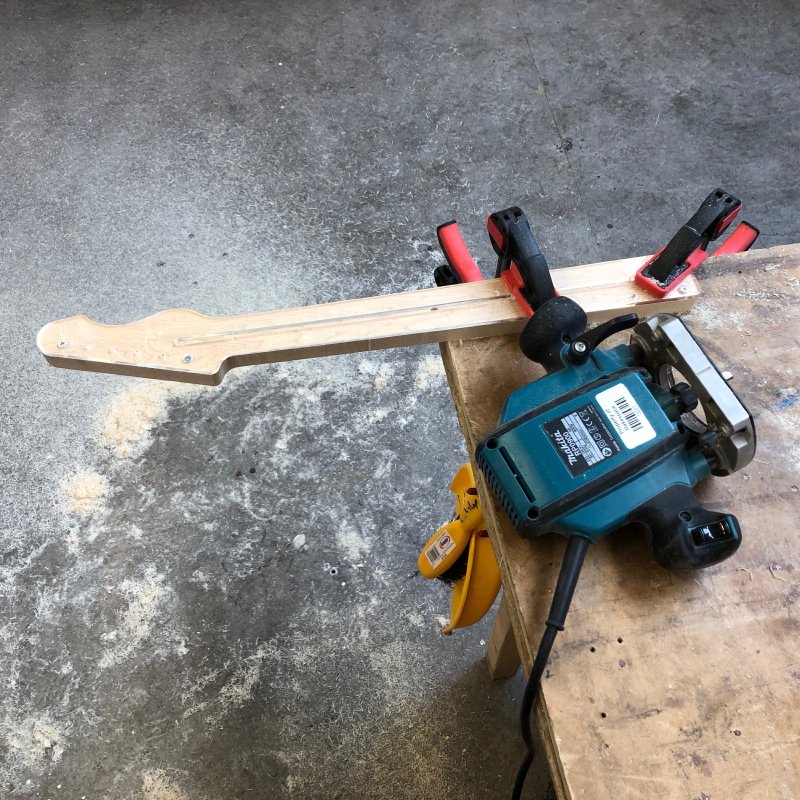
With the new template mounted, it was once again the bandsaw and hand-router tag team to get the main body of the neck cut out.
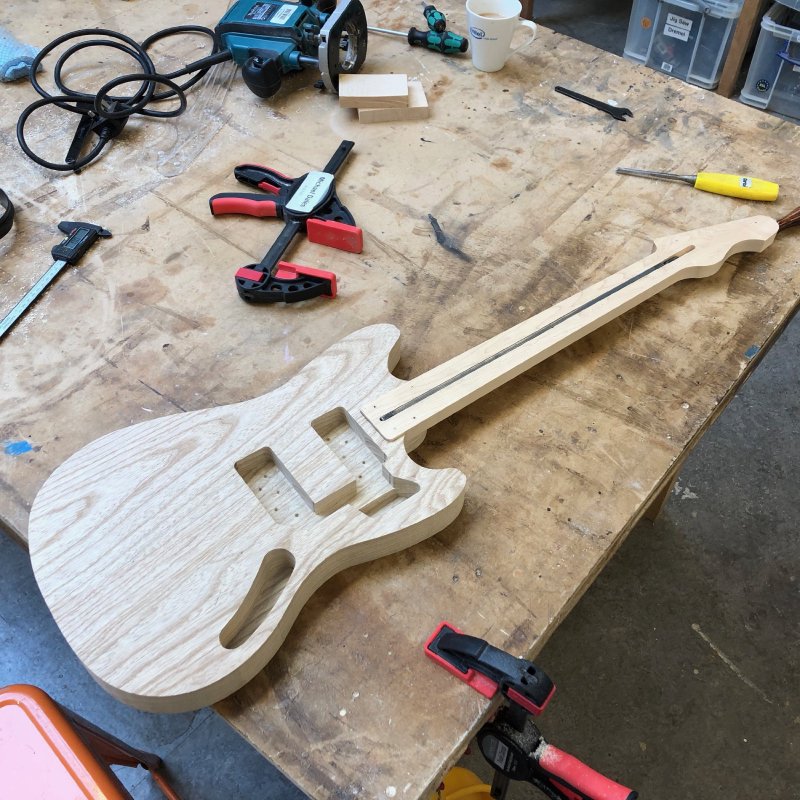
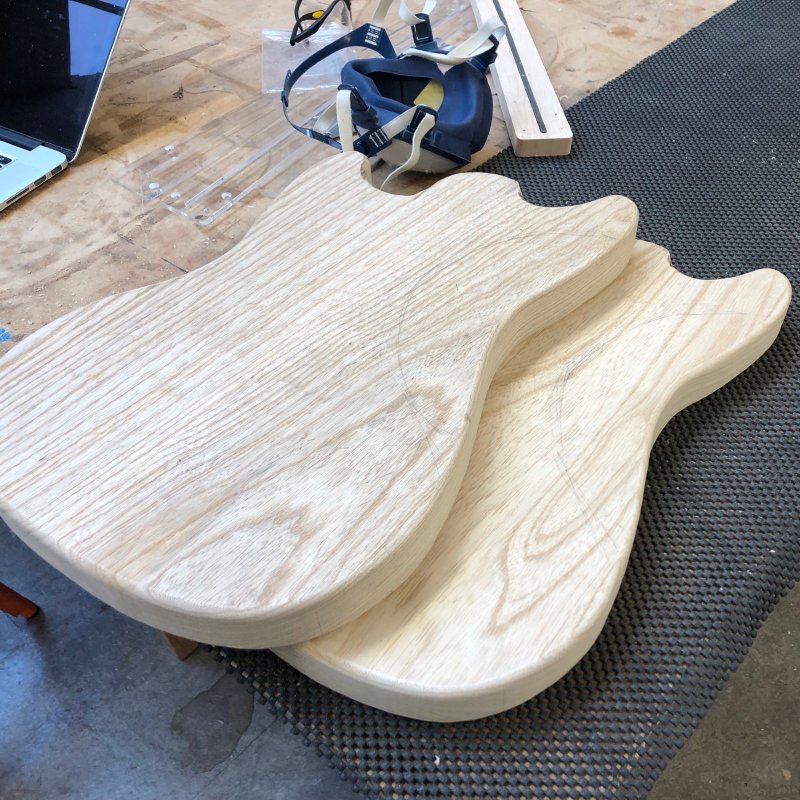
Paired up with the body, #10 is now looking like a thing:
I had to leave this neck here unfortunately as the fence for the new Makespace bandsaw is currently away being worked on, so I can get back to that next week.
With the necks paused briefly, I turned my attention to the bodies for #10 and #6. Last time I worked on them I got all the pockets and cavities routed out, and this time I turned my attention to the ergonomics. Firstly I rounded over the edges all round on both sides to make them more comfortable to hold, using a 1/4” round over bit.
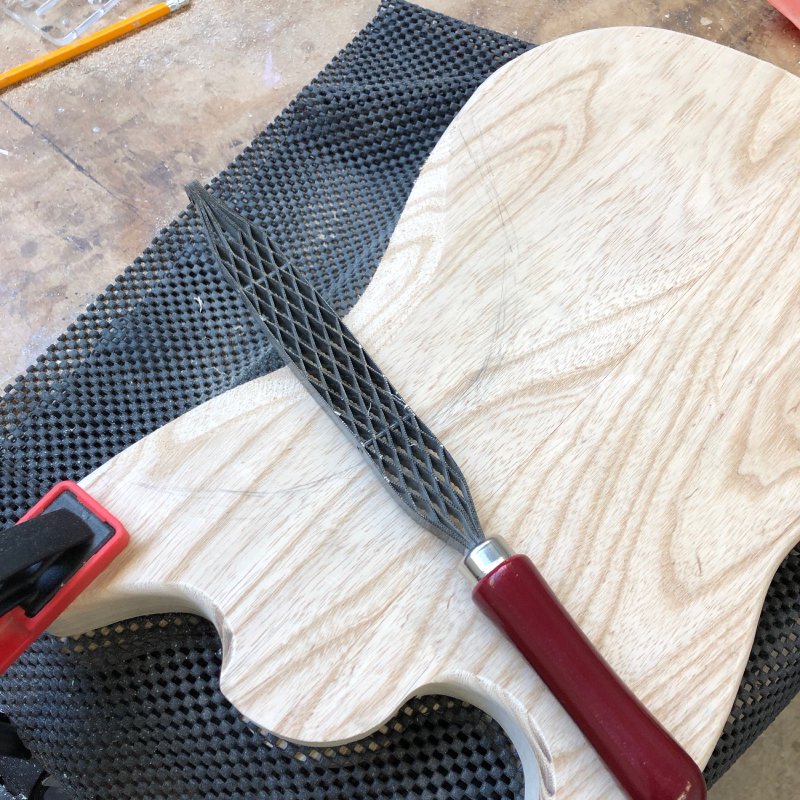
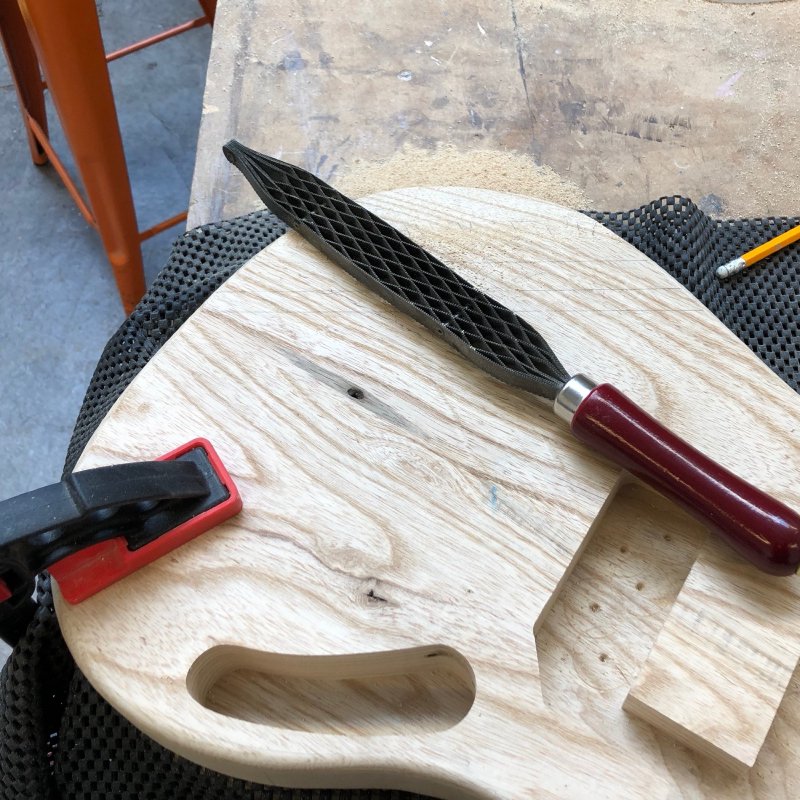
After this I then started on the comfort carves on both the rear side for the belly and on the front side for the picking arm. These I mark out with pencil first:
Before carefully hacking away with a rasp the bits I don’t want:
And then I smooth everything off using a finer rasp and an orbital sander:
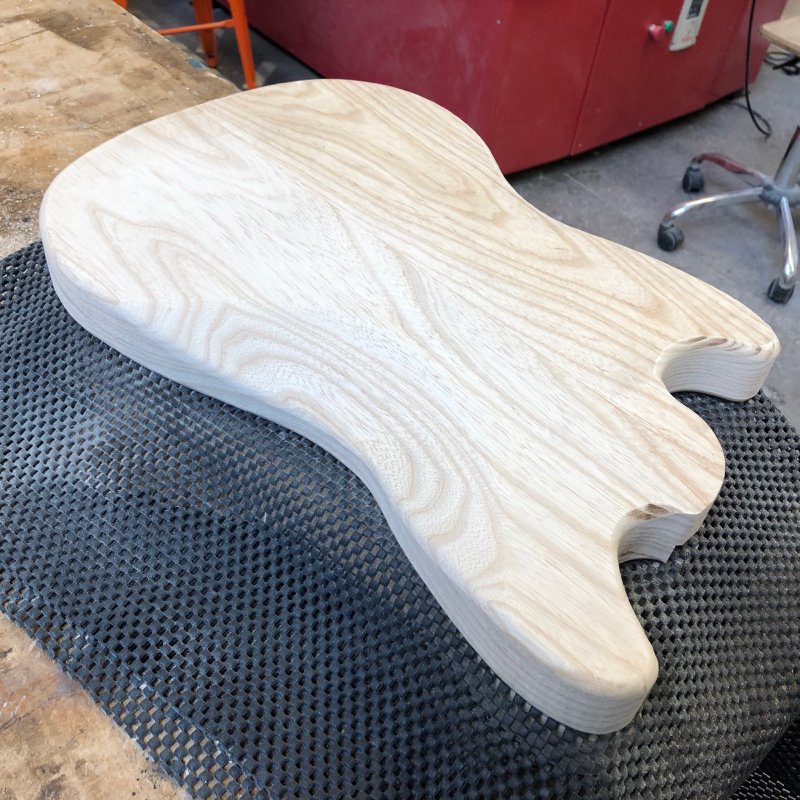
This is probably the most exercise I get all year :p Same again for the front, using multiple lines to ensure I remain straight as a I carve the comfort carve.
I managed to get halfway through these this week, having started this at the end of the week, and I’ll finish them off first thing next week.
The final thing I found time to do last week was look at how I’m going to attach the neck on the Corvette build. Both the Mustang style builds will use a traditional (albeit it rounded) neck plate, but personally as a builder I’m not a huge fan of these, and so wanted to try mounting the neck using ferrules on the Corvette.
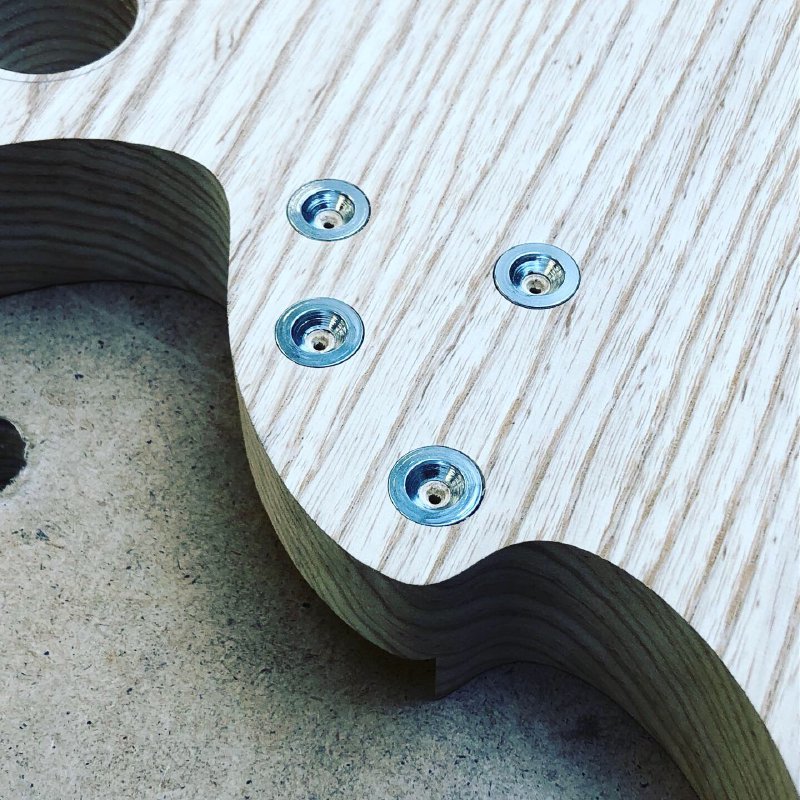
It took a little hunting to find some ferrules that were the same diameter as one of my Forstner drill bits, but once I did it was dead easy to make suitably deep holes for the ferrules.
My objection to neck plates is they will tend to mark the wood when you string up the guitar before finishing it, and with ferrules there’s no risk of this. Also, there’s less exposed metal to get scratched etc. I know it’s not a look that’s to everyone’s taste, but I’m looking forward to seeing this neck assembled so I can get a feel for how strong they are compared to the plate.
A nice surprise to end the week on was being invited to OggCamp 2019 to be an exhibitor. It’s a slightly odd pace to find me exhibiting guitars, as OggCamp has more an open source software/digital hardware hackery theme to it from my understanding, but ultimately it’s about people nerding out and learning new things, so from that point of view having a stand explaining how electric guitars are made will fit in perfectly. So if you’re in Manchester on the 19th/20th next month then do come along and say hello!