A month in and out the shop: Verkstaden
8 Jun 2024
Tags: 3D-printing, electronics, verkstaden
How can it be a month already since the last set of notes?! After a trip up to Scotland for my brother’s wedding, and the getting ready for EMF festival where I was giving a talk, I’ve falled a bit behind, so time to catchup. Rather than try do a massive catchup that will feel like a slog to write (and so get me even more behind), I’ll split the backlog up into three parts to help get it done. Today we’ll look at a now completed guitar, Verkstaden, then next we’ll look at Hästen, and then I’ll catch up on the amazing EMF where I talked about and played Älgen.
Fitting the electronics
In the last set of notes I finally got Verkstaden strung up, which is always a great milestone to reach on a build. It feels like the start of the final straight on a build, but there is still a bunch of work to do, and as ever it takes a bit longer than I expect: what I guessed was a day’s work took a bank holiday weekend :)

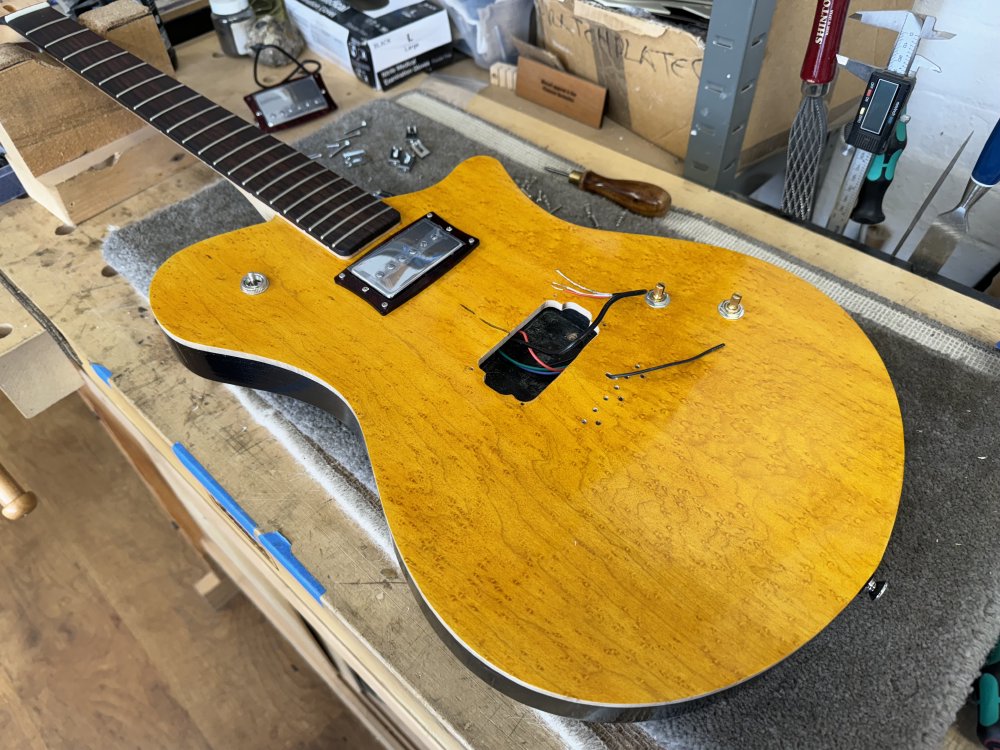
Having left it under tension for a week or so, the first thing I wanted to get done was fit the electronics, as this involves taking things apart for hopefully the last time, and it’s much easier to do the setup on an electric guitar when you can plug a tuner into it.
To fit the pots and pickup selector switch I needed to tweak the holes I’d drilled for them in the front of the body, as they were a tiny fraction too small. For this I used a reamer (you can see next to the guitar in the above picture). This is one of those tools that I went for ages without but now I’ve used one it’s on my essentials list. Pots and tuners etc. are all usually not quite the match to your drill bits, and this is a easy and controller way of making things fit perfectly.
With the holes in the body all at the right size, I could now start trying to run all the wiring. Whilst having the pickup-selector switch near the neck is a common position for this control, but it’s not ideal from a fitting perspective. Having it there does mean it’s very clear which control you’re reaching for so don’t accidentally knock the volume control say when changing pickup, but it does make the wiring a mess internally, as you either need to run both pickups up to the switch and then the result all the way back down to the volume/tone control, or you need to run the switch wiring and the pickups both down there (the later being what I did).
Thankfully this is where having a guitar body that is made with cap construction like this pays off. To recap (ha ha), this body is made mostly from poplar, which is the black painted part, and then has the front 5mm or so made from a beautiful birds-eye maple. This is a fairly common construction technique on say Gibson Les Pauls or PRS guitars; at least the fancier ones, the cheap ones these days just use a maple veneer as I understand it.
The advantage of the cap is partly you can save money on the expensive nicely figured wood, but it also means that when you cut the main bulk of the body, you can also route out nice wide channels for the wires to run through that are then covered up when you add the cap, rather than the usual job of having to use long drill bits that never are quite wide enough to get all the wires through comfortably. This is the first time I’ve made a guitar with this construction method, and wiring it up was so much easier than any other build I’ve done. I think in future, even if I’m not making such a feature of the cap, I’ll use this construction technique for future solid-body guitar builds unless there’s a specific reason not to.
Saying all that, I didn’t make my life entirely easier, as on the rear I’d made quite a small cavity for the electronics, which was a pain in the neck to work within:
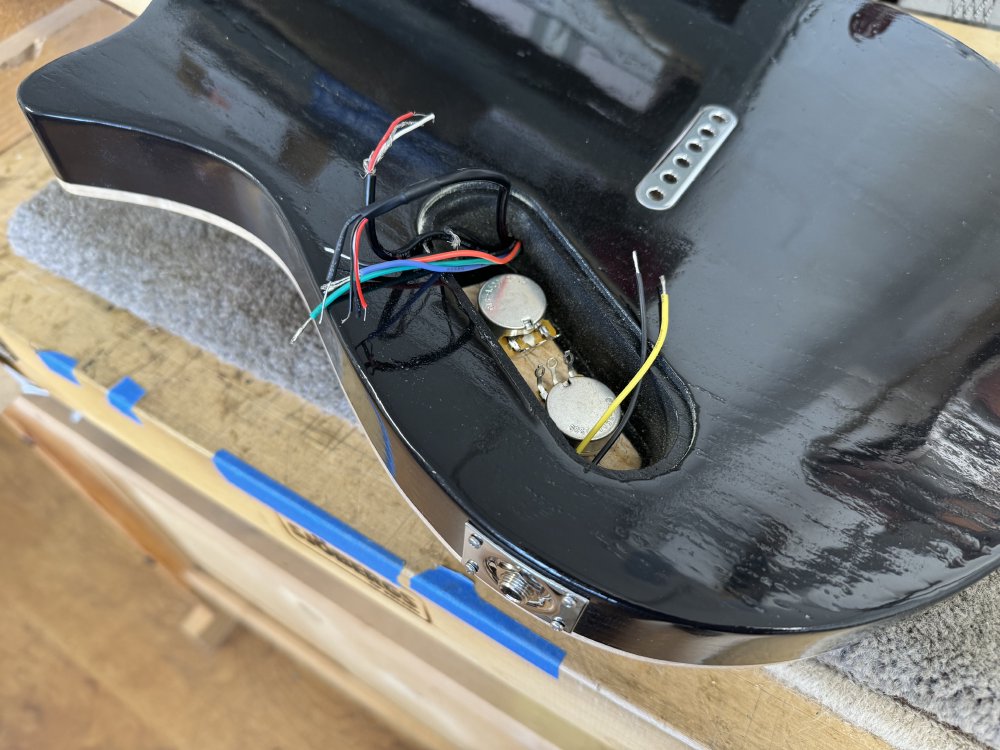
Indeed, it was sufficiently tight a space that I opted to solder up most the wiring harness outside the guitar before installing it:
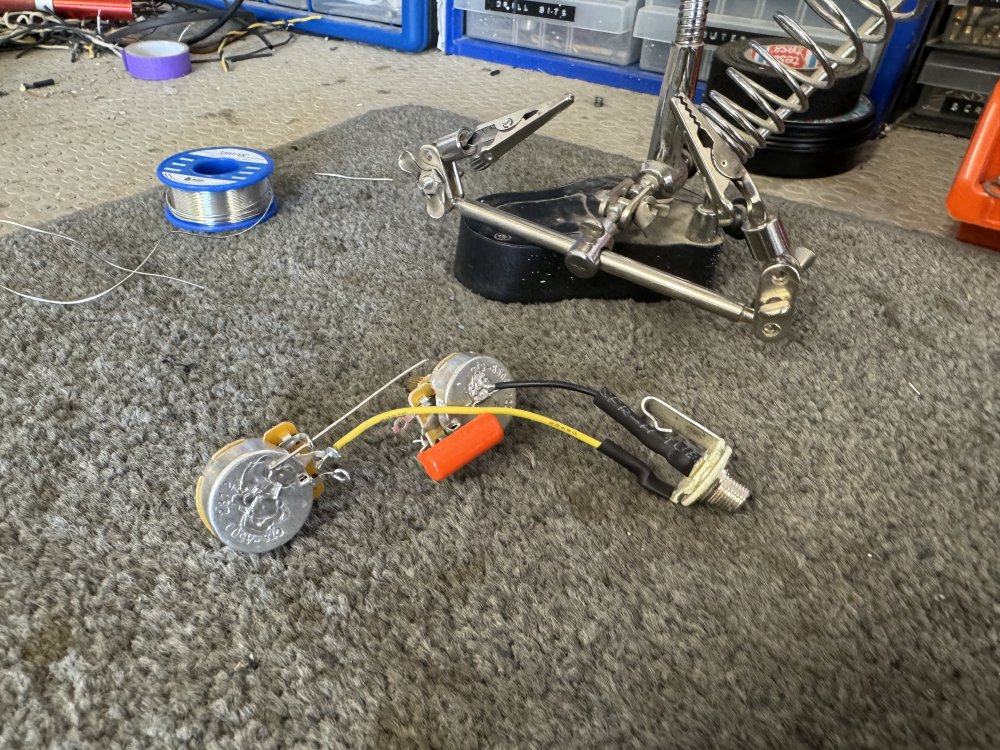
This is at least an easy fix for next time, and when it was done, I still found wiring up this guitar much less fussy to work on than the non-capped Delfinen as I wrote up last month.
A tree or a forest
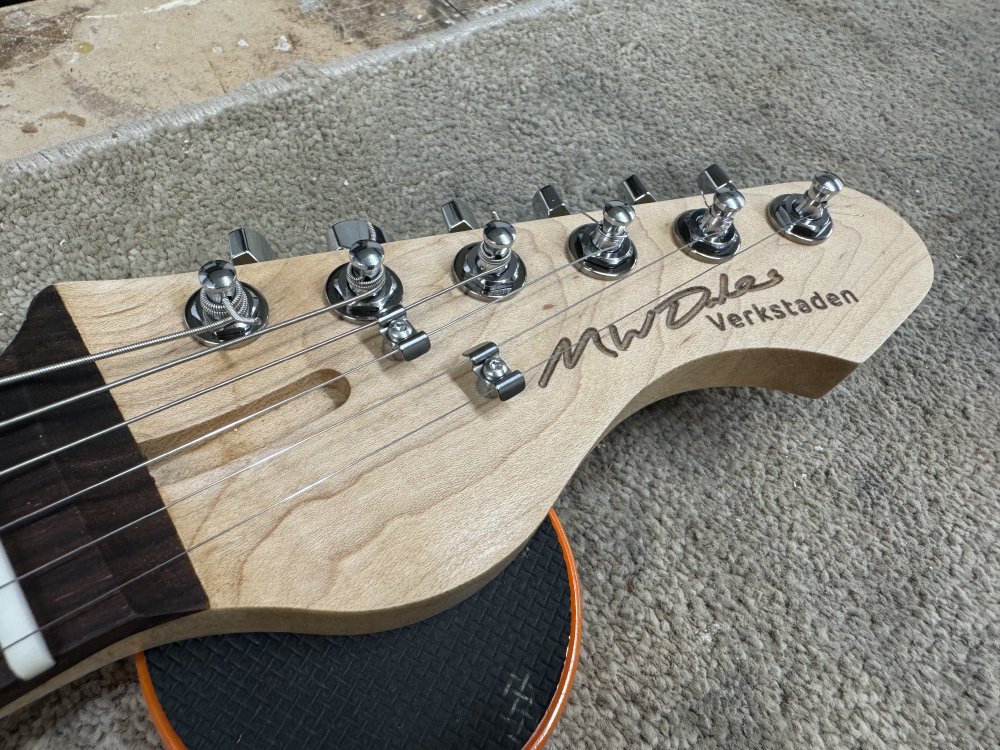
At the other end of the guitar I needed to add the string trees before I could do the final set up. The purpose of string trees is to pull the strings down over the nut when you have a flat headstock like those on my guitars (also Fender style guitars in general). The flat headstock makes the neck easier to build and require less material wastage, but the downside is that the the tuners at the far end of the headstock pull down the strings onto the nut much less than those closer to it, and a string tree is a way to bring a more steep angle over the nut for those strings.
Normally I just add one on the highest two strings, which is what most Fender style guitars have, but I have noticed that over time I’ve wished for a bit more tension on the next string along also, and it’s not uncommon to see some guitars with a double string tree, and so I opted to go for that here.
This isn’t the only way to achieve this. Obviously not having a flat headstock where it is tilted back at say 10 degrees is one option, as per Gibson and PRS and others, is one option, but then that adds to the complexity of building the neck and/or requires more material. It’s something I definitely want to try, but I’m already a victim of trying to do too much on each build, so I’ve been holding off on this for now (though I have made CAD models for it in the past).
The other option is you can buy tuners that have staggered heights, with the closer ones being taller to accommodate the thicker strings but the more distant ones lower to provide more tension. But for now the double string tree approach does seem to work for me, and it’s an easy tweak to do, so I suspect I’ll just do this for all new guitars.
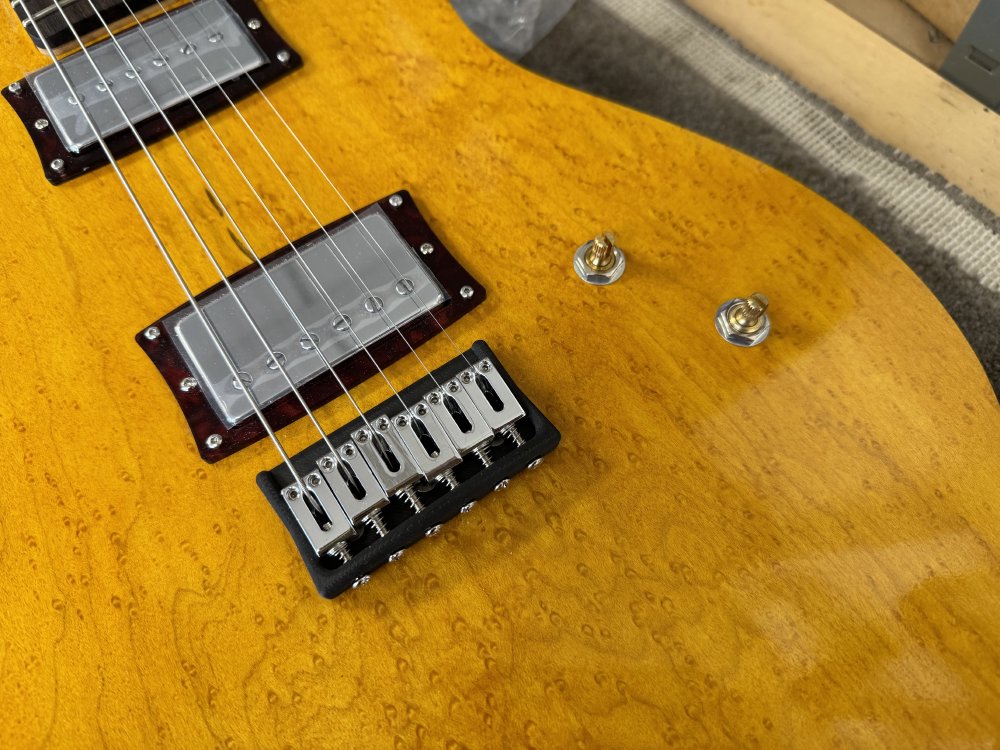
As an aside, I took this photo just before adding the string trees, as I was made aware that this is a thing I’m known for in the old maker-space workshop gang, but never thought of it as my thing until it was pointed out to me (hello Jonathan and Graham :)
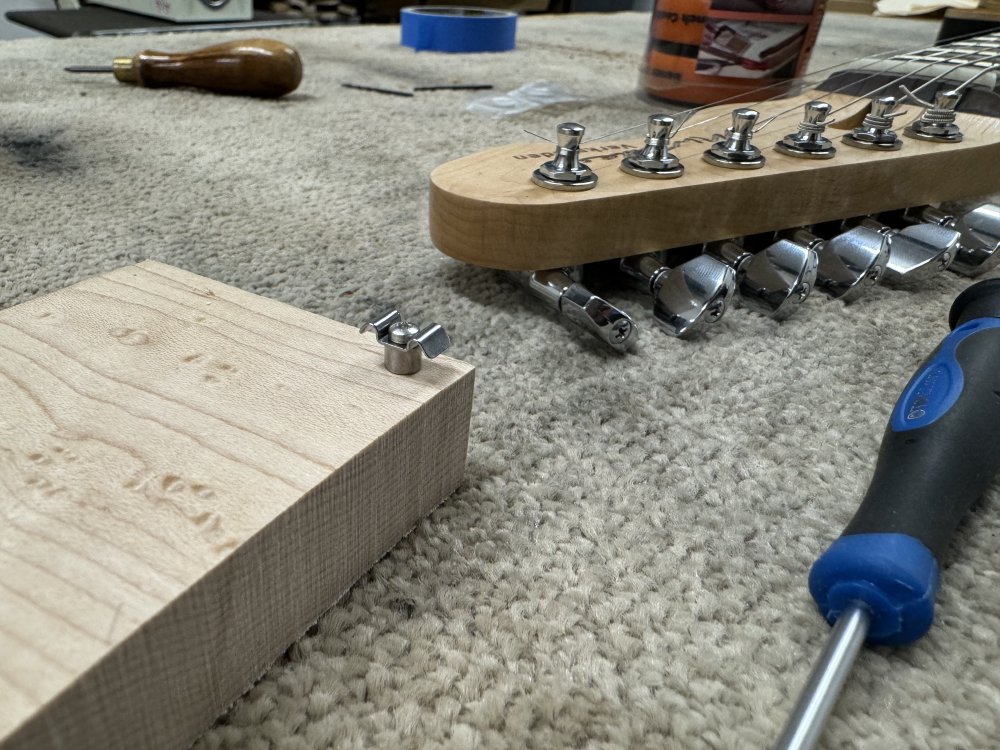
Before drilling any pilot hole in a guitar part, I always test drill it in a bit of scrap first. It takes no time, and can prevent expensive mistakes - measure, measure, cut! Ideally I also do it in the same material here so I can check the strength of the screw. I have to confess I’m always faintly amazed that such tiny screws can hold with the tension of two guitar strings trying to constantly pull them out!
Controls and covers
One of the nice things about how I build is that for the last few bits and pieces I could just dive into the local maker space and create them from scratch. In this instance I needed some knobs for the volume and tone controls, and covers for the rear. I wasn’t quite sure what colour to go for on the rear covers, other than I knew I wanted them translucent, so I made a couple of sets:
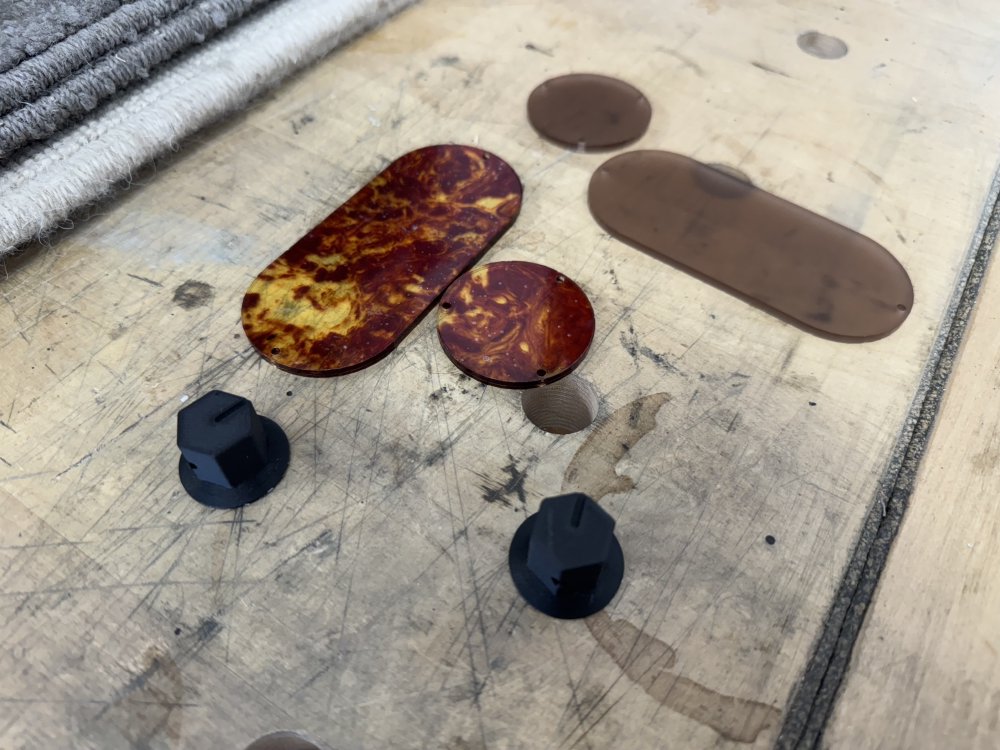
Annoyingly, whilst the circular cover for the switch cavity fit, the one for the larger lower cavity did not:
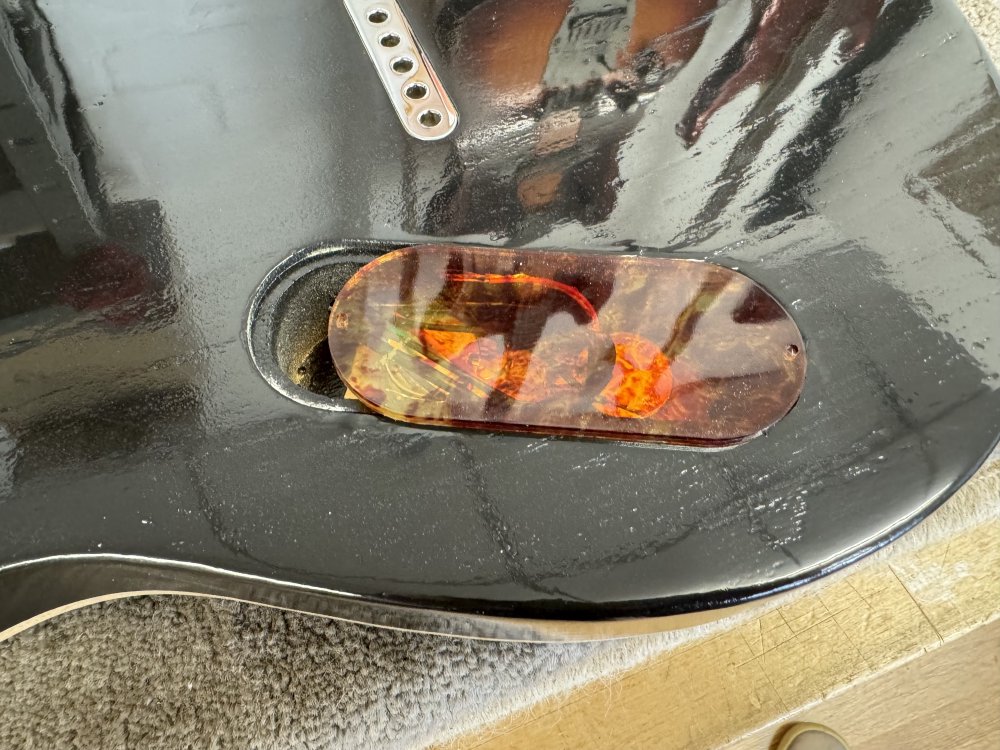
This turned out to be some issue with the new laser-cutter software, Trotec Ruby at the maker-space mangling the DXF import. In the end I had to bounce the DXF I made in Fusion 360 into Inkscape, and then get it to save a new DXF, and that worked for whatever reason.
For the 3D-printed knobs, these I did on the Markforged mark two printer, which is a bit of overkill, but at that point I’d not been trained on the new Bambu filament printers at the maker space and so went with the fancy carbon-fibre-in-nylon option here!
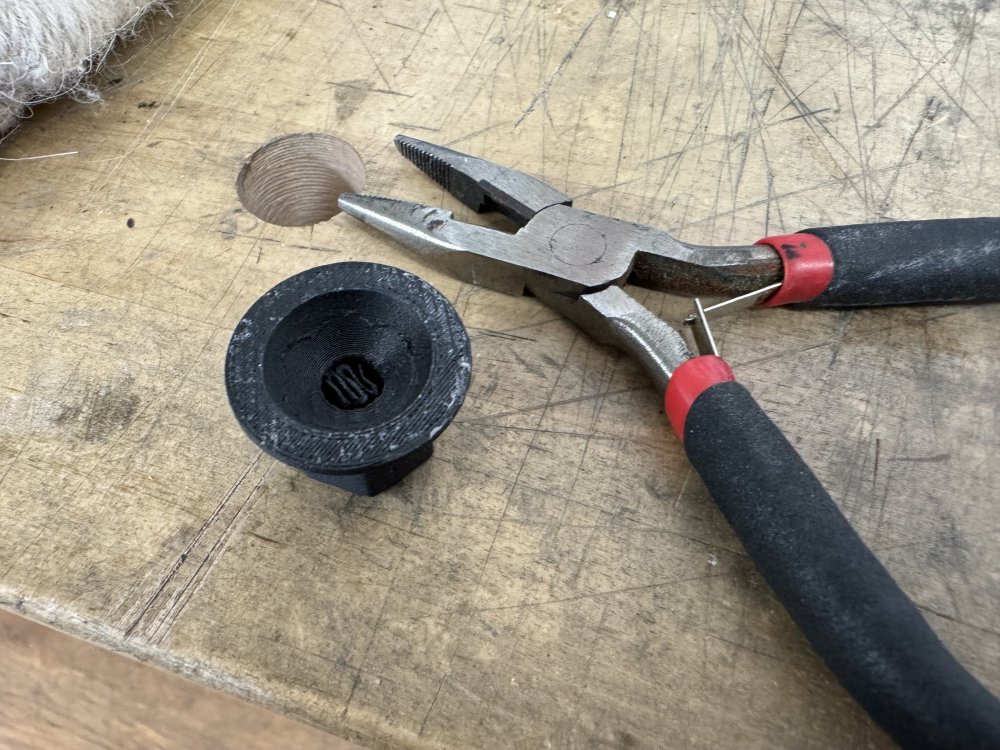
Before they could be installed though, I needed to remove all the support material the printer software inserts to ensure a good print:
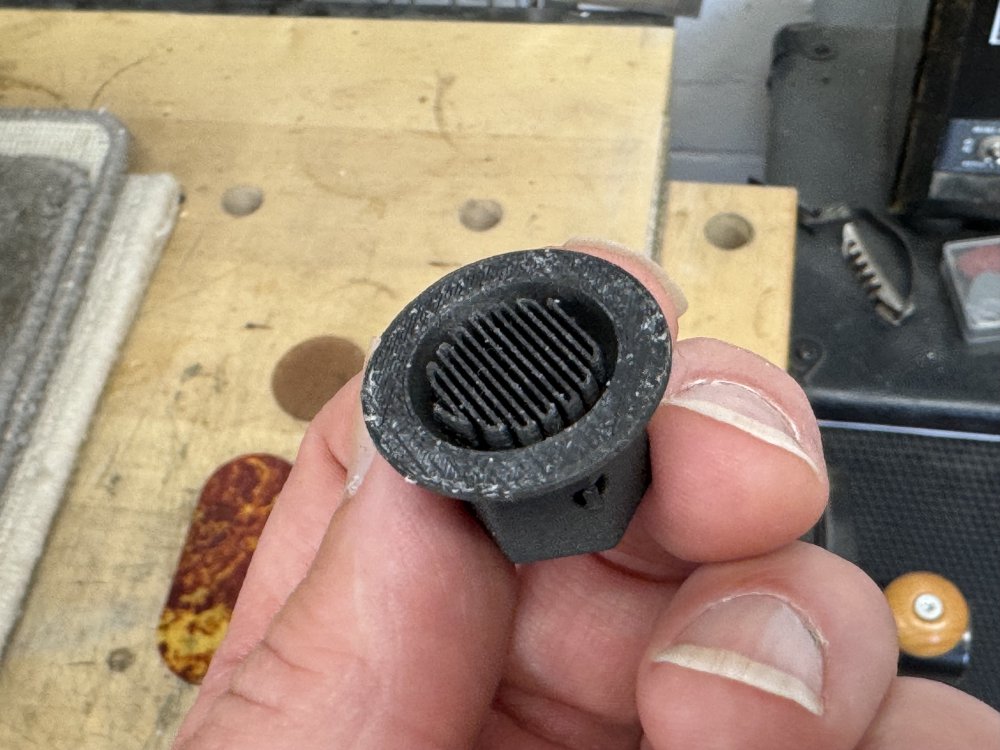
Thankfully I’ve found that the Markforged technique of adding supports is quite well done in terms of making it relatively easy to remove them. Compared to say using the old Ultimaker filament printers, the supports the Markforged software adds come away fairly easily:
Though in the smaller reaches I did need to go in with tweezers!
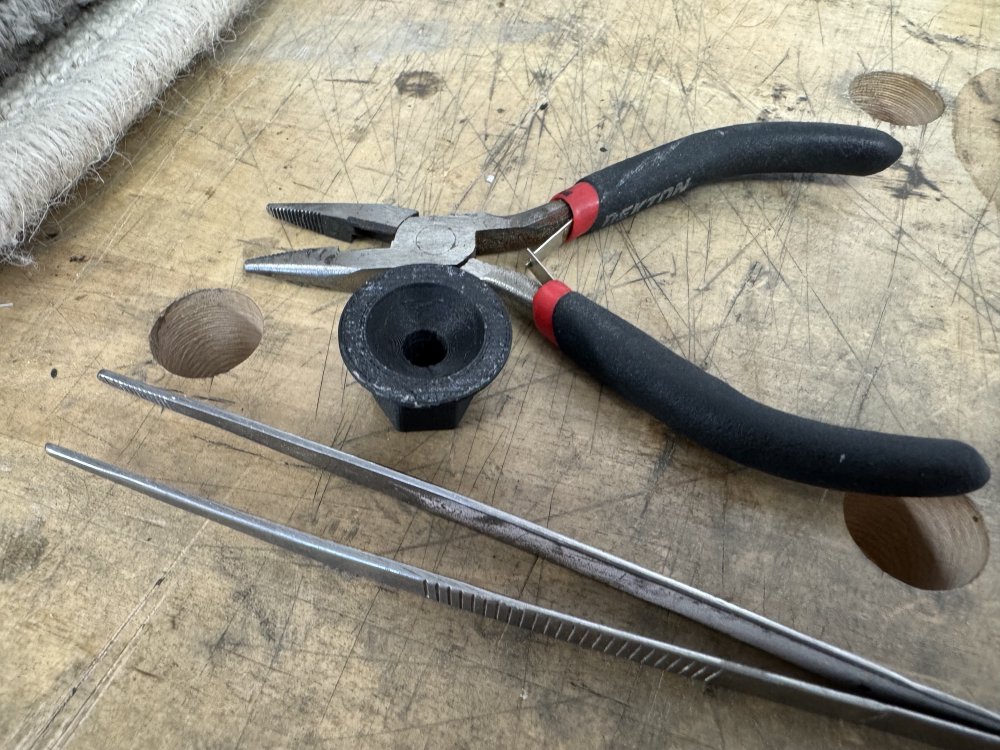
Once all the support material is removed, I then tapped the hole that is for the grub screw that holds the knob to the pot:
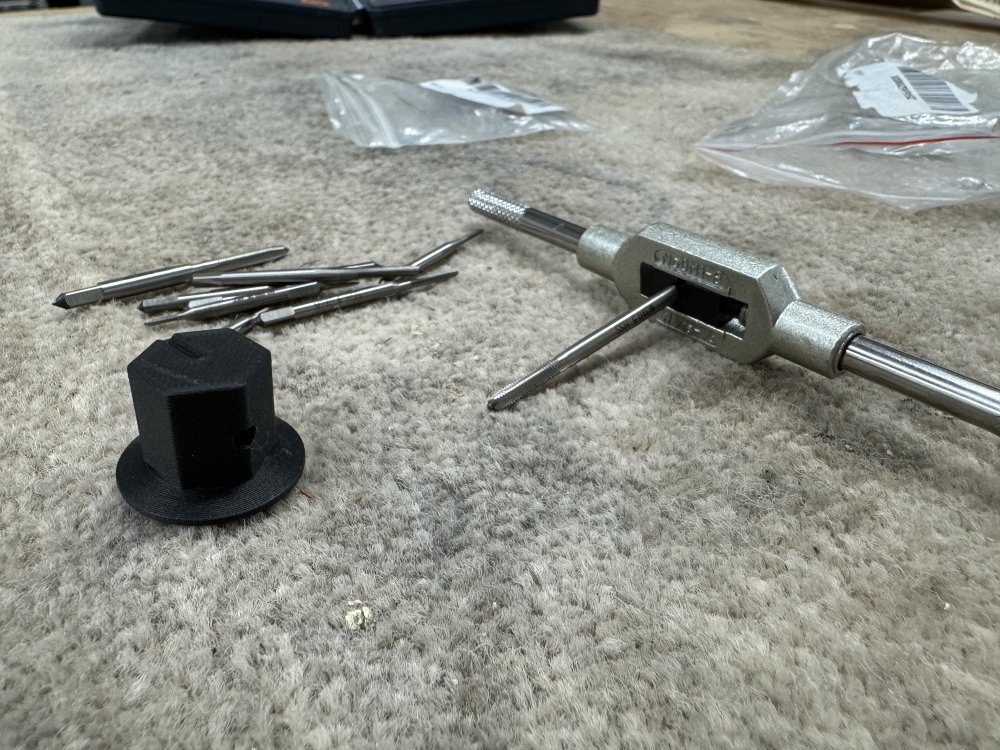
With that done we can easily fit the grub screw. I imagine the grub screw would self-tap in this material if I didn’t bother with the proper tap, but I have a tap set, so I might as well make life easier and do it properly.
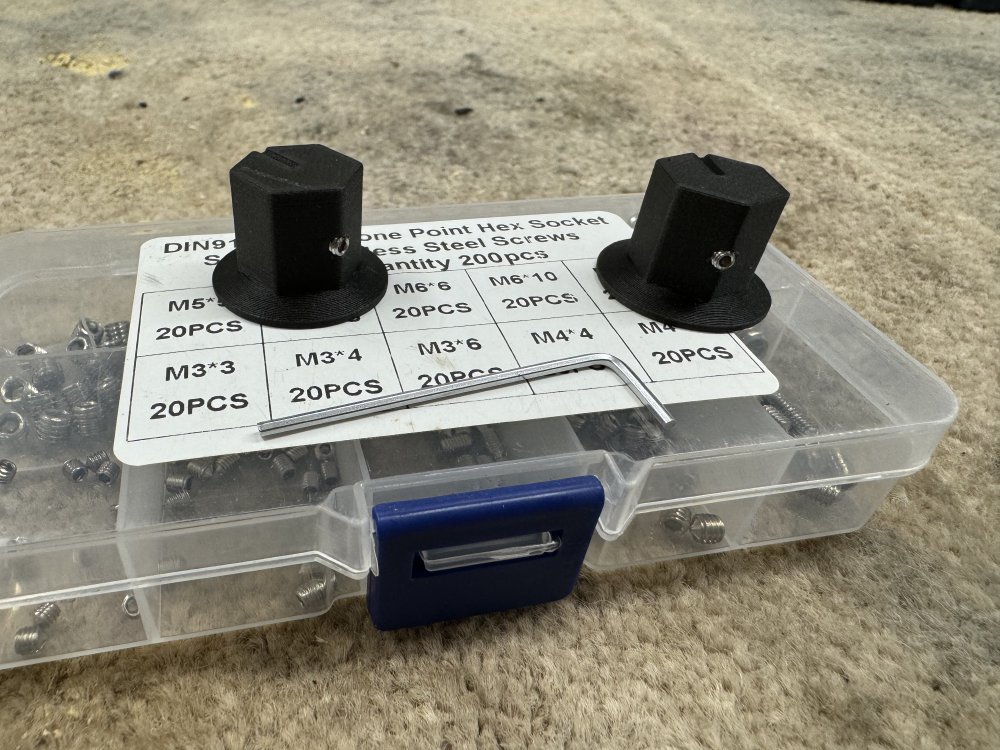
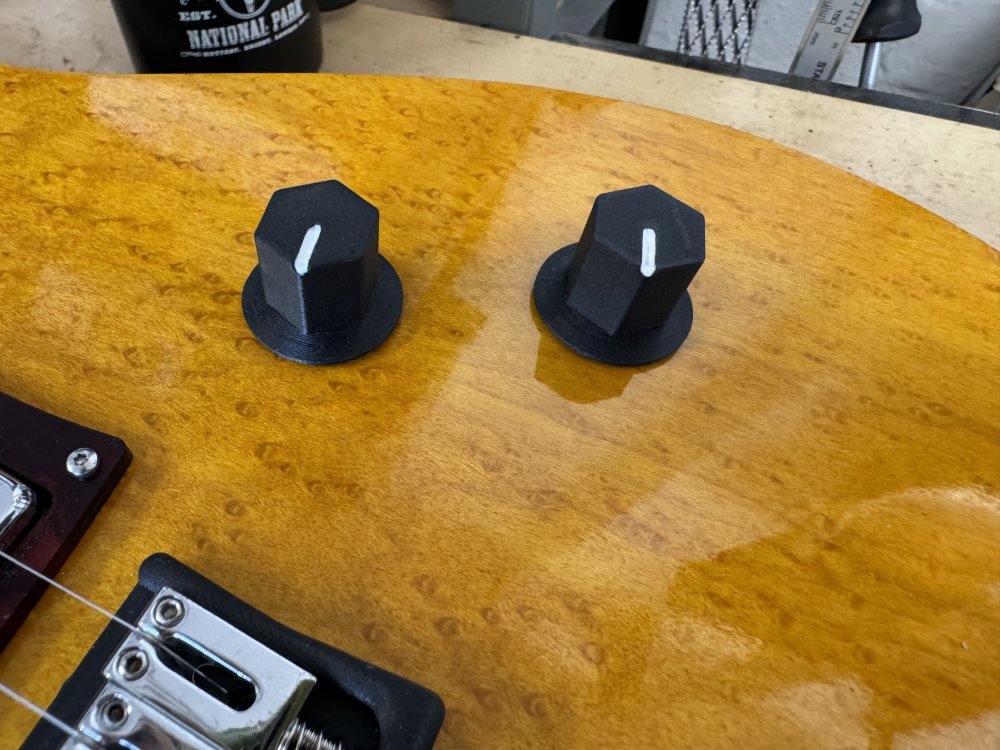
The final touch (which I actually did a week after I finished the rest of the guitar as I lost my paint brush 😳) was just a bit of paint in the top recess of the knobs to add a direction indictor:
Back when I started doing 3D-printed controls for my guitars back in 2019, I didn’t really think it made sense given how flakey the printers I had access too were at the time, and how cheap off the shelf parts are. But a combination of access to better printers and getting my technique down for cleaning them up, it’s now the case I find it easier and quicker to do this than buy off the shelf parts.
The new Bambu printers I mentioned above are quite fancy, so I’m looking forward to trying to print some controls with them in the near future. They both have good finishing options, and they let me print multi-colour parts thanks to having a 4-spool feeder, which means I can print in the indicator mark for instance.
Setup and done
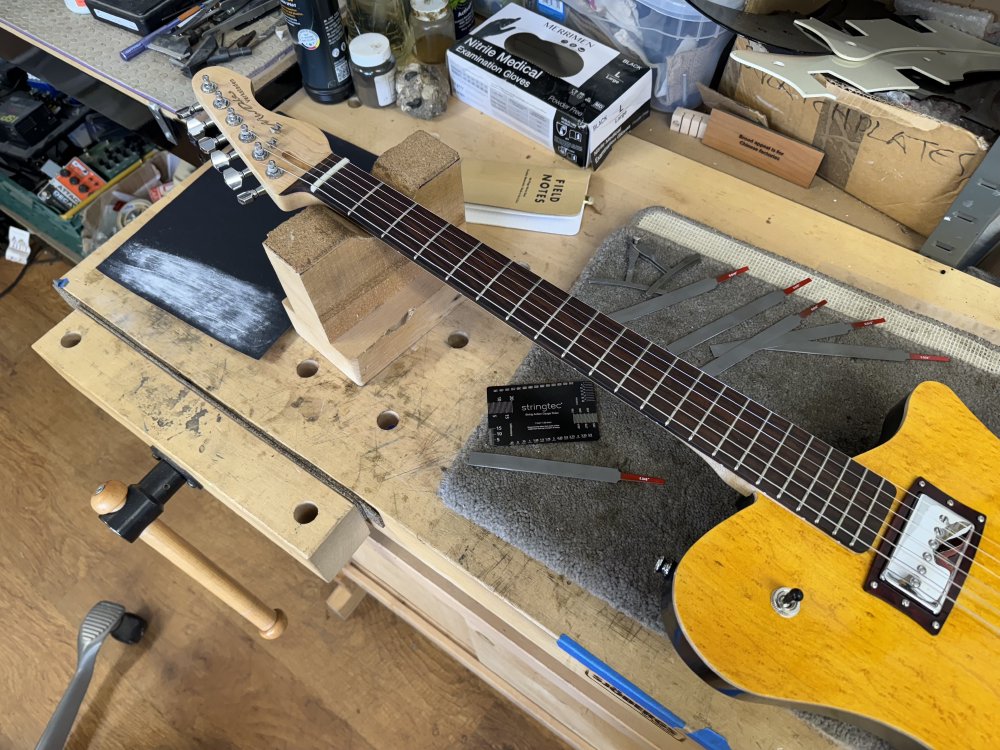
With all the parts in place, all that remained for me to do was the final setup: filing the nut slots, setting the intonation, getting the bridge saddles to the right height and so forth.
And that is it, another guitar done!
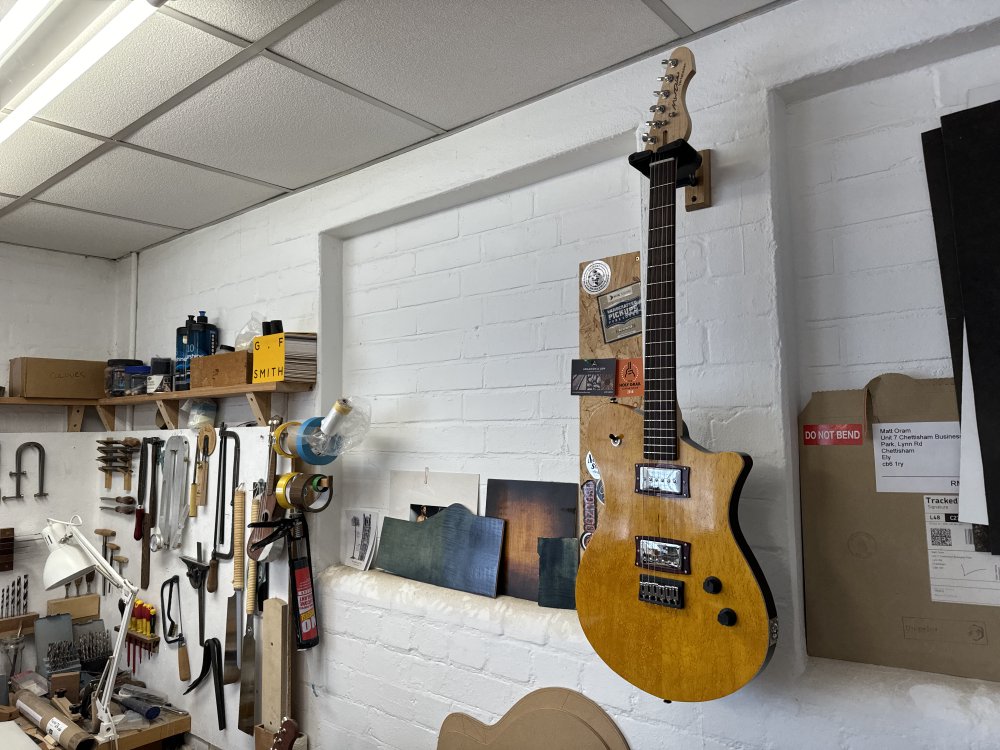
Verkstaden is a funny guitar to me: it started as a way to test my then new workshop (the one before my current workshop!), and then had a change of shape, let me test out a bunch of new processes like using a separate cap for the front, painting and lacquering, natural binding, etc. As a result, there’s lots of niggles on this guitar that would normally make me unhappy with it, as it isn’t ideal. But I think because it was never meant to be anything more than an mule for carrying new ideas, I’m actually really pleased with it, even if it’s not to a standard that I’d normally hold myself to. Which is nice, as I can just enjoy it for a bit :)
That said, I know there’s things I’d do differently on the next iteration. The poplar I used on this build is very light, which makes for a great light guitar, but the neck is a little heavy, so the balance isn’t quite where I’d like it. Chatting to workshop-mate Matt he recommended using roasted-maple rather than regular maple for the neck, which should be lighter and thus give me a better balance. The jack port needs to come closer to the tail, which goes well with making the electronics cavity a bit bigger anyway. And the finish I’d try to do with staining and oiling rather than painting, as I don’t make enough guitars for spraying to be a practical technique for me.
But with that all said, I’m super happy with how this build has turned out. I made a short video of the guitar, and a little bit of it making some noise:
Between this and Delfinen, I think I now have a pair of solid-body electric guitar shapes I can call my own, and if I’m asked to make a regular guitar these are the styles that I’ll run with for now. That said, hopefully the next set of guitars will be siblings to Älgen.